
The other day, while wasting time on Facebook, I came across a link that was shared to this awesome little FPP Jack-O-Lantern pattern by Sonja Callaghan from the blog Artisania. And with Halloween coming up very soon, I just knew that I had to print it off and give it a go!

Firstly, I printed off the pattern at a scale of 90% so that I was sure the pattern would fit comfortably on a A4 piece of paper. Then I sat down for a bit, trying to figure out the best way to make it as I’ve never attempted a FPP pattern this intricate before!
Once confident of how to start and what steps I had to do to be successful at the end, I picked out some fun autumnal RJR Supreme Cotton Solids and jumped straight into making!
Here are a few tips that I think might help you when making the block yourself…
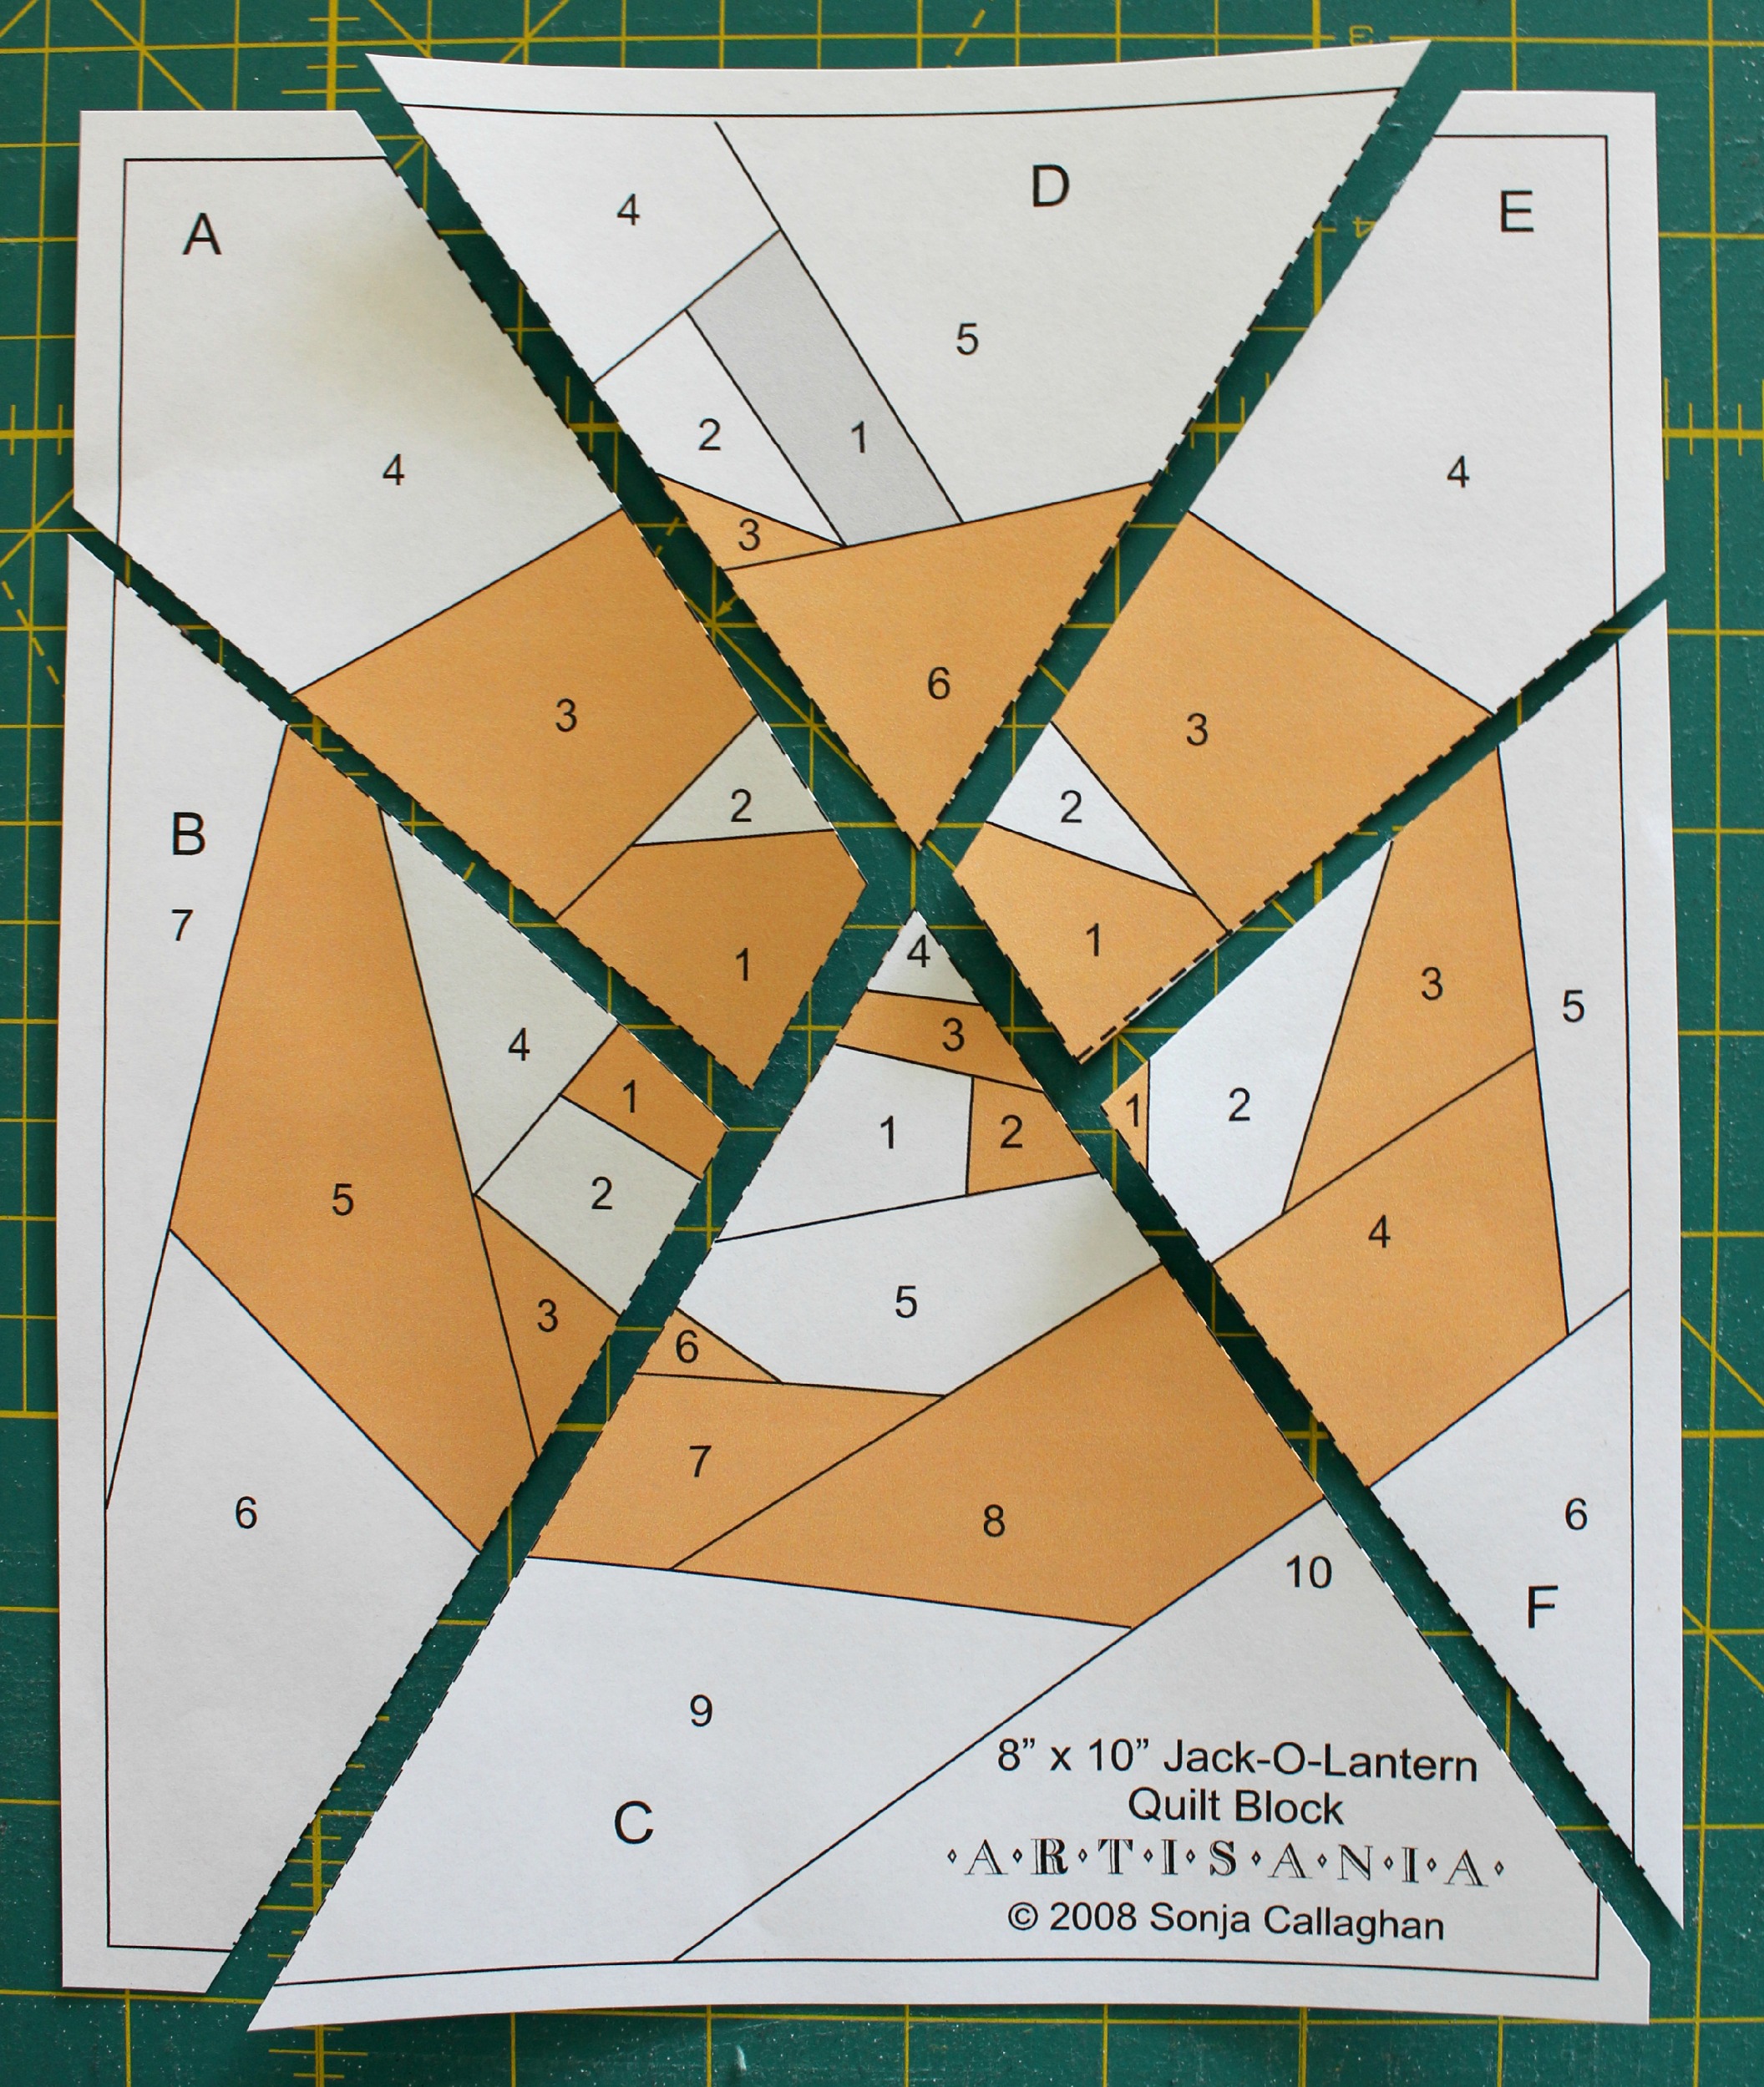
No. 1 – The block is divided into six sections labelled A to D. So you need to carefully cut the paper pattern into the sections before you can start any sort of piecing! (See Photo #2) I also cut an extra 1/4″ seam allowance around the outside line of the pattern so that I wouldn’t get caught out not having enough fabric to cover each section. (See Photo #1)

No. 2 – Another prep step before starting: Using a Clover Serrated Tracing Wheel and a ruler I perforated all of the lines in each section that I’ll be sewing on top of. (See Photo #3) Doing this simply helps to ensure that the paper will rip away smoothly from the back once the block is finished.

No. 3 – I found it really helpful to initial each numbered section of the colour that was to be used so that I wouldn’t get confused!

W=White, O=Orange, B=Black and G=Green.
No. 4 – I was really relaxed with sizes of fabric I cut for each section. I found, that because a majority of the numbered sections were quite small, I was able to use quite a lot of fabric pieces from my little scrap pile I was creating from the other sections I had finished piecing. And due to that, the block came together really quite quickly!
No. 5 – As you piece each section together, make sure to leave enough fabric over the edges so that you can trim the block down with a 1/4″ seam allowance around each side. For this pattern to come together perfectly at the end, you need to cut a 1/4″ out from each edge on all six sections (excluding the edges you cut around before on the outside of the pattern)…Hopefully Photo #4 will help you understand a little better…

No. 6 – Once you’ve come to the part where you’re ready to piece each section back together, I found doing it in this order the easiest…
Sew section A to section B, then section C to the other side of B. Remove the paper from the back and press the seams either to one side or flat open. Then sew section D to section E and then section F to the other side of E. Again, carefully remove the paper from the back and press the seams in the same way as before. From here, piece the two sections together to finish the block.
TIPS: When piecing each section together make sure to line up the seams around the outside of the pumpkin and around his mouth to achieve clean crisp lines. It may take a little bit to get these parts aligned and sitting perfect but trust me, it’ll be worth it in the end!
Finished block size: 7.5″x9.5″ (19cmx24cm)

So to sum it all up, despite a few mistakes on my part resulting in the seam ripper to make an appearance more than once, this was a really fun FPP pattern to piece together! Believe it not, I did learn a few new things and expanded my knowledge on the way I should tackle these types of tricky pattern designs! I also felt like a slight rebel making this little guy as Halloween isn’t widely celebrated in Australia as it’s seen as more of an ‘American’ tradition. But I like Halloween – it appeals to the crafty and creative side to me! Hence why I loved this making little guy!
If you like the look of this guy and would love to make him yourself but don’t know a thing about Foundation Paper Piecing (FPP), then check out this tutorial I made a little while ago taking you through the steps of how to do it!
Of course, if you have any questions about this block or are stuck on any step, please don’t hesitate to ask! I’m always here to help!
Best of luck to all of you who are going to print this little guy off and give him a go! Don’t forget to share your photos with me!
Happy Paper Piecing, Friends!!
xx

I’ve been quilting for about 5 years, and am just now tempted to tackle FPP. Thank you for this and for your grand tutorials!
LikeLiked by 1 person
Yay!! That’s wonderful! It’s always fun learning a new patchwork technique – the possibilities almost seem endless! 🙂
LikeLike
Wow! I’m so impressed with your crisp points!
LikeLiked by 1 person
Thank you!! 🙂
LikeLiked by 1 person