May 4th: Sewing & Craft Books Haul!

BookHaul

The other day I naively walked into my local Spotlight and stumbled upon the biggest bargain in my life!

And that was a wonderful selection of beautifully published sewing and craft books by Stash Books on sale for $2.99 each! Each!! Oh. Em. Gee!

I just simply couldn’t believe it!

So like any sane quilter, I had a good rummage through the titles and piled up each one that took my fancy!

So let’s have a look at what I got…

PillowPopBook
Pillow Pop, compiled by Heather Bostic (2013)

So the title of the first one pretty much explains everything! It’s a gorgeous little book full of 25 quick and easy pillow patterns and ideas by some of the leading makers in the modern quilting movement. As I flick through it, my eye keeps catching on some super basic but very effective patterns and designs. Some of these include autumnal chevrons, fresh drunken path blocks, darling little Union Jacks (a must make!!) as well as rainbow flying geese and sunburst dresden plates! So if you’re crazy for making gorgeous pillows and cushions for the home, this book is a must for any quilter’s library!

ScandinavianStitchesBook
Scandinavian Stitches, by Kajsa Wikman (2010)

So with this book, I did what we all shouldn’t do and judged the book by it’s cover and said, YES! I mean, how adorable are some of the darling crafty things on this cover?!! Ohh! So homey and fun! Once I had a quick flick through it at home, I knew I had made a good choice! There are some super fun and aesthetically pleasing projects in this book ranging from patchwork pincushions featuring beautifully free-motioned embroidered words: Sew me! The lovely house and clothesline framed design is a pattern in the book along with the sweet little stuffed houses (or garden sheds!). If you have kids in your life, I think this is a great book to use as inspiration when the next birthday rolls around!

LibertyLoveBook
Liberty Love, by Alexia Marcelle Abegg (2013)

I absolutely love Liberty print fabrics!! They feature so many beautifully delicate floral patterns, colours, forms and proportions. I swoon every time I see them! When I get the chance to visit London, Liberty will be one of the first places I’ll go where I’ll make a beeline straight for the fabrics and haberdashery department! Ooo, I can’t wait!! Anyway, back to reality and this lovely book at hand! This one features a great handful of different type of sewing and quilting projects like a Classic Thread Spools Quilt, a modern Medallion Quilt, a fun little dog collar and fabric rosettes, a few easy to construct bags and totes as well as some dressmaking designs like a t-shirt and tunic dress. The photos and over-all layout of the book is just simply darling and sooo Liberty! It’s definitely my kind of sewing book!

SweetwatersSimpleHomeBook
Sweetwater’s Simple Home, by Lisa Burnett, Karla Eisenach & Susan Kendrick (2011)

Another title that pretty much sums up the theme of the book – lots of simple projects that can be made for the home! Patterns include a sweet but very modern frilly apron, pot holders, a few fun little quilts, office based projects such as journal covers and lamp shades and then a few things for the kids such big round floor cushions, a checkers board mat and a birthday board made from fabric! There are so many great ideas in here it’s so hard not to just list them all down!

UrbanScandinavianSewingBook
Urban Scandinavian Sewing, by Kirstyn Cogan (2015)

I have to be honest with you again… The only reason why I bought this book (a part from the fact I love the Scandinavian aesthetic!) was for that jolly little Santa softie sitting proudly and oh-so sweetly! What a little legend! But apart from him, there are some really great ideas in this one! Not only is it full of homey sewing projects but it has some delicious Scandinavian recipes, beverages and traditions! There are some fab things to make the kids like the Santa softie, a fabric fish mobile and lovely appliquéd strip quilt! Then there are some great makes for the kitchen as well as a few simple bags and totes. Four words to describe this book – Simple. Fresh. Modern. Humble.

ThePracticalGuidetoPatchworkBook
The Practical Guide to Patchwork, by Elizabeth Hartman (2010)

And last but not least, I was able to pick up another copy of one of my all-time favourite quilting books! I will always recommend this one as a great first quilting book to have in your stash. All of the designs are modern and fresh, easy to follow and photographed beautifully. Like all quilting books, right at the beginning there is a dedicated chapter to showing and explaining all of the basic (and more advanced) techniques, tools and materials you will need to know and have to begin patchwork and quilting. In this book, this info is explained in plain english, no fancy-pants words or misleading instructions. It’s straight to the point and super helpful! Some of the projects include blocks such as the square-in-a-square, four-patch and nine-patch as well as plenty of other modern and traditional block forms. Perfect!

+++

Whew! Book haul over!

Now I just have to find a place to put them all! 😀

What’s your favourite quilting/sewing/craft book? I would love to know!

Happy Reading, Friends!

xx

+++

PS. Happy Star Wars Day!

May the 4th Be With You!

‘Quilt-Along-With-Me’ Part Four: Quilting!

Hello!

Welcome to part four of my QAWM series! If you’re playing along at home, we’re now up to the stage where we are ready to quilt our basted quilt!

Over the past three parts to the series, I’ve been writing up a pattern/info sheet for you to download and print off… This time around, I’ve decided to put all of the information, tip, tricks and ideas for quilting in a blog post!

So let’s start off with the three main ways you can quilt your quilt:

The first is the most traditional way – hand quilting. This is a form of quilting where you sandwich your basted quilt into a large hoop, usually wooden that can some times be attached to a frame. Then using a short hand-quilting needle and waxed or non-waxed cotton thread, you sew a short running stitch through all three layers of the quilt. The technique takes quite a lot of patience and practice to get used to and can take up a lot of time, depending on the size of the quilt and the design you plan on quilting.

Another way would be to simply quilt on your own domestic sewing machine. The way you choose to do this is completely up to you! You can stick to straight vertical lines like I have or even explore Free-Motion Quilting where you lower the bottom feed dogs on your machine and move the quilt top in any direction you like using an embroidery/darning/spring-loaded foot! This form of quilting can also be known as ‘stippling’ and can be a little tricky to master! My advice would be to practice on some scrap batting and fabric to get a feel of the motion and direction before trying it out on your quilt.

The third way to get your quilt quilted would be to take it to a long-armer. This form of quilting is seen as a more ‘professional’ way to finish a quilt, with the end result looking absolutely beautiful, clean and perfect! You can usually find long-arm quilting services at your local quilting store or you can find a private quilter in your area.

Personally, I prefer to quilt my own quilts. The reasons for this are:

1. I have a fairly limited income and so can’t quite afford to pay someone else to quilt my quilt.

2. I’m a control freak and love that I have free reign on how I get to quilt.

3. I love the romance of my quilts being purely made by my self. That my hands, my heart, my efforts and my time, with nobody else’s, have constructed and finished a quilt. Sometimes this notion can come back and bite me in the butt – especially when time is a major factor – but on most occasions, a huge rush of accomplishment crashes over me and every gruelling, challenging and sometimes soul-changing step is totally worth it!

QuiltingDucks1

Okay, let’s now move onto how I get my sewing machine ready to start quilting. (Obviously, this information would only be relevant to those of you who wish to quilt their own quilts!)

– First, I change the foot on the machine from my 1/4″ foot to a walking foot. A walking foot features a set of ‘feed dogs’ that work together with the feed dogs on your sewing machine to help feed all three layers of your quilt through the machine all at once. The foot prevents the top layer of the quilt from moving forwards, keeps stitches even, stops the layers from puckering and it creates a smooth surface for you to quilt over.

– Next, depending on the last time I changed my needle, I’ll replace and put in a new sharp needle. I usually use a 90/14 universal needle as I find them to be the perfect strength for quilting.

– When it comes to threads, I’m pretty non-fussed about using a particular weighted thread or one that is marketed towards quilting. I mainly use a Gutermann polyester thread for all of my sewing and quilting as I find they’re strong and versatile, there’s a bigger colour range to choose from and they can sometimes be a little less expensive than quilting cotton threads. (Remember, I’m on a limited budget here!) Now don’t get me wrong, I love using cotton threads and fully understand the reasoning behind why it’s best to use cotton thread in patchwork etc. But I just personally find that polyester works best for me and that’s okay.

So in this quilt I’ve chosen to use a purpley-type-colour in the bobbin to match the purpley-type-fabric I’ve used for the backing: Gutermann polyester thread in the colour: 247. For the top thread I’m using an off-white-but-not-quite-cream Gutermann polyester thread in the colour: 111.

QAWMQuiltingLines

– The last thing I do to my machine is change the stitch length from 2.5 to 4.5. I find that when using a longer stitch length the machine feeds it through faster thus getting the quilt quilted faster! I also love how the long stitches leave this beautiful tactile surface effect making the quilt look fresh, modern and insanely mesmerising!

To test out what the stitch length will look like on your quilt, place a scrap piece of fabric along one edge of the quilt and sew lines at different lengths until you find the one that looks the best! Note the stitch length down and always remember to set it back to that every time you turn the machine back on! (If you have one of those really fancy sewing machines, program the stitch length in so that it’s easier to come back to!)

QuiltingSpace

Setting up the the space around you:

– Make sure where you’ve set up is comfortable, spacey and has good light.

– Choose a comfortable chair that supports your back and allows you to be front-on with your sewing machine.

– Have essential tools beside you like thread snips, extra thread for the bobbin, water and some snacks if you really need them! I also like to have my phone close by incase I want to take some Instagram photos!

– Lastly, put on some good music, a movie, audio book or podcast to help you get into ‘the zone’!

QuiltingDucks2

My quilting technique:

– Before I start quilting, I make sure the surface of the quilt along with the batting and batting layers are lying flat, with no immediate tucks, folds or chances of puckering.

– I sew the first quilting line through the centre on the quilt, ditch-stitching along the seam of the middle sashing strip. This line will become my marker or guide to follow as I sew the rest of the lines.

– Beginning from the top edge, I gently feed the quilt through positioning my hands on top of the quilt at either side of the needle and walking foot, keeping the layers taut as they are fed through.

– I allow the sewing machine to feed the quilt through at it’s own pace. Don’t push or force the quilt through as this may result in skipped stitches, puckering and fabric shifting.

– Placing an extension table alongside your machine will help to control and feed through the quilt.

– Have the quilt hang into your lap as you feed it through to prevent the quilt from dragging and placing strain on you and your machine. Allowing the heavy weight of your quilt hang from your machine may result in skipped stitches and wonky quilting lines.

– To help ease the trouble you may have with the quilt hanging down from your left side, place a chair or ironing board along this side to prop up the quilt, easing the strain placed on you and your machine.

– If you’re quilting straight vertical lines, place the edge of the walking foot alongside the previous line you’ve just sewn and use it as a guide. If you want to make the space between your lines wider, insert a quilting guide-bar into the back of the walking foot, set it to the width you wish to use and place the bar alongside the previous line instead.

– Most importantly: take your time! Be patient with the process and always learn from the mistakes you make! (Remember: it’s okay to make mistakes! They make us better at what we do, even though you don’t think so at the time!!)

+++

So I think that’s everything I wanted to share with you in regards to quilting!

If you think I’ve missed a crucial step or if there’s a technique or way you love most to do, comment below and share your knowledge with us!

Don’t forget to keep sharing photos of your fabric choices, finished blocks and quilts if you’re following along with the series! I absolutely love seeing what you’re making and how you’re interpreting the pattern!! You’re all so wonderfully creative!! You can easily tag me on Instagram and Twitter using the handle: @3and3quarters or you can simply upload a picture to my Facebook page!

I hope that you’ll join me soon for part five where I’ll be teaching you how to make and attach a simple double binding to your quilt – the second last step to the finish line! Yay!!

Until then,

Happy Quilting, Friends!!

xx

References:

The Quilting Answer Book by Barbara Weiland Talbert

A Beautiful Baby Quilt…

AmeliasQuilt2

AmeliasQuilt4

AmeliasQuilt1

AmeliasQuilt3

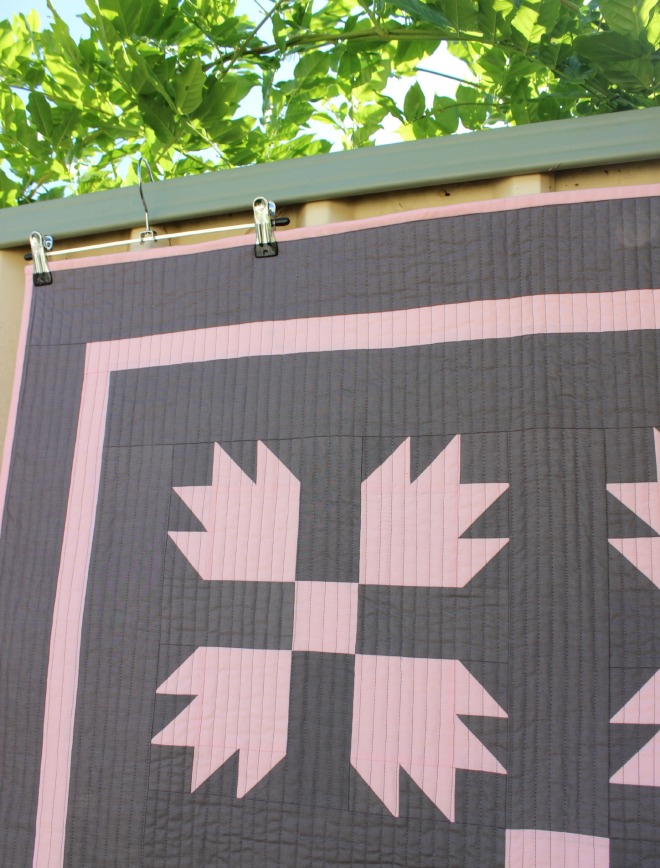
Over the past few weeks, I’ve been busy cutting, piecing and quilting this beautiful little quilt for my future niece, due next month.

For this quilt, I wanted to merge traditional with modern by using this Bear Paw Block as the central design while featuring fresh colours and modern quilting lines.

I also have to admit that it was joyfully wonderful to finally work in the colour pink! After making quilts for four nephews, the change in colour palette was like a beautiful breeze of fresh air!

I gifted this quilt away yesterday at her baby shower and I can only hope that she will find comfort and warmth in it always!

xx

So Many Side Projects!

This is how my sewing list works…

I have a main project/quilt on the go at all times – currently it’s my Friendship Star Quilt, which is in a state of half-started quiltiness!

Then I have lots of other little side projects sprouting out from my sewing room, (usually lying on a coffee table or sitting mid-stitch on my desk), that I seem to begin to occupy/procrastinate my time with.

This post is dedicated to those side projects that are currently distracting me away from quilting this!

{Side Project #ONE}

Stop Motion Embroidery

When I get a chance to sit down in front of the telebox, I’m coolly stitching away at this number.

Heart Embroidery
It’s current state!

Every two minutes I take a photo of my progress, resulting in an effect that looks a little like this.

I’m so close to finishing this one! Hopefully I’ll be able to edit and upload it within the next few weeks!

{Side Project #TWO}

Mother’s Day Appliqué

This Sunday in Australia we’ll be celebrating Mother’s Day and because I’m as broke-as-two-bob-watch, I’m making this for my mum!

Ready to start stitching!

It’s a sweet little applique design I found in a quilting book in my library called 101 Full-Sized Blocks.

I thought this would be cheaper and a lot more personal than buying her real flowers – at least these ones won’t die in three days!

I’ll hand-stitch a satin/buttonhole stitch around all of the shapes, baste and bind it turning it into a mini wall quilt.

{Side Project #THREE}

Heart Block Video Tutorial

Another Quilty Tutorial is on its way to be uploaded onto my YouTube Channel.

You may’ve seen this cheeky little sketch in my Instagram feed a week or so ago…

IMG_2681

I’ve always loved the pixelated looking heart block design…

So I’ve drawn up my own design and will be sharing the how-to process with you very soon!

{Side Project #FOUR}

Mini Spool Wall Quilts

Mini Spools

I made up these blocks sometime late last year and have been wondering what to do with them ever since.

Happily, I was inspired by my Mother’s Day project and quickly whipped them up in one evening to the point of just stitching on the binding.

The over-all purpose of these making these little wall quilts is to sell them in my online madeit store,Love along with Side Project #FIVE…

{Side Project #FIVE}

Little Wallets

I made some more of these this week and still have another three waiting to be completed!

Little Purses

These five pretty little purses are waiting to be sent out to new homes…

If you live in Australia and are searching for a last-minute Mother’s Day gift, these could be what you’re looking for!

 ***

So there we have it. Five little side projects waiting their turn for my attention.

Well actually, some of them aren’t really that little

If only there were more hours in the day…

Cheerio

&

Happy Sewing!

xx

TUTORIAL | The Plus-Sign Block

I present to you another one of my Quilt Block Tutorial videos!

When I’m browsing on Pinterest (which is practically all the time!), I always seem to come across beautiful quilts made with this block.

Links to these quilts are at the end of this post!

And they’re always so pretty and effective!

I ummed-and-aahhed between calling this block the Plus-Sign or (Modern) Crosses block as it can be referred to as both these names.

In the end, I settled on the Plus-Sign block as this particular design looks more like a plus-sign (+) than a cross (x).

Lately, I’ve been receiving some wonderful and very encouraging feedback about my tutorials (which I love!) and in the way that I present them.

People are torn between the narrative style I’ve done in the past and the annotated versions I’ve been doing of late.

Let me know what you think!

I would love to know where and what I can improve on to help you understand and enjoy my video tutorials!

The next video tutorial in the works is a Foundation Paper-Piecing idea that I said I would do in my Craft Haul video!

I’m super-super excited to get that underway!

So I here I leave you for the day…

I wish you all a splendid weekend!!

Happy Sewing Friends! xx

~ LINKS ~

The quilt by cluckclucksew

The quilt by Custard Bean

The quilt by allbuttonedup

The quilt by craftyblossom

Mini Craft Haul!

I’ve been buying so many quilting gadgets and sewing accessories over the past month or so (who doesn’t, right?!), that I wanted to share a few of them with you in something that I call:

A Craft Haul!


Item #1

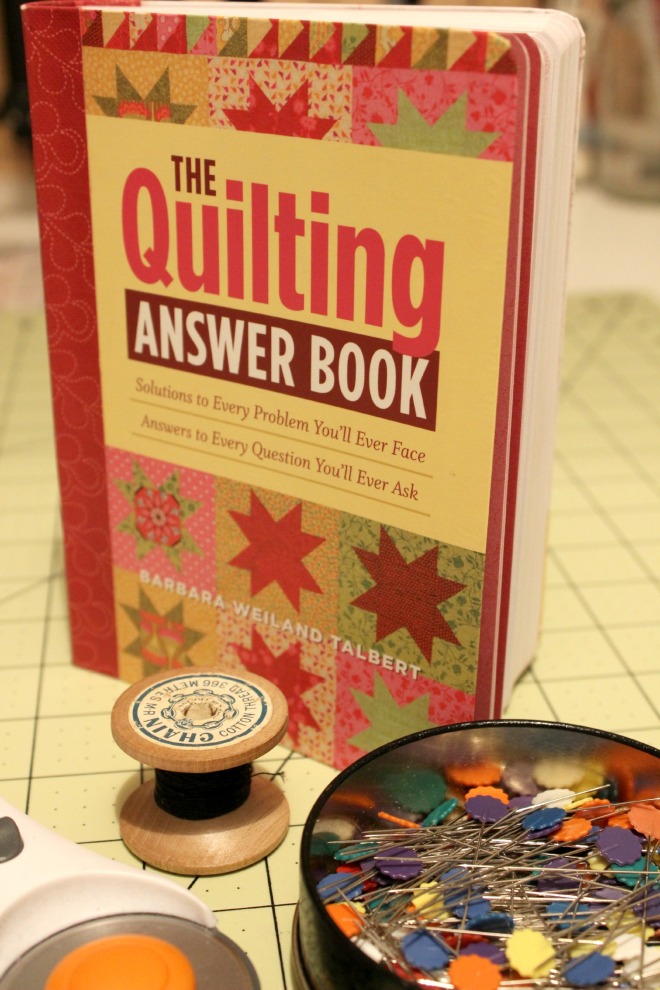
‘The Quilting Answer Book’ | Barbara Weiland Talbert

I discovered this little beauty of a book in one of my local bookshops and immediately knew it was coming home with me!

QUILT BOOK

I had a good little flick through it to see what it was all about…

It begins with the basic questions and answers that all newbie quilters begin with regarding fabrics, batting, tools/accessories as well as cutting, piecing and pressing and how a quilt is assembled etc.

The book also delves into answering the deeper and more advanced techniques of quilting like applique, quilting techniques and skills, embellishments, calculating your own block designs and more!

The book has been set out into easy to find and read sections that have informative diagrams and images to follow along with.

[CLICK HERE] To see more information about this book!

Item #2

Fiskars Self-Healing Double-Sided Cutting Mat | 18x24inches

I had been saving like mad and keeping my patience hat on, waiting to get this.

My previous cutting mat was getting a bit ‘rough-around-the-edges’, both sides. Because I was really impressed by the quality and features of that Fiskars cutting mat, I was on the look out for a good sale price (these baby’s aren’t cheap!).

Eventually my patience was rewarded with a 40% off Fiskars Quilting Tools sale at Spotlight! Cha-Ching!

CUTTING MAT

The thing that I especially love about the Fiskars Mats is that they have the 1/8th” measurement lines as well as a dotted lines in between the solids so that accurate measuring and cutting is a breeze!


Item #3

Sew Easy Patchwork Ruler | 14×4.5inches

While I was ‘treating’ myself to a new cutting mat, I also purchased another quilting ruler.

RULER

I was looking for another one of those ‘basic’ types of rulers that can be used when measuring and cutting anything.

This particular ruler is slightly longer than the previous one I was using (tick!) and features the all-important imperial measurements (tick!).

Item #4

Clover Tracing Wheel | With Serrated Edges

CLOVER

When I do paper-piecing, I like to perforate the lines that I’ll be sewing over by guiding the paper through an unthreaded sewing machine. This perforation helps when tearing the paper off in the later stages of the block construction.

To avoid this time consuming step, I bought a serrated edge tracing wheel that will, hopefully, do the same kind of job as the sewing machine.

I’m yet to trial this method out so I can’t really say whether this will work with much success! I’ll keep you posted!


Item #5

Pink Thread Snips | With anti-slip grip handle

I like using these types of thread cutters. I find that they’re quicker to pick up and use and the point at the end of blade cuts closer to the surface.

SNIPS

These particular thread snips are unbranded and were on the cheap side, so how well they’ll work and how long they’ll last is anyone’s guess!


Item #6

‘PaintBox’ Collection by Cynthia Rowley | ‘Prism’, 50x112cm

FABRIC

Gosh I love this fabric! I’m sucker for anything with crisp geometric forms and bold intense colours.

As you may know, I’m using this print as the feature in my Friendship Star Quilt. Initially I only got about half-a-metre (50cm) from the meterage and realised it wouldn’t quite be enough for what I was doing (don’t you hate it when that happens!?). So I bought another 50cm for when I need it – and I will!

This print was part of a super-swish collection from Cynthia Rowley that I purchased from Spotlight. The other designs in the range are all insanely beautiful and fun…I wish I was a millionaire so I could buy them all!

Item #7

Black Acrylic Chalk Board Paint | Typo, 250ml

I’d been searching around for chalkboard paint for ages until I very randomly came across this sweet little tin in one of my favourite stationary stores.

PAINT

I was happy with the price ($9.95) and the size, so I got it!

I haven’t used this product yet, so again, I’m not sure of the quality that lies within… However, I’m always on Pinterest, so I’m sure I’ll come across a brilliant craft idea to try it out on! I’ll share that too when the time comes!

I also filmed a video of me chatting about all of these products on my YouTube Channel!

All of these products, except the book and chalkboard paint, I purchased at Spotlight – usually when there was a catalogue sale or storewide sale.

I haven’t been paid or asked to review/chat/share these items. Everything written is my own opinion, experience and thought.

Moving on, I have new quilt block tutorial coming out later this week!!

Here’s a little glimpse…

Mystery Block...
Mystery Block…

Ooo, what could it be!?!?

Stay tuned for more!

Happy Sewing Friends!

xx

PS. You can also find more of me, my work and patchworky dreams here –

TWITTER | https://twitter.com/3and3quarters

INSTAGRAM | http://instagram.com/3and3quarters

PINTEREST | http://www.pinterest.com/3and3quarters/boards/

TUMBLR | http://amandarolfe.tumblr.com

xx

TUTORIAL | Friendship Star Block

Over the weekend, I pushed everything I should’ve been doing to one side and concentrated on getting this video out!

And now it’s finally here!

So enjoy. Enjoy. Enjoy!

Happy Sewing Friends!! xx

TUTORIAL | Four Patch Block

Good Morning!!

Here’s another little tutorial for all of you to peruse at…

Do you know of anyone who is just starting out in patchwork and would benefit from watching some quick information-filled video tutorials?

Well, by all means share this with them! I make these tutorials specifically with those people in mind!

See the playlist here to watch more of my quilty tutorials!

On to other things, it’s summing up to be a few busy days of sewing and quilting ahead as I’ve been invited to lead the sewing/patchwork/quilting demonstrations at my local Spotlight store on Saturday as part of their Sewing Fest/Craft Month celebrations!

S100987_E13B_14A_WP_TOP

I’ll be demonstrating basic techniques such as how to quilt and bind a quilt along with how to construct a few selected 9-Patch Blocks designs.

It should be a fun day and I’m really looking forward to it!

Look out for a post some time early next week to see what I got up to that day!

Happy Sewing Friends! xx

Sewing Room Tour!

If you’re a regular reader of this darling little blog, you may have notice that I didn’t post up a weekly WIP update on Monday, as I have for the past month or so.

This is mainly because there is nothing to really update you with i.e.. nothing has changed since I last wrote about my WIPs. (My laziness/procrastinating ways are finally showing!)

However, this week I feel very proud to introduce to you a tour of my sewing room!

I love this space!

It’s where I feel the most comfortable.

Where I feel the safest.

The most inspired.

Freely creative.

And connected to the rest of the world.

In the video I show you where I sew/quilt (duh!) but also where I write, shoot, edit and publish my blogs and videos.

It may not be the best kind of sewing space as some others may have (look up ‘sewing studios’ on Pinterest and you’ll know what I’m talking about!) but I’m thankful for my mum giving up her little study space for me to have my very own little sewing space!

IMG_2423

I also made a second video with some other extra bits I couldn’t quite fit into the first Sewing Room Tour video.

If you want to check that out, click right here!

Happy Sewing Friends! xx

TUTORIAL | Square-in-a-Square Block

I’ve had this video tutorial in the planning for a while – ever since I filmed my Fast Forward Quilting video last year in early September, where the Square-in-a-Square Block features.

Small Plates Lap Quilt (2013)

The Square-in-a-Square Block, in my opinion, has to be one of the most easiest, quickest and adaptive blocks available for all levels and types of quilters.

It can be made into any size, using a range of differing centre-square and sashing measurements and can be made into a block as traditional or as modern/quirky as you wish it to be!

Give it a go and see what you think!

Way back in 2006, when I first became interested in making quilts, I used the Square-in-a-Square Block to make my very first quilt!

My First Quilt! (2006)

So essentially, this block was the very first block I had ever constructed!

If you’re a beginner I hope this little tutorial, in some small way, can help you in your own patchwork/quilting journey!

Happy Sewing Friends! xx