Long Time, No Word…

Hello my lovely Friends!

It’s been a bit of a while between posts, huh? This is the part where I typically write up my excuses… Busy life. No time. Unbelievably tired. So on and so on.

Well, although I haven’t been sharing very much both here and on my YouTube channel, I’ve been busily planning, designing and organising behind the scenes! Yeah!

One major thing that’s in the works is my next Quilt-Along series! I know, I know, I’ve been teasing what’s in store for the past few months but I do promise it’ll be starting very soon!

Planning time, using 'Printshop' by Cotton+Steel!
Planning time, using ‘Printshop’ by Cotton+Steel!

All of the blocks have been designed and are ready to go and the over-all layout of the quilt is locked in! Now I’m just waiting on the arrival of my fabrics (I’m using ‘Printshop’ by Cotton+Steel) and I’ll get straight into filming! I’ll also then be able to release an official start date as well as a full run-down of all of the info you’ll need to sew along with me (in blog post and video form)! TBH, I did want to have it started by now but a few unforeseeable things came up that prevented the series getting started. But no worries, it will be getting underway very soon and I’m so excited to get into it! I miss making tutorials for you!

Moving onto making content for my YouTube channel, I wanted to share an idea I’ve recently been seriously thinking about. I’ve mentioned this before, but one of my favourite types of content to watch on YouTube are Vlogs. This is where people film their everyday daily life and either upload it everyday or patch the week together into a weekly video. I did begin doing something like this on my channel a few years ago but it fell by the way-side as I felt I wasn’t quite ready to make that kind of content yet. But is this something you’d be interested in watching if I did this on my channel? Do you wanna see what happens in my everyday life? Obviously it’s a big thing to take on. I’m naturally very quite and shy and keep a lot to myself, so this would be a huge adjustment and fun challenge for me to take on. But it’s something I’ve been mulling over in my mind this past month or so and would really love to take it up and try it out. I’ve even begun researching what camera and equipment I could use to make the vlogs the best that they can be! Anyway, I would love to know what you think! Any feedback is good feedback in my opinion! 🙂

+++

In other news, just like my blog and channel, my poor sewing machine has been sadly neglected over the past few weeks. 😦 Call it being busy. Call it lack of inspiration. Call it a creative-brain-block. Whatever it is, I just haven’t felt the old spark or natural urge to do any ‘personal’ sewing. It’s actually really bumming me out. (It’s also another reason why I haven’t been blogging recently. There hasn’t been anything new to share with you! Or any photos to upload into this blog post!) Although I’m really excited to get started on my Quilt-Along, I don’t have any exciting sewing to get into while waiting for it to begin. Everyday I scroll through my Instagram feed and see all of you making such beautiful blocks, quilts and projects while I’m sitting here feeling guilty about not getting on with anything or whipping up something special to share with you… Ho-hum, hopefully I’ll break through my creative doldrum soon and find that good ol’ inspirational spark again! Fingers crossed!

So hopefully it won’t be too long between this post and my next! I’ll try not to let a month(!) fly past without touching base with you!

I hope you’re all having a wonderful week!

Happy Sewing, Friends!

xx

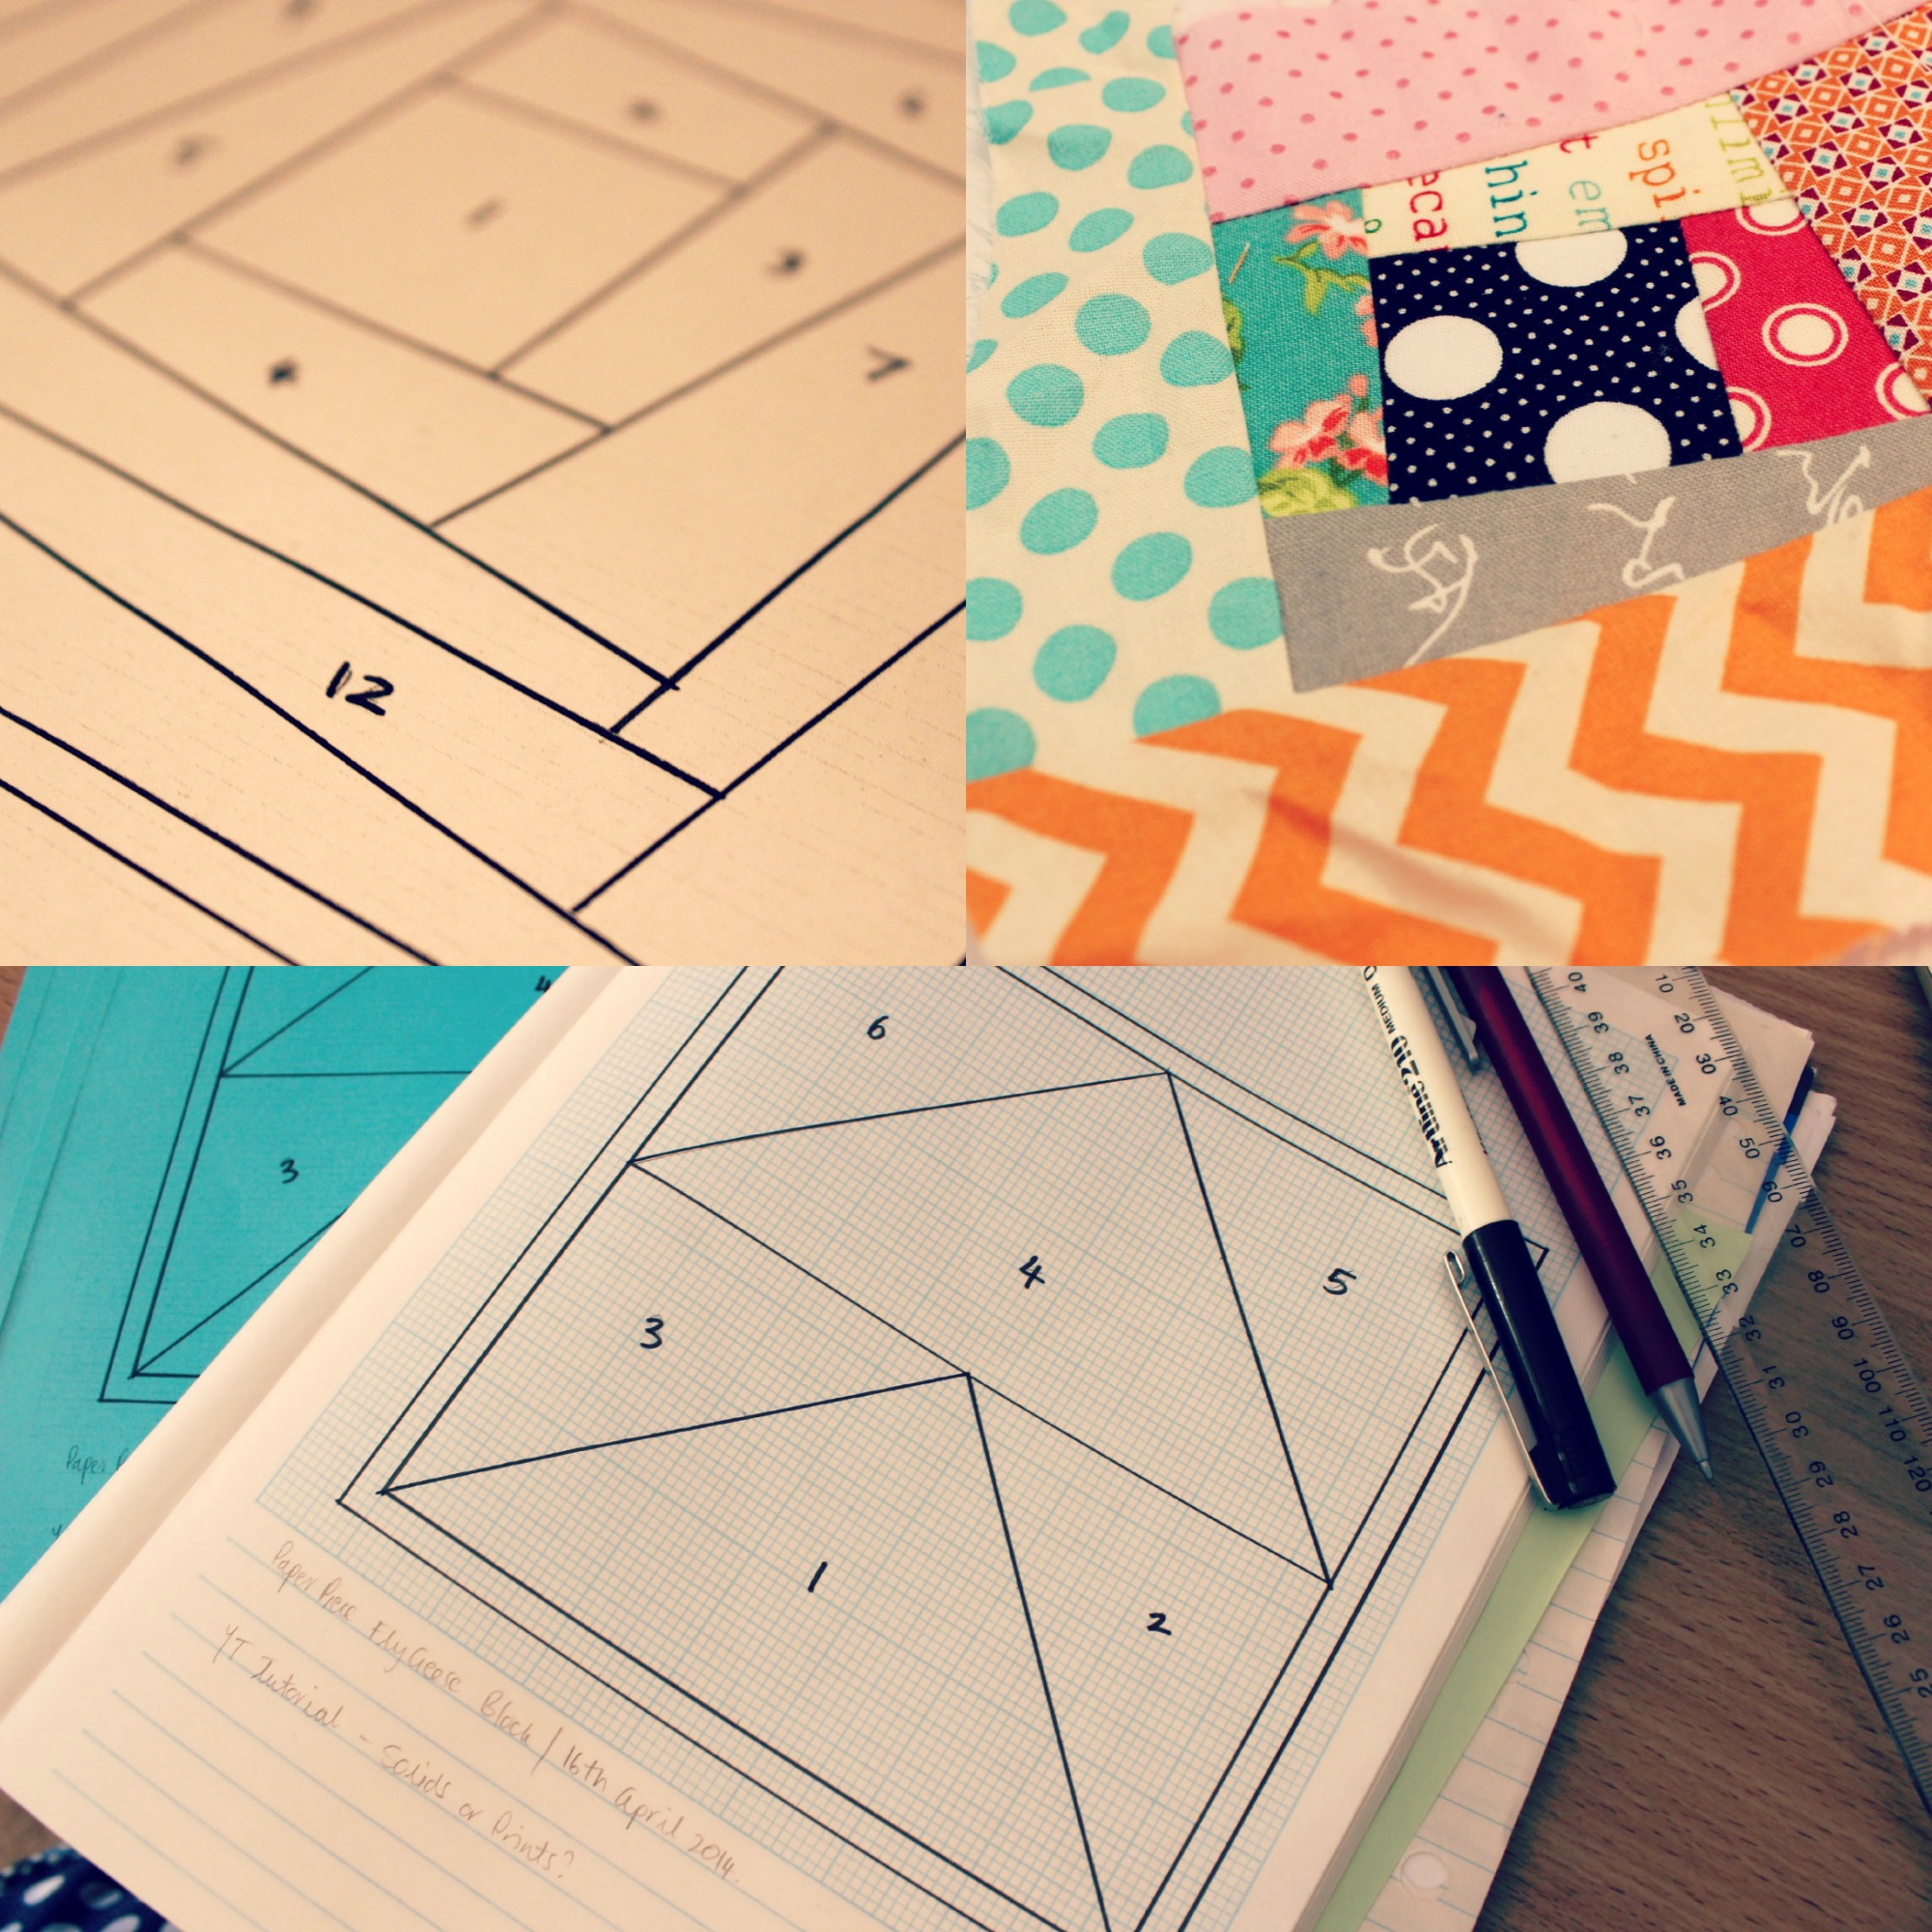
PS. By the way, have you seen my latest block tutorial? I made a FPP Arrow Block!

GET THE TEMPLATE: FPP Arrow Block Templates

TUTORIAL: RJR Fabrics ‘In The Kitchen’ FPP Coffee Cups Wallhanging

Hello and Happy Friday!!

(Yay!!)

In today’s post I’m combining both part one and part two in my most recent project uploaded onto my YouTube channel featuring the new RJR Fabrics collection, ‘In the Kitchen’ by Patrick Lose. And that of course is my Foundation Paper Pieced (FPP) Coffee Cups Wallhanging!

CoffeeCupsWallhanging:AmandaRolfe

So I thought, instead of doing two separate posts, why not join them together in a lovely huge blog post for you to come back to and have all of the info you need in one neat little package!

So let’s get into the nitty-gritty stuff and start making!

First of all you’ll need the pattern to make those cute-as-a-button coffee mugs! And here it is!

—>> FPPCoffeeCupsPattern <<—

Download it and print it off as many times as you wish! (Although for this project you’ll only need three copies!)

Next is the video tutorial where I show you how to piece them together… You’ll find that right under this video, there’s a full list of all of the fabrics you’ll need, how much to cut for each section (all of the guess work has been taken care of!) as well as a few of the tools and notions I use when I’m FPP.

MEASUREMENTS & CUTTING INFO:
Cut these amounts for each section in the template. (These amounts are to make one Coffee Cup block.)

TEMPLATE A –
A1: x1 4.5″x5″ rectangle
A2 & A3: x2 1.5″x1.5″ squares
A4 & A6: x2 1″x5″ rectangles
A5: x1 1.5″x5″ rectangle
A7: x1 2″x5″ rectangle

TEMPLATE B –
B1: x1 2″x2″ square
B2 & B3: x2 1.5″x1.5″ squares
B4 & B5: x2 1.5″ x2″ rectangles
B6: x1 1.5″ x3″ rectangle
B7 & B8: x2 1.5″x1.5″ squares
B9: x1 2.5″ x3″ rectangle
B10: x1 2″ x2.5″ rectangle
B11: 2″x6.5″ rectangle

PLUS for the opposite side of the cups and diagonal sashings, cut –
x3: 2¼”x5.5″ rectangles and
x4: 2¼”x8¾” rectangles from your background fabric.

FABRICS I USED FOR EACH CUP:
Top Coffee Cup block
– Main print: Coffee Cups Calico in Paprika
– Line detail: Silhouettes in Butter
– Background: Quilted Grid in Salt

Middle Coffee Cup block
– Main print: Kitchenware in Fresca
– Line detail: Tile in Multi
– Background: Quilted Grid in Salt

Bottom Coffee Cup block
– Main print: Utensils in Chocolate
– Line detail: Silhouettes in Fresca
– Background: Quilted Grid in Salt

NOTIONS & SUPPLIES I USED:
– Brother Innovis 200QE sewing machine
– Brother ¼” piecing foot
– Fiskars Rotary Blade (28mm) & thread snips
– Sew Easy Rulers
Clover Serrated Tracing Wheel
Clover Finger Presser

+++

Moving onto part two in the project, I show you how you can finish your wallhanging with two lovely borders that frame the coffee cup trio and then how to simply sew it all up and quickly quilt it to completion!

Again, there’s a full list of all the measuring and cutting info for this part directly underneath for you to take a squizz at!

FABRICS, MEASUREMENTS & CUTTING INFO:

First Border –
FABRIC: ‘Silhouettes’ in the colour Butter
CUT: x2: 1½”x23″ strips and x2: 1½”x10¾” rectangles

Second Border –
FABRIC: ‘Kitchenware’ in the colour Eggshell
CUT: x2: 2¼”x25″ strips and x2: 2¼”x14″ rectangles

Batting –
FABRIC: Legacy Bamboo/Cotton Blend Batting
CUT: x1: 15″x29″ rectangle

Backing –
FABRIC: ‘In the Kitchen’ in the colour Multi
CUT: x1: 15″x29″ rectangle

+++

And now it’s time for a GIVEAWAY**!! Whoo!!!

I have one delightful little Fat Quarter Bundle with 16 prints from the range that I would love to give away to somebody! If you want that to be you, then simply comment below answering this question:

What do you love most making in the kitchen and why?

The winner will be announced/contacted next Friday, 5th February 2016.

Best of luck!!

(PS. World-wide entries are welcomed!)

**NB: THIS GIVEAWAY IS NOW CLOSED! THANK YOU TO EVERYONE WHO ENTERED!!

+++

Now if you’re just as smitten with this range as I am, here are a few places online where you can get the ‘In The Kitchen’ collection!

Patrick Lose Studios

Missouri Quilt Company

Again, I would like to say a huge thank you to RJR Fabrics for giving me the opportunity to play, make and create with this fun new range!

Wishing you all a very lovely weekend ahead!

Happy Sewing, Friends!

xx

PS. Don’t forget to check out this Pieced Apron tutorial I made using the ‘In the Kitchen’ range too!

‘Tis The Season! | December Diary

DecemberDiaryBanner

As I sit here, thinking of something fun and witty to write to begin this post, all I can think of is the scary thought of just how quick this year has flown by! Sure, we say it every year, but this time it feels slightly different for me… Perhaps it’s simply because I’ve had so much fun this year blogging and making stuff that time has simply slipped by without me noticing… Or maybe it’s due to my young-adult mind developing and maturing and taking more of a notice to these things… Ooo, I’m going a bit too deep in the thought process here… let’s rewind and get back onto the fun ‘It’s almost Christmas!’ bandwagon!

Yay!! It’s almost Christmas!! 😀

ARTIST: Andrea Smith

You know, I love this time of the year. (Minus the sweaty, humid heat! Yuck! Give me jeans-and-a-t-shirt kind of weather any day, thanks!) I love planning and making and wrapping and celebrating and eating and decorating and singing and eating and worshipping and shopping and eating and giving and being happy and being thankful and eating! Everything about it I love!!

As you may’ve already guessed, I live in Australia. And in Australia, Christmas equals Summer! It’s hot and dry, humid and sticky, windy and stormy, and the sun sets late into the night. So I thought that because the majority of people who read my blog live in the Northern Hemisphere where Christmas equals Winter, I would give you an insight into what an Australian Christmas is like in a thing I like to call my December Diary! Unlike what I did in September where I wrote a post everyday during the month, this time I would write a post every few days or so with all things Christmas, lifestyle, family, friends, tutorials and crafts and anything else that makes December in Australia a happy one!

Like many of us, December is a very busy month with lots of things happening: social events, family catch-ups, carol services, birthdays (three in my family alone!), crafting and sewing sessions (#HandmadeChristmas) and of course lots of afternoon swimming pool sessions! So as your December gets a bit crazy, a bit manic and a bit stressful, by all means take some time to chill and relax and perhaps use the time to catch-up on what’s happening on the other side of the world with me and my Aussie Christmas!

+++

So getting the ball rolling, so to speak, here’s my first bit of Christmas sewing to share with you!

This year on Instagram, I’ve signed up to be apart of an #AussieChristmasSwap where quilters, sewers and makers from all over Australia make or buy something special for their Aussie partner and send it off to them in the first week of December.

Amongst the other things I have to give, I made this sweet little Christmas Robin wallhanging/mini quilt using a foundation paper pieced pattern by Kristy from Quiet Play. As soon as I saw it I knew I had to make it – it’s so adorable!! And when I found out that my partner likes a lot of the Cotton+Steel ranges, I knew I had to use some of their Tinsel Christmas range that I recently received from Dayview Textiles! So with both of those elements combined along with a few matching spotties from my stash, this little beauty was made…

ChristmasRobinMini

ChristmasRobinMini2

I quilted it in my usual vertical straight-line way but this time with the lines slightly closer together almost borderlining on matchstick quilting. Then once the binding was sewn into place, I stitched on a little button for the Robin’s eye which simply brought the whole thing to life! The hanger in the picture above isn’t the final one I’ll send it away with, I’ll buy a better looking one over the next day or so!

The final measurement of this gorgeous little mini is: 10&1/4″x10&1/4″! Super cute!!

+++

I’m so excited to get into and share with you all of my Christmas-y crafts and ideas that have been brewing in my mind over the past few weeks! And as we wrap up the final elements in my HST Sampler Quilt Along both here and on my YouTube channel, I’ll also be uploading all of my fun Christmas videos too! Yay!!

Sing with me now: ‘Tis the season to be jolly, fa-la-la-la-la-la-la-la-la!!

Happy Sewing, Friends!

xx

A Block Review // FPP Jack-O-Lantern

The other day, while wasting time on Facebook, I came across a link that was shared to this awesome little FPP Jack-O-Lantern pattern by Sonja Callaghan from the blog Artisania. And with Halloween coming up very soon, I just knew that I had to print it off and give it a go!

FPP JackOLantern Block 1

Firstly, I printed off the pattern at a scale of 90% so that I was sure the pattern would fit comfortably on a A4 piece of paper. Then I sat down for a bit, trying to figure out the best way to make it as I’ve never attempted a FPP pattern this intricate before!

Once confident of how to start and what steps I had to do to be successful at the end, I picked out some fun autumnal RJR Supreme Cotton Solids and jumped straight into making!

Here are a few tips that I think might help you when making the block yourself…

No. 1 – The block is divided into six sections labelled A to D. So you need to carefully cut the paper pattern into the sections before you can start any sort of piecing! (See Photo #2) I also cut an extra 1/4″ seam allowance around the outside line of the pattern so that I wouldn’t get caught out not having enough fabric to cover each section. (See Photo #1)

Cutting a 1/4" seam allowance out from the edges of the paper pattern.
Photo #1
Image #2
Photo #2

No. 2 – Another prep step before starting: Using a Clover Serrated Tracing Wheel and a ruler I perforated all of the lines in each section that I’ll be sewing on top of. (See Photo #3) Doing this simply helps to ensure that the paper will rip away smoothly from the back once the block is finished.

JackOLanternStep3
Photo #3

No. 3 – I found it really helpful to initial each numbered section of the colour that was to be used so that I wouldn’t get confused!

JackOLanternStep4

W=White, O=Orange, B=Black and G=Green.

No. 4 – I was really relaxed with sizes of fabric I cut for each section. I found, that because a majority of the numbered sections were quite small, I was able to use quite a lot of fabric pieces from my little scrap pile I was creating from the other sections I had finished piecing. And due to that, the block came together really quite quickly!

No. 5 – As you piece each section together, make sure to leave enough fabric over the edges so that you can trim the block down with a 1/4″ seam allowance around each side. For this pattern to come together perfectly at the end, you need to cut a 1/4″ out from each edge on all six sections (excluding the edges you cut around before on the outside of the pattern)…Hopefully Photo #4 will help you understand a little better…

Photo #4
Photo #4

No. 6 – Once you’ve come to the part where you’re ready to piece each section back together, I found doing it in this order the easiest…

Sew section A to section B, then section C to the other side of B. Remove the paper from the back and press the seams either to one side or flat open. Then sew section D to section E and then section F to the other side of E. Again, carefully remove the paper from the back and press the seams in the same way as before. From here, piece the two sections together to finish the block.

TIPS: When piecing each section together make sure to line up the seams around the outside of the pumpkin and around his mouth to achieve clean crisp lines. It may take a little bit to get these parts aligned and sitting perfect but trust me, it’ll be worth it in the end!

Finished block size: 7.5″x9.5″ (19cmx24cm)

FPP JackOLantern Block 2

So to sum it all up, despite a few mistakes on my part resulting in the seam ripper to make an appearance more than once, this was a really fun FPP pattern to piece together! Believe it not, I did learn a few new things and expanded my knowledge on the way I should tackle these types of tricky pattern designs! I also felt like a slight rebel making this little guy as Halloween isn’t widely celebrated in Australia as it’s seen as more of an ‘American’ tradition. But I like Halloween – it appeals to the crafty and creative side to me! Hence why I loved this making little guy!

If you like the look of this guy and would love to make him yourself but don’t know a thing about Foundation Paper Piecing (FPP), then check out this tutorial I made a little while ago taking you through the steps of how to do it!

Of course, if you have any questions about this block or are stuck on any step, please don’t hesitate to ask! I’m always here to help!

Best of luck to all of you who are going to print this little guy off and give him a go! Don’t forget to share your photos with me!

Happy Paper Piecing, Friends!!

xx

March Favourites!

A bit late, huh!? Well, there’s no time better than present, so here were the things I most loved during the month of March!

HOME by Peter Morrissey Vanilla Candle

HOME Candle

I love a good homey vanilla scent candle! They fill the house with a lazy comforting aroma that makes you feel happy all day! I usually like to burn candles later on in the day and into night as it makes the house cozy and delightful!

This particular candle is the first I’ve bought with double wicks. At the time of purchasing I wasn’t sure how quick it would burn through. But now that I’ve had it a while, it seems to burn in the same similar time as a single wick.

I’m not too sure what I’ll do with the glass dish once the candle has died. I was thinking of cleaning it out and using as a place to store random knick-knacks. Do you have any other suggestions? Let me know in the comments!

Bourjois Limited Edition Vintage Blusher in 16 Rose Coup de Foudre (Love-Struck Rose)

Bourjois Blush

I say, ‘what’s a favourites list without a few beauty products?!’ And this one doesn’t disappoint!

Now to be completely honest and melodramatic, this blush has changed my life! It is so beautiful, petite and lush that I’ve been swooning over it all month! It’s this gorgeous shade of pink/coral that has a delicate shimmer mixed throughout. It’s quite a heavy type covering blush, so only a little on the brush goes a long way!

I bought it online through ASOS who, I happily discovered, have a pretty good beauty/makeup range to explore with some very competitive prices that makes this little Aussie smile! (Cosmetics are super expensive in Australia, so any place where I can buy at a cheaper price is fantastic!!)

Rimmel Lasting Finish Lipstick in 006 Pink Blush

RimmelLippy006

Along with my sweet little blush, I also purchased another Rimmel lipstick. My excuse for buying it was that I didn’t have this shade of pink lippy in my collection. (As one does!) I find that I really like soft pinks like this when I want a makeup day to be really light, casual and minimal.

Pieces Akamo Bar Stud Earrings

BarEarringsCloseup

I’ve been looking for a pair of stud earrings like this for a good little while now, so when I was browsing on ASOS, I checked out their jewellery section and found these little beauties! They were super cheap and the exact colour I was wanting! Win! So naturally, I’ve been wearing them all month!

Fluffy Socks

FluffySocks

Autumn has finally set in in Australia and the nights are getting particularly chilly! So to keep my little piggies (my toes, that is!) warm, I’ve been snuggling up in these cozy fluffy socks! I find because it’s not quite Ugg Boot weather yet, these socks seem to do the best job at keeping me warm. Their soft, feathery nature makes it feel like I’m walking on clouds! It devine!

A Circle of Geese foundation paper piecing pattern by Piece By Number

A Circle of Geese Block

I’ve had a great month getting lost in some random and fun sewing projects, especially this block pattern by Piece By Number. It was a bit strange actually; I had this odd craving to get stuck into some foundation paper-piecing for some reason and remembered this great block I had made when I was doing the Craftsy Block of the Month with Amy Gibson a few years ago. So I printed out the pattern pieces, dug out a few of my favourite DS Quilts fabrics and simply got lost in the sewing process! It was wonderful!

Hot Cross Buns!

So March was Easter. And with Easter comes chocolate and Hot Cross Buns! And man, was I craving them! I’m pretty sure I bought over three packets of buns in as many weeks! And don’t worry, I did share them with my family but even that was pretty hard to do!!

The way that I love to eat them is heated to warm, with a good spread of butter and a hot cup of tea! Ooo, heaven!

BONUS FAVOURITE!

AVPM One other thing I absolutely loved throughout March was re-watching A Very Potter Musical, A Very Potter Sequel and A Very Potter Senior Year by StarKid on their YouTube channel. If you’re a fan of the Harry Potter books I would very much encourage you to watch them! They’re ‘totally awesome!’

+++

So one month over and another has replaced it! Let me know of any things you’ve loved over the past few weeks! I would love to know!

I also uploaded this video chatting all about these favourites! Check it out if you wish!

Happy Favouriting, Friends!

xx

Other Favourites posts from this year…

+ January

+ February

TUTORIAL: FPP Union Jack Block!

Over the past few months, I’ve had a numerous amount of interest and requests to make a video tutorial showing how I make the Union Jack block…

The Union Jack Block

The first time I made this block I had just learnt how to Foundation Paper-Piece and was absolutely daunted by all of the different pieces and angles I had to sew! Oh. My. Gosh. So, I took a deep breath, studied the pattern and instructions and then took one step at a time. So then of course I proceeded to make countless mistakes, under and over judged fabric lengths and widths AND importantly learnt that keeping to a quarter-inch seam was critical for the pattern to come together, crisp and evenly at the end! What’s that saying? Through our mistakes, we become stronger… Well, maybe…

Since then I’ve gone on to make a lot of versions of this block, almost to the point where I could do it with my eyes closed! (Well, no. Not really. That would be a terrible idea!!) I had high hopes (and still do, actually) of piecing my many blocks together to make one of those big Britannia type quilts.

A sample of the Union Jacks I've made...
A small sample of the Union Jacks I’ve made…

I’ve written about it before in other blog posts and it was on my New Year Quilting Resolutions of 2014 list to make during that year. (An idea that failed miserably! None of those quilts got made! My bad.) But hope is not lost! It will get made… one day… soonish…next year, maybe…

But, alas! I have had the chance to incorporate this block into quilt! I was commissioned by a work colleague to make a quilt for our department manger who was leaving to pursue another job. The biggest love in her life was bunnies as well as sharing the same admiration for all things British, like me. So I made her this quilt as a farewell gift!

English Bunny Quilt (2012)

It still is one of the most favourite quilts I’ve ever made.

I originally found this block in the book Modern Blocks, compiled by Susanne Woods as I was casually flicking through it when visiting my favourite bookstore in Sydney, Kinokuniya. As soon as I saw this block pattern in the book, I immediately made the decision to buy it without even looking at what other blocks were in the book! That’s how keen I was to make it! However, it wasn’t until I got home that I realised the block was made entirely using the foundation paper-piecing method… A technique, at the time, I didn’t know anything about! With my excitement and high hopes of being able to make an inspiring Union Jack Quilt squashed, I placed the book on my shelf and forgot about it.

My little library!
My Quilting Book Library

A few months later, I signed up to do the online Craftsy Block of the Month with Amy Gibson[And just on a side note: If you’re new to quilting and want to learn lots of new techniques and be wholly inspired by everything patchwork, I recommend highly to watch these video tutorials! It’s 100% free to watch and join. Honestly, without watching these tutorials, I wouldn’t be the quilter I am today! So go! Do it now! Watch. Learn. And grow!] …and in one of the months she taught me how to foundation paper-piece. Here I was, thinking it would be this weird, strange, ancient technique that I thought I would never enjoy. How very wrong I was. In a matter of minutes, I was in awe of just how easy and simple the technique was. I just couldn’t believe how straight, clean and crisp I could get my seams and how many new and awesome modern block designs that were now open for me to make! And then…Lightbulb! I now had the power to make that Union Jack block!! Huzzah!!

The block in question, called Just Jack, was designed by Lynne Goldsworthy. (A quilt-block designer I seem to keep running across over the past few months…spooky!) The block that I make is a little bit different to the one in the book. I’ve made it smaller (165% as opposed to the suggested 200%) and have eliminated the two pieced strips from the top and bottom so that it’s just a Union Jack.

JustJack

Now I must admit, this block is pretty tricky (and a little bit daunting!) if you’re new to foundation paper-piecing but I still want to encourage you to give it a go! Don’t worry if you make mistakes – I did and I learnt from them! Be brave, dive in and see what happens! (Oh man, I should take on some of my own advice inother parts of my life! Jeez!) 

If you are new to foundation paper- piecing, you’re more than welcome to check out this tutorial I made last year that goes through all of the basic tools and steps to understand the technique.

One of the things I absolutely love about this block is that it allows you to be as free and creative as you wish! You can use fabrics that are rich in print and colour, ones that clash horribly but still look good or just stick to the classic side of things using solid colours to bring the block to life!

Now, the final size of this block will all depend on how big you choose to enlarge this pattern. At 165%, my finished block measured 26.5cmx17.5cm (10&3/8″x7″).

If you don’t have this book or unable to purchase it, here are a few other Union Jack patterns I’ve found on the net that are similar to the one I’ve made.

‘Union Jack Block & Bag Pattern’ by Amy Smart (Diary of a Quilter)
‘Union Jack Quilt Block’ by traceyjay on Craftsy (FREE PATTERN!)

And lastly, here’s a list of the tools and notions I like to use when I’m doing any foundation paper-piecing…

– Brother Innovis 200QE sewing machine
– Brother 1/4″ sewing foot
– Gutermann polyester thread
– Fiskars Rotary Blade and Cutting Mat
– Sew Easy Rulers
– UHU Glue Stick
– Triumph Craft Scissors
– Birch Non-Melt Flower Head Quilting Pins
Clover Thread Snips
Clover Serrated Tracing Wheel 
Clover Finger Presser 

Of course, let me know if you’re going to make this block (or already have!). Send me a photo of your finished block, or a project with the UJ in it or your fabric selections for your planned block! I absolutely love it when you share your creations and ideas with me!

The ways in which you can share with me…

Instagram & Twitter: @3and3quarters

Email: 3and3quarters@gmail.com

Facebook

If you’ve made it to the end of this post, I send you a big virtual HIGH-FIVE for getting through all of my rambling back story!

You’re a true super star!

Happy Sewing Friends!!

xx

TUTORIAL: Paper-Pieced Christmas Trees!

ChristmasTrees

GET THE PATTERN: FPP Christmas Tree PDF

Hello & a Happy Wednesday to you all!
Today brings my first of many Christmas videos for 2014! And we’re starting off with a bit of a tricky one. But take comfort, once you know the basic steps to Foundation Paper-Piecing, you’ll be whipping up these blocks in no time!

Like I mention at the beginning of the video, if you’re new to Foundation Paper-Piecing, perhaps watch the tutorial I made a little while ago explaining everything there is to know to this technique to then help you out with this video.

Tools

And if you’re interested, here’s just a quick little list of the sewing tools I used in this video*…

– Brother Innovis 200QE sewing machine
– Brother 1/4″ sewing foot
– Gutermann polyester thread
– Fiskars Rotary Blade and Cutting Mat
– Sew Easy Rulers
– UHU Paper Glue
– Triumph Craft Scissors
– Clover Serrated Tracing Wheel
– Clover Finger Presser 
– Fabric from Spotlight

And as always, share with me any pictures of your finished blocks if you’re keen on giving this a go! You can contact me here: 3and3quarters@gmail.com

Happy Sewing Friends!

*This is not a sponsored video or post. All products have been bought by me and all opinions are my own.

TUTORIAL | Foundation Paper Piecing

GET THE PATTERN: Paper-Pieced Flying Geese Pattern

The Easter Long Weekend came as blessing in disguise for me.

I was able to use the time to focus on getting my Foundation Paper Piecing tutorial edited and uploaded for you!

Initially I was going to demonstrate the technique using a Wonky Log Cabin pattern that I had drawn up, but decided it was possibly a little bit too complicated and fiddly for a ‘beginners’ tutorial.

blog6

So in the end, I drew up a Flying Geese type pattern that seemed a lot more quick and simple.

The method I use to tackle Foundation Paper Piecing is the way I was initially taught and feel is the most easiest, quickest and neatest way to do it.

However, there are plenty of other ways Foundation Paper Piecing can be done. These preference will (and do!) vary from quilter to quilter!

Is your method different from mine?

Let me know how you do it!

Enjoy watching..

and

Happy Sewing Friends! xx

When life gives you lemons…

…you make a soothingly warm lemony drink powerful enough to banish all unwanted weekend sniffles.

blog1

Yes, that’s right, all my weekend plans went out the window when I was struck down by one of those pesky not-yet-a-head-cold-but-soon-will-be yucky feelings.

So I pumped my body full of some good ole vitamin C, a healthy dose of Ibuprofen and snuggled down under a quilt with a book: The Fault In Our Stars by John Green.

And blamed the abrupt change of the weather for my sudden bout of illness!

One day it’s hot and sunny, the next cold and rainy – welcome to autumn: Australian style!

Anyway, enough about feeling sorry for myself…

I had planned for the weekend to begin filming a video tutorial (VT) I had promised about Foundation Paper Piecing – obviously didn’t happen – as well as to continue on my way with my Friendship Star blocks.

Foundation Paper Piecing Video Tutorial | Pattern Sneak Peek!

Now the latter did happen: four more pretty little blocks are adorning my design wall, giving me ample encouragement to keep-on-keeping-on with this quilt because the end result is going to be FABULOUS!!

(If I may say so myself!)

Top: 14 blocks completed! Bottom: The perspective shot!
Top: 14 blocks completed!
Bottom: The perspective shot!

So the next few days I hope to concentrate on getting said VT on it’s way, taking onboard all of your wonderful suggestions, thoughts and opinions on how I can improve and make my VTs better for you to watch and learn from.

Until then,

Bon Oui* lovely friends! xx

~

*Good Night! (French)

String Quilting on a Rainy Day!

I’ve dug out all of scrappy strips from my stash, dumped them on my sewing desk and proceeded to dig in to begin my first ever string quilt!

Here’s my messy-but-organised set up…

My Messy Set Up
My Messy Set Up

I’ve placed the iron and ironing board on my right for easy access, my sewing machine ready to sew in the middle and my cutting board/working space on the left. Everything is in easy reach – ruler, rotary blade, big and little scissors and the bin is up on the table behind the sewing machine. I’ve two piles: one of pre-cut paper (I’m using a foundation paper piecing method) with the other being the completed string blocks.

Here are a few of my favourites so far…

IMG_0209

IMG_0210But for now I’m off to play with old school LEGO with my nephews!

IMG_0213Happy Sewing!