Reacquainted…

Today, after a very long time, I clicked on a bookmark link on my web browser that’s been patiently waiting for me to give it some attention since early 2019.

That link, dear friends, was to you, here on my ever-faithful little sewing blog.

A few years have gone by with a few quilts made here and a few quilts made there. Some of them life-time favourites and others I can happily forget. (Although, I don’t think there are many of these!) Other projects have been started and then instantly dumped in the ‘I’ll finish this later because another new and shiny project/idea has come along’ and a few skills or obsessions have been discovered! (Hello Machine Embroidery & Dressmaking!)

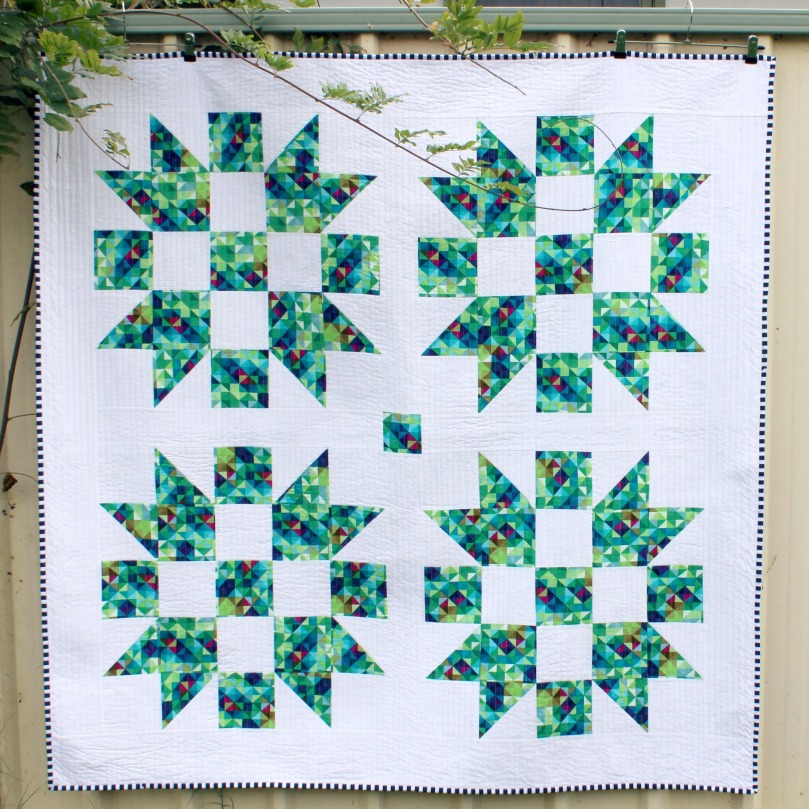
Nightingale Quilt (2023)
Bear Paw Quilt (2023) & Christmas Quilts (2022)
Machine Embroidering all of my jumpers! (Dino design from Urban Threads)

But no matter what craft, project, idea, discovery, or obsession wanders lazily across my path grabbing my attention like a two-year-old, everything always leads me back to my one true love – making quilts.

Ahh, yes. Quilt making. That sweet, cosy practise of cutting up perfectly woven cotton fabrics into little squares, triangles or hexies and then sewing them all back together again into a design that’s just a little bit more pleasing to the eye.

It’s that giddy thought of having endless possibilities to create something great with just my fingers and brain. To draw out the skills I’ve been honing since I was 16 to master and perfect a nested seam, a faultless HST or a crisp flying geese.

The fun play with colour and clashing print, with texture, size and value, with direction and precision.

The focus and drive that washes over you as you cut, piece, and sew a quilt, embedding it with every inch of love you possess as once it’s finished, you’ll be handing it over to someone you love who will cherish it and care for it always. It’s as though they now have a very small piece of you, a brief, fleeting moment of time from your life that you’ve dedicated or given just to them.

Finishing a quilt makes for a happy Quilter!

Who would of thought the practice of Quilting could be so philosophical and almost…romantic?!

Anyway…moving on.

I’ve wanted to reacquaint myself with my darling blog for ages but the same excuses would always crop up – no time, heavy self-doubt, a lack of motivation, an odd sense of social anxiety, self-questioning, ‘who’s still reading blogs?’ blah, blah, blah, the list goes on. You get the gist.

But a time eventually strikes you, even when you least expected it and you just get on with it. You just do it! No. More. Faffing!

So here we are, on the first day of February 2024(!) and we’re jumping back into the saddle, so to speak. I make no promises of regular written content or anything on here being of any worth. But I do promise, when I do get to write here throughout the year, it’ll always been an honest ramble sharing my eternal love for sewing and quilting and whatever’s going good in the sewing room at that time.

Shall I share with you what’s currently on the Design Wall?

No surprise. It’s a lovely parade of hexie flowers! (Always a sentimental favourite of mine!)

Spot the jelly-baby and nested chick!

The story goes a little something like this…

A friend from church is a missionary in a place called Galmi in Niger, a country in Africa. On their most recent trip home, they gave me a beautifully pieced length of fabric pieced/sewn by local women, expertly made up of left over fabric scraps.

My mind instantly went into overdrive thinking of how I can showcase every little detail of each fabric scrap, highlighting and praising each print in a harmonious way.

And here enters the subtle beauty and economy of the humble hexie flower…

Clashing prints, colours and textures! 😍

By employing a rough fussy-cut approach, I was able to get as much of the ‘good-bits’ as I could. And by ‘good-bits’, I mean perfectly cutting out bright yellow floral prints that sided next to a kitsch jelly-baby/embryo print that then flowed into a gorgeous pastel pink and blue floral. I also wanted to keep the bulky junctions of where two or three clashing prints came together, creating a wonderful push and pull of colour and texture.

So, with each hand-sewn whipstitch, clashing prints and all warm colours of the rainbow, some lovely little flowers have begun to bloom.

I’m currently up to the stage of expertly pairing each hexie flower to a complementing solid background square and then lovingly appliquéing into place using a dab of fabric glue and finishing with a quick straight-stitch whiz around along the edges with the sewing machine.

A tidy-ish pile of the last six hexie flowers to be appliquéd and finished.

As time permits and life settles back into a steady rhythm after the summer holiday break here in Australia, I’ll also gently ease myself back into working on projects that spark the joy and thrill I mentioned earlier. I have a butt-tonne of sewing goals I’d love to accomplish this year – a few include finishing a second Swoon Quilt and making a trendy Quilt Jacket/Coat!

And of course, making the effort to pop up here a few times each month (as well as on my YouTube channelI make sewing room vlogs and the occasional block tutorial video!), connecting, sharing and celebrating my love for all things sewing and quilting!

Happy Sewing, my lovely friends!

Amanda x

2018: Year in Review

Thinking back on last year, I immediately frown and wonder just what it was I actually did during the year that could hold some significance for me.

At first I was all like, ‘nahh. Nothing happened that could really hold up in a blog post, detailing my life in and around my sewing room!’

But then a simple scroll through my Instagram and all of a suddenly I have a hurried, messy scribble of a list detailing all of the wonderful events and creative pursuits I managed to fit into the year!

So, listing in chronological order, let’s review the year that was 2018!

January

I always like starting the year off with a bang! This usually means a big holiday/cruise somewhere warm and exotic! This way, during those times in the year where I feel a little worn down, crushed by societal expectations and it’s noisiness I can reflect on the one thing that bought joy and happiness to my life and I can remember what it’s like to be happy and carefree once more…

Was that a little bit too deep and depressing for a beginning paragraph? Oops! My bad!

Anyway…

What I was trying to say before going off on a weird tangent, four days into 2018 my parents, some family friends and I sailed away to visit New Zealand! Although it was my second time visiting, I loved every. Single. Minute!

We visited all of the major city/towns along the east coast of the country and even got the opportunity to visit Hobbiton! It was the best day ever.

I did a vlog series on my YouTube channel, filming and documenting the highlights of our trip. I recently watched it back and had totally forgotten just how awesome and fun our holiday together was!

I can’t wait to go back!

+++

While on our cruise to The Long White Cloud, another little Rolfe entered our family! Zayne Paul arrived on the 6th, healthy, happy and endlessly squishy and sweet!

We celebrated his 1st Birthday two days ago. (Seriously, where has the time gone!)

+++

The end of January saw me finally piece together my mammoth Pixelated Rose Quilt top. I made it a priority to get it finished by months end to then begin quilting it. As of today, this quilt is half basted, roughly folded and hung loveless over a chair in our living room.

HOWEVER!! This sad outcome will change very soon! Plans are in motion for this darling to be completed this year – and very soon too! (Fingers crossed!)

February

I got a new sewing machine, baby!! Whoo!

I spent a ridiculous amount of money on a new gadget that I knew would become one of my most beloved and treasured items that I own!

It’s taken us a little while to bond and get used to each other but I think we’ve got there. We’re in tune with what needs to get done, how to get it done and with what force, strength and/or delicacy the project at hand needs.

The machine I bought is a Brother PQ1500SL.

+++

On the 1st of February, I finished piecing together an old-ish WIP I had piled in a sad and dusty corner of my sewing room. And so my Simple Cross Quilt was born! I went on to finish this about a week later, with it being the first quilt I ever quilted with my new sewing machine.

I love this quilt so much. The pops and clashes of colour and print, the fun and whimsical cat print on the back to the classic gingham binding I wrapped the quilt in.

Ohmph!! 😍

It’s simplistic yet busy nature makes my heart sing and my face smile every time I see it!

+++

In late February I began Swooning around! Te-he! 😜

I became more serious and put more focus into making Swoon blocks just because, you know!

It was a block I’ve also wanted to make and piece into a quilt so I took the opportunity by the… well you know what, and just cut, pieced, pressed and repeat until I had nine beautiful blocks. (These were pieced together in May and the quilt top is stilling waiting for attention from me!)

May

Cracking on to May, while a Swoon Quilt top lay in the shadows waiting for me to find it again, I started a new Quilt Along series on my YouTube channel!

We delved into the world of mini blocks. A concept that I’ve introduced a few times on my channel in various block tutorials but never as a complete set to be then pieced together into a quilt/wallhanging.

All nine block tutorials have been made and published and now everyone is just waiting for me to get off my behind and publish the finishing steps in the QAL! (It’s coming, I promise!!)

June

This month saw me finish another WIP that had been lying unloved somewhere in a deep recess of our house!

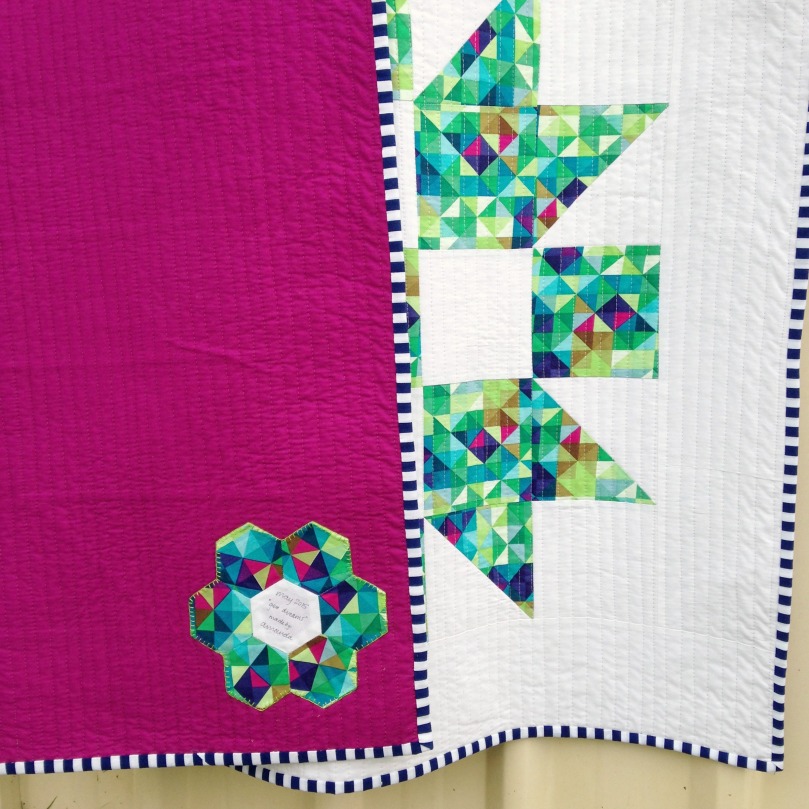
I’ve always loved this Friendship Star Quilt. The colourful geometric triangle print, the bold white square centers and then a richly dark and comforting navy background tying all of the elements together!

This quilt has been a real labour of love over the year, having been quilted once and then having all of the stitches ripped out because I hated my terrible attempt at FMQ!

The quilt has been scarred from this. At times you can see a faint messy snail trail, a ghost of where past stitches have been. I love that these lines add a history and a story to its journey of finally being finished!

The finishing touches to this quilt are perfect! The backing is spot on with the colours in the print in the blocks and the binding I used was the exact same fabric I initially was going to use when I first starting making plans for this quilt. The label is pretty perfect too if I may say!!

July

And then came July. A month where I cut off all of my thick, long and wavy hair and opted for a shorter and swishy bob cut that I’ve thankfully loved over the past 6 months!

+++

And can you believe it?! I finished piecing together another very old WIP!

I think the very first FPP Union Jack blocks I made were back in 2012?!?! And here it is, 2018 and I finally sashed and pieced them into a beauty of a quilt top! I had completely forgot how many I had actually made and couldn’t believe all of the different and fun prints I matched together.

Again, this quilt top is still hanging by (literally) for me to remember it and eventually finish it! I think I have cause for enthusiasm to finish it this year as in (quickly checks the calendar…) 7 and a half months, I’ll be on a big jet plane rocketing towards the UK!! Eeeeee!!! London baby!! 🇬🇧

+++

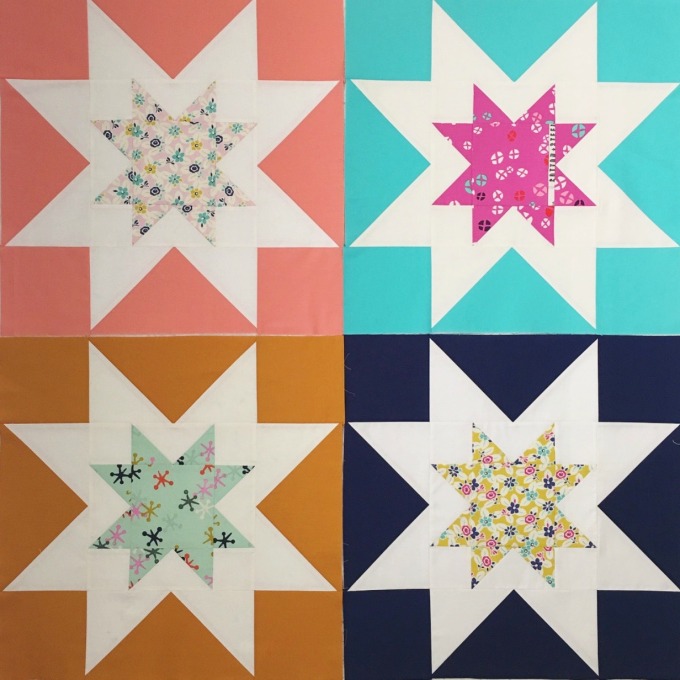
I cheekily started a new quilt top also. I began, quite out of the blue, making Lucky Star blocks. Inspired by my Simple Cross Quilt, I wanted to make another where the solid background fabrics where different in each one, with the colours clashing on either side of the blocks and creating distinctive squares and patterns.

So far, I’ve made five, with another two ready to be cut and pieced. I’m hoping to make nine blocks all up which I think will make a pretty decent sized quilt.

August

I became addicted to making colourful Hexie Flower blocks. I would sit for hours basting 2.5” hexies and then stitching them into funky flower templates.

I also found a love for glue basting in lieu of using chunky and time-consuming applique paper. Don’t get me wrong, I love how great HeatnBond is for applique etc, but when it comes to wanting a quick fix, so to speak, fabric basting glue is the best! 👌🏻

December

The months before December all went by with a blur, with nothing too exciting really happening. (The true narrative of my life.)

With December, however, comes Vlogmas! And Vlogmas very quickly turns into a month that is fast, chaotic, stressful, oh-so Christmassy and is jammed packed full of birthdays for our family!

As much as it stresses me out, I strangely and truly love doing Vlogmas. It gently and very quickly forces me to be productive, creative, savvy in my time management skills and gives me an odd sense of purpose and contentment. How people daily vlog all year round, I got no idea! My head isn’t big enough to feel all of those emotions all day everyday!

During Vlogmas, I got so many things made and finished! Two projects I’ve always wanted to make were finally ticked off the list! An Advent Calendar and a Christmas Tree Skirt!

Both projects were a labour of love but so much fun to make!!

+++

And that’s kinda it…

I literally haven’t sewn a thing since last year!

I’ve had a much needed break away from everything, re-assessed what I want to achieve and accomplish this year and have set the wheels in motion with a new blog theme, a new 3and3quarters logo and a set of goals that I’ll be sharing in my next post!

Bring on 2019!

xx
Falling In Love With Sewing Again

It’s no secret, this year has freakishly flown by, eating up time like it’s no bodies business. And my poor sewing machine has suffered as a consequence.

Also, not gonna lie, my motivation to sew and be creative has taken a bit of a hit too. So with all of that combined, not a whole lot of movement has been had in my sewing room this year.

But recently a few projects have come to hand to make me dust off the sewing machine, dig out my rulers and cutters and get sewing again.

In my last post, I shared with you my finished Star Sampler Quilt (sans quilt label!)

It felt like it took me for ages to get this quilt (and YouTube series) finished. But I’m so happy with the end result.

I currently have it hanging in my sewing room and I find myself just staring at it at times, admiring it’s beautiful tactile quilted surface, it’s perfectly pieced and nested points as well as the monochromatic tones clashing with the pops of colours dotted here and there.

When I was quilting this quilt, I took a gamble and used a new tool that I’ve been told is a must-have to use when quilting… Quilting Gloves!! OMG!! How did I ever get through quilting a quilt without these bad boys all of my quilting life?! They’re ah-maz-ing! Although I felt a little bit clumsy and resembled a bad Mickey Mouse look-a-like, the grip the gloves gave me was 10-fold compared to just using my bare hands!

Although the series has now come to an end, I only just finished the final touches to the quilt today… The quilt label!

Quilt Labels from my two previous QALs

And as tradition stands, I made the quilt label a Hexie Flower using some of the fabrics featured throughout the blocks in the quilt. Love it, love it, love it!

+++

Over the past few months, I’ve been sharing a new quilt that I very excitedly started after wanting to do it for ages and ages! The pattern is called Pixelated Rose by Riley Blake Designs and it sings to my yearning Florist inside of me!

So far I’ve loved every stage of getting this quilt underway. Choosing the harmonious solid colours was a breeze, the measuring and cutting was a slow but very meditative experience (I think I must be one of the very few quilters out there who loves the cutting process!) and then the precise piecing has kept me on my toes! Because of it I’ve been able to settle into an easy pressing and nesting routine that each block needs to be able to fit together in the end. Not gonna lie, the whole process (for me anyway) has been quite slow and lengthy. But I already knew this and I took on this project as one of those slow burners that you keep coming to over a set period of time until it’s finished, either months or years after you started!

I’ve been posting pics here and there on Instagram of the progress so far…

Unfortunately, I haven’t gotten any further than the last photo in the right hand corner. The past month has been jammed packed full and this project has been pushed to the side, collated into block order and hung outta mind, outta sight. Although, I do have some free time tonight… Hmm… 🙂

+++

Now, I must also confess that there has been a spectacular fail in the sewing room too.

That being a terrible attempt at making a pretty gathered A-Line skirt for my birthday a few weeks ago.

Despite being quite time poor during the weeks leading up to my birthday, I knew it would be a pretty big stretch to be able to cut, make and finish a skirt when dressmaking really isn’t a strong skill of mine. Although, in saying that, I did successfully stitch a side pocket for the first time as well as sew in a zipper next to another side pocket! Yeah!

However, things began to fall a part when I had to attach the waistband and match up dots and seams and things that I didn’t know I had to match up… So with time pressing on me and my interest and patience waining, I gave it up and allowed in the realisation that I’m no good at dressmaking one bit. (I’m sharing no photos of my sad attempt of a skirt!) Perhaps with a bit more practice and a bit more patience, I may become a superstar seamstress yet!

+++

I hope you enjoyed this brief glimpse back into my sewing room.

I feel like I’ve really fallen back in love with sewing again… Just the raw, basic and fundamental steps in this creative skill I’ve been blessed with. Over the past year or so, I’ve felt slightly distant from my sewing bubble that I’m so used to be being in. But I think I’m finding it again and it feels great!

Happy Sewing, Friends!

xx

Star Sampler Quilt | Finishing Touches

After almost a year of getting the ball rolling, the end of my Star Sampler Quilt Along has come to an end! *insert sad/happy face – whichever one applies!*

In the final instalment of the series, I’ve jammed packed it full of all of the ‘finishing touches’ we need to do to have a completed quilt!

This time ’round there’s no pattern sheet to follow or to download, instead everything you’ll need to know is either in the video tutorial or listed here in this post…

So once you’ve finished piecing together your quilt top with sashing and borders, it’s ready to be backed and basted in preparation for quilting! If you’ve made your quilt with the same measurements as mine, you’ll need:

BACKING: WOF*x150cm (59″)

BATTING: 120cmx150cm (47″x59″)

For my batting I’m using a lovely Premium 100% Cotton Quilt Batting in an Autumn weight by a company called Bosal. To be honest, before receiving this, I never knew that batting was or could be available in ‘seasonal weights’. I chose an Autumn weight as it’s not too fluffy (or lofty) to sandwich between my quilt top and backing, while still being light/heavy enough to keep one warm on a chilly winter’s eve.

When it comes to basting your quilt, use the method that you feel the most comfortable with. For me, that’s spray basting. It’s quick, simple and equates to less time rolling on the floor pricking my fingers with pesky pins! 😀

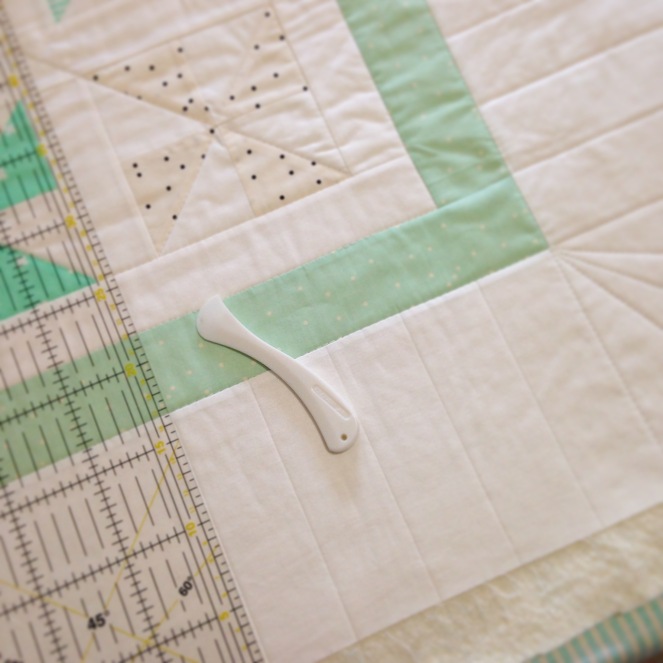
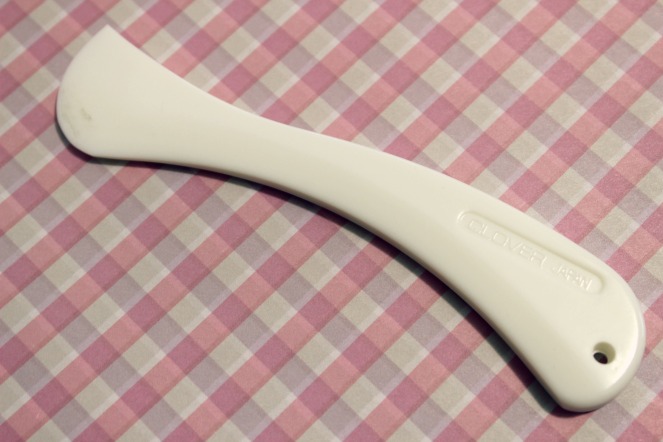
The same advice goes for your choice in quilting. From the early stages of planning this QAL, I always envisaged this quilt to have a subtle mathematical grid texture to it’s surface. To achieve it, I used my handy Clover Hera Marker and long quilting ruler to mark a 2″ grid pattern across the top of the quilt, three lines at a time (ie. mark three lines, quilt, then mark another three lines, quilt etc.) until the entire quilt was finished.

After trimming away any excess backing/batting from around the edges of the quilt, it’s time to bind! To make your own quick and easy binding, you’ll need:

BINDING: WOF*x40cm (16″)

Cut this into x6 2.5″ strips and sewn end to end on a diagonal to create a long binding strip.

After pressing the binding in half, simply machine sew it onto the front of the quilt as shown in the tutorial, then bring it around to the back and slip-stitch the other edge to the back of the quilt. Too easy!!

Don’t forget to label your quilt with the month/year the quilt was completed, the name of the quilt as well as the name of the person who made it! My label is still to be made (oops, my bad!) but when I do, hopefully I’ll remember to come back to this post and upload a photo of it for you! 😀

FINISHED QUILT MEASUREMENT: 141cmx107cm (55.5″x42″)

*WOF = Width of Fabric

+++

I want to extend a HUGE thank you to the lovely ladies over at Dayview Textiles who so generously helped out with the fabrics and materials I used for this series. Without them I would’ve been able to have the pleasure of using such beautiful fabrics from the Printshop Fabric Range!

And of course, thank you to all of you who participated so patiently in this series! I’ve absolutely loved seeing all of your gorgeous blocks, quilt tops and finished quilts – you’re all so talented and amazing! Although the series is finished, keep on sharing them with me using the hashtag #AmandasQuiltAlong on Instagram as well as over on my Facebook page!

So now that the QAL is finished, it’s time to move on to some more ‘old-school’ content that you’ve been used to seeing! That means some new block tutorials, crafty sewing tutorials, flower based tutorials, some fun Christmas things as well as other usual stuff like Monthly Favourites, Vlogs, Hauls etc! Exciting times ahead people!! Yeah!

So while I go and enjoy my last week of being in my twenties (It’s my 30th Birthday this coming Sunday! Eek!), I hope you all have fun completing your gorgeous quilts!

Happy Sewing, Friends!!

xx

PS. Happy News! I now have a PO Box! If you would like to send me something lovely, you can using this address:

Amanda Rolfe
PO Box 1179
St Marys NSW 1790
Australia

May 25th: Favourite Sewing Memes!

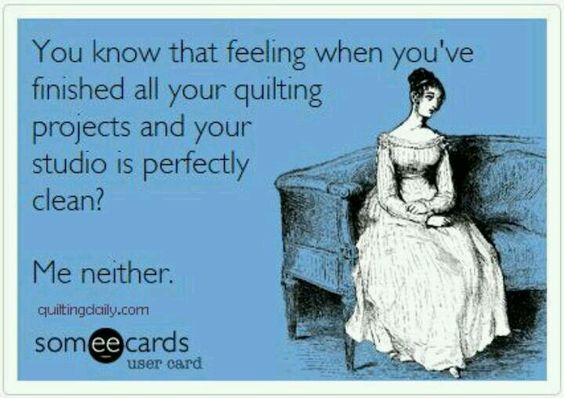
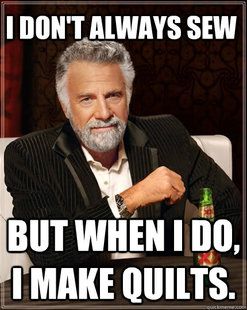
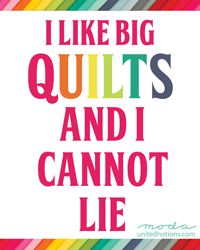
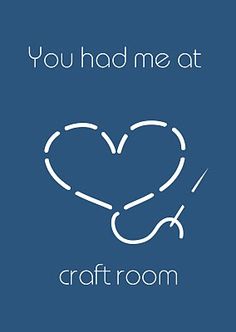
Ooo, I love a good sewing/quilting related meme! When you find a fab one that you achingly relate to, it’s like finding gold right underneath your bobbin case! (I wish! Ha!)

In this post I wanted to share with you a few of my favourites I’ve been able to come across on Pinterest. Some of them are incredibly (and very scarily) accurate while others are just down-right hilariously true!

Enjoy!!

SOURCE
SOURCE

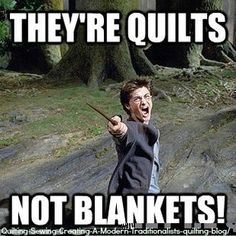
When ever anybody calls my quilts blankets I always think of this meme! And then it makes me chuckle to my self and people think I’m weird. 🙂

SOURCE
SOURCE

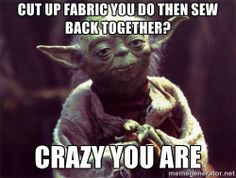
I tell ya, it’s the pop culture memes that really get me! Anyway to have quilts, quilting, references to patchwork and so on mixed with movies and characters that I love, I’m hands-down in! This Yoda meme is a perfect example. Us quilters really are quite crazy in one way or another! 😀

SOURCE
SOURCE

Yeah… We’ve all been there before. Life really can suck when those darn pesky points just won’t match up!

SOURCE
SOURCE

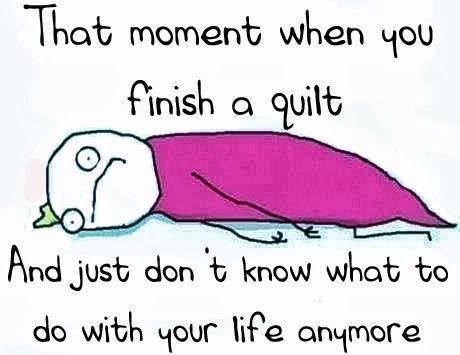
I’ve felt this feeling way too many times before! When I finally finished my Happy Quilt, this feeling resounded in me like never before! I was so completely lost, but in a good way, you know?

SOURCE
SOURCE

There’s truth in this one… Am I right?

SOURCE
SOURCE

Every. Single. Time. Whenever I walk into a Spotlight or fabric shop! 😀

SOURCE
SOURCE

The Classic sewing meme. We’ve all seen it. We all relate to it!

SOURCE
SOURCE

Admit it. You sung it in your head, didn’t you?! So did I! 🙂

SOURCE
SOURCE

Take note boys! This is how you win over this quilter’s heart! 😉

And then this last one is dedicated to all of you who read my blog, watch my YouTube channel and share with me your wonderful makes on Instagram and Facebook!

SOURCE
SOURCE

Much love!

xx

May 18th: The Name Origin of 3and3quarters!

So a request came in from one of my fabulous regular readers, Sharon (go check her blog out!) to share with you the origins of my blog’s name – 3and3quarters. I really can’t remember if I’ve shared the story behind it… It’s nothing too long or complicated or philosophical… Just a name that stood out and felt right!

DSC02748-trimmed

**Flash Back to mid 2011**

As you may already know, I used to work at Spotlight in the Dress department, where I would listen to numbers and measurement requests and cut fabric all day long. I’d have so many different combinations of measurement requests thrown at me (in the nicest way possible of course!) from one-and-a-half-metres to two-and-a-quarter-metres so and so forth. So as I was brainstorming for a name to call a blog and online store I was hoping to set up, I kept coming back to the notion of naming it around a measurement. I thought it would be highly appropriate as what I do (quilting and sewing) is heavily based around numbers and measurements etc. So when I went through in my head the measurements that I was continually hearing at work, three-and-three-quarters struck a chord. I loved how it seemed to roll off my tongue and how it had a bit of an alliteration under-tone to it. It also seemed like a great name that wouldn’t be so easily forgotten!

IMG_0325
Me in 2011!

So once the name was chosen, the real tricky bit I had was deciding on how to write the name out:

threeandthreequarters

three&threequarters

3&3quarters

3and3quarters – bingo!

And then from there, I worked up the guts to register for a blog domain and then wrote and published my first-ever post!

Since then, there have been lots of different updates and re-designs of my logo and blog layout as well as the gain of so many new quilty friends!! Yay!

Here are a few ways things have changed over the years…

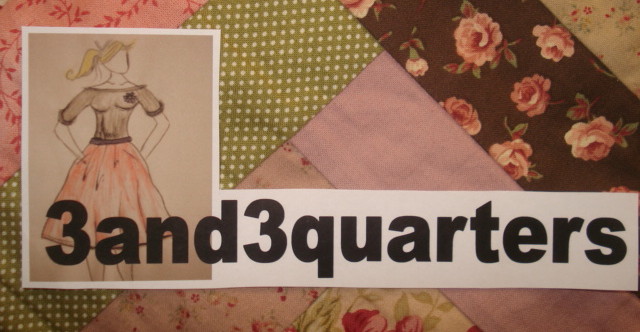
The top logo banner at the beginning is a fashion drawing of a girl I drew up during my ‘inspired to be fashion designer’ phase! Happily the phase didn’t last as I would’ve been a rubbish fashion designer! I’d instantly crumble under the pressure! The quilt in the background of that picture is the Rail Fence Quilt I showed you in My Quilt Collection video earlier this year.

IMG_7167

cropped-fb-banner12.jpg

ChannelArtJune2015

logoest-2011v2-e1452910483974

The last three banners were made on one of my favourite online photo editor websites called Pic Monkey! The site has some great tools to edit photos with as well a handy platform to make your own designs and creations from scratch!

+++

So that in a nut shell is how the name, 3and3quarters came about! I think it’s been working well over the years and people are beginning to associate the name with the things that I do online (which is very exciting!).

I’m curious… How did you come to find me and my blog? Was it through my YouTube channel? Instagram? Pinterest? A friend or favourite blogger? I would love to know!

🙂

I hope you’re all having a lovely week!

Happy Sewing, Friends!

xx

May 15th: My Top 7 Most Useful Tools & Notions

happy-sunday-quotes

Hello!

I hope you’re all having a lovely Sunday!

So I had a great request from one of you guys a few days ago to share with you a few of the notions and tools that I find to be the most useful when I’m sewing and quilting. A few of them I have shared before, but if you’re new to these parts, I hope you find the following helpful!

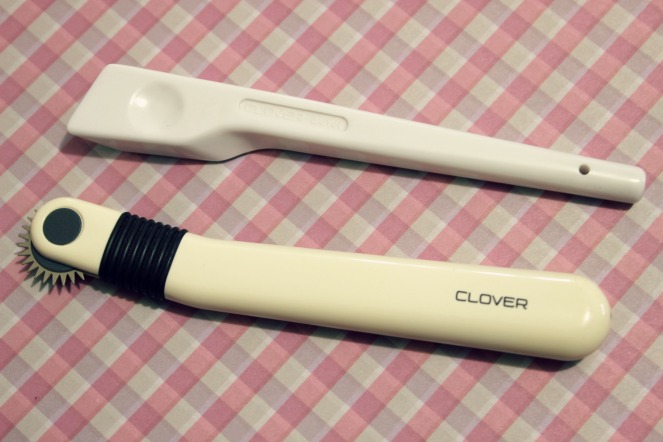
First off are these two awesome little tools from Clover.

TracingWheel&FingerPresser

Both of these I find super useful when I’m paper-piecing. I use the Serrated Tracing Wheel to perforate the lines on the paper before sewing over them. Doing this also helps to tear the paper away from the seams and fabrics at the end. The other tool is called a Finger Presser and I use this to quickly press the seams open all throughout the construction of a paper-pieced block instead of using the iron. For me, it saves so much time on going back and forth to the ironing board and also saves my poor little fingers from getting burnt! Ouchies!

Next up is another Clover product called a Hera Marker.

HeraMarker

As strange and weird as it looks, this little tool is so awesome and very useful to use for us quilters. Because I mainly incorporate straight lines all throughout my quilting, I use a Hera Marker and a long quilting ruler to mark out clear, even lines onto the quilt top that I then simply sew over, achieving a (almost) straight quilted line!

IMG_4546

Since using this tool, I’ve seen a huge improvement in my quilting! Everything just looks so more consistent and pro-fesh, sky-rocketing my confidence by a mile!

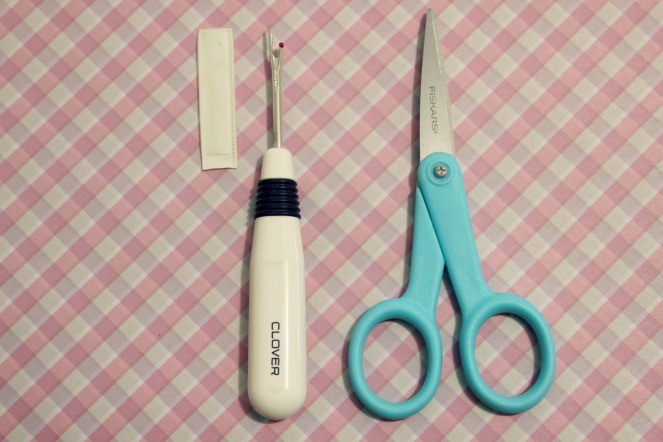
The next two things I like to see as more everyday-type useful tools.

SeamRipper&Snips

The Fiskars thread snips would have to be one of the best little scissors I’ve ever used! They cut through thread like butter and have a little tapered like point that elevates the blade away from the surface of the fabric but is still able to make the closest of cuts when trimming away thread! It really is like magic!

Ahh, the seam ripper. Where would we be without one! And just like all of the other Clover products, this one doesn’t disappoint! It’s light and easy to hold and rips through the toughest of mistakes like it’s no bodies business! It’s a fab little tool and I know I can rely on it to fix some of the worst mistakes I can ever dream of making!

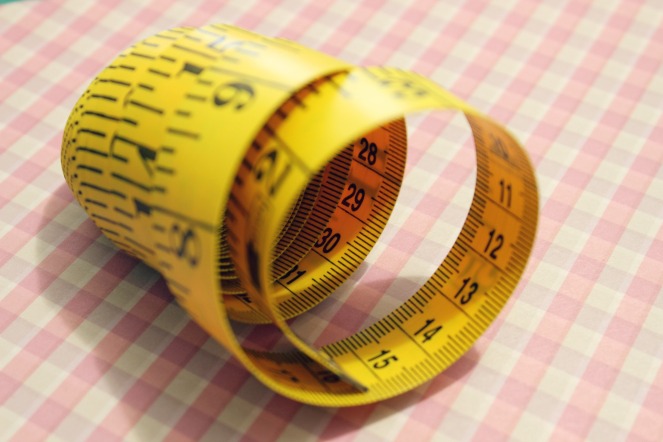
This is my tape measure…

TapeMeasure

I have it sitting on my desk and I would say that I reach for it at least five times during one day! Whether that be for answering your questions, figuring out size scales for patterns and blocks as well as playing with it when I’m bored or procrastinating! My nephews also love playing with it too! 😀

I particularly find this one useful as it has centimetres on one side and inches on the other. Because I use both of these types of measurements in my quilting, it’s so helpful to turn to it and quickly figure out what 5″ is in centimetres! (It’s about 12.5cm if you’re curious!) 😀 The tape measure is also super long, measuring up to 120″ (300cm) which is helpful when figuring out how much batting and backing fabric one needs to finish a quilt!

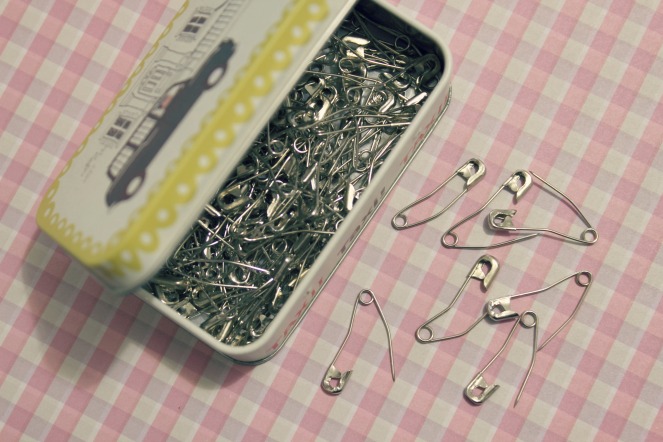
And last of all is a tin of basting pins.

BastingPins

I don’t usually baste my quilts with pins but when I do I find these ones super helpful! This is because they have a slight bend to them almost acting like a hook as you pierce them through the three layers of the quilt. They close nice and quickly and also undo almost instantly as you’re quilting along on your machine. This particular set of pins I bought from Spotlight and are by a Australian haberdashery company called Birch.

+++

So there are just a few of my top tools and notions that first came to mind to share with you!

In tomorrows post I’ll go through a few more that didn’t quite make the top seven! 🙂

Do you have any top fave tools and notions that you find useful when your sewing and quilting? Let me know!

Happy Sewing, Friends!!

xx

An Update from my Sewing Room… #6

Hello Friends!!

It’s always so lovely to find the time to sit and write and share and catchup with you!

I must admit, my blog has very sadly been neglected over the past few months… Life has seem to find the accelerator pedal and made the past few weeks just fly by! (I mean, can you believe it’s the middle of February already!! Geez!)

So as always, there are lots and lots of new exciting things to catchup you up on – so let’s dive in!

first update – floristry!

I’m a student once more and no ordinary student at that! I’m learning how to become a Florist!

IMG_5493

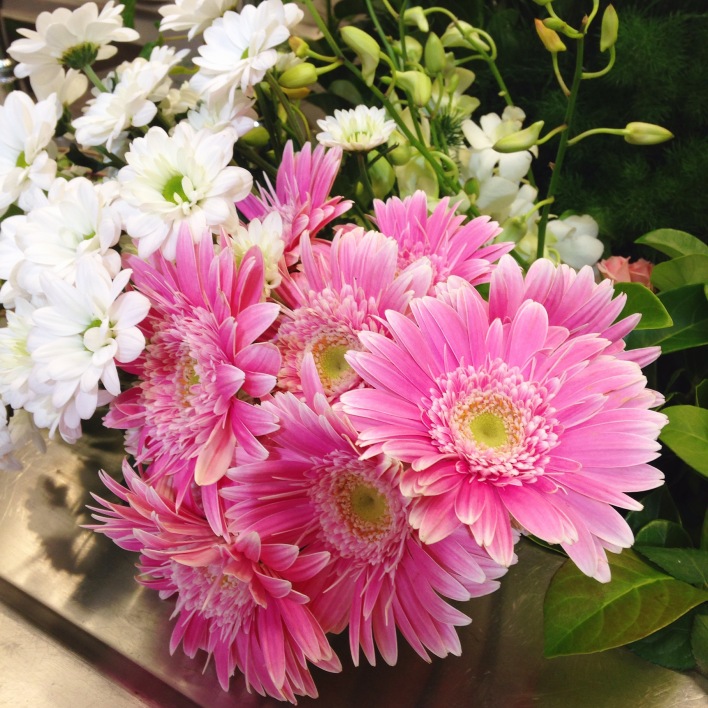
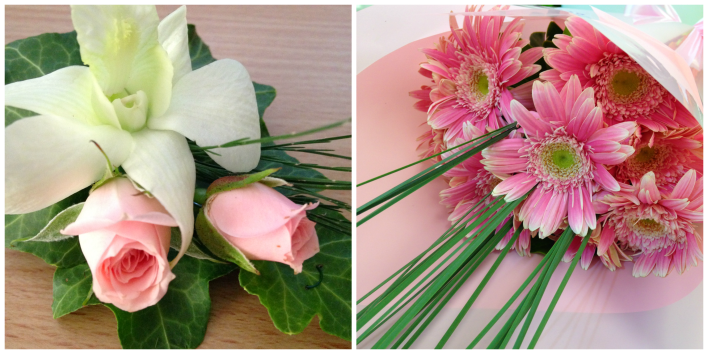
I’ve always wanted to study floristry ever since I was in my last year at high school. (I’ve also always been into gardening and growing my own plants, veggies, herbs and fruits. A trait inherited from my dad and paternal grandfather.) But things and experiences prevented me from pursuing it until late last year when I was very randomly reminded of my early interest in wanting to do it. So I did some research and found out that one of the local TAFE colleges in my area offered the very course I was interested in! Yay! So I applied and begun the course on the 1st February!

FlowerDuo

If you follow me on Instagram, you may have seen some new photos of flowers and arrangements and be thinking, ‘why?’…. And now you know! Of course I’ll keep posting pictures of my sewing adventures and life adventures and other sorts of things, but now pretty florals and bouquets will be added to the mix as well!

+++

second update – youtube

Now, you may be thinking if I’m studying floristry does that mean no more tutorials, videos, blogging, sewing, crafting…??!!

No. I will never stop sewing! Patchwork and quilting is my life! I’ve found that if I’m ever having a personal crisis or have had a bad day or am feeling blue or even 100% happy, I know that I can always rely on sewing to cheer me up, to put me back in the right mind set and to remind me that life is good. 🙂

And I love sharing that with you! I love teaching and helping you out. I love inspiring you and watching you grow in your skills and confidence. I have so many great things planned to share with you on my YouTube channel and blog this year and I’m so excited to get stuck into them!

However, now that my time is being shared with my studies there will be times when videos may be late or go up on the wrong date or not go up at all from week-to-week. (I may even change my upload day soon – I’ll let you know when and if I do!) It really will depend on how busy the week gets with study, family life, prior commitments etc. But just know I will always do my best to get something up and out to you each week!

And just as a sneak-peek to those of you who read my blog, here are a few of the tutorials/videos coming up on my channel over the next month or so… (in no particular order, btw!)

TutorialSneakPeek

– My Mini Quilt Collection

– Ocean Waves Block Tutorial

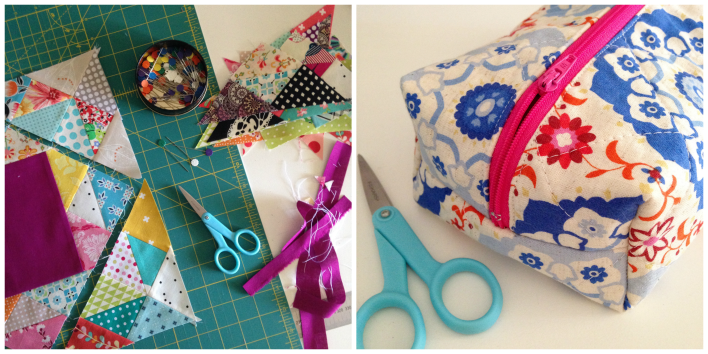
– Boxy Zipper Pouch Tutorial

– February Favourites

– Behind the Scenes: The Tutorial Edition*

(*This will be a video showing you how I film, edit and produce my block tutorials. It’ll be the behind the scenes of the Ocean Waves block!)

– And there’s the potential of a mini Spotlight Fabric Haul if you would like to see it… Let me know if you do!

+++

third update – sugar block club

This year I decided to jump on the band wagon and join in on one of Amy’s from Stitchery Dickory Dock Sugar Block Clubs. (Click here if you want to learn more about it!)

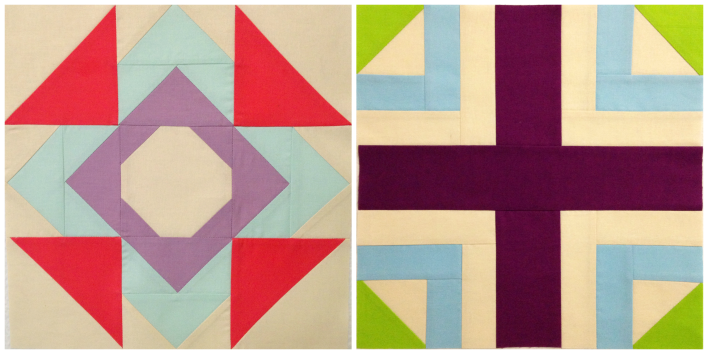
These are the two blocks I’ve made so far for January and February – Churn Dash and Log Cabin variations!

SugarBlockClubDuo

I’ve decided to use solids for each of my blocks as I absolutely love using them at the moment! (Plus, I have lots of solid fabric to get through!) I’m sticking with a neutral creamy colour for the background which will help each of the colours I choose to sing and show off the designs in each block. I’m so excited to see where this quilt will end up!

+++

fourth update – happy mail!

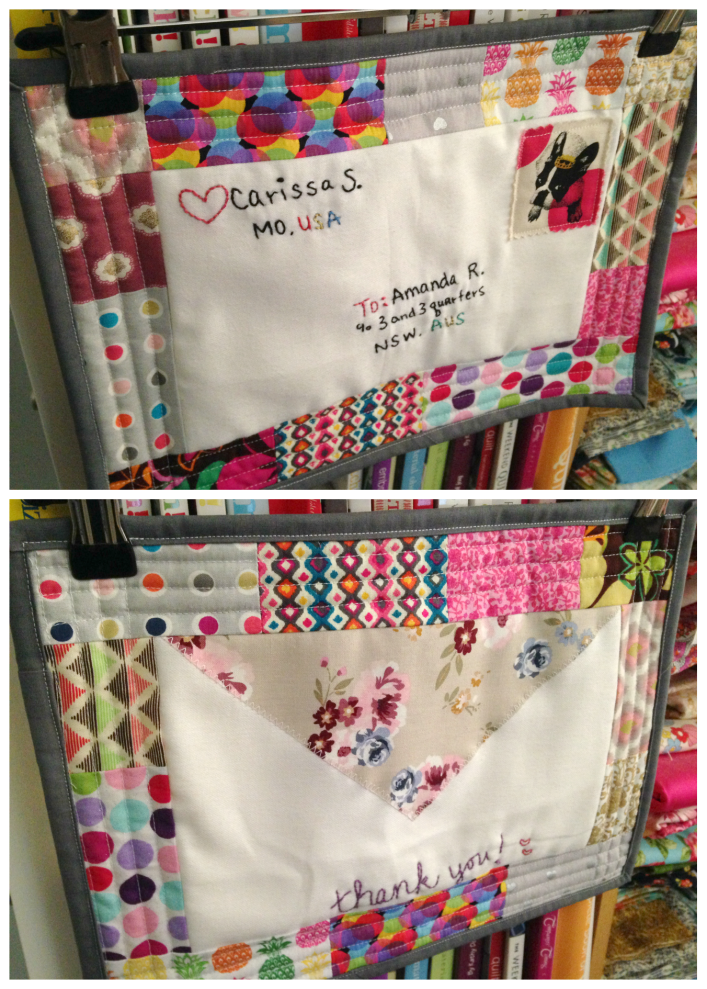
Although I’ve already thanked her, I just want to acknowledge and share this lovely gift that a wonderful friend, reader and viewer sent me last week!

CarissasThankyou

Carissa made me this super cute little ‘thank you’ wall hanging/mini in the design of an envelope, featuring hand embroidered details, beautiful little sample fabrics from her HST Sampler Quilt along with a gorgeous little frenchie bulldog fussy cut for the fabric postage stamp!! Ahh, soooo cute!!

Along with this, she so generously sent lots of fun things like Pop Tarts and a selection of American candies, binding clips, a Buzz Lightyear Mug (!!) and so many other awesome little things!

And so again Carissa, thank you so much for sending me such a lovely, generous and thoughtful package! You’re truly the best! (Can you tell I’m still on a bit of a high from all of it?! Te-he!)

+++

And that’s the update done! (There’ll be a fifth update but I’m going to make that into a separate post – it’ll be all about my Four-Patch Love Heart Block tutorial!)

 I’m so looking forward to completing my floristry course and perhaps sharing some flower care and construction tips with you some time!

And, I’m quite eager to get those tutorials underway and share them with you asap!

Wishing you all a wonderful week ahead,

Happy Sewing, Friends!

xx

Celebrating 4 years of 3and3quarters!

Last week, on the 4th November, my darling little blog celebrated it’s 4th anniversary!

You know, there really are times when I can’t believe it’s been four years since I begun writing and sharing all of my quilty adventures! So much has happened between then and now (naturally) and in no way did I think that my blog would ever be as rewarding as is it today!

So as I’ve done previously in my past yearly anniversary posts, we’re gonna take a look and recap all of the highlights from the past year – starting with the birth of my niece last year…

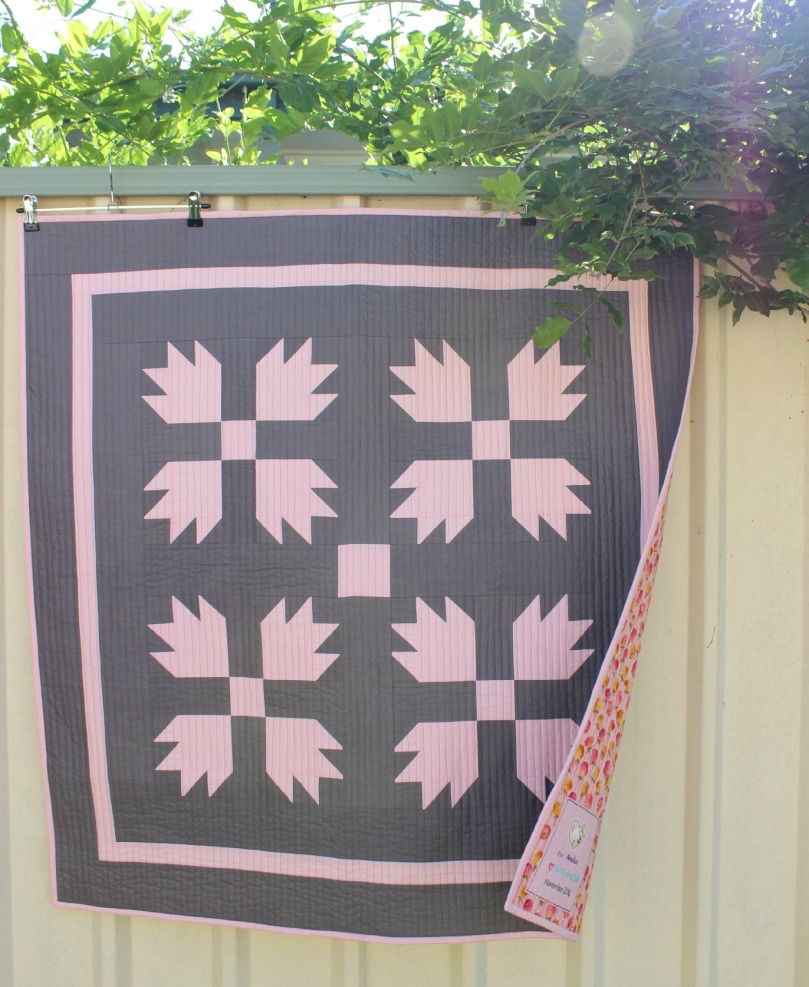
With the news of my first niece due to be born in early December, I got cracking immediately onto making a quilt to give to her and the family at her Baby Shower. I opted for a block that I had previously made very early on in my patchwork-y venture, the Bear Paw block (one of the first blocks I ever made HSTs for!). The vision I had for this quilt was traditional-meets-modern (which is pretty much my approach for all of the quilts I make) and wanted to have the quilt top be a concentrate of richly deep solid fabric colours; grey and pink.

Amelia's Baby Quilt (2014)
Amelia’s Baby Quilt (2014)

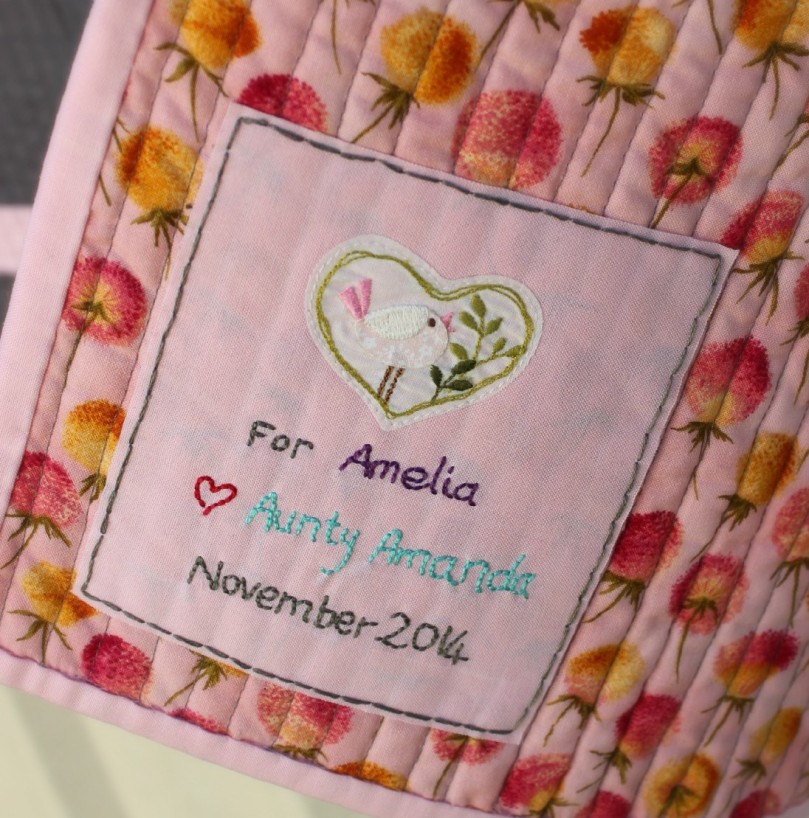
Amelia's Baby Quilt Label
Amelia’s Baby Quilt Label

I added a beautifully matching modern floral print as the backing and made a one-of-a-kind embroidered label with her name and best wishes from her Auntie. And now with her 1st birthday rapidly approaching, this little gorgeous little girl is one of the most sweetest and cheekiest little things who loves blowing raspberries and is ready to get exploring on all fours! Such a darling!

+++

In February, I had a lovely break away from reality and went on a cruise holiday to Fiji and New Caledonia, sailing on Princess Cruises. It was a holiday I was very much in need for and I enjoyed every minute of it! If you like to re-experience the places we visited, you can read the post I wrote or watch the vlog I made!

Dravuni Island, Fiji

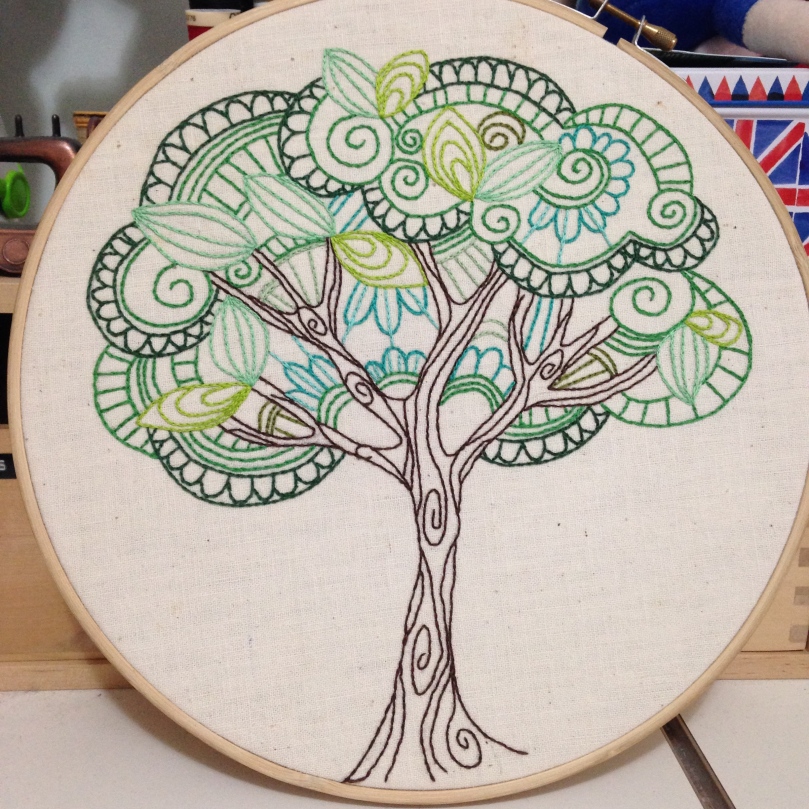
And while sailing around the big blue Pacific Ocean, I also had the chance to chill out and stitch up this fun tree embroidery pattern that I had purchased from Urban Threads.

Delicate Tree (2015)

Admittedly, I haven’t done as many embroidery projects as I would’ve liked to this year, but this one turned out so lovely that I’m quite content with it being the only one I’ve made so far!

+++

Okay, so let’s get into some of the quilts I’ve made over this past year! Happily, I’ve made more quilts this year than I did last year which really is wonderful! I had made a secret new year resolution to myself to make more quilts this year and the amount that I’ve made has made me quite happy!

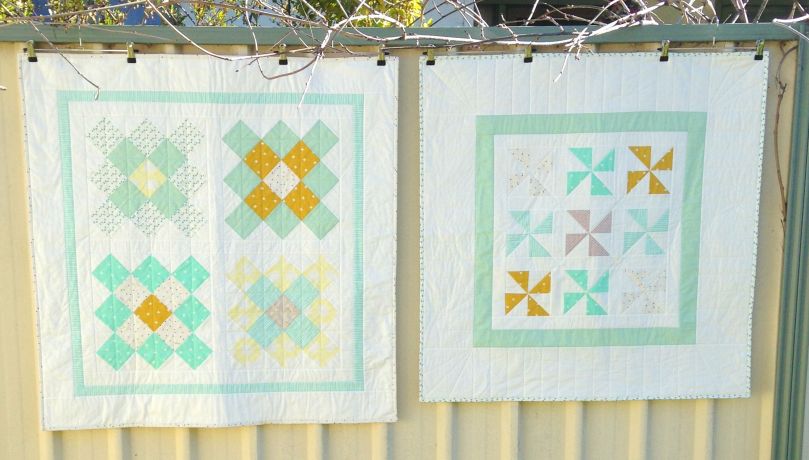
The first two that shine like little gems in my mind are the commissioned baby quilts I made for a friend back in July. The brief was that both mums-to-be didn’t know the genders of their babies so each quilt needed to be gender-neutral and super cute!

TwoLittleBabyQuilts
Granny Squares Baby Quilt & Pinwheel Baby Quilt (2015)

And these are what I ended up with! Words really can’t describe how lovely they equally turned out. Everything about each one I was so happy about: the quilting, the fabrics, the binding, the neutral-pastel tones, the sizes and their sheer cuteness! From what I’ve been told, both mummies loved their little quilts and each bundle-of-joy arrived safely and happily!

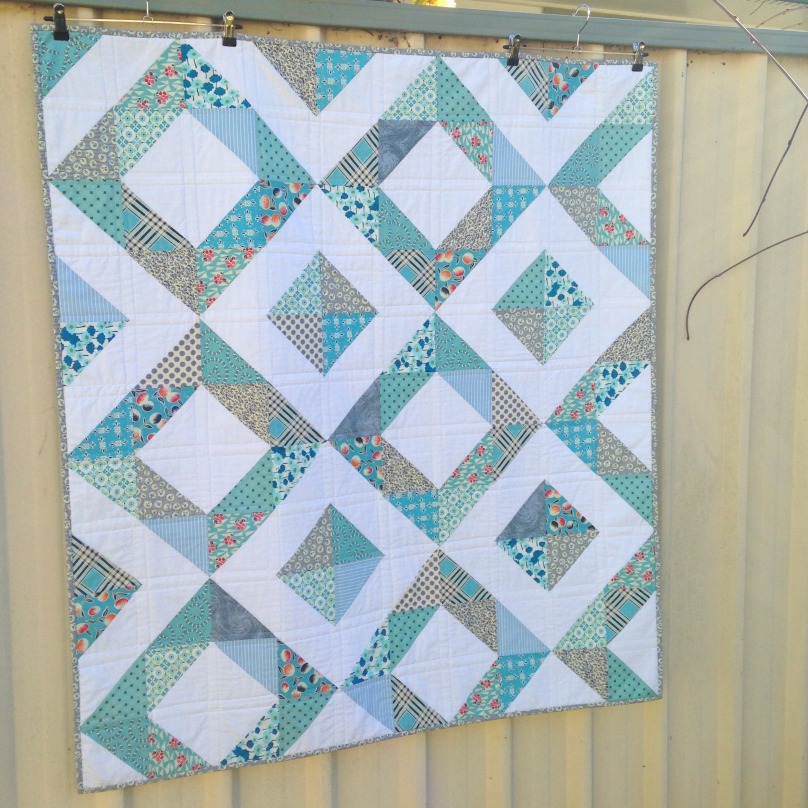
The next quilt that I’m equally thrilled about making was Donna’s 50th Birthday Quilt using the Diamond Square block! Although gifted a few weeks after the big day, she thankfully loved it!

Donna's 50th Quilt (2015)
Donna’s 50th Birthday Quilt (2015)

Knowing that her favourite colour was blue, I raided my sash and pulled out a number of contrasting blue prints that I knew would look really effective against each other. After cutting and piecing over 120 HSTs into this all-over quilt top design, I chose to quilt it with a design I’d been seeing everywhere on Pinterest but had never actually tried. It’s where you quilt a line on either side of the seams, creating this super effective spaced-out grid type pattern. I absolutely love it! It was so quick to do and really suited the over-all feel of the quilt.

The next quilt is Geo Dreams. This one holds a lot of sentimental feelings and emotions as it was the first quilt made in my first ever Quilt-Along series on my YouTube channel.

Geo Dreams Quilt (2015)

Geo Dreams Quilt & Label (2015)

The amount of support and love I received from all you in regards to the series and the finished quilt is something that I will cherish for a very long time to come! And because of that wonderful participation and encouragement, you gave me the guts to start another Quilt-Along! Although we’re only half-way through, the HST Sampler Quilt Along is going great-guns and I couldn’t be more happier with the amount of people who are giving it a go and who are learning and growing in their patchwork skills!

+++

Two very exciting opportunities that happened over the past year was the chance to join in on two very special Blog Hops! Both opportunities were so much fun to be involved in and I’m so grateful to have been invited and put my two-cents into the ring!

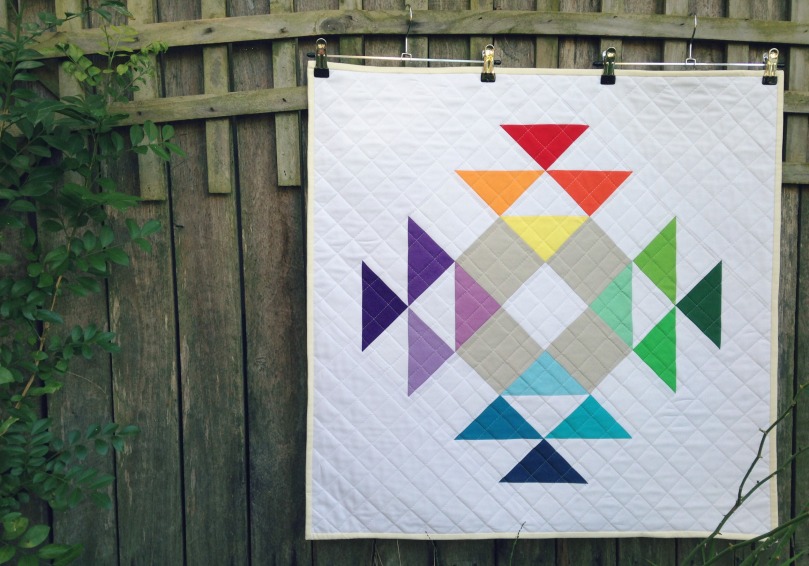
The first one I was invited to join was the RJR Supreme Cotton Fabrics Blog Hop! For this one I made my darling Crown of Thorns Mini Quilt using some of their deliciously bright and rich solid fabrics.

Crown of Thorns Mini Quilt (2015)

What I loved about this one was the beautiful harmony between traditional and modern. The Crown of Thorns block is very traditional in nature and is known by many other names. With this mini quilt, I simply turned the block onto a point, added some richly modern colours to the mix and voila, a thoroughly modern little mini!

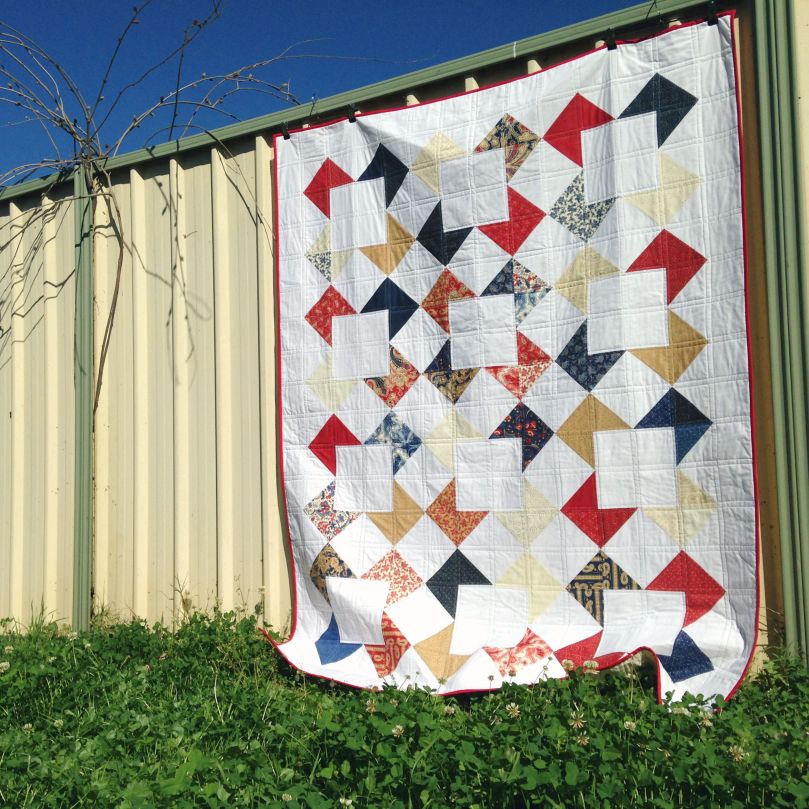
The second Blog Hop that I was invited to join in on was one hosted by the Fat Quarter Shop celebrating the versatility of their Jolly Bars pre-cuts! The range I was given to play with was the Polka Dots & Paisleys by Minick & Simpson for Moda Fabrics.

OpenWindowQuilt1

Paired with a white solid fabric and matching red binding, I cut and pieced each Jolly Bar into 12 Open Window blocks resulting in this warming quilt! (And this quilt has a very happy ending: It now lives in America with a family who will cherish and love it for years to come!)

+++

Ooo, we gotta touch on some of the darling little mini quilts I’ve made this year! I have a huge love, appreciation and possible obsession when it come to mini quilts! What can I say, they’re just so darn fun and quick to make!

The highlights from the year have to be these three little darlings!

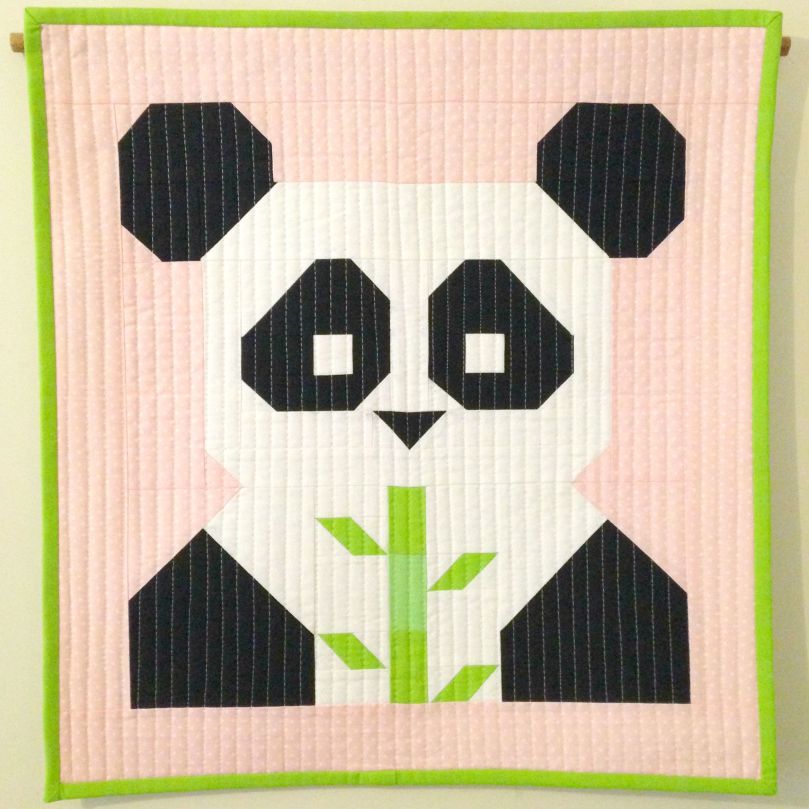
FQS Pandamonium Mini Quilt (2015)

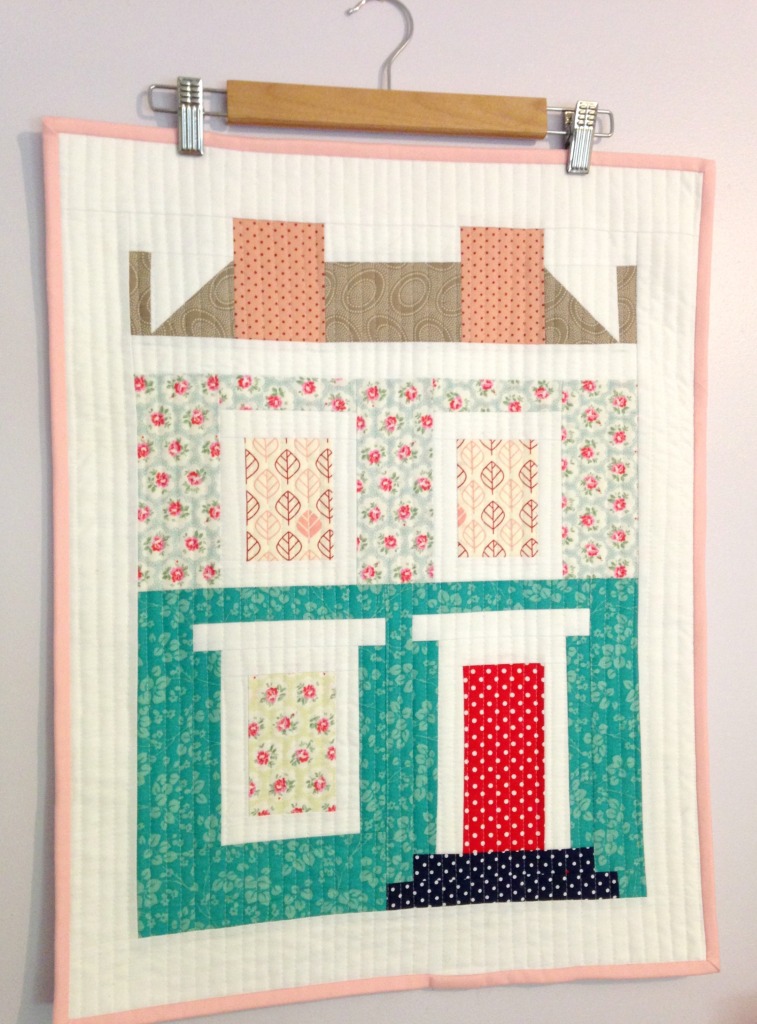
Notting Hill House Mini Quilt (2015)

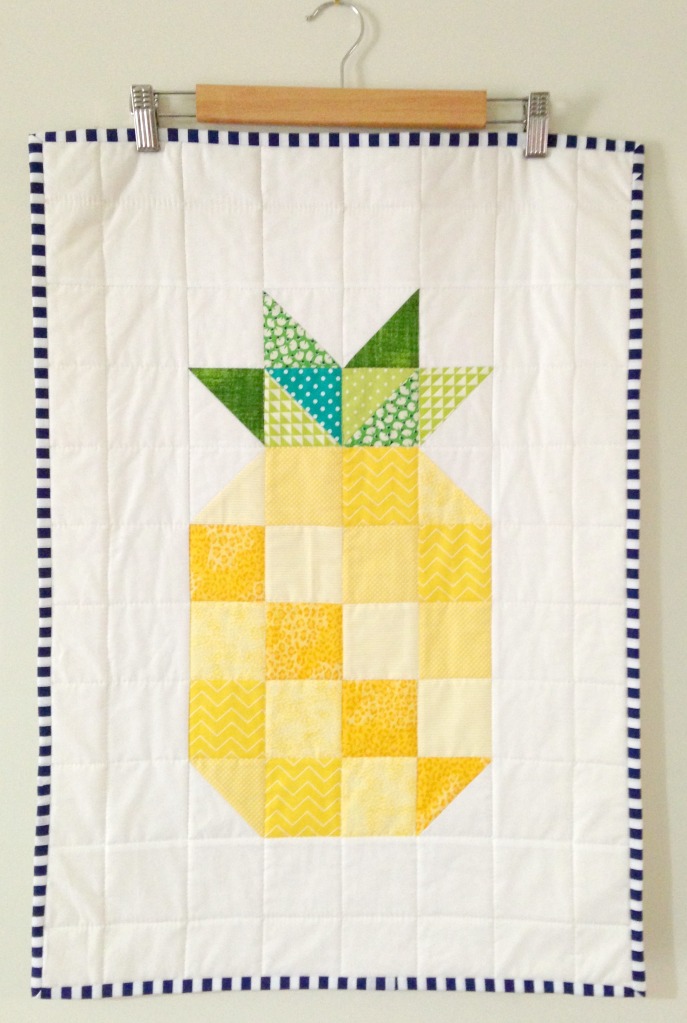
Pineapple Mini Quilt (2015)

So now, because of my mini quilt obsession, the walls in our house are overloaded with precious pictorial mini quilts greeting people as they walk through the house. There’s nothing wrong with that, right?

+++

And lastly, the one other thing I want to reflect on and share with you is the wonderful support and growth of my YouTube channel. It’s crazy to think that there are so many people out there who share the exact love and passion that I have for patchwork and quilting! (For a while there I thought I was the only one!) It’s been so lovely to be able to reach out and chat to other like-minded people whom I can share my exciting successes with and swoon together over delightful fabrics and fun new patterns!

The reason why I chose to start a YouTube channel was to simply have another avenue to create content for my blog. I was ready to venture out and challenge my creativity with a new medium to share and teach my love and skills in patchwork, quilting, crafting and baking. It was also an opportunity I took to strengthen my self-confidence in speaking out-loud and to grow and challenge my teaching skills. And I can happily say today that in each of these things I have grown tremendously and have gained a few thousand new friends along way!

So a big THANK YOU to each and everyone of you who watches, comments, likes and supports everything that I do both on here on my blog and my channel (and Instagram!). You’re all such wonderful people and I’m so glad to call you all my friends! Yay! 😀

+++

If you would like to take a squizz at the past three yearly recaps I’ve written, here are the links for you to follow:

Year One: One Year Down…

Year Two: Two Years Later…

Year Three: Three Years Down!

So here’s to another successful and fun year of making quilts, making mistakes, saying Yes! to every opportunity that comes my way, making new friends and strengthening the bond with old ones!

Happy Sewing, Friends!

xx

+++

2015 Blogging is dedicated to my darling Lucy. A beautiful soul that I miss dearly everyday.

Lucy

Rescued: 4th July 2004/Passed: 14th April 2015

xx

September 14th: A Happy Monday

I feel that for the third day in a row, I should comment on how great the weather has been today as my first few opening sentences… Man, the weather was lovely today! Super sunny, warm breeze and the scent of fresh flowers perfuming the air! Ooo, it was grand! 😀

So just as the title of this post suggests, it’s been a happy Monday! Big collaboration prospects were discussed and organised this morning. (More on that when the right time comes along!) Fun and exciting future projects were developed further (HINT: Quilt-Along!!). A little bit more sewing got done. And I put a quilt on sale in my Etsy Shop!

OpenWindowQuilt1

Yep, my Open Window Quilt I made for the Fat Quarter Shop Blog Hop last week is looking for a new home! It so deserves a place where it can be loved, used and cherished everyday by someone who loves it just as much as I do! The reason I’ve decided to sell this quilt is simply because I have no room for it! Our house has literally been taken over by quilts (every lounge, sofa and chair practically has one draped over the back and/or over its arm!) that I just have no where to put it! So that’s why it must to go to a good home where it’ll be appreciated!

+++

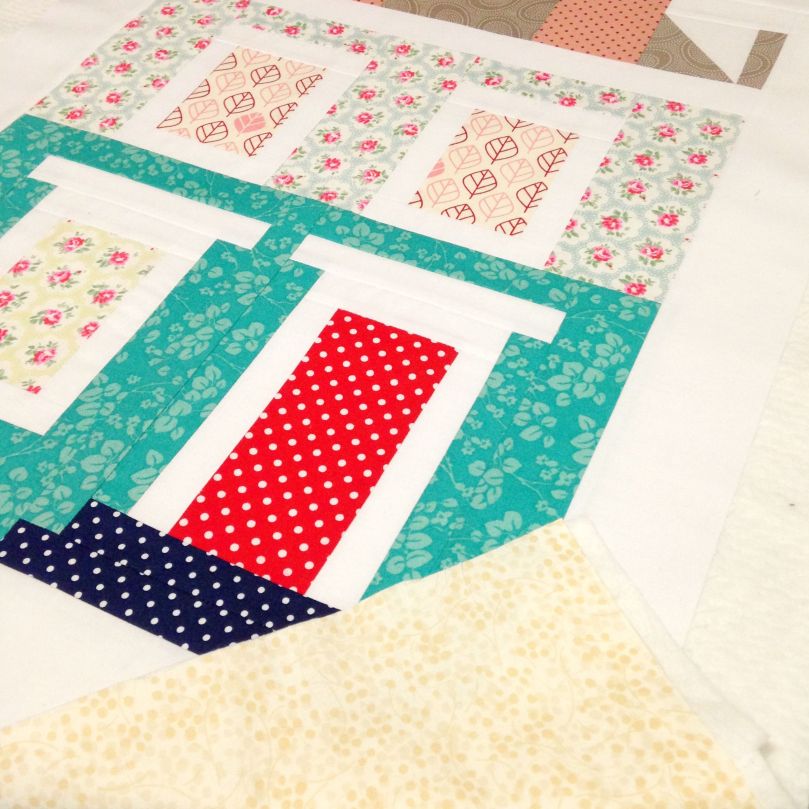
 Ooo, I also got a little bit more done on my Notting Hill House Mini! I stitched on a 2.5″ white sashing around the four edges of the quilt top, then prepared the binding (pastel pink, left-over from a baby quilt I made for my niece last year!) along with the backing (left-over backing from my Open Window Quilt) as well as the batting (white Cosy Cotton, left-over from my Geo Dreams Quilt!).

NottingHillHouseMini2

Right now, I’ve got it to the stage where all three layers are ready for basting and then quilting! Yay! Although, I’m still not sure how I want to quilt it… Criss-cross grid? Straight line? Ditch in the stitch? Dare I say it: FMQ?! Hmm, that decision needs to be slept on and decided in the morning, I think! 🙂

I hope you all have a great Monday too!

Happy Sewing, Friends!

xx