My 2018 Sewing Goals

Did you know that 2018 marks my seventh year of blogging?! Seven years! Where has the time gone from when I was a shy 23 year old, tentatively entering the scary waters of online blogging? It seems like a life-time ago!

Anyhoo! A new year has started (even though we’re four months in already!! Eek!) and my precious little blog has been screaming out for some love and attention.

November… November was the last time I sat down, logged on and typed my little heart away catching you all up on my Sewing Room Adventures.

With lots of fun and laughs in between, April (!!) has now rolled around and it’s time to put my 2018 Sewing Goals out into the void, hoping that each one will get accomplished before 2019 creeps up on us!

MY 2018 SEWING GOALS:

+ Simple Cross Quilt (My first finish for 2018! Whoo!!) +

What started out as a basic WIP first started in 2016, I dug these blocks out, quickly whipped up another nine to make the quilt top a 5×5 block pattern and as though it was just like over night, the quilt is finished, including a label! (Go me!)

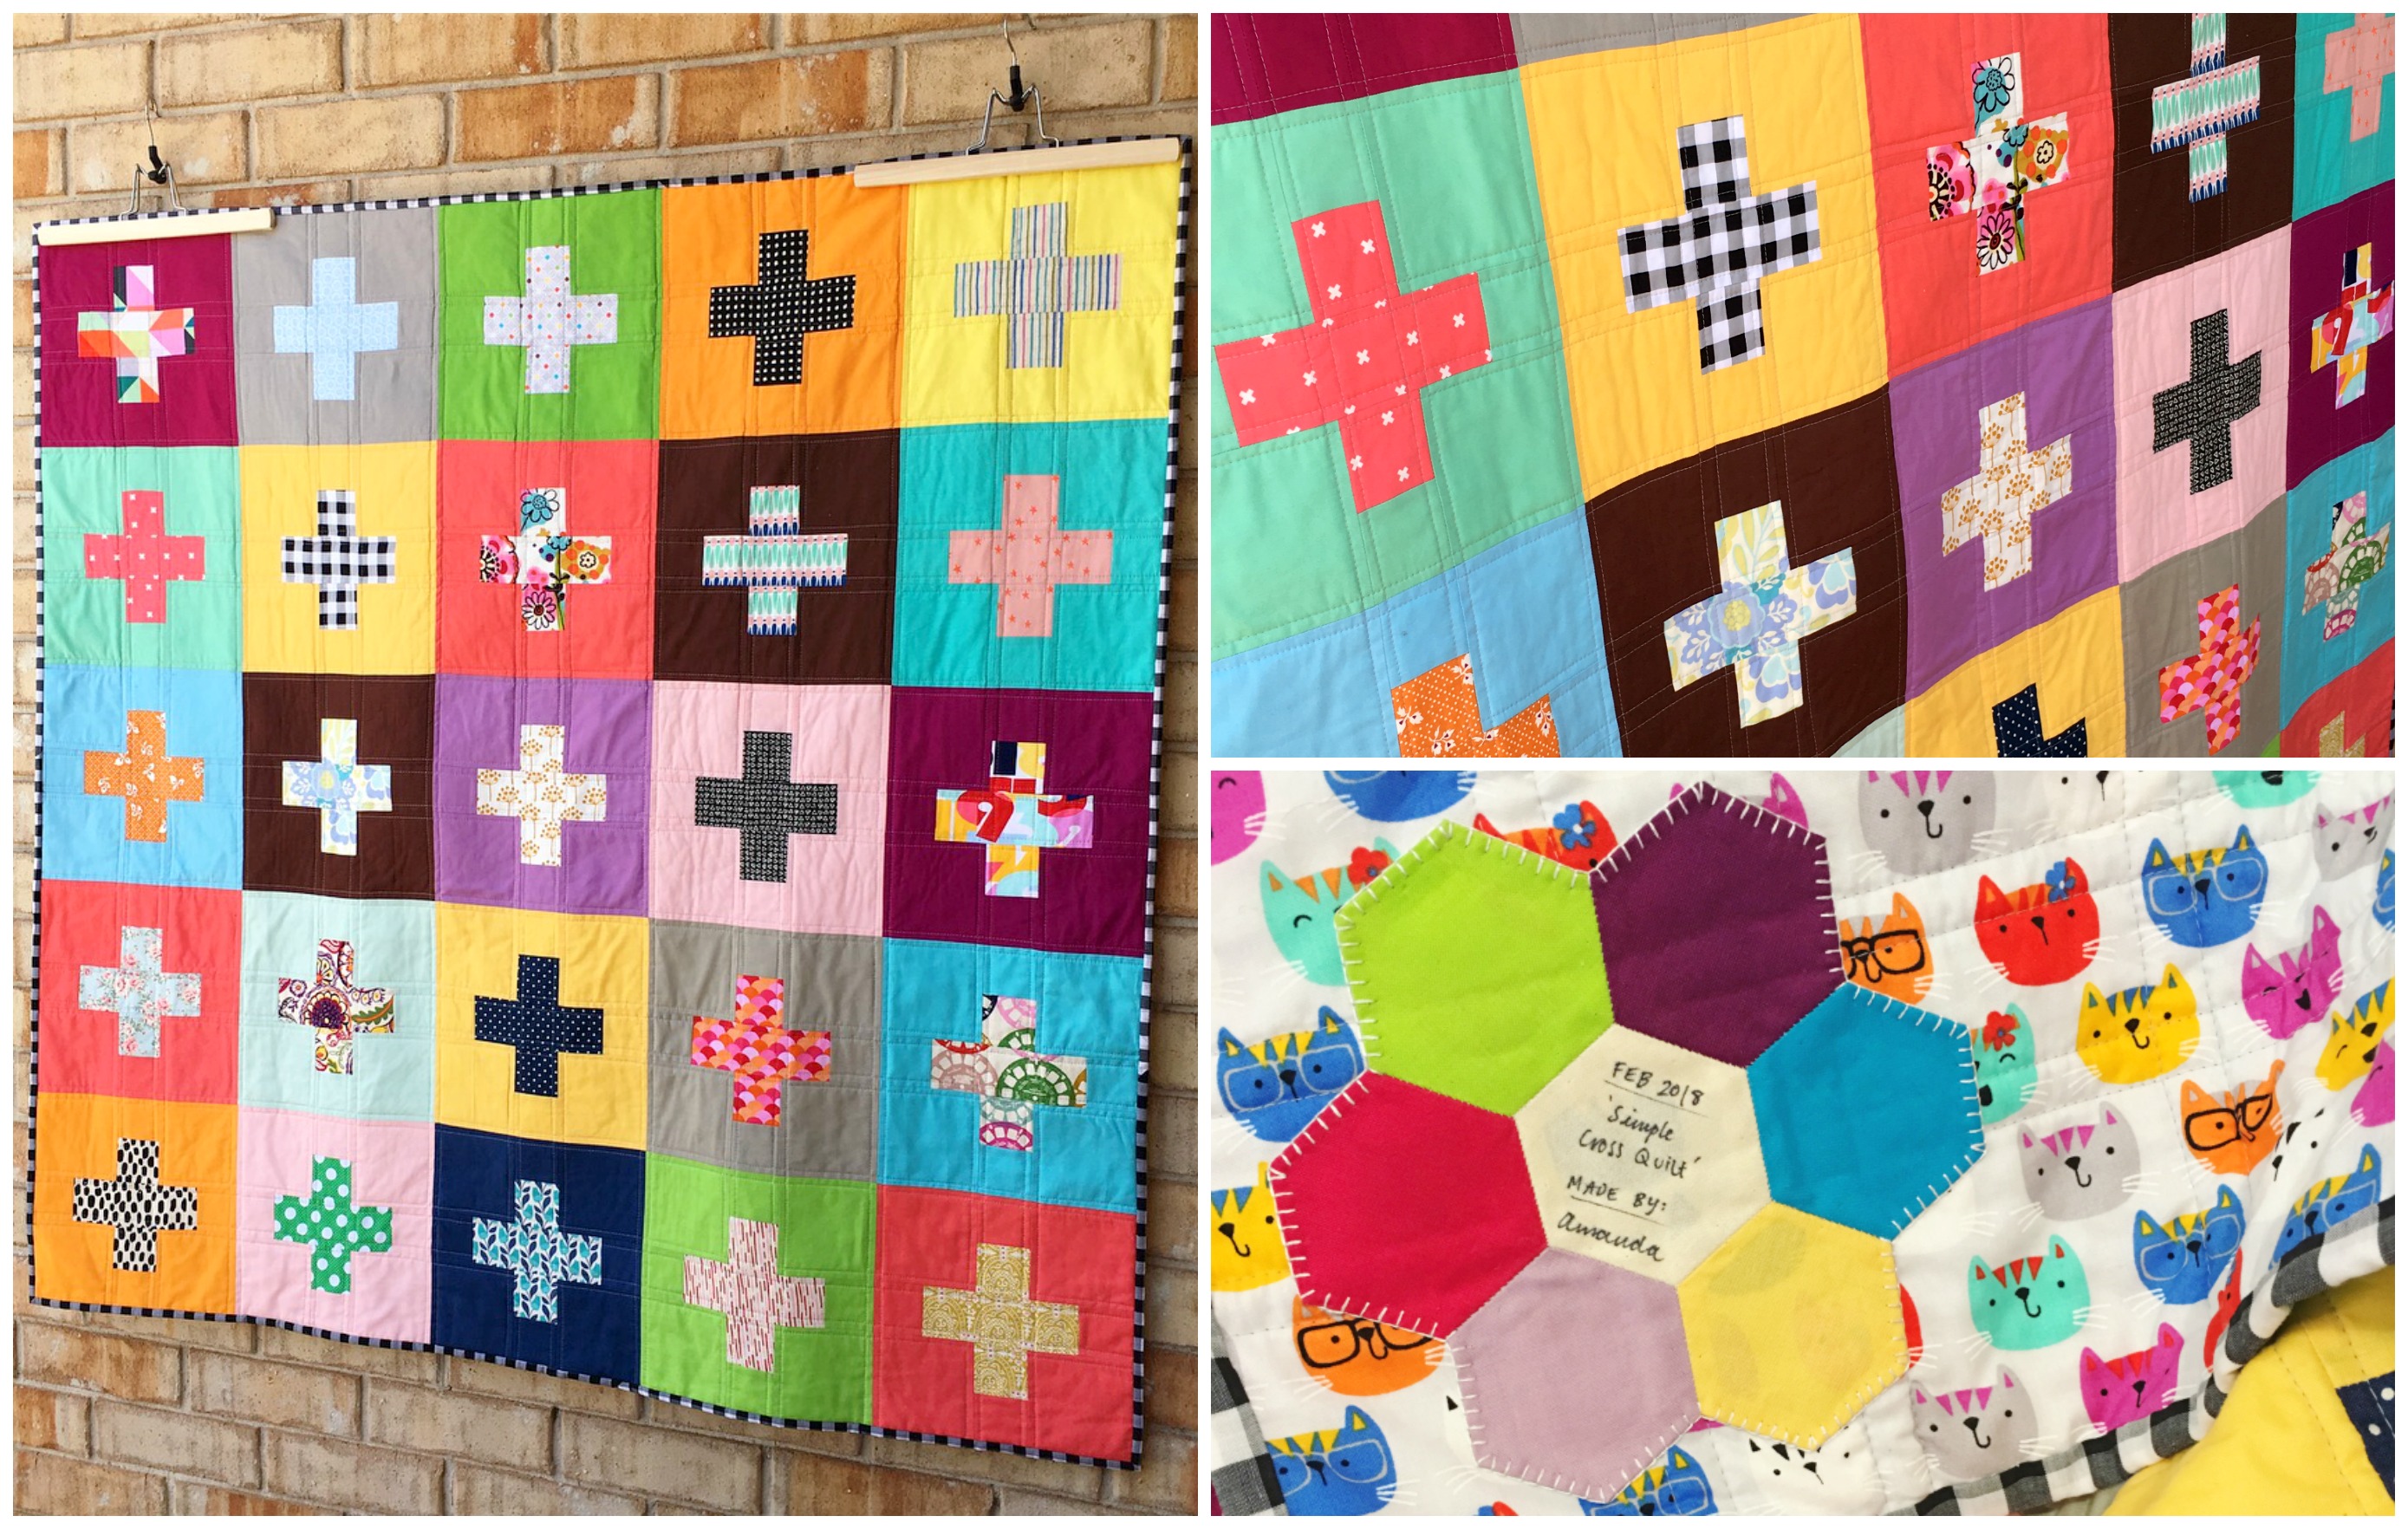
I love everything about this quilt! The colours, the prints, the texture from the quilting, the kitty-cat backing (!!!) and the fun gingham binding finishing it all off.

This had to be one of the easiest and quickest (minus the blocks sitting unfinished for two years!) quilts I’ve ever made and I just adore it!

Wanna make this block?? Click here for the tutorial! (You’re welcome! x)

+ Pixelated Rose Quilt +

This little beauty of quilt has been on the go since May of last year. Over the past 7-8 months, I’ve been chipping away at building each individual block together to make up the whole. And now that all of the blocks have been joined together, a mammoth quilt top that I wasn’t expecting has emerged and the procrastination brakes have been applied at full force!

About a month or so has passed since the top has been finished and low and behold it’s still hanging in the same place (on a side hutch in our kitchen as it’s the only place big enough to house the size of this baby!). Every day I look at it and think, I really need to give this quilt top some more love!

It’s not that I don’t want to finish it… It’s just applying the time to rearranging the whole house to accommodate the size of the quilt so that I can back and baste it and then have the available time and space in my sewing room to get it quilted. (Whew!) I have a lot things happening in my little sewing room, so allotting time/space for sewing, filming tutorials, quilting etc, is a tricky one at best!

BUT, enough with the excuses!! Simple fact of the matter, is that this quilt top needs to be quilted and deserves to be finished (cos it’s soooo pretty!), by me, by at least the end of the year! (That still gives me some wriggle room to procrastinate a little bit more, right?!)

Wanna make this quilt?? Click here for the free downloadable pattern from the Riley Blake website! (You’re welcome! x)

+ Swoon Quilt +

Now this. This is what I’m working on right now and am absolutely LOVING IT!!

For ages I’ve wanted to dive in and make a humongous Swoon Quilt! I’ve lusted and envied over so many beautiful versions of it in my Instagram and Pinterest feeds. This year, I thought, what the heck! Let’s add another make into the mix and see how far I get with it!

You see, one of the main goals I had this year was to simply make more quilts. To find the time to do some more ‘me’ sewing. Projects that I make only for myself without doing a tutorial or some sort step-by-step guide on how to do it. I just wanted a few quilts that I could make for me and my itchy-hands! And this Swoon Quilt represents just that!

So far, I’m 8 blocks in to a 9 block quilt top, using fabrics that just simply catch my eye while making the Swoon design pop from afar!

Wanna make a Swoon Quilt too?? Click here to find the pattern! (You’re welcome! x)

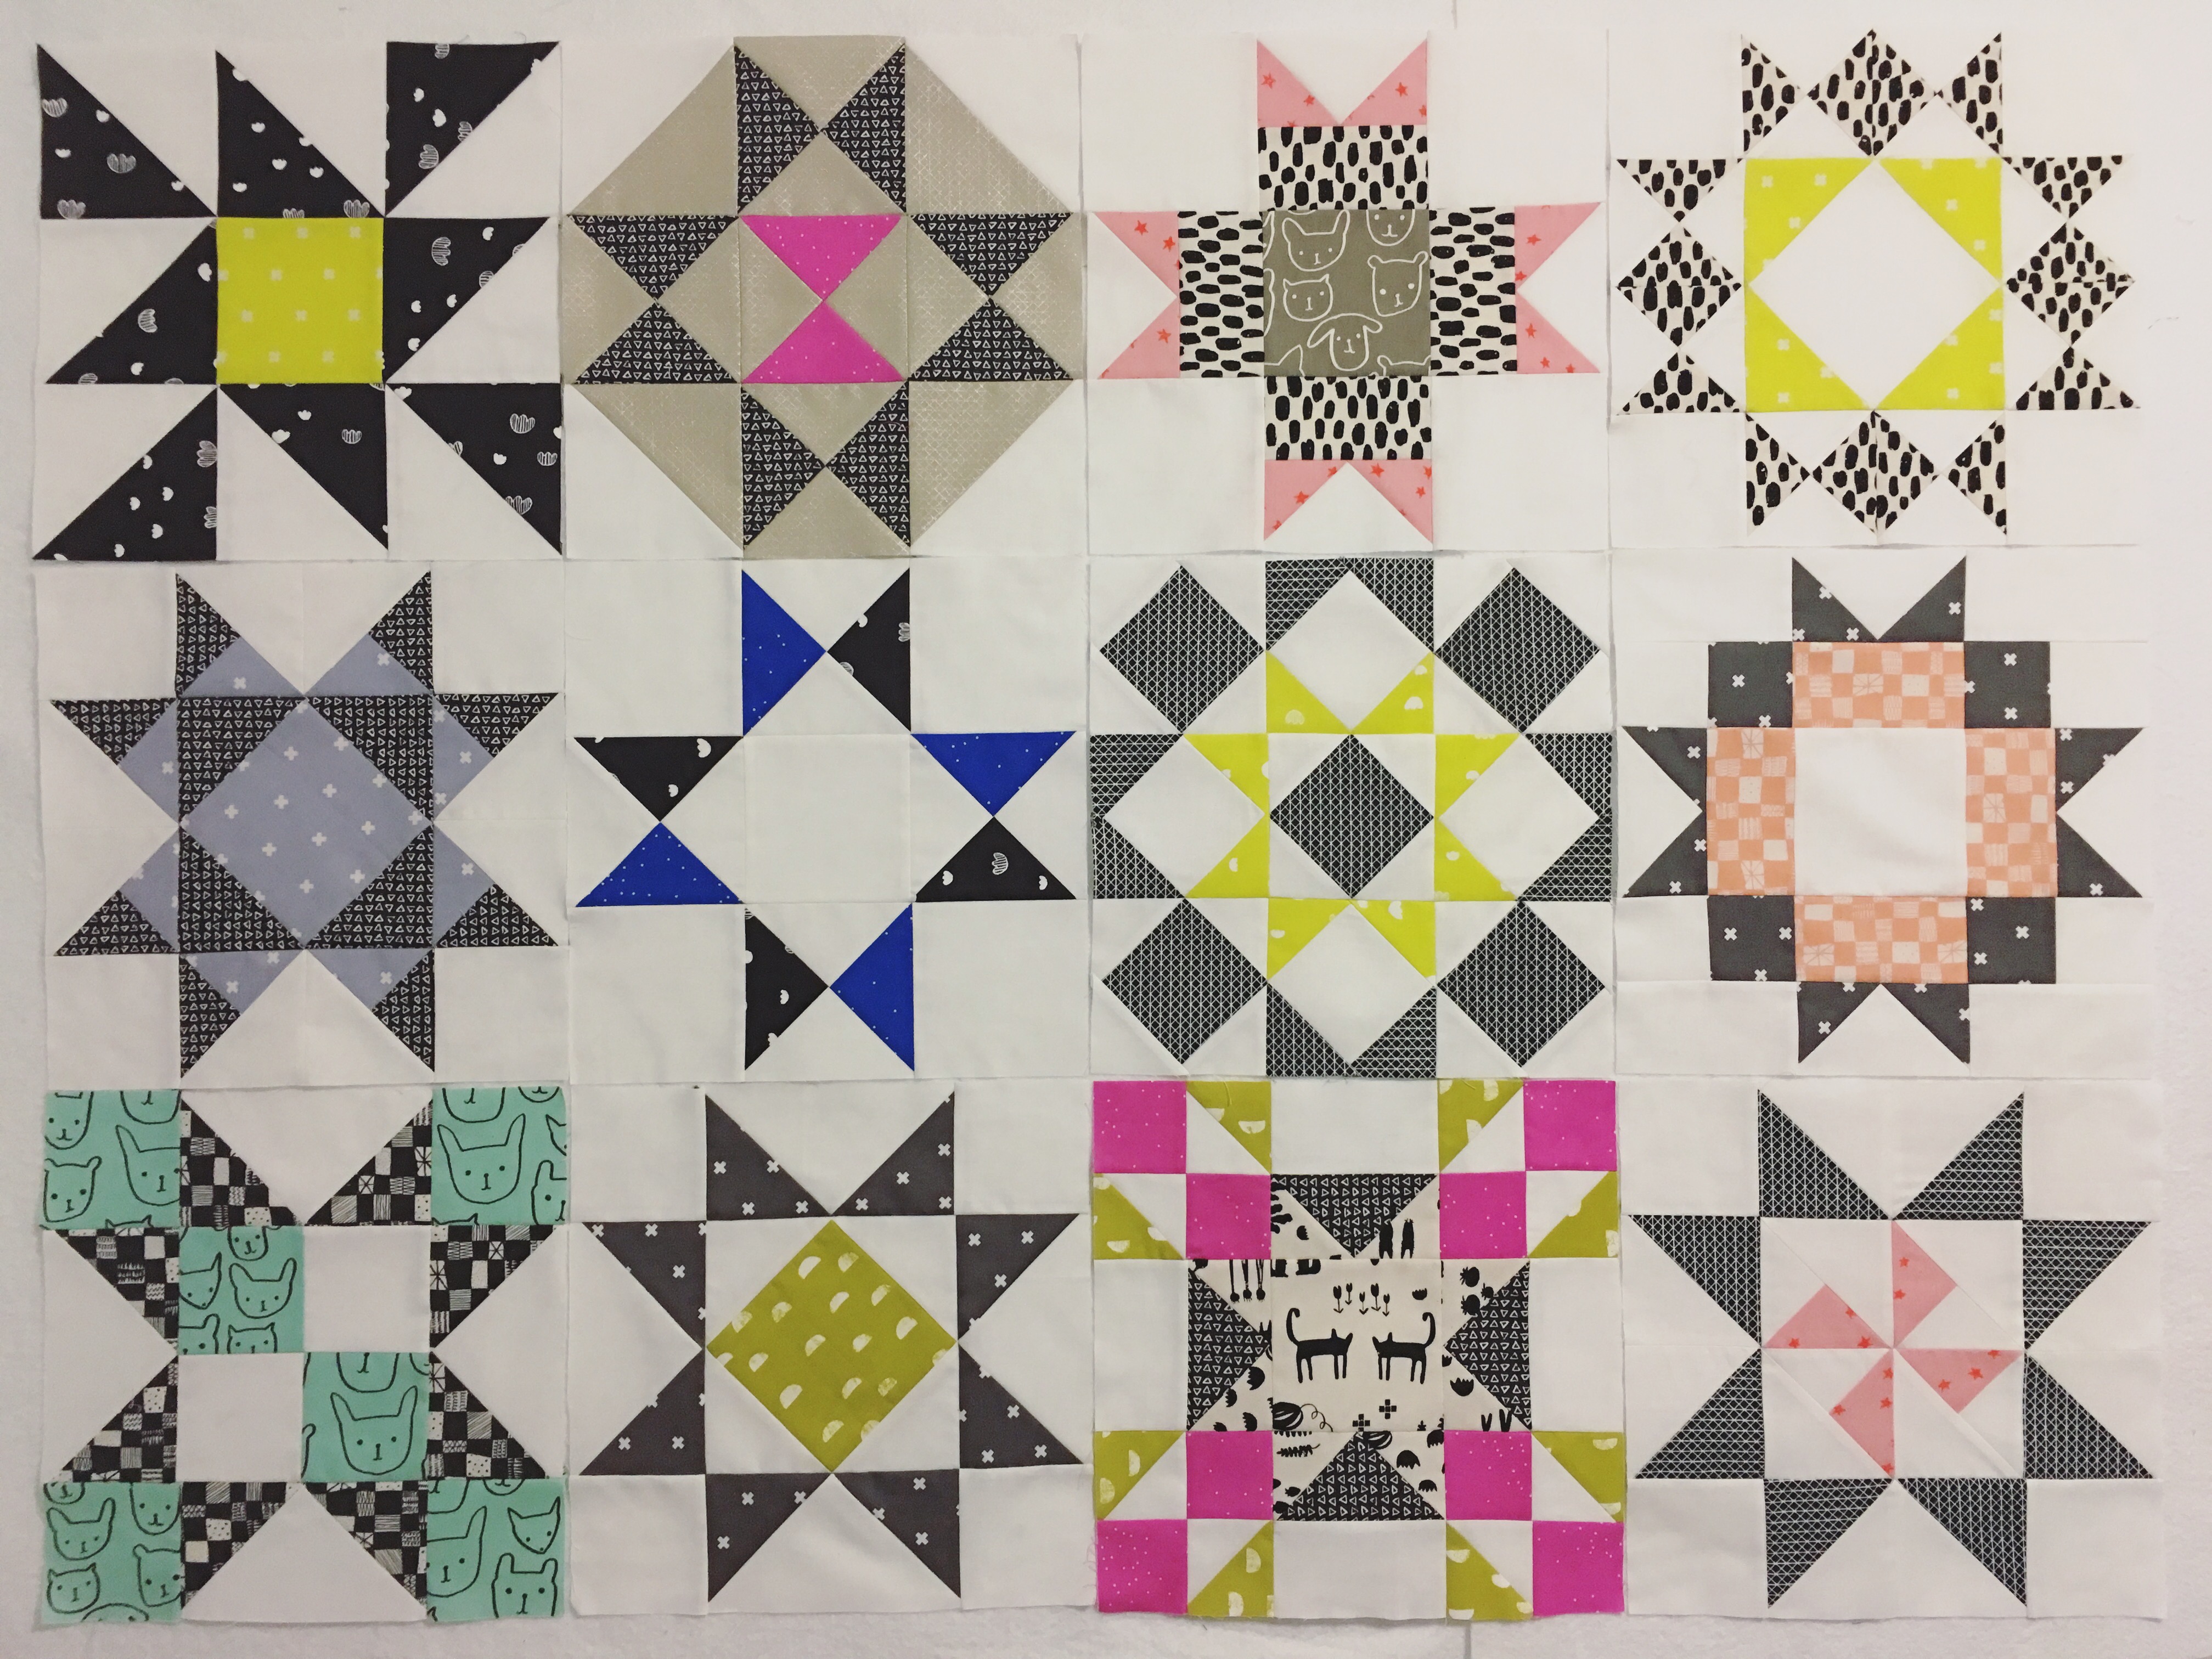
+ Rediscovering ‘Like Diamonds In The Sky’ Quilt Top (Quilt name will be changing!) +

Within the last week or so, I rediscovered an old favourite quilt top that I started sometime in 2014. It features a block that I made as a tutorial on my YouTube channel called the Friendship Star.

I had started quilting this one but ended up really hating the choice of quilting I chose to do. (Free Motion Quilting really isn’t my thing!) I think it’s taken me about three years, on and off, to unpick all of the stitches to free the quilt top from the batting and awful backing fabric I paired with it. (Lot’s of decisions were made with this quilt that were just wrong, wrong, wrong!) Now the time has come to re-write those wrongs and finish this quilt to a beautiful standard that I’m absolutely happy with!

To be honest with you, I actually really love this quilt top. And always have! The blocks are bright and vivid while the overall design is still quite dark and subtle because of the navy solid background. It’s such a perfect balance.

I’m thinking for quilting, just to keep it really simple. Straight-line grid criss-cross across the entire surface (hey, it’s what I do best!) and then do a contrasting binding to bring everything together. Super easy!

Wanna make a Friendship Star block too?? Click here for the tutorial! (You’re welcome! x)

Now, moving onto a few quilts/projects that aren’t in the current making but are the list to do this year…

+ Christmas Quilt +

I am so determined to make a Christmas Quilt this year! If I didn’t have about a gazillion other things on my plate right now, I would’ve started it an hour ago!

Whenever Christmas rolls around, I’m always so bummed that I don’t have a beautiful festive themed quilt to pull out and enjoy throughout the season. (Even though Christmas in Australia is during Summer and having the need for a snuggly heavy quilt anywhere near you is totally out of the question!)

The pattern that I’m itching to start is one by Thimble Blossoms (the same lady who designed the Swoon Block/Quilt) called, Winterville.

It’s such a super cute pattern and I’ve already been collecting little bits of fabric for the houses and little Ohio Star blocks. It’s gonna look great once it’s finished!

+ Christmas Tree Skirt +

Another Christmas project I’ve been wanting to make for years now… A Christmas Tree Skirt!

I came across the perfect pattern quite randomly when I was replenishing our paper patterns stock at work one day. It’s a McCalls’s pattern (M7704) and features the sweetest gingerbread people paired with Christmas Trees and Christmas candies. I just thought the designs together were really lovely and are totally the type of design I love around this time of year.

The pattern looks quite simple and straightforward, with the option to mix lots of designs together into one final skirt for the tree. Perfect!

+ Winter Jacket +

This one was a project I had wanted to make for winter last year (so we’re looking at around May 2017 sometime…) but is yet to leave the bag it came home in!

I think I’ve written about this one before… But anyhoo, I just really wanted to make myself a really nice jacket that I could wear to and from work or on nights out during the colder months. I have made a winter jacket before when I was briefly at uni one year in my mid twenties. But it’s quite amateurish and the fabric I chose is really quite awful. Perfect excuse to make another one, right? Right!

The pattern I hope to make/follow is by Simplicity (1254), is fully lined and has a weird collar/hood thingy that looks intimidating as heck to make!

I’m no dressmaker and possess very little patience for it, but with grit and determination, I’m gonna give it a go and see where I end up!

(Please send chocolate and lots of encouraging hugs! Thanks! x)

+ New Sewing Machine +

So I treated myself to a new sewing machine a few months ago… Yep. All for the sake of being able to quilt my massive Pixelated Rose Quilt that I haven’t started quilting yet.

In all honestly, I was ready for an upgrade. My previous machine (a Brother Innovis 200QE), as brilliant and perfect it is, was becoming a bit too small for the types of quilts I’m moving into making this year. (They’re all big ‘uns! God help me!) My new Brother (a PQ1500SL) is huge! It’s powerful, fast, roomy, does everything I ask of it and more and I just want to use it all day, everyday! (Hence all of these beautiful Swoon Blocks popping up in my Instagram feed!)

If you didn’t see it, I recently filmed a very honest review about this machine on my YouTube channel. (I also did an unboxing vlog too if you’re interested!) I went through the pros and cons I’ve found with the machine along with elements I’ll get used to as I sew with it more. From the comments left on the video, I think it’s been quite insightful for people to watch especially those who were/are planning on buying the same sewing machine.

+ YouTube Catch Up +

While on the subject of my YouTube channel, I’ve been uploading lots since I last wrote on here…

Vlogmas – 2017

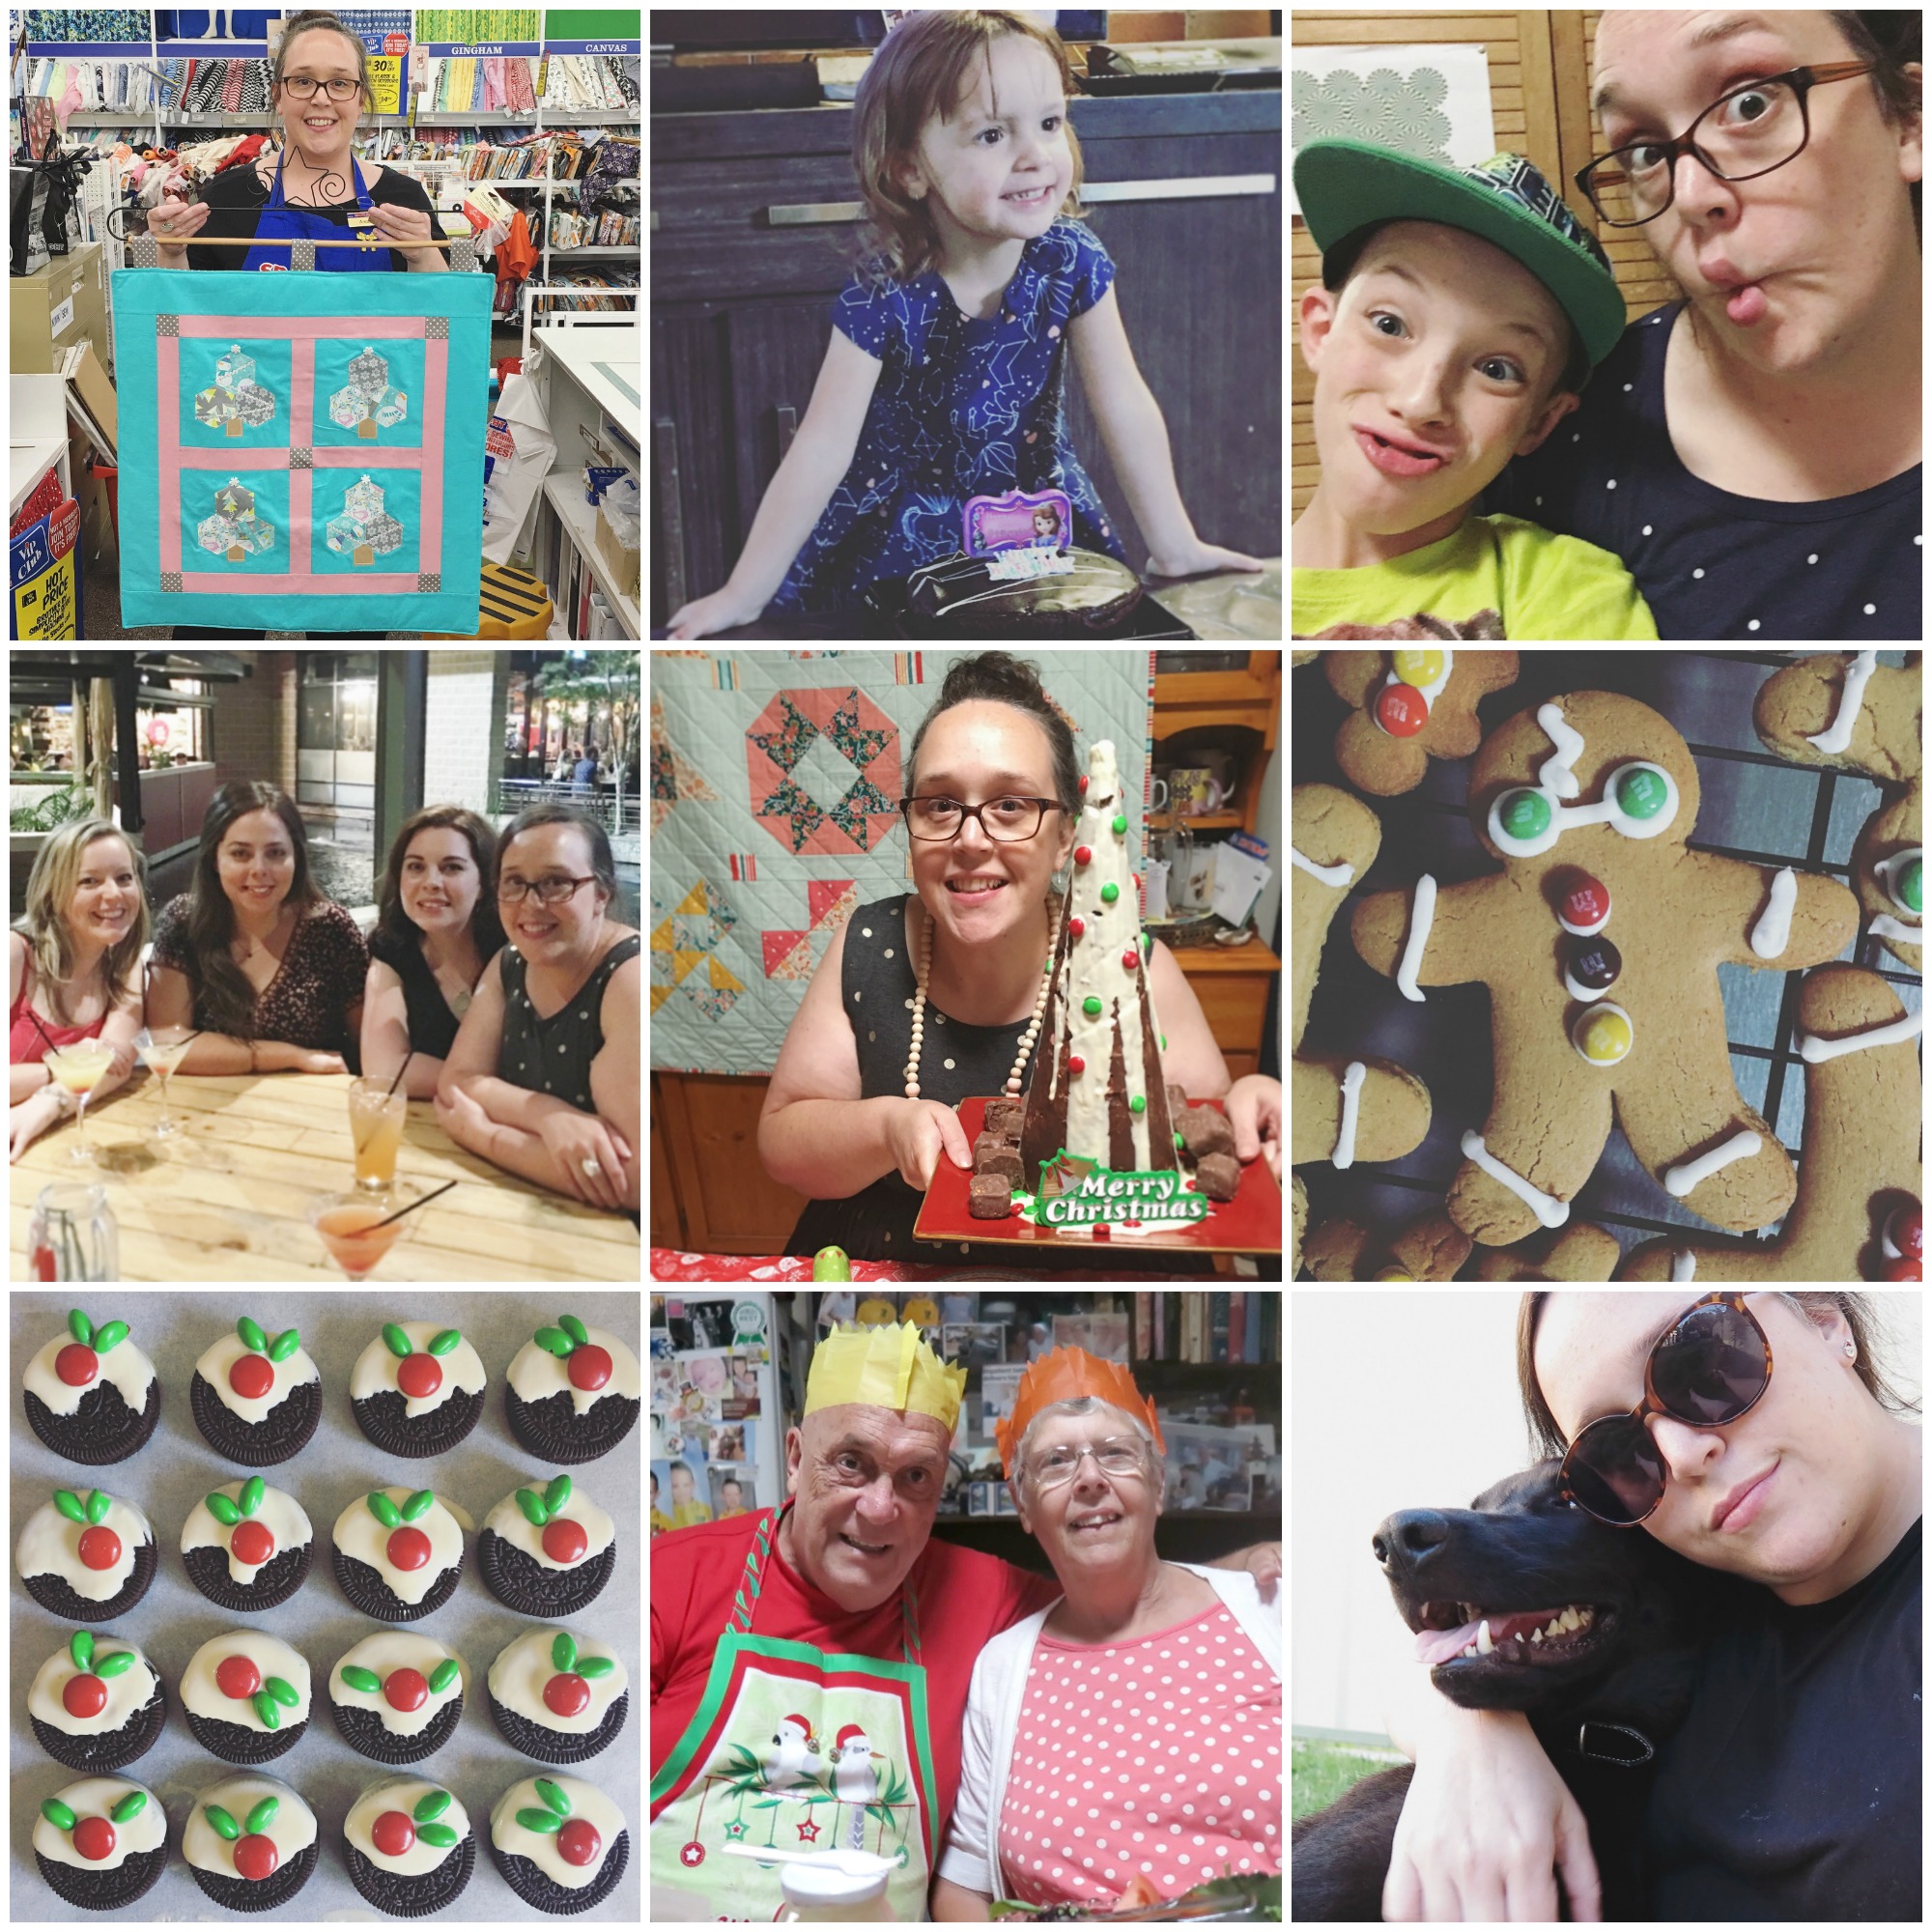
We’ve had Christmas where I did a thing called Vlogmas. Basically I vlogged everyday during December right up to Christmas Day (which I also filmed!). I really thought I would struggle do it but I actually really enjoyed it and fell in love with vlogging and creating that kind of content for my channel. Everyone who watched was so supportive and encouraging and I think we kinda bonded a bit more which I love!

In January I went to New Zealand and vlogged it too! I went with my parents and some family friends and had an absolute blast! I can’t wait for the day I get to go back and explore more!

February and March have been a mix of a few more vlogs, some tutorials and stuff all about my new sewing machine!

Over the next few weeks, I’m hoping to launch a new Quilt Along series on my channel (and here on my blog too)! Inspired by a viewer, this time around we’re focusing on mini block designs, with all of the blocks we’ll be making measuring a sweet 5″ square! Each block pattern has been written up and (somewhat) finalised, I have just a few smaller details I need to sort out before realising the series out into the world, block by block as I’ve done in the past.

Stay tuned for that coming very soon!

+++

So that’s everything! It’s been a world-wind few months and so much stuff has been crammed in. (With more to come!)

I’m hoping I’ll also be able to dedicate some more time to writing here, on my blog. I’ve always enjoyed the process of blog writing and feel so relaxed and lighter once I hit that ‘publish’ button. I love sharing what I’m doing and hope to do in my sewing room with you and love hearing the awesome feedback you guys always give me!

Let’s make 2018 a productive one full of lots more quilts, crafty projects and good times with family and friends!

Happy Sewing, Friends!

xx

Star Sampler Quilt | Block #12: Aunt Eliza’s

PATTERN SHEET: Star Sampler Quilt BLOCK12

Can you believe it!? The final block tutorial in my Star Sampler QAL is here! Yay! (And also boo!! There are no more stars to make!)

I think I saved quite a little darling of a block to make right at the end… All of the hard blocks are over and done with and now it’s just plain sailing into the finishing off of the blocks. The Aunt Eliza’s Star is simple, quick and very effective to make – you’ll have yours pieced before you know it!

For all of the measurement and cutting details, along with the fabrics* I’ve used to piece this block together and a diagram of the block layout, click on the pattern sheet linked at the top of this post. If you would like to use a similar 12.5″ set square as me, you can find it here:June Tailor Get-Squared 12.5″ Ruler.

+++

My 12 Star Blocks!

Now that we have all of our blocks made, it’s time to piece them together into a quilt top!

Although at the end of the tutorial I mentioned that I didn’t know whether I wanted to do sashing and borders, I’m 99.5% sure that I’ll do a smaller sashing than I have in the past… I’m thinking a 1″ sashing between each of the blocks and a 2″-3″ border around the edge.

So once we have the quilt top pieced, we’ll be able to start talking about what types of batting we can use along with what fabric prints/colours you’ll like to use for the backing AND what type of design we can use when it comes to quilting it!

So although the making-the-blocks-part has come to an end, there’s still so much more to think about, plan and do before we have a lovely finished quilt!

Bring it on!! 🙂

Happy Sewing, Friends!!

xx

PS. Once they’ve all been pieced, I would love to see a photo of all of your 12 finished blocks together like I have above! Although this isn’t my final layout, it’s so exciting to see them all sitting so prettily next to one another! 🙂

*A big thanks to Australian wholesale supplier and fabric distributer Dayview Textiles for supplying me with such beautiful fabrics! If you want to see all of the fabrics I’ll be using in this Quilt Along, check out this post where I share them all with you!

Star Sampler Quilt | Block #11: Square & Star

PATTERN SHEET: Star Sampler Quilt BLOCK11

A big hello to you on this chilly May day! Late Autumn has definitely set in here in Australia… The afternoons are turning darker earlier, the chill in the air is becoming more bitter each morning and the Ugg boots are already getting a good workout at home! And it’s finally tea drinking season and I’m loving it! 🙂

In today’s post I’m sharing with you the second last block that we’ll be making in my Star Sampler QAL! It’s a beautiful chunky-like star called the Square & Star. Personally, I’ve never heard (or really seen) of it before. It’s one of those blocks that looks tricky from the outside but once you peek inside and see the simple units that make up the block, it’s one of those easy-peasy ones that you can make within 45 minutes or so.

Have fun with mixing different contrast fabrics together for this block. The bolder the contrast, the better the block will look I think! Or if you want, stick with a favourite solid or bold all-over print for the ‘square’ and ‘star’ bits and it’ll turn out just as great!

As always, everything you’ll need to know in regards to the measurement and cutting information as well as the fabrics* I’ve use to piece this block together are in the pattern sheet linked at the beginning of this post! If you would like to use a similar 12.5″ set square as me, you can find it here: June Tailor Get-Squared 12.5″ Ruler.

+++

Like I mention in the video, block 12 has been a long time coming and I thank and appreciate everyone for being so patient with me! Block 12 is the one design that I’ve been so excited to make! It’s final layout, I think, will be very effective and really add an element of interest to the finished quilt top! The final hint for this block is that it’s similar to an Ohio Star block but it’s not an Ohio Star block… If you get what I mean! 🙂

Until that tutorial comes out…

Happy Sewing, Friends!

xx

PS. Keep sharing your blocks with me on Instagram using the hashtag: #AmandasQuiltAlong!

*A big thanks to Australian wholesale supplier and fabric distributer Dayview Textiles for supplying me with such beautiful fabrics! If you want to see all of the fabrics I’ll be using in this Quilt Along, check out this post where I share them all with you!

Star Sampler Quilt | Block #7: Indian Star

PATTERN SHEET: star-sampler-quilt-block7

And away we go again!

Block seven is finally here for you to watch, enjoy and make! Yay!

I’m so sorry for taking ages to get this one out to you – I’ve been terribly ill with a nasty flu/chest infection for the past week and a bit and needed some urgent R&R!

But happy days, I’m back and feeling a lot more like myself again!

Like I promised last time, block seven is a more simpler and kinder block to piece together compared to what block six was. The Indian Star is a lovely and gentle design consisting of a few classic patchwork construction techniques – flying geese and a four-patch!

As always, everything you’ll need to know in regards to the measurement and cutting information as well as the fabrics* I’ve use to piece this block together are in the pattern sheet linked at the beginning of this post! If you would like to use a similar 12.5″ set square as me, you can find it here: June Tailor Get-Squared 12.5″ Ruler.

+++

As mentioned in the video, block eight is a similar variation to the Indian Star. It’s another easy one where we’ll be re-visiting the flying geese technique again, which I’m all sure you’re all pros at making by now!

Until then,

Happy Sewing, Friends!

xx

*A big thanks to Australian wholesale supplier and fabric distributer Dayview Textiles for supplying me with such beautiful fabrics! If you want to see all of the fabrics I’ll be using in this Quilt Along, check out this post where I share them all with you!

Star Sampler Quilt | Block #5: Maple Star

PATTERN SHEET: star-sampler-quilt-block5

Hello Friends!

My apologies for taking so long to get block five out to you! The last few weeks have been busy with work and so limited my time (and energy) to get the tutorial filmed and edited! I hope you’ll understand. 🙂

So block five is a beautiful one, if I may say so myself. It’s called the Maple Star and is very similar in design to our last block which was the Janet’s Star. The only difference between the two are the extra opposing squares in corner units of the Maple Star. Everything else is exactly the same as the Janet’s Star! Don’t you just love it how some blocks are so close to each other in design, with just one slightly different element either added or taken away to create it into something else that’s so effective and lovely?! It’s one of the many things I love about patchwork!

Anyway, moving on… Let’s delve into how the Maple Star block is made!

As always, if you click on the pattern sheet linked at the top of this post, you’ll be able to find a full list of all of the measurements and cutting info, along with the fabrics* I’ve used to piece this block together! If you would like to use a similar 12.5″ set square as me, you can find it here: June Tailor Get-Squared 12.5″ Ruler.

+++

I hope you all have a lovely weekend stitching up your blocks! Please do share them with me once you’re done – I love seeing what everyone is doing!

Also, to my friends in the States (and wherever else it’s celebrated in the world), Happy Halloween weekend – I hope it’s a spooky one!

Happy Sewing, Friends!

xx

*A big thanks to Australian wholesale supplier and fabric distributer Dayview Textiles for supplying me with such beautiful fabrics! If you want to see all of the fabrics I’ll be using in this Quilt Along, check out this post where I share them all with you!

Star Sampler Quilt | Block #4: Janet’s Star

PATTERN SHEET: star-sampler-quilt-block4

Hello to you on this very warm Spring Sunday afternoon from a Western Sydney suburb in Australia!

I had a weird moment just now when thinking about how far in we are in the series… Can you believe we’re already a quarter of the way through?! Holy-moly! 😮

So block four is a fun one! A lot less tricky than what the Kansas Star block was. The Janet’s Star is made of three different but very simple units that come together to make, what I think is a very beautiful star!

So here’s how you make it!!

As always, everything you’ll need to know in regards to the measurement and cutting information as well as the fabrics* I’ve use to piece this block together are in the pattern sheet linked at the beginning of this post! If you would like to use a similar 12.5″ set square as me, you can find it here: June Tailor Get-Squared 12.5″ Ruler.

+++

Keep on sharing all of your lovely blocks with me! The new hashtag we have on Instagram is going great guns and I’m loving seeing everyone’s blocks altogether in one place! It’s all very exciting! If you wish to hop on to the Instagram hashtag train, don’t forget to add #AmandasQuiltAlong in your photo description/comment and you’re in the club! 😀

Have fun making this one and I’ll see you in about a week with block five, which happens to be very, very similar to the Janet’s Star layout! The block is called the Maple Star and features a slight difference in design! Anyway, you’ll see what I mean in the next tutorial!

Until then,

Happy Sewing, Friends!

xx

*A big thanks to Australian wholesale supplier and fabric distributer Dayview Textiles for supplying me with such beautiful fabrics! If you want to see all of the fabrics I’ll be using in this Quilt Along, check out this post where I share them all with you!

Star Sampler Quilt | Block #3: Kansas Star

PATTERN SHEET: star-sampler-quilt-block3

Good morning, Friends!

I hope you all had a lovely weekend sewing and creating in your unique ways! Me, my weekend (and past week) was spent working and earning those good ol’ dollars! (Hence why this block tutorial is slightly late!)

So block three is a bit of a good-un! Although the Kansas Star looks a little complicated to piece together, once broken down into manageable steps and sections it really is quite simple to piece together. Although I do have a few tips for you to keep in mind when your sewing…

First is to make sure you’re really precise with placing/pinning the 2.5″ squares into the corners of the 4.5″ squares when making each of the ‘snowball’ units. When pressed, you want the 2.5″ corner squares to replace the corner of the 4.5″ square, (I hope that just made sense??) so that when measured at the end, you still have a 4.5″ square/unit(s) ready to be sewn into the Kansas Star design.

Secondly, if you’re having trouble with getting your 4.5″ ‘snowball’ units to sit flat and straight, give them a good spray with some starch, then press with a hotish steamy iron you’ll find they’ll behave themselves a lot better! (If ever in doubt about wrinkles, wonky lines, curled up edges etc, whip out the spray starch and then press the heck out of it and I’m 99% confident it’ll fix any of your problems!)

Thirdly, if you find that some of your ‘snowball’ units are slightly under 4.5″ squared, that’s okay. As long as it isn’t any more than a 1/4″ on any one side, your block should still come together pretty easily.

If you want some inspiration on how using different colour ways transforms the block, do what I did and Google, ‘Kansas Star Block’, click on Images and be instantly inspired!

For all of the measurement and cutting details, along with the fabrics* I’ve used to piece this block together and a diagram of the block layout, click on the pattern sheet linked at the top of this post. If you would like to use a similar 12.5″ set square as me, you can find it here:June Tailor Get-Squared 12.5″ Ruler.

+++

As I mention at end of the tutorial, block four will hopefully be up for you to watch on Friday (or Sunday, depending on a few things that are happening this week!). It’s another simple yet effective one called Janet’s Star!

Oh also, I had a great idea suggested that we get a hashtag going for the Quilt-Along! So whenever you share your blocks with me on Instagram include the hashtag #AmandasQuiltAlong (really original, I know!) and we’ll all be able to see each others blocks etc. How exciting!

Until then…

Happy Sewing, Friends!

xx

*A big thanks to Australian wholesale supplier and fabric distributer Dayview Textiles for supplying me with such beautiful fabrics! If you want to see all of the fabrics I’ll be using in this Quilt Along, check out this post where I share them all with you!

Star Sampler Quilt | Block #2: Star X

PATTERN SHEET: star-sampler-quilt-block2

Sooo….. Who’s ready for block two?? I know so many of you are excited for the next piece in my Star Sampler QAL puzzle!

And here it is!!

Week two brings the Star X Block!

Now, I absolutely love this block for how similar it is to one of my all-time favourite blocks – the Ohio Star! I also love how the metallic grey fabric (called: Notorious in Cloud Metallic) sparkles and glimmers in the light! It just finishes the block off so beautifully! 🙂

So in the following tutorial, I go through how to make HSTs (as usual) as well as how to make those super-effective QSTs (that is Quarter Square Triangles) that form the ‘Star’ and ‘X’ shapes in the block.

If you click on the pattern sheet linked at the top of this post, you’ll be able to find a full list of all of the measurements and cutting info, along with the fabrics* I’ve used to piece this block together! If you would like to use a similar 12.5″ set square as me, you can find it here: June Tailor Get-Squared 12.5″ Ruler.

Enjoy your weekend sewing up this block and don’t forget to share it with me on Instagram or Facebook!

See you next week for block three! It’s another ‘out-of-the-box’ type one again but will be fun to piece together nonetheless!

Happy Sewing, Friends!

xx

*A big thanks to Australian wholesale supplier and fabric distributer Dayview Textiles for supplying me with such beautiful fabrics! If you want to see all of the fabrics I’ll be using in this Quilt Along, check out this post where I share them all with you!

Star Sampler Quilt | Block #1: Eccentric Star

PATTERN SHEET: star-sampler-quilt-block1

Hello!

Welcome to the first block tutorial in my Star Sampler Quilt Along series!! First up is the Eccentric Star Block! Aptly named for it’s very crazy and super fun layout!

Everything you’ll need to know in regards to the measurement and cutting information as well as the fabrics* I’ve use to piece this block together are in the pattern sheet linked at the beginning of this post! If you would like to use a similar 12.5″ set square as me, you can find it here: June Tailor Get-Squared 12.5″ Ruler.

As I’ve said so many times before, I’m so excited to get this series started!! I hope you’ll be joining along too!

See you next week with block two!

Happy Sewing, Friends!

xx

*A big thanks to Australian wholesale supplier and fabric distributer Dayview Textiles for supplying me with such beautiful fabrics! If you want to see all of the fabrics I’ll be using in this Quilt Along, check out this post where I share them all with you!

INTRODUCING: A Star Sampler Quilt Along!

I’m not sure why I’ve just titled this post as ‘Introducing’ as most of you already knew that this Quilt Along was happening! But I thought, if any newbies come by looking for something different this title just might catch their eye!

(If you are that newbie, welcome! I’m so glad you’ve popped by!)

But yes! Finally I can announce that my next Quilt Along series is ready to begin!! Yay!!!! We’re only just a few months behind schedule, but nonetheless we’re ready to go!

So let’s first go through a few of the important details about this Quilt Along…

+ After a world-wide vote on a past post, the majority of you wanted to do a 12 block Star Sampler Quilt. So that’s what we’re doing!

+ The fabric range that I’m using is called Print Shop by Alexia Marcelle Abegg for Cotton+Steel. I’ve based the design of the blocks/quilt using the black and white version of the range (as requested by all of you!), with sprinkles of the bright colour way that’s also a part of the range, along with a few staple favourites from the Cotton+Steel Basics range. (You can see the full range of the fabrics I’ve hand-picked further down in this post.)

+ Although I’m using yardage/meterage, most* of the blocks can be made using either charm packs, layer cakes and/or fat quarters (*just be aware that there are a few blocks that have 6″-6.5″ unit pieces). However, you will need extra fabric for the sashing and border pieces, for the backing and the binding. (A full list of measurements are listed further down in this post.)

+ For the batting, I’m using a beautiful 100% Cotton batting from a company called Bosal. I’ve never used this particular type batting before so I’m really interested to see how easy it is to work with. I’ll go into more detail about it when the time comes for basting and quilting!

+ All depending on my work schedule/roster, I’m hoping to have each block tutorial up on my YouTube channel as well as here on my blog every week… Okay, now that currently might be a bit of a stretch to promise when I don’t know what my working hours are each week! So just be aware that every now and again there may be more than a week between tutorials! At the moment I’m thinking my upload/release day will possibly be a Thursday as I don’t usually work that day. (Weekends are no good as I work most of them!) I hope that this works for you – at least then you’ll have the weekends to make each block as we go along!

+ Now, if you’re new to the way my block tutorials/Quilt Along series go, in each tutorial I let you know all of the measurements and cutting info as well as what fabrics I’m using for that block. Then I take you through step-by-step on how to piece that block together. And just like with my HST Quilt Along, a beautifully coloured information sheet for each block will be available for you to print off and follow along with at home! (These will be available to download from my blog.)

+ Interested in what Star blocks we’ll be making?? Well here they are in the order that we will be making them!

Block One: Eccentric Star / Block Two: Star X / Block Three: Kansas Star / Block Four: Janet’s Star / Block Five: Maple Star / Block Six: Amish Star / Block Seven: Indian Star / Block Eight: Crystal Star / Block Nine: Missouri Star / Block Ten: Martha Washington Star / Block Eleven: Star + Square / Block Twelve: Aunt Eliza’s Star

Each will finish at 12.5″ squared and range in different levels of difficulty. However, I believe what ever level of quilting you’re up to, you’ll definitely be able to make each and every one of these blocks listed!

+ Just like with my last Quilt Along, I’ve been so lucky to have it sponsored again by Australian wholesale supplier and fabric distributer, Dayview Textiles. If you’re in Australia and are keen on using the same fabrics as me, pop over to their website to find the nearest quilt store to you that they distribute fabrics to!

+ And now on to all of the fabric deets!! Like I previous mentioned, all of these fabrics have been handpicked from the range to individually suit each of the blocks I’ll be making for my quilt. So because of that you’ll notice that not all of the fabrics in the Print Shop range are here.

printshopbw

The black and white fabrics in the range I’m classing as my ‘main’ fabric. Each block features one of these key fabrics which has then been paired with either a coloured print from the range or with a C+S Basic print.

The fabrics are:

1. ‘Meadow’ in the colour Midnight

2. ‘This + That’ in the colour Linen

3. ‘This + That’ in the colour Black

4. ‘Bricka’ in the colour Black

5. ‘Grid’ in the colour Dark Charcoal (This one reminds me of little British flags! Do you see them too?)

6. ‘Point’ in the colour Charcoal

7. ‘Hello’ in the colour Grey (Those little animal heads are a-dor-a-ble!!)

printshopcolour

These are the coloured prints from the Print Shop range I’ll be using… Along with the C+S Basics, these will add a delightful pop of colour next to the black and white prints!

1. ‘Meadow’ in the colour Citrus

2. ‘Starry’ in the colour Seashell

3. ‘Hello’ in the colour Seaglass

4. ‘Moons’ in the colour Grass

5. ‘Grid’ in the colour Peach

csbasics

And lastly, these are the C+S Basics and other fabrics I’ll be using:

1. ‘XOXO: #2 Pencil’

2. ‘XOXO: Lightning’ (This one is insanely bright and fluro-like! It’s absolutely gorgeous!)

3. ‘XOXO: Thistle’

4. ‘Sprinkle: Peacock’

5. ‘Netorious: Black Cat’

6. ‘Sprinkle: Petal’

7. ‘Netorious: Cloud (Metallic)

8. ‘Dottie: Rosewater’ (This is the fabric I’m using for my binding.)

9. Cotton Supreme Solid in the colour Kerchief (This is my main background fabric that will used in my blocks, sashing and borders.)

+++

+ If you would like to use fabric yardage/meterage like me, here is a list of the measurements you’ll need… (Apologies for how I write out the yardage measurements – they’re very foreign to me!)

Of each print:

Meterage: half to three quarters of a metre (50cm-75cm) – these are the lengths I’ll be working with

Yardage: 0.60-0.85 of a yard (22″-31″)

(PS. You will have fabric left over – I just want to make sure you’ll have enough and won’t run out!)

Background & Backing fabrics:

Meterage: 3 metres for each

Yardage: 3.3 yards for each

Binding:

Meterage: three quarters of a metre (75cm)

Yardage: 0.85 of a yard (31″)

Batting: (estimate)

Meterage: 1.5 metres x 220cm+ width

Yardage: 1.7 yards x 2.4+ yard width (61″x87″)

I’ve planned for the finished quilt to roughly measure around 50″x65″ (127cmx165cm)

+++

 Now I think that’s everything that is important to know right now… If you think there’s any important details I’ve missed or have any questions about this Quilt Along, please feel free to let me know in the comment section below!

Ooo! One very important thing I haven’t mentioned yet is when we’re starting! I’ve penciled in for Thursday the 22nd of September to have the first block tutorial in the series up on my channel and blog!

I can’t wait to get started and to see all of your beautiful Star Blocks come to life into a beautiful Sampler Quilt!

Happy Planning, Friends!

xx