TUTORIAL: RJR Fabrics ‘In The Kitchen’ FPP Coffee Cups Wallhanging

Hello and Happy Friday!!

(Yay!!)

In today’s post I’m combining both part one and part two in my most recent project uploaded onto my YouTube channel featuring the new RJR Fabrics collection, ‘In the Kitchen’ by Patrick Lose. And that of course is my Foundation Paper Pieced (FPP) Coffee Cups Wallhanging!

CoffeeCupsWallhanging:AmandaRolfe

So I thought, instead of doing two separate posts, why not join them together in a lovely huge blog post for you to come back to and have all of the info you need in one neat little package!

So let’s get into the nitty-gritty stuff and start making!

First of all you’ll need the pattern to make those cute-as-a-button coffee mugs! And here it is!

—>> FPPCoffeeCupsPattern <<—

Download it and print it off as many times as you wish! (Although for this project you’ll only need three copies!)

Next is the video tutorial where I show you how to piece them together… You’ll find that right under this video, there’s a full list of all of the fabrics you’ll need, how much to cut for each section (all of the guess work has been taken care of!) as well as a few of the tools and notions I use when I’m FPP.

MEASUREMENTS & CUTTING INFO:
Cut these amounts for each section in the template. (These amounts are to make one Coffee Cup block.)

TEMPLATE A –
A1: x1 4.5″x5″ rectangle
A2 & A3: x2 1.5″x1.5″ squares
A4 & A6: x2 1″x5″ rectangles
A5: x1 1.5″x5″ rectangle
A7: x1 2″x5″ rectangle

TEMPLATE B –
B1: x1 2″x2″ square
B2 & B3: x2 1.5″x1.5″ squares
B4 & B5: x2 1.5″ x2″ rectangles
B6: x1 1.5″ x3″ rectangle
B7 & B8: x2 1.5″x1.5″ squares
B9: x1 2.5″ x3″ rectangle
B10: x1 2″ x2.5″ rectangle
B11: 2″x6.5″ rectangle

PLUS for the opposite side of the cups and diagonal sashings, cut –
x3: 2¼”x5.5″ rectangles and
x4: 2¼”x8¾” rectangles from your background fabric.

FABRICS I USED FOR EACH CUP:
Top Coffee Cup block
– Main print: Coffee Cups Calico in Paprika
– Line detail: Silhouettes in Butter
– Background: Quilted Grid in Salt

Middle Coffee Cup block
– Main print: Kitchenware in Fresca
– Line detail: Tile in Multi
– Background: Quilted Grid in Salt

Bottom Coffee Cup block
– Main print: Utensils in Chocolate
– Line detail: Silhouettes in Fresca
– Background: Quilted Grid in Salt

NOTIONS & SUPPLIES I USED:
– Brother Innovis 200QE sewing machine
– Brother ¼” piecing foot
– Fiskars Rotary Blade (28mm) & thread snips
– Sew Easy Rulers
Clover Serrated Tracing Wheel
Clover Finger Presser

+++

Moving onto part two in the project, I show you how you can finish your wallhanging with two lovely borders that frame the coffee cup trio and then how to simply sew it all up and quickly quilt it to completion!

Again, there’s a full list of all the measuring and cutting info for this part directly underneath for you to take a squizz at!

FABRICS, MEASUREMENTS & CUTTING INFO:

First Border –
FABRIC: ‘Silhouettes’ in the colour Butter
CUT: x2: 1½”x23″ strips and x2: 1½”x10¾” rectangles

Second Border –
FABRIC: ‘Kitchenware’ in the colour Eggshell
CUT: x2: 2¼”x25″ strips and x2: 2¼”x14″ rectangles

Batting –
FABRIC: Legacy Bamboo/Cotton Blend Batting
CUT: x1: 15″x29″ rectangle

Backing –
FABRIC: ‘In the Kitchen’ in the colour Multi
CUT: x1: 15″x29″ rectangle

+++

And now it’s time for a GIVEAWAY**!! Whoo!!!

I have one delightful little Fat Quarter Bundle with 16 prints from the range that I would love to give away to somebody! If you want that to be you, then simply comment below answering this question:

What do you love most making in the kitchen and why?

The winner will be announced/contacted next Friday, 5th February 2016.

Best of luck!!

(PS. World-wide entries are welcomed!)

**NB: THIS GIVEAWAY IS NOW CLOSED! THANK YOU TO EVERYONE WHO ENTERED!!

+++

Now if you’re just as smitten with this range as I am, here are a few places online where you can get the ‘In The Kitchen’ collection!

Patrick Lose Studios

Missouri Quilt Company

Again, I would like to say a huge thank you to RJR Fabrics for giving me the opportunity to play, make and create with this fun new range!

Wishing you all a very lovely weekend ahead!

Happy Sewing, Friends!

xx

PS. Don’t forget to check out this Pieced Apron tutorial I made using the ‘In the Kitchen’ range too!

A Block Review // FPP Jack-O-Lantern

The other day, while wasting time on Facebook, I came across a link that was shared to this awesome little FPP Jack-O-Lantern pattern by Sonja Callaghan from the blog Artisania. And with Halloween coming up very soon, I just knew that I had to print it off and give it a go!

FPP JackOLantern Block 1

Firstly, I printed off the pattern at a scale of 90% so that I was sure the pattern would fit comfortably on a A4 piece of paper. Then I sat down for a bit, trying to figure out the best way to make it as I’ve never attempted a FPP pattern this intricate before!

Once confident of how to start and what steps I had to do to be successful at the end, I picked out some fun autumnal RJR Supreme Cotton Solids and jumped straight into making!

Here are a few tips that I think might help you when making the block yourself…

No. 1 – The block is divided into six sections labelled A to D. So you need to carefully cut the paper pattern into the sections before you can start any sort of piecing! (See Photo #2) I also cut an extra 1/4″ seam allowance around the outside line of the pattern so that I wouldn’t get caught out not having enough fabric to cover each section. (See Photo #1)

Cutting a 1/4" seam allowance out from the edges of the paper pattern.
Photo #1
Image #2
Photo #2

No. 2 – Another prep step before starting: Using a Clover Serrated Tracing Wheel and a ruler I perforated all of the lines in each section that I’ll be sewing on top of. (See Photo #3) Doing this simply helps to ensure that the paper will rip away smoothly from the back once the block is finished.

JackOLanternStep3
Photo #3

No. 3 – I found it really helpful to initial each numbered section of the colour that was to be used so that I wouldn’t get confused!

JackOLanternStep4

W=White, O=Orange, B=Black and G=Green.

No. 4 – I was really relaxed with sizes of fabric I cut for each section. I found, that because a majority of the numbered sections were quite small, I was able to use quite a lot of fabric pieces from my little scrap pile I was creating from the other sections I had finished piecing. And due to that, the block came together really quite quickly!

No. 5 – As you piece each section together, make sure to leave enough fabric over the edges so that you can trim the block down with a 1/4″ seam allowance around each side. For this pattern to come together perfectly at the end, you need to cut a 1/4″ out from each edge on all six sections (excluding the edges you cut around before on the outside of the pattern)…Hopefully Photo #4 will help you understand a little better…

Photo #4
Photo #4

No. 6 – Once you’ve come to the part where you’re ready to piece each section back together, I found doing it in this order the easiest…

Sew section A to section B, then section C to the other side of B. Remove the paper from the back and press the seams either to one side or flat open. Then sew section D to section E and then section F to the other side of E. Again, carefully remove the paper from the back and press the seams in the same way as before. From here, piece the two sections together to finish the block.

TIPS: When piecing each section together make sure to line up the seams around the outside of the pumpkin and around his mouth to achieve clean crisp lines. It may take a little bit to get these parts aligned and sitting perfect but trust me, it’ll be worth it in the end!

Finished block size: 7.5″x9.5″ (19cmx24cm)

FPP JackOLantern Block 2

So to sum it all up, despite a few mistakes on my part resulting in the seam ripper to make an appearance more than once, this was a really fun FPP pattern to piece together! Believe it not, I did learn a few new things and expanded my knowledge on the way I should tackle these types of tricky pattern designs! I also felt like a slight rebel making this little guy as Halloween isn’t widely celebrated in Australia as it’s seen as more of an ‘American’ tradition. But I like Halloween – it appeals to the crafty and creative side to me! Hence why I loved this making little guy!

If you like the look of this guy and would love to make him yourself but don’t know a thing about Foundation Paper Piecing (FPP), then check out this tutorial I made a little while ago taking you through the steps of how to do it!

Of course, if you have any questions about this block or are stuck on any step, please don’t hesitate to ask! I’m always here to help!

Best of luck to all of you who are going to print this little guy off and give him a go! Don’t forget to share your photos with me!

Happy Paper Piecing, Friends!!

xx

When life gives you lemons…

…you make a soothingly warm lemony drink powerful enough to banish all unwanted weekend sniffles.

blog1

Yes, that’s right, all my weekend plans went out the window when I was struck down by one of those pesky not-yet-a-head-cold-but-soon-will-be yucky feelings.

So I pumped my body full of some good ole vitamin C, a healthy dose of Ibuprofen and snuggled down under a quilt with a book: The Fault In Our Stars by John Green.

And blamed the abrupt change of the weather for my sudden bout of illness!

One day it’s hot and sunny, the next cold and rainy – welcome to autumn: Australian style!

Anyway, enough about feeling sorry for myself…

I had planned for the weekend to begin filming a video tutorial (VT) I had promised about Foundation Paper Piecing – obviously didn’t happen – as well as to continue on my way with my Friendship Star blocks.

Foundation Paper Piecing Video Tutorial | Pattern Sneak Peek!

Now the latter did happen: four more pretty little blocks are adorning my design wall, giving me ample encouragement to keep-on-keeping-on with this quilt because the end result is going to be FABULOUS!!

(If I may say so myself!)

Top: 14 blocks completed! Bottom: The perspective shot!
Top: 14 blocks completed!
Bottom: The perspective shot!

So the next few days I hope to concentrate on getting said VT on it’s way, taking onboard all of your wonderful suggestions, thoughts and opinions on how I can improve and make my VTs better for you to watch and learn from.

Until then,

Bon Oui* lovely friends! xx

~

*Good Night! (French)

2014 Quilting New Year Resolutions

I’m not normally one of those resolution-kind-of-setting people making plans at the beginning of each New Year and then failing two weeks later…

So when I made up my mind to set out some quilting resolutions for 2014, I made sure I would choose goals that I knew I would happily follow through on.

(I may regret this!)

 I start so many new projects each year, each month, each week, each day that it’s absolutely ridiculous!

Worse yet, three quarters of these projects don’t get finished or are ever seen again!

This year, that changes!

I have a total of six quilts that I’ve ‘started’, all at different stages of the quilt-making adventure, that I resolute to FINISH over the course of this year.

I may even go to the point of saying that I need to get all these finished before I start a(nother) new project! (Oh no! Can I take that back??)

 So, there are four quilt tops that are ready to be sandwiched and basted ready for quilting and two stacks of completed blocks that need to be pieced together.

 Some of these quilt tops may seem familiar…

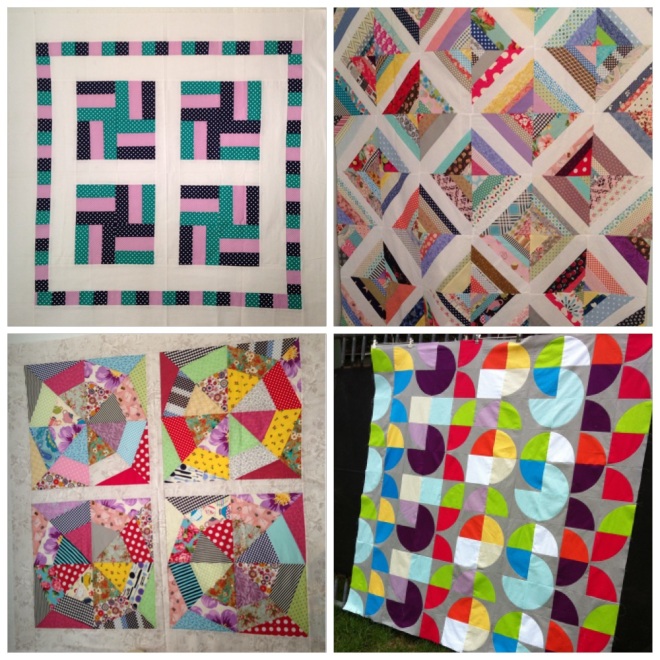
IMG_2345

From top left to bottom right –

  • This is a small lap quilt or baby quilt I began two years ago using the Rail Fence block along with some sweet polka-dot fabrics that I was madly in love with at the time. I’m thinking, once I’ve finished it, I’ll put it up for sale in my madeit store. Watch this space!
  • The next one is my Scrap-Happy String Quilt! I accidently made this quilt a whole lot bigger than I originally intended to last year after ‘trying’ to demolish the never-ending growth of my scrap fabric! I freely admit that the size put me off from ever wanting to get it finish. And yet, I know that when I do get around to finishing it, it’s going to be B-E-A-utiful!
  • Two years ago, I tried the endless struggle to not let my fabric scraps overwhelm me! (See previous quilt top!) So when I discovered an awesomely scrappy-kinda-quilt PDF pattern by Anna Maria Horner, I sung out loud the Hallelujah Chorus and pressed print! I have no idea why I didn’t get the chance to finish this little gem: the size is like a lovely cozy lap quilt and I simple adore the crazy mix-match of the prints together! (Hmm, that’s a head scratcher!) But the ball has been set into motion again and this little sweetie will be finished!
  • This would have to be the BIGGEST quilt I have pieced together! Seriously this quilt will be a beast when it’s finished! I remember I found the pattern to this quilt when I had a craving to tackle a quilt featuring curved piecing as well as one where I could only use block colours. Bingo! This quilt was perfect! The original design for this quilt came from Jen Carlton Bailey and her quilt 5-HTP Squared. I started this quilt (named Colourplay) this time last year (January 2013) and I distinctly remember that as it got to the part where I needed to baste and proceed onto quilting, the harsh Australian Summer decided to get even. In that week alone we suffered through 40-45C+ heat. Every. Single. Day. Because of this, I was put-off from quilting it (which I was also internally dreading because of it’s size!) and conveniently forgot all about it until a few weeks ago when I decided to commit to some silly New Year resolutions lark! I know completing this quilt will challenge me. I know that I’ll need to be as strong as an ox to quilt it. And I know that I’ll need to be so much more patient than I already am to reach that moment of completion! I say: bring it on!

 And now onto the quilt blocks that are ready to be pieced!

IMG_2348

  • At the top is my stack of Craftsy’s 2012 Block of the Month blocks that have, so unfortunately, been sitting on my sewing table over the past year, yearning out to be finished! This was and still is my very first Sampler slash Block of the Month type of quilt. It symbolises a lot of new skills that I learnt along with some simply wicked modern fabrics that I do and will always love!
  •  Although I identify myself as an Australian, I’m also a self-obsessed Anglophile and absolutely adore the thought of quintessential British living! If given the opportunity to live in another country apart from Australia, I would choose England hands-down! From Sydney to London is my ultimate dream. Full. Stop. Thank you very much! So to help immerse myself into that dream, I started to make some Union Jack paper-pieced blocks with the intention to make a tip-top Britishy quilt all for me! Yeah…obviously that hasn’t happened yet. My quilt in progress was inspired by this quilt made by Amy Smart at Diary of a Quilter.

 Alternatively (833 words later!), you can watch me display and chat about each of these quilts here…

Other Quilting-related New Year Resolutions I’ve got in the bag include –

  • Entering local quilt shows, in particularly the Sydney Royal Easter Show (application form submitted this morning!!) in April and the Sydney Quilt Show in June.
  • Challenging my quilting skills by attempting block patterns that force me into a spinning vortex of stress and anxiety!! *Falls into a foetal position*

 Sooo, watch this space for these WIPs or ‘Works-In-Progress’!

I’m pumped and ready to get going!

 Have I inspired you to get your unfinished quilts and projects out and onto the road of completion? Let me know and we can discuss our progresses together!

Happy Sewing Friends!! xx

PS. Happy New Year!

It Shall Be Called: A Summer Bloom

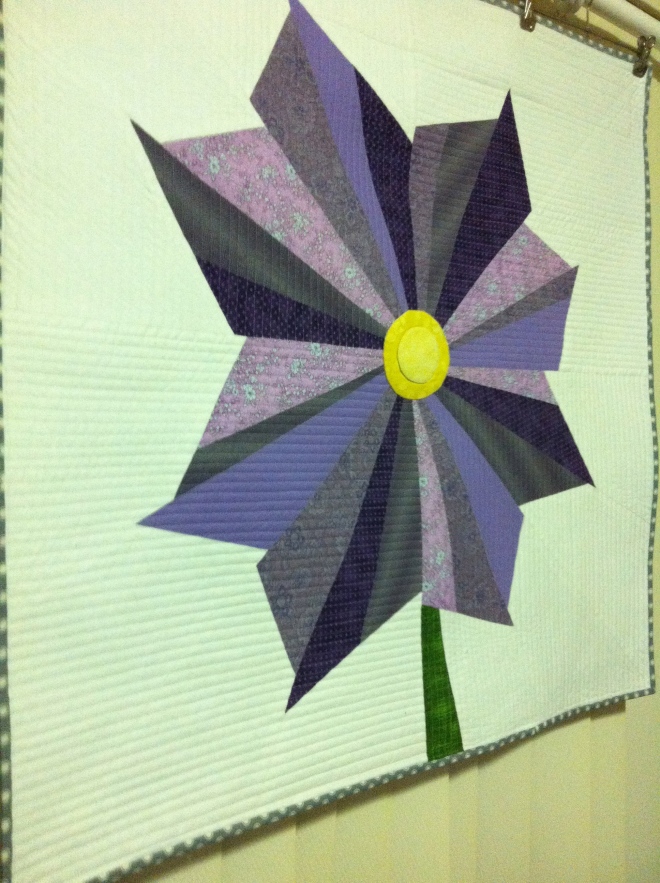
It t’was a glorious day yesterday – at around 7.30pmish last night I finished my How Does Your Garden Grow? Competition quilt!! It was a very happy, happy moment…. stepping back and admiring the long hard hours I put into making it. And yet, strangely, all I could make myself see were the faults and mistakes I’d skipped over and tried to ignore. Apart from that, I’m very pleased with the end result and hope it does well in the competition – fingers crossed!!

So, here’s how I made it…

To start the paper piecing process, I bought four large pieces of poster board and sticky taped them together in a very professional manner (sprawled across the floor, butt in the air, tape hanging out of my mouth while my measure tape, hanging around my neck, tried desperately to strangle me to death!).

I made a 1m ruler out of a wood stick I had floating around (I’m a poor artist and can’t afford to buy a real 1m ruler stick) and drew up a 1m-squared square, cross-sectioned it into fours etc. and then drew in my petal blades and stem. I made a few adjustments here and there until I was satisfied with the final design. I numbered each piece in a clock-wise direction so I wouldn’t get lost and befuddled with all the different pieces. It more or less became a big number puzzle for me to cut up and then stitch back up again.

So that I wouldn’t be too overcome by cardboard everywhere, I cut and sewed back together the pieces in quarters; the first quarter of the flower design, then the second, third then fourth which then completed the quilt top.

I chose randomly which petal blade got what purple print fabric because – well – because that’s just how I roll.  I like to be spontaneous and try (very hard, with little success) not to over think things.

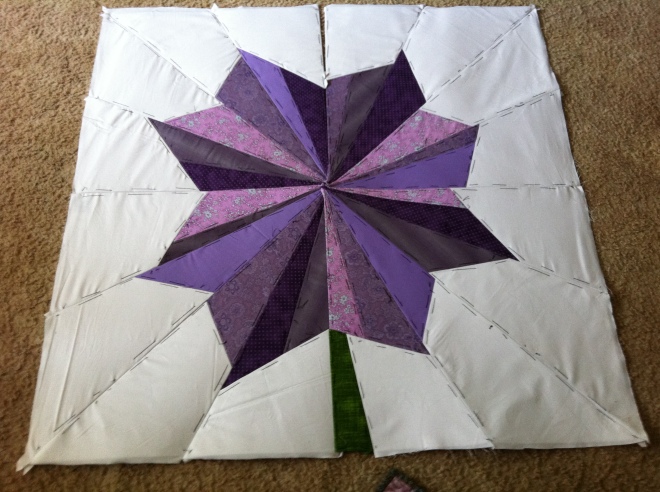
Hand basting was a slight nightmare. You see those pins? Well, let’s just say many cuss words came out of my mouth thanks to those sharp little buggers. (Please understand my meaning of cuss words: crap, poo, sonova biscuit, far-out and [oh] flip it!) Once basted, I patiently whipstitched all the pieces together, in their correct order, while watching a fair few classic episodes of Friends.

Spray Starch became my best friend – my crime-fighting buddy (no, more like my seam-flattening buddy! Ha!) and my quiet achiever while I untact all the paper pieces away from their fabric companions. I steamed ironed the hell out it and then became stuck on what to do next for two weeks.

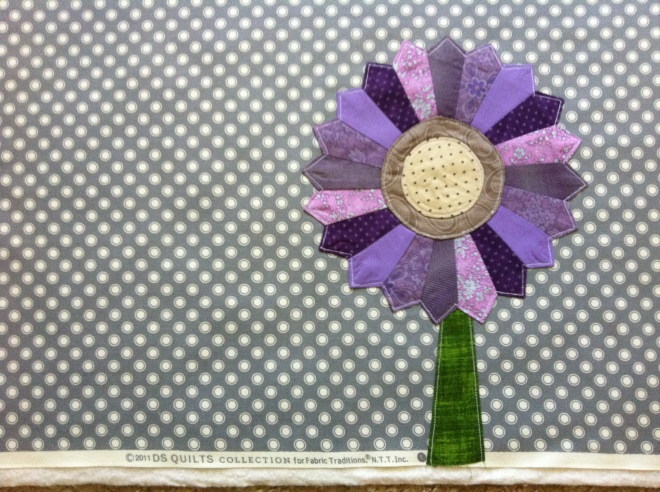
Do I put a Dresden Plate Wheel on it to create the illusion of it blooming? No…

Do I use a browny/earthy centrepiece? No…

Should I put both of these together to see if they cancel each other out to make something better? Ew. No…

Do I break my pact of not resorting to making a typical flower with a yellow spot in the centre? Yes. And it works. You know why? Because purple and yellow are matching opposites on the colour wheel and so naturally work and look well together. (Ha! See I told you I don’t over think things!!)

After making such a crucial important simple decisive essential boring time wasting decision, I got on with the job! I hand stitched the centrepiece onto the quilt top and then got onto setting up ready to quilt it.

To shake off the tag that Gen Y (which is me) are a throw away generation, I recycled the idea of the Dresden Plate Block and the browny/earthy coloured centrepiece and appliqued it onto the back of the quilt – just for the sake of it. (And for the fact that I really didn’t want to throw it away after all the effort I put into making it.) I’m changing the world one quilt at a time!!

Once basted and ironed (for about the tenth thousandth time), I spent three days quilting. Three whole days of sewing line after line after line after line after line after line after line… It was fun – for the few minutes. I had to force myself to go to a happy place for the sake of my sanity. But, you know, this is what you do for your art, your passion and for your living.

Next came the binding and stitching on the rod pocket while watching more classic Friends episodes.

And then – tah dah!!! Finish! Fin! Finito!

So, that’s my very first self-designed, hand pieced, machine quilted competition quilt! Hoorah!

It shall be called: A Summer Bloom (as the photo I took of the inspired flower was blooming mid summer this past January).

And so I say: Bring on the next one!

Happy Sewing! xx

A Quilters Mind Never Stops Thinking!

Just only a few moments ago this afternoon, I finished hand sewing the binding onto the Gumnut Babies Quilt – escaping with only a few needle pricks and my sanity still in tact! Tomorrow I will label and photograph it, share here with you on my blog and then pass it on to the lucky lady who gets to snuggle underneath it’s warmth and comfort. Here is the quilt being quilted during the week. I had fun playing around with the composition of the quilting lines to tie in with the modern approach I took to making this quilt.

Obviously you’ll be able to see the final result when I photograph it tomorrow. I’m genuinely happy with how this quilt has come out, especially when I wasn’t following a pattern; it turned out exactly how I pictured it in my head and that, in itself, is refreshingly satisfying!

The quilt top I’ve made for the How Does Your Grow? Competition has been finalized and yesterday I embellished the quilt backing, cut the batting down to size and basted all three layers together.

The next step now is to decide how I’m going to quilt it so I can fully emphasize the overall design and message of the quilt, as well as to highlight the hand pieced flower blades.

So, now that these two projects are nearing their ends, it’s time to start thinking about the next few quilts that need to be made! I love planning and starting new projects; there’s such joy and excitement in choosing the right quilt designs, fabrics and quilting patterns! Within the past few months I’ve seemed to become addicted to solid block colours and have a few quilt designs in mind that, I think, will show off the harmonies between certain colours.

I was recently inspired to use a particular colour palette after watching the highlights of the 2011 Dew Tour on Fuel TV. I love the bright and vivid lime green that’s smattered around the Skate/BMX course and how the greys and black sit comfortably next to each other. These aren’t the best pictures, but you can see what I mean about that intense lime green!

So naturally I thought that those colours would look awesome in a quilt! I think the fabrics I bought match very well with the course’s colours and I plan to re-visit the notion of the ‘modern approach’ that I used with the Gumnut Babies Quilt, but with a different design of course!

Here’s a rough design sketch of the quilt that I hope to construct…

It’s amazing how inspiration can be found anywhere along with how it hits you like a ton of bricks when it does!

Another project that has sprung to mind is taking the opportunity to explore the use of negative space in a quilt. This thought came about after receiving an email from the organizers of QuiltCon (Texas, 2013) about the different categories that can be explored for the Quilt Show that they’ll be presenting. Entry is open for international quilters, so I’m thinking why not try my luck and make something that could be chosen for display! You never know these things unless you try!

These are the two fabrics I’ve chosen to use; purposely paired for the minimalistic design I’m working on. I’ll update more as things progress!

I’m also dying to find the perfect quilt project so I that I have an excuse to use these Denyse Schmidt fabrics that I oh-so love!

They’re just sooo pretty and fun!! I think I’ll have to spend some time this researching quilt patterns, waiting for the right one to jump out at me and inspire my mind!

Happy Sewing! xx

Ohh….iMac!

I can hardly contain my excitement, as I am, at this very moment, writing this blog post on my new, very shiny, extremely fast, super-dooper awesome iMac! OH MY GOSH I LOVE THIS THING! Although most of the time I have no idea what I’m doing or where to find anything on the desktop, I’m having the best time exploring the cool little short cuts, simple apps that make life insane and being blown away by the awesome little touch-track mouse that is so incredible to use! In my opinion: BEST PURCHASE EVER!

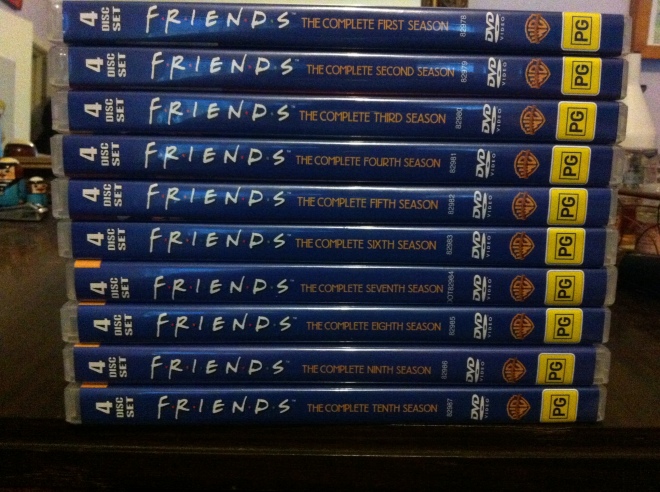
With all the refreshing spare time I have on my hands now, I made a start on my How Does Your Garden Grow? competition quilt. The final decision on how to construct this quilt came down to paper piecing. Over the past three to four days I’ve been constructing plans, drawing up the final design, cutting out the pieces, tacking on fabric and sewing all the pieces back to one another by hand. All I can say is thank goodness for my 10 series collection of Friends that has gotten me through the mundaneness of repeating the same steps over and over and over again!! When the quilt is all finished, I’ll post up a How it was Made blog showing you the different steps I took to make it. Here are a few photos I’ve taken over the last few days….

I’ve also taken the time to start a friends Gumnut Babies quilt. I’ve made it with giant half-square triangles (HST) that then makes a Giant Square block – equaling the quilt top. I’ve used a few co-ordinating fabrics from own stash to mix up the prints and hope to make my first pieced-back with the left over Gumnut Babies fabrics.

Over the weekend, I took the plunge and re-organised my sewing area – it was in desperate need of a tidy and re-vamp! I sorted a quarter of the fabrics that I have on show into colour bundles, folded them nicely and stacked them in colour order in of many bookshelves.

I also sorted out my quilting/fabric/crafty related books and recycled a whole lot of quilting magazines that I haven’t read or referred to since I bought them like three years ago!

You never realized just how much crap you actually have that is cluttering up your shelves until you pull it all out and then regret you even started!

Happy Sewing! xx

A Diamond Jubilee Celebration fit for a Queen!

If you’ve been living under a rock, in a cave, under the bed or are just plain ignorant, you may have been unaware that this weekend was the Queen’s Diamond Jubilee. The hype about this event has been building up for months and the UK has been dressing up the London city streets with an abundance of Monarchy pride!

As a great lover of all things British, and the fact my dad’s an Englishman, we celebrated the Queen’s Diamond Jubilee in style in the form of a ‘simple’ Sunday dinner.

I decked out our table with some red and blue gingham fabric, a Union Jack printed tea towel the folks bought back from their European holiday last year, my Grandmother’s 1950’s print frame of the Queen when she was younger along with fancy crockery, glasses and goofy crown hats!

We had Coronation Chicken sandwiches, a Victoria Sponge, Jam Tart and Shortbread biscuits. We started dinner with some sparkling grape drink (non-alcoholic for the teetotallers in our family) followed by leaf-tea in fancy cups and saucers with our dessert. We truly enjoyed ourselves by doing something different while acting silly with our posh little pinky fingers in the air as we sipped our tea and spoke in posh English accents – well attempted to anyway!

Before our fancy dinner, I had dedicated the afternoon to watching some of my favourite British films.

I started with About a Boy then treated my self to the ridiculously funny and classic Bridget Jones. I did have all intentions to watch Four Weddings and a Funeral but Downton Abbey was on TV and I couldn’t miss that! There are plenty of other British titles that rank in my top favourite movies; The King’s Speech, Pride & Prejudice (BBC version – swoon over Mr. Darcy!), Persuasion,  The Inbetweeners, Love Actually, Bend it Like Beckham, Mr Bean etc. I would need a whole week to watch all of these titles to truly enjoy every moment!

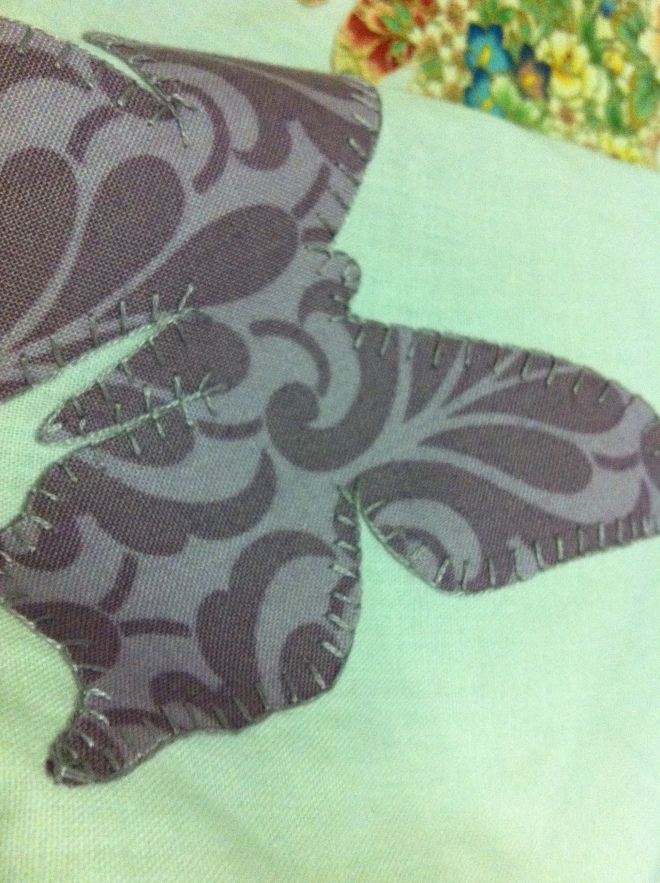
My movie afternoon-slash-evening became the ideal time to continue appliqueing the butterflies on the Butterfly cot quilt that’s currently in the making. Only four more to go, with 24 butterflies in total! Yay! Once they’re all secured, I can sandwich the quilt up with wadding and the backing fabric and get ready to quilt!

Saturday evening, with a stubborn itch to do some sewing, I came up with this Stacked Coins cushion cover using some coordinating scraps from my scraps tub. No pattern, no instructions. Just my imagination and mind’s eye helped to create this little gem.

It’s now ready for a quick bout of quilting and then the quirky pear print backing to be sewn on (with a zipper or buttons I’m not sure yet) and then stuffed with a cushion in-fill and it’s ready for the lounge!

I’ve finalised my design for the Quilter’s Guild of NSW’s under 35 years quilting competition based on the theme How Does Your Garden Grow?

Just a sneeky-peek…I can’t give the whole idea away just yet! Today I was researching into how I would actually construct this beauty. It’ll definately have to be some type of Foundation Piecing, either string or paper piecing or English paper piecing. I’ll have to do some mock up testing first to find out which would best. Any suggestions??

Happy Sewing! xx

Craftsy Block of the Month

Craftsy Block of the Month 

Join me in The Craftsy Block of the Month!

‘Learn fun quilting techniques, make new friends and create a one-of-a-kind quilt with the FREE Craftsy Block of the Month! Each month, Amy Gibson will guide you through a specific quilting technique – half- and quarter-square triangles, appliqué, string quilting, paper piecing and more. Then she’ll teach you two nifty 12-inch blocks using what you’ve learned. Some are brand-new designs, others fresh twists on traditional favorites. Along the way, you’ll make 20 blocks from fat quarters, then assemble them into a throw-sized quilt.’

I’ve just recently finished my first two blocks for the month of January and found it so easy to make after watching Amy on the video tutorial.

I’ve teamed my blocks up with pure white cotton homespun (one of my favourite fabrics!) along with some retro and contemporary printed fabrics. I plan to use some of the small quarter and half metre cuts of fabric that I’ve bought and just added to my ever growing stash of fabric.

So being my first ever online class, I pretty excited about getting started and being involved in the conversation pages on the website and recieving feedback about my blocks etc. I’m looking forward to learning new techniques, especially sewing curves properly and what string quilting involves aswell as having a lovely sample-like quilt at the end of it!

I’ll post up my blocks as the year progresses aswell as all my other sewing and quilting projects. Gee, it’s not even the middle of January and I’m already busy planning and blotting for the rest of the year!

Happy Sewing!