MINI BLOCK QAL | Finishing Touches

VERSION #1 PATTERN SHEET: MiniBlockQAL – FinalLayout
VERSION #2 PATTERN SHEET: MiniBlockQALFinish V2

It’s been a long time coming, I know, but the very last tutorial in my Mini Block Sampler Quilt Along is here! Finally!!

It’s been a long old road with this one but I couldn’t be happier with how everything has come together to create a beautifully quirky little quilt-slash-wallhanging!

As you may’ve noticed, I’ve provided two different quilt top layouts that you can choose from. I decided I wanted to do something just that little bit different. I shuffled my nine sweet mini blocks down into the right hand corner, enlarging the top corner border pieces creating some luscious negative space to fill will lots of directional quilting lines.

And I have to say, I think the gamble paid off! It’s added another interesting twist to the overall theme of the quilt. And it’s the perfect size to squeeze on a wall somewhere in our house!

As I mention at the beginning of the tutorial below, it’s completely up to you how you would like to finish your quilt top. Choose one of the versions I’ve provided above or reject both and do your own thing! (I really won’t mind if you do!) Be creative. Have fun. Be happy with your choice!

+++

Just like a broken record, I want to take another moment to thank everyone who participated in this QAL, who learnt learnt some new skills and had fun along the way!

You’re all such wonderful people and mean so much to me! Thank you!

And for the last time – share your makes with me on Instagram!

#AmandasMiniQAL

Happy Sewing, Friends!

xx

Advertisement

2018: Year in Review

Thinking back on last year, I immediately frown and wonder just what it was I actually did during the year that could hold some significance for me.

At first I was all like, โ€˜nahh. Nothing happened that could really hold up in a blog post, detailing my life in and around my sewing room!โ€™

But then a simple scroll through my Instagram and all of a suddenly I have a hurried, messy scribble of a list detailing all of the wonderful events and creative pursuits I managed to fit into the year!

So, listing in chronological order, letโ€™s review the year that was 2018!

January

I always like starting the year off with a bang! This usually means a big holiday/cruise somewhere warm and exotic! This way, during those times in the year where I feel a little worn down, crushed by societal expectations and it’s noisiness I can reflect on the one thing that bought joy and happiness to my life and I can remember what itโ€™s like to be happy and carefree once more…

Was that a little bit too deep and depressing for a beginning paragraph? Oops! My bad!

Anyway…

What I was trying to say before going off on a weird tangent, four days into 2018 my parents, some family friends and I sailed away to visit New Zealand! Although it was my second time visiting, I loved every. Single. Minute!

We visited all of the major city/towns along the east coast of the country and even got the opportunity to visit Hobbiton! It was the best day ever.

I did a vlog series on my YouTube channel, filming and documenting the highlights of our trip. I recently watched it back and had totally forgotten just how awesome and fun our holiday together was!

I canโ€™t wait to go back!

+++

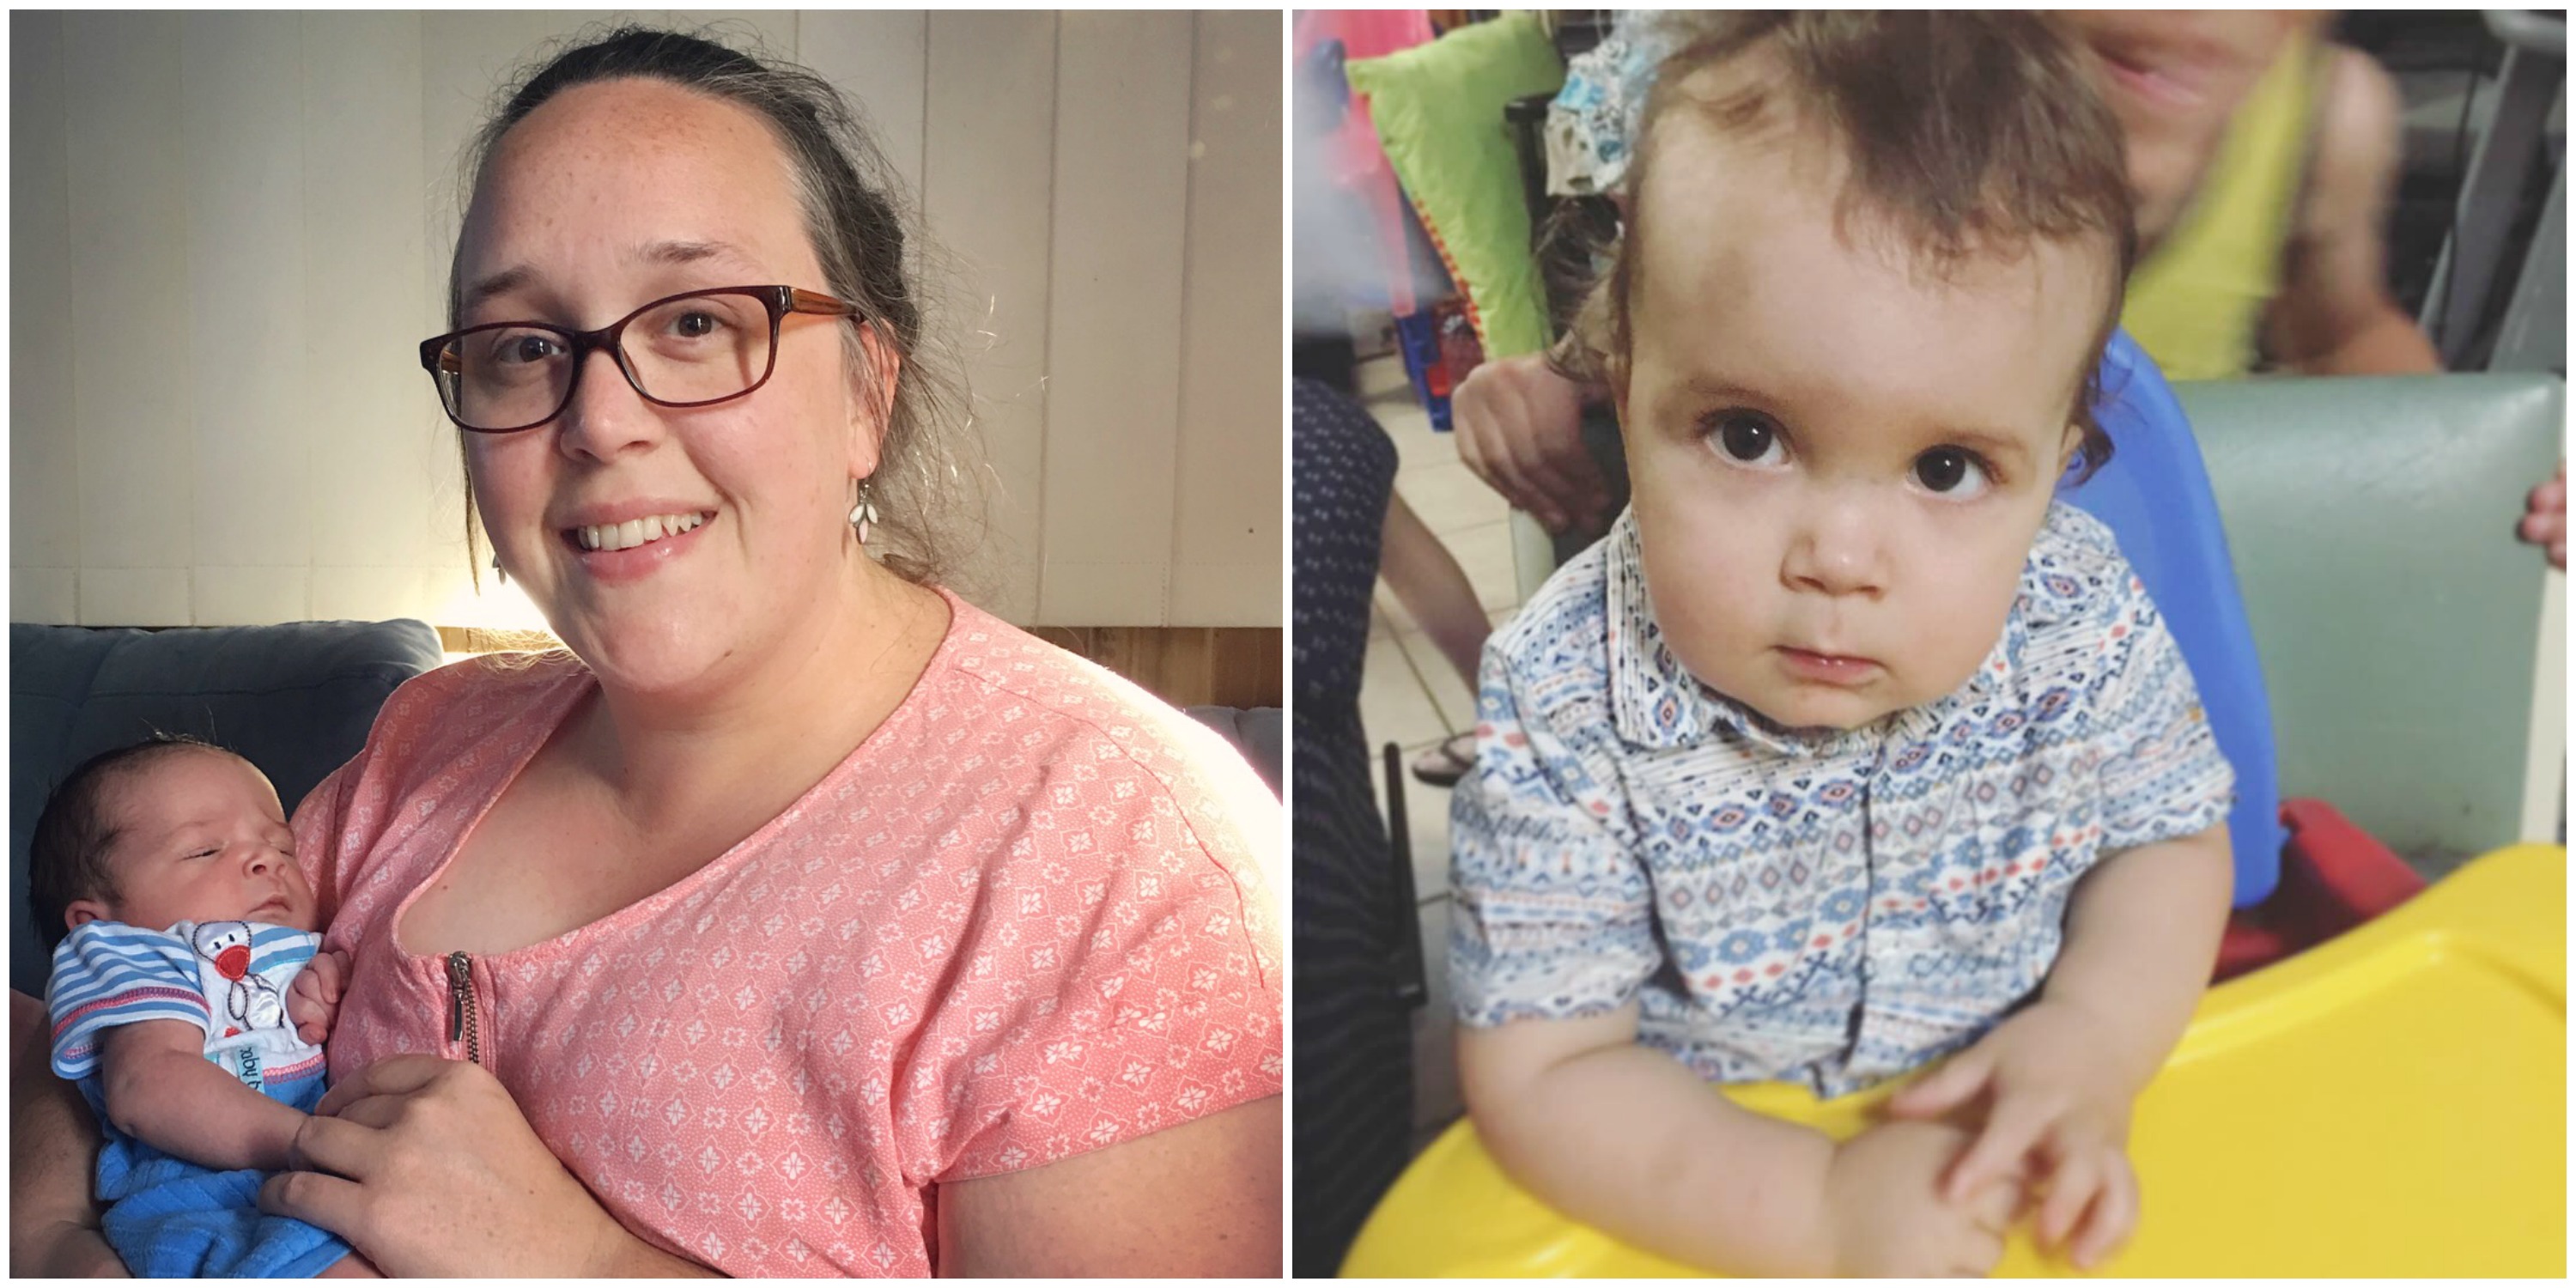
While on our cruise to The Long White Cloud, another little Rolfe entered our family! Zayne Paul arrived on the 6th, healthy, happy and endlessly squishy and sweet!

We celebrated his 1st Birthday two days ago. (Seriously, where has the time gone!)

+++

The end of January saw me finally piece together my mammoth Pixelated Rose Quilt top. I made it a priority to get it finished by months end to then begin quilting it. As of today, this quilt is half basted, roughly folded and hung loveless over a chair in our living room.

HOWEVER!! This sad outcome will change very soon! Plans are in motion for this darling to be completed this year โ€“ and very soon too! (Fingers crossed!)

February

I got a new sewing machine, baby!! Whoo!

I spent a ridiculous amount of money on a new gadget that I knew would become one of my most beloved and treasured items that I own!

Itโ€™s taken us a little while to bond and get used to each other but I think weโ€™ve got there. Weโ€™re in tune with what needs to get done, how to get it done and with what force, strength and/or delicacy the project at hand needs.

The machine I bought is a Brother PQ1500SL.

+++

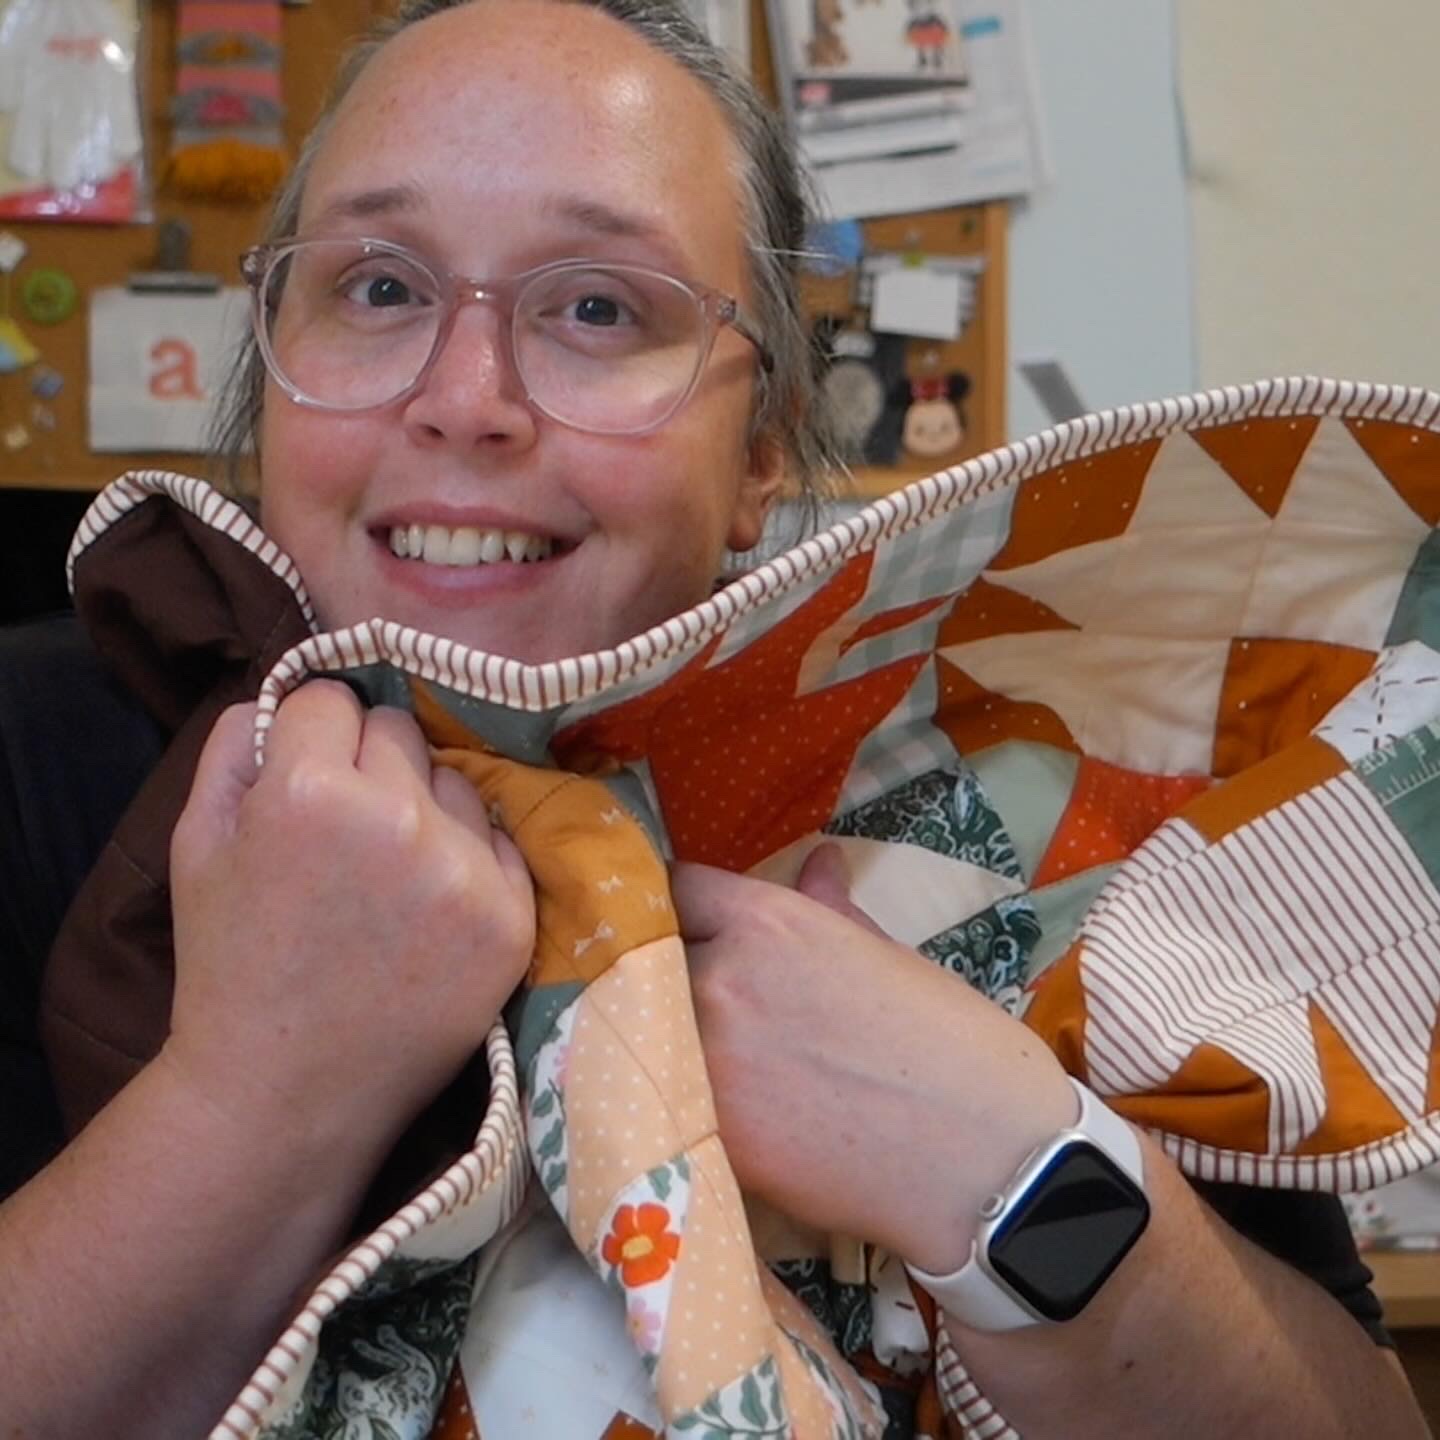
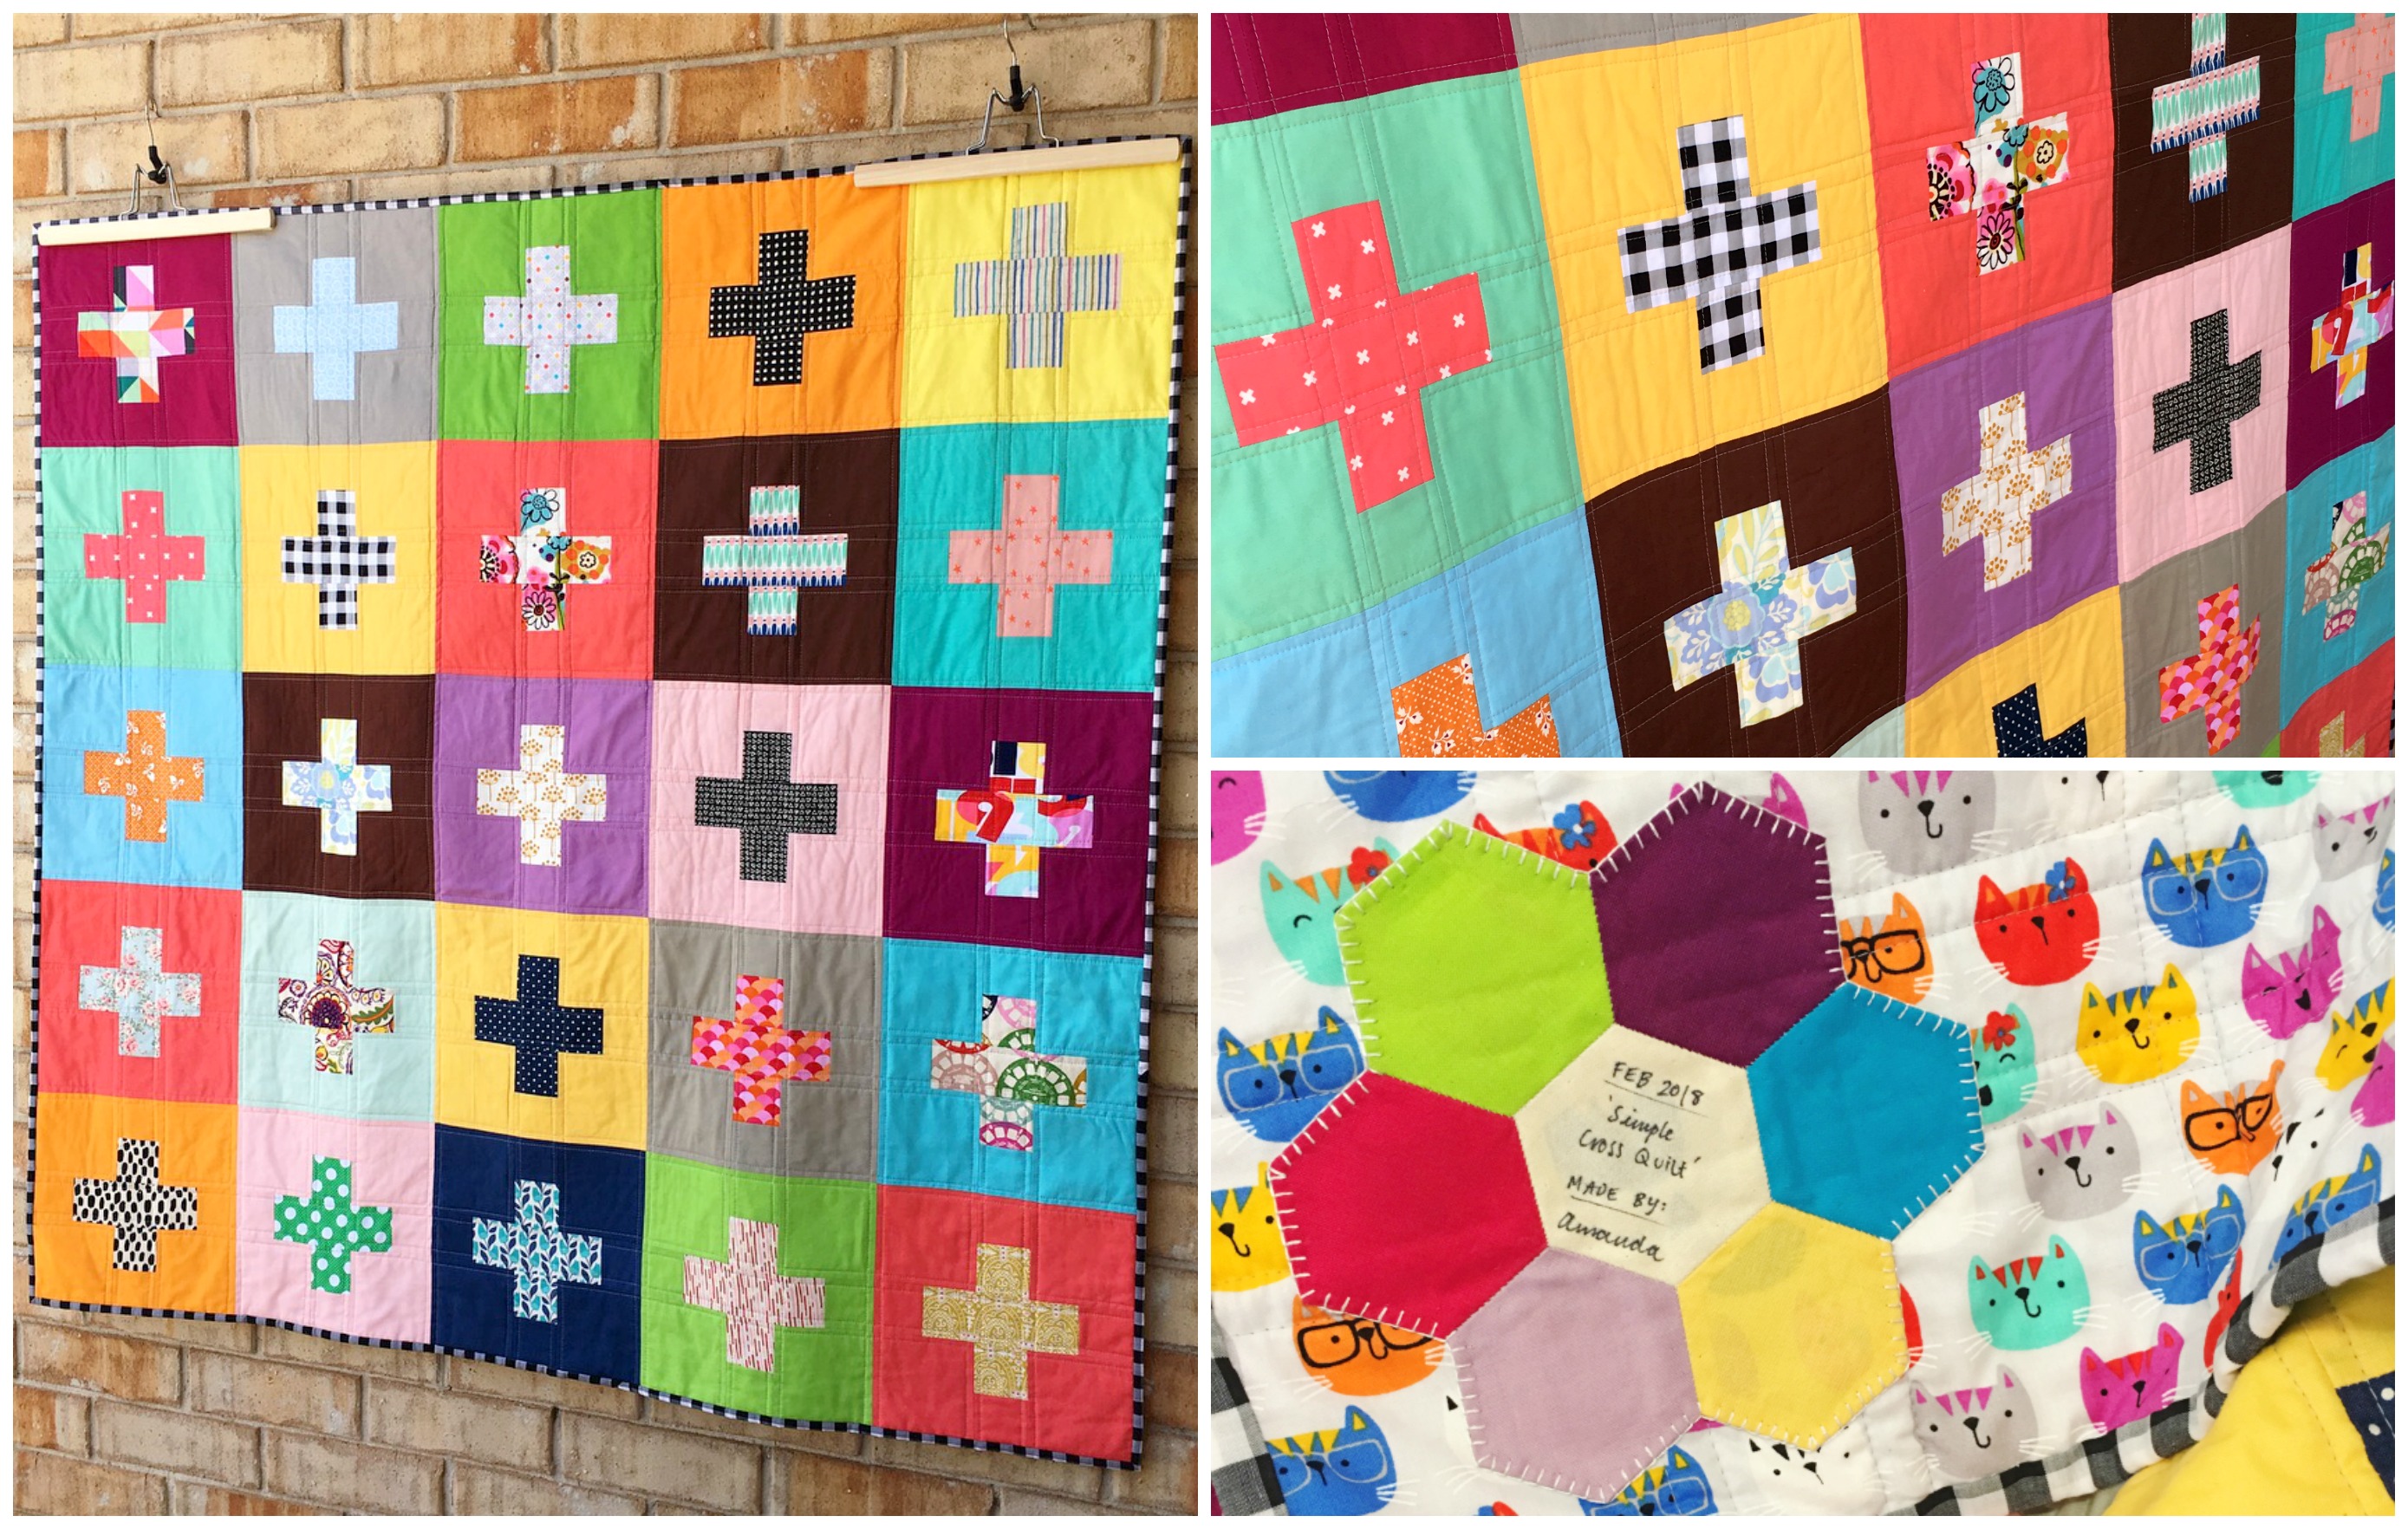
On the 1st of February, I finished piecing together an old-ish WIP I had piled in a sad and dusty corner of my sewing room. And so my Simple Cross Quilt was born! I went on to finish this about a week later, with it being the first quilt I ever quilted with my new sewing machine.

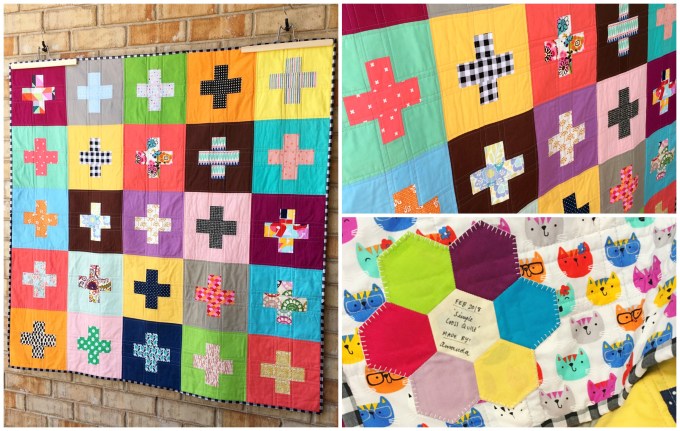
I love this quilt so much. The pops and clashes of colour and print, the fun and whimsical cat print on the back to the classic gingham binding I wrapped the quilt in.

Ohmph!! ๐Ÿ˜

Itโ€™s simplistic yet busy nature makes my heart sing and my face smile every time I see it!

+++

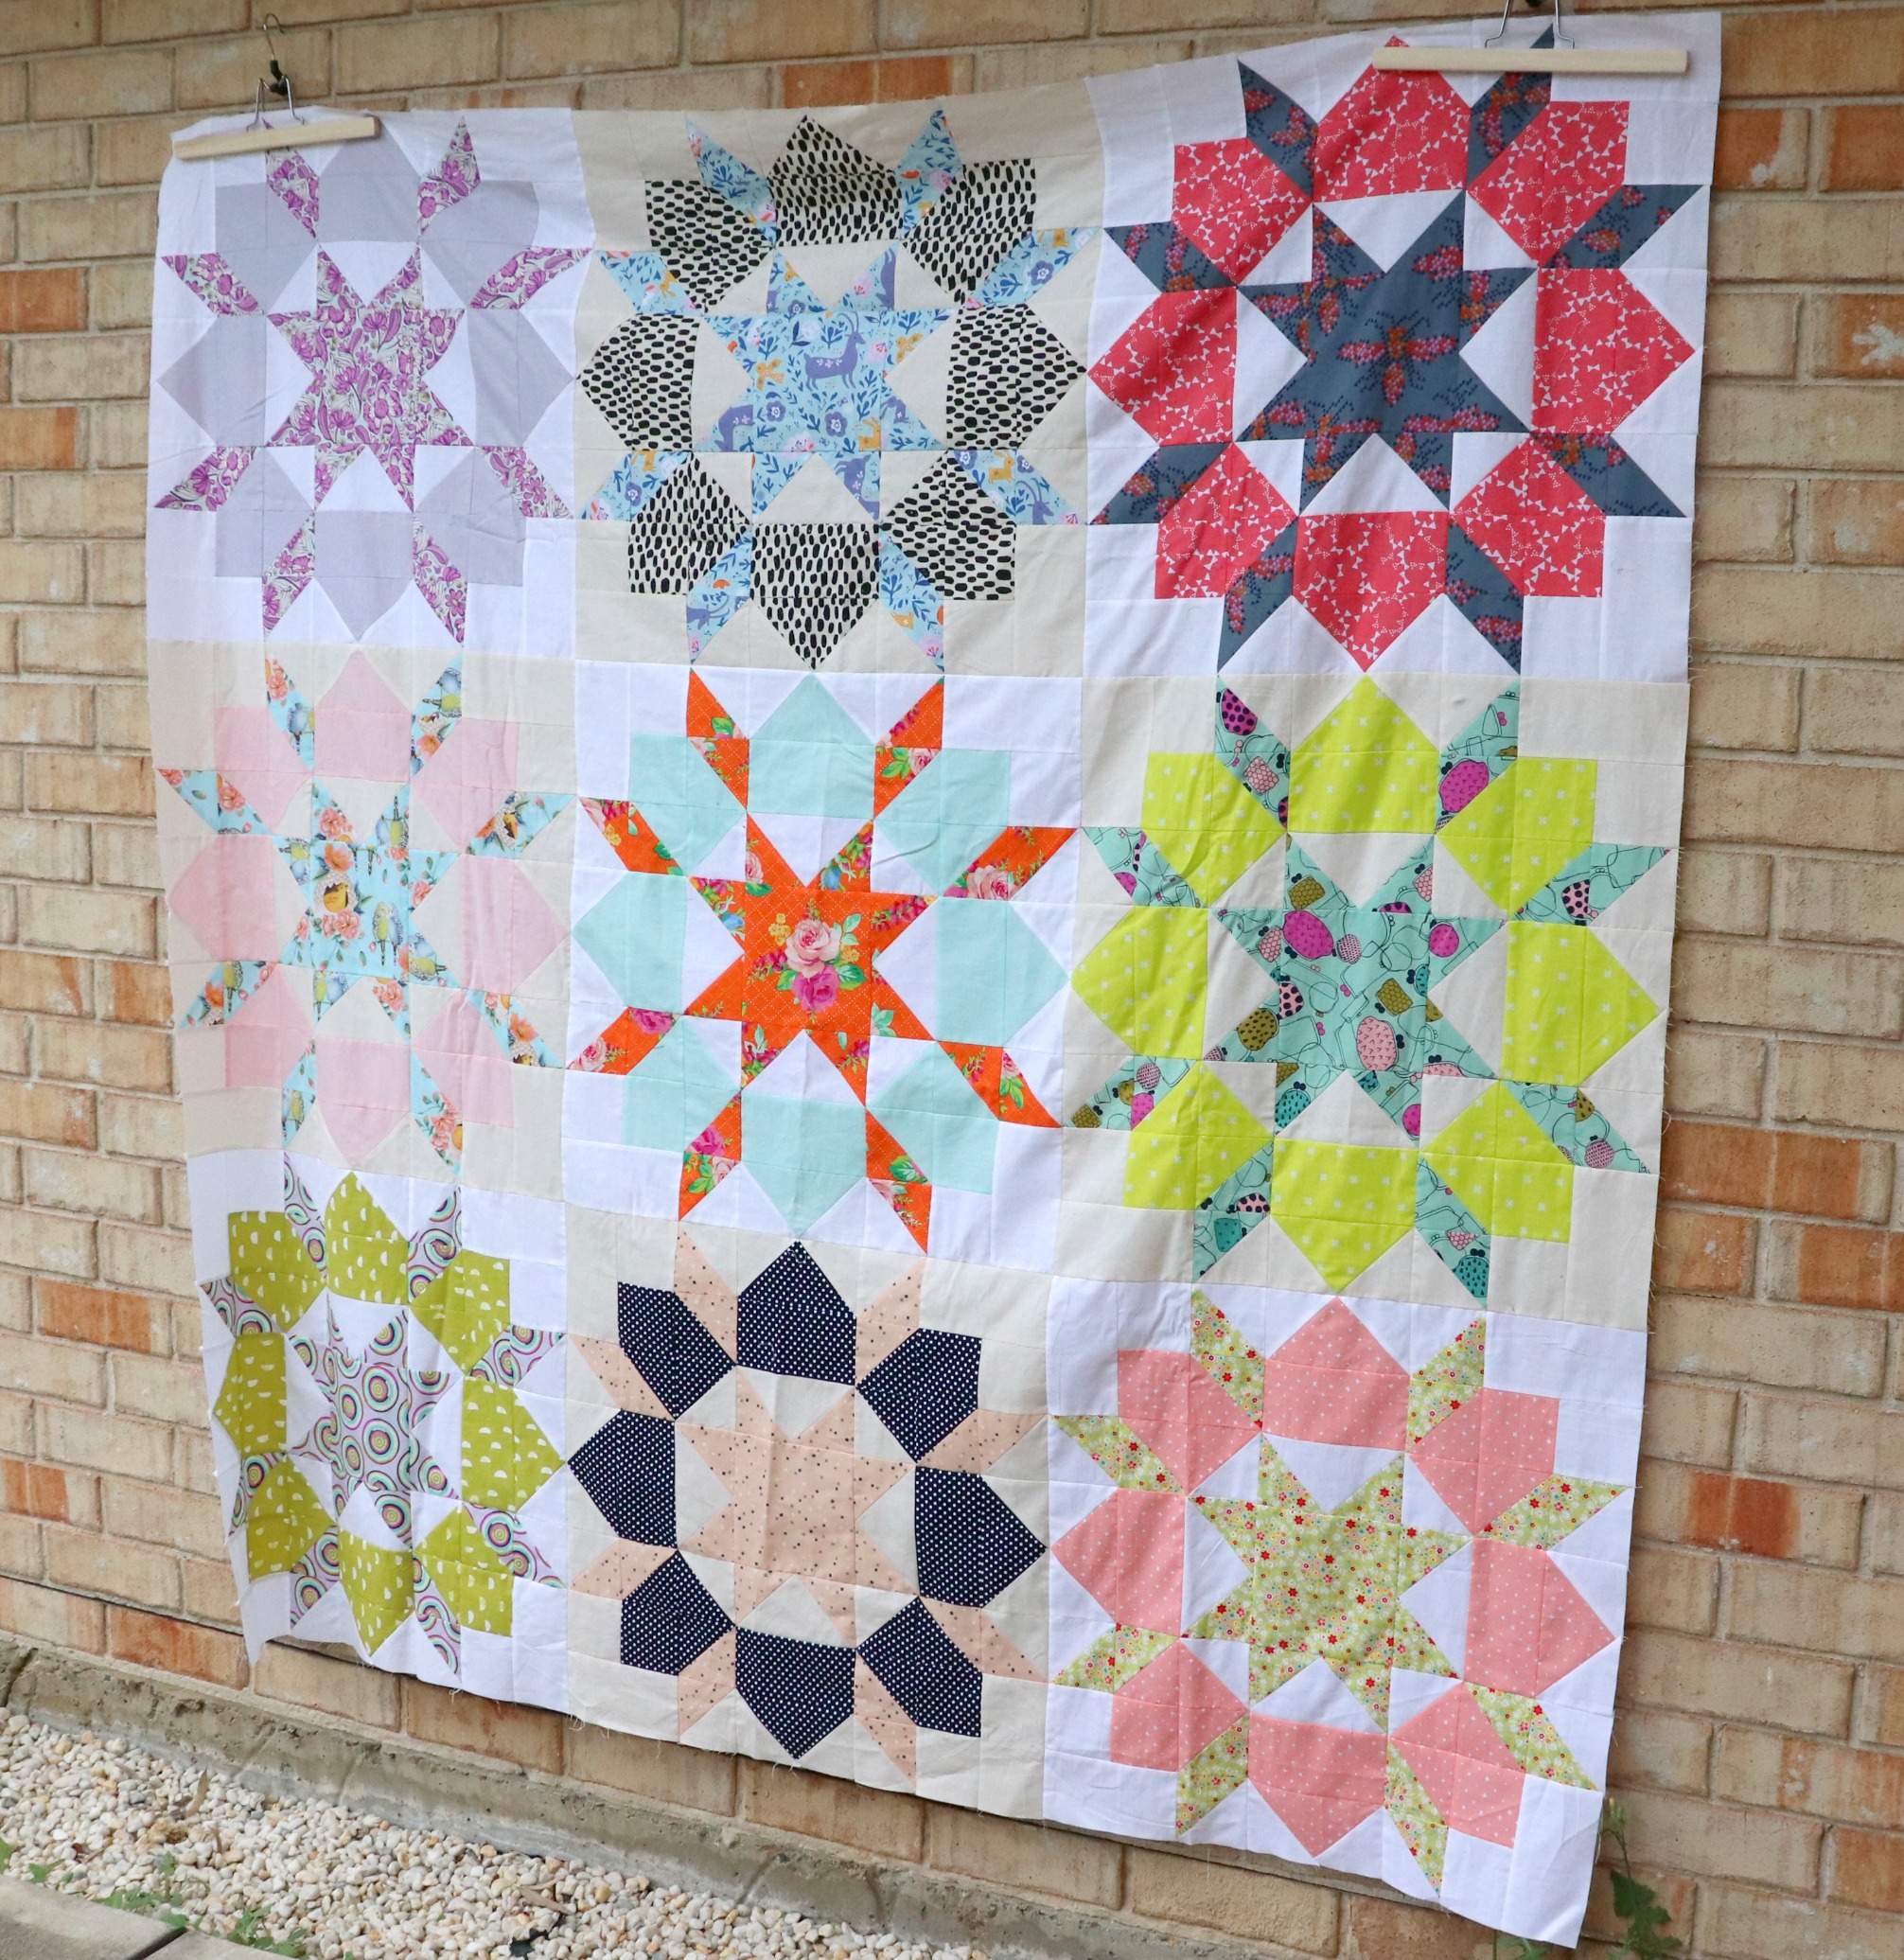
In late February I began Swooning around! Te-he! ๐Ÿ˜œ

I became more serious and put more focus into making Swoon blocks just because, you know!

It was a block Iโ€™ve also wanted to make and piece into a quilt so I took the opportunity by the… well you know what, and just cut, pieced, pressed and repeat until I had nine beautiful blocks. (These were pieced together in May and the quilt top is stilling waiting for attention from me!)

May

Cracking on to May, while a Swoon Quilt top lay in the shadows waiting for me to find it again, I started a new Quilt Along series on my YouTube channel!

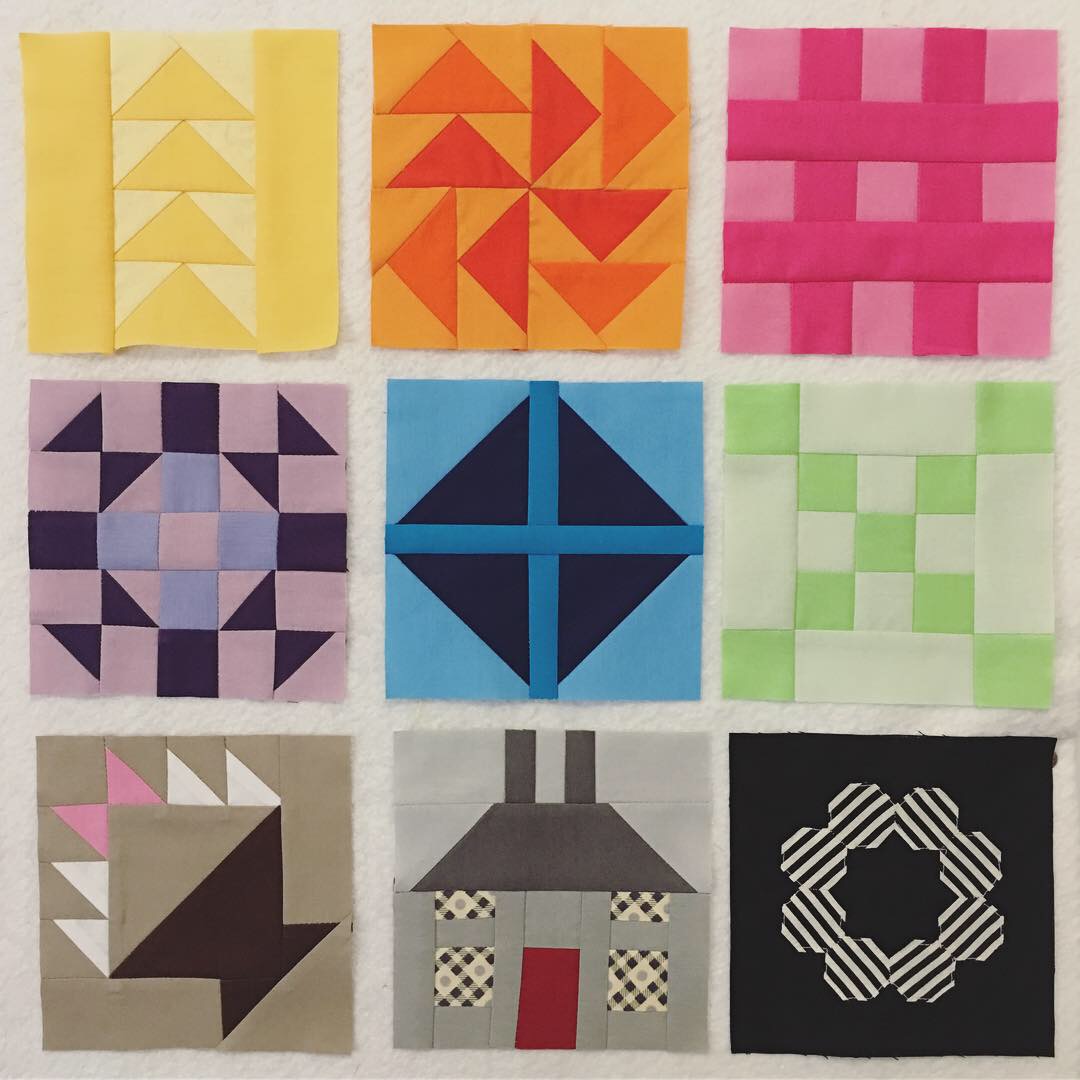
We delved into the world of mini blocks. A concept that Iโ€™ve introduced a few times on my channel in various block tutorials but never as a complete set to be then pieced together into a quilt/wallhanging.

All nine block tutorials have been made and published and now everyone is just waiting for me to get off my behind and publish the finishing steps in the QAL! (Itโ€™s coming, I promise!!)

June

This month saw me finish another WIP that had been lying unloved somewhere in a deep recess of our house!
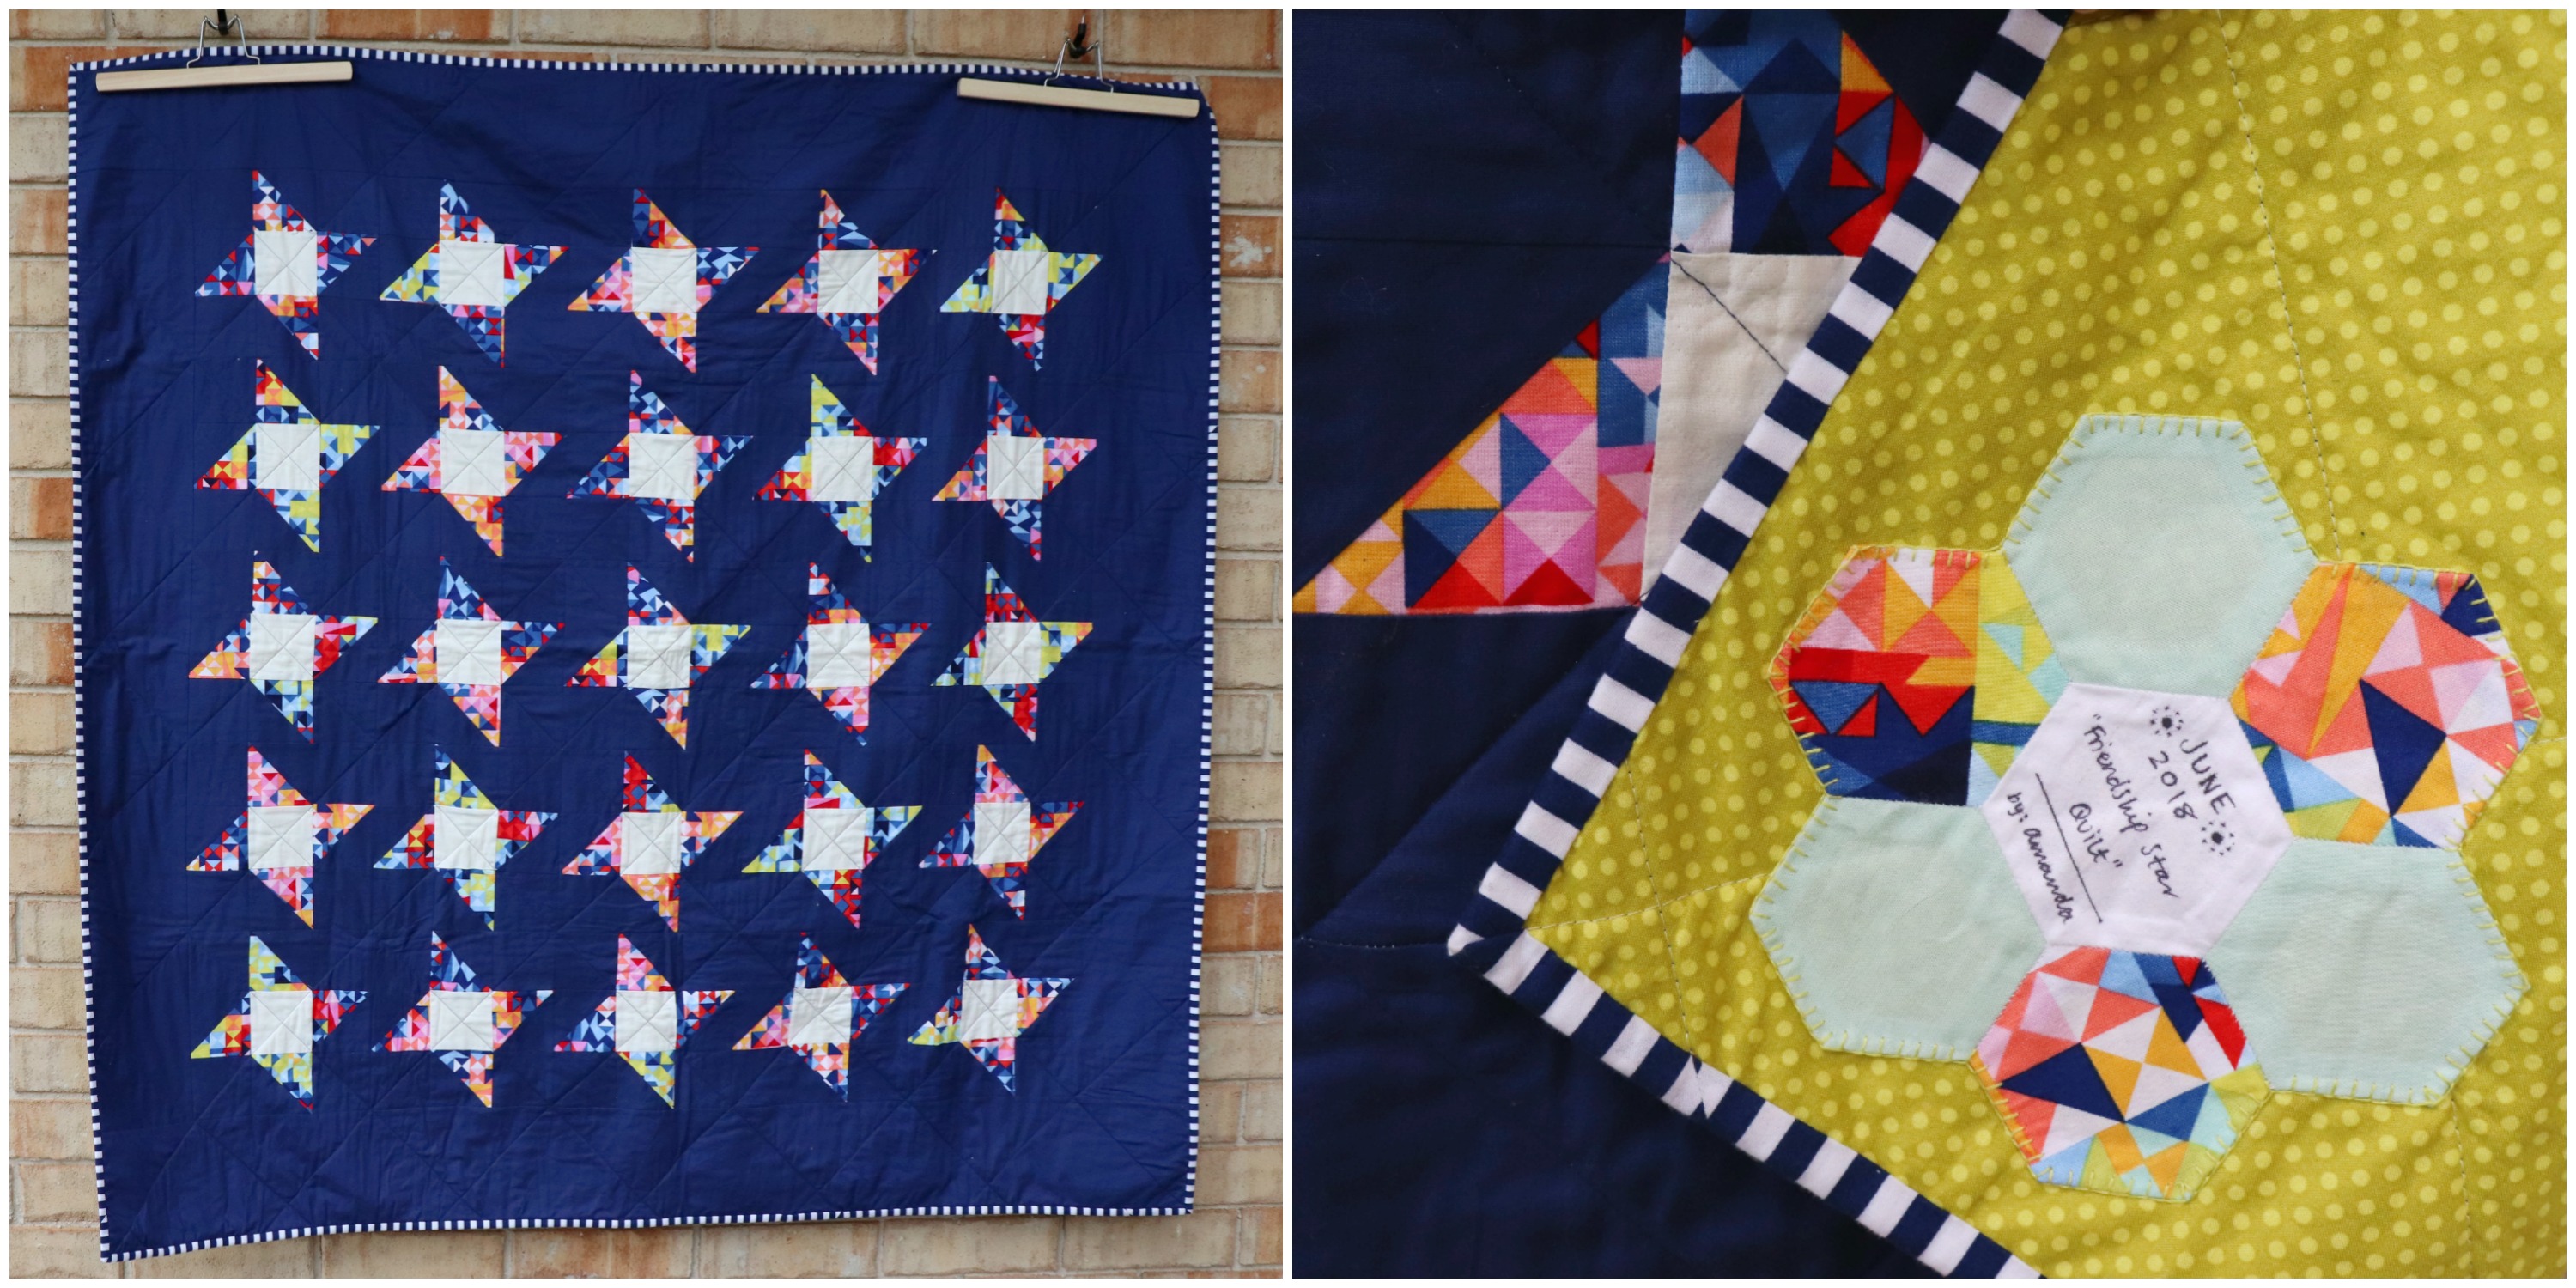
Iโ€™ve always loved this Friendship Star Quilt. The colourful geometric triangle print, the bold white square centers and then a richly dark and comforting navy background tying all of the elements together!

This quilt has been a real labour of love over the year, having been quilted once and then having all of the stitches ripped out because I hated my terrible attempt at FMQ!

The quilt has been scarred from this. At times you can see a faint messy snail trail, a ghost of where past stitches have been. I love that these lines add a history and a story to its journey of finally being finished!

The finishing touches to this quilt are perfect! The backing is spot on with the colours in the print in the blocks and the binding I used was the exact same fabric I initially was going to use when I first starting making plans for this quilt. The label is pretty perfect too if I may say!!

July

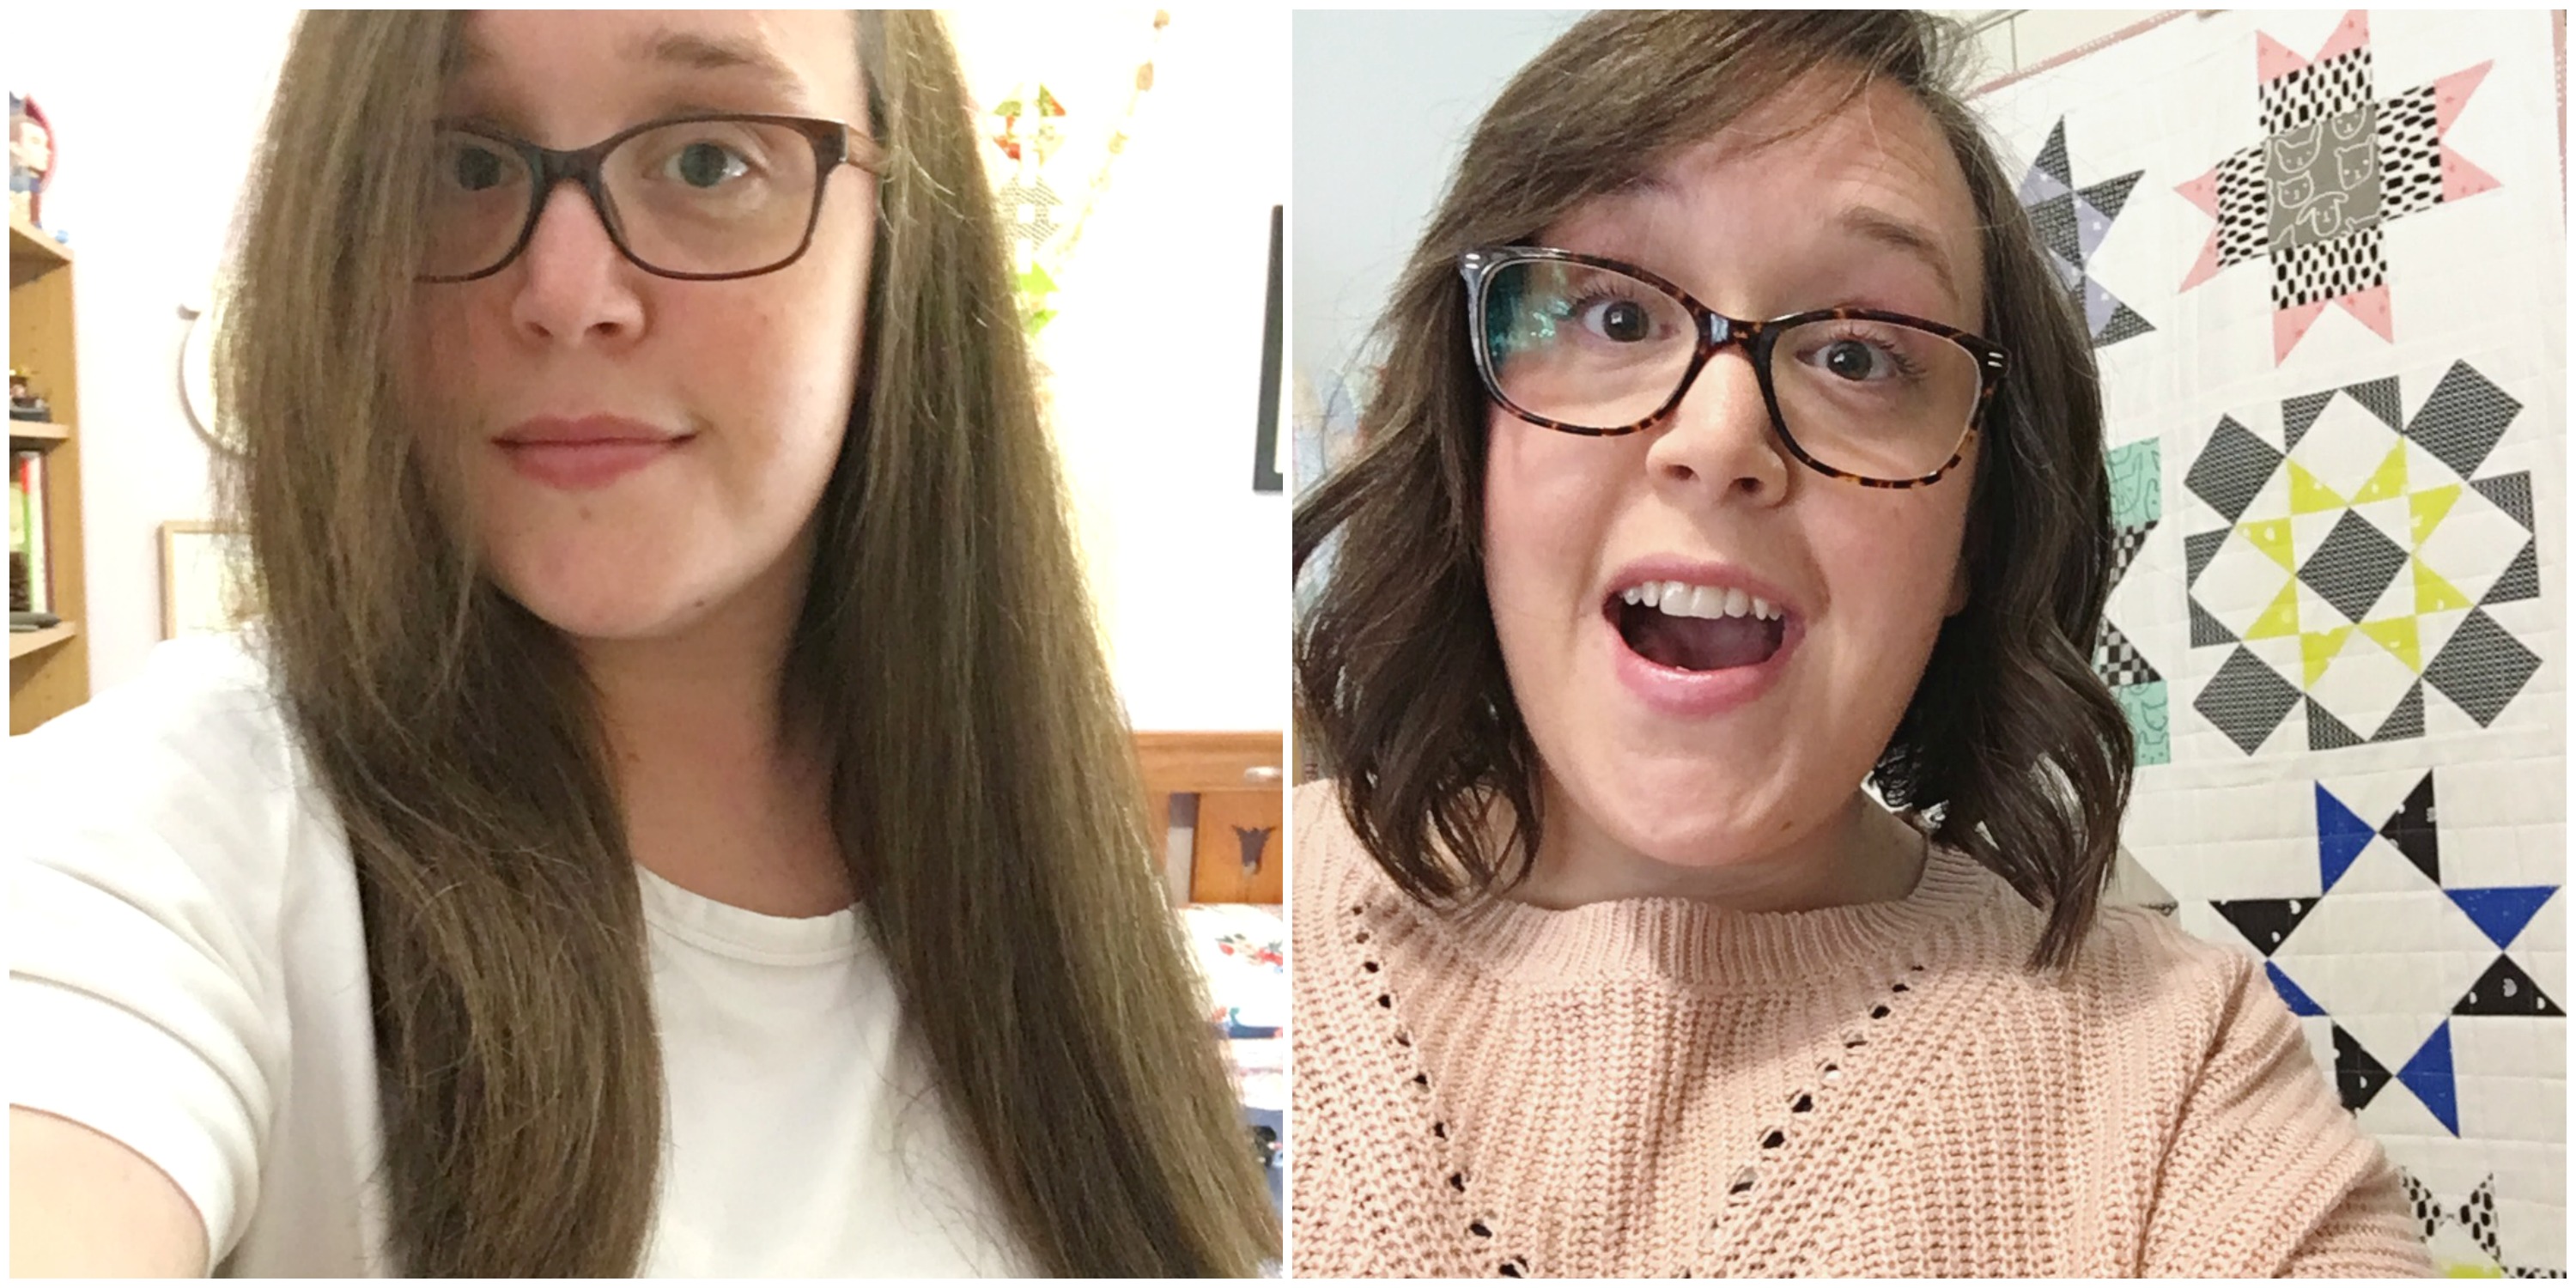
And then came July. A month where I cut off all of my thick, long and wavy hair and opted for a shorter and swishy bob cut that Iโ€™ve thankfully loved over the past 6 months!

+++

And can you believe it?! I finished piecing together another very old WIP!

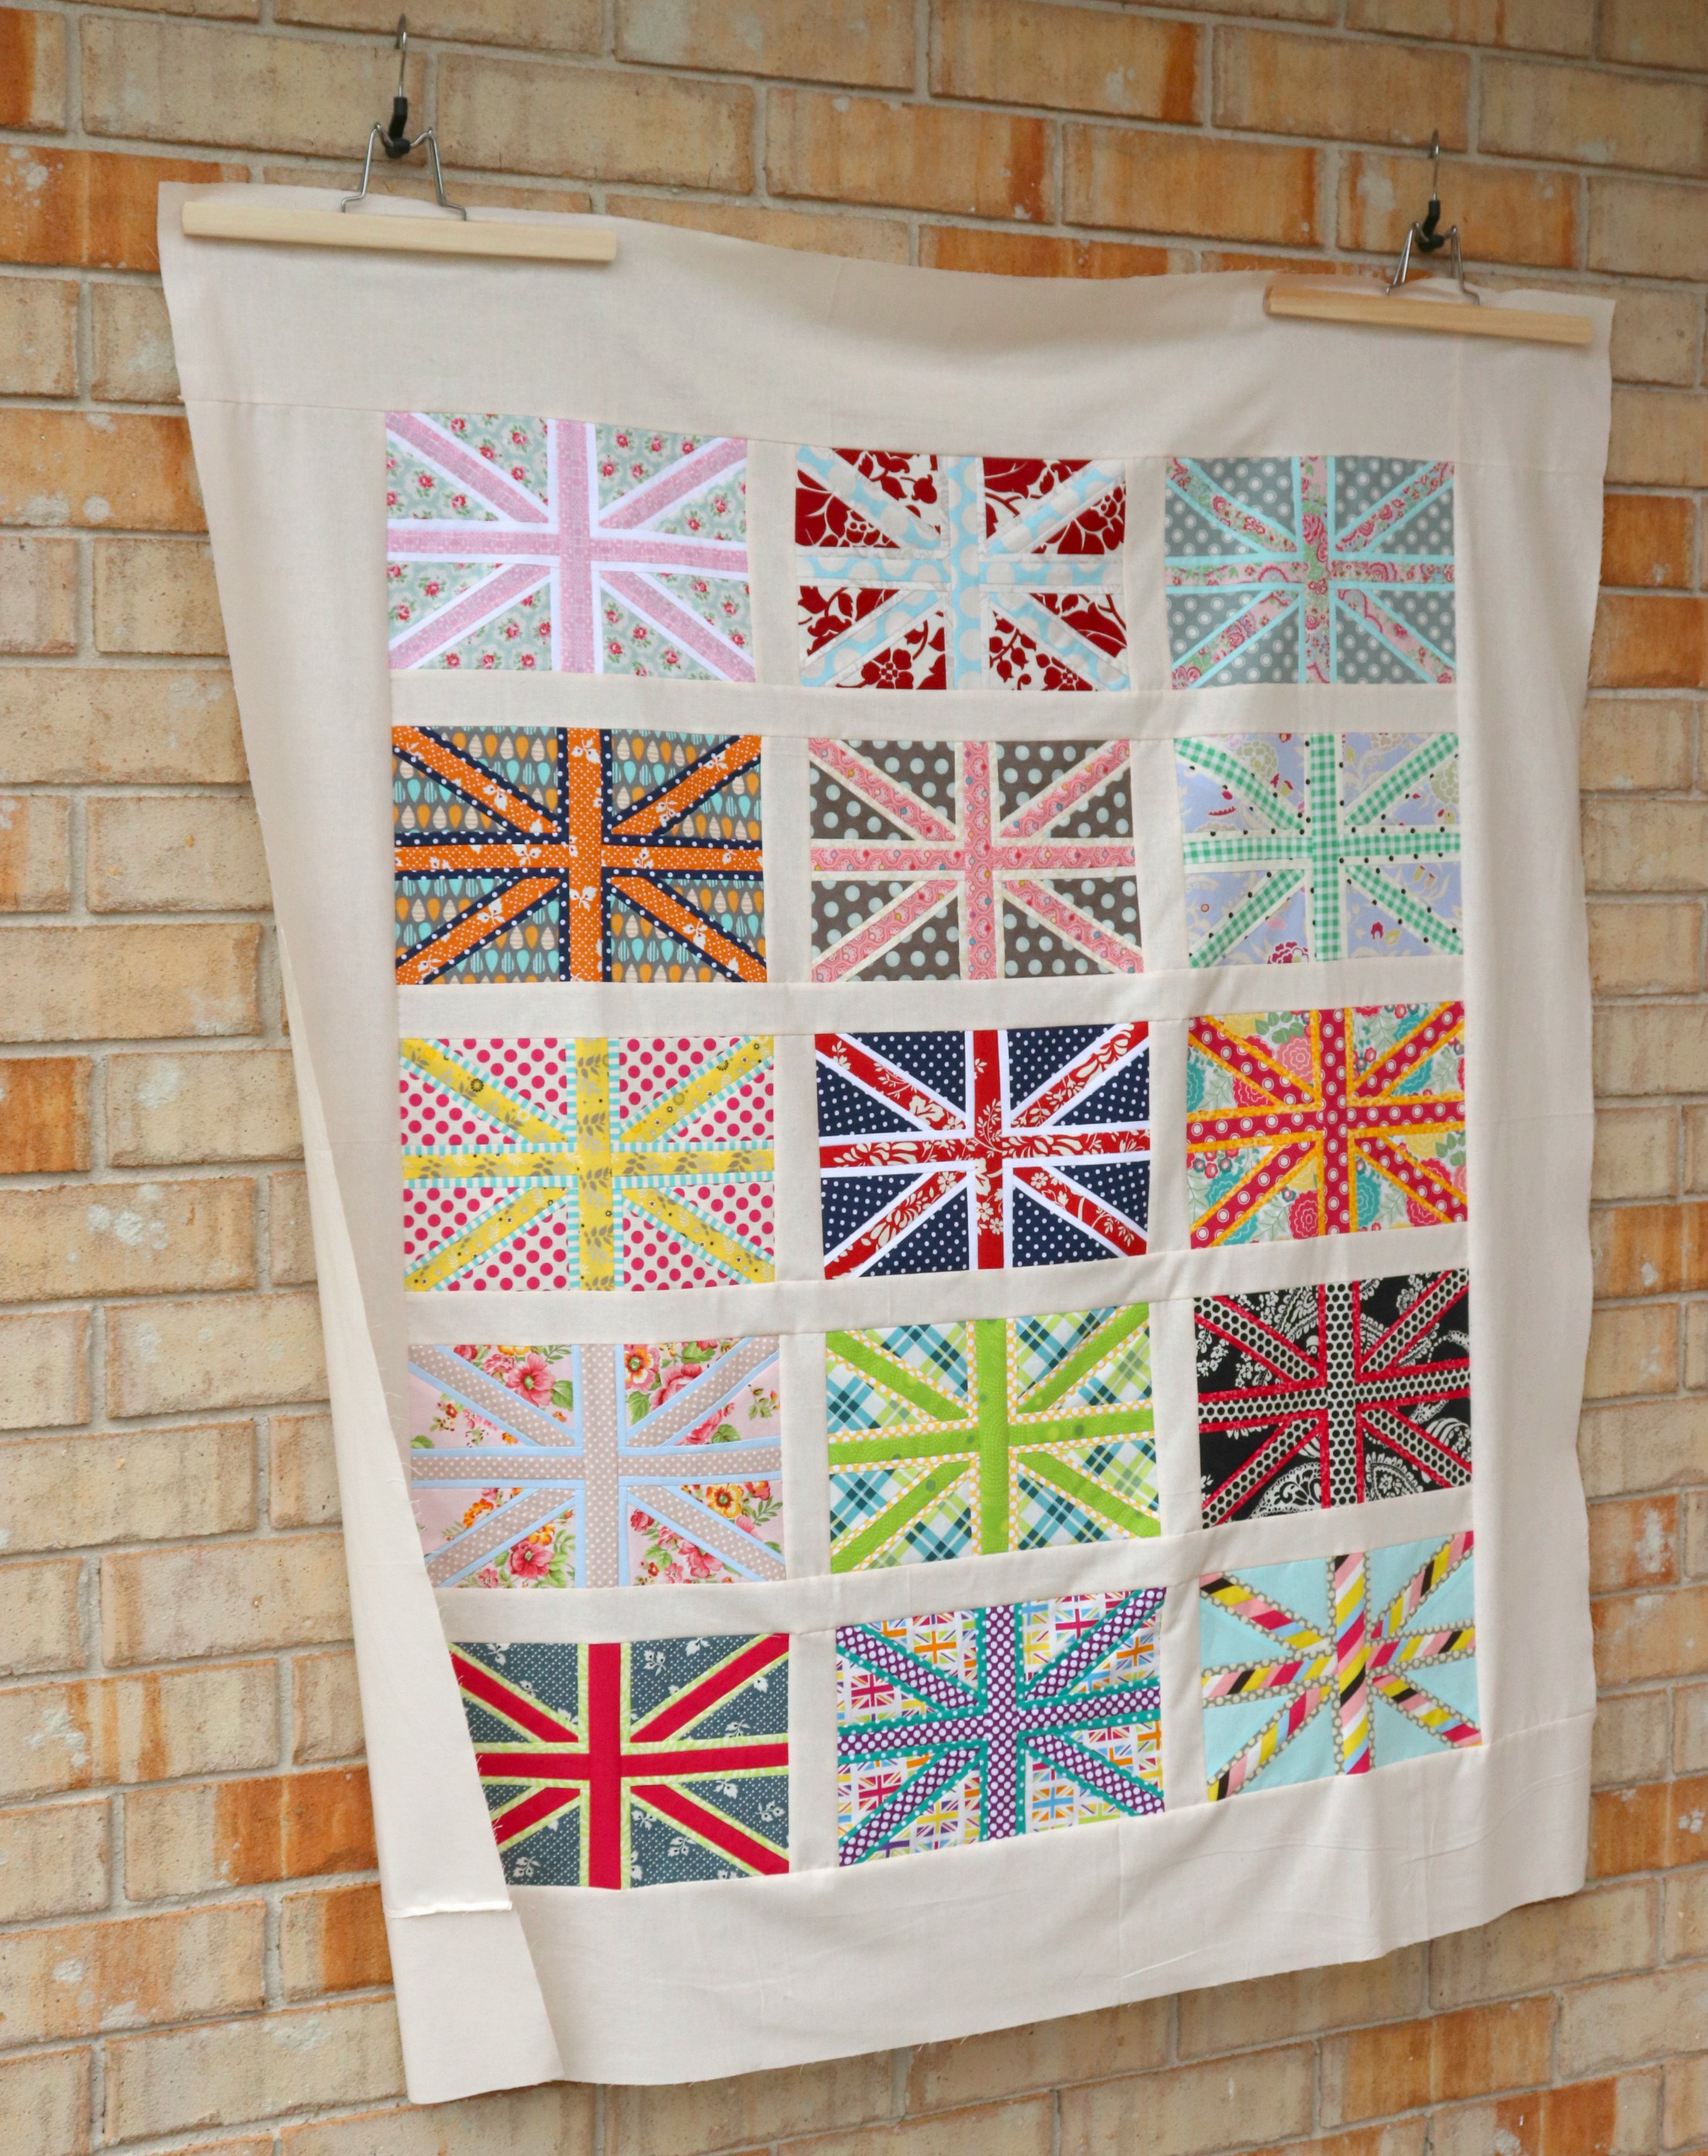
I think the very first FPP Union Jack blocks I made were back in 2012?!?! And here it is, 2018 and I finally sashed and pieced them into a beauty of a quilt top! I had completely forgot how many I had actually made and couldnโ€™t believe all of the different and fun prints I matched together.

Again, this quilt top is still hanging by (literally) for me to remember it and eventually finish it! I think I have cause for enthusiasm to finish it this year as in (quickly checks the calendar…) 7 and a half months, Iโ€™ll be on a big jet plane rocketing towards the UK!! Eeeeee!!! London baby!! ๐Ÿ‡ฌ๐Ÿ‡ง

+++

I cheekily started a new quilt top also. I began, quite out of the blue, making Lucky Star blocks. Inspired by my Simple Cross Quilt, I wanted to make another where the solid background fabrics where different in each one, with the colours clashing on either side of the blocks and creating distinctive squares and patterns.

So far, Iโ€™ve made five, with another two ready to be cut and pieced. Iโ€™m hoping to make nine blocks all up which I think will make a pretty decent sized quilt.

August

I became addicted to making colourful Hexie Flower blocks. I would sit for hours basting 2.5โ€ hexies and then stitching them into funky flower templates.

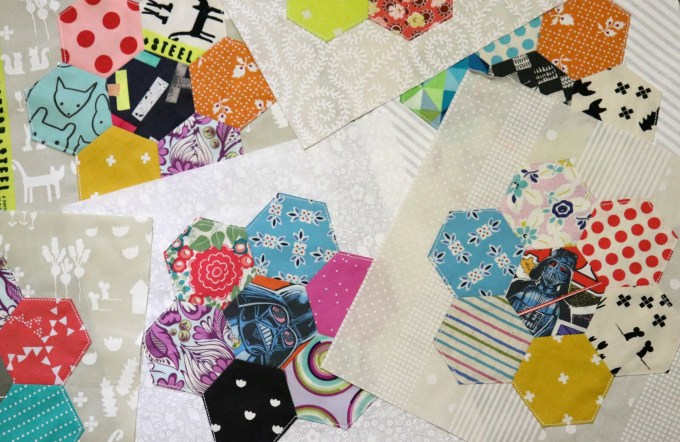
I also found a love for glue basting in lieu of using chunky and time-consuming applique paper. Donโ€™t get me wrong, I love how great HeatnBond is for applique etc, but when it comes to wanting a quick fix, so to speak, fabric basting glue is the best! ๐Ÿ‘Œ๐Ÿป

December

The months before December all went by with a blur, with nothing too exciting really happening. (The true narrative of my life.)

With December, however, comes Vlogmas! And Vlogmas very quickly turns into a month that is fast, chaotic, stressful, oh-so Christmassy and is jammed packed full of birthdays for our family!

As much as it stresses me out, I strangely and truly love doing Vlogmas. It gently and very quickly forces me to be productive, creative, savvy in my time management skills and gives me an odd sense of purpose and contentment. How people daily vlog all year round, I got no idea! My head isnโ€™t big enough to feel all of those emotions all day everyday!

During Vlogmas, I got so many things made and finished! Two projects Iโ€™ve always wanted to make were finally ticked off the list! An Advent Calendar and a Christmas Tree Skirt!

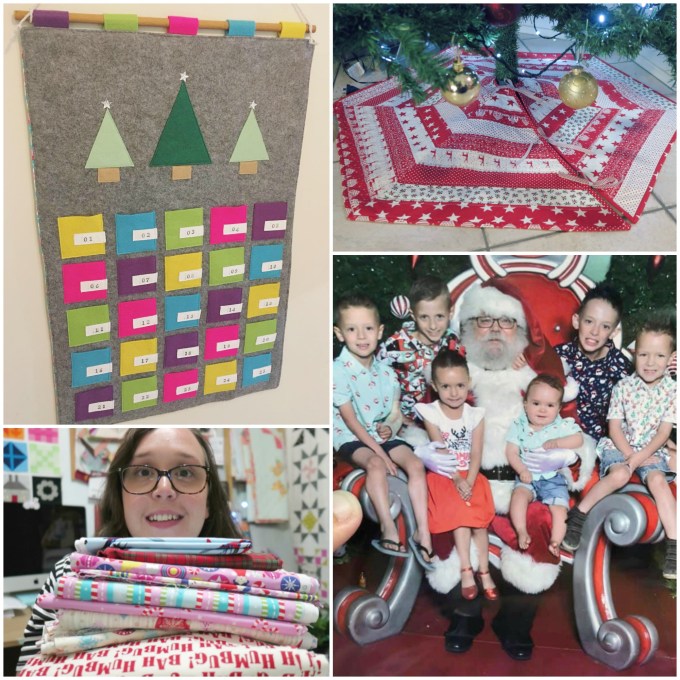
Both projects were a labour of love but so much fun to make!!

+++

And thatโ€™s kinda it…

I literally havenโ€™t sewn a thing since last year!

Iโ€™ve had a much needed break away from everything, re-assessed what I want to achieve and accomplish this year and have set the wheels in motion with a new blog theme, a new 3and3quarters logo and a set of goals that Iโ€™ll be sharing in my next post!

Bring on 2019!

xx

MINI BLOCK QAL | Block #9: Octagon Rosette

PATTERN SHEET:ย MiniBlockQAL – BLOCK9

It’s the last one, my friends. The very last block in this QAL! ๐Ÿ˜ญ

For our final block, we’re flexing our English Paper Piecing skills and taking a dabble in making octagons! (Something I’ve never done before!) Our sweet little 1″ octagons are then hand sewn into a circle, or rosette (another thing I’ve never done before!) to complete the block. Easy!

I then amped the skill level up a notch by using a directional print fabric to create a fun geometric pattern within the rosette. Such fun!

As I mention in the video, if you’re unable to source pre-made 1″ octagons, I’ve included a template in the pattern sheet for you to trace around and use. A basic lightweight card stock will do the trick as a paper template.

Also, you don’t have to use a Fabric Glue Stick like I have to baste your octagon templates and to applique your rosette to your fabric. There are plenty of other ways to do it and you’re more than welcome to do it the way you best feel confident!

I think one of the great things about this block is that there is such a freedom in how you choose to construct and finish it. For example, when sewing the edges of the rosette to the background square, you can do it either by sewing machine (straight-stitch, zig-zag stitch or something fancy and fun) or by hand (a buttonhole or blanket stitch might be nice!).

Whatever you do, I hope you enjoy making this block (It’s so much different compared to all of the other blocks we’ve made!) and you become more confident in your EPP skills! ๐Ÿ˜Š

+++

So, the next video in the series will be the last tutorial…

I’ll be wrapping it all up by showing you how:

Piece in the sashing and borders

Sandwiching the top with a batting/pellon and a backing

Whizzing it through the machine with a few quilted lines here and there

Sewing on a simple binding

Attaching a rod pocket to the back

And then finally labelling the finished wallhanging

Phew! I definitely have my work cut out for me! It’s gonna be an intense tutorial to make! But I’m excited though!! I can’t wait to see everyone’s finished projects!!

REMEMBER: Keep on sharing those blocks! (#AmandasMiniQAL / @3and3quarters)

Happy Sewing, Friends!

xx

MINI BLOCK QAL | Block #8: Cake Stand

PATTERN SHEET:ย MiniBlockQAL – BLOCK8

Can you believe it?!

We’re slowly getting to the pointy-end of the series with our second-to-last block to make!

Today’s block is another one of those traditional types that I’ve always wanted to make but just have never got around to doing it! Not anymore though! This sweet delicious little block is called Cake Stand and is sooo scrumptious and lovely, I just want to make a whole quilt out of it!

As I was coming up to the colour ‘brown’ in my own theme for this QAL, I just had to combine chocolate + cake to equal a yummy block design! The added pink and white are supposed to loosely resemble sickly sweet spiking icing on top of the cake. ๐Ÿ˜‹

So, my advice when making this block…

Be patient and take your time. And double check the position of all of your units more than once before sewing them together, just to avoid any stressful unpicking moments! (I know this from personal experience!!) This block can be deceptively tricky if you’re not paying attention!

Best of luck and enjoy making!

+++

So, yep! The next block to come will be the last in the series before we start sashing all of our beautiful blocks together!

I can’t wait to see what everyone’s will look like!!

Remember, if you want me (as well as all of the other equally talented and creative people joining in on the QAL) to see what you’re making, share them with us on Instagram using the hashtag #AmandasMiniQAL and tagging me with the handle: @3and3quarters ๐Ÿ‘๐Ÿป

Block 9 is a super-duper simple design. We’ll be using some techniques and tools that I’ve never used before in any of my previous QALs.

Should be fun, I think!! ๐Ÿ˜Š

Until then…

Happy Sewing, Friends!

xx

MINI BLOCK QAL | Block #6: Single Irish Chain

PATTERN SHEET:ย MiniBlockQAL – BLOCK6

After a few weeks between drinks, so to speak, we’re back to it and ready to plunge into Block 6 of our Mini Block QAL!

This time around, we’re making the Single Irish Chain.

FUN FACT! I’ve never made this block before until now. I’ve seen bigger versions of it here and there on many social media places and a quilt made entirely out of this block is just simply gorgeous! I’ve definitely added it to my ‘Quilts-To-Make-One-Day-When-I’ve-Got-Nothing-Else-To-Do’ list! ๐Ÿ˜‚

This block, like most in this series, is super simple to construct and gives you a really great opportunity to practice and perfect your skill in nesting seams. (You should all be pros at it by now!! ๐Ÿ˜œ)ย It’s a block that’s not too fiddly or stressful to piece and should take no time to finish!

I can’t wait to see all of the beautiful versions of this block that you’ll make! Enjoy!

+++

I’ll do my very best to try and not have such a gap of time between this block tutorial and the next! Block 7 just has to be my absolute favourite in this series and I can’t wait to get making it! It’s just the cutest!

Until then, don’t forget to share all of your blocks with me on the Instagrams using the hashtag: #AmandasMiniQAL and tagging me: @3and3quarters!

Happy Sewing, Friends!

xx

MINI BLOCK QAL | Block #4: Cain & Abel

PATTERN SHEET:ย MiniBlockQAL – BLOCK4

After navigating through winter colds, endless days/weeks at work and my terrible habit of procrastinating,ย block four is finally here!

Hoorah!

It may look tricky on the outside but once you delve into what makes this block tick, you’ll be pleasantly surprised by just how simple it actually is to piece together!

The only real ‘tricky’ bit to this one are the sizes of the pieces that make up the block. (But hey, that’s the whole point to this series isn’t it? Challenging our abilities to make gorgeous mini blocks out of mini pieces of fabrics!)

I’m 100% sure, like me, you’ll squeal and swoon over the wee 1.5″ HST blocks you’ll piece together and then stare amazingly at the intricacies of the finished block. (You can actually see me do this near the end of the tutorial!)

So like I always say when it comes these complicated looking blocks, take your time when making it; try to be as accurate as you can when cutting and sewing, relax and just simply do your best!

Made a mistake? Try again. Learn from it. Become better! ๐Ÿ‘๐Ÿป

+++

For block 5, we’ll be back to something a bit easier compared to this block. I promise!

It’ll also mark the halfway point in our Quilt Along!! (Can you believe it!?!)

Hopefully it won’t be too long between drinks (so to speak) until I can get that out to you!

As always, don’t forget to share your blocks with me using the hashtag: #AmandasMiniQAL on all the socials!

See you in the next one!

Happy Sewing!

xx

MINI BLOCK QAL | Block #3: Mini Hashtag

PATTERN SHEET:ย MiniBlockQAL – BLOCK3

Let me dive straight in and introduce you to the Mini Hashtag Block, our third in my Mini Block QAL!

You know, I actually never realised just how quick and simple this little block was to cut and piece together! It seems like I blinked and it was miraculously sitting in front of me! (Almost like a ‘I Dream of Jeannie’ type of situation!) You’ll know what I mean once you make it yourself! It’ll be a ten minute job, easy! ๐Ÿ˜œ

Totally have fun picking fabrics for this little beauty! Try to choose two really stark and contrasting fabrics/prints/colours to really make that Hashtag design POP!

+++

Start preparing yourselves for the next block – we’re delving into trickier waters and playing with a block saturated with itty-bitty HSTs and squares! It’ll be fun, I promise!!

But before that, don’t forget to share your finished Mini Hashtag Blocks with me using the ‘official’ hashtag – #AmandasMiniQAL – over on Instagram, Facebook, Twitter or wherever it tickles your fancy! (Also, include my handle: @3and3quarters and I’ll definitely see it! ๐Ÿ˜œ)

Until then Friends,

Happy Sewing!!

xx

MINI BLOCK QAL | Block #2: Flying Dutchman

PATTERN SHEET:ย MiniBlockQAL – BLOCK2

Woot! Block two is a little beauty!

This darling orange filled triangle maze is called the Flying Dutchman. Made entirely of flying geese units, you can choose to make a statement with the centre triangles (make that pinwheel standout, honey!) or go real low-key and do all of your F.G units the same! (As always) The choice is yours!!

FYI, this block is slightly tricky to piece (obvs because of it’s itty-bitty size!) so be really aware of keeping to a 1/4″ seam each time you’re at the sewing machine and make sure to nest that middle seam as close as possible to get a really crisp pinwheel centre. Do your best, learn along the way and don’t be afraid to make mistakes! ๐Ÿ˜Š

+++

Keep on sharing your blocks with me by using the hashtag:ย #AmandasMiniQAL or tagging me with @3and3quarters on Instagram and Facebook.

All of your first blocks were beautiful!! I love that everyone is doing something different while challenging and enjoying themselves along the way!! Yay!

Block three will be a fun one! I’ve already pulled my fabrics out for that one and can’t wait to share it with you!! (Here’s a clue for you: #) ๐Ÿ˜œ

Happy Sewing, Friends!!

xx

MINI BLOCK QAL | Block #1: Flying Geese

PATTERN SHEET:ย MiniBlockQAL – BLOCK1

And we’re on our way! Let’s get in to making Block 1!

This one is simply called ‘Flying Geese’ as it features four lovely little Flying Geese sweetly stacked in the centre and then framed by two chunky rectangles on either side.

One of the great things about making mini blocks is that they take a flash to make – literally! As soon as you’ve cut the tiny pieces out, you’ve magically made a tiny block that you’ll squeal all over due to it’s itty-bitty size! But let’s not romanticise it too much! A high level of concentration, patience and accuracy is still needed to create a successful block!

As mentioned in my Introduction blog post, I’m colour-blocking each of my minis, hoping to achieve a rainbow effect as the finished result. Therefore, my first block has been made using two contrasting yellow solid prints. Feel free to either follow the same idea as me or finally have an excuse to break into that FQ bundle you’ve been hoarding away since forever! Be creative, be free and have fun with your fabric selections!

As always, you’ll find all of the written measurement and cutting instructions in the pattern sheet linked above.

+++

I’ll do my best to get Block 2 out to you as soon as I can. It’s another one heavily featuring Flying Geese, so brush up on your piecing skills with Block 1 so that Block 2 will come together perfectly! (Or as perfectly as you can – no pressure here – just do your best!)

Remember to share your finished blocks on your favourite social media platforms using the hashtag – #AmandasMiniQAL – so that we can all see what each other is up to and spread some encouragement and positivity! I can’t wait to see all of your blocks!!

Also, if you have any questions about the Quilt Along, shoot them my way and I’ll try my best to answer them as soon as I can and to the best of my ability! ๐Ÿ˜Š

See you soon for Block 2!

Happy Sewing, Friends!

xx

INTRODUCING: A Mini Block Quilt Along!

Who’s ready for a new Quilt Along?!?!?!

MEEEEE!! ๐Ÿ™‹๐Ÿป

Yes! Quilt Along no.4 is here and ready to launch! ๐ŸŽ‰

If you didn’t know by now, this time around we’re doing a Mini Block version! And I’m super excited to get it started!

Here are some of the deets you need to know:

Final Layout (This may change slightly…)

Firstly, all nine blocks in the Quilt Along will finish at approx. 5.5″ or 5″ once pieced altogether.

The theme of my Mini Block Quilt is rainbow! Each block will be colour blocked to a specific solid fabric colour so that the end result will look a little like the diagram above. (Fingers crossed!!)ย Please feel free to make yours any theme you want! Scrappy, matchy-matchy, black and white – anything! – the choice is completely up to you!

The blocks are 100% fat quarter, pre-cut bundle and meterage/yardage friendly! (Jelly Rolls and Charm Packs can work, but a few blocks will require bigger pieces of fabric than a 2.5″-5″ strips/pieces.) You will need additional fabric for the sashing & borders (I’m using a white solid), for the backing and binding along with a piece of cotton/bamboo/blended batting.

(NB: The following are estimated measurements and may slightly change as the Quilt Along progresses.)

For the blocks: any type fat quarter bundles etc will be perfect – prints & colours are your choice!

For the sashing & binding: 1 metre/1 yard x WOF* of a solid or print fabricย (112cm/44″) –ย again, the choice is yours!

For the backing & binding: 90cmxWOF* (35″xWOF)ย of each

For the binding: 30cmxWOF* (12″x44″)

For the rod pocket:ย 12cmx76cm (4.5″x30″) – fabric matching the backing

FINISHED MINI BLOCK QUILT SIZE: 80cmx80cm (31.5″x31.5″) estimate

The techniques I’ll be covering in the Quilt Along include: piecing (HSTs** and Flying Geese), English Paper Piecing, basting, quilting, attaching a binding, label and an optional rod pocket.

As always, each block tutorial will be accompanied by a pattern sheet featuring all of the measurement and cutting information that can be easily downloaded and printed out. There will also be a dedicated playlist for this Quilt Along on my YouTube channel that you can easily click and have all of the tutorials together in one place.

And finally, I want to take some space to acknowledge where I got my inspiration and details for each block… A wonderful book that resides in my Quilt Book library: ‘130 Mini Quilt Blocks’ by Susan Briscoe. I absolutely love this book! It’s full of sweet little block designs that range from the traditional, to the modern and to the real weird and a bit wacky! Most blocks in the book measure around the 5″ mark, a few are smaller while there are a couple that finish around the 6″-7″ mark. It’s a fab little book for inspiration and ideas and I’d definitely encourage you to check it out if mini blocks are your kinda thing!

+++

I think that’s everything I need to let you know right now…

I’ve decided not to promise on getting a new block tutorial out every week or anything as my work schedule is always up-in-the-air (the joys of casual work!) and I can never be sure of when I have the time to get content made etc. (Sorry in advance!)

If there are any questions you have about the series, what blocks we’ll be making, what fabrics and notions you’ll need – anything! – please don’t hesitate to send me an email to: 3and3quarters@gmail.com and I’ll do my best to answer you as soon as I can!

Also, I’ll be doing another hashtag on Instagram for you guys to use so we can all see each others blocks and spread some encouragement and positivity! Note this down lovelies – the hashtag for this Quilt Along will be #AmandasMiniQAL – real original, I know, but I wanted it to be something simple and easy to remember and type in! ๐Ÿ˜œ

Block #1 will be up very, very, very soon!!!

I hope you’ll join in on the fun, learn some new stuff along the way and make a gorgeous little Mini Quilt that you’ll love!

Happy Sewing, Friends!

xx

*WOF = Width of Fabric

**HSTs = Half Square Triangles

PS. Here’s the intro video if you’re interested in watching that too!