I think for starters, I’m still so blown away by how much support and involvement I had from all of you in each of the past series! The possibility of another one being so successful is both very exciting and extremely daunting!
Now, I don’t want to get you too excited just yet! Unfortunately, there won’t be another QAL for a good couple of months… Once I finish up my Floristry course in June, I’ll be sure to get the ball rolling as soon as possible!
But in the meantime, let’s brainstorm some ideas together so that I can gauge your interest in what kind of quilt you would like to make!
Last year I came very close to doing a Christmas theme one with some festive appliques and colour combinations! Another suggestion I’ve had is to do a Mini Quilt Blocks sampler due to all of the fun little mini blocks I’ve shared and love! I also like the idea of perhaps doing another sampler with blocks that have star themes eg. Ohio Star, Diamond Star, Lemoyne Star, Lone Star etc.
So what I thought, to help me see what you guys think, WordPress have a fancy application where I can add a Poll to my post that will allow you to take a vote on what you like best! So I’m gonna give it a go and see if it’s a successful tool for me to see what you guys are most interested in!
The poll closes in a week’s time (12th May 2016), so cast you vote or add another suggestion that you would love to do and we’ll see what happens!
+++
So that’s it for today my Friends. Join in on the poll whether or not you’re likely to join in on the fun when it rolls into action, I don’t mind! Any feedback is good feedback in my opinion!
Happy Polling, Friends!
xx
PS. Also, comment below with any fabric ranges or lines from your favourite Fabric Houses (eg. Moda, Tula Pink, RJR Fabrics, Riley Blake, FQS etc.) that you would like me to make with next! I would love to be able to use fabrics that everyone where ever you are in the world has some type of access to buy and use along with me.
What a wonderful day! You wanna know why? Cos it’s the final step in finishing our quilt!! Yay!!
In part six, we find out how to make and attach a quilt label so that we can officially say that our quilt is finished!
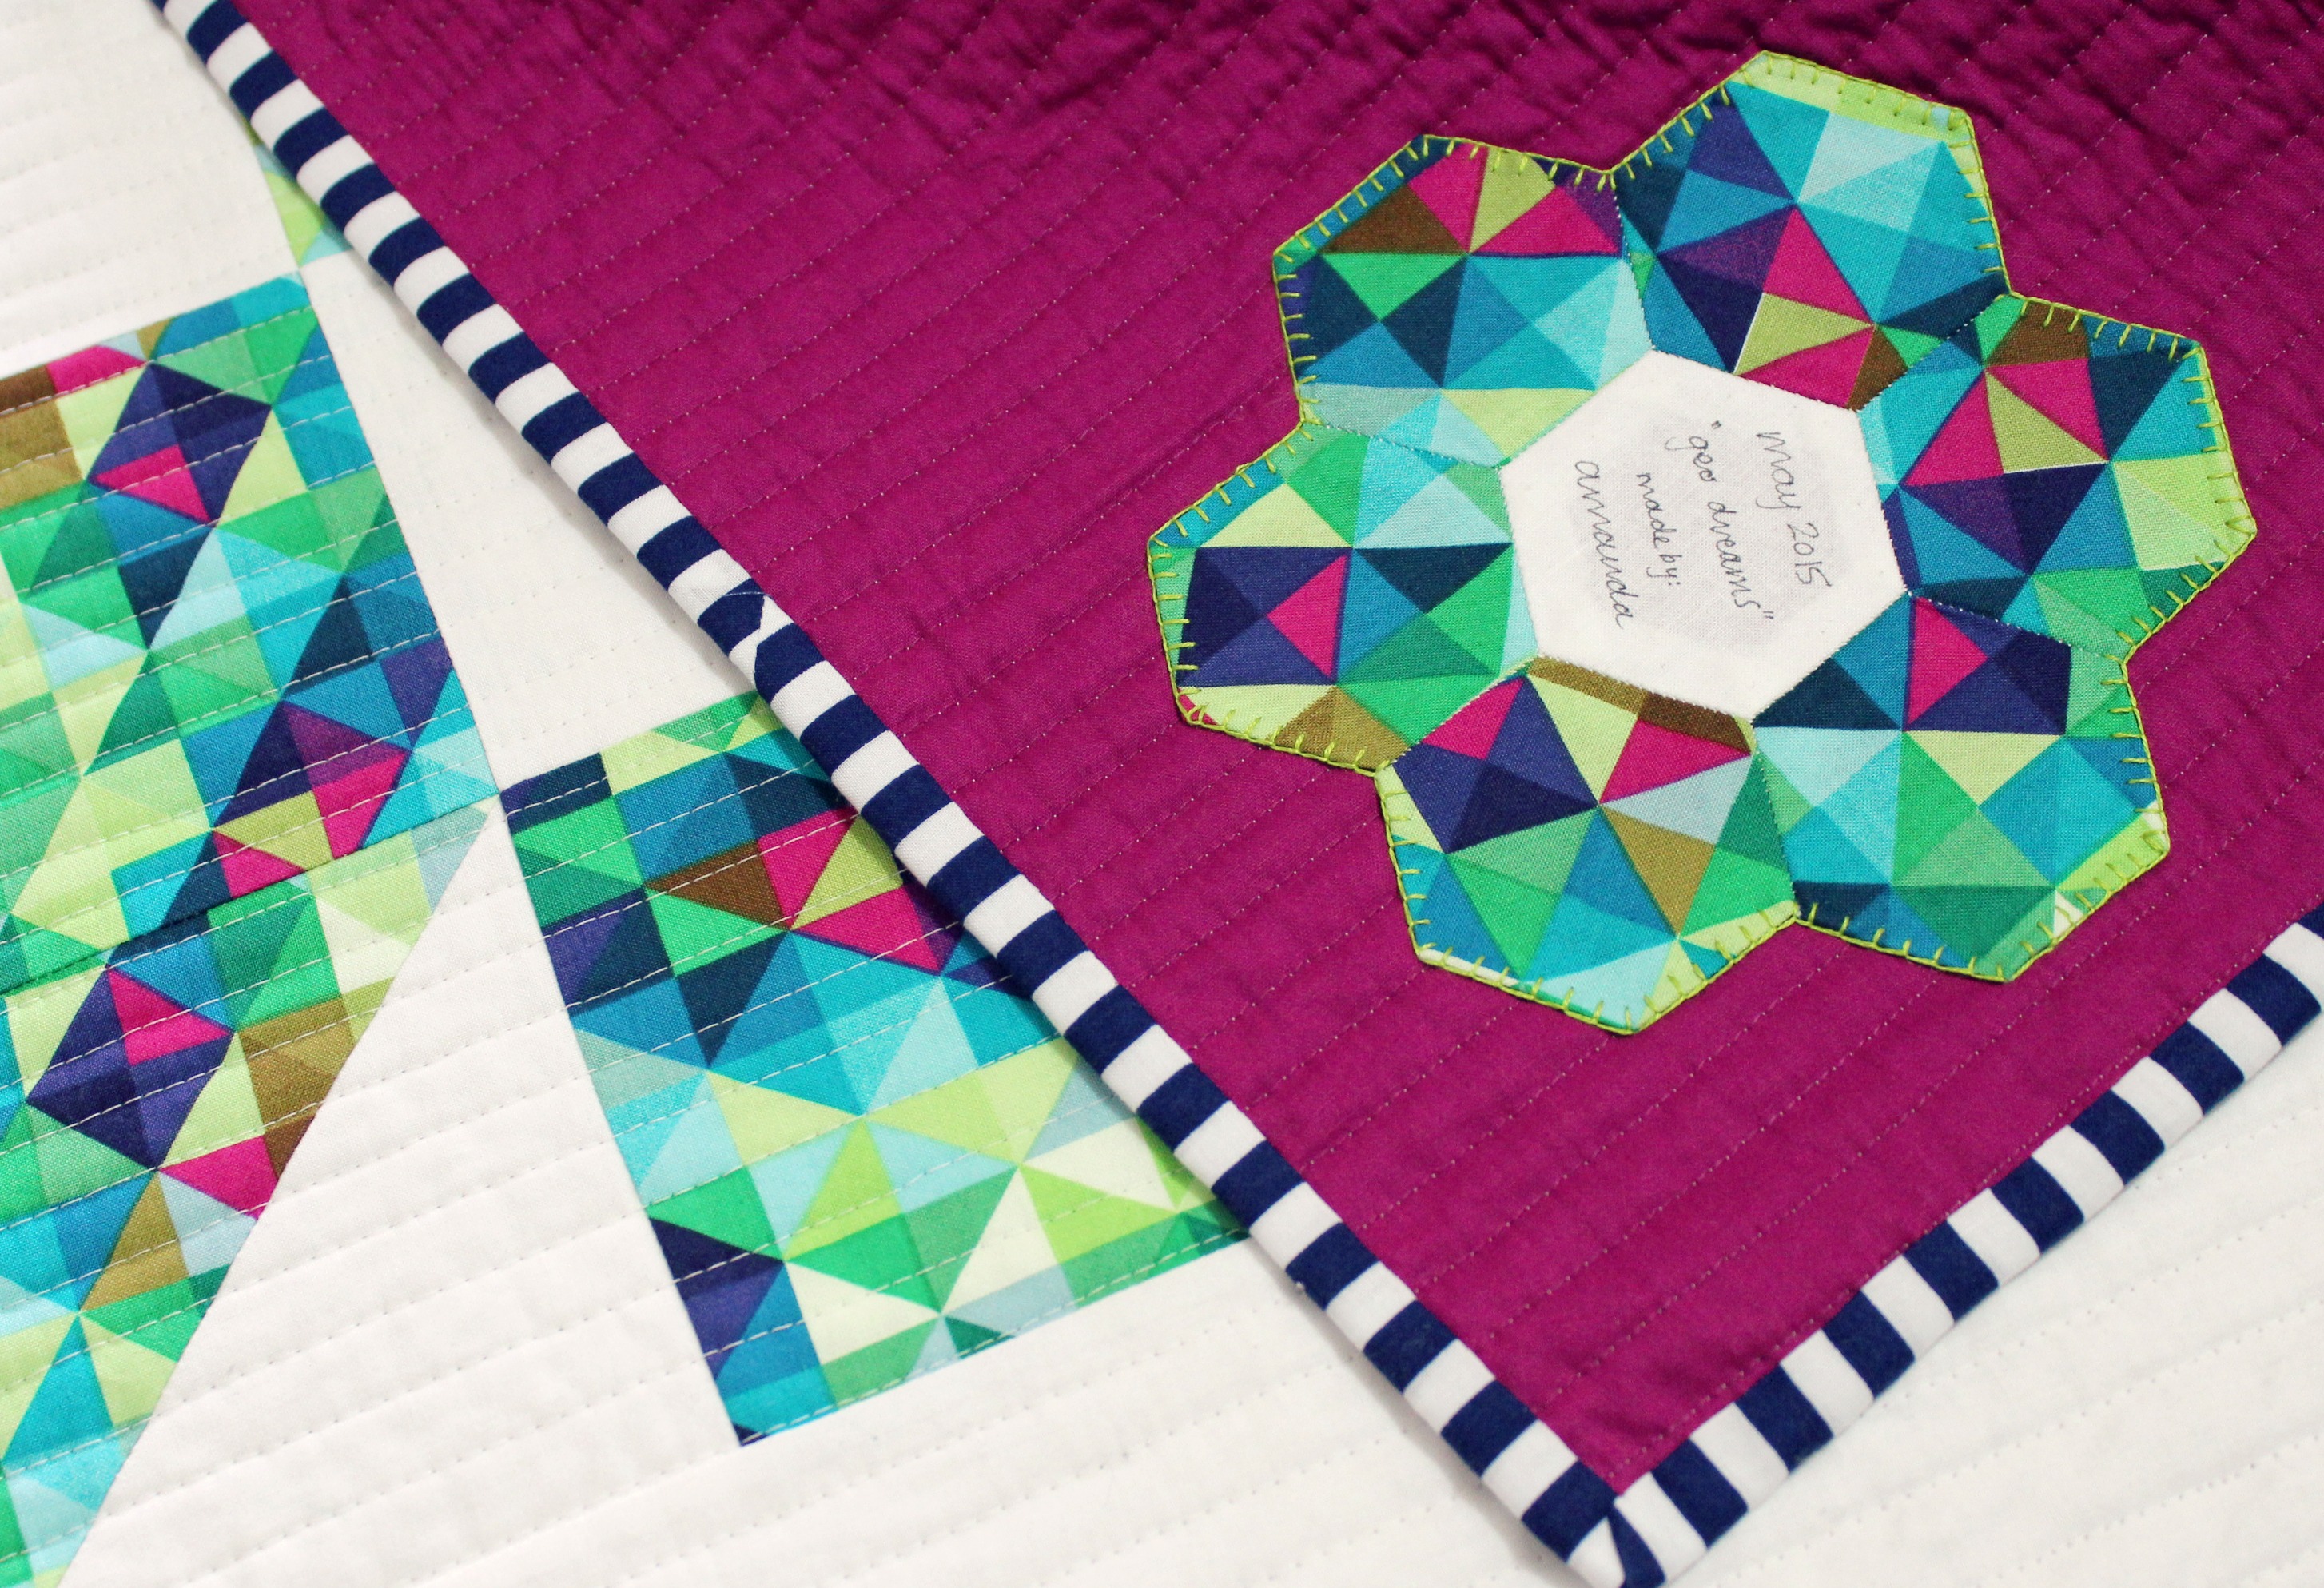
I think it’s super important to take time at the end and document all of the crucial details of the quilt in a label. It’ll serve as a great reminder of when the quilt was made, by whom it was made, for who it was made for as well as documenting the name of the quilt!
And the official name I’ve called this quilt is: Geo Dreams!
Geo Dreams Quilt Label
If you want to know a little bit more about quilt labels, how to make them, what to write on them along with the best ways to attach them to a quilt, I made this video and wrote this blog post about it!
As always I encourage you to make and attach your quilt label in the way that you know best and using a method that you find the easiest and/or most successful. You are always more than welcome to use my way as guide or for inspiration! If you would like to make your label as a hexie flower the same as mine but don’t know how to make them, here are two super-early videos I made showing you how to make hexies and then sewing them into a flower…
Because this is the final part in my QAWM series, the full pattern is now available for you to download, print and share with your quilty friends! Yeah!! The link to this at the top of this post… (PS.Let me know if there are any typos or mistakes – it’s always best to get a second opinion about these things!)
Thank you so much to all of you for participating and supporting me in this series! Your words of encouragement and excitement has made all of the hard work I put in totally worth it!
Thank you, thank you, thank you, thank you, thank you!!!
Although the series is at an end, please keep sharing with me your photos of your finished blocks, quilt tops, quilts or any of the stages you’re up to! Feel free to tag me on Instagram or Twitter at @3and3quarters, send me an email or share them on my Facebook page!
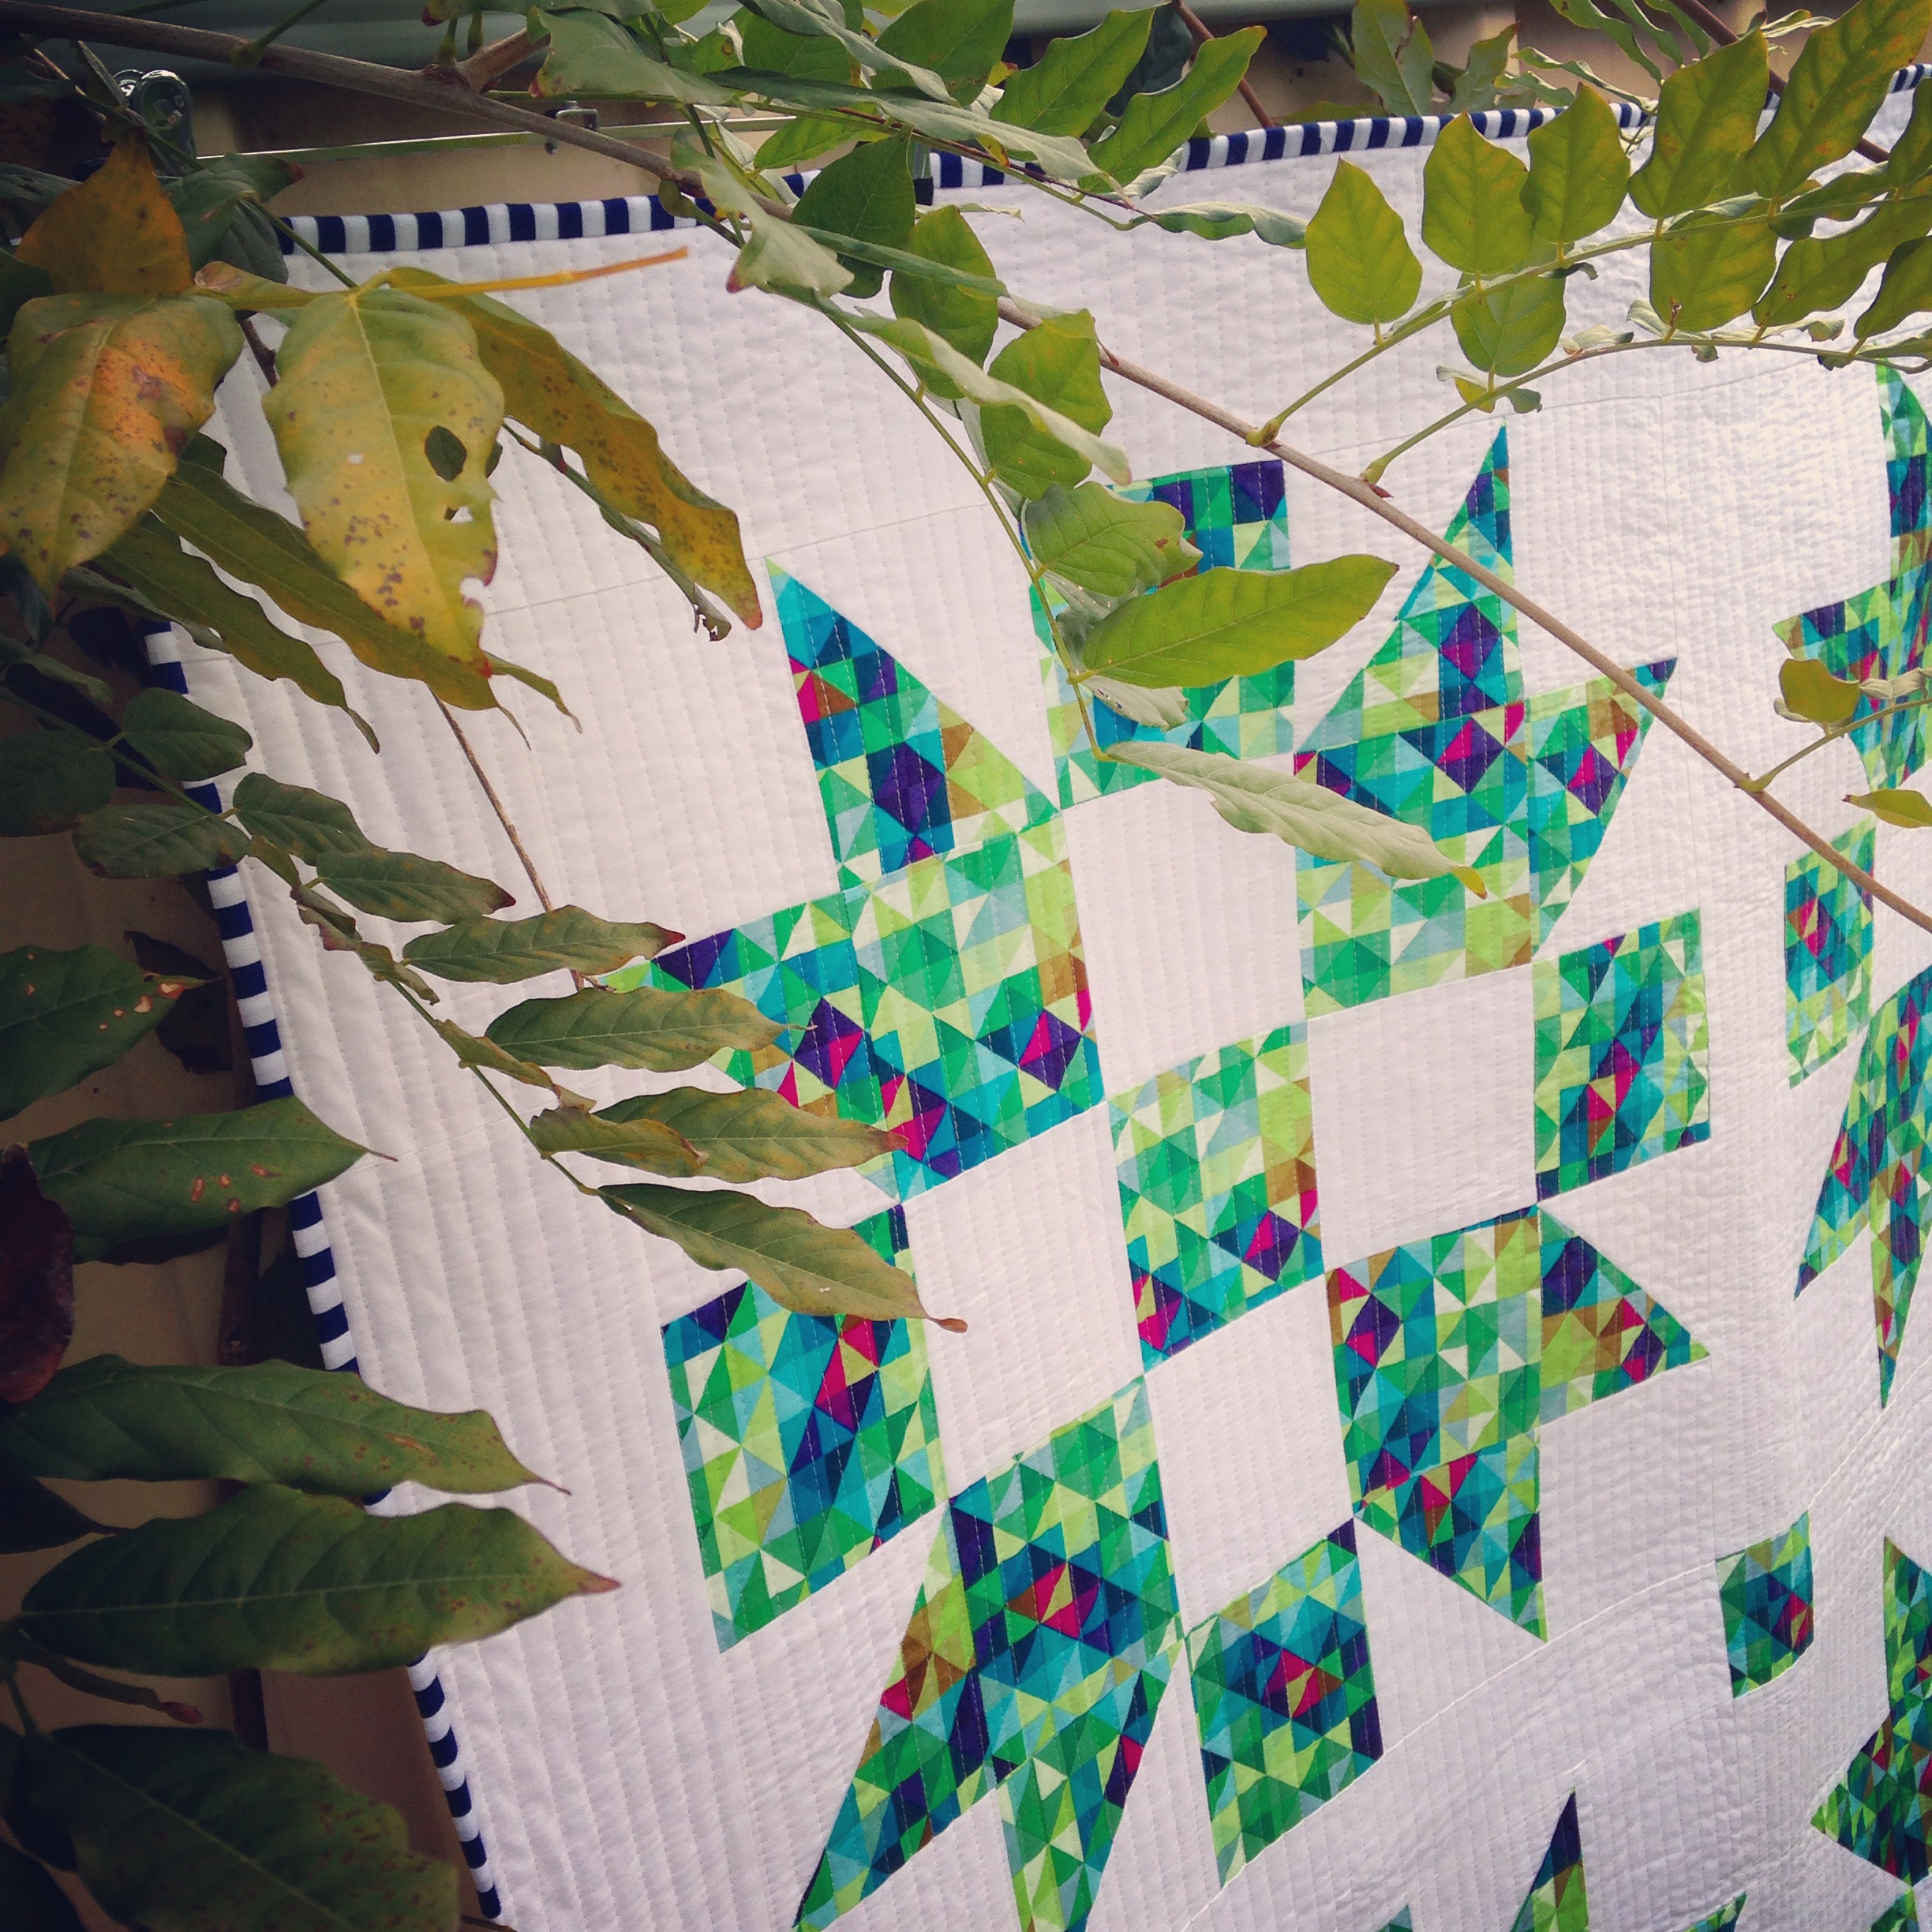
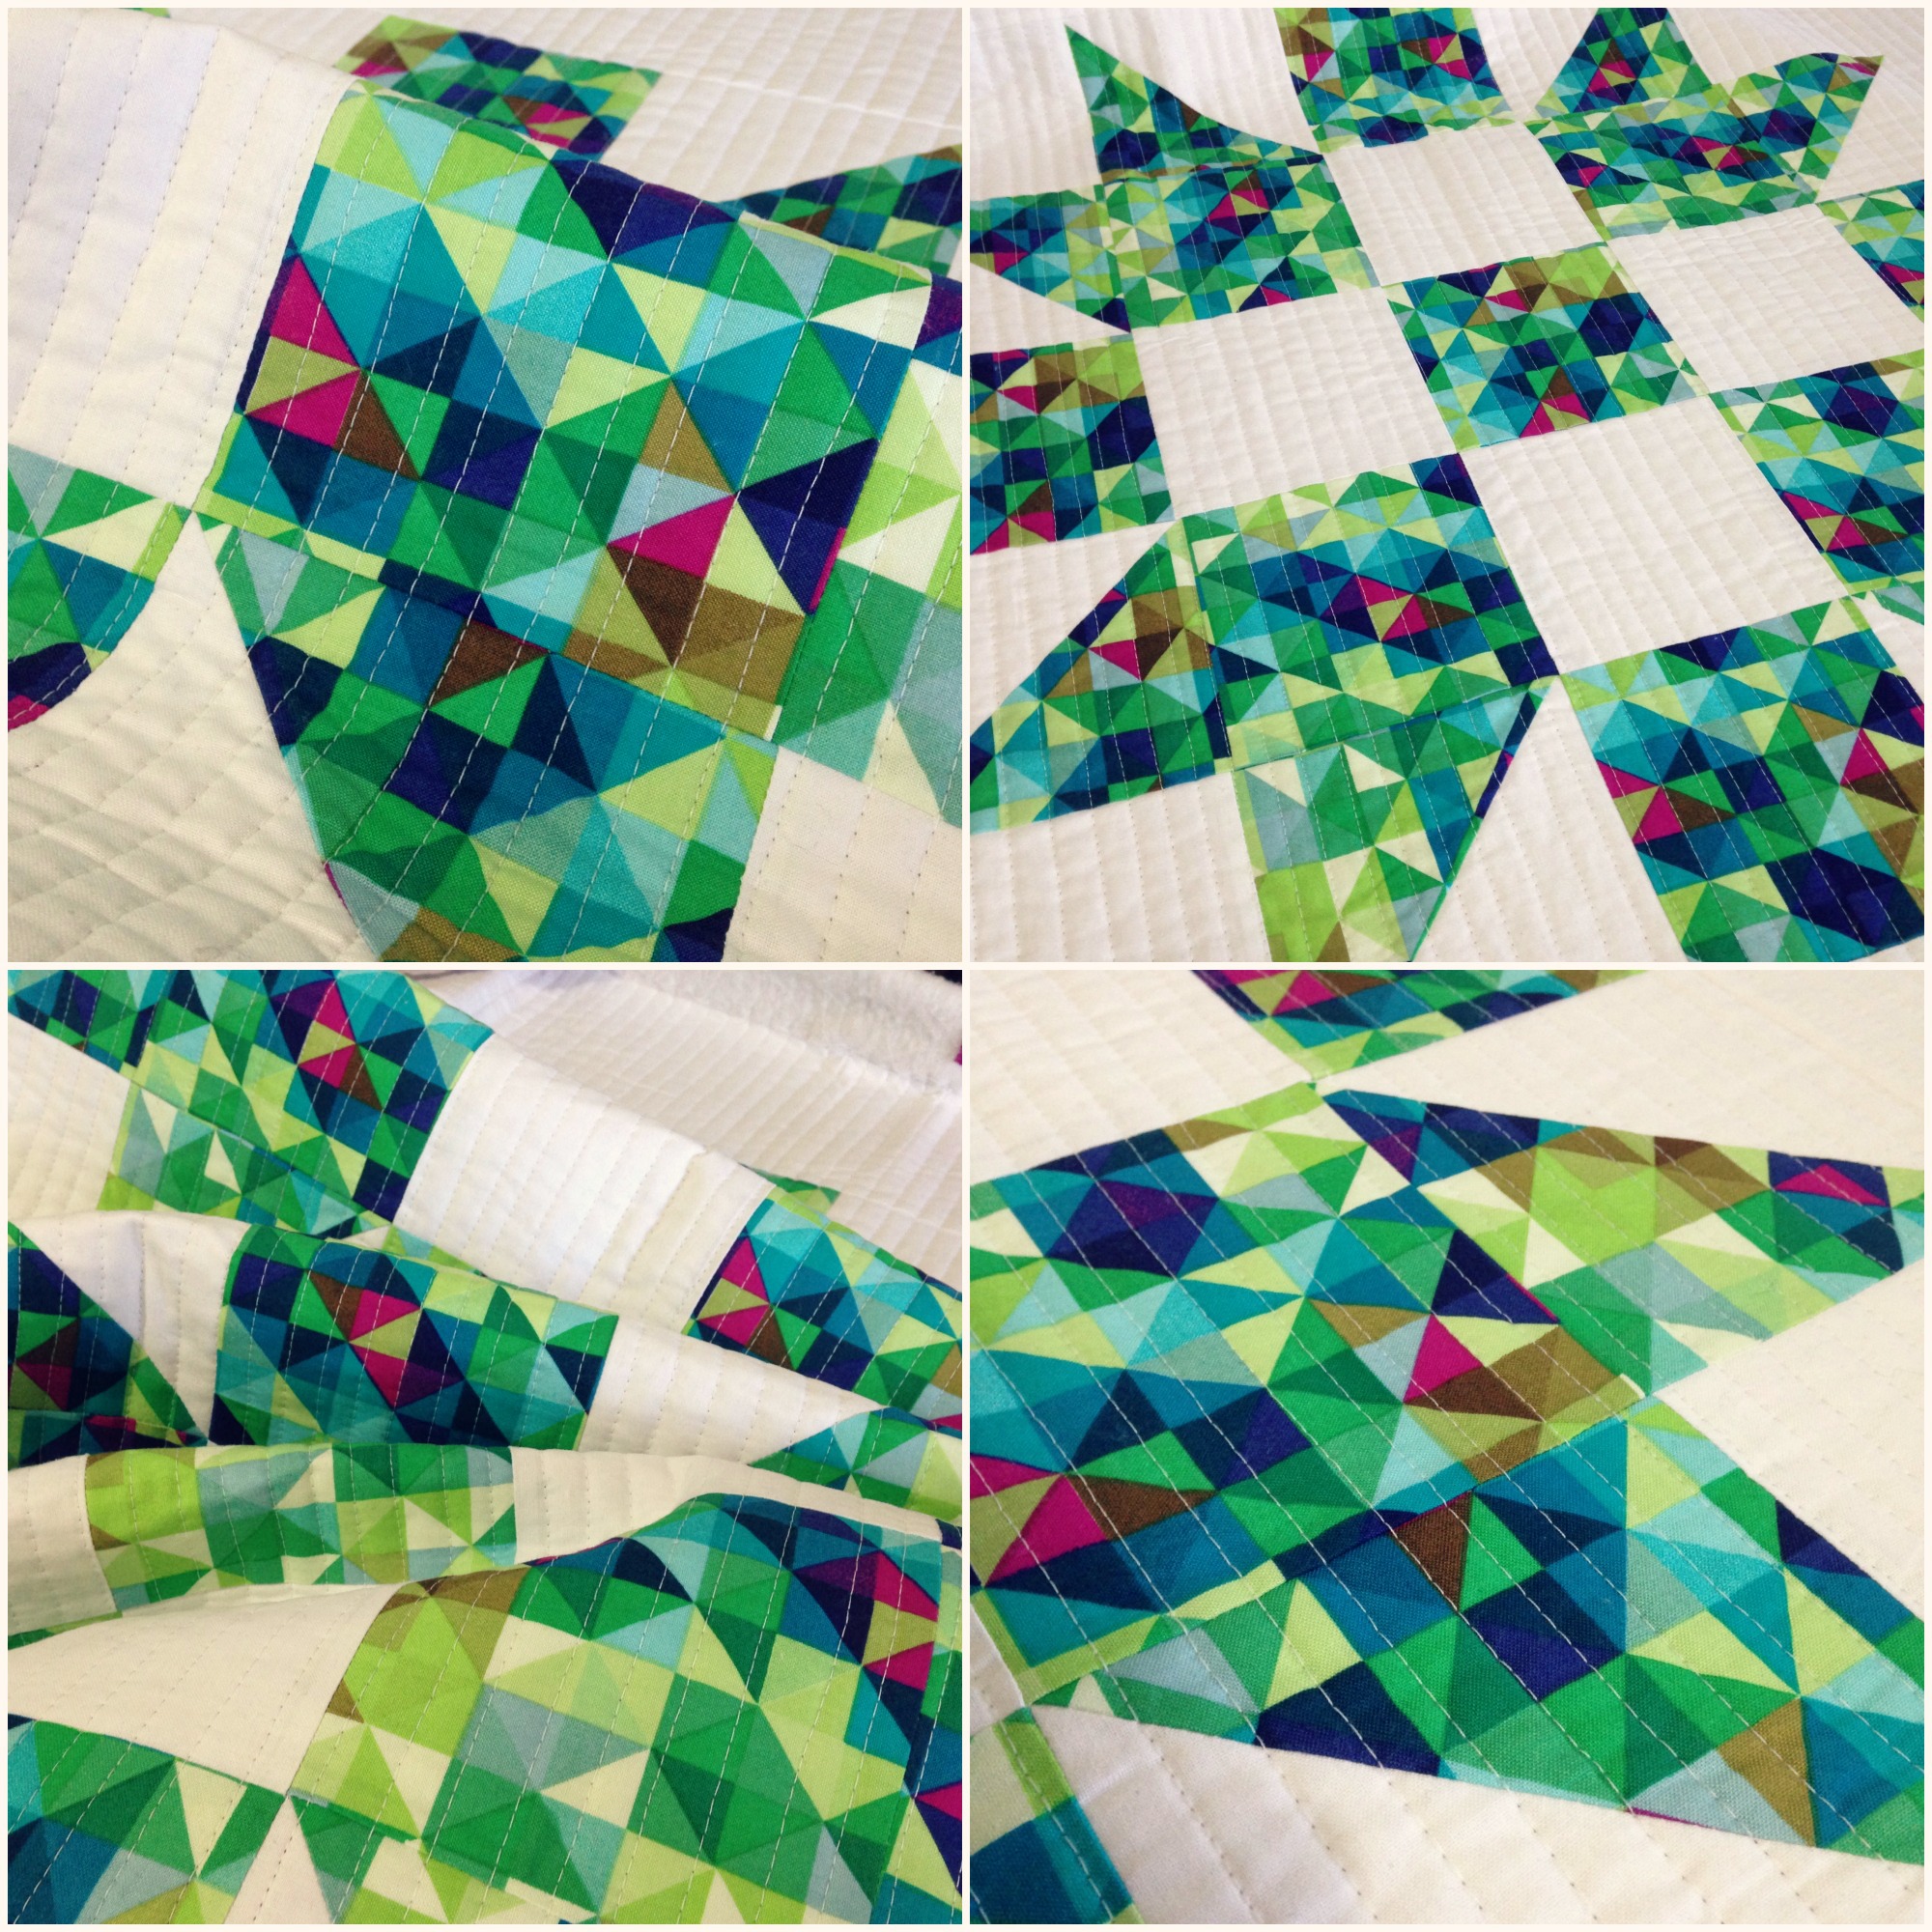
I’m going to leave you with a few of my favourite photos of the finished quilt I took in our backyard a few days ago…
Way-hey! We’re so close to the end of this series, with only one more installment to go after this one! Where has the time gone!
So in part five, we’re looking at how to make and attach a ‘cheat’s binding’ (that is: Straight-Grain Binding) to the raw edges around our quilt using sewing machine and hand sewing techniques!
TBH, making and sewing the binding is my favourite, favourite step in quilt making. After sewing it on with the machine, there’s just something so calming about sitting down with your almost-finished quilt and adding an element of hand sewing to it. It’s almost like that last finishing touch of colourful sprinkles on a pretty birthday cake before delivering it to the table to be devoured by hungry party guests. It’s like your last touch before you can almost let it go…
Wow, where did that deep-and-meaningful thought come from…?? Ooo…?!
Anyway…
As always I want to encourage you to make and attach the binding to your quilt in the way that you know best and using a method that you find the easiest and/or most successful. You are always more than welcome to use my way as guide or for inspiration! And if you do chose to follow my method, you’ll find all of the measurement and cutting info as well as a quick walk through of the steps to complete this stage in the pattern sheet linked above!
I always love it when you share with me your finished blocks, quilt tops and quilting! Feel free to tag me on Instagram* or Twitter at @3and3quarters, send me an email or share them on Facebook!
*FYI: If your Instagram account is set to private and I don’t follow you, I won’t be able to see your photos!! If this is the case, send me an email letting me know you’ve tagged me and I’ll do my best to find you on Instagram so I can give you a big fat LIKE and some wonderful words of positivity and encouragement!! 😀
So don’t forget to join me for part six, where we’ll go through the last step in making our quilt – the quilt label! And then…our quilt is officially finished!!! YAY!
Welcome to part four of my QAWM series! If you’re playing along at home, we’re now up to the stage where we are ready to quilt our basted quilt!
Over the past three parts to the series, I’ve been writing up a pattern/info sheet for you to download and print off… This time around, I’ve decided to put all of the information, tip, tricks and ideas for quilting in a blog post!
So let’s start off with the three main ways you can quilt your quilt:
The first is the most traditional way – hand quilting. This is a form of quilting where you sandwich your basted quilt into a large hoop, usually wooden that can some times be attached to a frame. Then using a short hand-quilting needle and waxed or non-waxed cotton thread, you sew a short running stitch through all three layers of the quilt. The technique takes quite a lot of patience and practice to get used to and can take up a lot of time, depending on the size of the quilt and the design you plan on quilting.
Another way would be to simply quilt on your own domestic sewing machine. The way you choose to do this is completely up to you! You can stick to straight vertical lines like I have or even explore Free-Motion Quilting where you lower the bottom feed dogs on your machine and move the quilt top in any direction you like using an embroidery/darning/spring-loaded foot! This form of quilting can also be known as ‘stippling’ and can be a little tricky to master! My advice would be to practice on some scrap batting and fabric to get a feel of the motion and direction before trying it out on your quilt.
The third way to get your quilt quilted would be to take it to a long-armer. This form of quilting is seen as a more ‘professional’ way to finish a quilt, with the end result looking absolutely beautiful, clean and perfect! You can usually find long-arm quilting services at your local quilting store or you can find a private quilter in your area.
Personally, I prefer to quilt my own quilts. The reasons for this are:
1. I have a fairly limited income and so can’t quite afford to pay someone else to quilt my quilt.
2. I’m a control freak and love that I have free reign on how I get to quilt.
3. I love the romance of my quilts being purely made by my self. That my hands, my heart, my efforts and my time, with nobody else’s, have constructed and finished a quilt. Sometimes this notion can come back and bite me in the butt – especially when time is a major factor – but on most occasions, a huge rush of accomplishment crashes over me and every gruelling, challenging and sometimes soul-changing step is totally worth it!
Okay, let’s now move onto how I get my sewing machine ready to start quilting. (Obviously, this information would only be relevant to those of you who wish to quilt their own quilts!)
– First, I change the foot on the machine from my 1/4″ foot to a walking foot. A walking foot features a set of ‘feed dogs’ that work together with the feed dogs on your sewing machine to help feed all three layers of your quilt through the machine all at once. The foot prevents the top layer of the quilt from moving forwards, keeps stitches even, stops the layers from puckering and it creates a smooth surface for you to quilt over.
– Next, depending on the last time I changed my needle, I’ll replace and put in a new sharp needle. I usually use a 90/14 universal needle as I find them to be the perfect strength for quilting.
– When it comes to threads, I’m pretty non-fussed about using a particular weighted thread or one that is marketed towards quilting. I mainly use a Gutermann polyester thread for all of my sewing and quilting as I find they’re strong and versatile, there’s a bigger colour range to choose from and they can sometimes be a little less expensive than quilting cotton threads. (Remember, I’m on a limited budget here!) Now don’t get me wrong, I love using cotton threads and fully understand the reasoning behind why it’s best to use cotton thread in patchwork etc. But I just personally find that polyester works best for me and that’s okay.
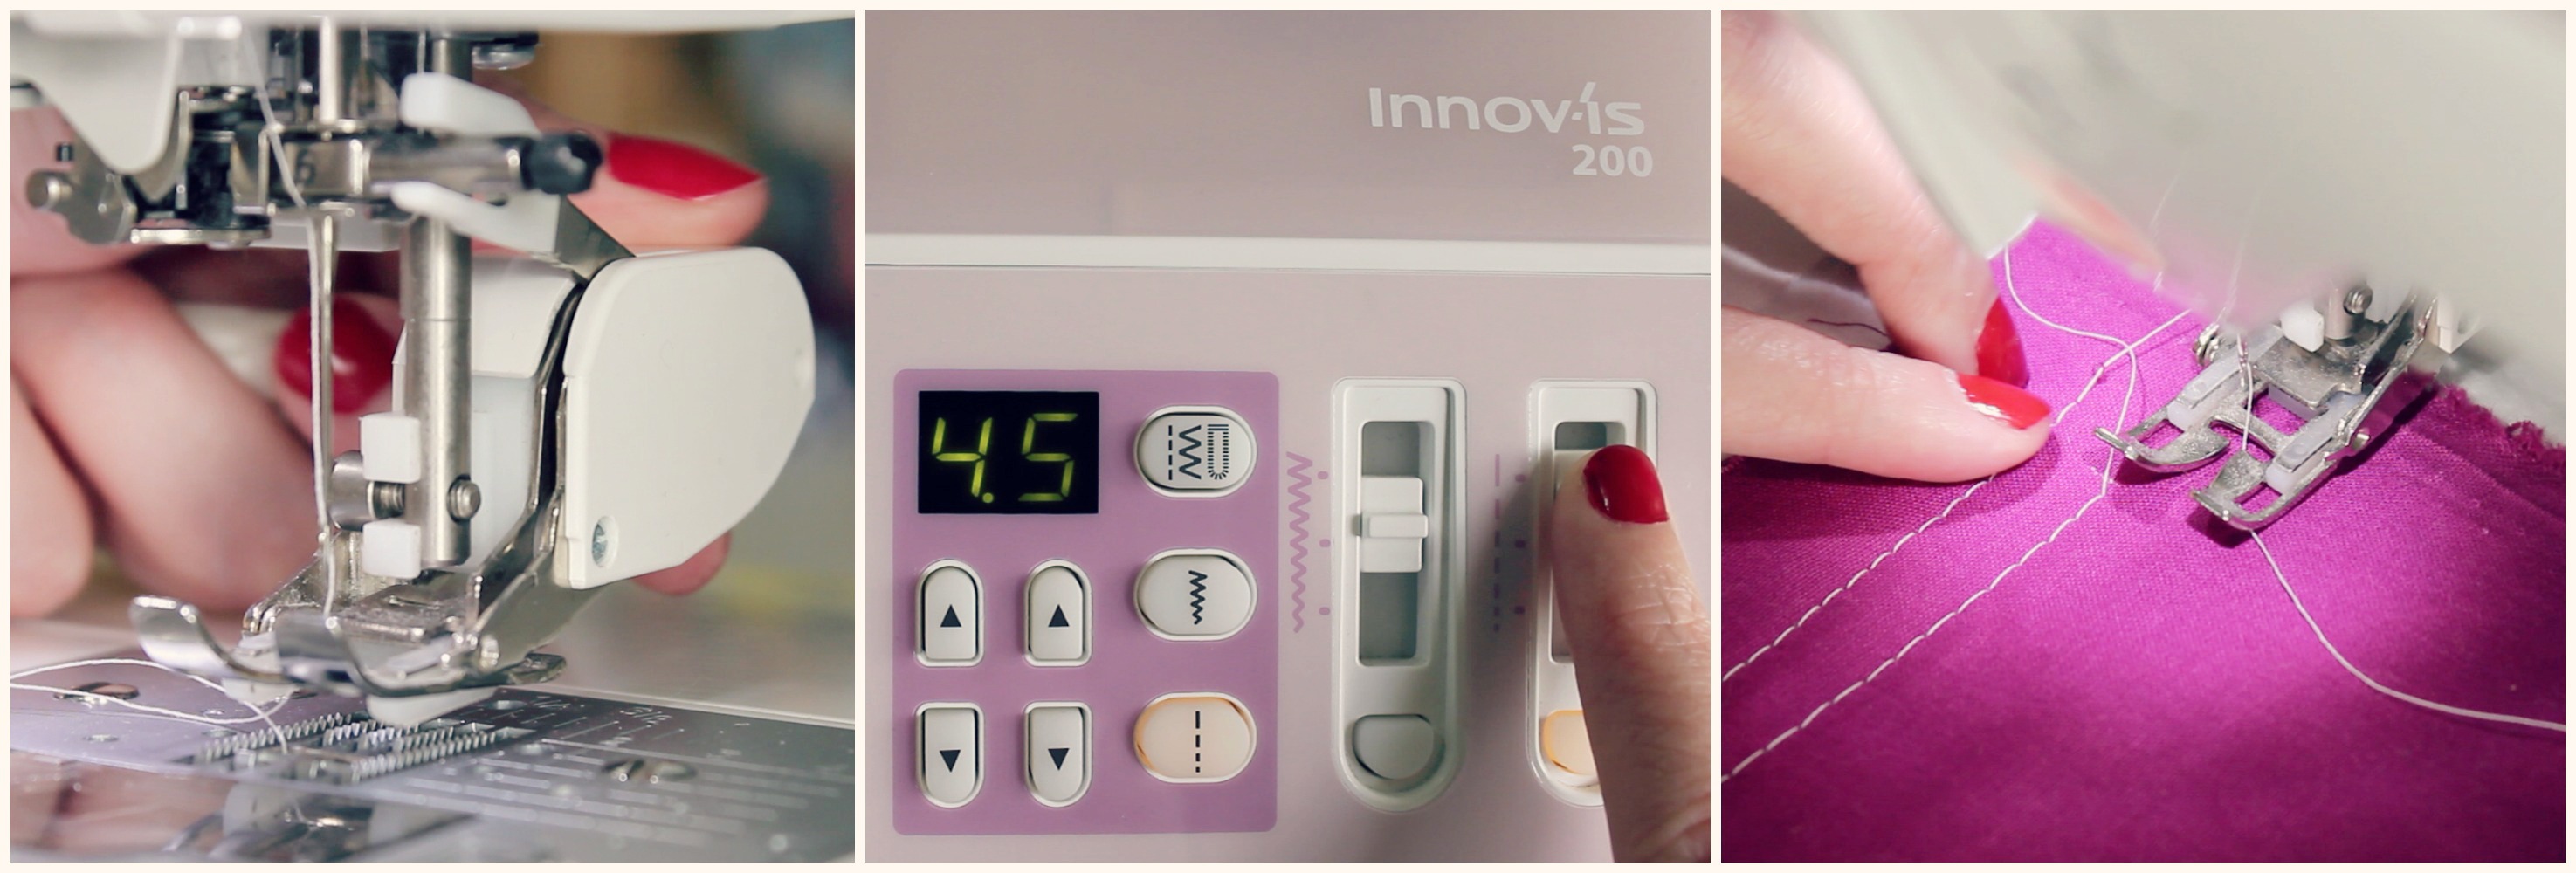
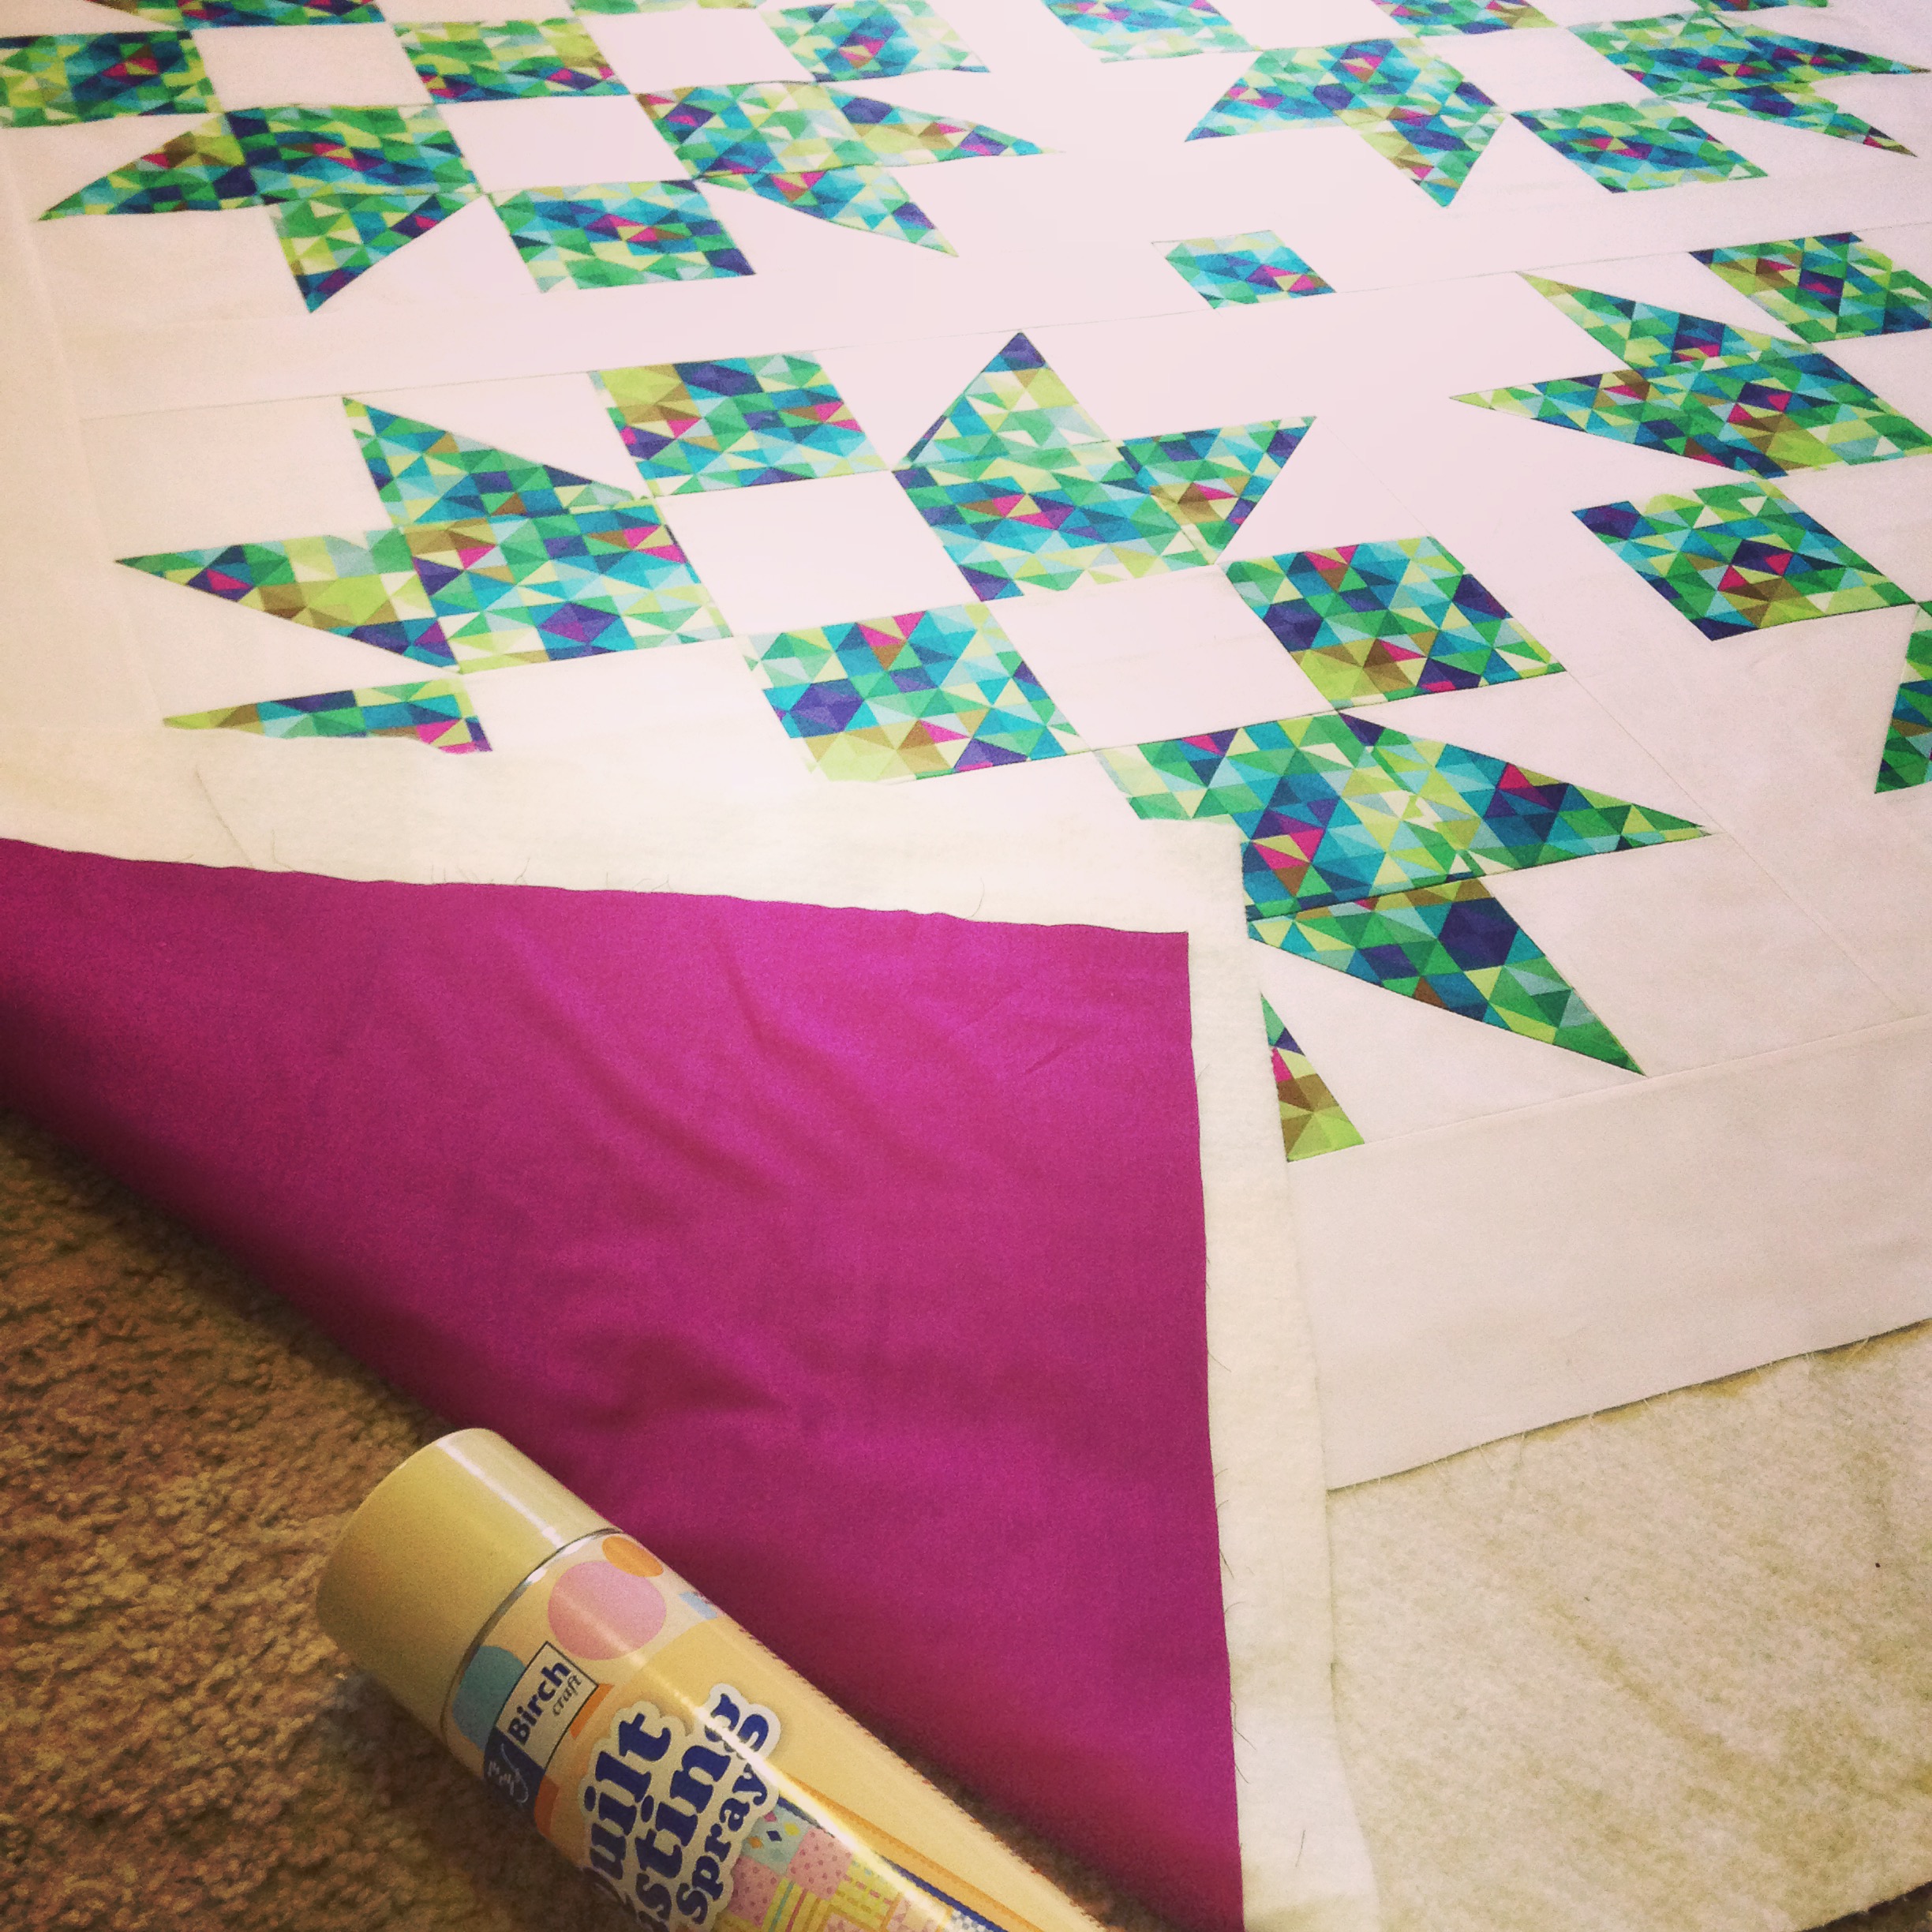
So in this quilt I’ve chosen to use a purpley-type-colour in the bobbin to match the purpley-type-fabric I’ve used for the backing: Gutermann polyester thread in the colour: 247. For the top thread I’m using an off-white-but-not-quite-cream Gutermann polyester thread in the colour: 111.
– The last thing I do to my machine is change the stitch length from 2.5 to 4.5. I find that when using a longer stitch length the machine feeds it through faster thus getting the quilt quilted faster! I also love how the long stitches leave this beautiful tactile surface effect making the quilt look fresh, modern and insanely mesmerising!
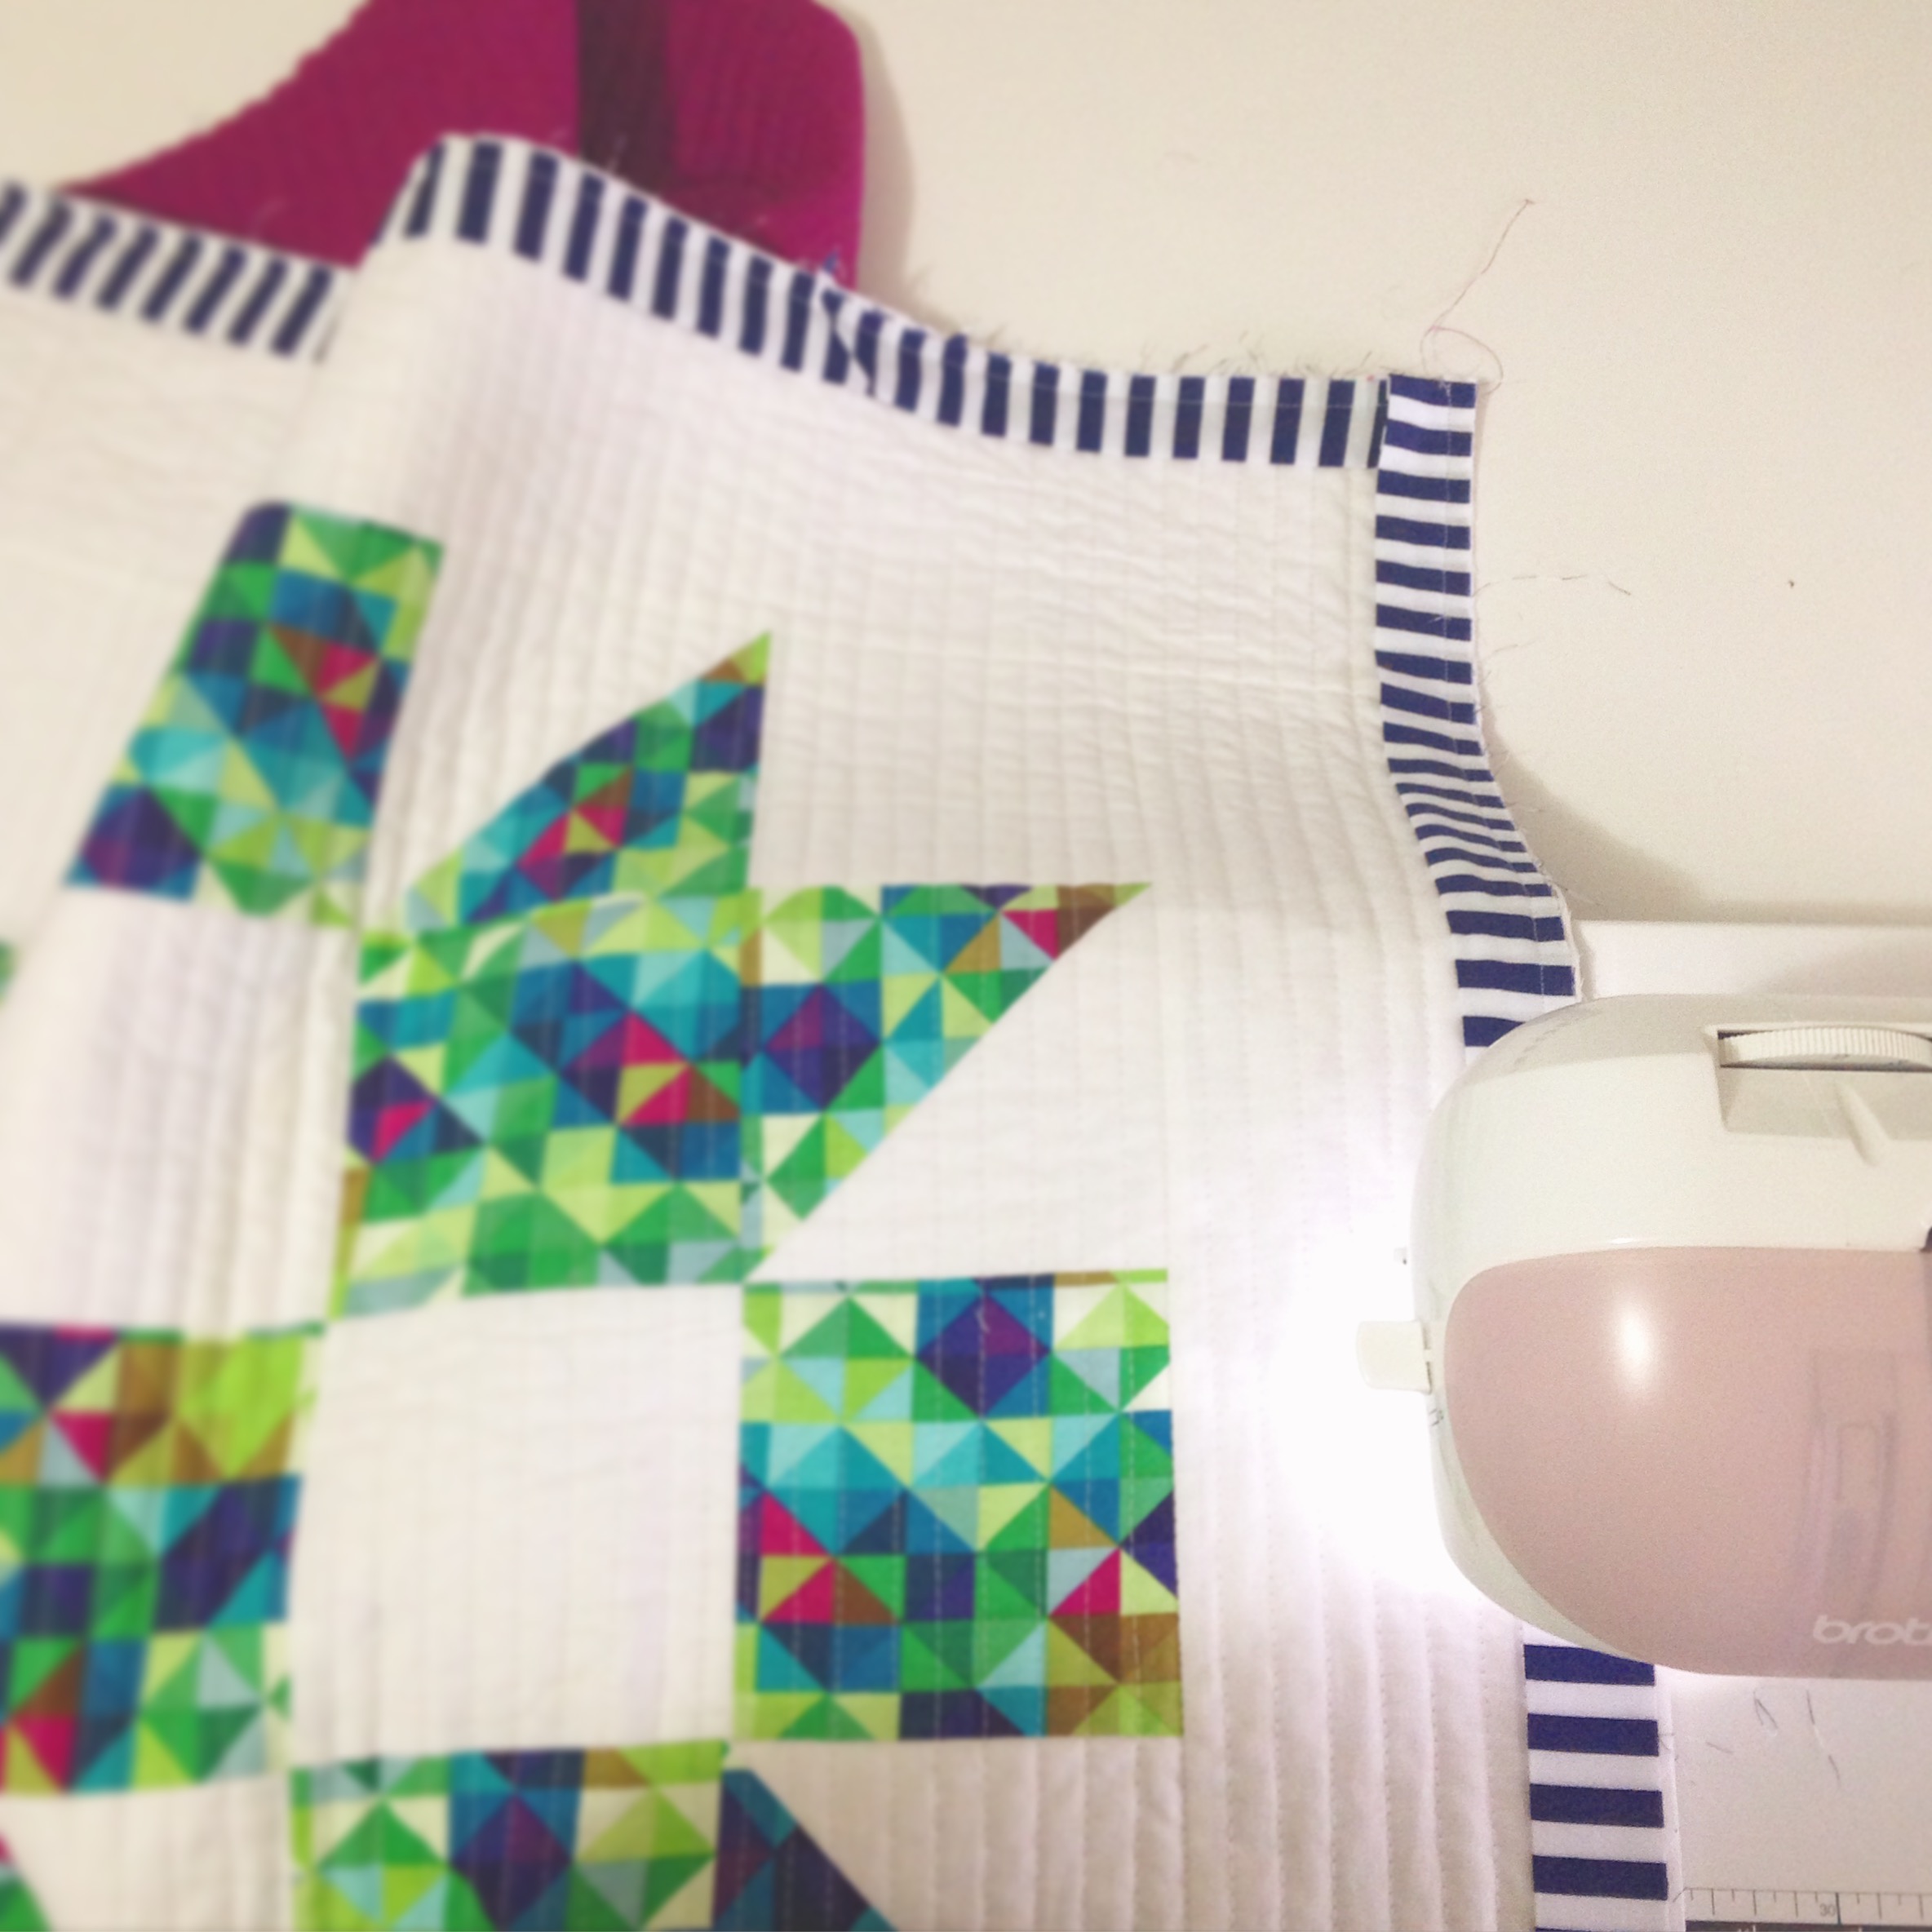
To test out what the stitch length will look like on your quilt, place a scrap piece of fabric along one edge of the quilt and sew lines at different lengths until you find the one that looks the best! Note the stitch length down and always remember to set it back to that every time you turn the machine back on! (If you have one of those really fancy sewing machines, program the stitch length in so that it’s easier to come back to!)
Setting up the the space around you:
– Make sure where you’ve set up is comfortable, spacey and has good light.
– Choose a comfortable chair that supports your back and allows you to be front-on with your sewing machine.
– Have essential tools beside you like thread snips, extra thread for the bobbin, water and some snacks if you really need them! I also like to have my phone close by incase I want to take some Instagram photos!
– Lastly, put on some good music, a movie, audio book or podcast to help you get into ‘the zone’!
My quilting technique:
– Before I start quilting, I make sure the surface of the quilt along with the batting and batting layers are lying flat, with no immediate tucks, folds or chances of puckering.
– I sew the first quilting line through the centre on the quilt, ditch-stitching along the seam of the middle sashing strip. This line will become my marker or guide to follow as I sew the rest of the lines.
– Beginning from the top edge, I gently feed the quilt through positioning my hands on top of the quilt at either side of the needle and walking foot, keeping the layers taut as they are fed through.
– I allow the sewing machine to feed the quilt through at it’s own pace. Don’t push or force the quilt through as this may result in skipped stitches, puckering and fabric shifting.
– Placing an extension table alongside your machine will help to control and feed through the quilt.
– Have the quilt hang into your lap as you feed it through to prevent the quilt from dragging and placing strain on you and your machine. Allowing the heavy weight of your quilt hang from your machine may result in skipped stitches and wonky quilting lines.
– To help ease the trouble you may have with the quilt hanging down from your left side, place a chair or ironing board along this side to prop up the quilt, easing the strain placed on you and your machine.
– If you’re quilting straight vertical lines, place the edge of the walking foot alongside the previous line you’ve just sewn and use it as a guide. If you want to make the space between your lines wider, insert a quilting guide-bar into the back of the walking foot, set it to the width you wish to use and place the bar alongside the previous line instead.
– Most importantly: take your time! Be patient with the process and always learn from the mistakes you make! (Remember: it’s okay to make mistakes! They make us better at what we do, even though you don’t think so at the time!!)
+++
So I think that’s everything I wanted to share with you in regards to quilting!
If you think I’ve missed a crucial step or if there’s a technique or way you love most to do, comment below and share your knowledge with us!
Don’t forget to keep sharing photos of your fabric choices, finished blocks and quilts if you’re following along with the series! I absolutely love seeing what you’re making and how you’re interpreting the pattern!! You’re all so wonderfully creative!! You can easily tag me on Instagram and Twitter using the handle: @3and3quarters or you can simply upload a picture to my Facebook page!
I hope that you’ll join me soon for part five where I’ll be teaching you how to make and attach a simple double binding to your quilt – the second last step to the finish line! Yay!!
Whew! Part Three in my QAWM series is finally here! It almost seems that the universe was throwing everything at me last week preventing me from getting this stage filmed, edited and published!
For starters, the weather in Sydney at the the start of last week went absolutely crazy! I had never seen so much rain fall in my life! It literally never stopped! Thus resulting in me being confined to the house to simply wait it out. (It was advised by authorities not to leave your home if you really didn’t need to! That’s how dangerous the rain had become!) So after three to four days stuck inside, cabin fever kicked in and I couldn’t help singing to myself this song from one of my favourite childhood movies, Muppet Treasure Island! Finally on Thursday the rain stopped and I was able to visit my local fabric store to buy the fabric for the backing, the exact batting I wanted, a new can of basting spray and thread that matched the colour of my backing fabric.
On Friday, we were forced out of the house as scheduled electrical work was happening in our area, thus resulting in losing our power for four hours between the time of 8am and 4pm. So to the city we went! We caught a train to Circular Quay, had some lunch and then hopped onto a ferry that took us around to Darling Harbour where we went to have a look at the Madame Tussauds Museum.
Sydney was looking beautiful this day!I met an Avenger! Squee!!
Saturday was the centenary of ANZAC Day, a special national day that all Australians and New Zealanders hold close. It was the day that our troops landed on the shores of Gallipoli during World War One. The history is a tragic one of poor leadership decisions, of being led to the wrong place and of heavy losses that weren’t at all necessary. ANZAC Day is a public holiday for us where we are given the chance to honour, remember and celebrate what the ANZACs did for our nation as well as recognise the others who have and who still do serve our country.
On Saturday afternoon, I thought I’d take the time to get started on filming part three. However, after discovering unfixable holes in my backing fabric after cutting it in half and sewing them together, I threw it in and spent the rest of my time making and sewing hexies!
Pretty Hexies!
Venturing out again to the fabric store was a no go as most stores closed early due to ANZAC Day and to add insult to injury, a huge storm was currently battling its way across Sydney that brought very heavy rain and hail stones! Eek!
Roll on Sunday… I bought some new backing fabric, ensuring that it was perfect! My camera was charged and ready to go. The sun was shining which meant my lighting would be perfect! And most importantly, I was in a good mood! So I jumped on the moment and got it filmed and done!
So that was my week… Although I did forget to mention the numerous people we had around for lunches and dinners (we were the most sociable house on the block last week!) as well as the horrid bout of stomach flu I suffered on Monday and Tuesday, adding to my rainy day blues!
On the positive side, on the down days I was able to write and publish a very over due blog post (my March Favourites) as well as make a quick and very spontaneous tutorial on how to make an ANZAC Poppy Felt Brooch! Win!
+++
So in Part Three of the series we’ll be looking at how to make a pieced quilt backing, how to chose the right batting as well as how to baste a quilt together so that it’s ready to be quilted.
As always, everything you’ll need to know regarding measurements and cutting instructions is in the information sheet linked above!
Part Four will be all about quilting our quilt! I’ll go through the different ways you can do this while also discussing the way I’ve chosen to quilt my quilt. I’ll show you how to set up your sewing machine for quilting as well as the way I like to organise my space so I’m comfortable and happy!
Also, don’t forget to show me your finished blocks and quilts! Tag me on Instagram or Twitter at @3and3quarters, send me an email or share them on Facebook!
If you have any questions or thoughts about the block, the finished quilt or the series as a whole, please comment below and I’ll try my very best to help you out!!
Welcome to Part Two in my ‘Quilt-Along-With-Me’ series!
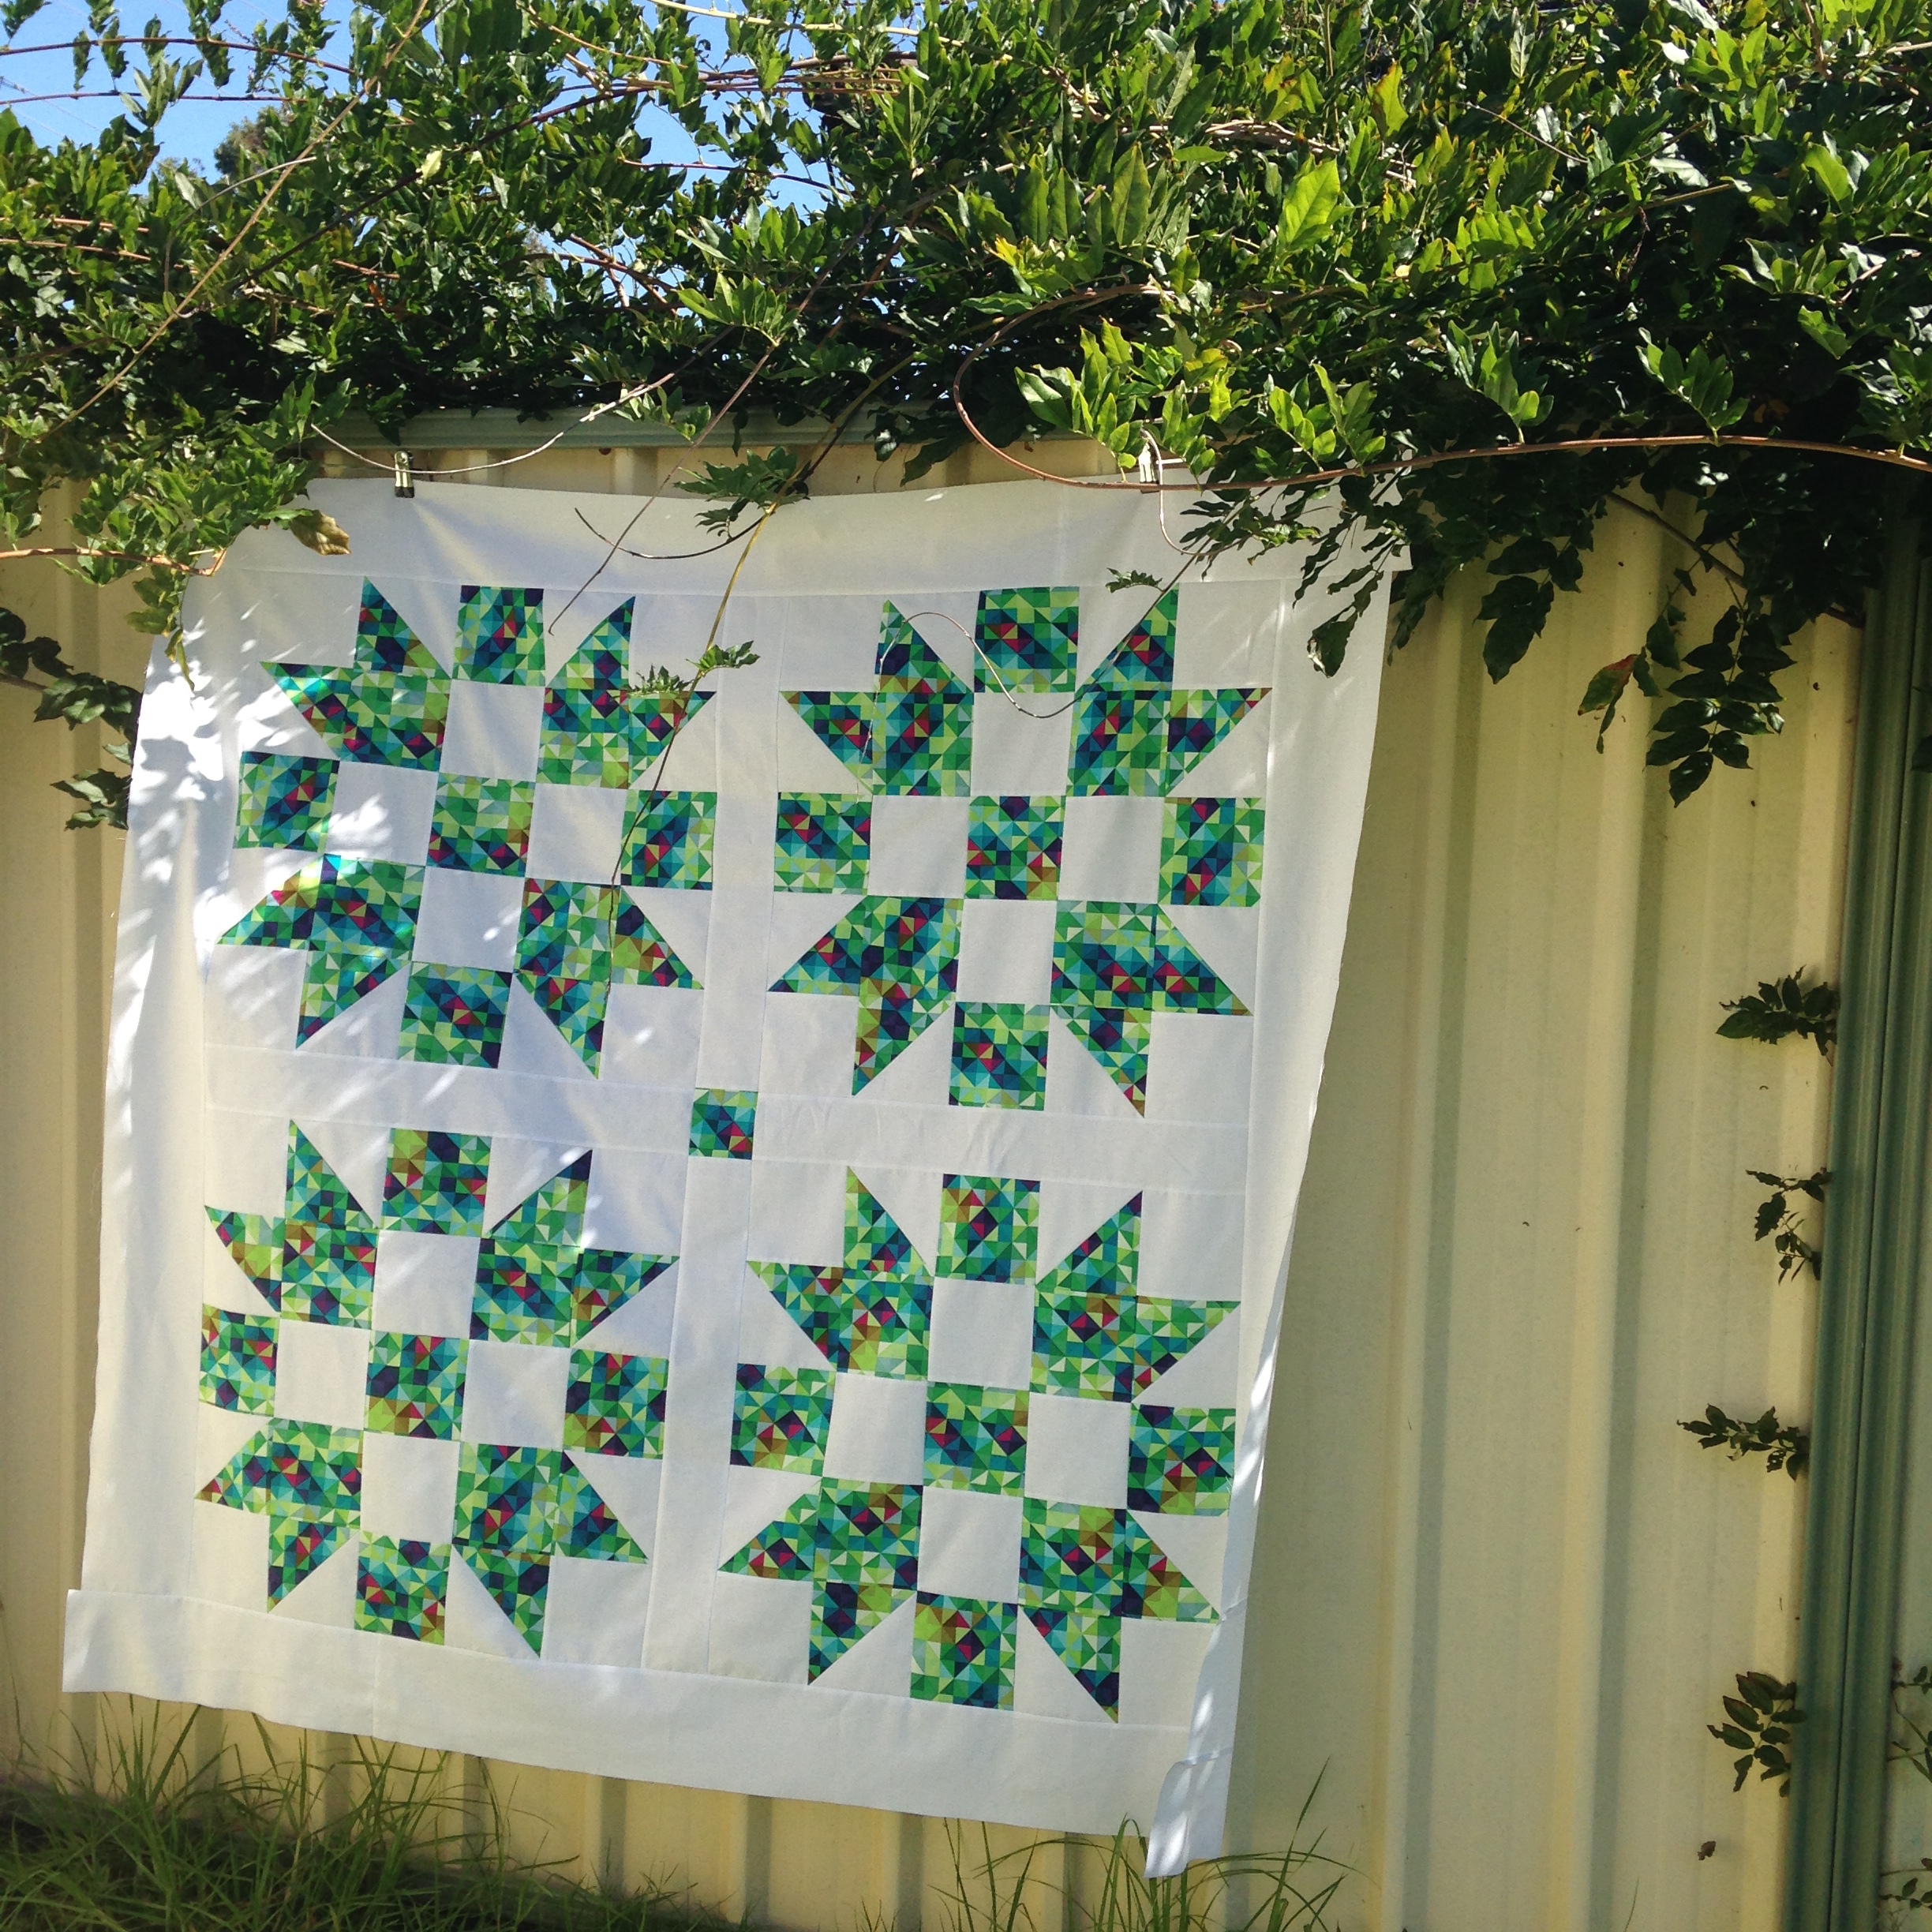
Now that all of our giant Father’s Choice blocks have been pieced, it’s time to sash them together and finish the quilt top with a basic border edge! Hooray!!
In the following video, I walk you through the way that I like to sash, piece and press these elements so that I have my completed quilt top. By all means, I encourage you to do these steps in a way you most feel comfortable doing or in another way that you know best! My steps are simply a guide for you to follow if you need them!
Now, if you find it hard to follow along with the instructions in this video, you’ll find everything you need to know in the pattern sheet above. All of the measurements, cutting instructions and steps to piece the sashing and borders are there for you!
In the next video of the series I’ll be showing you how to make a pieced backing, we’ll be having a chat all about batting and I’ll go through the different ways you can baste your quilt so that it’s ready to be quilted!
Sashed Father’s Choice Block
Also, don’t forget to show me your finished blocks and quilt tops! Tag me on Instagram or Twitter at @3and3quarters, send me an email or share them on Facebook!
If you have any questions or thoughts about the block, the finished quilt or the series as a whole, please comment below and I’ll try my very best to help you out!!
Happy Sewing, Friends!
xx
PS. If you missed out on Part One, click here and you’ll be taken straight to it!
In loving memory of my darling Lucy.
I had planned to have part two in this series finished and uploaded on Wednesday. However the day before, Tuesday the 14th of April, my beautiful Lucy who was close to 15 years of age, passed away.
My darling brown eyed baby left my world while lying on the grass in our backyard. I was with her as she passed, stroking the top of her head and twirling her ears, just the way she liked it, willing her to wake up and be okay.
The past few days have been hard. Very hard. I cry as I write this, missing her sounds and her presence. The routine and the snuggles.
We buried her in the backyard, near the garden along our back fence, wrapped in her fleece ‘Hello Kitty’ blanket that I had bought by the panel at Spotlight. I used to call her ‘Kitty’ as she would meow for attention and purr when we would snuggle.
Lucy was a big delight in our family. She was only a small dog but had a huge presence in our home.
She will be achingly missed and will be loved forever.
Welcome to the first instalment of my ‘Quilt-Along-With-Me!’ series! I’m so excited to get started and I hope you are too!
In part one, I introduce the block we’ll be piecing together (which is the Father’s Choice block!) along with showing you the way I like to prep and cut my fabric as well as how I choose to make a bulk load of HSTs and how I piece and press my blocks.
Now, if you find it hard to follow along with the instructions in the video, you’ll find everything you need to know in the pattern sheet above. All of the measurements, cutting instructions and steps to piece the block are there for you!
A few facts about this quilt:
– The quilt that we’re making together will feature four Father’s Choice blocks, each one measuring 23″ (58.5cm)
– The blocks will be pieced together using a sashing technique
– The final quilt top will measure approx. 59″ (150cm) squared
I first came across this block when I was flipping through the book 500 Quilt Blocks by Lynne Goldsworthy & Kerry Green and looking for inspiration for this series. I had never heard of the block until it’s star-like nature caught my eye. The block featured in this book was a little bit too small for the type of quilt I wanted to design and make with you all, so I doubled the measurements, made a test block and fell in love!
Father’s Choice Block
I was a little conscience to the fact that the piecing of this block could be a little tricky for beginners to manage. But once I made it and thought about it, I actually think this is a great block for beginners to try as it touches on some great basic technical skills that all patchworkers should learn and know. These include cutting basic squares, piecing and trimming down HSTs, basic forms of layout design (eg. learning how to make a four-patch unit), how to press units to achieve perfect nesting seams as well as how to manage piecing a large-ish block together.
{If you are new to patchwork and are going to give this block a go, let me know how you go! Tell me if you thought it was a bit hard or if you felt comfortable with the challenge…}
Also, don’t forget to show me your finished blocks! Tag me on Instagram or Twitter at @3and3quarters, send me an email or share them on Facebook!
In the next video I’ll be showing you how to sash all four blocks together as well as adding a boarder around the outside, completing your quilt top! You’ll find the pattern sheet with all of the information here once it’s uploaded!
Four Father’s Choice Blocks
If you have any questions or thoughts about this block, the finished quilt or the series as whole, please comment below and I’ll try my very best to help you out!!
Happy Sewing, Friends!
xx
PS. If you missed out on the Introduction post I published, you can click here to get up to speed! 😊
The first instalment to this series will be live later on today (Monday)! I’ll be publishing another post once the video is up that will have a link to the Part One pattern sheet along with a nice little written piece informing you on more about the block construction and what’s coming up next!
All of the pattern sheets will be available to download from here, my blog, each time a new video in the series is uploaded. Once the series is finished, the completed pattern will be available to download for free!
I hope that you’ll join me in making this idea a success!
Happy Sewing, Friends!
xx
PS. You may be wondering why everything is running a day late… Yes?
Well yesterday (Sunday) I had a chance to catch up with some of my dearest friends that I hadn’t seen for the past few months. We chatted and laughed over afternoon treats and then had a lovely dinner together! It was a great day!
So this obviously resulted in a late edit and I unfortunately ran out of time to upload it on the day I said I would. But everything is full steam ahead today and I’m so excited to get the first video up for you to get stuck into!