Welcome friends to a muchly anticipated and very over-due Quilt Along!
I can’t quite believe the last Quilt-Along (the Mini Block QAL) I hosted was seven years ago – that was 2018! What!?!?
Well today, I’m so happy to be able to share with you the first block in this new House Block QAL!
The Original Homestead is a nod to the classic house block seen in both vintage and modern quilts and is relatively simple to piece together.
Take your time choosing the right colours and prints you want to use for your block and take advantage of the colouring-in page to explore and decide what works best!
Follow the tutorial below to learn how to piece this block together.
Don’t forget to share your finished blocks with everyone using the hashtag – #AmandasHouseBlockQAL as well as tagging me on Instagram @3and3quarters!
Sneaky hint for the next block in the QAL…
Block #2 is a Trio of fun! 🏠🏠🏠
Happy Sewing, friends!
PS. Just incase you missed it, here’s the Introduction video I shared chatting all about this new QAL! xx
Today, after a very long time, I clicked on a bookmark link on my web browser that’s been patiently waiting for me to give it some attention since early 2019.
That link, dear friends, was to you, here on my ever-faithful little sewing blog.
A few years have gone by with a few quilts made here and a few quilts made there. Some of them life-time favourites and others I can happily forget. (Although, I don’t think there are many of these!) Other projects have been started and then instantly dumped in the ‘I’ll finish this later because another new and shiny project/idea has come along’ and a few skills or obsessions have been discovered! (Hello Machine Embroidery & Dressmaking!)
Nightingale Quilt (2023)Bear Paw Quilt (2023) & Christmas Quilts (2022)Machine Embroidering all of my jumpers! (Dino design from Urban Threads)
But no matter what craft, project, idea, discovery, or obsession wanders lazily across my path grabbing my attention like a two-year-old, everything always leads me back to my one true love – making quilts.
Ahh, yes. Quilt making. That sweet, cosy practise of cutting up perfectly woven cotton fabrics into little squares, triangles or hexies and then sewing them all back together again into a design that’s just a little bit more pleasing to the eye.
It’s that giddy thought of having endless possibilities to create something great with just my fingers and brain. To draw out the skills I’ve been honing since I was 16 to master and perfect a nested seam, a faultless HST or a crisp flying geese.
The fun play with colour and clashing print, with texture, size and value, with direction and precision.
The focus and drive that washes over you as you cut, piece, and sew a quilt, embedding it with every inch of love you possess as once it’s finished, you’ll be handing it over to someone you love who will cherish it and care for it always. It’s as though they now have a very small piece of you, a brief, fleeting moment of time from your life that you’ve dedicated or given just to them.
Finishing a quilt makes for a happy Quilter!
Who would of thought the practice of Quilting could be so philosophical and almost…romantic?!
Anyway…moving on.
I’ve wanted to reacquaint myself with my darling blog for ages but the same excuses would always crop up – no time, heavy self-doubt, a lack of motivation, an odd sense of social anxiety, self-questioning, ‘who’s still reading blogs?’ blah, blah, blah, the list goes on. You get the gist.
But a time eventually strikes you, even when you least expected it and you just get on with it. You just do it! No. More. Faffing!
So here we are, on the first day of February 2024(!) and we’re jumping back into the saddle, so to speak. I make no promises of regular written content or anything on here being of any worth. But I do promise, when I do get to write here throughout the year, it’ll always been an honest ramble sharing my eternal love for sewing and quilting and whatever’s going good in the sewing room at that time.
Shall I share with you what’s currently on the Design Wall?
No surprise. It’s a lovely parade of hexie flowers! (Always a sentimental favourite of mine!)
Spot the jelly-baby and nested chick!
The story goes a little something like this…
A friend from church is a missionary in a place called Galmi in Niger, a country in Africa. On their most recent trip home, they gave me a beautifully pieced length of fabric pieced/sewn by local women, expertly made up of left over fabric scraps.
My mind instantly went into overdrive thinking of how I can showcase every little detail of each fabric scrap, highlighting and praising each print in a harmonious way.
And here enters the subtle beauty and economy of the humble hexie flower…
Clashing prints, colours and textures! 😍
By employing a rough fussy-cut approach, I was able to get as much of the ‘good-bits’ as I could. And by ‘good-bits’, I mean perfectly cutting out bright yellow floral prints that sided next to a kitsch jelly-baby/embryo print that then flowed into a gorgeous pastel pink and blue floral. I also wanted to keep the bulky junctions of where two or three clashing prints came together, creating a wonderful push and pull of colour and texture.
So, with each hand-sewn whipstitch, clashing prints and all warm colours of the rainbow, some lovely little flowers have begun to bloom.
I’m currently up to the stage of expertly pairing each hexie flower to a complementing solid background square and then lovingly appliquéing into place using a dab of fabric glue and finishing with a quick straight-stitch whiz around along the edges with the sewing machine.
A tidy-ish pile of the last six hexie flowers to be appliquéd and finished.
As time permits and life settles back into a steady rhythm after the summer holiday break here in Australia, I’ll also gently ease myself back into working on projects that spark the joy and thrill I mentioned earlier. I have a butt-tonne of sewing goals I’d love to accomplish this year – a few include finishing a second Swoon Quilt and making a trendy Quilt Jacket/Coat!
And of course, making the effort to pop up here a few times each month (as well as on my YouTube channel – I make sewing room vlogs and the occasional block tutorial video!), connecting, sharing and celebrating my love for all things sewing and quilting!
It’s no secret, this year has freakishly flown by, eating up time like it’s no bodies business. And my poor sewing machine has suffered as a consequence.
Also, not gonna lie, my motivation to sew and be creative has taken a bit of a hit too. So with all of that combined, not a whole lot of movement has been had in my sewing room this year.
But recently a few projects have come to hand to make me dust off the sewing machine, dig out my rulers and cutters and get sewing again.
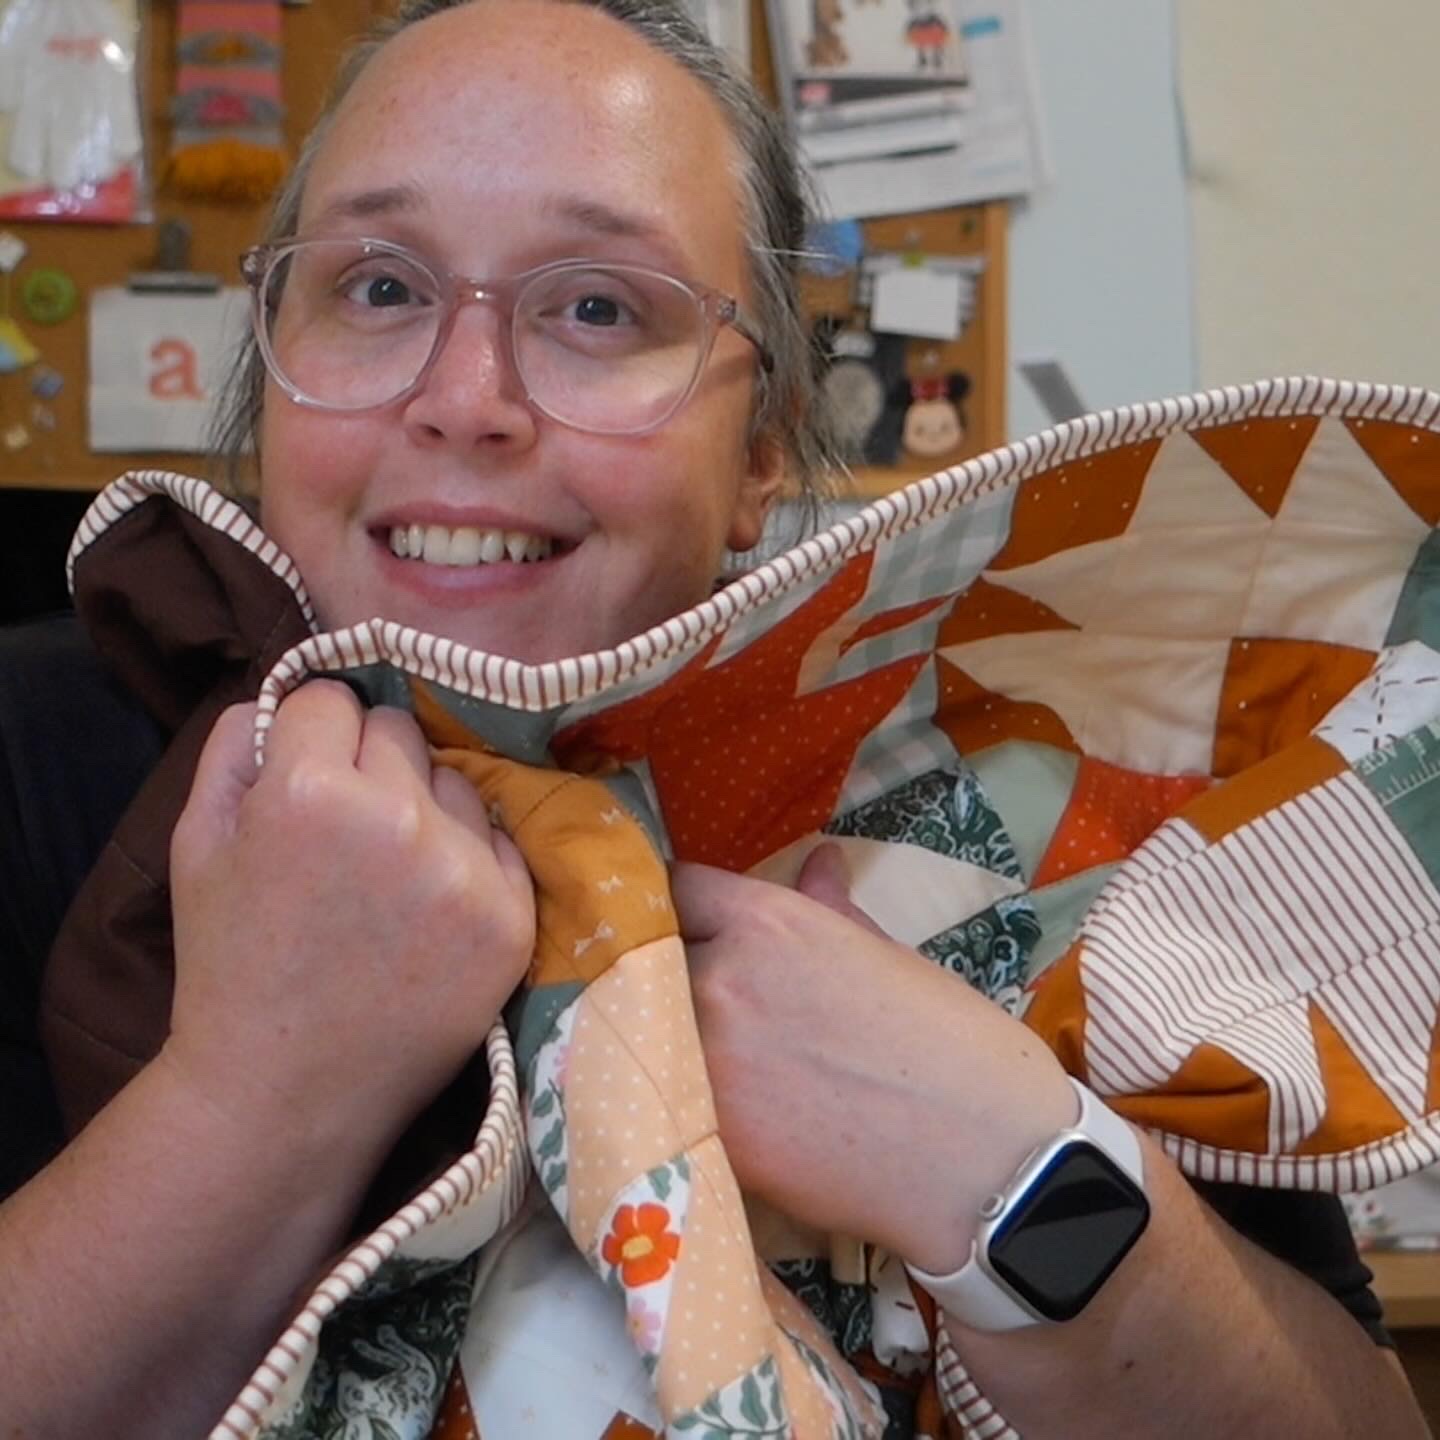
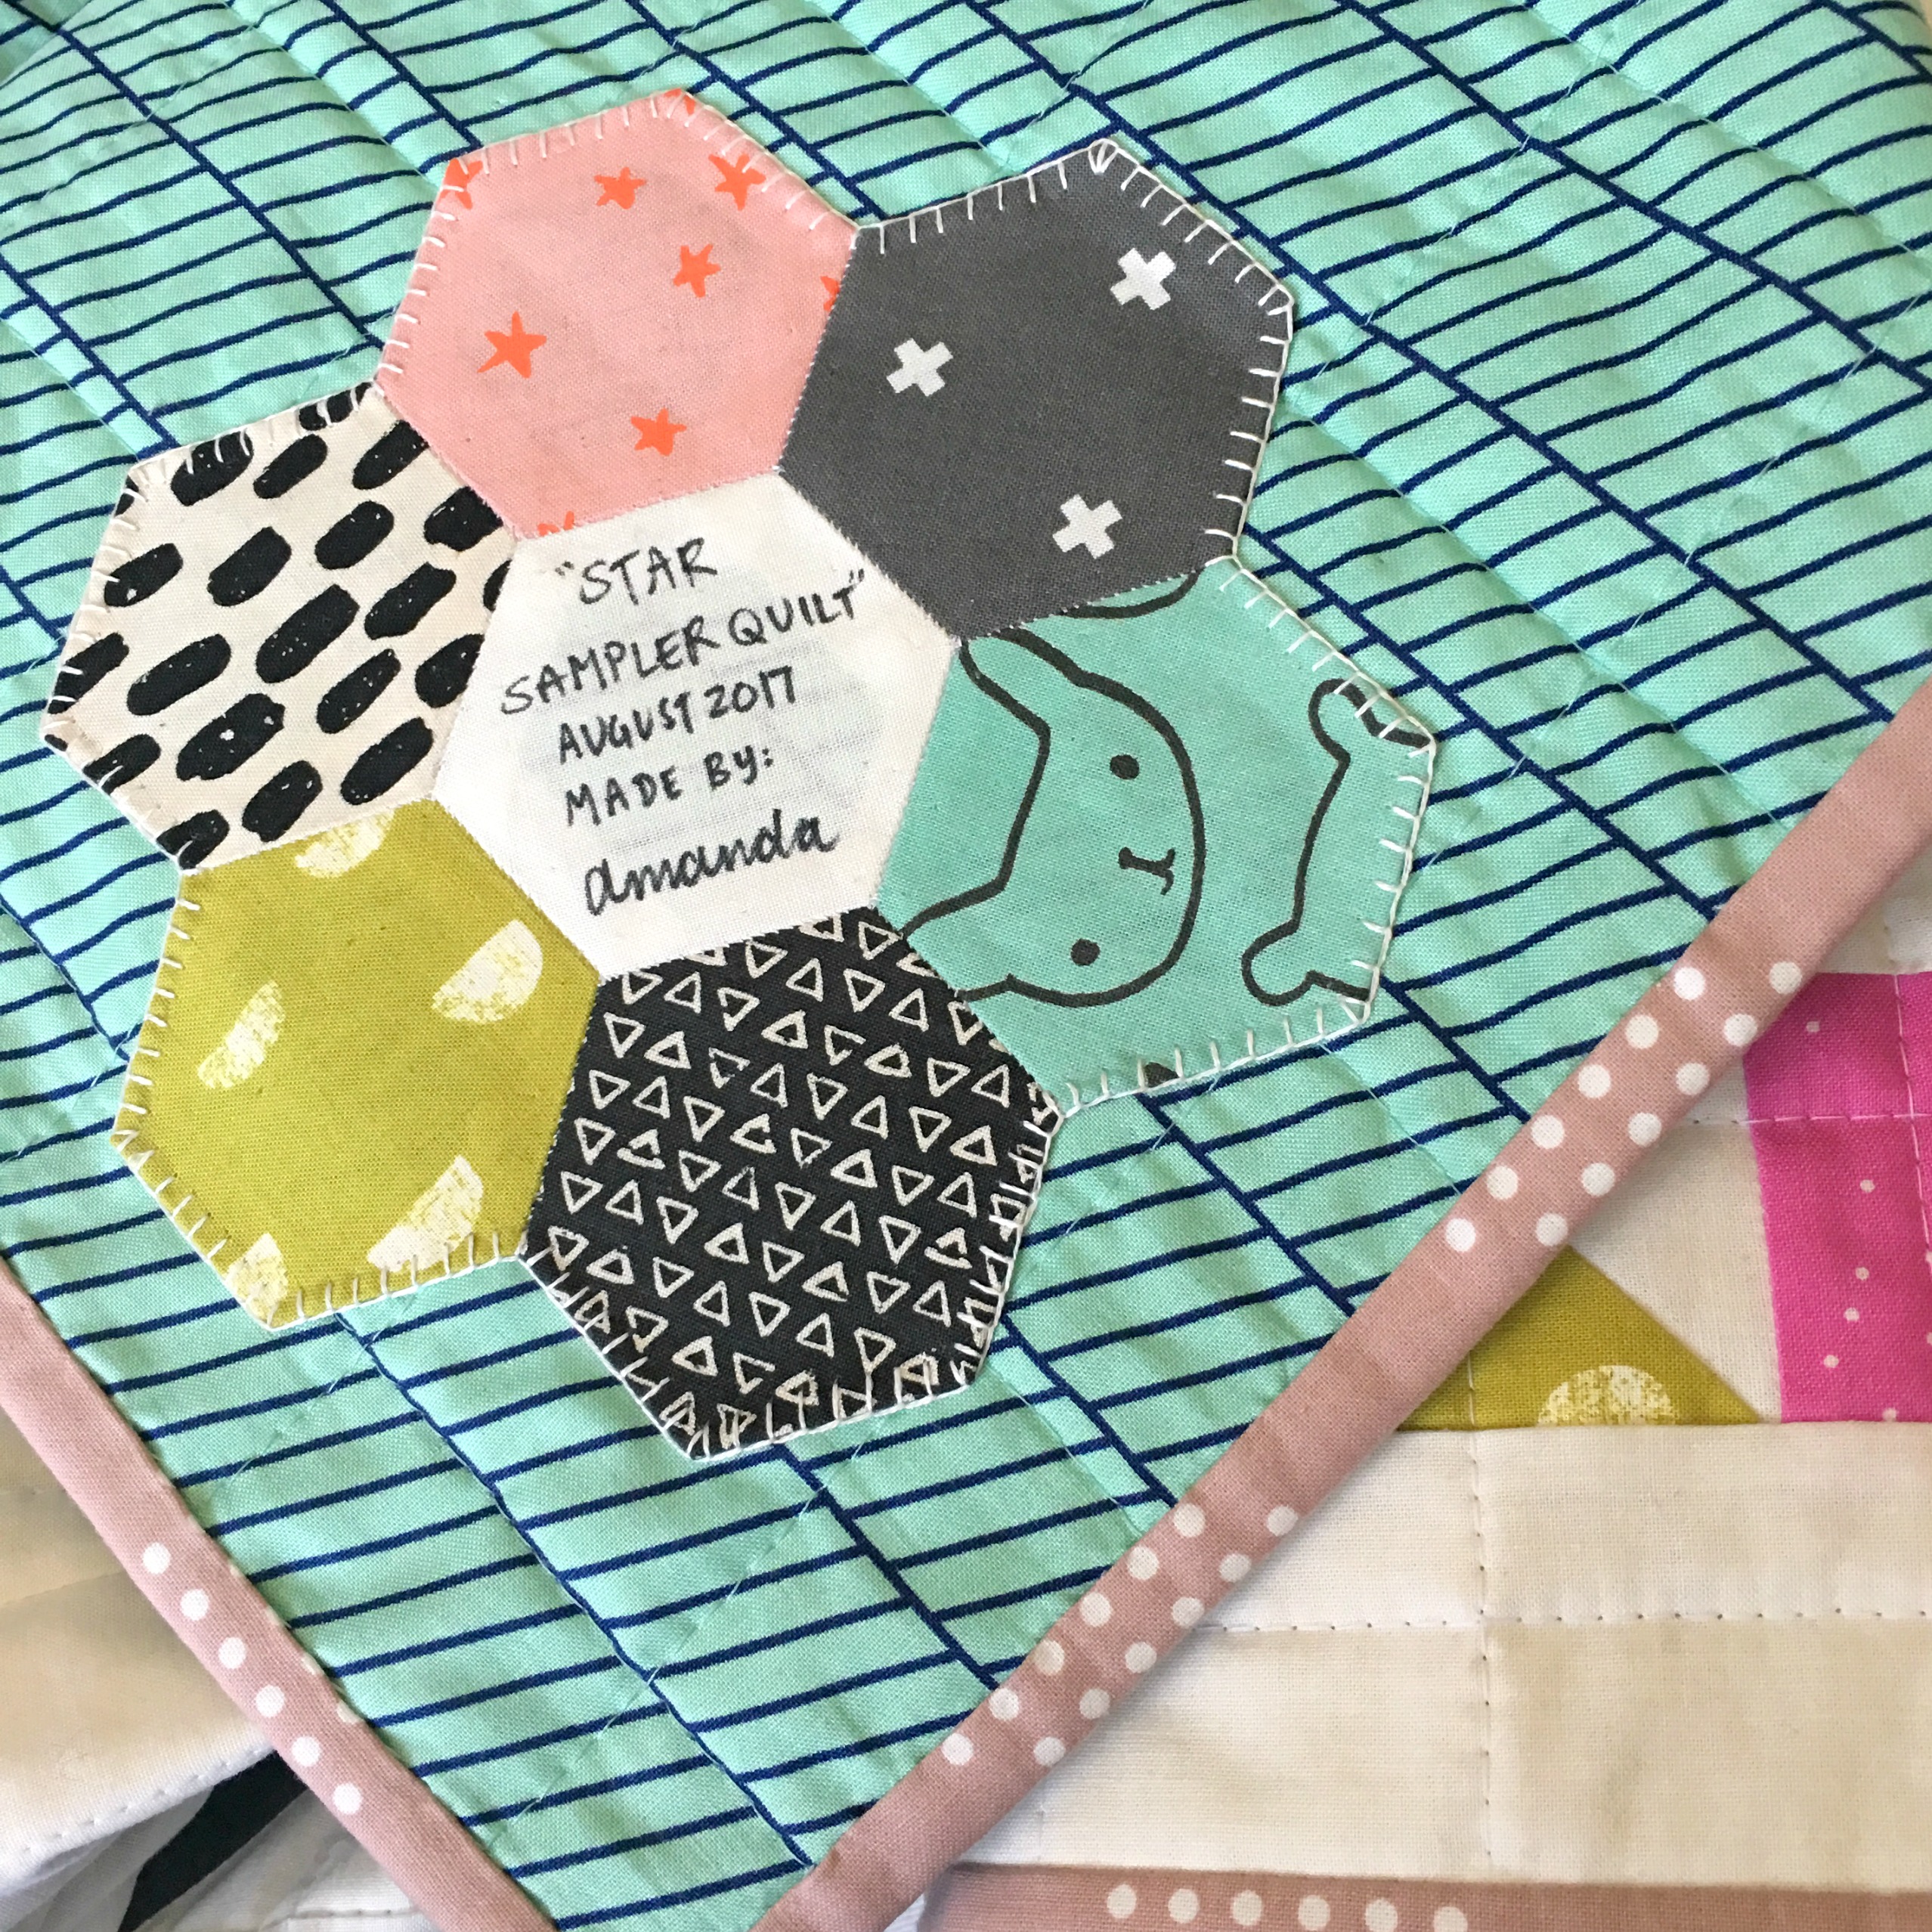
In my last post, I shared with you my finished Star Sampler Quilt (sans quilt label!)…
It felt like it took me for ages to get this quilt (and YouTube series) finished. But I’m so happy with the end result.
I currently have it hanging in my sewing room and I find myself just staring at it at times, admiring it’s beautiful tactile quilted surface, it’s perfectly pieced and nested points as well as the monochromatic tones clashing with the pops of colours dotted here and there.
❤
When I was quilting this quilt, I took a gamble and used a new tool that I’ve been told is a must-have to use when quilting… Quilting Gloves!! OMG!! How did I ever get through quilting a quilt without these bad boys all of my quilting life?! They’re ah-maz-ing! Although I felt a little bit clumsy and resembled a bad Mickey Mouse look-a-like, the grip the gloves gave me was 10-fold compared to just using my bare hands!
Although the series has now come to an end, I only just finished the final touches to the quilt today… The quilt label!
Quilt Labels from my two previous QALs
And as tradition stands, I made the quilt label a Hexie Flower using some of the fabrics featured throughout the blocks in the quilt. Love it, love it, love it!
+++
Over the past few months, I’ve been sharing a new quilt that I very excitedly started after wanting to do it for ages and ages! The pattern is called Pixelated Rose by Riley Blake Designs and it sings to my yearning Florist inside of me!
So far I’ve loved every stage of getting this quilt underway. Choosing the harmonious solid colours was a breeze, the measuring and cutting was a slow but very meditative experience (I think I must be one of the very few quilters out there who loves the cutting process!) and then the precise piecing has kept me on my toes! Because of it I’ve been able to settle into an easy pressing and nesting routine that each block needs to be able to fit together in the end. Not gonna lie, the whole process (for me anyway) has been quite slow and lengthy. But I already knew this and I took on this project as one of those slow burners that you keep coming to over a set period of time until it’s finished, either months or years after you started!
I’ve been posting pics here and there on Instagram of the progress so far…
Unfortunately, I haven’t gotten any further than the last photo in the right hand corner. The past month has been jammed packed full and this project has been pushed to the side, collated into block order and hung outta mind, outta sight. Although, I do have some free time tonight… Hmm… 🙂
+++
Now, I must also confess that there has been a spectacular fail in the sewing room too.
That being a terrible attempt at making a pretty gathered A-Line skirt for my birthday a few weeks ago.
Despite being quite time poor during the weeks leading up to my birthday, I knew it would be a pretty big stretch to be able to cut, make and finish a skirt when dressmaking really isn’t a strong skill of mine. Although, in saying that, I did successfully stitch a side pocket for the first time as well as sew in a zipper next to another side pocket! Yeah!
However, things began to fall a part when I had to attach the waistband and match up dots and seams and things that I didn’t know I had to match up… So with time pressing on me and my interest and patience waining, I gave it up and allowed in the realisation that I’m no good at dressmaking one bit. (I’m sharing no photos of my sad attempt of a skirt!) Perhaps with a bit more practice and a bit more patience, I may become a superstar seamstress yet!
+++
I hope you enjoyed this brief glimpse back into my sewing room.
I feel like I’ve really fallen back in love with sewing again… Just the raw, basic and fundamental steps in this creative skill I’ve been blessed with. Over the past year or so, I’ve felt slightly distant from my sewing bubble that I’m so used to be being in. But I think I’m finding it again and it feels great!
So I had a great request from one of you guys a few days ago to share with you a few of the notions and tools that I find to be the most useful when I’m sewing and quilting. A few of them I have shared before, but if you’re new to these parts, I hope you find the following helpful!
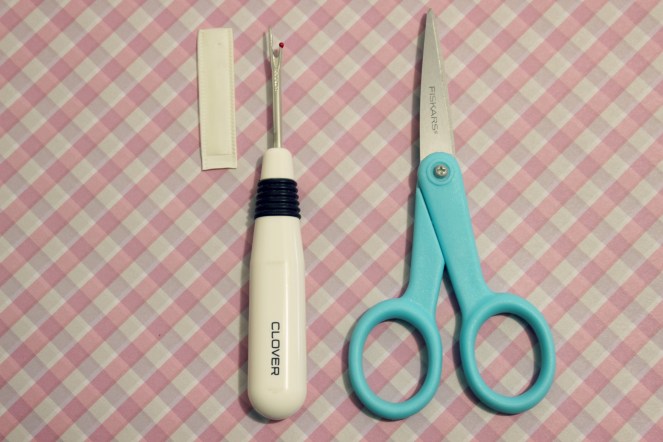
First off are these two awesome little tools from Clover.
Both of these I find super useful when I’m paper-piecing. I use the Serrated Tracing Wheel to perforate the lines on the paper before sewing over them. Doing this also helps to tear the paper away from the seams and fabrics at the end. The other tool is called a Finger Presser and I use this to quickly press the seams open all throughout the construction of a paper-pieced block instead of using the iron. For me, it saves so much time on going back and forth to the ironing board and also saves my poor little fingers from getting burnt! Ouchies!
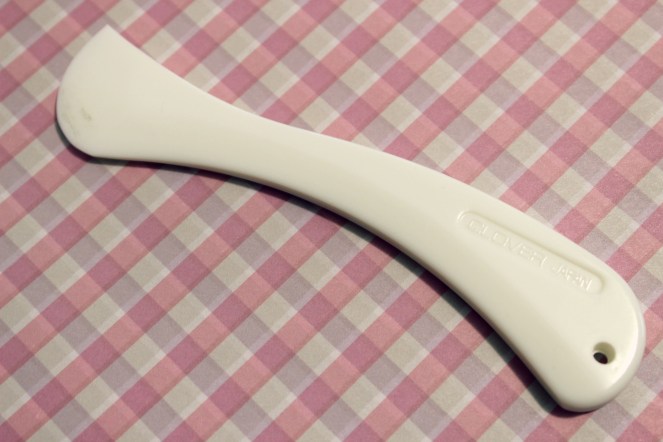
Next up is another Clover product called a Hera Marker.
As strange and weird as it looks, this little tool is so awesome and very useful to use for us quilters. Because I mainly incorporate straight lines all throughout my quilting, I use a Hera Marker and a long quilting ruler to mark out clear, even lines onto the quilt top that I then simply sew over, achieving a (almost) straight quilted line!
Since using this tool, I’ve seen a huge improvement in my quilting! Everything just looks so more consistent and pro-fesh, sky-rocketing my confidence by a mile!
The next two things I like to see as more everyday-type useful tools.
The Fiskars thread snips would have to be one of the best little scissors I’ve ever used! They cut through thread like butter and have a little tapered like point that elevates the blade away from the surface of the fabric but is still able to make the closest of cuts when trimming away thread! It really is like magic!
Ahh, the seam ripper. Where would we be without one! And just like all of the other Clover products, this one doesn’t disappoint! It’s light and easy to hold and rips through the toughest of mistakes like it’s no bodies business! It’s a fab little tool and I know I can rely on it to fix some of the worst mistakes I can ever dream of making!
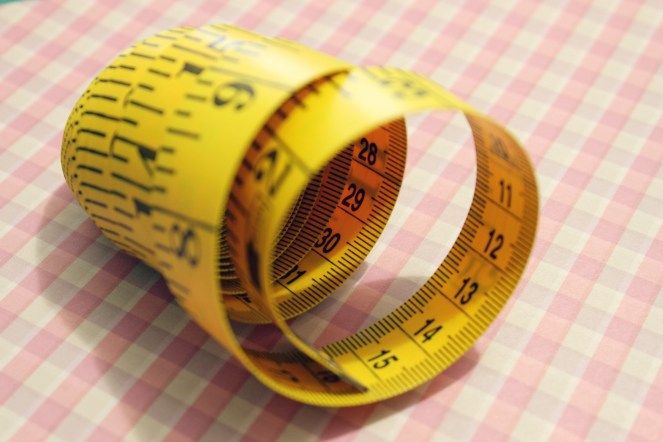
This is my tape measure…
I have it sitting on my desk and I would say that I reach for it at least five times during one day! Whether that be for answering your questions, figuring out size scales for patterns and blocks as well as playing with it when I’m bored or procrastinating! My nephews also love playing with it too! 😀
I particularly find this one useful as it has centimetres on one side and inches on the other. Because I use both of these types of measurements in my quilting, it’s so helpful to turn to it and quickly figure out what 5″ is in centimetres! (It’s about 12.5cm if you’re curious!) 😀 The tape measure is also super long, measuring up to 120″ (300cm) which is helpful when figuring out how much batting and backing fabric one needs to finish a quilt!
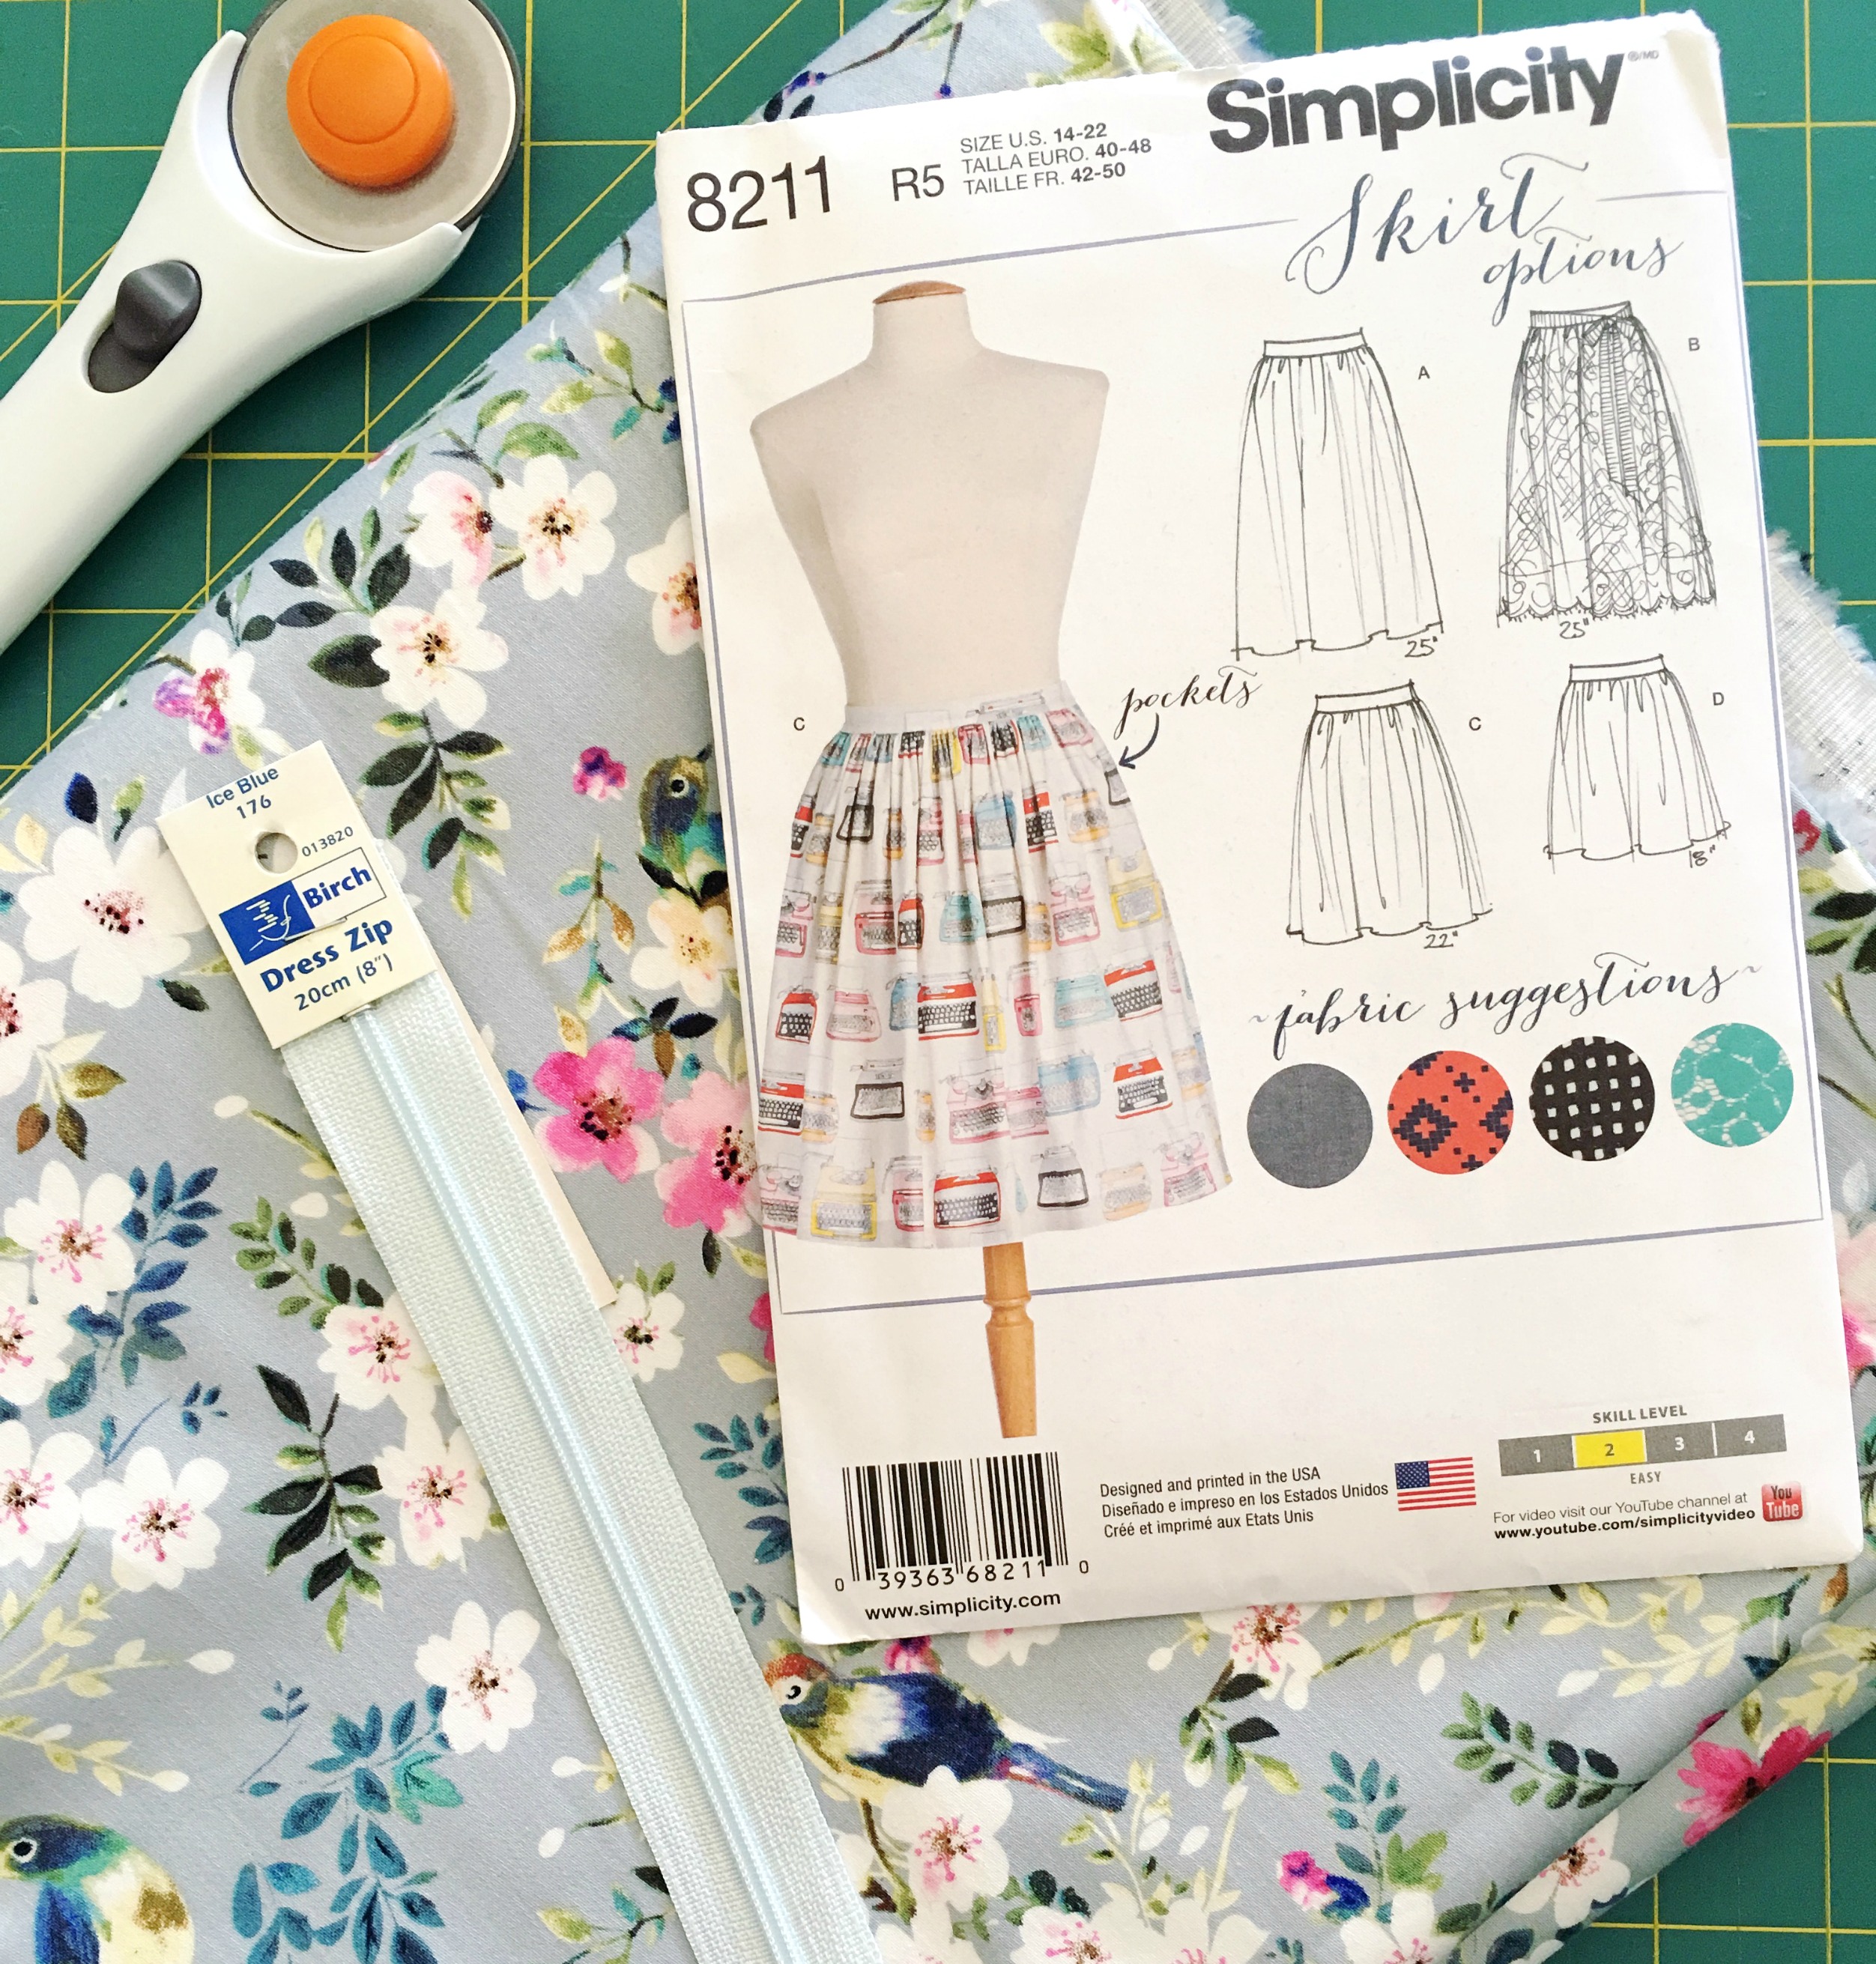
And last of all is a tin of basting pins.
I don’t usually baste my quilts with pins but when I do I find these ones super helpful! This is because they have a slight bend to them almost acting like a hook as you pierce them through the three layers of the quilt. They close nice and quickly and also undo almost instantly as you’re quilting along on your machine. This particular set of pins I bought from Spotlight and are by a Australian haberdashery company called Birch.
+++
So there are just a few of my top tools and notions that first came to mind to share with you!
In tomorrows post I’ll go through a few more that didn’t quite make the top seven! 🙂
Do you have any top fave tools and notions that you find useful when your sewing and quilting? Let me know!
Another sunny weekend-day has come to an end and today I finally got stuck into some sewing!
As the early afternoon rolled over, I fired up the iron, got my machine in working order (new needle, full bobbin and full thread on top), pressed all of my fabrics and begun the task of making my Notting Hill House Mini!
Ooo, isn’t it just the loveliest thing!!
I found, just like the Pandamonium Mini Quilt, there was a lot of cutting before the sewing could begin. But being as I’m a total loser for cutting (it’s one of my favourite steps in quilt making!), I was in my element as I meticulously checked and re-checked the measurements, lined up the fabric on my mat and then cut, cut, cut!
Piecing it together was a piece of cake! At almost every step in the pattern, there is a little diagram showing you what, where and how to piece all of the little pieces together to create the door, the windows and the roof and then how to bring them all together to complete the quilt top! Fab!
I was saying in yesterdays post, I wasn’t too sure on the fabrics I had chosen to use for this mini. But you know, I looked at the choices this morning with fresh eyes and didn’t change a thing! I could see that all of the fabrics I had pulled out would work brilliantly with each other!
All in all, I’m really happy with how everything came together. The door and stair section is a little wonky, but hey, it adds character! Now, I think I’m going to add a little border sashing around the outside of the house (even though the pattern doesn’t suggest that), just so that it stands out a little bit. I’m not too sure when I’ll have the time to quilt it as the week ahead is a busy one along with the weekend! I may have to pull some late-nighters to see it finished! But what ever happens, I’ll keep you in the loop!
Happy Sunday friends and I hope you all have a lovely week ahead!
One of the wonderful things that has come out of writing a blog, managing a YouTube channel and having an active Instagram account is that of creating some beautiful friendships with fellow, like-minded people all across the world! There are quite a number of you who regularly comment, chat, encourage and inspire me in everything that I publish and upload which makes my heart sing with gratefulness, humbleness and thankfulness! (Whew, so many ‘nesses’!) Words can never do justice to how kind you all are and how proud I am to call you friends, even though we’ve never met!
One act of insane kindness that I’m still blown away with is one made by a lovely lady in the UK whom I met on Instagram, Ayshia. Over the past year or so through sharing photos and having lots of great little chitta-chatta sessions, we’ve crazily discovered how many things we have in common even to a point where it’s borderline scary! I find it so fascinating that someone who literally lives on the other side of the world can be so alike to yourself that it feels as though you’ve known each other for ages, even though we’ve never met!
Anyway, with my birthday coming up soon Ayshia so kindly sent me a lovely package in the mail full of sweet gifts that made me so happy!
Everything she sent was just perfect! Lots of UK memorabilia (because I’m obsessed with the country, as you may know by now!): British flag keyring, a pack of socks (that’ll wear everyday with my Aussie Uggs!) and a half-metre cut of quilting fabric with MINI Coopers on it!!! OMG! Then the most adorable draw-string button bag (with buttons!) from Cath Kidston that I’ve ever seen! I love it so much!
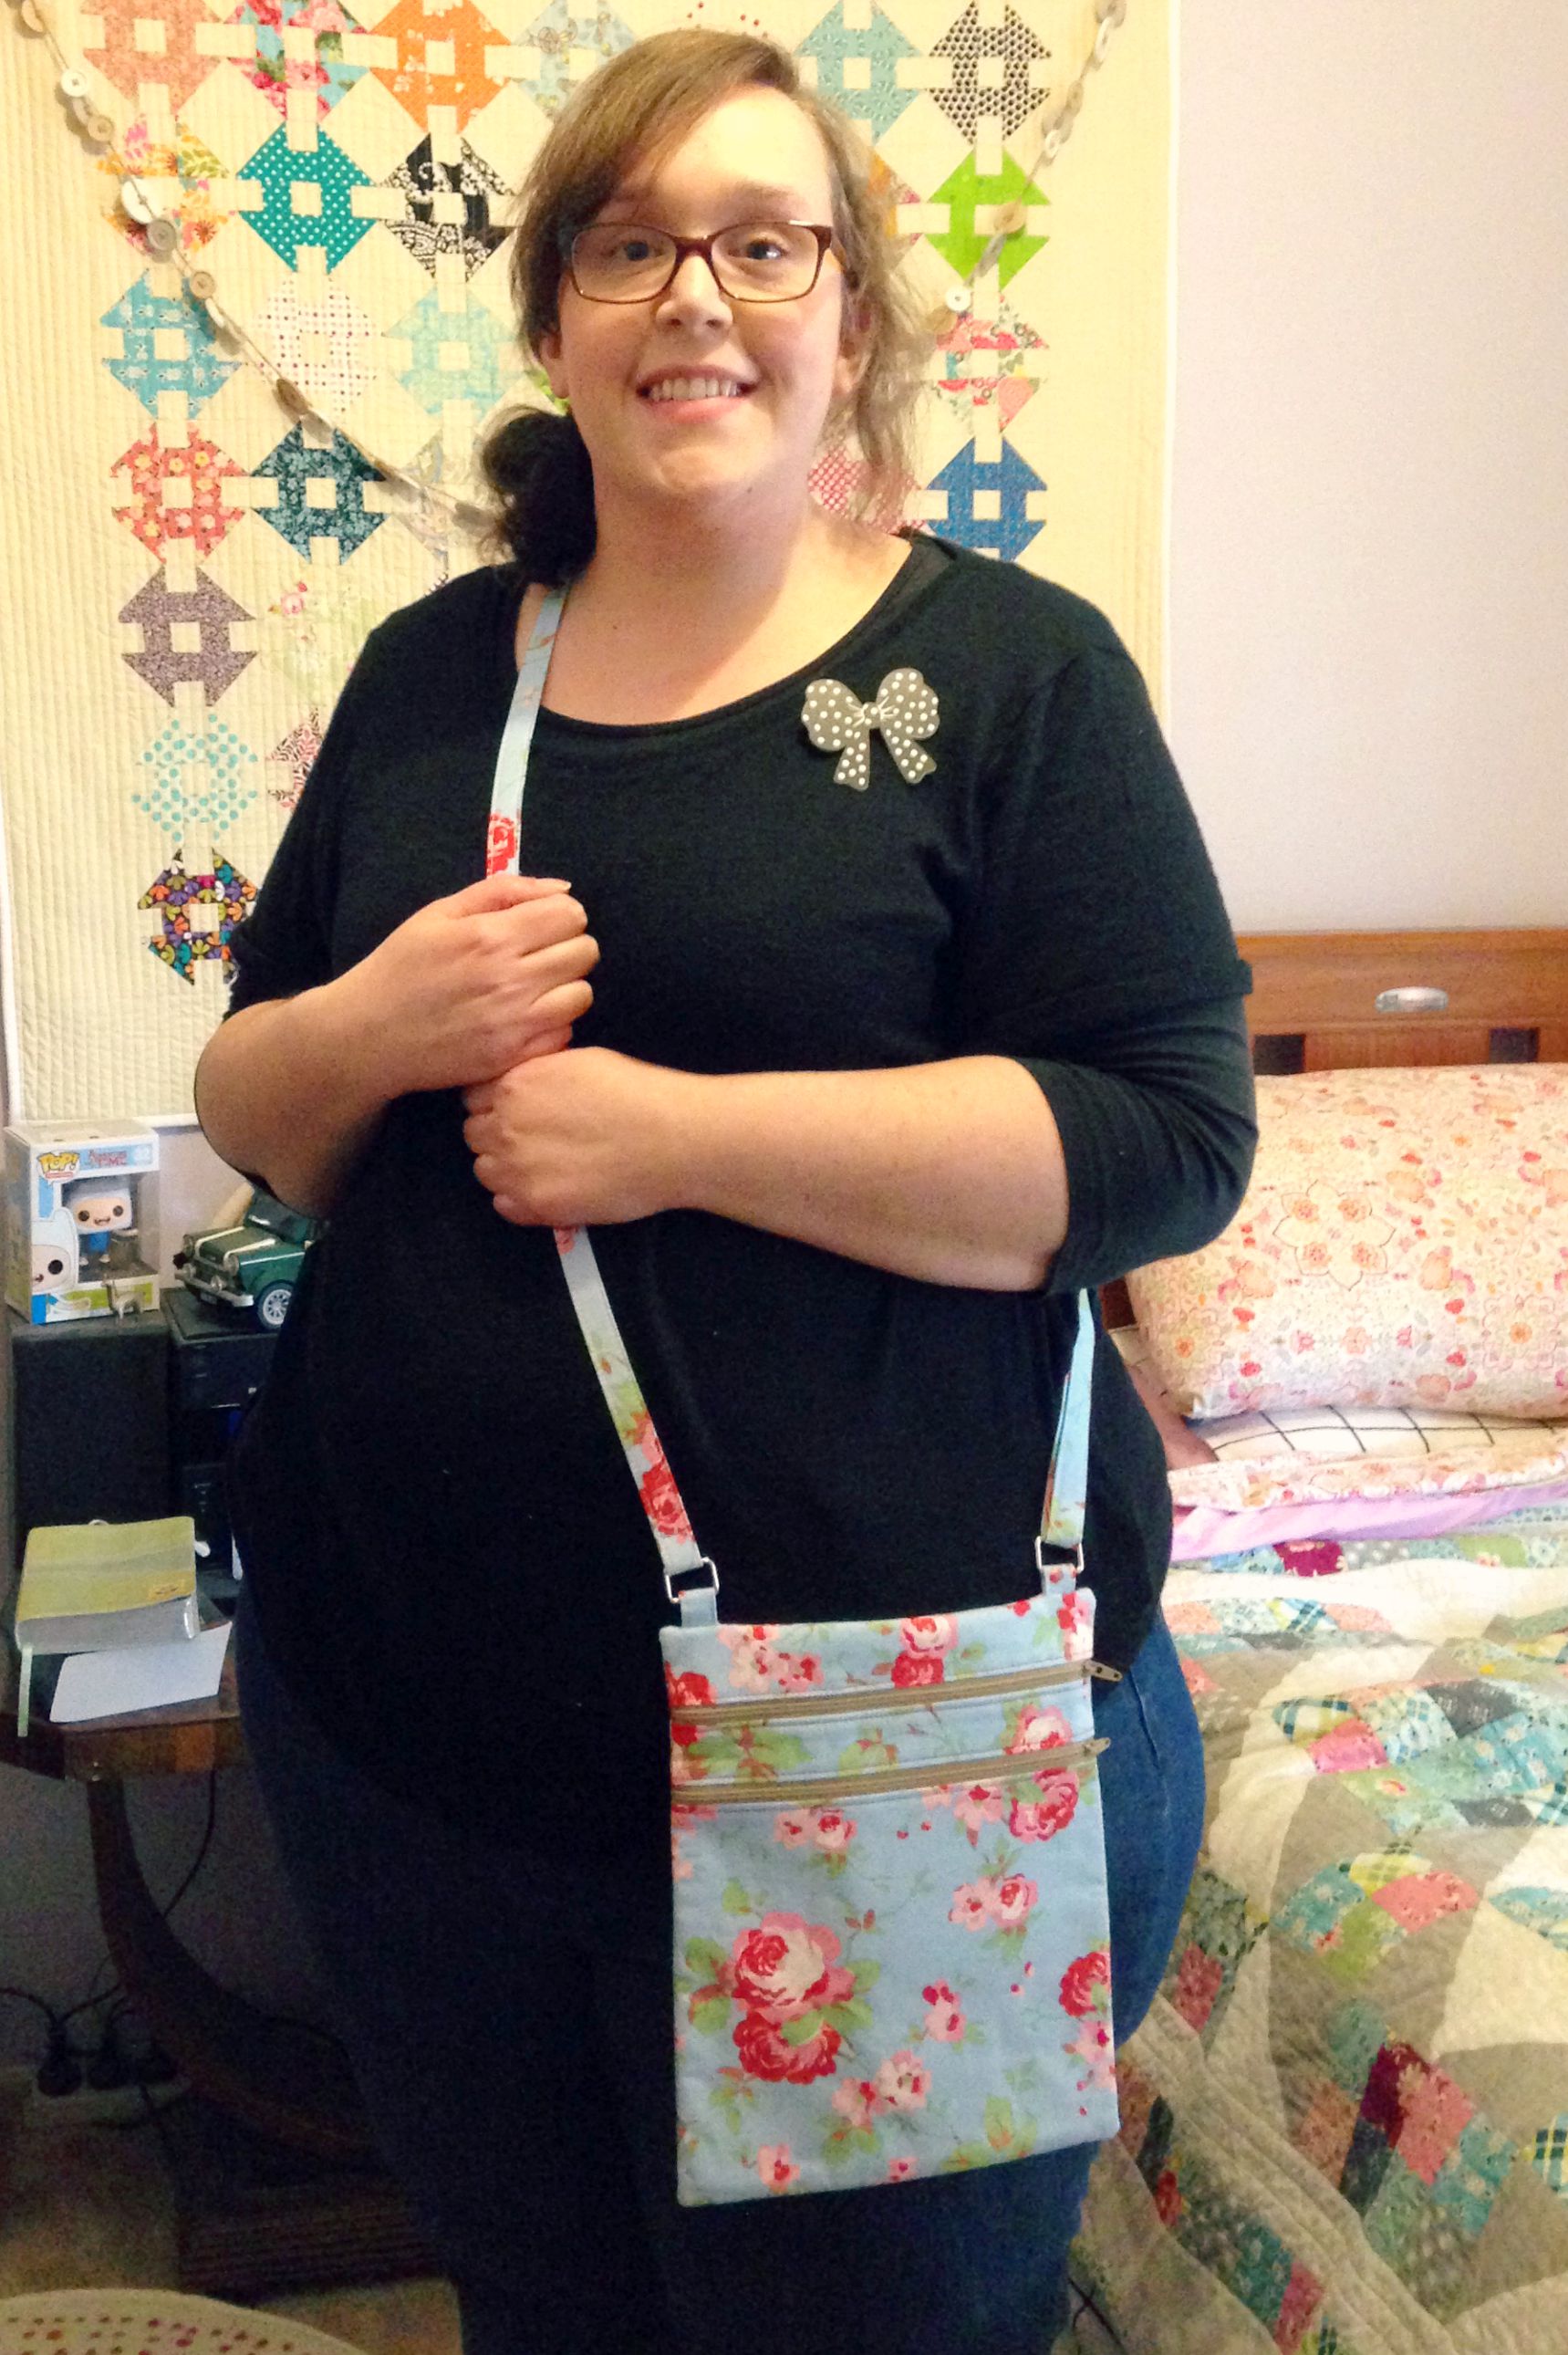
But the one thing that I am so grateful to receive is this beautiful cross-the-body bag that she made herself out of such gorgeous fabric!
I mean it’s absolutely perfect! Literally! I’m completely blown away by how talented she is and how wonderfully constructed the bag is!
The bag itself features two deep zippered compartments, both fully lined and has a nice long adjustable strap to sling around the body! My favourite type of bag! I’ve decided I’ll be using it tomorrow at the Market Day so that I always have all of my valuables and change safe and close to hand!
To Ayshia, thank you so much!! Truly, your utter kindness has blown away and I’m so thankful for our little blossoming friendship! I’ll cherish everything you’ve taken the time to send me and continue to sing your praises whenever someone asks about that gorgeous little bag!
And to all of you who regularly read my blog, watch my YouTube videos, like/comment on my Instagram and Facebook page, thank you for your lovely friendship! Everyday you blow me away with your lovely comments and words of encouragement that it makes all of the hard work and late nights totally worth it!
Today, the 3rd of September is my beautiful mum’s birthday!
Words really can’t express just how wonderful this woman is in my life as well as my brothers, my dads and our extended family and friends. I’m so proud to say that my mum really is my best friend. (Something I’ve only really noticed these past few months or so!) She knows everything about me, supports and encourages me and is always, always there when I need her for anything, whether it be big or small. She also always knows the right time and the perfect way to snap me back into reality when I’ve been in ‘the clouds’ too long, which is quite a regular occurrence I must admit! Put simply, life is better when she’s around and I don’t want that to change. Ever.
So today, we spent a lovely day together by going out local for lunch, laughing, chatting and being our usual nutty selves. Our dining table has been taken over by glittery cards, pretty flowers, chocolate cupcakes, oodles of strawberries and handfuls of crunchy caramel popcorn! Ooo, yum!!
Tomorrow we’ll be extending the celebrations further when my brother and his family come by for an afternoon-tea-slash-early-dinner party! It’s there, when we’re all together, that the fun, laughter, chaos and big ‘happy birthdays’ are sung! It should be fun, I think!
+++
Also today I’ve been busily sewing away making some sweet little things for my stall at a Market Day the PWA are holding at my church this coming Saturday! (Actually, I should OUR stall as I’m sharing a table with my sister-in-law Amie, who makes the most adorable little baby accessories!) Ergo, the day has consisted of making the finishing touches to a few new little wallets as well as quickly stitching up some very cute petal pincushions and some tissue box fabric covers! Well, the tissue box covers have only been cut out at the moment. I hope to squeeze in some more sewing tonight and tomorrow morning!
I’m so unbelievably happy with how these little pincushions turned out! The pattern I used was one that came in issue no. 52 of Mollie Makes. Once I read through it and saw how simple they were to make, I knew I had to get into it and make some to sell at the stall! Also, while we’re talking about them, hands up those of you who want a tutorial on how to make one… I’d be more than happy to share with you how I make them!
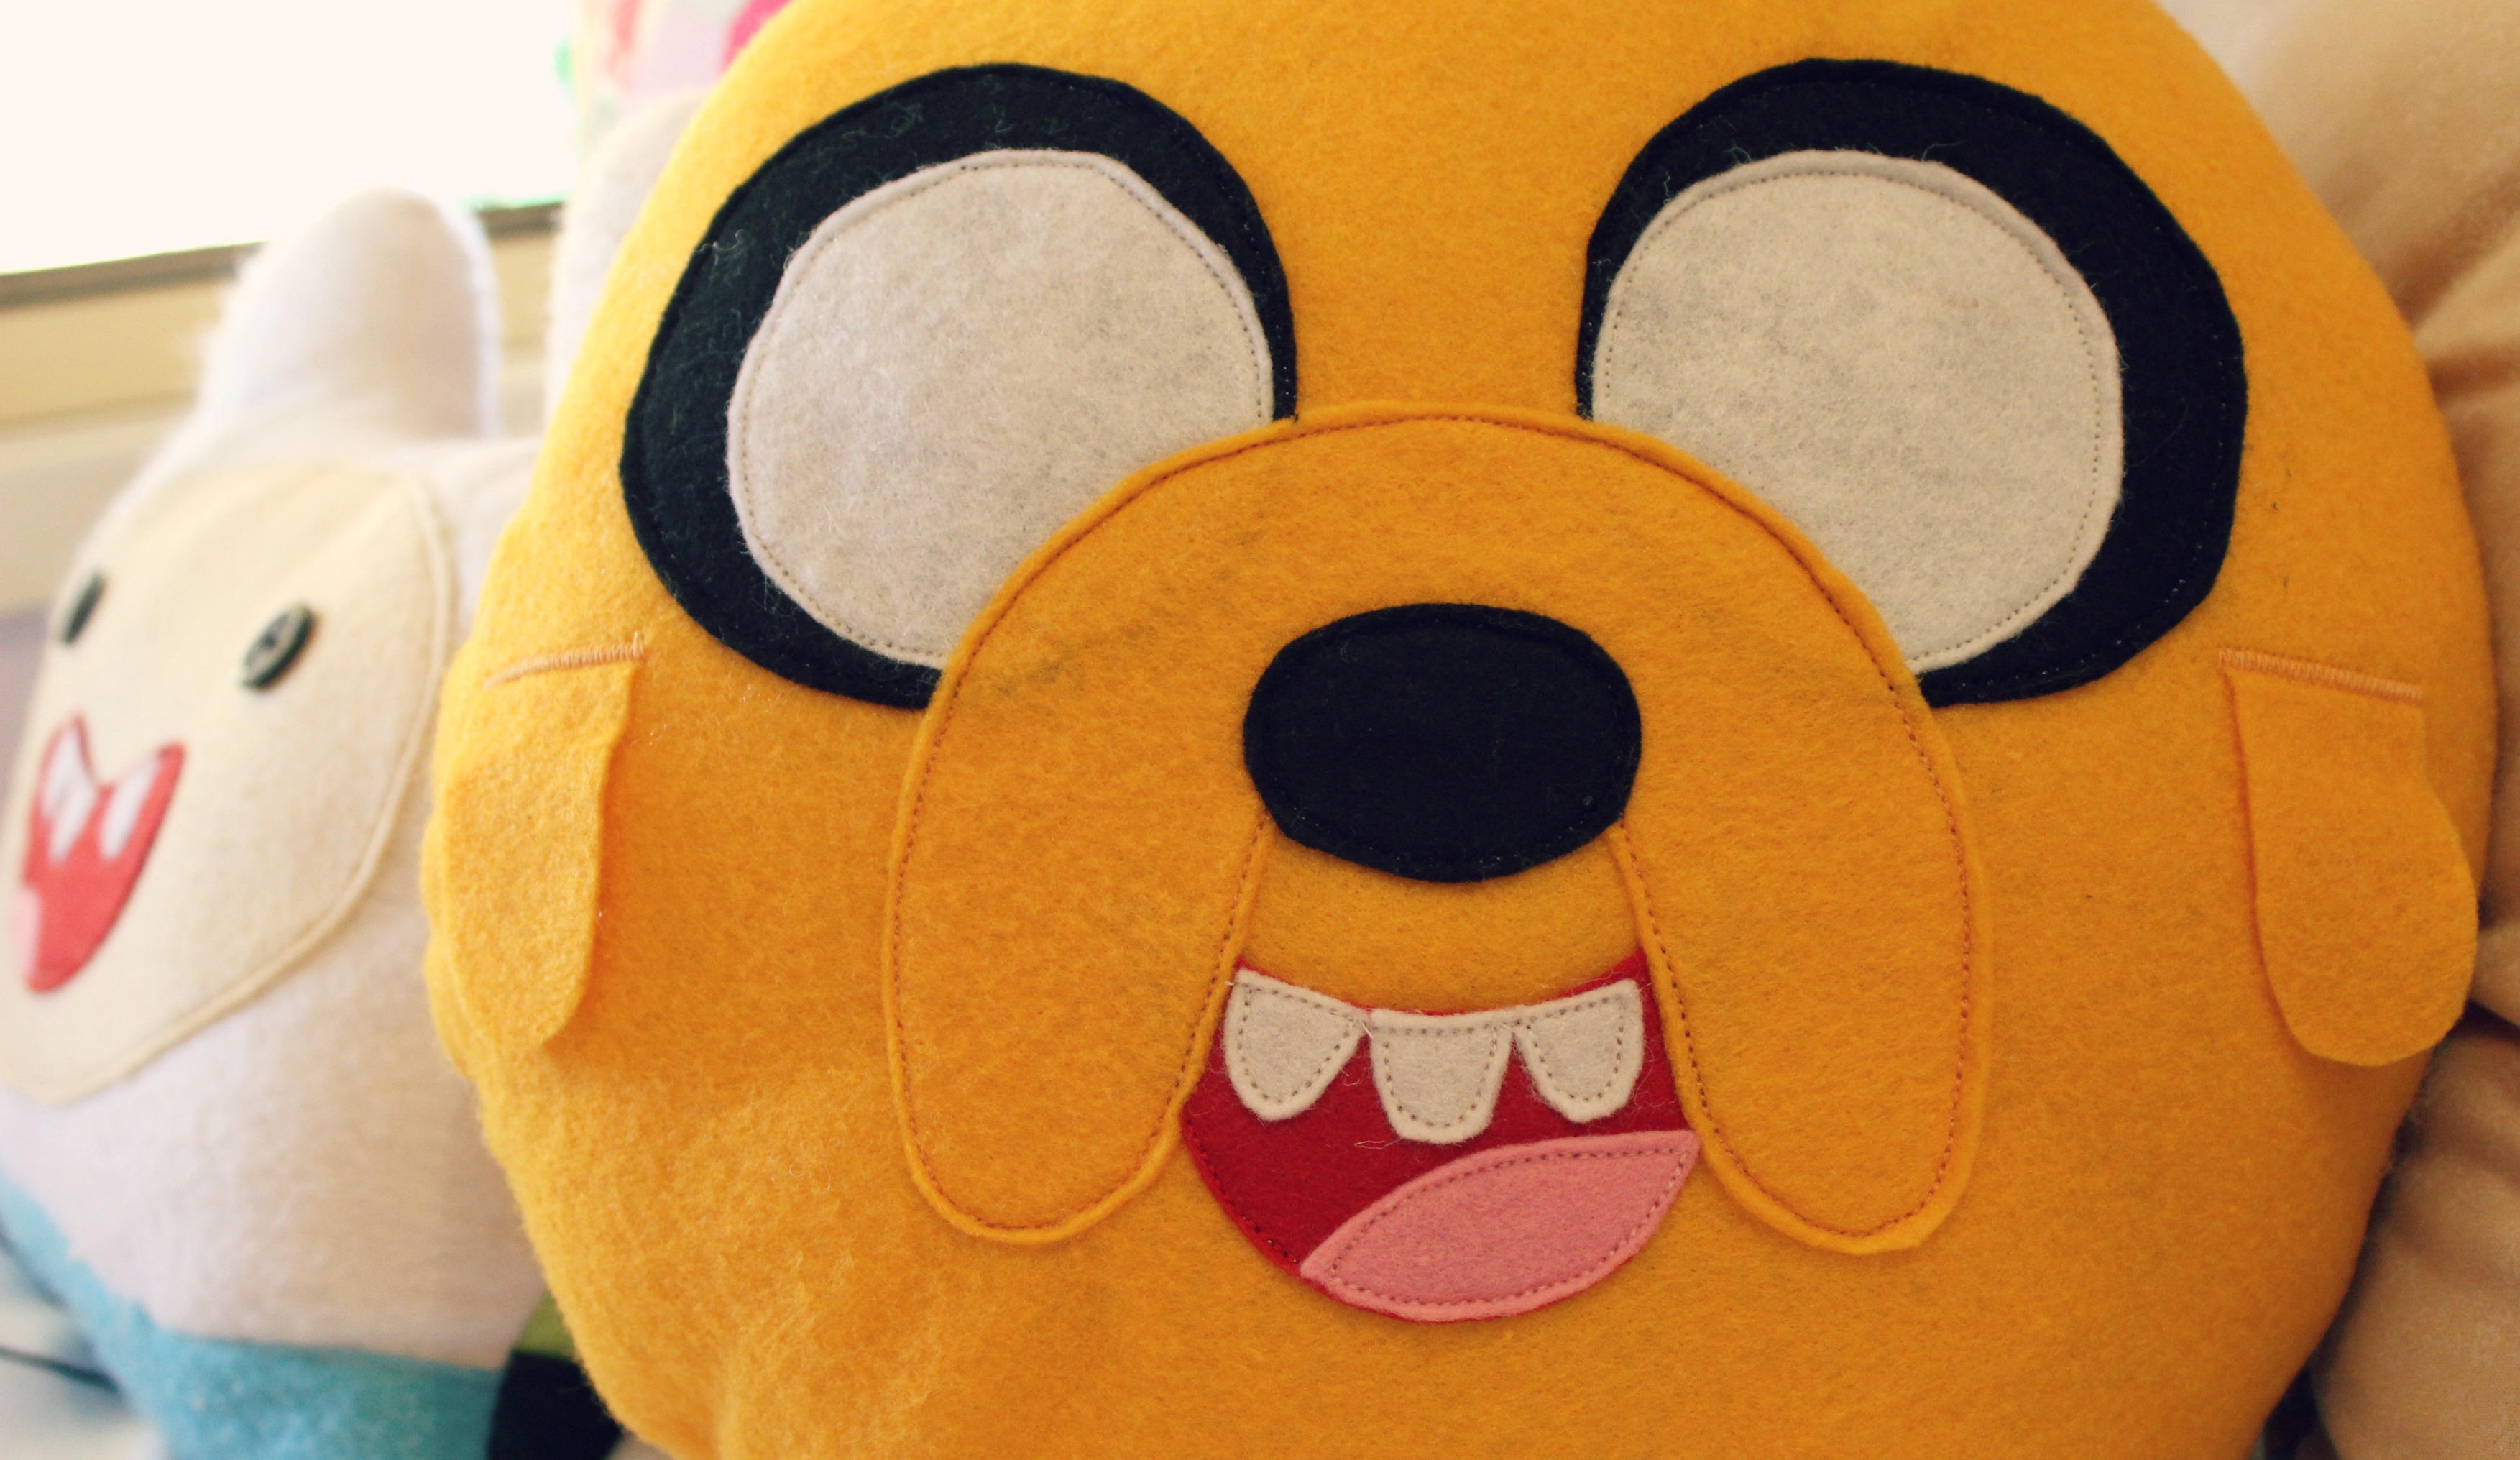
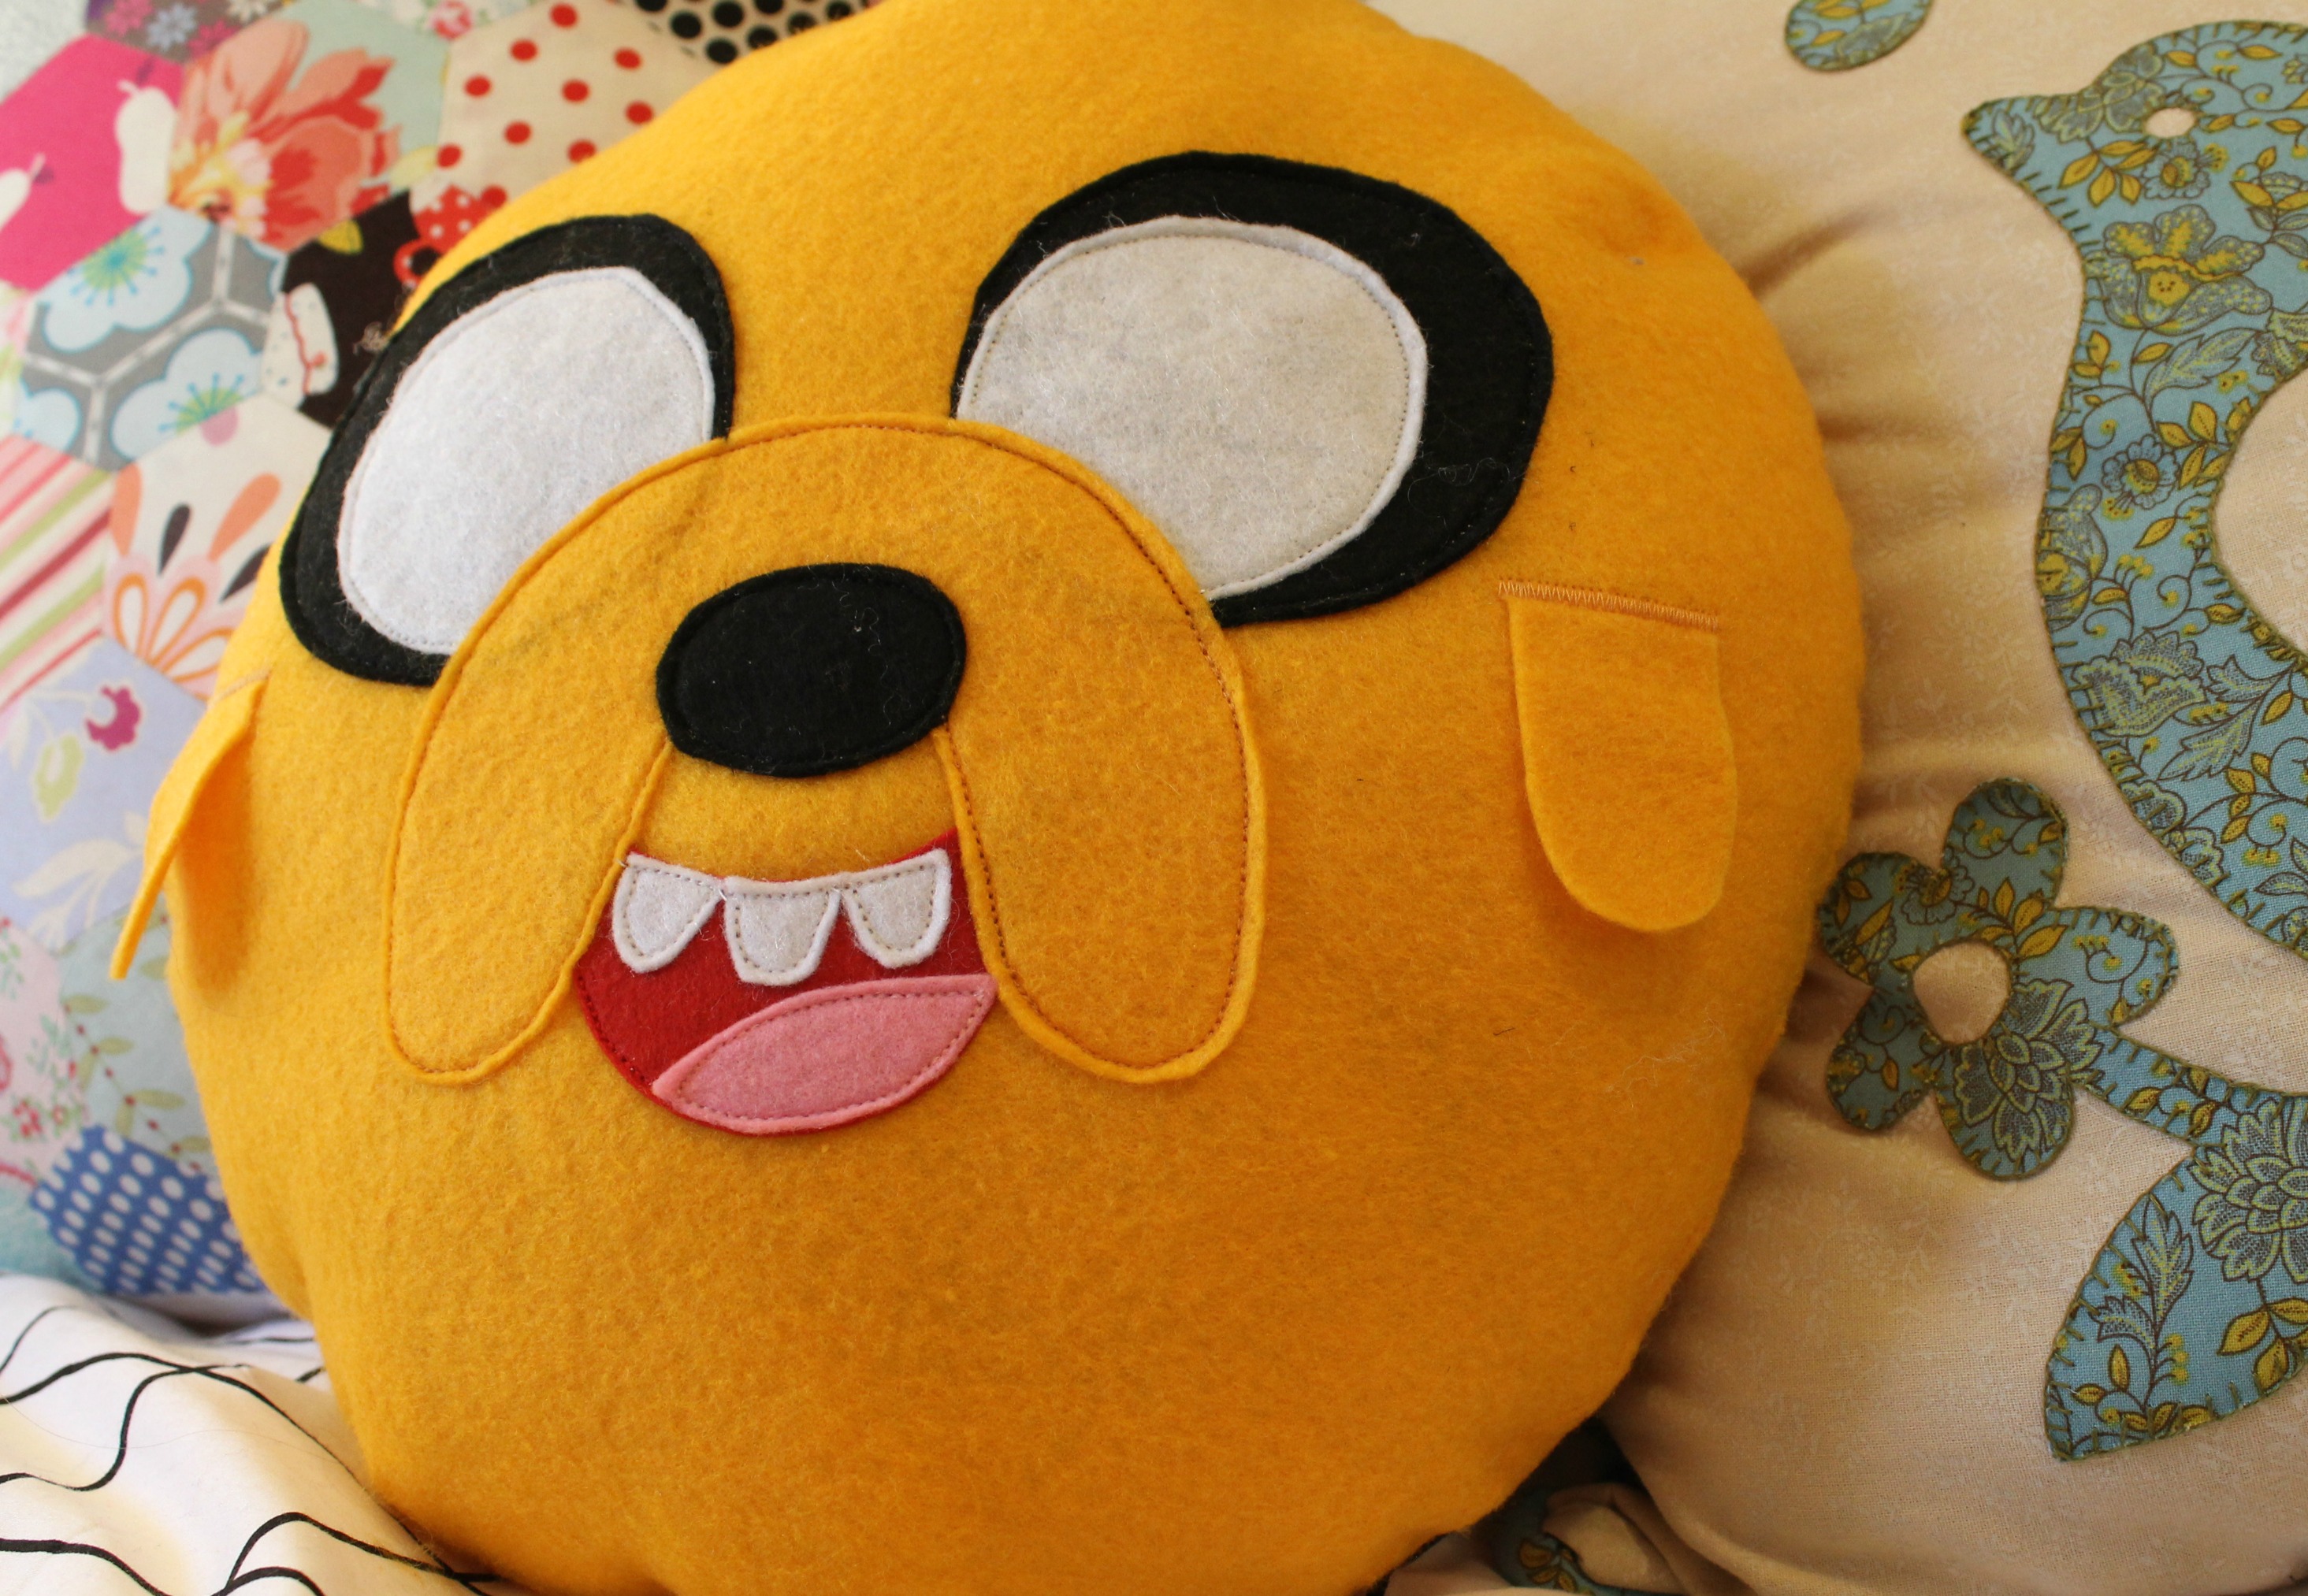
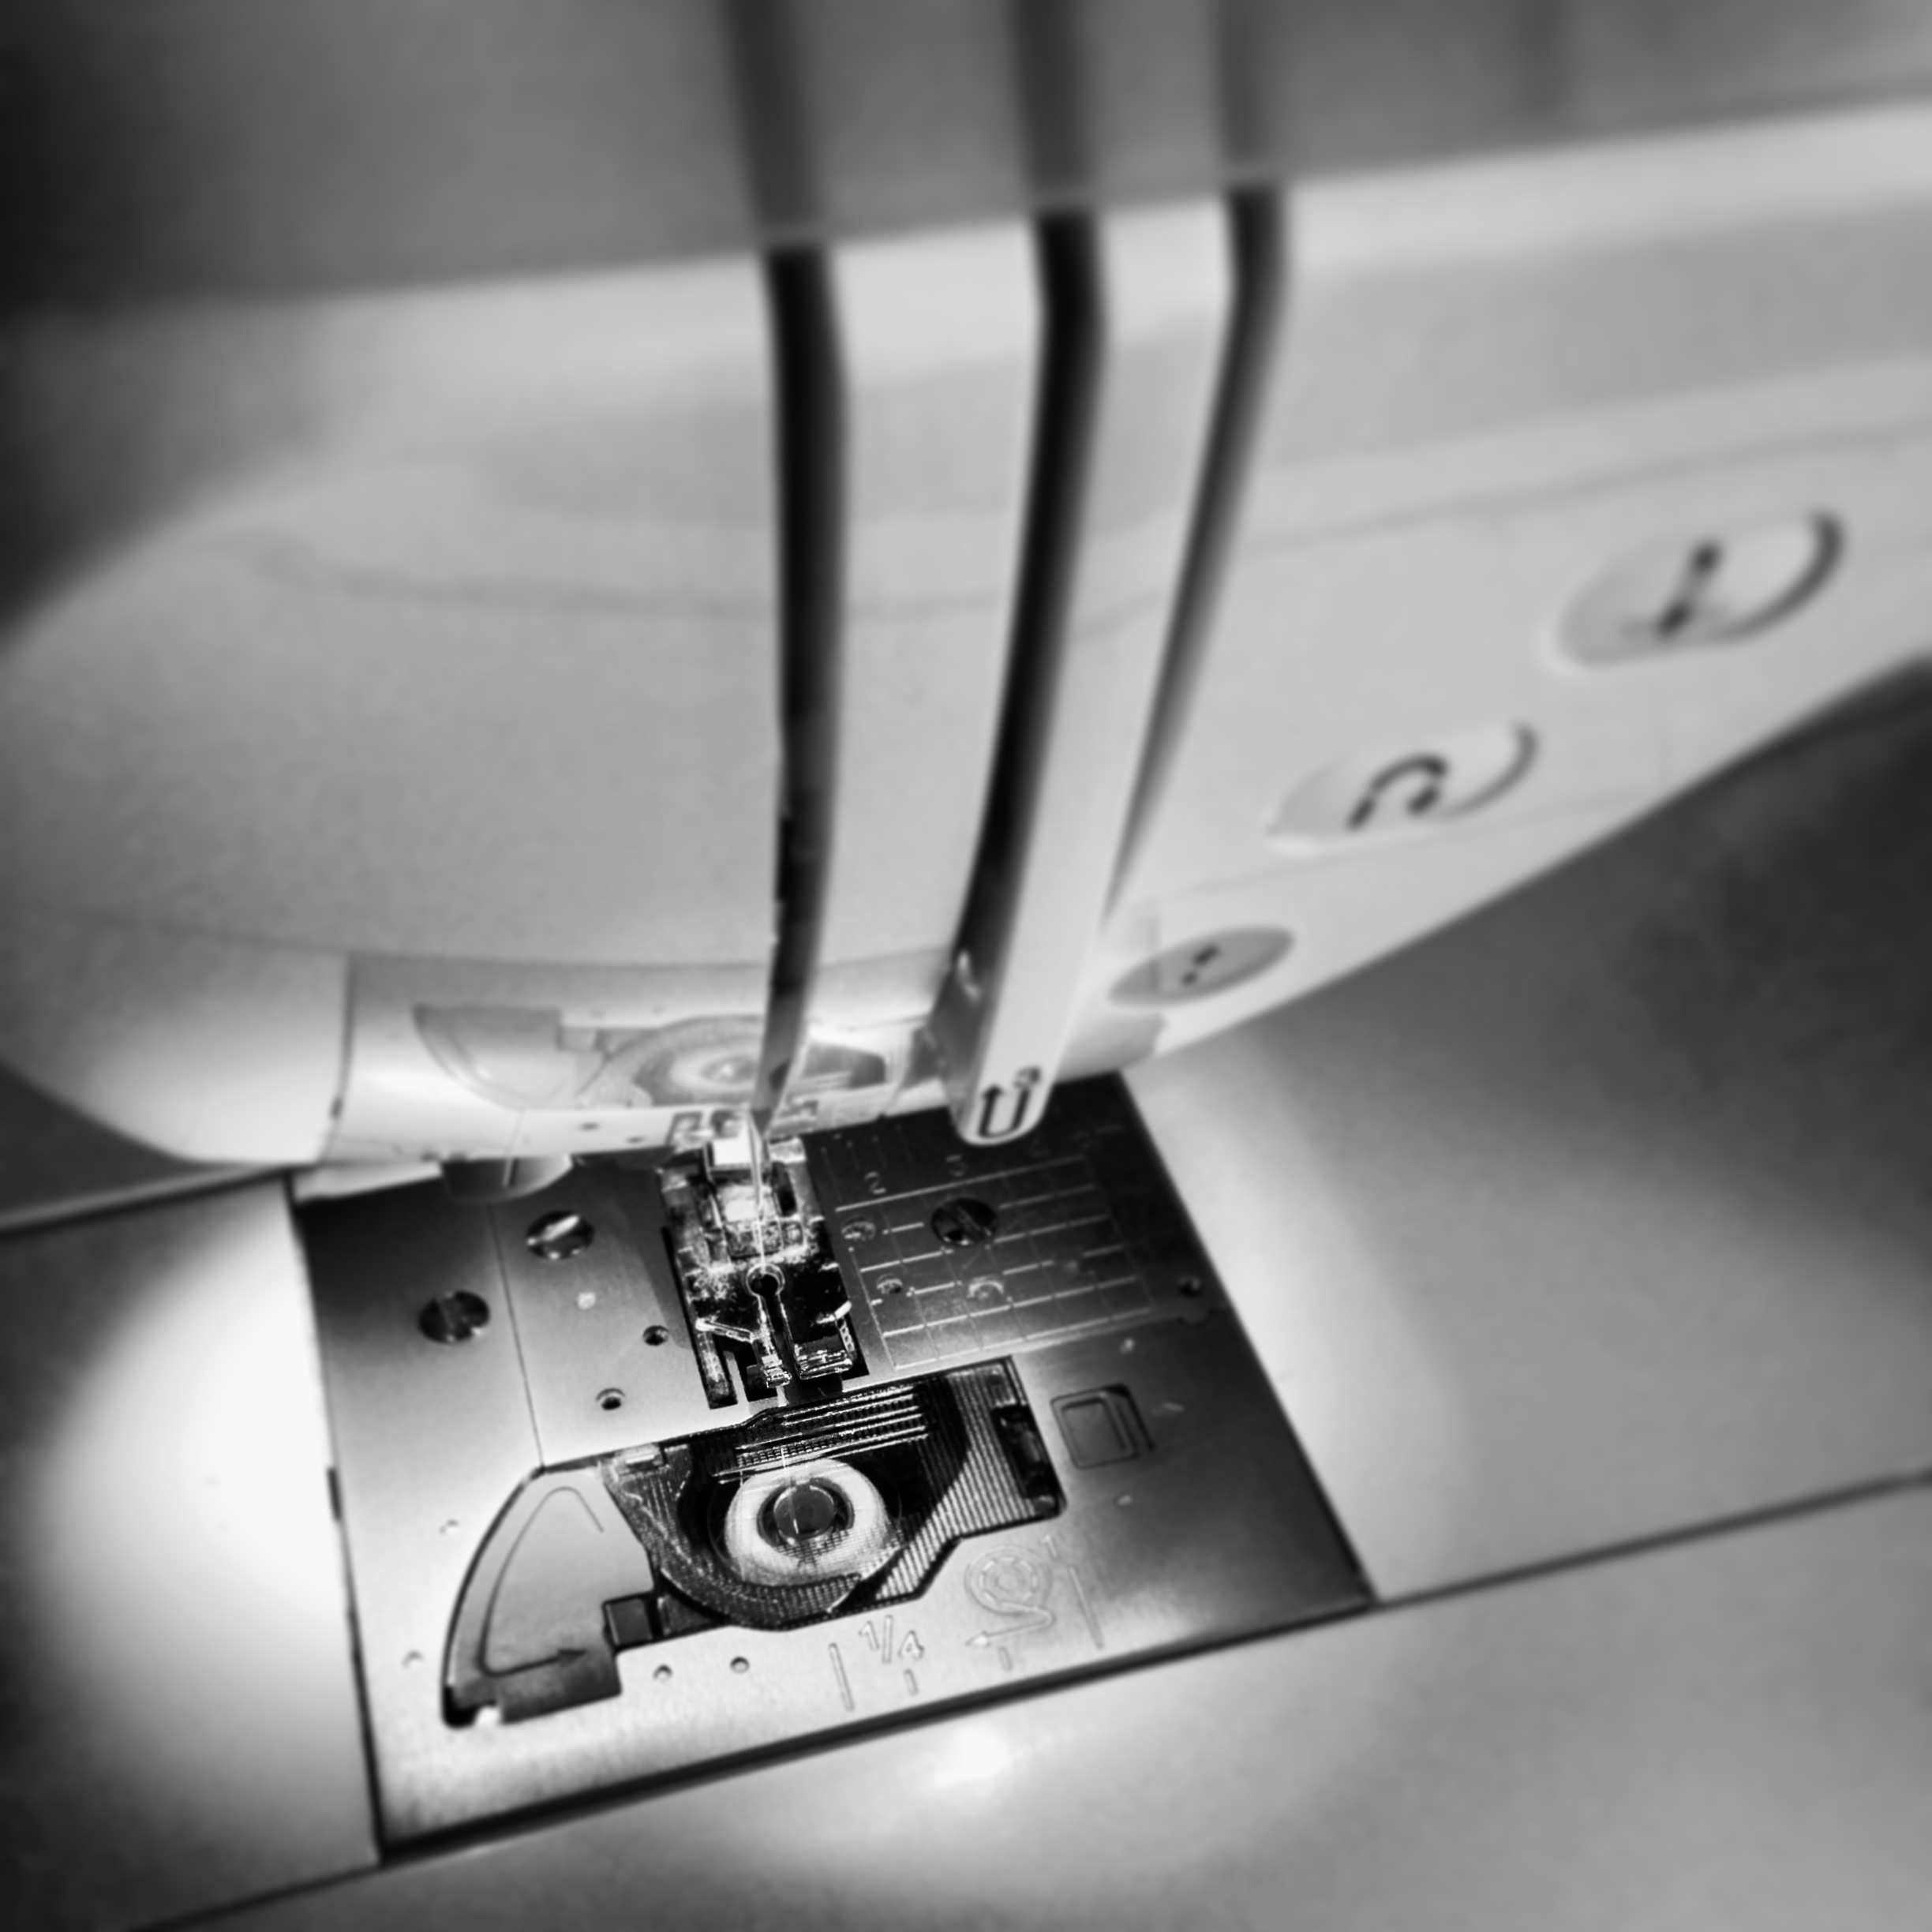
It’s here! I’ve finally made the next instalment of my Adventure Time Pillow creations!
So, if you didn’t already know, I’m a bit of an Adventure Time nerd and I’ve had this tutorial on my to-do list ever since I did my Finn The Human Pillow last year in July! So I penciled it in and here it is for you today!
I had so much fun sketching, cutting, trimming, adjusting and making this project and I really hope you do too!
In all honesty, I think this pillow is easier to make than my Finn one as Jake doesn’t have as many features to attach as he does. So if you’re beginner in the sewing/crafting world and want to make one of these guys, try Jake first and make your way up to creating Finn!
And of course, let me know if you’re going to make this! I would love to know how you go! (And perhaps send me a photo?!) Also, please send through any feedback you have about the pattern if there is anything you think I need to change or tweak! (NOTE: I’m no professional when it comes to pattern making and writing, and I use no fancy software to create them either – just hand-drawn templates and Microsoft Word!)
Well, it’s been a bit of a while since I last published post! Gosh! But I think I have a pretty rock-solid excuse for why… I’ve just returned home from a two week cruise to Fiji!!
Dravuni Island, Fiji
I had the best time and will be sharing more of my adventures and love for cruising with you in the next few days!
Now, a few weeks ago, before I went on holiday, I made a video tutorial showing how to make a Quilty Cross Pincushion and I’ve only just realised that I haven’t yet shared that with you here, on my blog!
After casually browsing on Pinterest looking for some inspiring ideas, I came across some sweet little pincushions that I thought would make a great little project to film and share.
So using my favourite Quilty-Cross method by Auntie Cookie, I paired white cotton linen with a few of my ultimate favourite DS Quilts fabrics and proceeded to make this tutorial…
Since uploading this video, I’ve had a wonderful amount of positive feedback from my lovely viewers saying they’ve been inspired to make one for themselves! Such words of encouragement are always wonderful to read!
Over the last little while, I’ve been asked some wonderfully awesome questions all about sewing machines. With questions ranging from…
What is the best sewing machine to use when I’m quilting?
How do I use a walking foot?
Can I make a large quilt using my small sewing machine?
What are the best types of threads to use for patchworking?
How much money should I spend on a good sewing machine?
And so many more!
So to answer these questions, I made a video where I sat down and went through all of the basics things there is to know about sewing machines!
Now you may be thinking, ‘how is it that she knows all this stuff!?’
Well, for about six years I worked in a very well know craft/fabric store here in Australia called Spotlight. There, I worked in the fabric and haberdashery department where we also sold sewing machines!
About twice a year, we would have intensive training days with sewing machine reps who taught us everything there is to know about sewing machines, inside and out. We learnt how to demonstrate and talk to customers about sewing machines, how to troubleshoot problems they were having as well as understanding what machine was best for a particular end use i.e. dressmaking, quilting, heavy duty sewing etc.
So because of this, I feel confident in myself and in the knowledge I’ve learnt over the years to answer these questions for you. I am aware that I do not know everything and nor am I ever likely too! I myself, am still learning about the endless possibilities and all of the little intricacies that my sewing machine has to offer and I really love that!
If you have any questions about anything I say in this video or are unsure of any features/functions on yours or are having any issues, please feel free to ask/comment below! I will try my very best to answer you as honestly and as simply as I can!
Also, if you have any tips or nuggets of knowledge that you would like to share with me and others, please comment as well!!
Happy Sewing Friends!!
xx
PS. If you would like to see a few fun little moments where I stutter, mumble, make weird faces and struggle with my words, then you can catch the Bloopers video right here!