Well here we are, five blocks in and still having a hoot of a time! (At least I think we are, yeh?)
I love this simple little block. It’s another super quick and easy one to whizz together and has the potential to be as fun and crazy as you wish it to be!
My best advice when pulling fabrics for this block would be to choose those that are contrasting from one another. That way, you’ll end up with a block where the design really pops and you can distinguish the unique ‘cross’ in the centre.
One other bit of advice I’ll share when making this block; pay very close attention to your measurements. There are a few tricky ones in this block, so just take your time, measure twice and cut once! (See what I did there! 😜)
REMEMBER: Trim all x4 HST units to 2¾”!
+++
I’m really looking forward to making block 6! Although it is another simple one, it’s a block that I’ve always wanted to make!
After navigating through winter colds, endless days/weeks at work and my terrible habit of procrastinating, block four is finally here!
Hoorah!
It may look tricky on the outside but once you delve into what makes this block tick, you’ll be pleasantly surprised by just how simple it actually is to piece together!
The only real ‘tricky’ bit to this one are the sizes of the pieces that make up the block. (But hey, that’s the whole point to this series isn’t it? Challenging our abilities to make gorgeous mini blocks out of mini pieces of fabrics!)
I’m 100% sure, like me, you’ll squeal and swoon over the wee 1.5″ HST blocks you’ll piece together and then stare amazingly at the intricacies of the finished block. (You can actually see me do this near the end of the tutorial!)
So like I always say when it comes these complicated looking blocks, take your time when making it; try to be as accurate as you can when cutting and sewing, relax and just simply do your best!
Made a mistake? Try again. Learn from it. Become better! 👍🏻
+++
For block 5, we’ll be back to something a bit easier compared to this block. I promise!
It’ll also mark the halfway point in our Quilt Along!! (Can you believe it!?!)
Hopefully it won’t be too long between drinks (so to speak) until I can get that out to you!
As always, don’t forget to share your blocks with me using the hashtag: #AmandasMiniQAL on all the socials!
Let me dive straight in and introduce you to the Mini Hashtag Block, our third in my Mini Block QAL!
You know, I actually never realised just how quick and simple this little block was to cut and piece together! It seems like I blinked and it was miraculously sitting in front of me! (Almost like a ‘I Dream of Jeannie’ type of situation!) You’ll know what I mean once you make it yourself! It’ll be a ten minute job, easy! 😜
Totally have fun picking fabrics for this little beauty! Try to choose two really stark and contrasting fabrics/prints/colours to really make that Hashtag design POP!
+++
Start preparing yourselves for the next block – we’re delving into trickier waters and playing with a block saturated with itty-bitty HSTs and squares! It’ll be fun, I promise!!
But before that, don’t forget to share your finished Mini Hashtag Blocks with me using the ‘official’ hashtag – #AmandasMiniQAL – over on Instagram, Facebook, Twitter or wherever it tickles your fancy! (Also, include my handle: @3and3quarters and I’ll definitely see it! 😜)
This darling orange filled triangle maze is called the Flying Dutchman. Made entirely of flying geese units, you can choose to make a statement with the centre triangles (make that pinwheel standout, honey!) or go real low-key and do all of your F.G units the same! (As always) The choice is yours!!
FYI, this block is slightly tricky to piece (obvs because of it’s itty-bitty size!) so be really aware of keeping to a 1/4″ seam each time you’re at the sewing machine and make sure to nest that middle seam as close as possible to get a really crisp pinwheel centre. Do your best, learn along the way and don’t be afraid to make mistakes! 😊
All of your first blocks were beautiful!! I love that everyone is doing something different while challenging and enjoying themselves along the way!! Yay!
Block three will be a fun one! I’ve already pulled my fabrics out for that one and can’t wait to share it with you!! (Here’s a clue for you: #) 😜
And we’re on our way! Let’s get in to making Block 1!
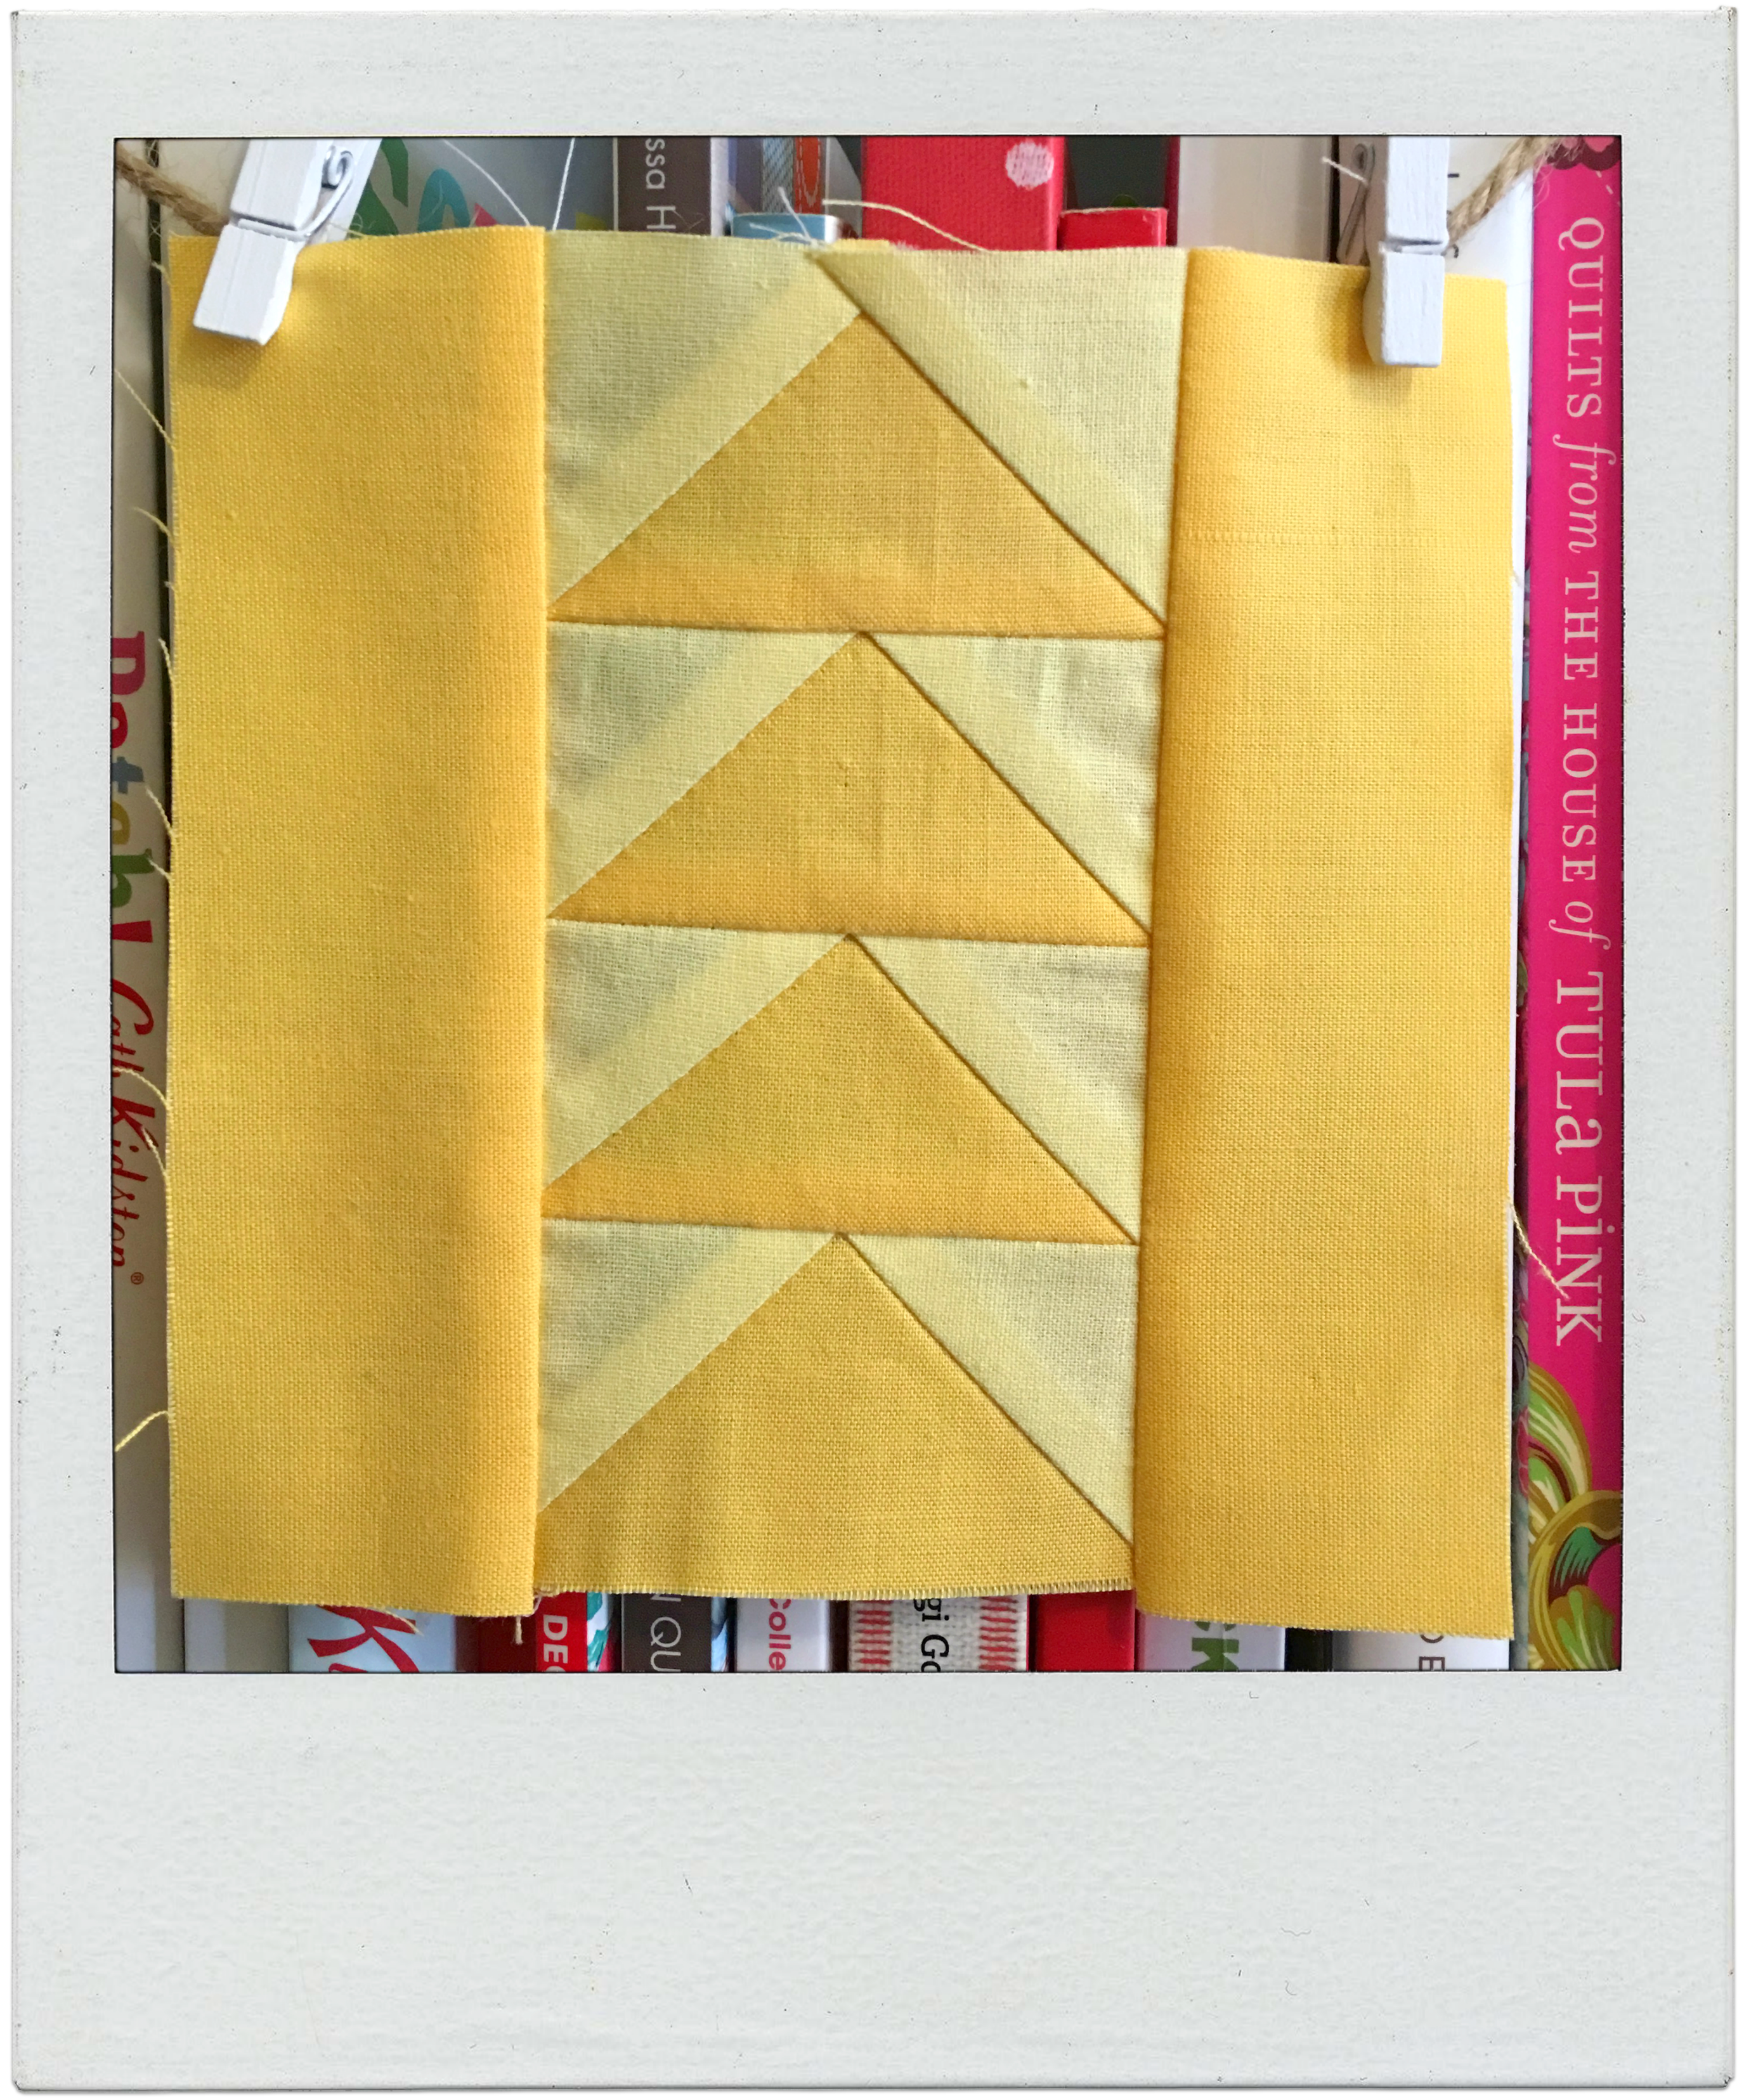
This one is simply called ‘Flying Geese’ as it features four lovely little Flying Geese sweetly stacked in the centre and then framed by two chunky rectangles on either side.
One of the great things about making mini blocks is that they take a flash to make – literally! As soon as you’ve cut the tiny pieces out, you’ve magically made a tiny block that you’ll squeal all over due to it’s itty-bitty size! But let’s not romanticise it too much! A high level of concentration, patience and accuracy is still needed to create a successful block!
As mentioned in my Introduction blog post, I’m colour-blocking each of my minis, hoping to achieve a rainbow effect as the finished result. Therefore, my first block has been made using two contrasting yellow solid prints. Feel free to either follow the same idea as me or finally have an excuse to break into that FQ bundle you’ve been hoarding away since forever! Be creative, be free and have fun with your fabric selections!
As always, you’ll find all of the written measurement and cutting instructions in the pattern sheet linked above.
+++
I’ll do my best to get Block 2 out to you as soon as I can. It’s another one heavily featuring Flying Geese, so brush up on your piecing skills with Block 1 so that Block 2 will come together perfectly! (Or as perfectly as you can – no pressure here – just do your best!)
Remember to share your finished blocks on your favourite social media platforms using the hashtag – #AmandasMiniQAL – so that we can all see what each other is up to and spread some encouragement and positivity! I can’t wait to see all of your blocks!!
Also, if you have any questions about the Quilt Along, shoot them my way and I’ll try my best to answer them as soon as I can and to the best of my ability! 😊
Yes! Quilt Along no.4 is here and ready to launch! 🎉
If you didn’t know by now, this time around we’re doing a Mini Block version! And I’m super excited to get it started!
Here are some of the deets you need to know:
Final Layout (This may change slightly…)
Firstly, all nine blocks in the Quilt Along will finish at approx. 5.5″ or 5″ once pieced altogether.
The theme of my Mini Block Quilt is rainbow! Each block will be colour blocked to a specific solid fabric colour so that the end result will look a little like the diagram above. (Fingers crossed!!) Please feel free to make yours any theme you want! Scrappy, matchy-matchy, black and white – anything! – the choice is completely up to you!
The blocks are 100% fat quarter, pre-cut bundle and meterage/yardage friendly! (Jelly Rolls and Charm Packs can work, but a few blocks will require bigger pieces of fabric than a 2.5″-5″ strips/pieces.) You will need additional fabric for the sashing & borders (I’m using a white solid), for the backing and binding along with a piece of cotton/bamboo/blended batting.
(NB: The following are estimated measurements and may slightly change as the Quilt Along progresses.)
For the blocks: any type fat quarter bundles etc will be perfect – prints & colours are your choice!
For the sashing & binding: 1 metre/1 yard x WOF* of a solid or print fabric (112cm/44″) – again, the choice is yours!
For the backing & binding: 90cmxWOF* (35″xWOF) of each
For the binding: 30cmxWOF* (12″x44″)
For the rod pocket: 12cmx76cm (4.5″x30″) – fabric matching the backing
FINISHED MINI BLOCK QUILT SIZE: 80cmx80cm (31.5″x31.5″) estimate
The techniques I’ll be covering in the Quilt Along include: piecing (HSTs** and Flying Geese), English Paper Piecing, basting, quilting, attaching a binding, label and an optional rod pocket.
As always, each block tutorial will be accompanied by a pattern sheet featuring all of the measurement and cutting information that can be easily downloaded and printed out. There will also be a dedicated playlist for this Quilt Along on my YouTube channel that you can easily click and have all of the tutorials together in one place.
And finally, I want to take some space to acknowledge where I got my inspiration and details for each block… A wonderful book that resides in my Quilt Book library: ‘130 Mini Quilt Blocks’ by Susan Briscoe. I absolutely love this book! It’s full of sweet little block designs that range from the traditional, to the modern and to the real weird and a bit wacky! Most blocks in the book measure around the 5″ mark, a few are smaller while there are a couple that finish around the 6″-7″ mark. It’s a fab little book for inspiration and ideas and I’d definitely encourage you to check it out if mini blocks are your kinda thing!
+++
I think that’s everything I need to let you know right now…
I’ve decided not to promise on getting a new block tutorial out every week or anything as my work schedule is always up-in-the-air (the joys of casual work!) and I can never be sure of when I have the time to get content made etc. (Sorry in advance!)
If there are any questions you have about the series, what blocks we’ll be making, what fabrics and notions you’ll need – anything! – please don’t hesitate to send me an email to: 3and3quarters@gmail.com and I’ll do my best to answer you as soon as I can!
Also, I’ll be doing another hashtag on Instagram for you guys to use so we can all see each others blocks and spread some encouragement and positivity! Note this down lovelies – the hashtag for this Quilt Along will be #AmandasMiniQAL – real original, I know, but I wanted it to be something simple and easy to remember and type in! 😜
Block #1 will be up very, very, very soon!!!
I hope you’ll join in on the fun, learn some new stuff along the way and make a gorgeous little Mini Quilt that you’ll love!
Happy Sewing, Friends!
xx
*WOF = Width of Fabric
**HSTs = Half Square Triangles
PS. Here’s the intro video if you’re interested in watching that too!
Did you know that 2018 marks my seventh year of blogging?! Seven years! Where has the time gone from when I was a shy 23 year old, tentatively entering the scary waters of online blogging? It seems like a life-time ago!
Anyhoo! A new year has started (even though we’re four months in already!! Eek!) and my precious little blog has been screaming out for some love and attention.
November… November was the last time I sat down, logged on and typed my little heart away catching you all up on my Sewing Room Adventures.
With lots of fun and laughs in between, April (!!) has now rolled around and it’s time to put my 2018 Sewing Goals out into the void, hoping that each one will get accomplished before 2019 creeps up on us!
MY 2018 SEWING GOALS:
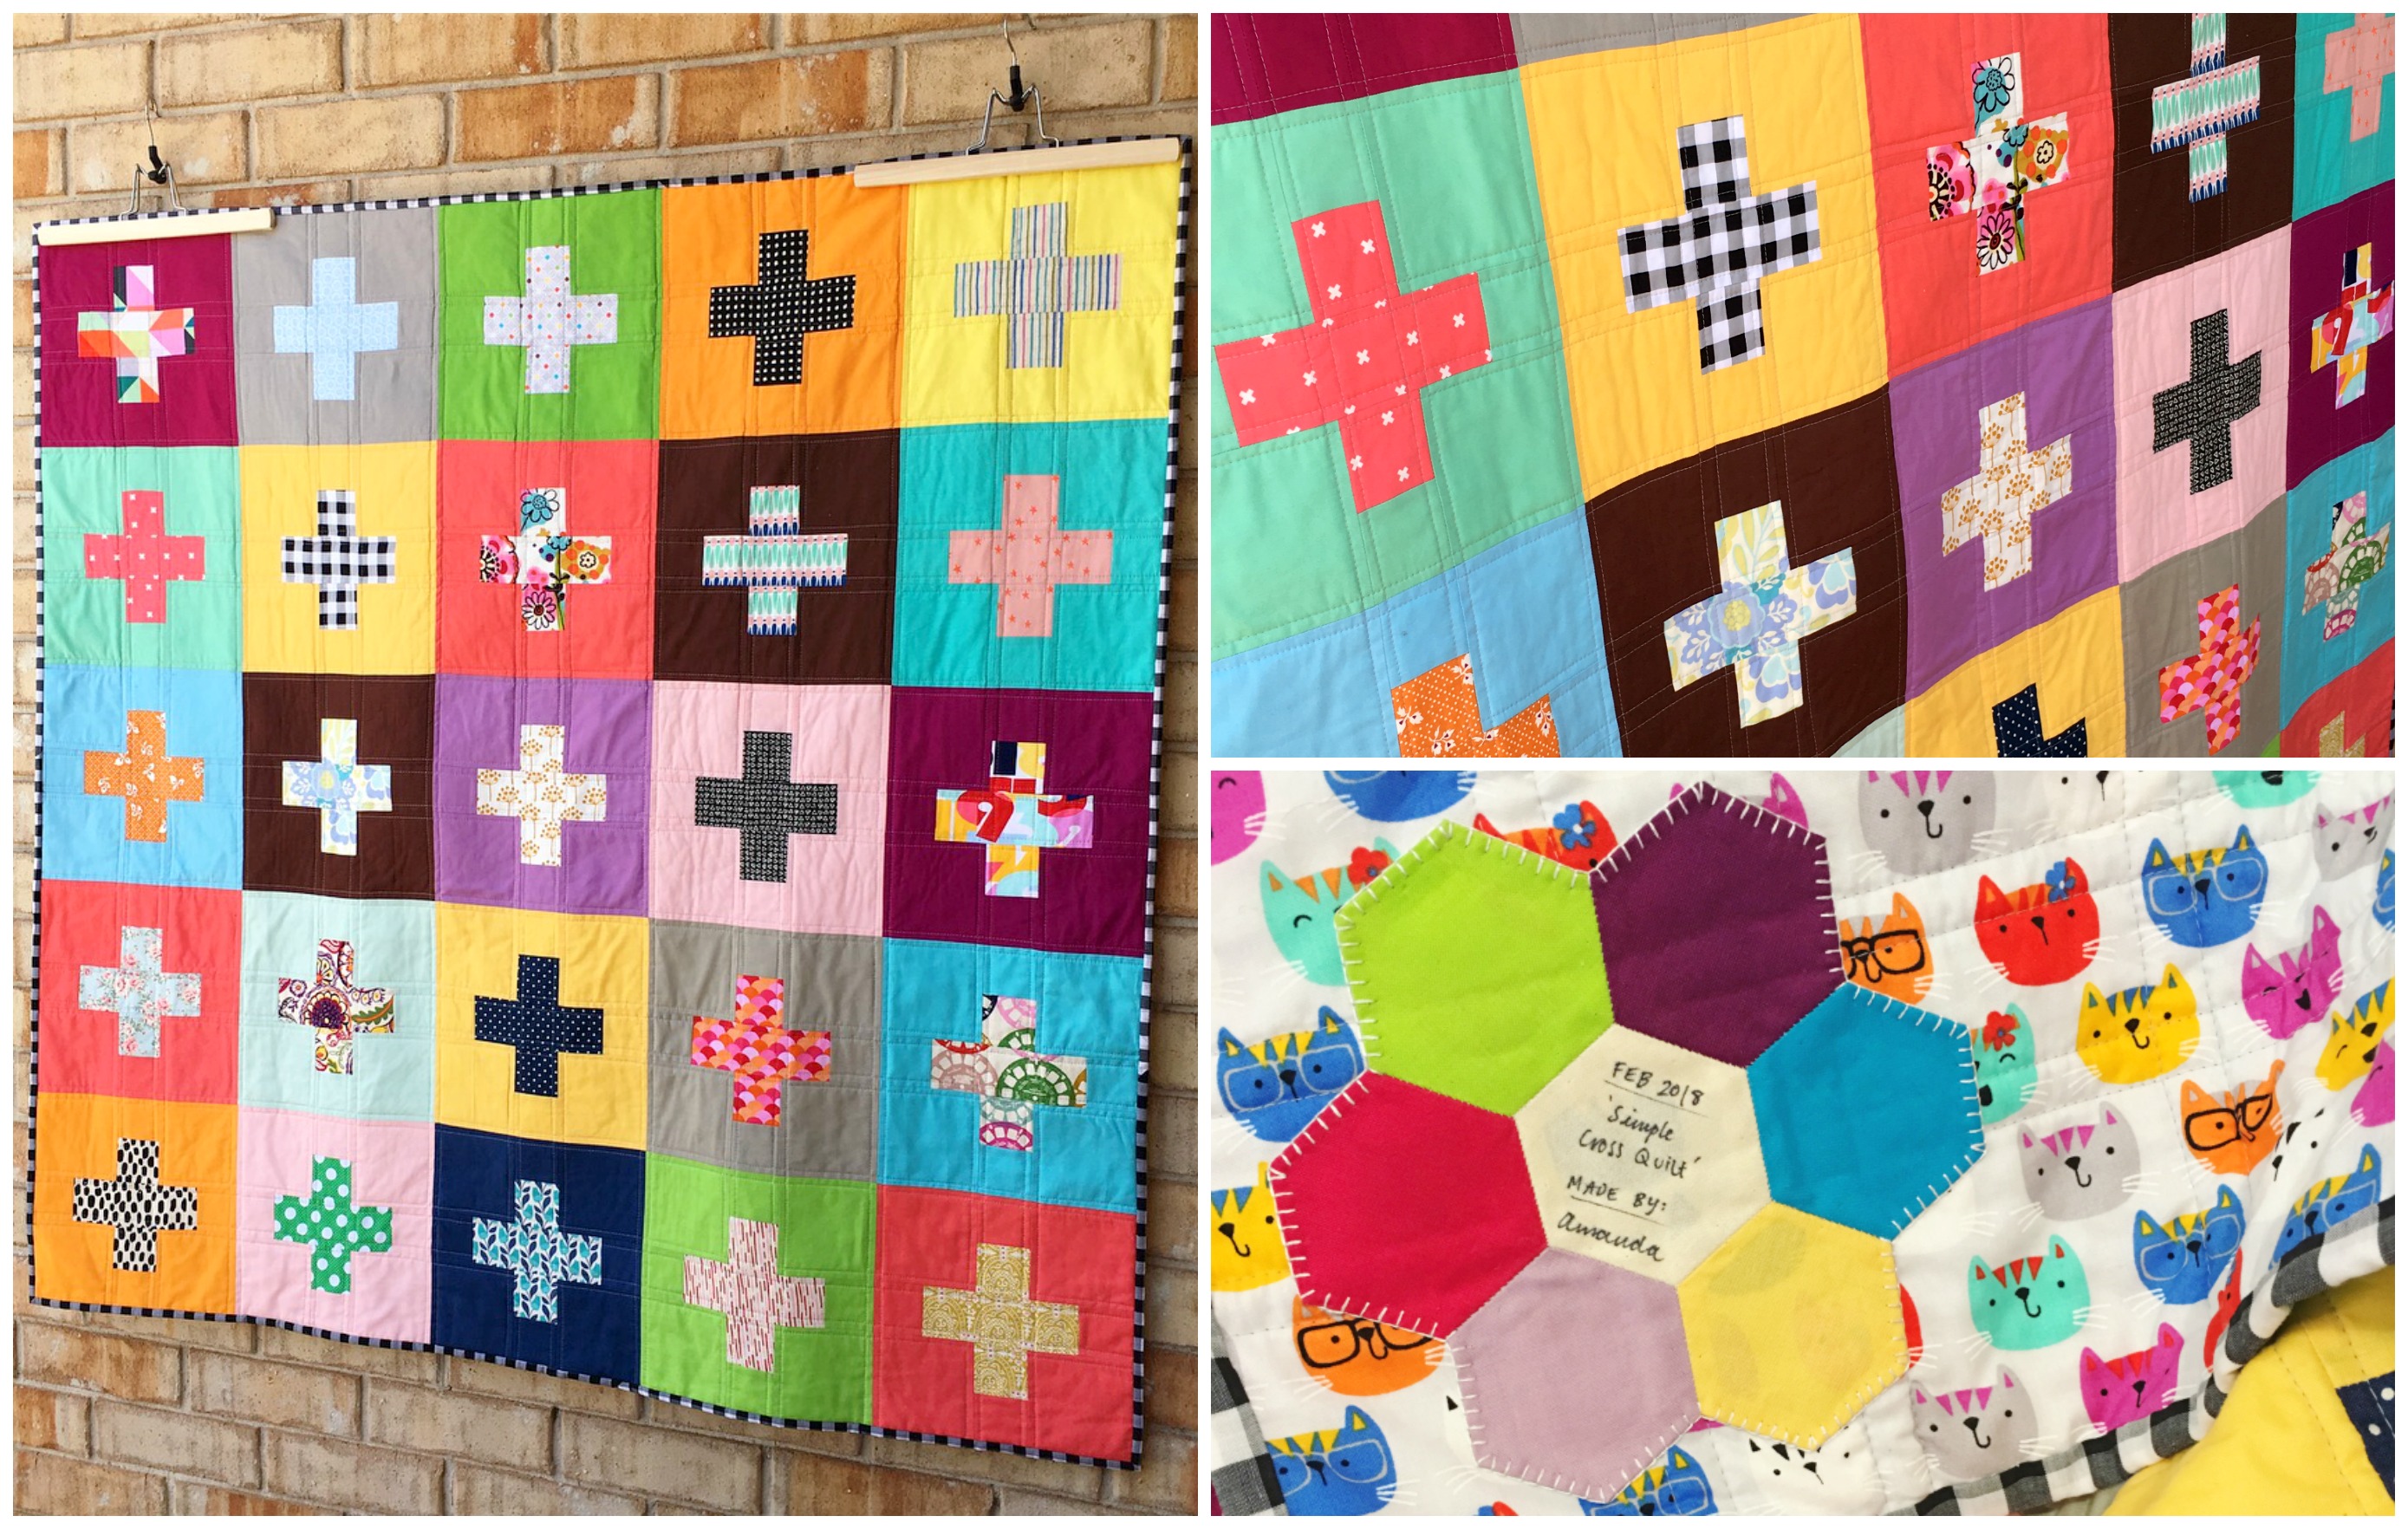
+ Simple Cross Quilt (My first finish for 2018! Whoo!!) +
What started out as a basic WIP first started in 2016, I dug these blocks out, quickly whipped up another nine to make the quilt top a 5×5 block pattern and as though it was just like over night, the quilt is finished, including a label! (Go me!)
I love everything about this quilt! The colours, the prints, the texture from the quilting, the kitty-cat backing (!!!) and the fun gingham binding finishing it all off.
This had to be one of the easiest and quickest (minus the blocks sitting unfinished for two years!) quilts I’ve ever made and I just adore it!
Wanna make this block?? Click here for the tutorial! (You’re welcome! x)
+ Pixelated Rose Quilt +
This little beauty of quilt has been on the go since May of last year. Over the past 7-8 months, I’ve been chipping away at building each individual block together to make up the whole. And now that all of the blocks have been joined together, a mammoth quilt top that I wasn’t expecting has emerged and the procrastination brakes have been applied at full force!
About a month or so has passed since the top has been finished and low and behold it’s still hanging in the same place (on a side hutch in our kitchen as it’s the only place big enough to house the size of this baby!). Every day I look at it and think, I really need to give this quilt top some more love!
It’s not that I don’t want to finish it… It’s just applying the time to rearranging the whole house to accommodate the size of the quilt so that I can back and baste it and then have the available time and space in my sewing room to get it quilted. (Whew!) I have a lot things happening in my little sewing room, so allotting time/space for sewing, filming tutorials, quilting etc, is a tricky one at best!
BUT, enough with the excuses!! Simple fact of the matter, is that this quilt top needs to be quilted and deserves to be finished (cos it’s soooo pretty!), by me, by at least the end of the year! (That still gives me some wriggle room to procrastinate a little bit more, right?!)
Wanna make this quilt?? Click here for the free downloadable pattern from the Riley Blake website! (You’re welcome! x)
+ Swoon Quilt +
Now this. This is what I’m working on right now and am absolutely LOVING IT!!
For ages I’ve wanted to dive in and make a humongous Swoon Quilt! I’ve lusted and envied over so many beautiful versions of it in my Instagram and Pinterest feeds. This year, I thought, what the heck! Let’s add another make into the mix and see how far I get with it!
You see, one of the main goals I had this year was to simply make more quilts. To find the time to do some more ‘me’ sewing. Projects that I make only for myself without doing a tutorial or some sort step-by-step guide on how to do it. I just wanted a few quilts that I could make for me and my itchy-hands! And this Swoon Quilt represents just that!
So far, I’m 8 blocks in to a 9 block quilt top, using fabrics that just simply catch my eye while making the Swoon design pop from afar!
Wanna make a Swoon Quilt too?? Click here to find the pattern! (You’re welcome! x)
+ Rediscovering ‘Like Diamonds In The Sky’ Quilt Top (Quilt name will be changing!) +
Within the last week or so, I rediscovered an old favourite quilt top that I started sometime in 2014. It features a block that I made as a tutorial on my YouTube channel called the Friendship Star.
I had started quilting this one but ended up really hating the choice of quilting I chose to do. (Free Motion Quilting really isn’t my thing!) I think it’s taken me about three years, on and off, to unpick all of the stitches to free the quilt top from the batting and awful backing fabric I paired with it. (Lot’s of decisions were made with this quilt that were just wrong, wrong, wrong!) Now the time has come to re-write those wrongs and finish this quilt to a beautiful standard that I’m absolutely happy with!
To be honest with you, I actually really love this quilt top. And always have! The blocks are bright and vivid while the overall design is still quite dark and subtle because of the navy solid background. It’s such a perfect balance.
I’m thinking for quilting, just to keep it really simple. Straight-line grid criss-cross across the entire surface (hey, it’s what I do best!) and then do a contrasting binding to bring everything together. Super easy!
Wanna make a Friendship Star block too?? Click here for the tutorial! (You’re welcome! x)
Now, moving onto a few quilts/projects that aren’t in the current making but are the list to do this year…
+ Christmas Quilt +
I am so determined to make a Christmas Quilt this year! If I didn’t have about a gazillion other things on my plate right now, I would’ve started it an hour ago!
Whenever Christmas rolls around, I’m always so bummed that I don’t have a beautiful festive themed quilt to pull out and enjoy throughout the season. (Even though Christmas in Australia is during Summer and having the need for a snuggly heavy quilt anywhere near you is totally out of the question!)
The pattern that I’m itching to start is one by Thimble Blossoms (the same lady who designed the Swoon Block/Quilt) called, Winterville.
It’s such a super cute pattern and I’ve already been collecting little bits of fabric for the houses and little Ohio Star blocks. It’s gonna look great once it’s finished!
+ Christmas Tree Skirt +
Another Christmas project I’ve been wanting to make for years now… A Christmas Tree Skirt!
I came across the perfect pattern quite randomly when I was replenishing our paper patterns stock at work one day. It’s a McCalls’s pattern (M7704) and features the sweetest gingerbread people paired with Christmas Trees and Christmas candies. I just thought the designs together were really lovely and are totally the type of design I love around this time of year.
The pattern looks quite simple and straightforward, with the option to mix lots of designs together into one final skirt for the tree. Perfect!
+ Winter Jacket +
This one was a project I had wanted to make for winter last year (so we’re looking at around May 2017 sometime…) but is yet to leave the bag it came home in!
I think I’ve written about this one before… But anyhoo, I just really wanted to make myself a really nice jacket that I could wear to and from work or on nights out during the colder months. I have made a winter jacket before when I was briefly at uni one year in my mid twenties. But it’s quite amateurish and the fabric I chose is really quite awful. Perfect excuse to make another one, right? Right!
The pattern I hope to make/follow is by Simplicity (1254), is fully lined and has a weird collar/hood thingy that looks intimidating as heck to make!
I’m no dressmaker and possess very little patience for it, but with grit and determination, I’m gonna give it a go and see where I end up!
(Please send chocolate and lots of encouraging hugs! Thanks! x)
+ New Sewing Machine +
So I treated myself to a new sewing machine a few months ago… Yep. All for the sake of being able to quilt my massive Pixelated Rose Quilt that I haven’t started quilting yet.
In all honestly, I was ready for an upgrade. My previous machine (a Brother Innovis 200QE), as brilliant and perfect it is, was becoming a bit too small for the types of quilts I’m moving into making this year. (They’re all big ‘uns! God help me!) My new Brother (a PQ1500SL) is huge! It’s powerful, fast, roomy, does everything I ask of it and more and I just want to use it all day, everyday! (Hence all of these beautiful Swoon Blocks popping up in my Instagram feed!)
If you didn’t see it, I recently filmed a very honest review about this machine on my YouTube channel. (I also did an unboxing vlog too if you’re interested!) I went through the pros and cons I’ve found with the machine along with elements I’ll get used to as I sew with it more. From the comments left on the video, I think it’s been quite insightful for people to watch especially those who were/are planning on buying the same sewing machine.
+ YouTube Catch Up +
While on the subject of my YouTube channel, I’ve been uploading lots since I last wrote on here…
Vlogmas – 2017
We’ve had Christmas where I did a thing called Vlogmas. Basically I vlogged everyday during December right up to Christmas Day (which I also filmed!). I really thought I would struggle do it but I actually really enjoyed it and fell in love with vlogging and creating that kind of content for my channel. Everyone who watched was so supportive and encouraging and I think we kinda bonded a bit more which I love!
In January I went to New Zealand and vlogged it too! I went with my parents and some family friends and had an absolute blast! I can’t wait for the day I get to go back and explore more!
February and March have been a mix of a few more vlogs, some tutorials and stuff all about my new sewing machine!
Over the next few weeks, I’m hoping to launch a new Quilt Along series on my channel (and here on my blog too)! Inspired by a viewer, this time around we’re focusing on mini block designs, with all of the blocks we’ll be making measuring a sweet 5″ square! Each block pattern has been written up and (somewhat) finalised, I have just a few smaller details I need to sort out before realising the series out into the world, block by block as I’ve done in the past.
Stay tuned for that coming very soon!
+++
So that’s everything! It’s been a world-wind few months and so much stuff has been crammed in. (With more to come!)
I’m hoping I’ll also be able to dedicate some more time to writing here, on my blog. I’ve always enjoyed the process of blog writing and feel so relaxed and lighter once I hit that ‘publish’ button. I love sharing what I’m doing and hope to do in my sewing room with you and love hearing the awesome feedback you guys always give me!
Let’s make 2018 a productive one full of lots more quilts, crafty projects and good times with family and friends!
Oh boy, it sure has been a while since I last did one of these posts! I couldn’t even remember what number edition I’m up to! 😂
But there’s lots to catch up on so let’s dive right in!
So, I know I’ve possibly over-shared this with you already but I made a quilt! A beautiful baby quilt for nephew no. 5 due just after Christmas! Visiting an all-time favourite pattern by Denyse Schmidt, I made this sweet Tribute Star Baby Quilt in a darling navy and turquoise blue colour-way paired with a light grey solid background. And I think it’s just perfect!
Making baby quilts for my nephews and nieces to-be have always been my most favourite to make! They’re made with pure love and excitement at the prospect of a new little life coming into our family. The thought process, the labour (pun not intended!) and then the end result is always the best. ❤️
+++
Polar-opposite to the start of the year, the last few months of 2017 have seen me do so much more sewing than I have in a long time! And I’m not complaining either – it’s been such a lovely respite from the hectic year I’ve had.
A part from my nephews baby quilt and my QAL quilt, another project I’ve been working on is my Pixelated Rose Quilt by Riley Blake Designs.
My, my, my, is this quilt gonna be epic!! I’m currently just over half way into piecing the quilt top together. Out of 30 blocks, I’ve just completed no. 21. It looks a bit messy here on my design wall, but once all blocks have been pieced together it’s gonna look real schmick!
I’ve found that this quilt is so big that I’ve had to piece, lay-up on my design wall and then take down the first half of the quilt top to accompany the next half on my design wall. I’m dreading the day when I have to quilt it! My ‘patience pants’ are gonna have to be on tight that day! 😂
Once this quilt is finished, I’ll hopefully do another post chatting through the process I did to successfully make it.
+++
November for my blog is a significant one because it’s our anniversary! Yep, six years ago on the 4th November, I wrote and published my very first blog post.
I always try and do a little hark back around this time reflecting on where I’ve started and how much everything has grown and evolved…
Six Years of Blogging Memories!
I’m gonna be honest with you, these past few years I’ve carried around so much guilt (completely placed on me by me and nobody else!!) that I haven’t been able to give my all and more to my blog and YouTube channel like I have in the past. I’m completely aware of how busy life is for all us and that’s just how it is. And because of that, things have had to be put into perspective of what is most important to keep my head above water… ie. heading back to work for a bit of much needed income!
Both my blog and YouTube channel are really important things for me. They’re like my little personal spot in the Quilting World where I can share my knowledge and love for quilting, sewing, craft as well as reaching out and connecting with other like-minded Quilty people all over the world.
I’m not really sure where I’m going with all of this but…
I think what I’m trying to say is that I’m actively planning on spending more time and effort on my ‘sites’ next year because it’s what I want to do. It’s what I love to do. And it’s what I want to put all my energy and passion into.
So heading into my 7th year of 3and3quarters, let’s cheers to a productive and successful year that I can look back on and be proud of!!
+++
Touching on YouTubes and things, are you caught up on the last few quilty videos I’ve put up?
The first being the one where I chatted though 10 of my favourite quilting tools.
I was inspired by another video I did a few years ago where I shared 5 quilting tools that I couldn’t live without. (It’s a bit of a cringe to watch – it was like the fourth video I ever filmed and uploaded on my channel!) This new one though is a bit more of an update of tools that I’ve found to be really helpful in almost any patchwork situation. I thought it was just a little bit of fun and I’ve loved that some of you have shared with me a few of your favourite quilting tools. I love how we all have our own different gadgets that we find we cannot live without when we’re sewing. It’s so fascinating!
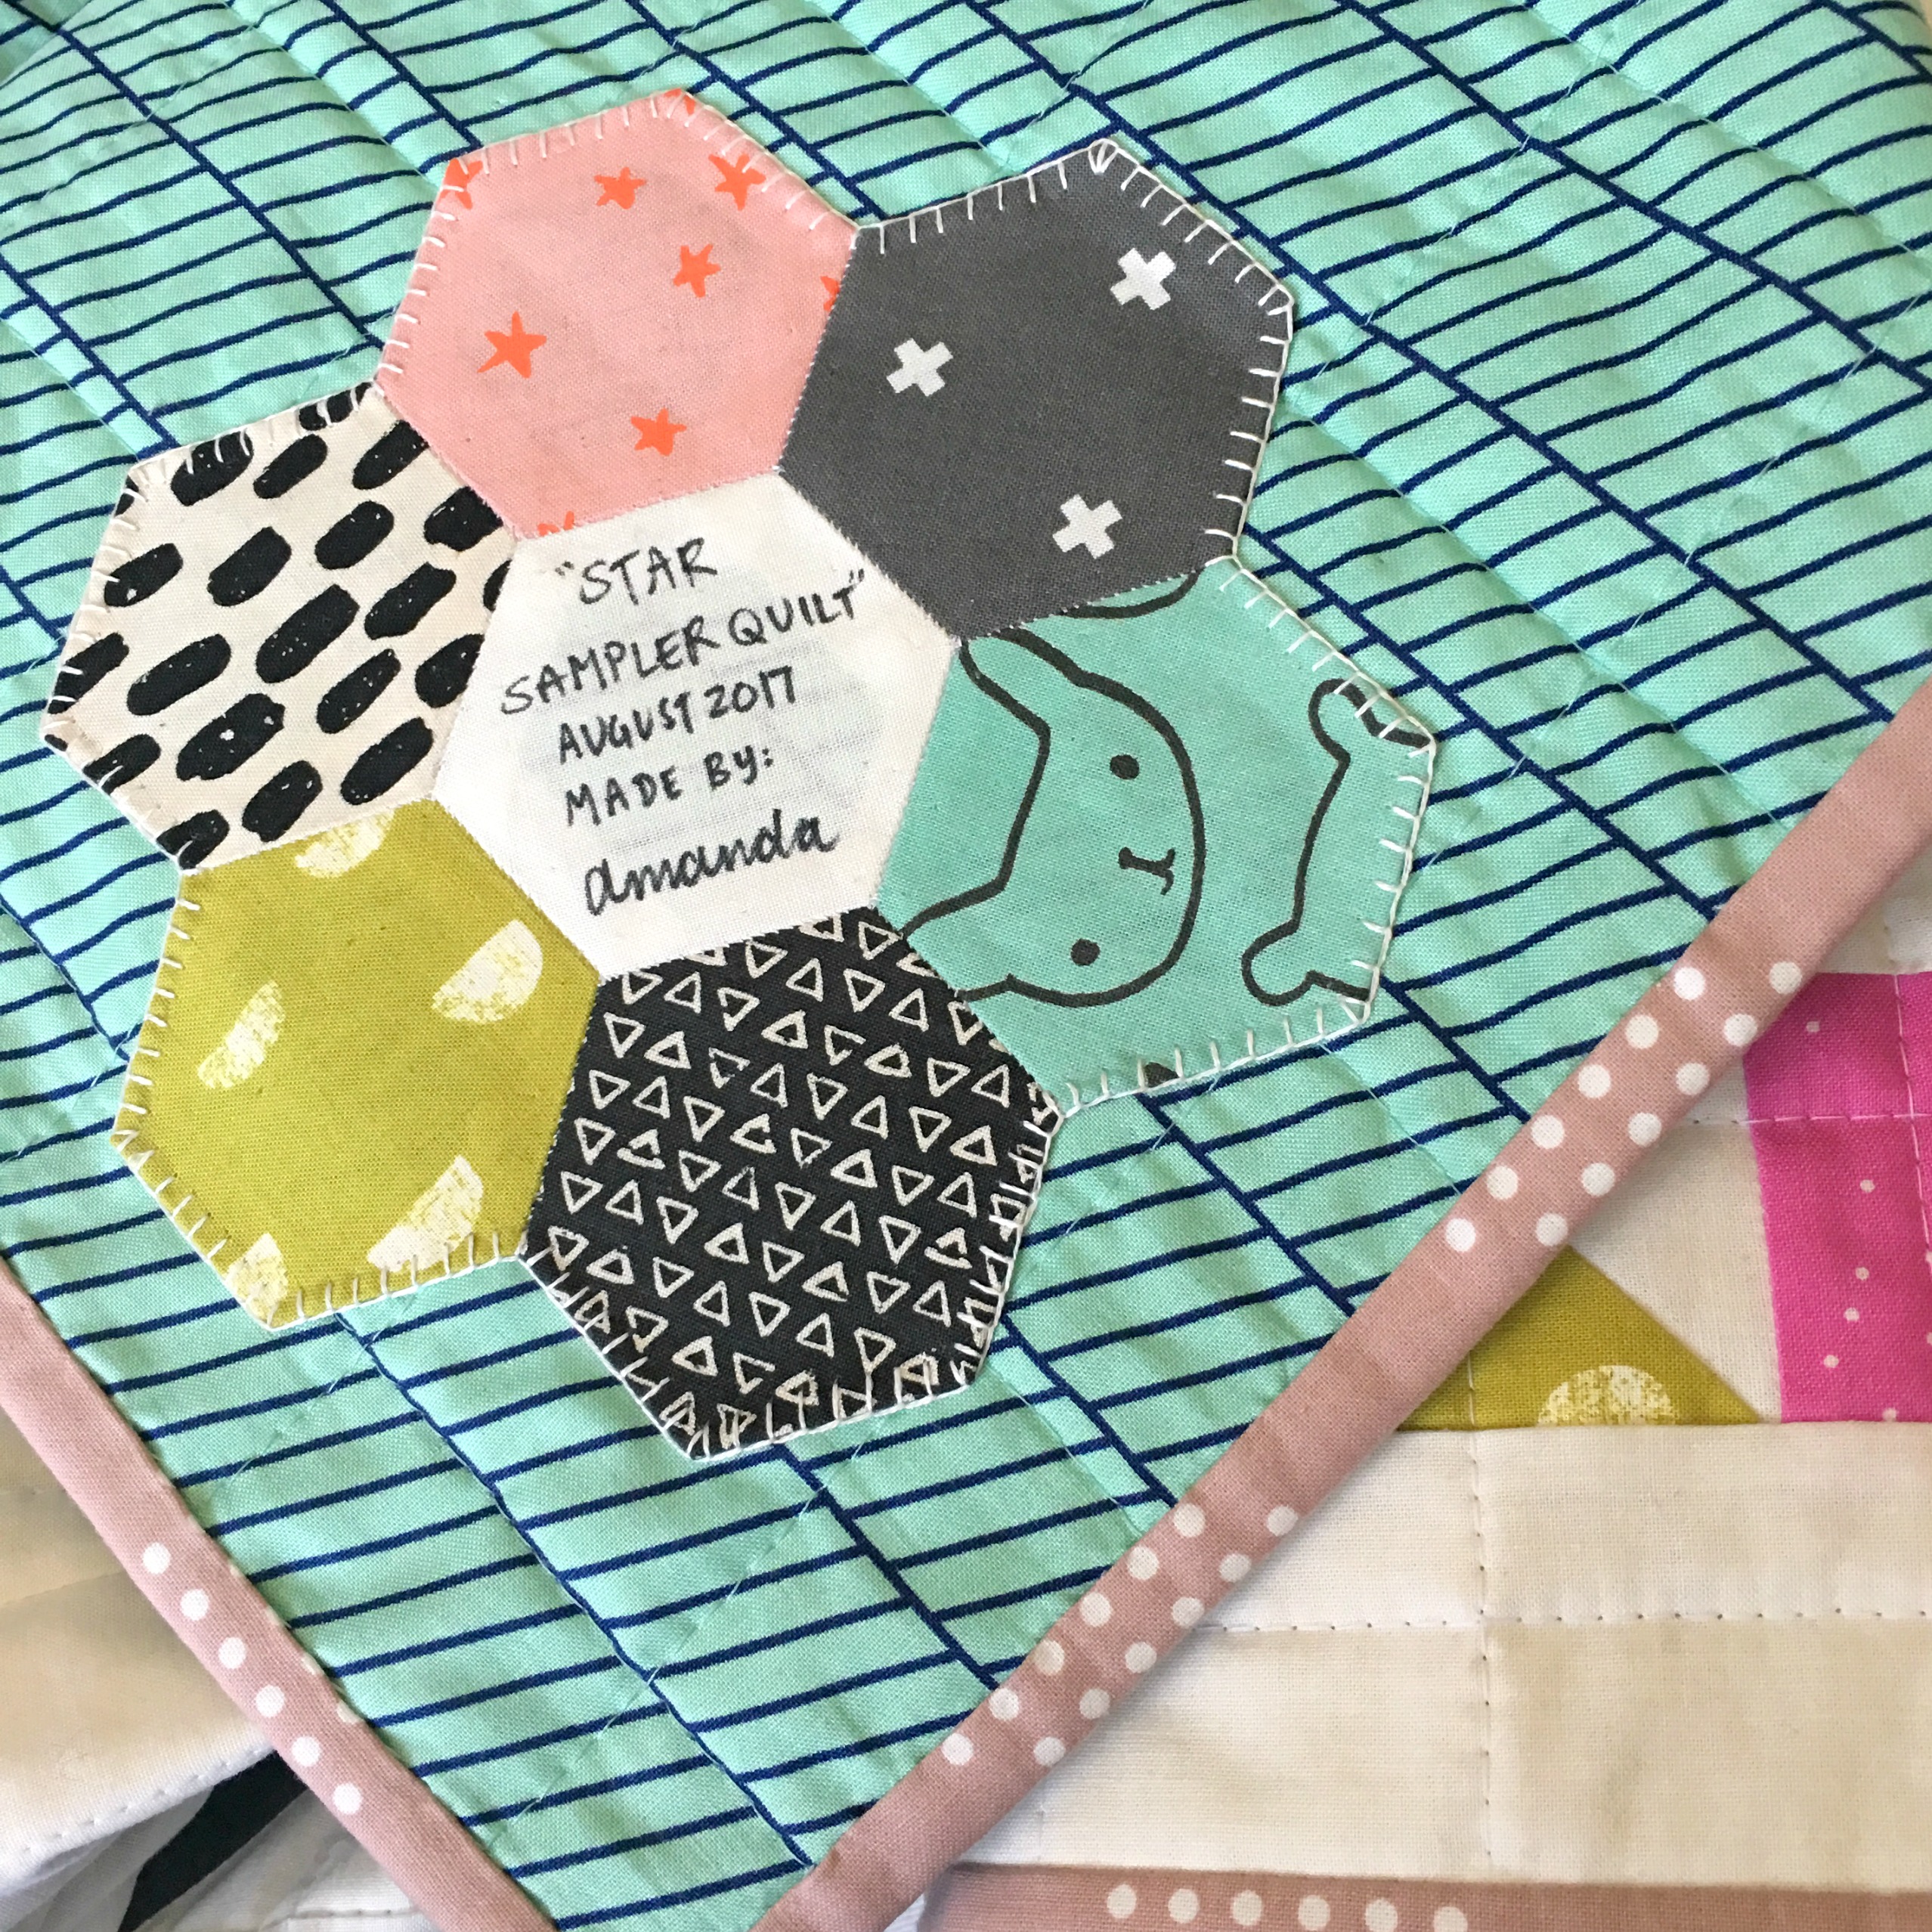
The other tutorial is my most recent – a Hexie Flower Quilt Label!
I had quite a few request for this tutorial when I posted on my Instagram page the label for my Star Sampler Quilt (and Tribute Star Baby Quilt).
And I was more than happy to do one!
It was about time that I revisited a how-to video on making English Paper Pieced hexies and how to stitch them together. It again feels like a life time when I filmed my first Hexie How-To with my young pudgy face chatting you through the intro and ending. Another cringe watch!! 😑
But I will always love making Hexie Flowers as quilt labels. It’s a great opportunity to use up scraps and bring a bit of the front of the quilt to the back. It’s just so patchwork!
+++
Whether it be a curse or a blessing, my hours at work have been significantly cut. 😦 This could change from week to week, but at the moment, it is what it is. It’s business, not personal… So!!!! Christmas tutorial planning is a go! Yay!!!
A modified Tribute Star quilt block (Christmas Edition) is in the works along with a patchwork-type Advent Calendar! (The latter is still in the very early stages of planning – measurements and other things have been sketched out, I just gotta do a trial run to iron out any wrinkles – HA! – and then I’ll be set to get filming it. It’s one that ideally should be finished before December 1st! Fingers crossed!)
I’ve also got a few other Christmassy ideas up my sleeve but I’m keeping mum on them for dramatic purposes! 😜
I’m also considering doing a thing called Vlogmas. It’s where I vlog everyday(-ish) during the month of December right up to Christmas Eve or in my case, I’ll include Christmas Day (and possibly Boxing Day too as it’s my middle brothers birthday and it’s usually a pretty busy and fun day). I thought it would be a great opportunity to show those of you in other countries how we celebrate Christmas in Australia during Summer!
No promises. But it is a possibility…
And that’s all I’ve got to share with you at the moment!
I hope you’re all finding some time to complete some of your own Christmas crafts and are gearing up for a busy holiday season ahead!
It’s no secret, this year has freakishly flown by, eating up time like it’s no bodies business. And my poor sewing machine has suffered as a consequence.
Also, not gonna lie, my motivation to sew and be creative has taken a bit of a hit too. So with all of that combined, not a whole lot of movement has been had in my sewing room this year.
But recently a few projects have come to hand to make me dust off the sewing machine, dig out my rulers and cutters and get sewing again.
In my last post, I shared with you my finished Star Sampler Quilt (sans quilt label!)…
It felt like it took me for ages to get this quilt (and YouTube series) finished. But I’m so happy with the end result.
I currently have it hanging in my sewing room and I find myself just staring at it at times, admiring it’s beautiful tactile quilted surface, it’s perfectly pieced and nested points as well as the monochromatic tones clashing with the pops of colours dotted here and there.
❤
When I was quilting this quilt, I took a gamble and used a new tool that I’ve been told is a must-have to use when quilting… Quilting Gloves!! OMG!! How did I ever get through quilting a quilt without these bad boys all of my quilting life?! They’re ah-maz-ing! Although I felt a little bit clumsy and resembled a bad Mickey Mouse look-a-like, the grip the gloves gave me was 10-fold compared to just using my bare hands!
Although the series has now come to an end, I only just finished the final touches to the quilt today… The quilt label!
Quilt Labels from my two previous QALs
And as tradition stands, I made the quilt label a Hexie Flower using some of the fabrics featured throughout the blocks in the quilt. Love it, love it, love it!
+++
Over the past few months, I’ve been sharing a new quilt that I very excitedly started after wanting to do it for ages and ages! The pattern is called Pixelated Rose by Riley Blake Designs and it sings to my yearning Florist inside of me!
So far I’ve loved every stage of getting this quilt underway. Choosing the harmonious solid colours was a breeze, the measuring and cutting was a slow but very meditative experience (I think I must be one of the very few quilters out there who loves the cutting process!) and then the precise piecing has kept me on my toes! Because of it I’ve been able to settle into an easy pressing and nesting routine that each block needs to be able to fit together in the end. Not gonna lie, the whole process (for me anyway) has been quite slow and lengthy. But I already knew this and I took on this project as one of those slow burners that you keep coming to over a set period of time until it’s finished, either months or years after you started!
I’ve been posting pics here and there on Instagram of the progress so far…
Unfortunately, I haven’t gotten any further than the last photo in the right hand corner. The past month has been jammed packed full and this project has been pushed to the side, collated into block order and hung outta mind, outta sight. Although, I do have some free time tonight… Hmm… 🙂
+++
Now, I must also confess that there has been a spectacular fail in the sewing room too.
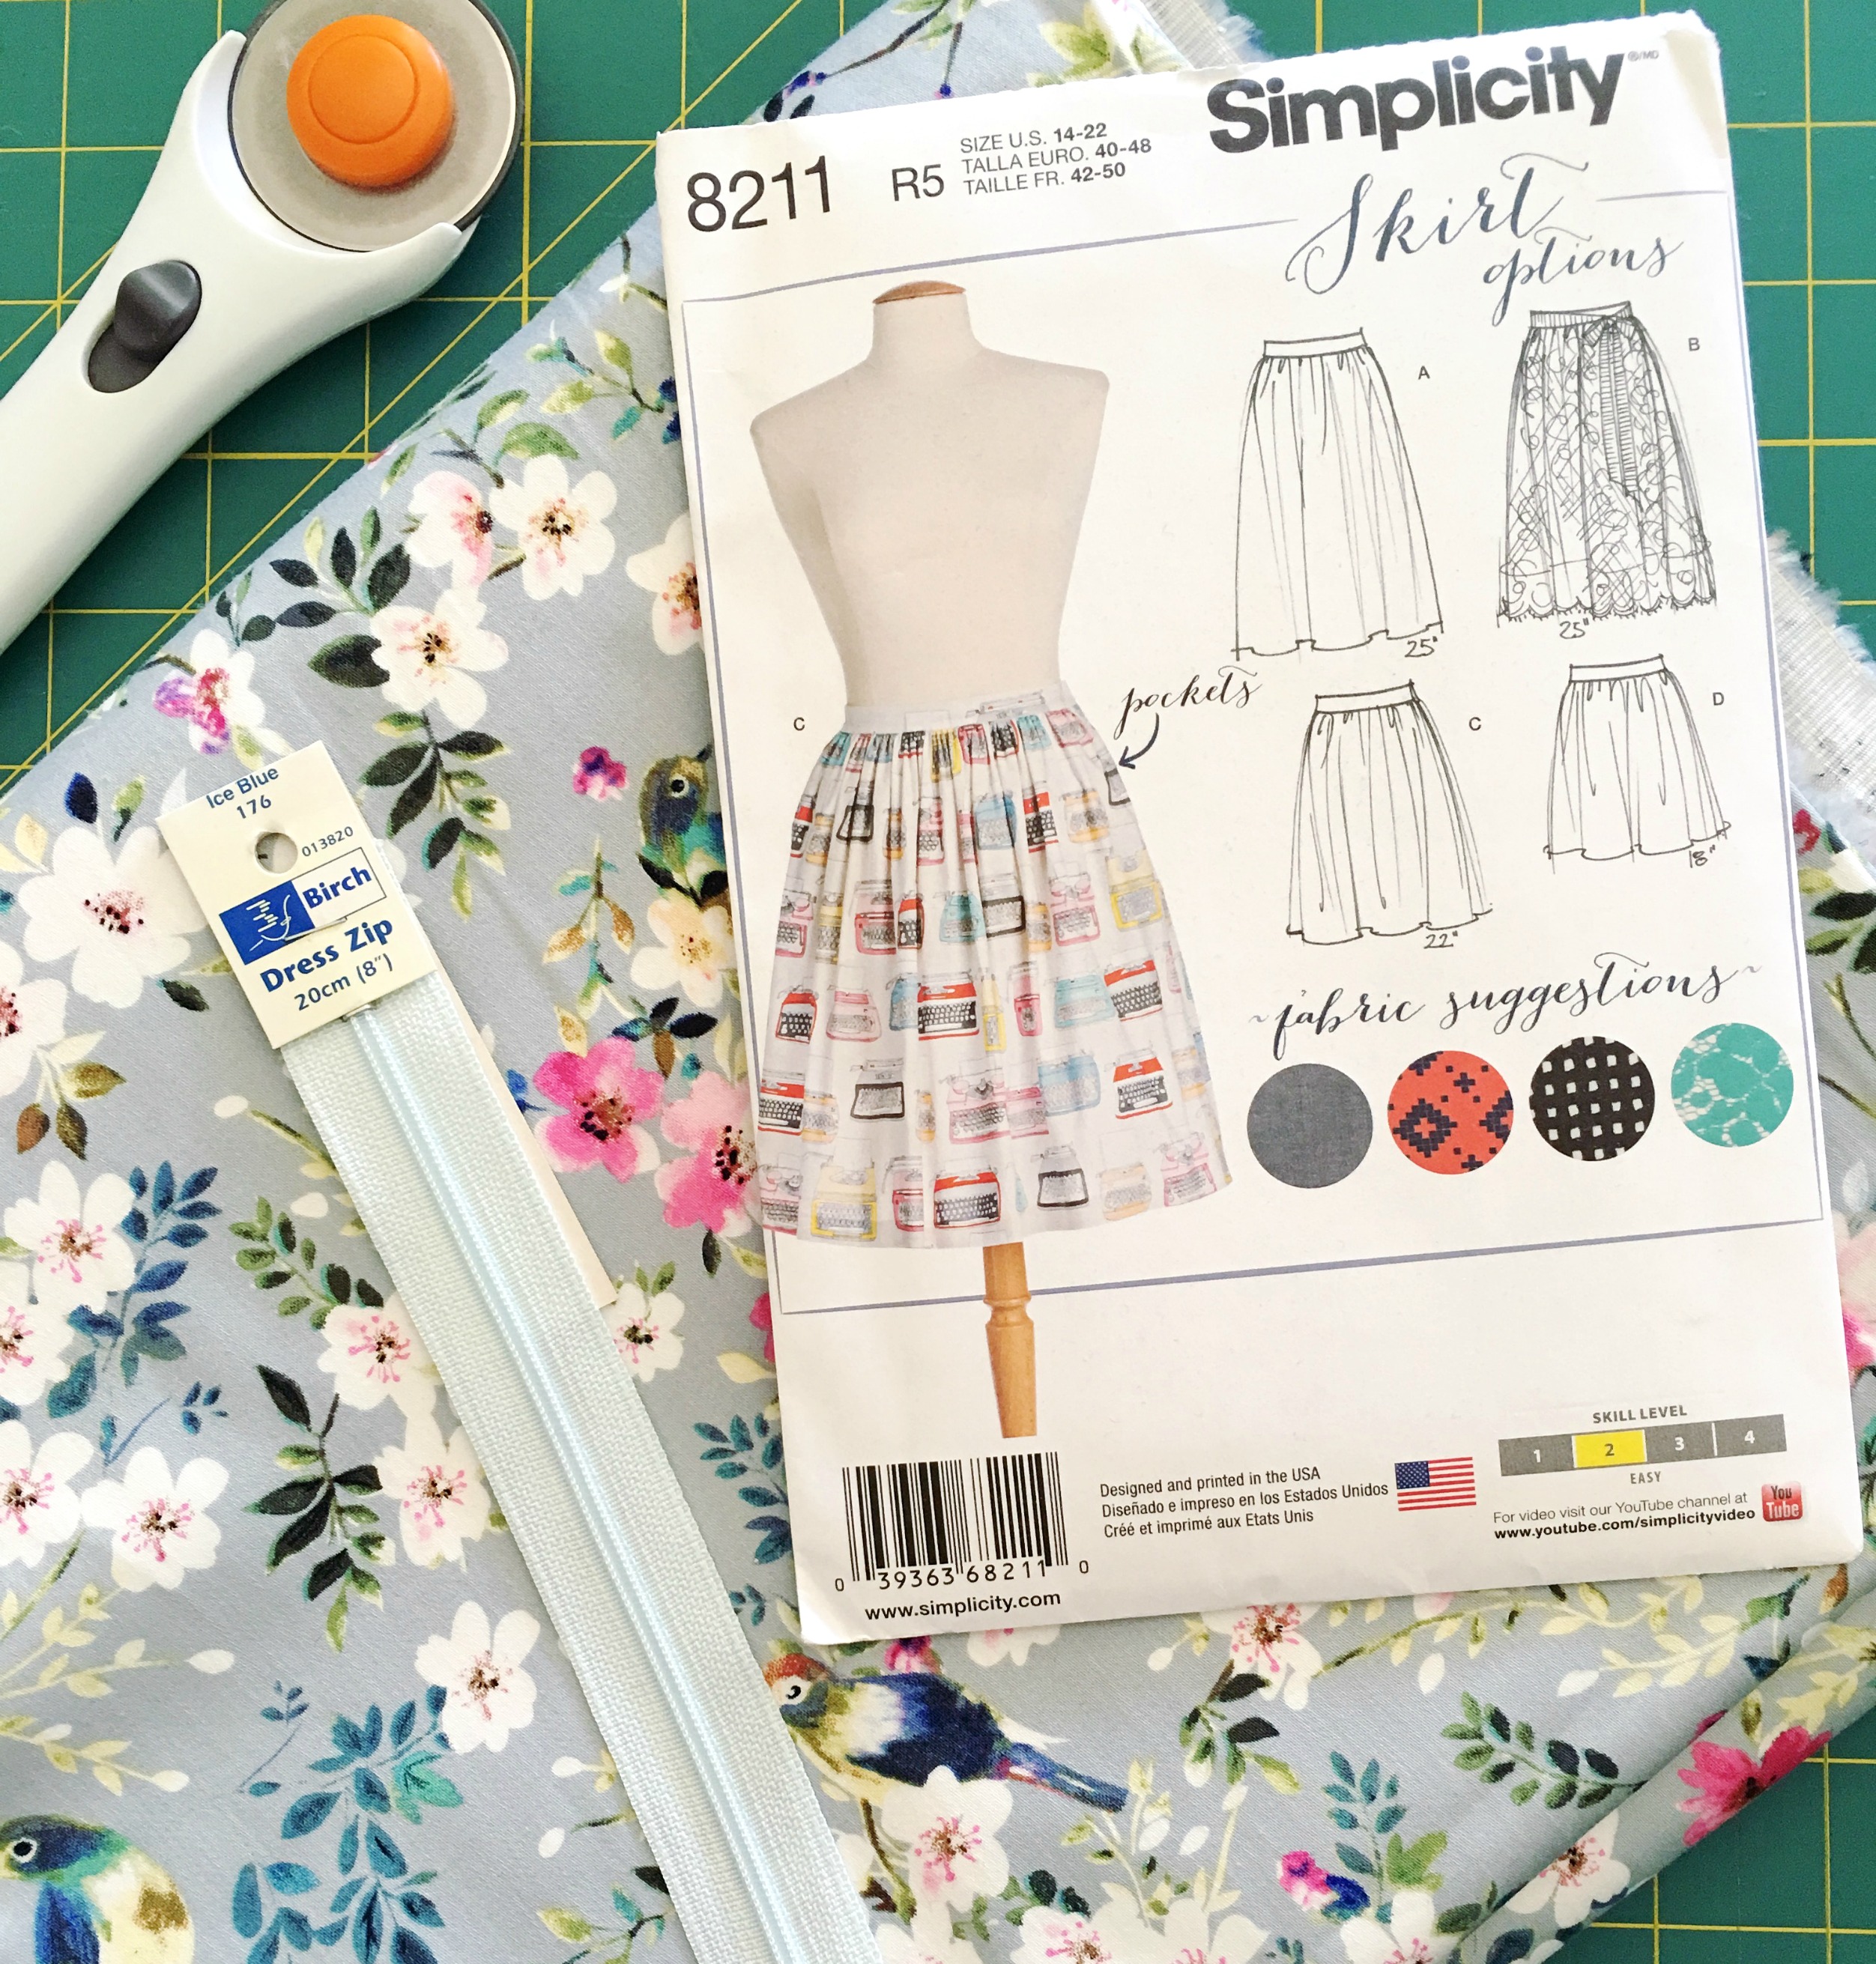
That being a terrible attempt at making a pretty gathered A-Line skirt for my birthday a few weeks ago.
Despite being quite time poor during the weeks leading up to my birthday, I knew it would be a pretty big stretch to be able to cut, make and finish a skirt when dressmaking really isn’t a strong skill of mine. Although, in saying that, I did successfully stitch a side pocket for the first time as well as sew in a zipper next to another side pocket! Yeah!
However, things began to fall a part when I had to attach the waistband and match up dots and seams and things that I didn’t know I had to match up… So with time pressing on me and my interest and patience waining, I gave it up and allowed in the realisation that I’m no good at dressmaking one bit. (I’m sharing no photos of my sad attempt of a skirt!) Perhaps with a bit more practice and a bit more patience, I may become a superstar seamstress yet!
+++
I hope you enjoyed this brief glimpse back into my sewing room.
I feel like I’ve really fallen back in love with sewing again… Just the raw, basic and fundamental steps in this creative skill I’ve been blessed with. Over the past year or so, I’ve felt slightly distant from my sewing bubble that I’m so used to be being in. But I think I’m finding it again and it feels great!
After almost a year of getting the ball rolling, the end of my Star Sampler Quilt Along has come to an end! *insert sad/happy face – whichever one applies!*
In the final instalment of the series, I’ve jammed packed it full of all of the ‘finishing touches’ we need to do to have a completed quilt!
This time ’round there’s no pattern sheet to follow or to download, instead everything you’ll need to know is either in the video tutorial or listed here in this post…
So once you’ve finished piecing together your quilt top with sashing and borders, it’s ready to be backed and basted in preparation for quilting! If you’ve made your quilt with the same measurements as mine, you’ll need:
BACKING: WOF*x150cm (59″)
BATTING: 120cmx150cm (47″x59″)
For my batting I’m using a lovely Premium 100% Cotton Quilt Batting in an Autumn weight by a company called Bosal. To be honest, before receiving this, I never knew that batting was or could be available in ‘seasonal weights’. I chose an Autumn weight as it’s not too fluffy (or lofty) to sandwich between my quilt top and backing, while still being light/heavy enough to keep one warm on a chilly winter’s eve.
When it comes to basting your quilt, use the method that you feel the most comfortable with. For me, that’s spray basting. It’s quick, simple and equates to less time rolling on the floor pricking my fingers with pesky pins! 😀
The same advice goes for your choice in quilting. From the early stages of planning this QAL, I always envisaged this quilt to have a subtle mathematical grid texture to it’s surface. To achieve it, I used my handy Clover Hera Marker and long quilting ruler to mark a 2″ grid pattern across the top of the quilt, three lines at a time (ie. mark three lines, quilt, then mark another three lines, quilt etc.) until the entire quilt was finished.
After trimming away any excess backing/batting from around the edges of the quilt, it’s time to bind! To make your own quick and easy binding, you’ll need:
BINDING: WOF*x40cm (16″)
Cut this into x6 2.5″ strips and sewn end to end on a diagonal to create a long binding strip.
After pressing the binding in half, simply machine sew it onto the front of the quilt as shown in the tutorial, then bring it around to the back and slip-stitch the other edge to the back of the quilt. Too easy!!
Don’t forget to label your quilt with the month/year the quilt was completed, the name of the quilt as well as the name of the person who made it! My label is still to be made (oops, my bad!) but when I do, hopefully I’ll remember to come back to this post and upload a photo of it for you! 😀
I want to extend a HUGE thank you to the lovely ladies over at Dayview Textiles who so generously helped out with the fabrics and materials I used for this series. Without them I would’ve been able to have the pleasure of using such beautiful fabrics from the Printshop Fabric Range!
And of course, thank you to all of you who participated so patiently in this series! I’ve absolutely loved seeing all of your gorgeous blocks, quilt tops and finished quilts – you’re all so talented and amazing! Although the series is finished, keep on sharing them with me using the hashtag #AmandasQuiltAlong on Instagram as well as over on my Facebook page!
So now that the QAL is finished, it’s time to move on to some more ‘old-school’ content that you’ve been used to seeing! That means some new block tutorials, crafty sewing tutorials, flower based tutorials, some fun Christmas things as well as other usual stuff like Monthly Favourites, Vlogs, Hauls etc! Exciting times ahead people!! Yeah!
So while I go and enjoy my last week of being in my twenties (It’s my 30th Birthday this coming Sunday! Eek!), I hope you all have fun completing your gorgeous quilts!
Happy Sewing, Friends!!
xx
PS. Happy News! I now have a PO Box! If you would like to send me something lovely, you can using this address:
Amanda Rolfe
PO Box 1179
St Marys NSW 1790
Australia