September 17th: Birthday Celebrations!

Today was my 28th birthday! 🙂

I spent the day rugged up at home (my favourite place) joyfully playing with my youngest nephew and niece! We sung songs, played with balloons, ate doughnuts and built Duplo towers!

Amelia: 'Auntie, what is that big thing you're shoving in my face?' (I took the picture using my big DSLR camera!)
Amelia: ‘Auntie, what is that big thing you’re shoving in my face?’ (I took the picture using my big DSLR camera!)
Oh, those big brown eyes and pouty lips!! Too cute!
Xavier singing his ABC's!
Xavier singing his ABC’s!
Doughnut time!
Doughnut time!

More of my family came over this evening where we had our traditional party tea, with homemade chocolate cake, lollies, Chocolate Crackles* and yummy fresh fruit!

And because I work from home (which means that technically I’m my own boss) I gave myself the day off! I do feel slightly bad that I did, as it means that Friday’s tutorial has now been pushed back a day or two! Sorry! But today’s little breather from everything has really helped clear my head and get a few things back into perspective!

Although, I do have one very exciting thing to tell you about! Last night I finalised everything for my next Quilt-Along Series!!! Yay! It’ll be a HST Sampler, made up of nine different blocks, all at different levels of difficulty and layout. This time around I’ll be using a beautiful fabric collection from RJR Fabrics that has some of the most loveliest colours and patterns that I’ve seen in quite a while! As soon as I saw it, I knew it was the perfect one to use for the quilt! I’ll announce what the range is and the whole story behind it once I receive it! Eek!! (Although, some of you might be able to figure it out with some of the clues in the picture below!)

Here’s a sneak peak of the blocks we’ll doing…

HSTSamplerSP

I guess this also gives a little insight into how I design and work out all the maths for my quilts! I must always draw them out and colour them in to be able to get a true understanding and visualisation of the block/quilt I want to make! At the moment, I don’t have a date for when this will begin, but know that it’ll be very soon! (Like ‘weeks’ soon!)

I hope your day was as lovely as mine!

xx

*PS. Curious to know what Chocolate Crackles are?? Here’s the recipe if you would like to try them! Every Aussie kid has been brought up eating these, especially at birthday parties, cake stalls, picnics and as special treats!

Chocolate Crackles

ChocolateCrackles

Ingredients:

4 cups of Rice Bubbles

1 cup of desiccated coconut

1 cup of icing sugar (powdered sugar)

250g of Copha (a type of vegetable fat made from coconut oil)

3 tablespoons of cocoa

To make:

First, slowly melt the Copha in a saucepan over a low heat.

Meanwhile, mix together the rice bubbles, icing sugar, coconut and cocoa in a large bowl.

Carefully pour the melted Copha into the rice bubble mixture and stir until well combined.

Spoon the mixture into a cupcake tray filled with paper cases and place in the fridge until set.

Enjoy!

Makes 24+

Store in an air-tight container in the fridge.

xx

September 9th: Baking Day!

Happy Hump-Day!

We’ve made it to the middle of the week and now we’re on the down-hill to the weekend! Yay!!!

Today I thought I would share with you a most beloved and favourited recipe of mine that I absolutely love to bake as the warmer Spring days slowly come back into our lives!

And that recipe is… Shortbread! Usually, I make it with a good handful of orange zest, but today I was feeling brave and choose to see how well it tastes with lemon zest instead! (Oh!! The fresh sweet smell of lemon filling my kitchen was just simply devine!) By adding the lemon or orange zest, it will just give the Shortbread a lovely subtle fresh fruity flavour that will make you go back for more and more!

So here’s how to make this delicious and fail-safe Lemon Shortbread!

You will need:

LemonShortbreadIng.

To make:

Begin by preheating your oven to 150C/300F/gas2. Then butter well a square slice tin measuring about 22cm or 9″.

Place the butter and sugar in a large bowl and cream them together using a wooden spoon until it looks light and fluffy.

LemonShortbreadButter

Add the plain flour, cornflour and lemon zest to the buttery mixture and gently fold them together with your spoon. Then get your clean hands into the bowl and mix until you have a lovely smooth dough.

LemonShortbreadDough

Place the dough into your buttered tin and press it evenly throughout the tin and into the corners using your fingers. (The rougher looking the better!) Before popping it into the oven, grab a fork and prick the surface all over.

LemonShortbreadTin

Place it into the oven for about 50 minutes until the top of the Shortbread is looking lightly golden brown.

While the Shortbread is still oven warm, cut it evenly into squares and sprinkle a generous amount of caster sugar over the top.

This Shortbread is best enjoyed with a lovely hot cup of tea!

LemonShortbread

LemonShortbreadTea

Recipe adapted from one by Jamie Oliver called ‘The Best Shortbread in the World’ from his book, Cook With Jamie, published in 2006.

+++

Let me know if you’re going to give this recipe a go! Even if you’re not the best chef in the kitchen, this Shortbread is insanely easy to make and just as easy to eat as well!!

Happy Baking, Friends!!

xx

A Few Of My Favourites!

I thought, for today’s blog entry, I might share a few of my favourite recipes with you. I’ve had a few requests for the recipes of a few things I’ve made and shared previously on my blog.

First one up is Orange Shortbread! This little beauty of an afternoon tea snack is at it’s best to eat straight out of the oven, all hot and crumbly! Nom-Nom!

I’ve sourced this recipe from one of Jamie Oliver’s brilliant cookbooks – Cook with Jamie: My Guide to Making You a Better Cook.


The Best (Orange) Shortbread in the World

Jamie says “This recipe will make buttery, crumbly, delicious fingers of shortbread, but, if you’re feeling adventurous, why not try adding some orange or lemon zest or a bit of lavender to your dough” (p. 412).

Makes up to 12 chunky finger-sized pieces (or more depending on how you cut it)

You will need:

  • 250g/9oz unsalted butter at room temperature, plus extra for greasing
  • 125g/4 ½oz caster sugar plus extra for sprinkling
  • 250g/9oz plain flour, sifted
  • 125g/ 4 ½oz semolina or cornflour
  • Zest of 1 orange

Now to make…

  • Preheat the oven to 150.C/300.F/gas 2
  • Butter a 22cm/9inch square tin
  • Cream butter and sugar together with a whisk or wooden spoon until pale, light and fluffy.
  • Add in the plain flour and semolina or cornflour as well as the orange zest.
  • Mix very lightly with a wooden spoon and then your hands until you have smooth dough.
  • Press the dough into your buttered square tin, poking it into the corners with your fingers (the more rustic looking the better!)
  • Prick the dough all over with a fork and then pop it into the oven for 50 minutes until lightly golden.
  • While still warm, sprinkle with a generous dusting of caster sugar.
  • Allow the shortbread to cool slightly, cut into 12 chunky finger-sized pieces.
  • Eat, Eat, EAT!!!

This is such a super-dooper easy recipe to make and by adding the orange zest the taste and pure satisfaction you receive from eating it triples the pleasure!!

This next recipe is for all you lovers of chilli!

I’ve been making these power-packed biscuits for the last six years and are usually all eaten in less then two days! They’re just too YUMMY! I’ve tweaked the recipe just a bit from the original, so I’ll write it up from the perspective of how I make them.

Brought to you (and me) by The Australian Women’s Weekly magazine, they would make the ideal gift to give for Christmas or to bring along to a dinner party etc.

Cheese and Chilli Biscuits

Makes up to about 50 biscuits depending on what size cookie cutter you use.

They’re suitable to freeze, but I guarantee they won’t last long enough to even worry about freezing them!

You will need:

  • 2 cups (300g) plain flour
  • 1/3 cup (50g) self-raising flour
  • 1 teaspoon of salt
  • ½ teaspoon of mild paprika
  • 250g butter, chopped
  • 2 cups (160g) of finely grated parmesan
  • 2 teaspoons of dried chilli flakes
  • 1 tablespoon of poppy seeds, optional
  • 6-7 tablespoons of tepid water

Now to make…

  • Preheat oven to moderately slow – 160.C/140C fan-forced
  • Sift together both flours, salt and paprika into a medium sized bowl.
  • Rub in the butter
  • Stir in the cheese, chilli flakes, poppy seeds and enough water to make a soft dough.
  • Gently knead the dough on a floured surface with your hands. (There’s no need to be too precious about it, the more rustic looking the better!)
  • With a cookie cutter (size and shape is your own choice) cut out biscuits and place them onto greased oven trays, about 1cm apart.
  • Bake the biscuits for about 30 minutes or until lightly golden brown.
  • Leave to cool on trays or transfer them onto a cooling rack.
  • Eat, Eat, EAT!!

Just like the orange shortbread, these little delights are best for mouth stuffing straight out the oven with a cooling glass of milk!

I’m more than happy to give all credit for these delicious recipes to their original writers/creators and heartily thank them for sharing their creativeness with us home cooks! Referencing can be found at the end of this blog post.

Soooo, I suppose I should also share some of my current sewing adventures with you…

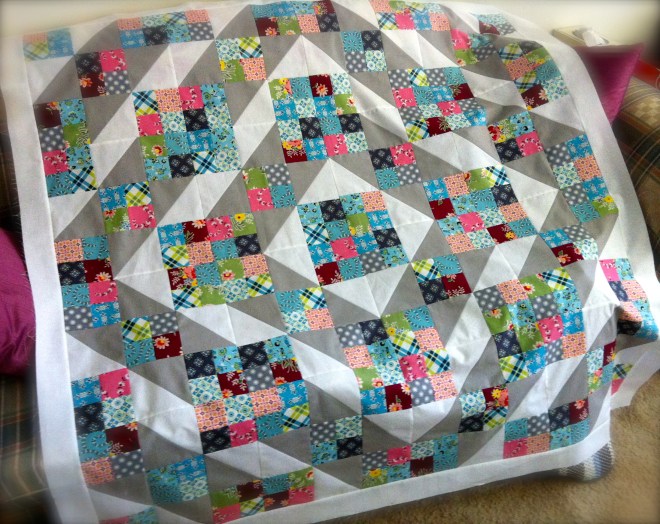
Yesterday, I plunged into the first steps of hand quilting my Jacob’s Ladder quilt.

I bought all the necessary products that I needed to start this enormous task (plus more fabrics that I didn’t need!) down at my local Spotlight store and then got stuck into it!

It was the very first time I had ever done hand quilting and desperately felt outside of my comfort zone!

However, after persisting with it all afternoon and into the early hours of the morning, I felt like I was finally getting somewhere regarding my technique along with what I had achieved so far.

I know the stitching isn’t perfect, but I’m not aiming for perfection. My aim is to try and experience a new quilting technique and to be proud within myself for attempting it as well as finishing it to a standard that I’m happy with. Well, this is what I keep telling myself anyway!

I still have a very, very, very, very long way to go until it’s finished BUT have now finally got something to work on while parked in front of the TV of an evening waiting for the ads to finish!

I will continue to update my progress with this new learning curve, sharing my triumphs and down-right frustrations with hand quilting such a big quilt as the start of the Australian summer begins!

God give me strength!!

Happy Sewing! xx


References

Oliver, J. (2006). Cook with Jamie: My guide to making you a better cook. London: Penguin Books

The Australian Women’s Weekly. (2006). Made for giving. Sydney: ACP Magazines

A Slow Lazy Week

It’s been quite a quiet and slow moving week on the sewing front. I’ve lazily taken the week to sew on the first border of my Jacob’s Ladder quilt while experimenting with a HST border, in an attempt to use up some of the leftover 2.5inch squares of DS Quilts fabric.

I also did a lazy mans attempt at bunting. Springing from an idea I saw on Pinterest, I dug out some coloured twine, matching fabric (British themed) and drew up a diamond shape on some plastic template.

I traced around the diamond template onto the fabrics I had chosen, then cut along the lines with pinking shears to avoid any fraying and then (here’s the lazy bit!) I stapled the little folded fabric flags over the twine– and TAHTAH – Lazy Mans Bunting: British Style.(In no way am I implying the British are lazy. I love the British!)

I’m not sure what I’ll do with the bunting, but I’ll find it a home somewhere in the house.

It seems this week I’ve been doing everything else but sewing. I’ve spent time in the kitchen cooking delicious food stuffs – orange shortbread (a household favourite and greedily finished by the end of the day!)

and a disaster of a carrot cake that definitely tasted better than it looked. It actually came out as more of a carroty-crumbly-moosh than a cake which had deflated and pancaked 2 minuets after it had come out of the oven. (No photos of this one – I’m too ashamed!) What made the experience of making this cake worse was that it had about ten billion steps in its method making that were time consuming and complicated. I mean how hard can it be to make a simple carrot cake?! Never, and I mean NEVER, will I be making that recipe again! I felt as deflated as the cake was after making it; it didn’t even deserve the mouth watering cream-cheese frosting that was meant to be slathered generously on top!!!

So, there is another reason why I’ve been distracted from my sewing table this week and which I’ve been devoting my waking hours to and that is Harry Potter. I’ve dedicated myself to re-reading the entire series again, which isn’t something too difficult to do. Within one week I’ve become a serious bookworm and have read the first three books while only this morning I brought down from the bookshelf HP & the Goblet of Fire, ready to cozy up on the lounge and begin reading.

The books are so hard to put down, even though I’ve read them many times before. I’m not ashamed to admit I’m a Pott-Head. I even have a Pinboard on Pinterest dedicated to my love for Harry Potter and the brilliance of JK Rowling. So there, I’ve just outed myself as a massive geek (and possible loser?) but who isn’t when it come to these things?!

So from looking after my three beautiful nephews pretending to be Princes for an evening…

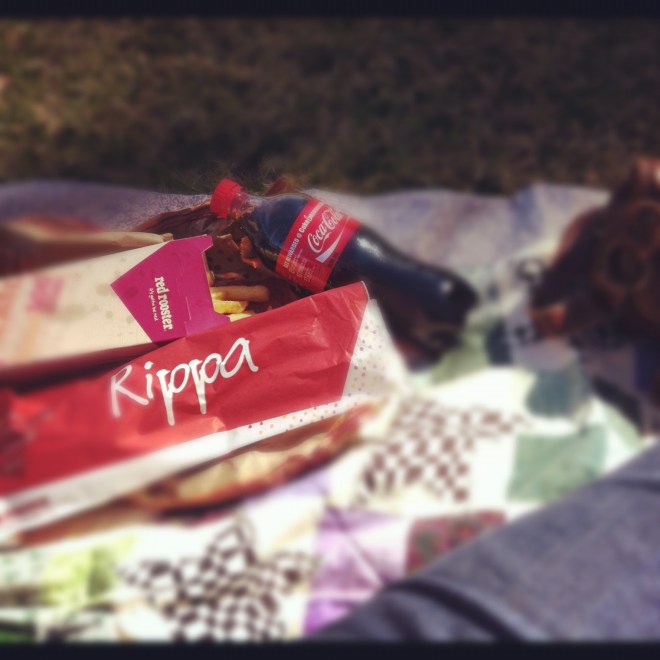
To enjoying a glorious teaser of Spring (albeit windy) weather in Sydney with a much deserved unhealthy lunch treat on Monday…

I’ve had a great week before ready myself into beginning my online university studies next week!

Happy Sewing!! xx