An Update from my Sewing Room…

Today, I thought I’d take some time out and write up a bit of an ‘old school’ type post.. One where I share with you all of the going-ons that have been happening in and around my sewing room! Just like the good ol’ days!!

First up, I’ve been spending my down time making this quilt for a friend of mine who recently celebrated a very special birthday! (I’m saying no more on the subject, just incase they read this blog!) Typically, I missed the deadline of their actual birthday to have this quilt finished and gifted to them, but you know, better late than never!

IMG_4195
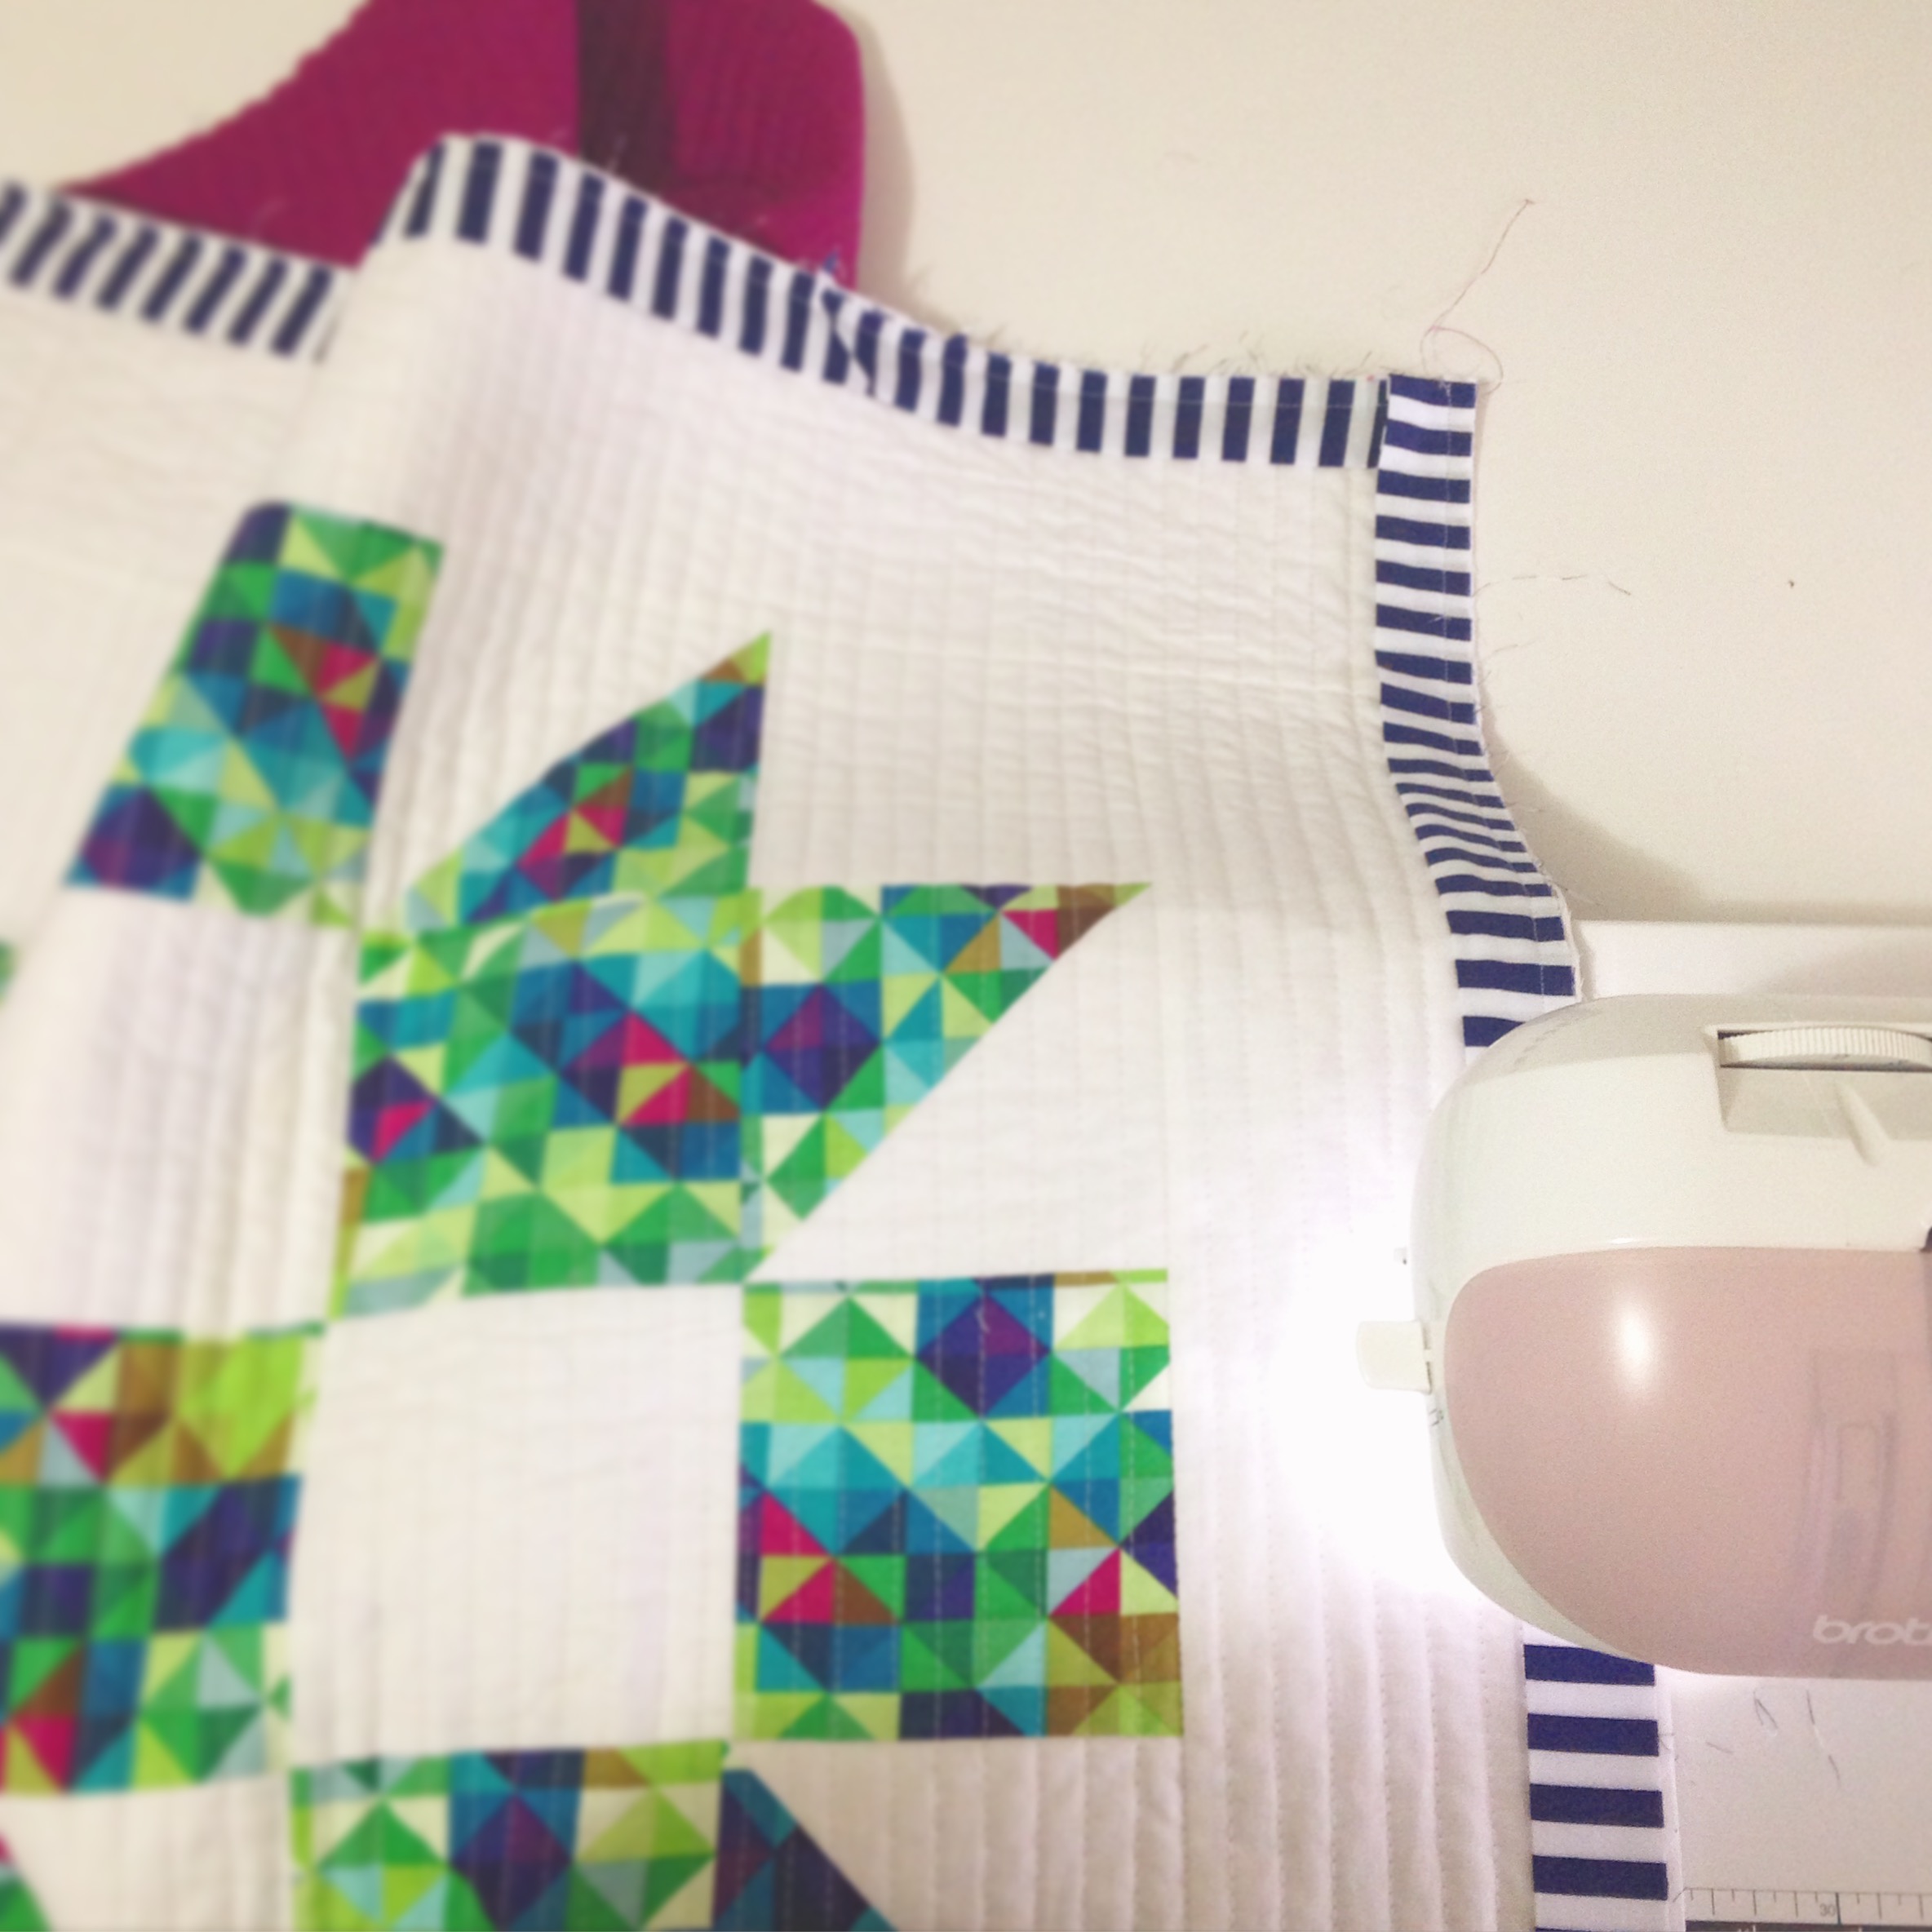
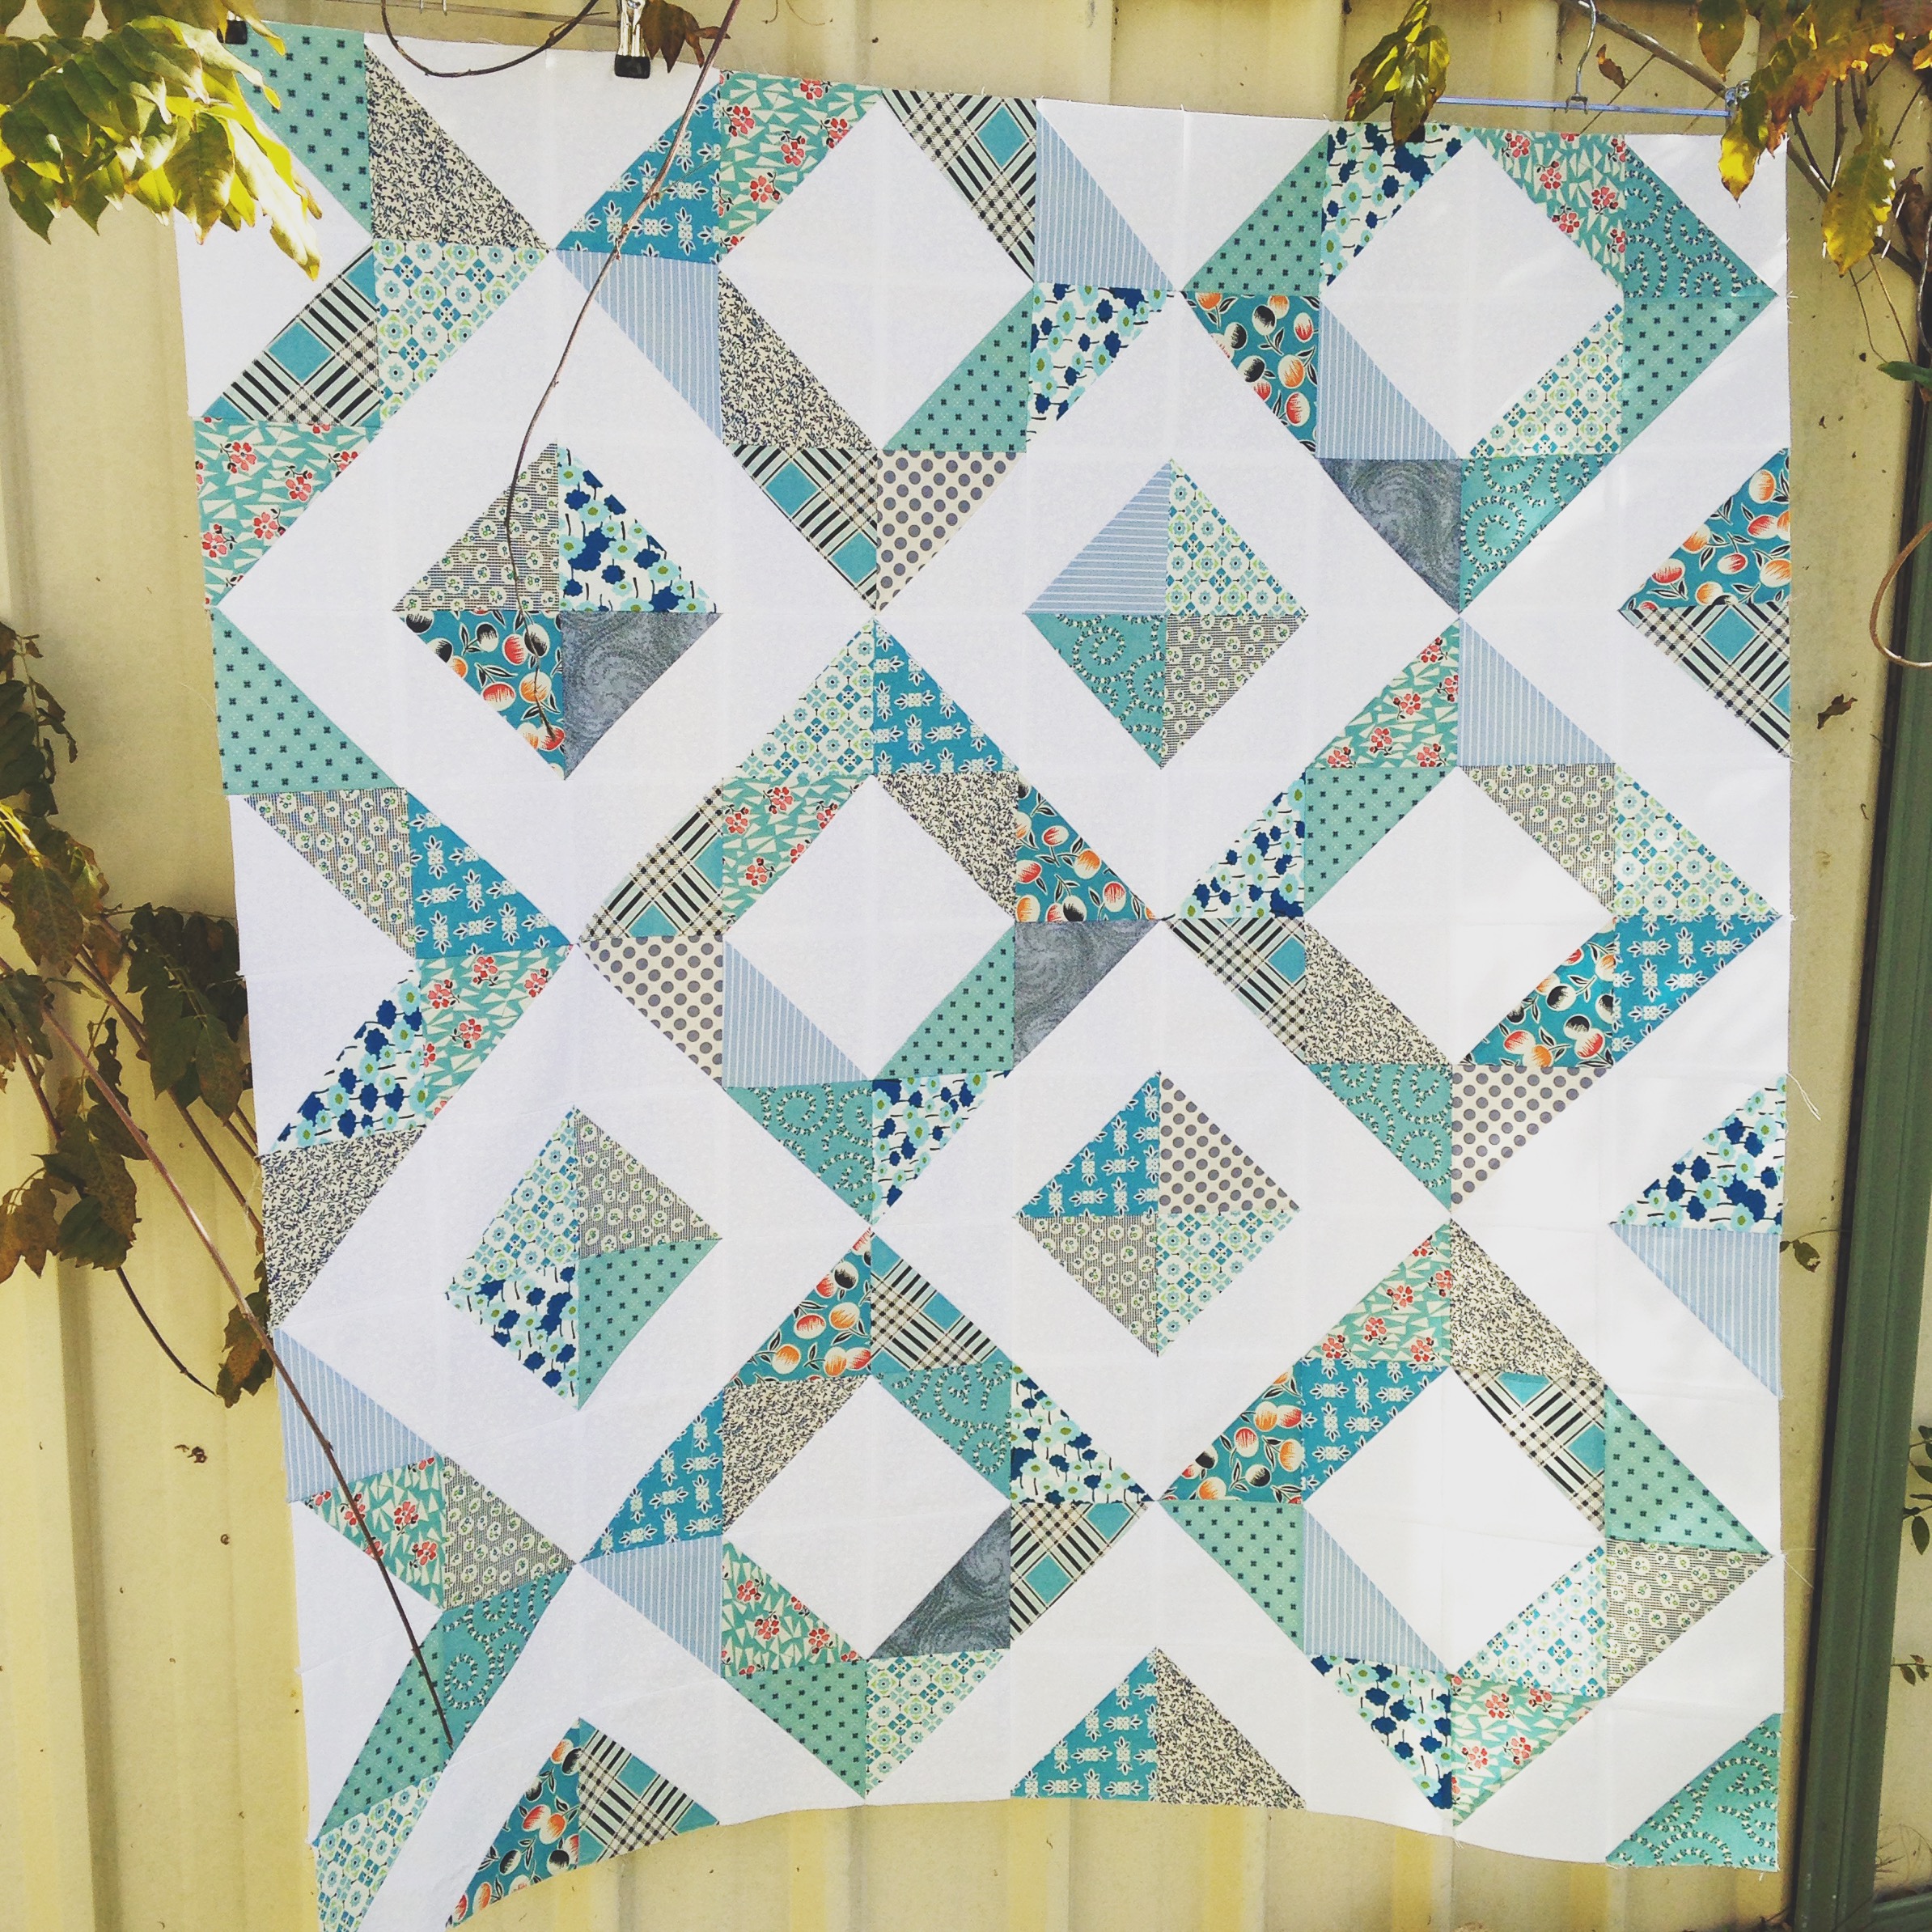
I found the inspiration for this one on Pinterest (where else!). The picture hit me straight in the face and I knew instantly it was perfect for this occasion! The recipient of this quilt loves the colour blue, so I riffled through my stash and found a mish-mash assortment of beautiful blues and mints with a mixture of prints, directions and values that would help add interest and movement to the quilt. I then paired these with a crisp white-on-white print fabric that make all of the blues pop and sing! All up I think I made about 120 5″ HSTs… I do love making HSTs but sometimes the monotony of trimming can be draining and painful! But after numerous cutting, piecing and trimming sessions, the time came to place the squares into place onto my design wall. I did this with no particular plan. I simply just placed them up ensuring similar prints and colours weren’t placed too close to one another. This did take a lot of back-and-forthing to ensure everything was working harmoniously!

TrioBlueHST

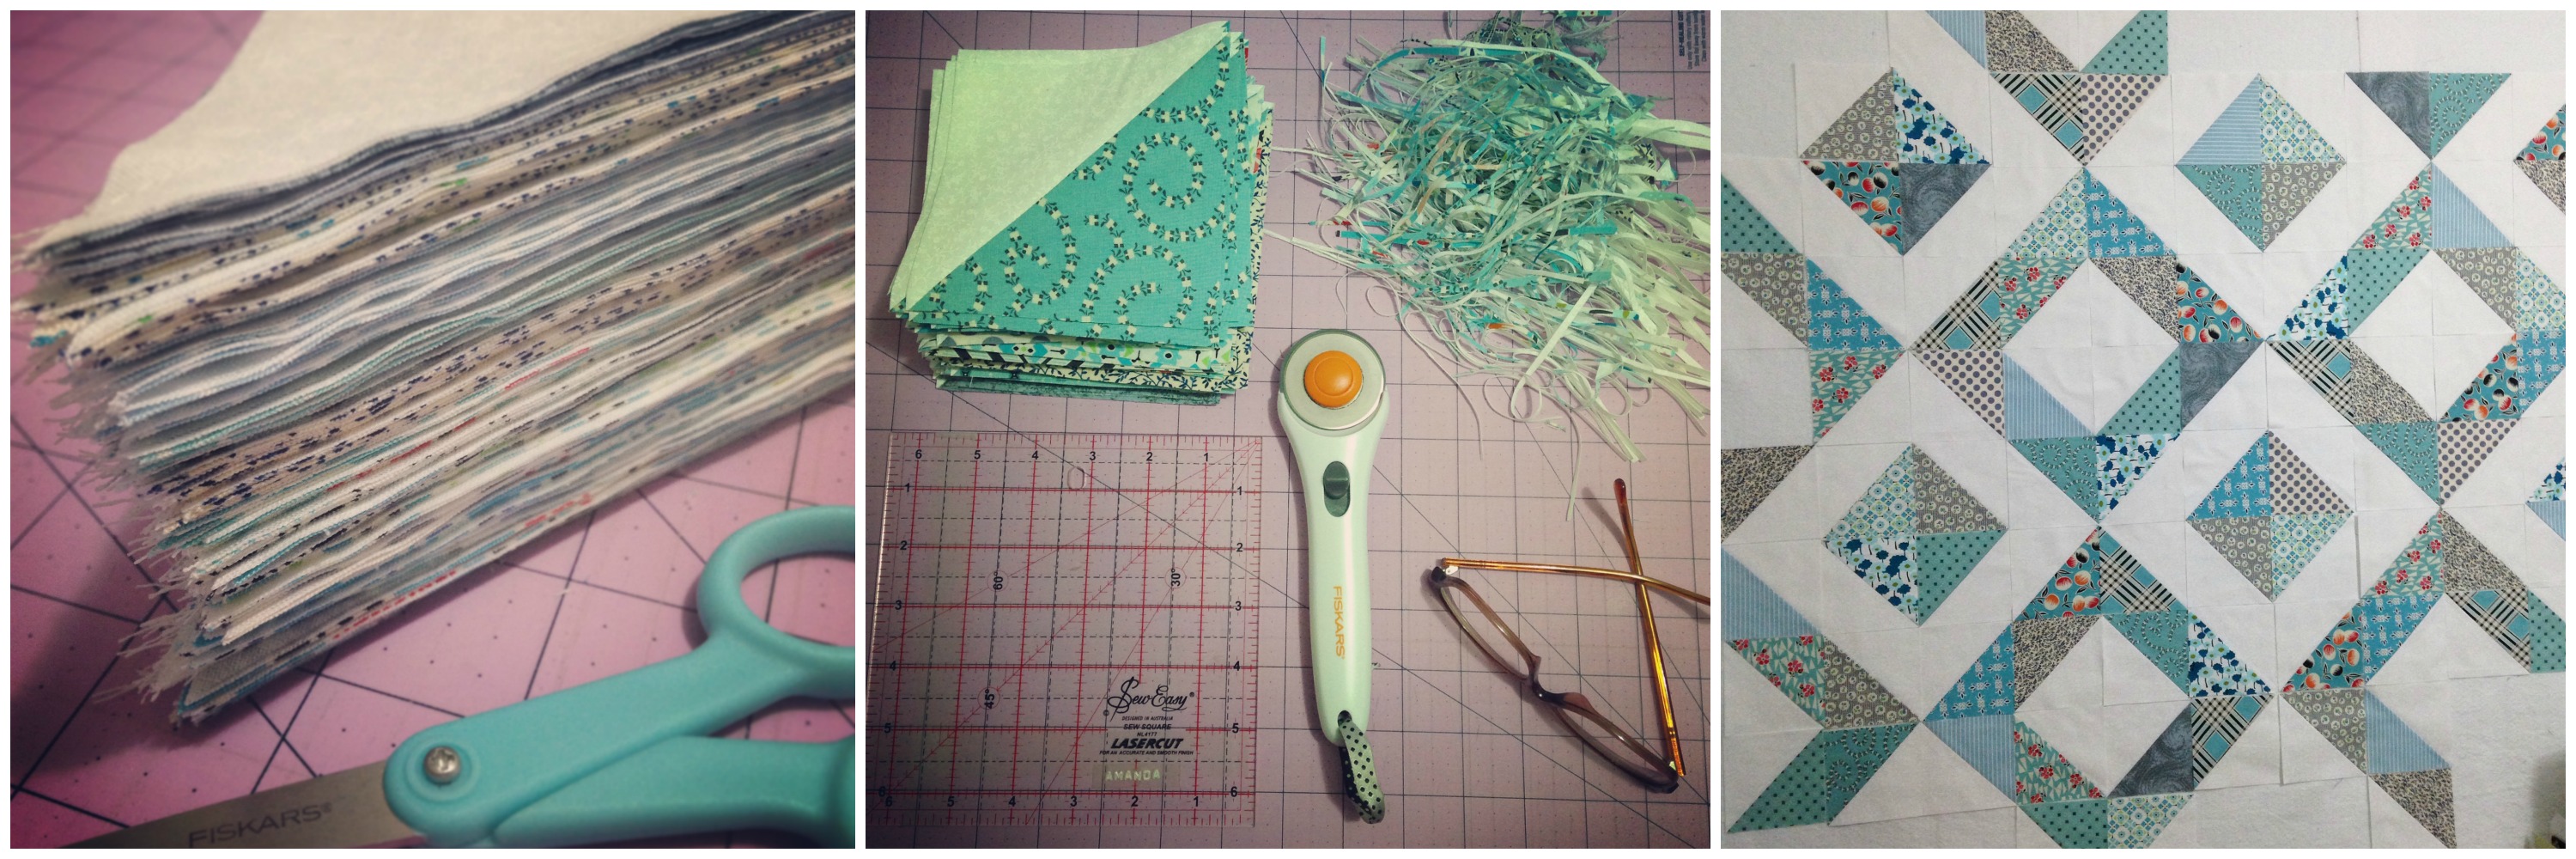
The way I chose to piece the quilt top was an odd and very laborious one. I literally pieced the quilt top together one square at time… What I did was divide the quilt into quarters, pieced each one together and then brought them all together to complete the quilt top! It may not seem that tiring, but by doing it this way, I was forced to press every single seam on the back flat open! It wasn’t fun and it slightly took away the fun and excitement of making this quilt. But hey-ho, I pushed through it and got it completed about two weeks past its due date! Oh dear!

However I must say, by doing it that way, I had so much more control on getting the points of the triangles sitting perfectly together! I don’t think I’ve ever been able to get such perfect point matches and seam nests/joins in any other quilt I’ve pieced! Some of these beautiful joins just simply take my breath away!! PerfectPoints
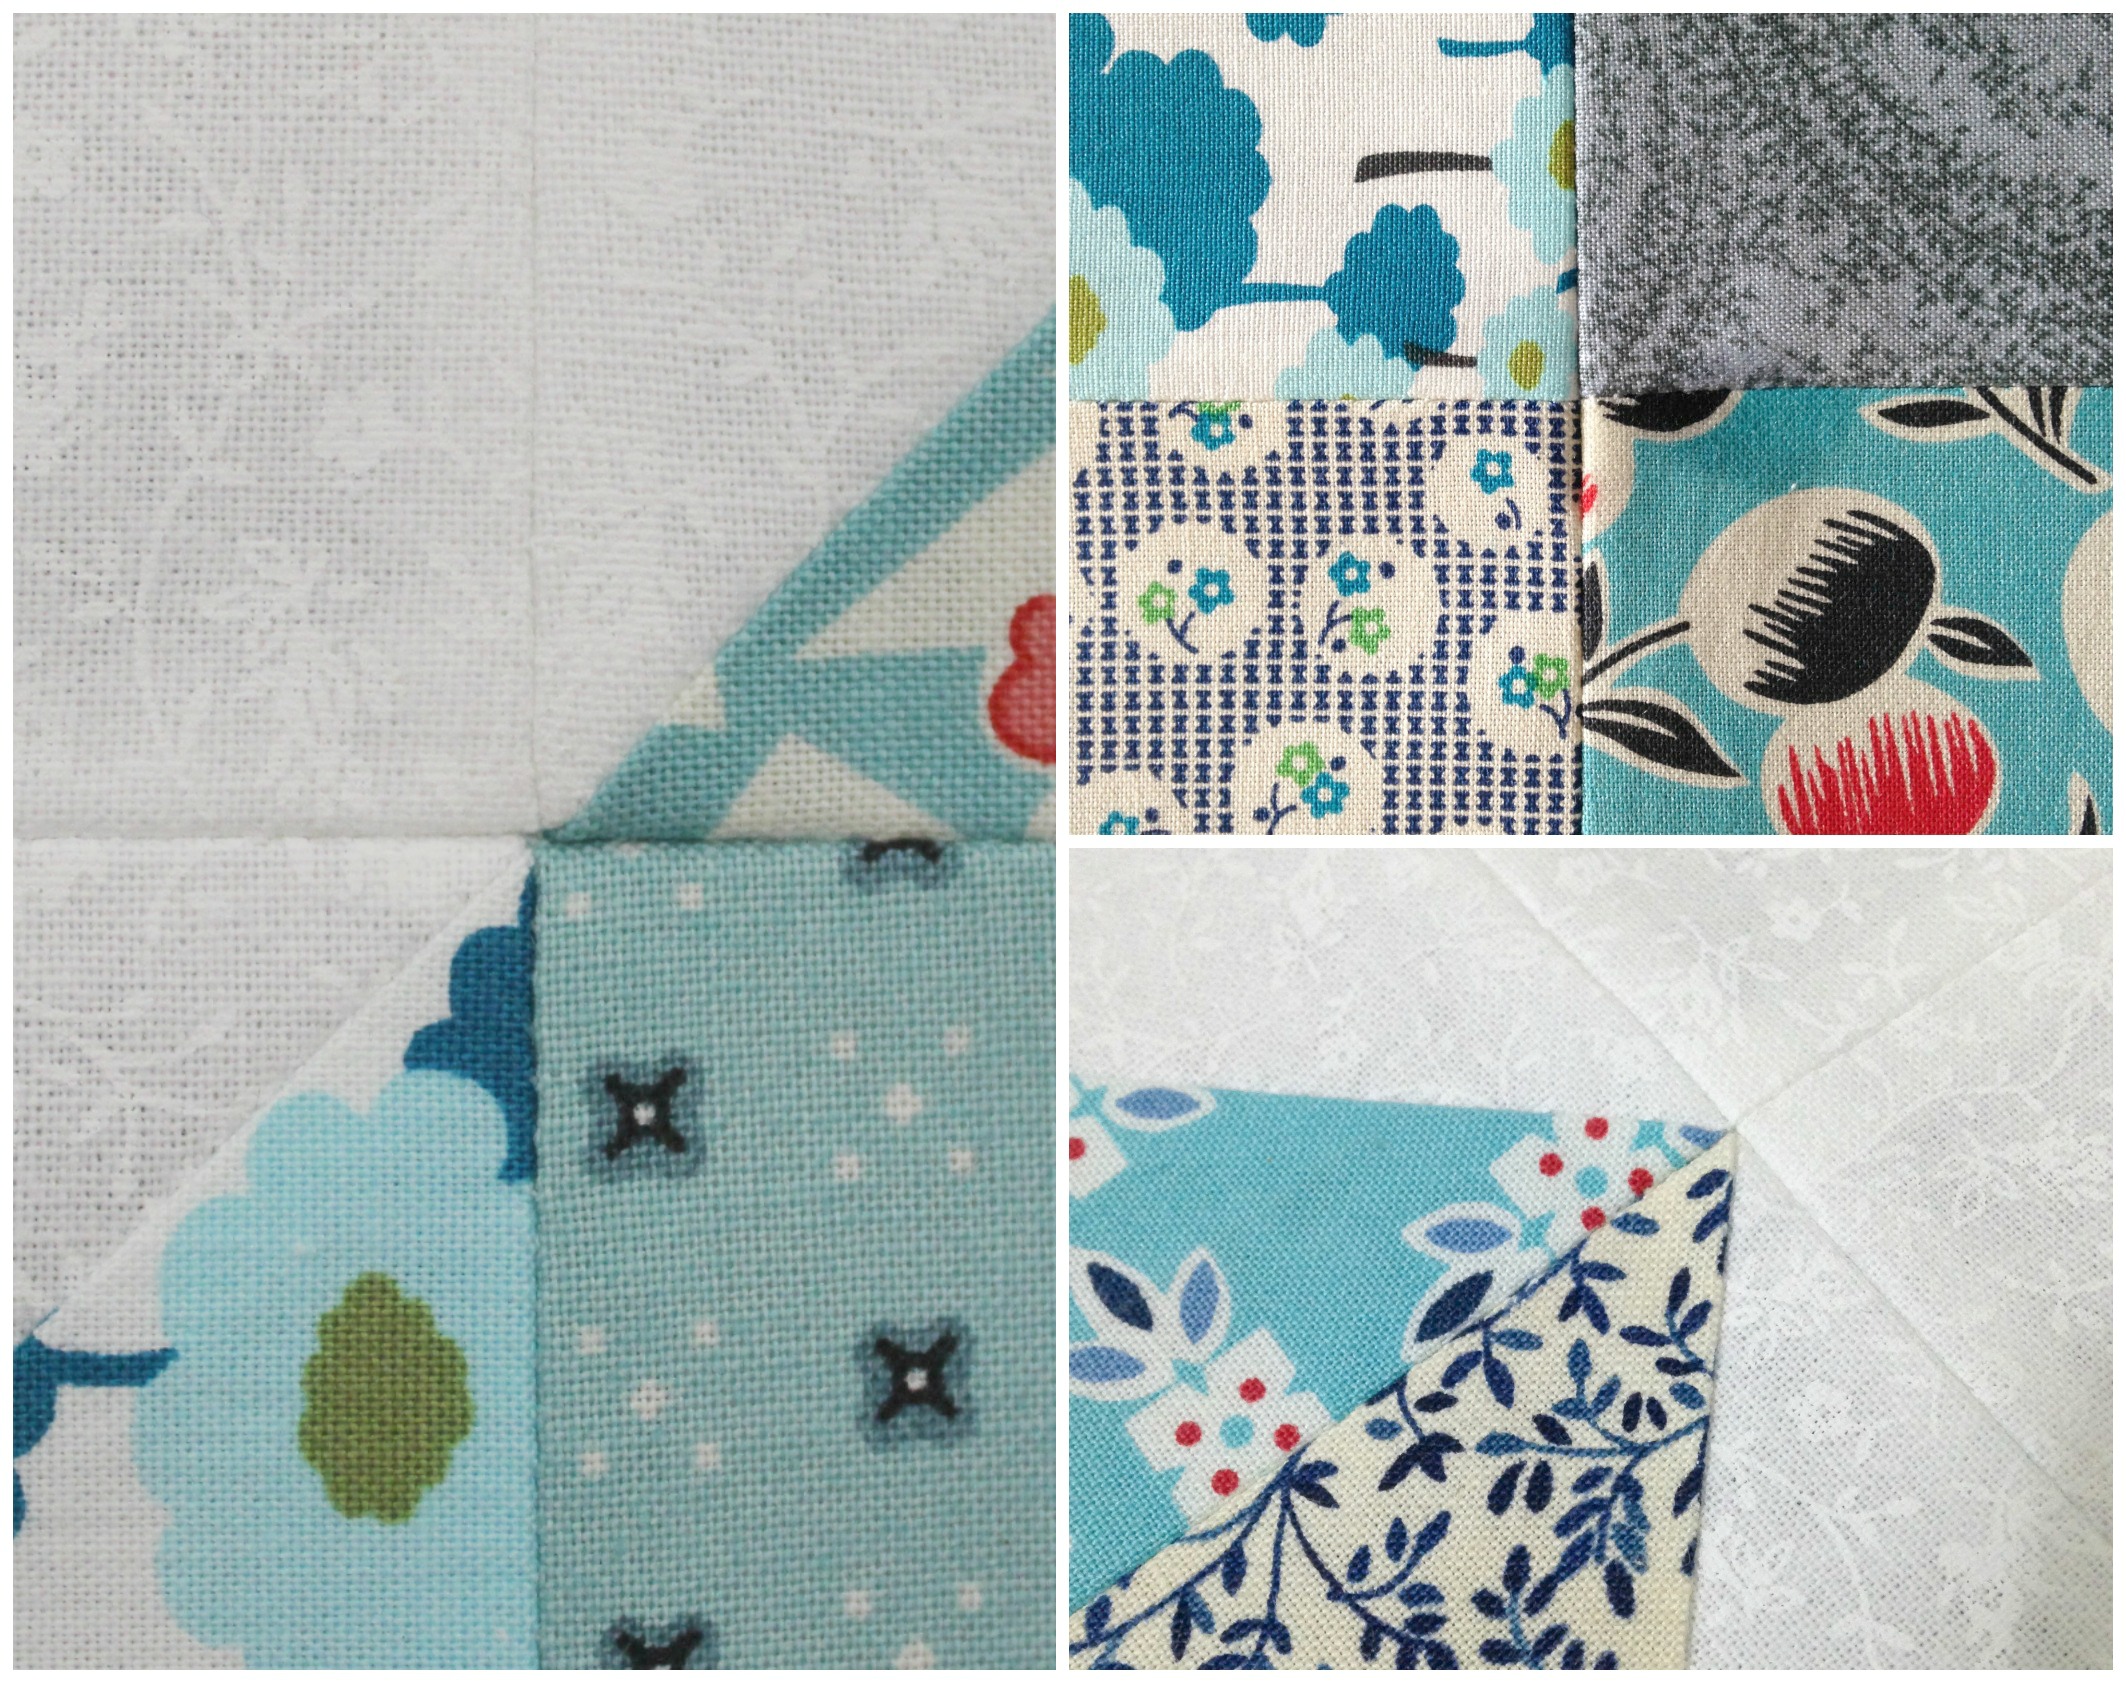
So now I have the quilt top hanging to the right of me whilst I find the perfect backing for it and muster the enthusiasm to baste it! I’ll keep you updated once I’ve basted it and starting the quilting!

+++

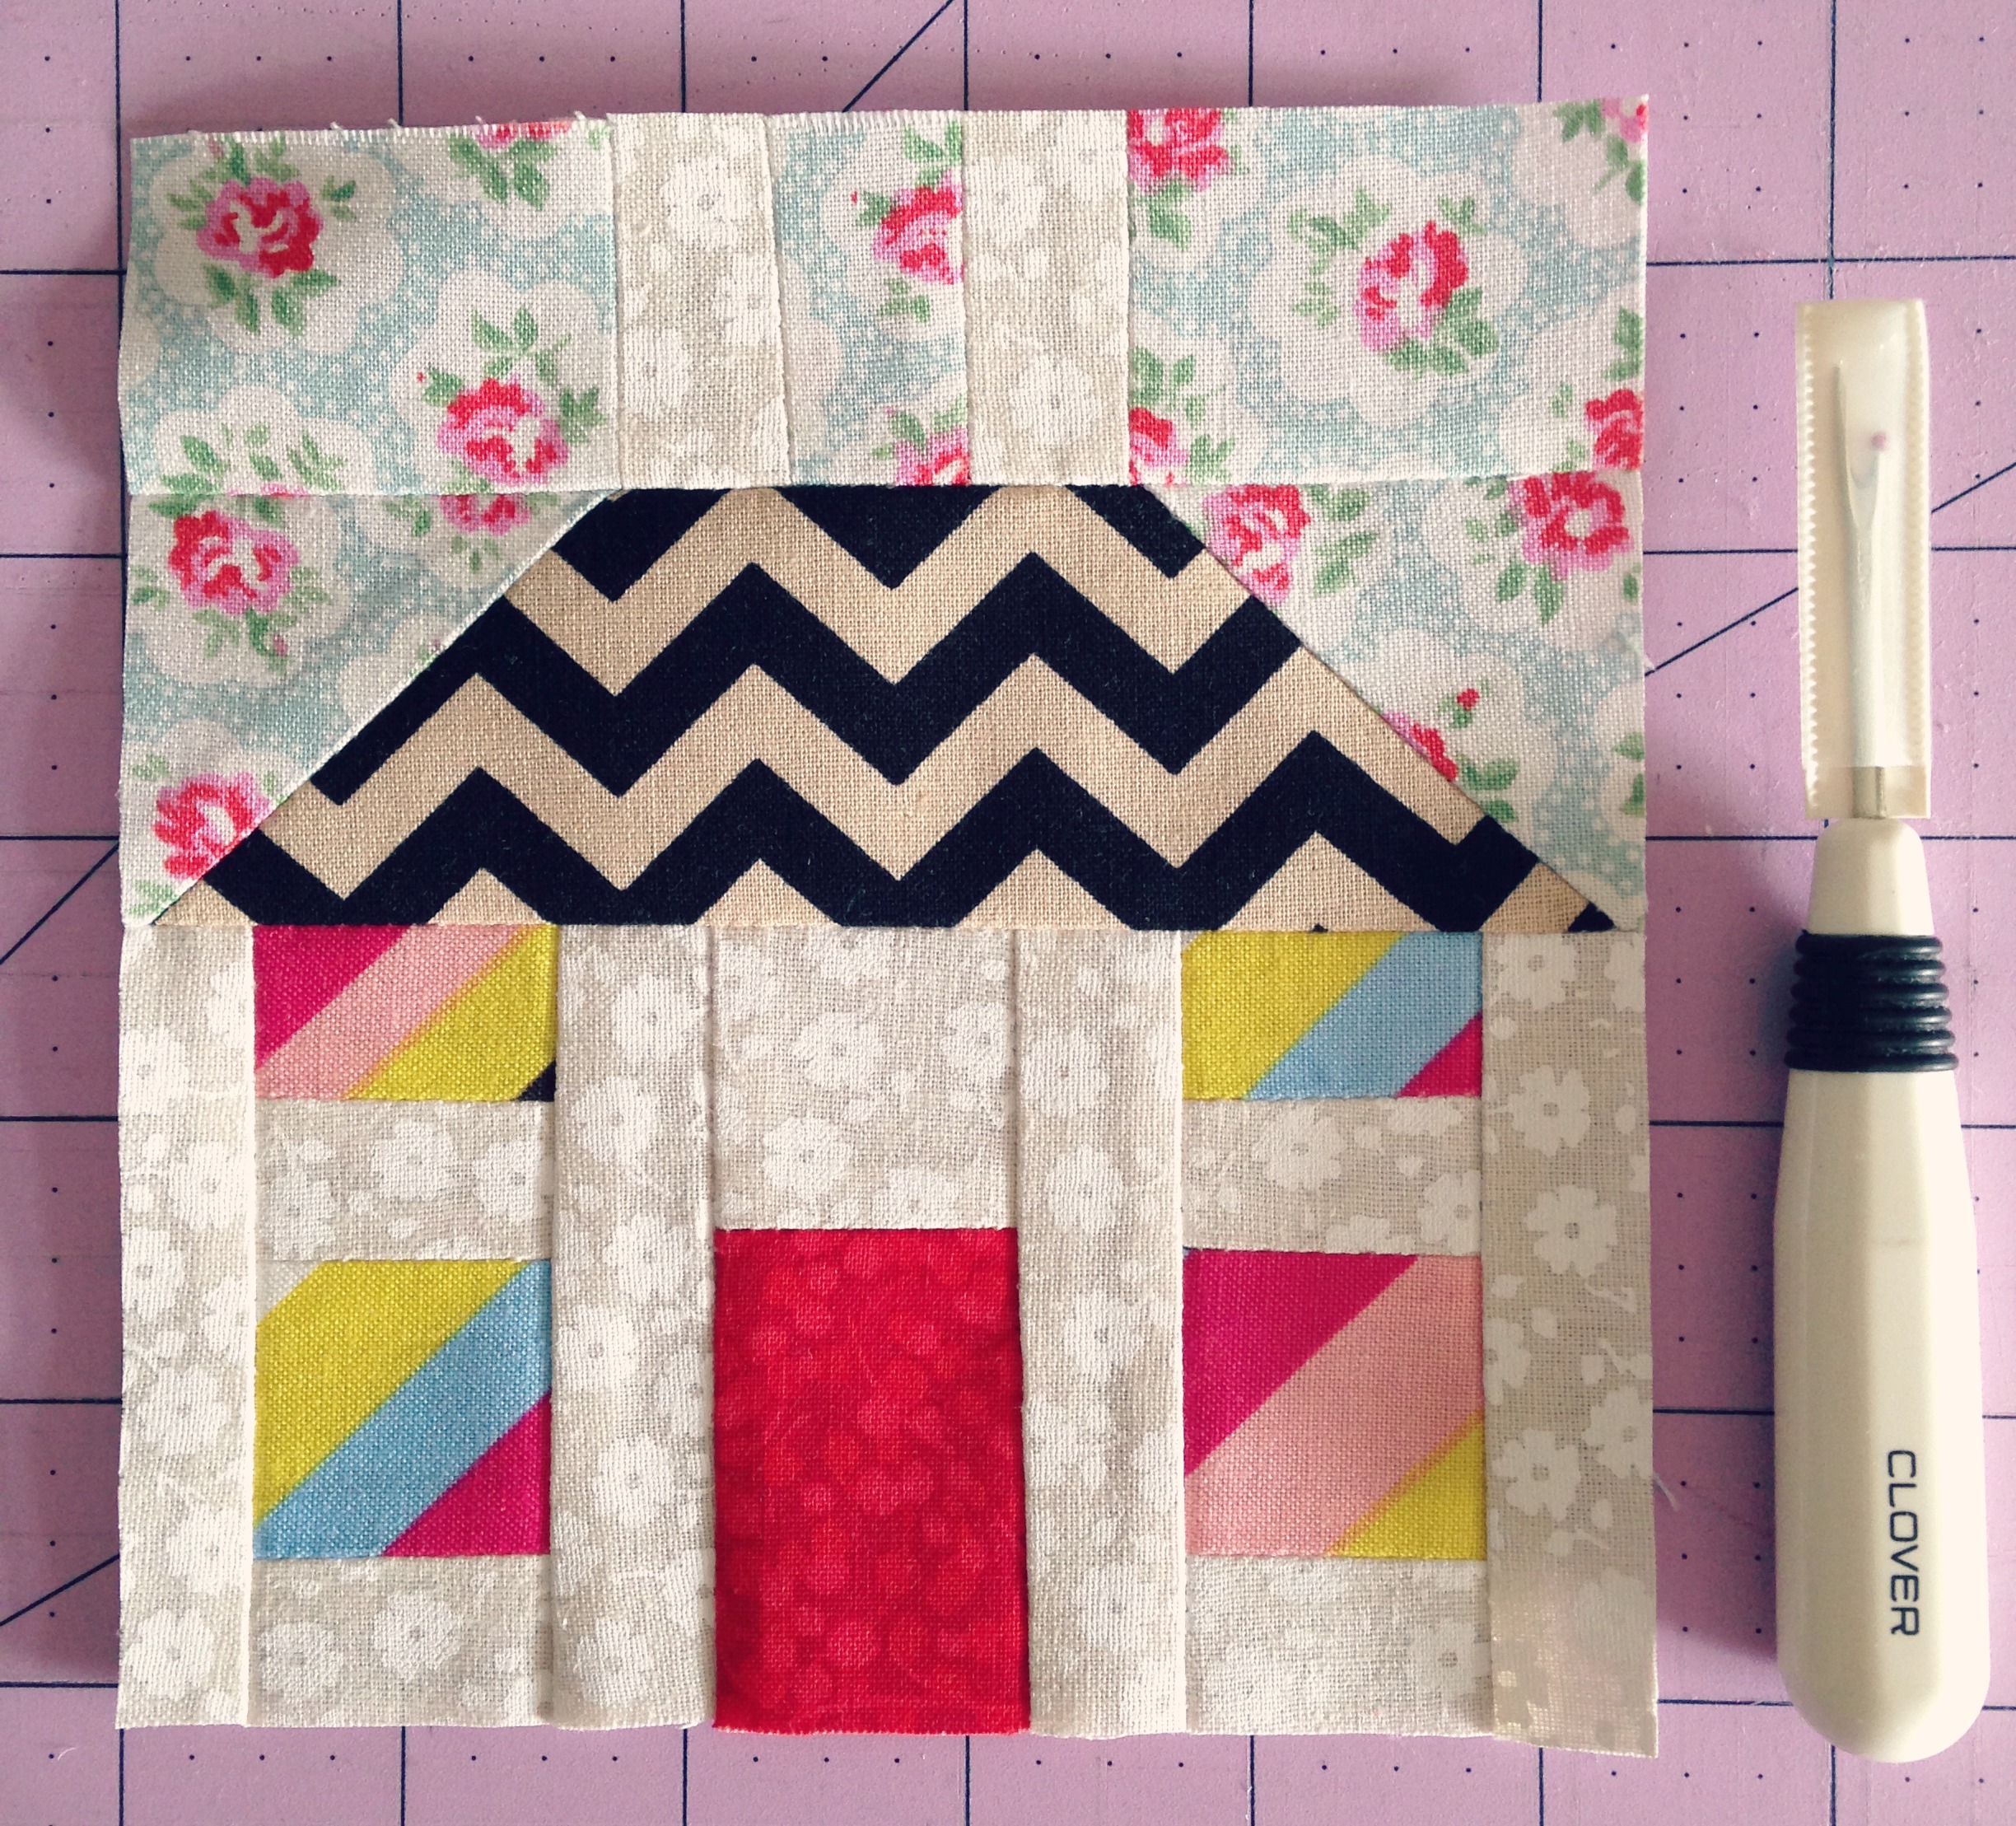
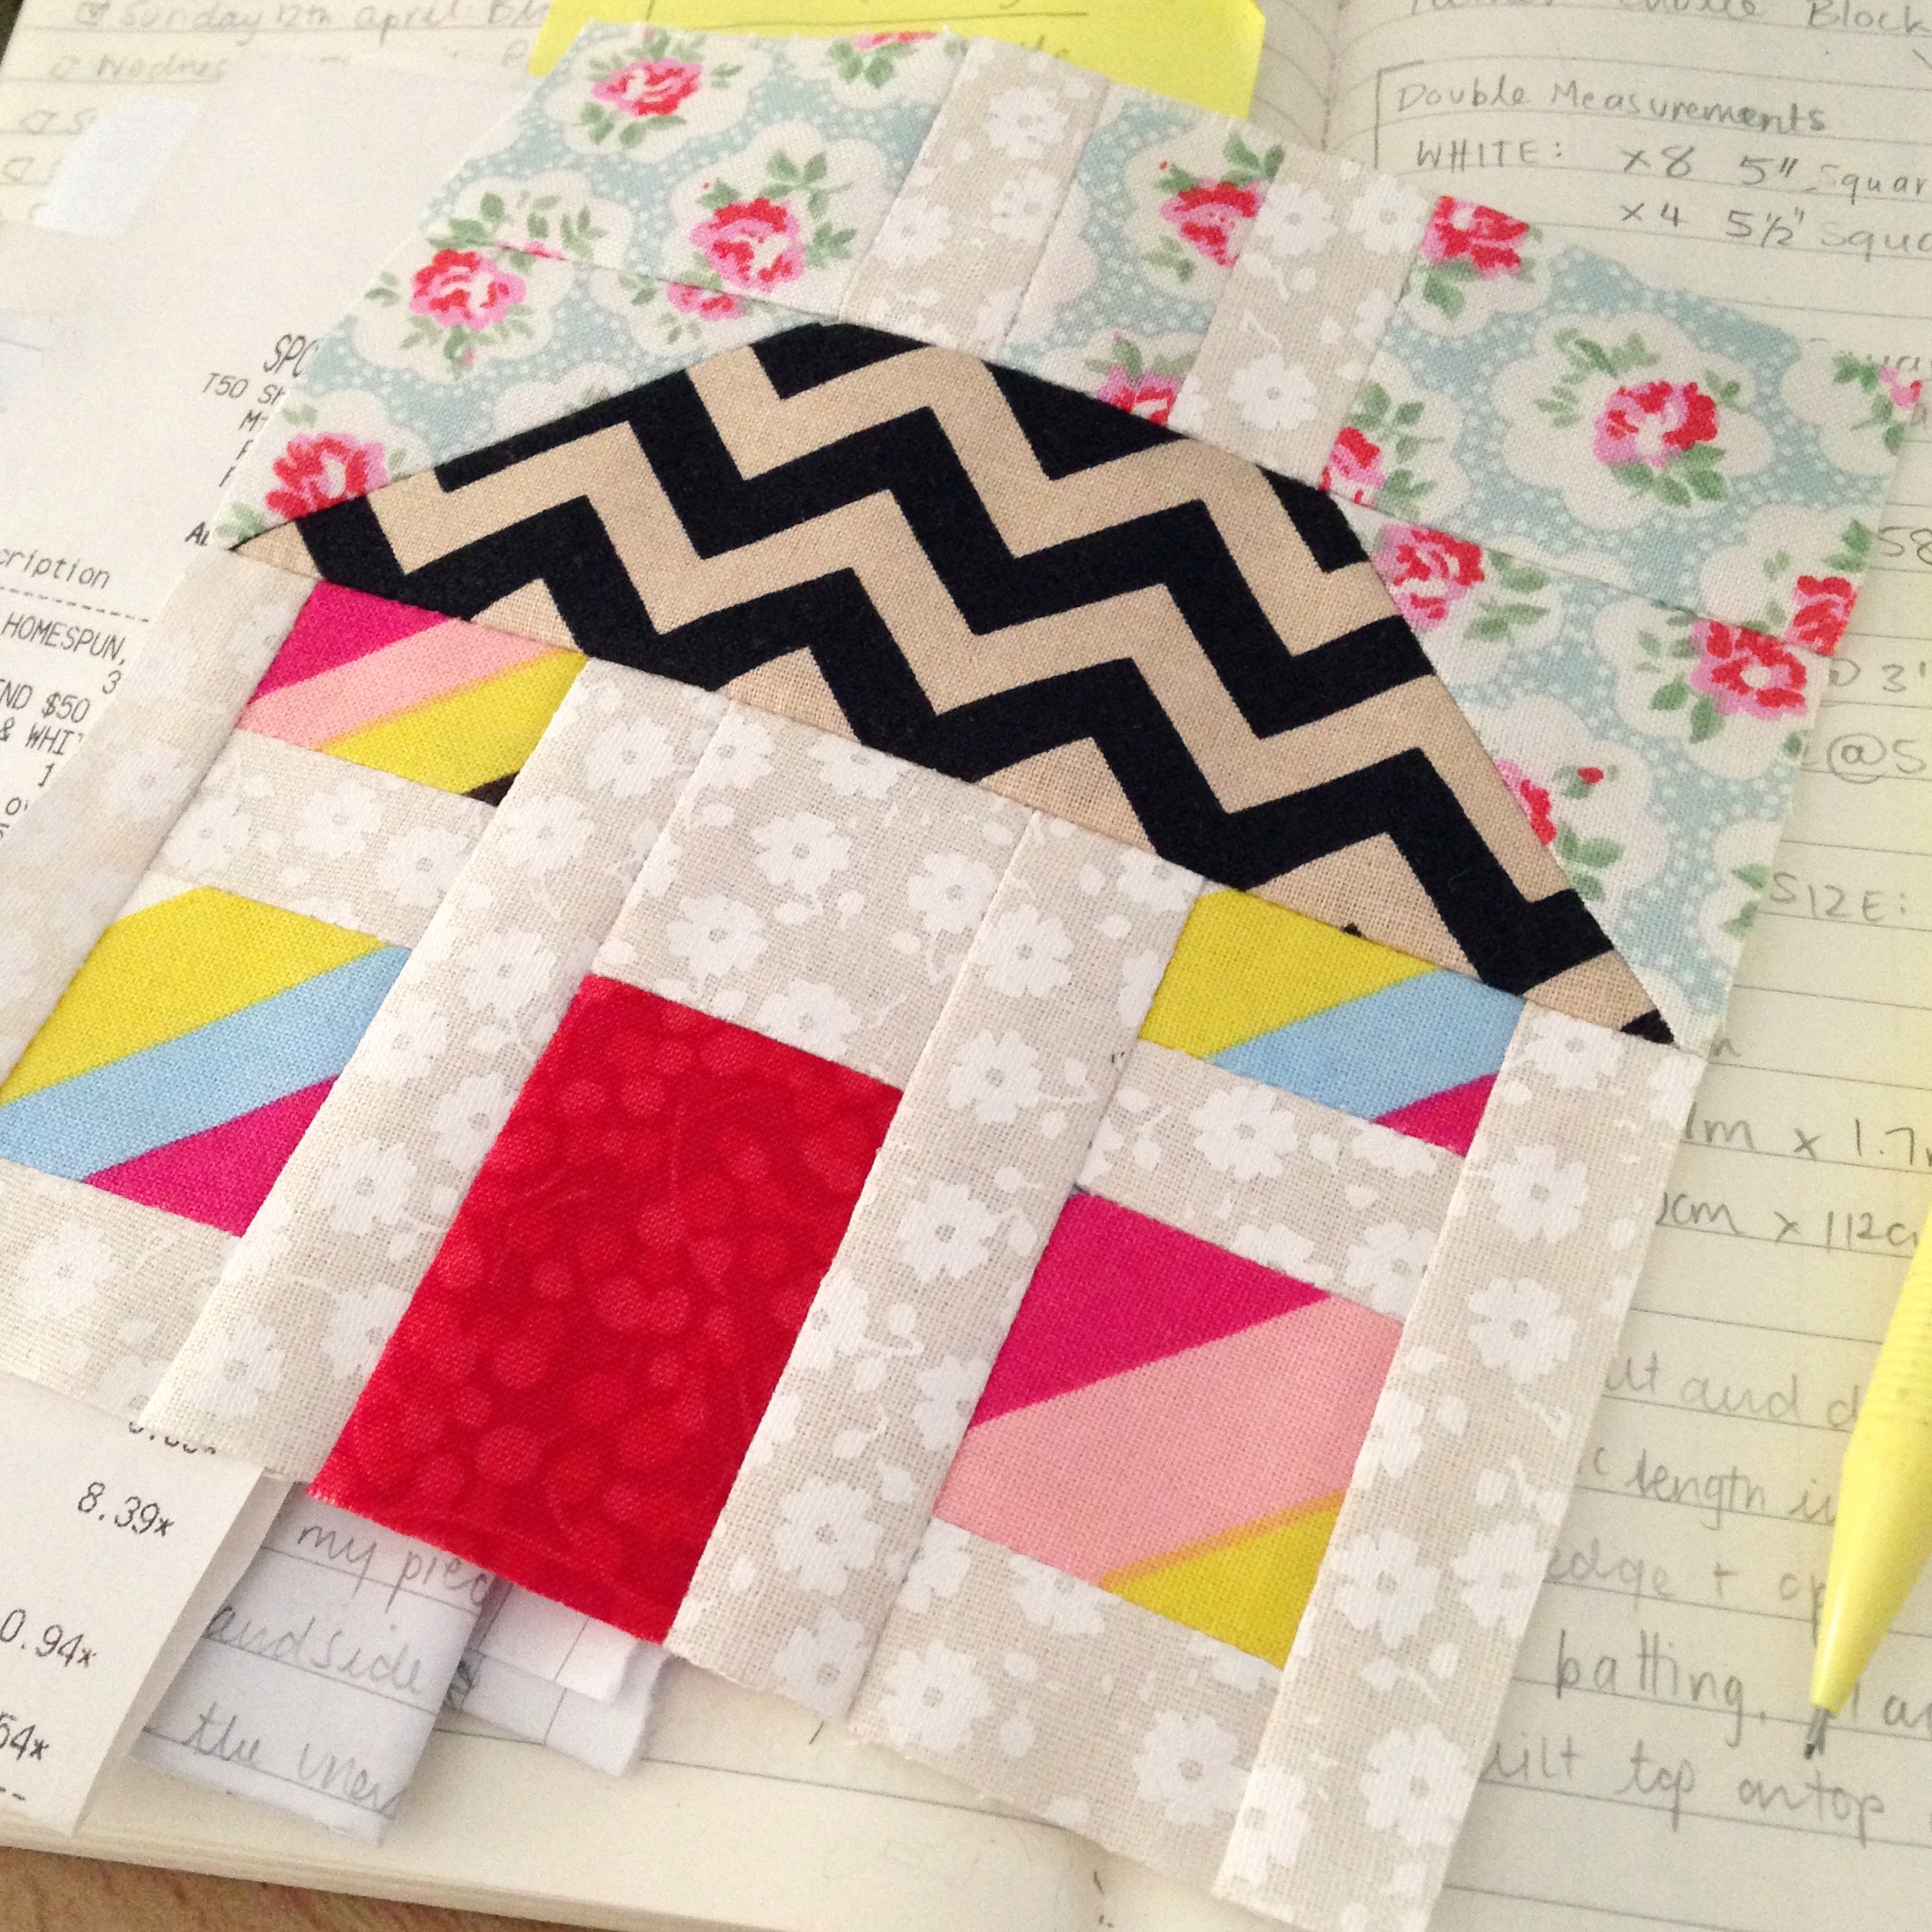
Next, I finally managed to finished my Tree embroidery that I took away with me while on holiday in Fiji! I’m not really sure why it took me so long to finish as I only had a few little areas to fill in to say that it was completed! I did share the finished result on my Instagram, but here it is again if you missed it, plus another showing the details…

IMG_4095

IMG_4102

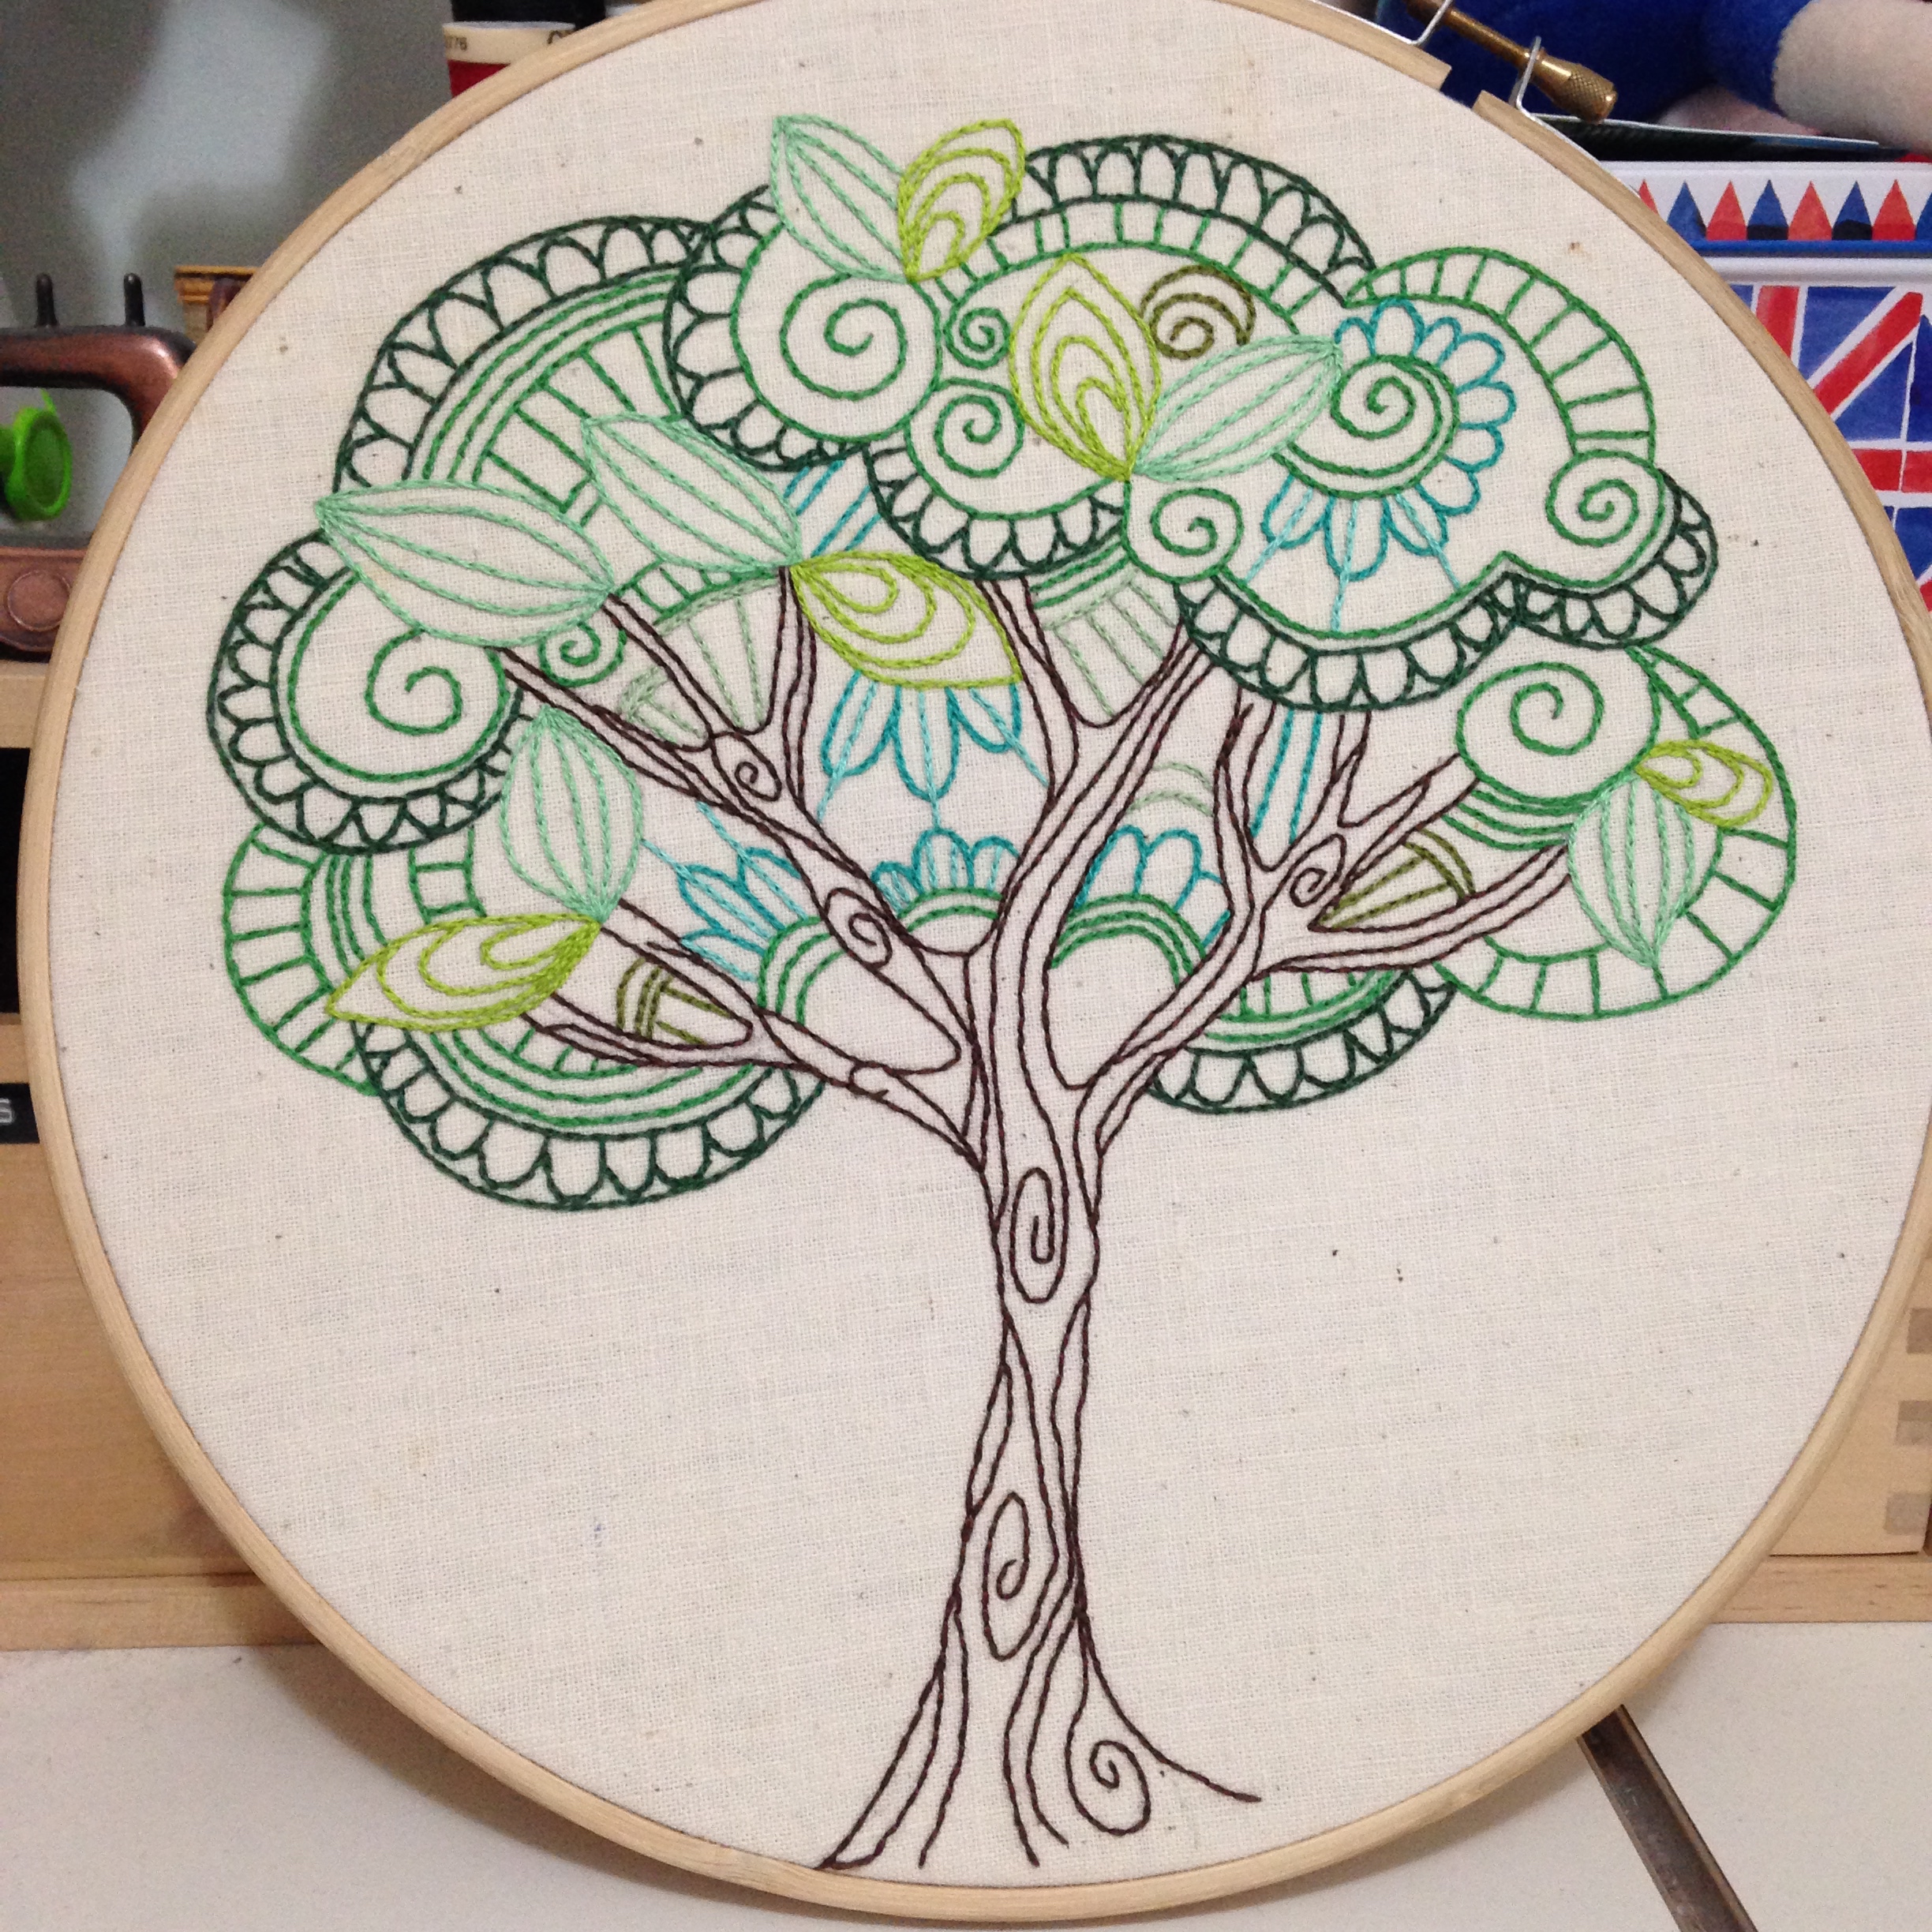
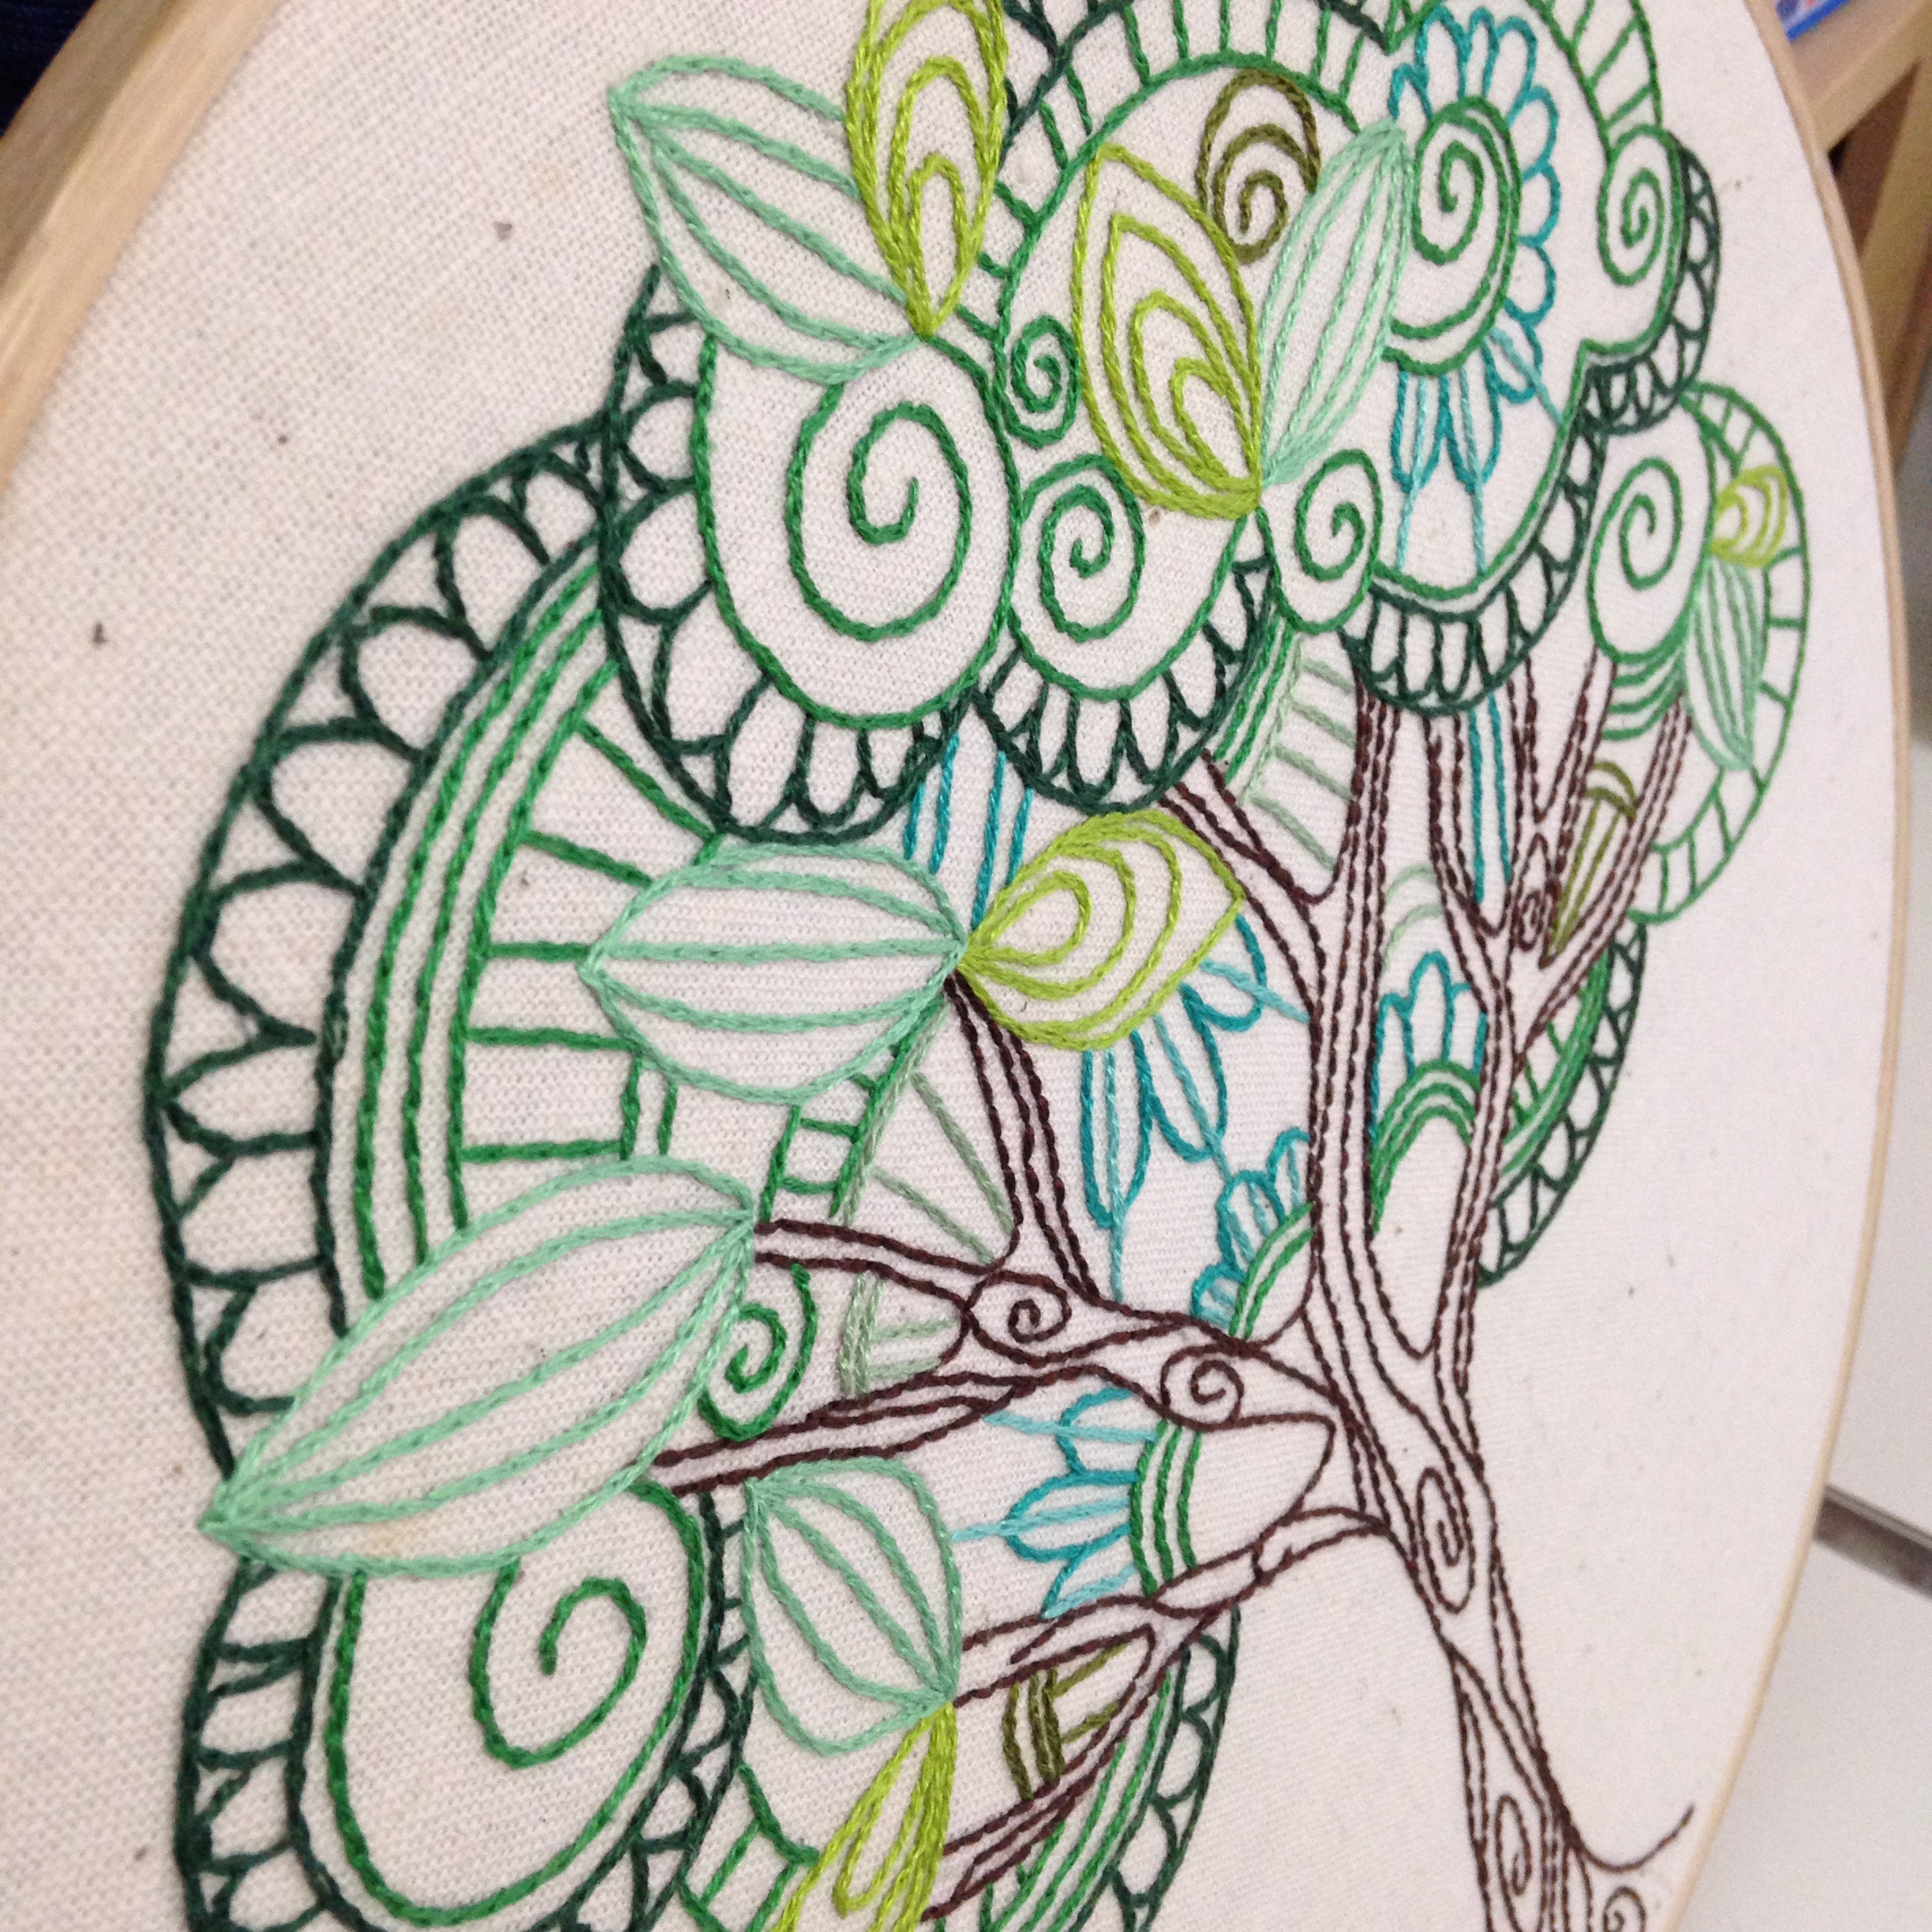
I purchased this embroidery pattern from Urban Threads – a great online source of modern and quirky embroidery patterns and ideas!

+++

Another thing that’s been revolving and considered in my sewing room is the decision to open my own Esty store! I’ve sold things I’ve made online before – for quite a few years actually – but wanted to find and use a new platform that would be and is more accessible to international shoppers. From what I’ve heard, Etsy has a pretty good reputation and is trustworthy and well known worldwide, so I thought I’d give it a go and see what happens!

At the moment, I haven’t anything for sale yet as I’m still at the planning stage of figuring out shipping rates, packaging and what it is I actually want to sell in my shop. I have a few quilts that I’ve made (or are half made atm!) that I would like to sell as well as some embroideries (possibly framed; still figuring that out!) and a few other things that I’ve made in the past that have sold well.

So stay tuned, things will be up and running fairly soon! (Hopefully!)

+++

Ooo!! Exciting times are ahead here in Sydney! The craft and quilting communities are getting ready for the Craft & Quilt Show to open next week!! Wheee!! This is like our version of QuiltCon or Quilter’s Market, where you get to explore, buy and be inspired by what’s new in the crafting and quilting worlds!

Craft-Quilt_FB-button_403px-by-403px_come-see-us2

Also at the show they have the Sydney Quilt Show on where they display all of the quilts to be judged for Best in Show and other awards for 2015. I’ve entered in quilts over the past two years, but decided not to enter this year for a few different reasons. But I’m excited to see what the quality is like this year. The quilts last year were the best I’ve seen yet!

+++

And speaking of quilts and fabric and all good things, I recently went on a bit of a splurge on one of my favourite online fabric stores, Kelani Fabric Obsession! Every time I click onto that website, there’s always something new and beautiful to tempt me to buy and I sit there trying to justify why I need it in my life!

IMG_4170

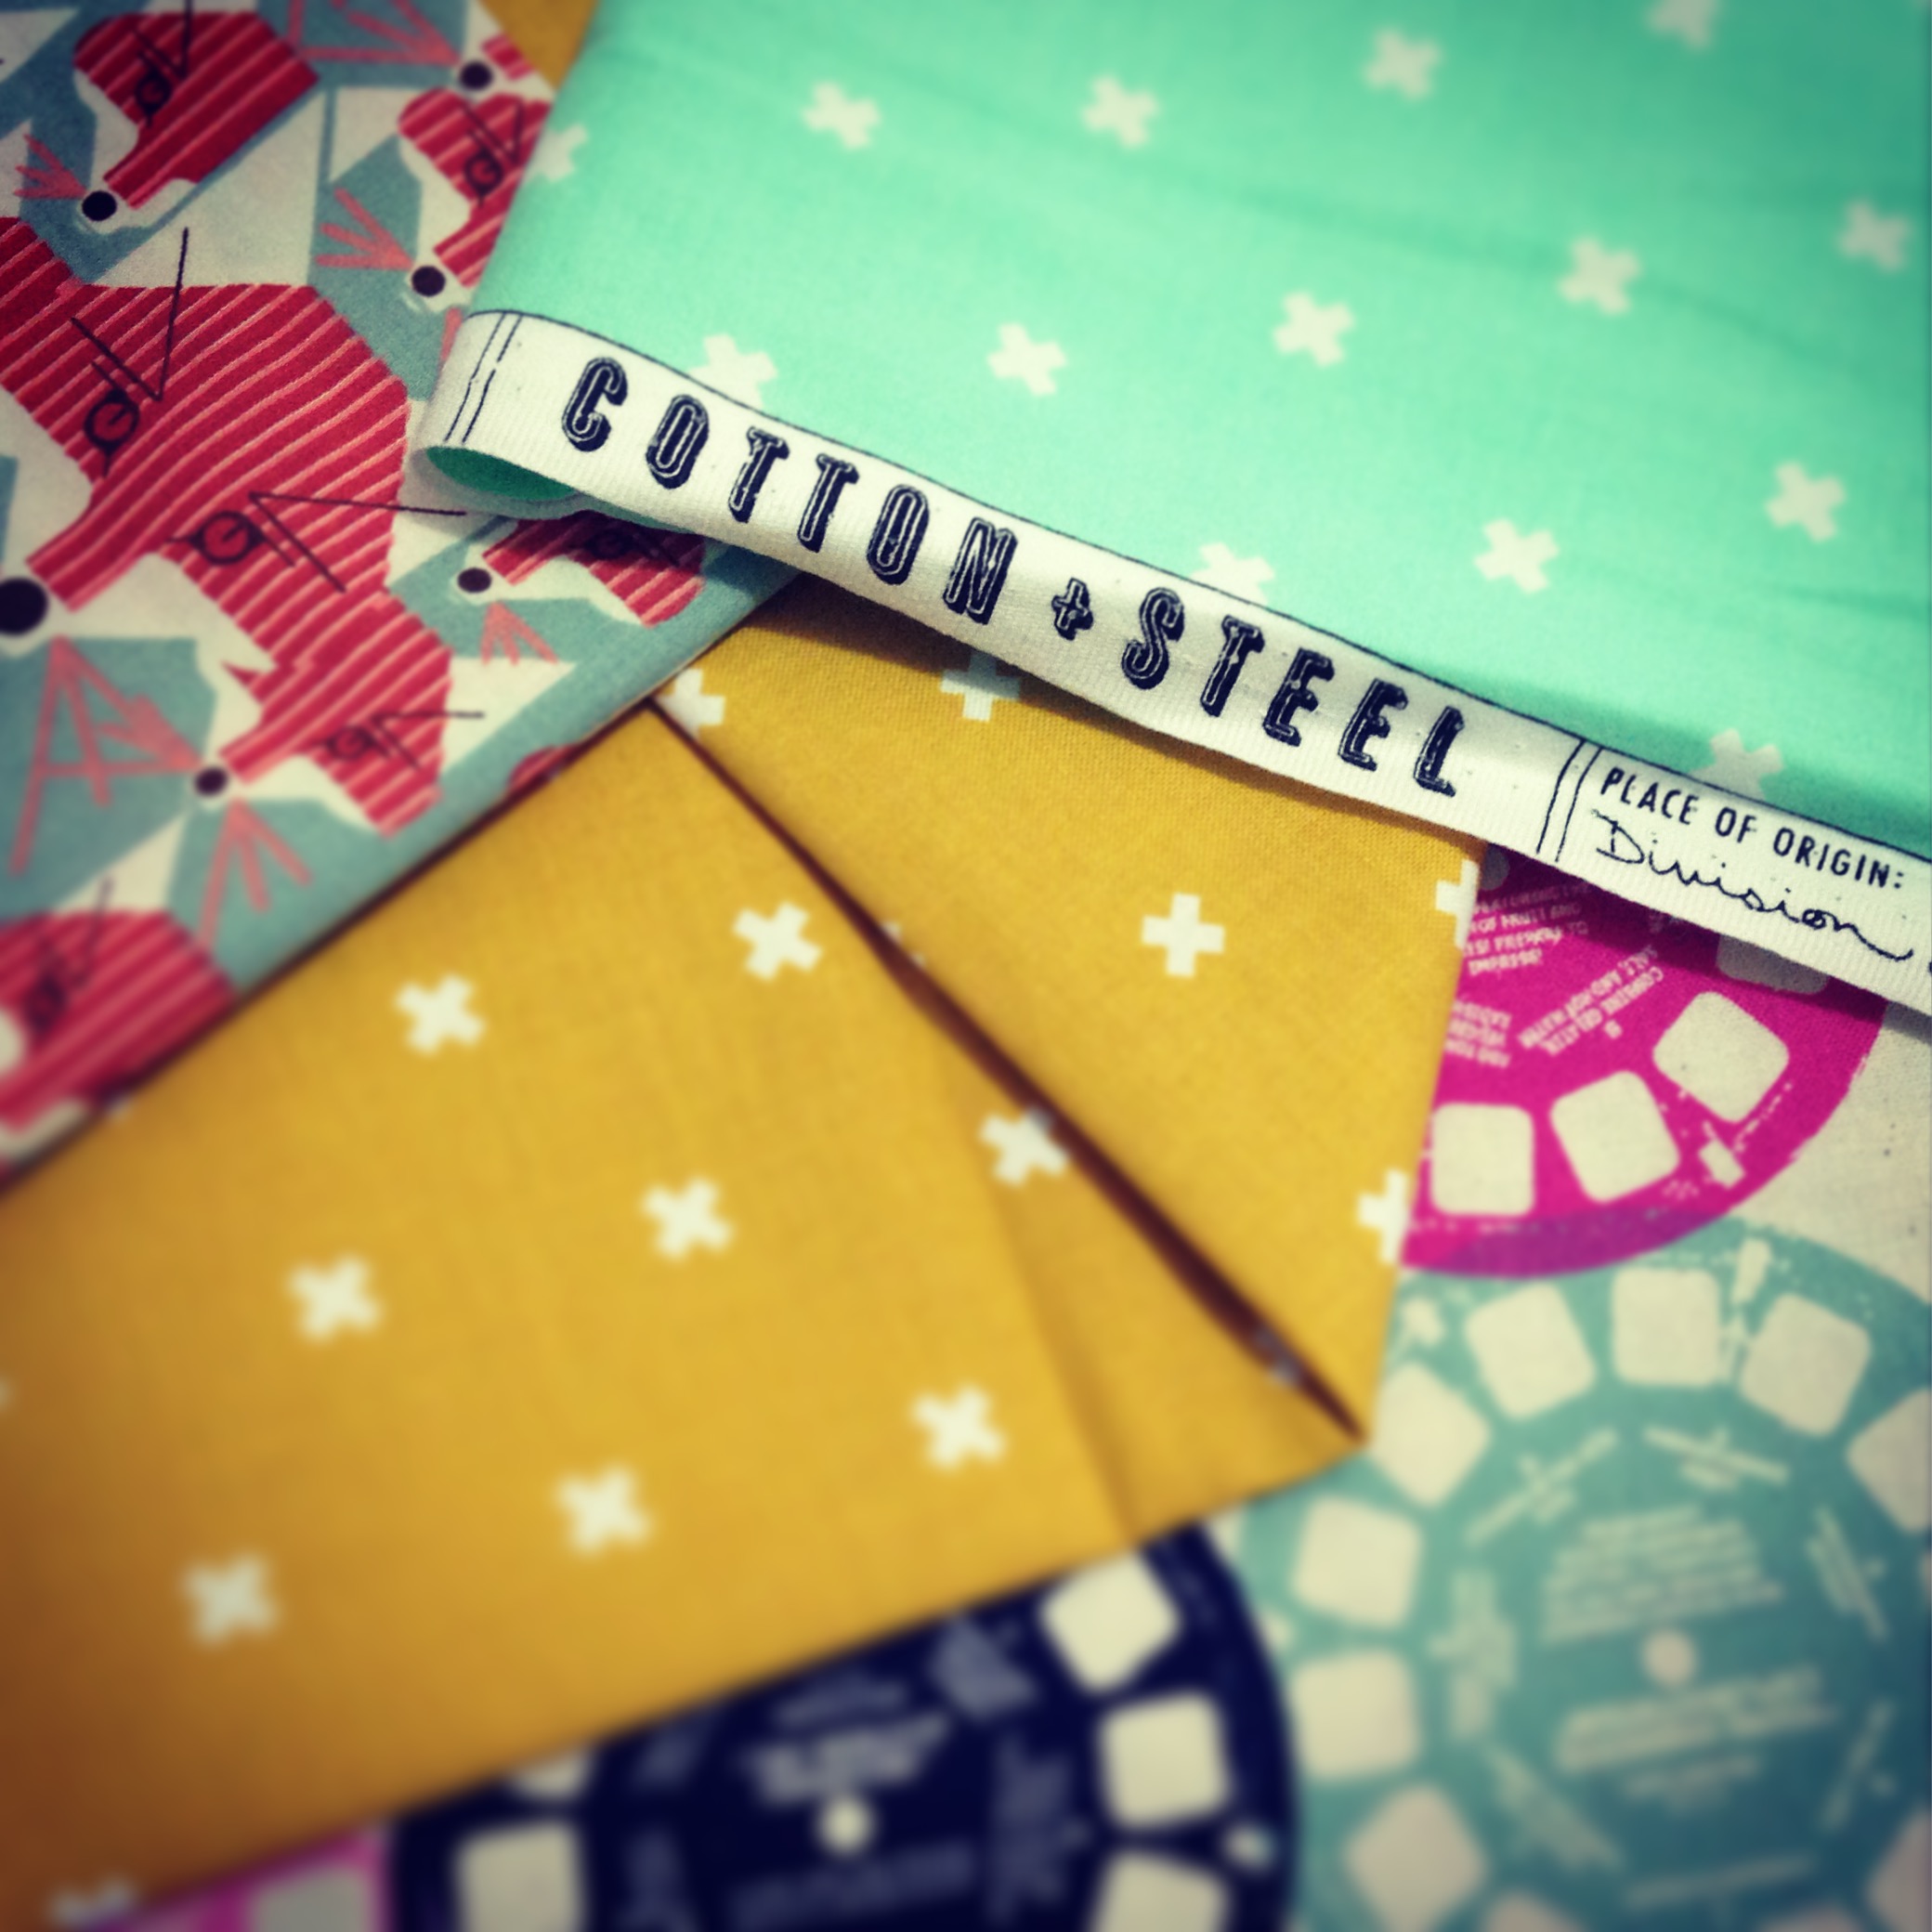
This time around, I did have a few good reasons why I needed to purchase some new fabrics… The first is a commission to make two gender-neutral baby quilts for a friend who has two girlfriends expecting! I love, love, love making baby quilts, so I said yes and immediately began planning what I would make! So half of the fabric I bought are to use in those two little quilts, while the rest of the order is to be used to make some special projects for my Esty shop! I’m so excited to get into them and get making some beautiful things for you all!

Oh, and I almost forgot! I uploaded a ‘Haul’ video on my YouTube channel over the weekend showing you everything I got!! If you would like to watch that, click right here!

+++

And finally the last thing I wanted to share with you is something I saw on Instagram this morning. It was a pledge created by Amy Gibson from the blog, Stitchery Dickory Dock. Called the ‘The For Keeps Pledge’, she encourages us quilters to pledge to keep the art of quilt making joyful, soulful, non-boastful and enjoyable! To see the pledge in full, click here to go to the blog post she wrote about it! I think it’s such a great concept for all quilters to focus on and work by, especially for me as I share so much of what I do online and with others.

+++

So that’s the end of the update! There is still so much to share with you but all in good time… 😉

Happy Sewing, Friends!

xx

‘Quilt-Along-With-Me’ Part Five: Binding!

GET THE PATTERN SHEET: QuiltAlongWithMe – Part Five

Way-hey! We’re so close to the end of this series, with only one more installment to go after this one! Where has the time gone!

So in part five, we’re looking at how to make and attach a ‘cheat’s binding’ (that is: Straight-Grain Binding) to the raw edges around our quilt using sewing machine and hand sewing techniques!

TBH, making and sewing the binding is my favourite, favourite step in quilt making. After sewing it on with the machine, there’s just something so calming about sitting down with your almost-finished quilt and adding an element of hand sewing to it. It’s almost like that last finishing touch of colourful sprinkles on a pretty birthday cake before delivering it to the table to be devoured by hungry party guests. It’s like your last touch before you can almost let it go…

Wow, where did that deep-and-meaningful thought come from…?? Ooo…?!

Anyway…

As always I want to encourage you to make and attach the binding to your quilt in the way that you know best and using a method that you find the easiest and/or most successful. You are always more than welcome to use my way as guide or for inspiration! And if you do chose to follow my method, you’ll find all of the measurement and cutting info as well as a quick walk through of the steps to complete this stage in the pattern sheet linked above!

IMG_4085

I always love it when you share with me your finished blocks, quilt tops and quilting! Feel free to tag me on Instagram* or Twitter at @3and3quarters, send me an email or share them on Facebook!

*FYI: If your Instagram account is set to private and I don’t follow you, I won’t be able to see your photos!! If this is the case, send me an email letting me know you’ve tagged me and I’ll do my best to find you on Instagram so I can give you a big fat LIKE and some wonderful words of positivity and encouragement!! 😀

So don’t forget to join me for part six, where we’ll go through the last step in making our quilt – the quilt label! And then…our quilt is officially finished!!! YAY!

Until then,

Happy Sewing, Friends!

xx

CATCH UP ON THE SERIES

Part One: Block Prep & Piecing

Part Two: Sashing & Quilt Top Finish

Part Three: Backing, Batting & Basting

Part Four: Quilting

+++

INFO REFERENCE: The Quilting Answer Book by Barbara Weiland Talbert

A Block Review // Mini Dollhouse

DollHouseBlock1The other day, I was looking for a challenge… A block, that I’ve never before constructed, was a bit cutesy in design and was a possible candidate for a future block tutorial.

So when a challenge is needed, I go straight for my trusty, most favouritist, well spoken about quilting book – 130 Mini Quilt Blocks by Susan Briscoe!

In there was this block: the Dollhouse. A sweet little House on the Prairie type design, that immediately ticked off all the boxes in my head.

As I was making it, I really wanted to share my honest thoughts and experiences about how the block came together…

So here is my honest review of the Mini Dollhouse Block.

Because it’s a mini block, I knew that the measuring and cutting would be intricate and that I would have to be patient with it. There are a lot of different little pieces that make that up this block which requires quite a bit of concentration to keep track of everything you’re cutting and where it should go.

I did find that a few of the measurements seemed a little bit off. But I trusted the pattern and cut my fabrics according to what was published after checking back several times! At the time, the pieces that seemed a little odd in size included the square-triangles that were to be pieced to either end of the roof piece and the length of the two chimney strips.

When I began piecing, I first started with the bottom half of the house, joining together the windows, walls and door. I had no issue with these until it came time to adding on the four vertical 1″ strips separating the window and door strips. Although the length of these strips fit perfectly with the door strip, the window strips were too short, leaving a gap of about half an inch. ‘No problem’, I thought, as I would just simply trim the bottom edge so that it was even with the length of the window strips.

Moving on to making the roof, I had issues understanding how two 2&1/2″ squares were to be stitched diagonally on either side of a 2″x5&1/2″ rectangle. So I decided to cut the two squares down to 2″, drew a line through the middle of each and sewed them onto the ends of the rectangle roof piece. After trimming off the excess fabric from each end (the seam was cut to a 1/4″ allowance) and giving the section a good steamy press, I then attached the roof to the top of the house section. These two parts came together seamlessly and had very little over hang.

MiniDollhouseBlock

The part where I had the most difficulty was matching up the two chimney strips with the top edge corners of the roof. After piecing the allocated pieces together, I realised the centre square separating the two chimney strips was about half an inch too wide! So out came my trusty seam ripper and I patiently picked the two seams on either side of the square apart. (Remember, these pieces are super tiny, so my big fat fumbling fingers got in the way very easily!) I made the decision to cut a 1/4″ off from either side of the square, thus getting rid of the perforated surface that the stitching tension had caused and proceeded to try again. Success! Even though the pattern said to cut one 1&1/2″ square for this section, it ended up only needing a 1″x1&1/2″ strip.

So once I trimmed and squared off the edges, the finished block came to a size of 5&1/4″x5&5/8″ compared to the size of 5″ squared as stated in the book.

So that was my journey in making this block.

Now I must state, that everything I’ve written in this post is my own opinion. I simply wanted to document my experiences, triumphs, failures and the thought process behind this block as it was taking shape.

As I was writing this, I was conscience of not sounding too harsh or judgemental over the pattern being published slightly wrong. (Who knows, maybe it was just me getting things wrong…?) But to be completely honest, I was a little bit disappointed by it as this is the first block in this book to let me down! And that’s a real shame because the endless possibilities of creativity behind this patchwork book is brilliant! But I guess it’s also important to remember that not everything can be perfect. Mistakes happen. Information can be misplaced and be so easily entered in wrong. Perhaps that’s what’s happened in this case…?

So sometime very soon I will re-make this block using the measurements that I found worked out better as well as picking out a range of fabrics that go together a lot nicer in comparison to the block above. And once I’m happy with that, I’ll more than likely create a tutorial showing you how to make it!

Happy Sewing, Friends!

xx

IMG_3996

‘Quilt-Along-With-Me!’ Part One: Block Prep & Piecing!

GET THE PATTERN SHEET : QuiltAlongWithMe – PartOne

Father's Choice Block
Father’s Choice Block

Hello!

Welcome to the first instalment of my ‘Quilt-Along-With-Me!’ series! I’m so excited to get started and I hope you are too!

In part one, I introduce the block we’ll be piecing together (which is the Father’s Choice block!) along with showing you the way I like to prep and cut my fabric as well as how I choose to make a bulk load of HSTs and how I piece and press my blocks.

Now, if you find it hard to follow along with the instructions in the video, you’ll find everything you need to know in the pattern sheet above. All of the measurements, cutting instructions and steps to piece the block are there for you!

A few facts about this quilt:
– The quilt that we’re making together will feature four Father’s Choice blocks, each one measuring 23″ (58.5cm)
– The blocks will be pieced together using a sashing technique
– The final quilt top will measure approx. 59″ (150cm) squared


I first came across this block when I was flipping through the book 500 Quilt Blocks by Lynne Goldsworthy & Kerry Green and looking for inspiration for this series. I had never heard of the block until it’s star-like nature caught my eye. The block featured in this book was a little bit too small for the type of quilt I wanted to design and make with you all, so I doubled the measurements, made a test block and fell in love!

Father's Choice Block
Father’s Choice Block

I was a little conscience to the fact that the piecing of this block could be a little tricky for beginners to manage. But once I made it and thought about it, I actually think this is a great block for beginners to try as it touches on some great basic technical skills that all patchworkers should learn and know. These include cutting basic squares, piecing and trimming down HSTs, basic forms of layout design (eg. learning how to make a four-patch unit), how to press units to achieve perfect nesting seams as well as how to manage piecing a large-ish block together.

{If you are new to patchwork and are going to give this block a go, let me know how you go! Tell me if you thought it was a bit hard or if you felt comfortable with the challenge…}

Also, don’t forget to show me your finished blocks! Tag me on Instagram or Twitter at @3and3quarters, send me an email or share them on Facebook!

In the next video I’ll be showing you how to sash all four blocks together as well as adding a boarder around the outside, completing your quilt top! You’ll find the pattern sheet with all of the information here once it’s uploaded!

Father's Choice Blocks
Four Father’s Choice Blocks

If you have any questions or thoughts about this block, the finished quilt or the series as whole, please comment below and I’ll try my very best to help you out!!

Happy Sewing, Friends!

xx

PS. If you missed out on the Introduction post I published, you can click here to get up to speed! 😊

How to make a Quilty Cross Pincushion!

Hello!

Well, it’s been a bit of a while since I last published post! Gosh! But I think I have a pretty rock-solid excuse for why… I’ve just returned home from a two week cruise to Fiji!!

Dravuni Island, Fiji

I had the best time and will be sharing more of my adventures and love for cruising with you in the next few days!

Now, a few weeks ago, before I went on holiday, I made a video tutorial showing how to make a Quilty Cross Pincushion and I’ve only just realised that I haven’t yet shared that with you here, on my blog!

After casually browsing on Pinterest looking for some inspiring ideas, I came across some sweet little pincushions that I thought would make a great little project to film and share.

So using my favourite Quilty-Cross method by Auntie Cookie, I paired white cotton linen with a few of my ultimate favourite DS Quilts fabrics and proceeded to make this tutorial…

Since uploading this video, I’ve had a wonderful amount of positive feedback from my lovely viewers saying they’ve been inspired to make one for themselves! Such words of encouragement are always wonderful to read!

Will you be making one too?

Happy Sewing Friends!

xx

TUTORIAL: FPP Union Jack Block!

Over the past few months, I’ve had a numerous amount of interest and requests to make a video tutorial showing how I make the Union Jack block…

The Union Jack Block

The first time I made this block I had just learnt how to Foundation Paper-Piece and was absolutely daunted by all of the different pieces and angles I had to sew! Oh. My. Gosh. So, I took a deep breath, studied the pattern and instructions and then took one step at a time. So then of course I proceeded to make countless mistakes, under and over judged fabric lengths and widths AND importantly learnt that keeping to a quarter-inch seam was critical for the pattern to come together, crisp and evenly at the end! What’s that saying? Through our mistakes, we become stronger… Well, maybe…

Since then I’ve gone on to make a lot of versions of this block, almost to the point where I could do it with my eyes closed! (Well, no. Not really. That would be a terrible idea!!) I had high hopes (and still do, actually) of piecing my many blocks together to make one of those big Britannia type quilts.

A sample of the Union Jacks I've made...
A small sample of the Union Jacks I’ve made…

I’ve written about it before in other blog posts and it was on my New Year Quilting Resolutions of 2014 list to make during that year. (An idea that failed miserably! None of those quilts got made! My bad.) But hope is not lost! It will get made… one day… soonish…next year, maybe…

But, alas! I have had the chance to incorporate this block into quilt! I was commissioned by a work colleague to make a quilt for our department manger who was leaving to pursue another job. The biggest love in her life was bunnies as well as sharing the same admiration for all things British, like me. So I made her this quilt as a farewell gift!

English Bunny Quilt (2012)

It still is one of the most favourite quilts I’ve ever made.

I originally found this block in the book Modern Blocks, compiled by Susanne Woods as I was casually flicking through it when visiting my favourite bookstore in Sydney, Kinokuniya. As soon as I saw this block pattern in the book, I immediately made the decision to buy it without even looking at what other blocks were in the book! That’s how keen I was to make it! However, it wasn’t until I got home that I realised the block was made entirely using the foundation paper-piecing method… A technique, at the time, I didn’t know anything about! With my excitement and high hopes of being able to make an inspiring Union Jack Quilt squashed, I placed the book on my shelf and forgot about it.

My little library!
My Quilting Book Library

A few months later, I signed up to do the online Craftsy Block of the Month with Amy Gibson[And just on a side note: If you’re new to quilting and want to learn lots of new techniques and be wholly inspired by everything patchwork, I recommend highly to watch these video tutorials! It’s 100% free to watch and join. Honestly, without watching these tutorials, I wouldn’t be the quilter I am today! So go! Do it now! Watch. Learn. And grow!] …and in one of the months she taught me how to foundation paper-piece. Here I was, thinking it would be this weird, strange, ancient technique that I thought I would never enjoy. How very wrong I was. In a matter of minutes, I was in awe of just how easy and simple the technique was. I just couldn’t believe how straight, clean and crisp I could get my seams and how many new and awesome modern block designs that were now open for me to make! And then…Lightbulb! I now had the power to make that Union Jack block!! Huzzah!!

The block in question, called Just Jack, was designed by Lynne Goldsworthy. (A quilt-block designer I seem to keep running across over the past few months…spooky!) The block that I make is a little bit different to the one in the book. I’ve made it smaller (165% as opposed to the suggested 200%) and have eliminated the two pieced strips from the top and bottom so that it’s just a Union Jack.

JustJack

Now I must admit, this block is pretty tricky (and a little bit daunting!) if you’re new to foundation paper-piecing but I still want to encourage you to give it a go! Don’t worry if you make mistakes – I did and I learnt from them! Be brave, dive in and see what happens! (Oh man, I should take on some of my own advice inother parts of my life! Jeez!) 

If you are new to foundation paper- piecing, you’re more than welcome to check out this tutorial I made last year that goes through all of the basic tools and steps to understand the technique.

One of the things I absolutely love about this block is that it allows you to be as free and creative as you wish! You can use fabrics that are rich in print and colour, ones that clash horribly but still look good or just stick to the classic side of things using solid colours to bring the block to life!

Now, the final size of this block will all depend on how big you choose to enlarge this pattern. At 165%, my finished block measured 26.5cmx17.5cm (10&3/8″x7″).

If you don’t have this book or unable to purchase it, here are a few other Union Jack patterns I’ve found on the net that are similar to the one I’ve made.

‘Union Jack Block & Bag Pattern’ by Amy Smart (Diary of a Quilter)
‘Union Jack Quilt Block’ by traceyjay on Craftsy (FREE PATTERN!)

And lastly, here’s a list of the tools and notions I like to use when I’m doing any foundation paper-piecing…

– Brother Innovis 200QE sewing machine
– Brother 1/4″ sewing foot
– Gutermann polyester thread
– Fiskars Rotary Blade and Cutting Mat
– Sew Easy Rulers
– UHU Glue Stick
– Triumph Craft Scissors
– Birch Non-Melt Flower Head Quilting Pins
Clover Thread Snips
Clover Serrated Tracing Wheel 
Clover Finger Presser 

Of course, let me know if you’re going to make this block (or already have!). Send me a photo of your finished block, or a project with the UJ in it or your fabric selections for your planned block! I absolutely love it when you share your creations and ideas with me!

The ways in which you can share with me…

Instagram & Twitter: @3and3quarters

Email: 3and3quarters@gmail.com

Facebook

If you’ve made it to the end of this post, I send you a big virtual HIGH-FIVE for getting through all of my rambling back story!

You’re a true super star!

Happy Sewing Friends!!

xx

TUTORIAL: The Hashtag Block!

The Hashtag block seems to be absolutely everywhere at the moment! And when I say ‘everywhere’, I really just mean Pinterest and Instagram! 😀

So I thought I’d jump on the bandwagon and make a tutorial showing you how to make this block yourself! Yay!

This is a great little block for all levels of quilters! It’s very simple and quick to piece together and is a wonderful pattern to be able to mix and match prints, colours and values with!

To make this block you will need to…

Cut from one fabric:
x3: 3″x9″ rectangles

and then…

Cut from a contrasting fabric:
x2: 3″x9″ rectangles
and
x2: 3″x13&1/8″ rectangles

And then simply follow the step-by-step instructions in the video to learn how to piece this block together!

The final block size should come to about 32.5cmx32.5cm (12&3/4″x12&3/4″)

The Hashtag Block
The Hashtag Block

And just incase you’re curious, the print fabric I used for this block is called ‘Memoir’, from the Alchemy Quilting Collection by Amy Butler.

Don’t forget to let me know if you’re going to make this block! I would love to know how you get along!

Happy Sewing Friends!!

xx

Sewing Machines 101

Over the last little while, I’ve been asked some wonderfully awesome questions all about sewing machines. With questions ranging from…

What is the best sewing machine to use when I’m quilting?

How do I use a walking foot?

Can I make a large quilt using my small sewing machine?

What are the best types of threads to use for patchworking?

How much money should I spend on a good sewing machine?

And so many more!

So to answer these questions, I made a video where I sat down and went through all of the basics things there is to know about sewing machines!

Now you may be thinking, ‘how is it that she knows all this stuff!?’

Well, for about six years I worked in a very well know craft/fabric store here in Australia called Spotlight. There, I worked in the fabric and haberdashery department where we also sold sewing machines!

IMG_2268

About twice a year, we would have intensive training days with sewing machine reps who taught us everything there is to know about sewing machines, inside and out. We learnt how to demonstrate and talk to customers about sewing machines, how to troubleshoot problems they were having as well as understanding what machine was best for a particular end use i.e. dressmaking, quilting, heavy duty sewing etc.

So because of this, I feel confident in myself and in the knowledge I’ve learnt over the years to answer these questions for you. I am aware that I do not know everything and nor am I ever likely too! I myself, am still learning about the endless possibilities and all of the little intricacies that my sewing machine has to offer and I really love that!

If you have any questions about anything I say in this video or are unsure of any features/functions on yours or are having any issues, please feel free to ask/comment below! I will try my very best to answer you as honestly and as simply as I can!
Also, if you have any tips or nuggets of knowledge that you would like to share with me and others, please comment as well!!

Happy Sewing Friends!!

xx

PS. If you would like to see a few fun little moments where I stutter, mumble, make weird faces and struggle with my words, then you can catch the Bloopers video right here!

Enjoy! 😉

TUTORIAL: The Economy Block

What a better way to start the New Year than to dive head first into a good ol’ block tutorial!

Today we’ll be focusing on the Economy Block!

This simple little block is made up of one centre square with two sets of contrasting triangles sewn around it. It’s a great block to use up some of those larger scrap fabric pieces or perfect to make a fun I-Spy Quilt for the kiddies!

Measurements & Cutting Info…

For the centre
– Cut x1: 5″ square

For the first set of triangles
– Cut x2: 4″ squares (to be cut in half, resulting in x4 triangles)

For the second set of triangles
– Cut x2 5&1/2″ squares (to be cut in half, resulting in x4 triangles)

Follow the steps in the video to learn how to piece this block together!

Final Block Size: 24cm x 24cm (9&1/2″ x 9&1/2″)

Mix & Match with some of your favourite fabrics!

Let me know if give this block a go! I would love to know how you went!

Happy Sewing Friends!

xx

I made a Quilt!!

As is expected at this time of the year, the last few weeks have been filled with festive get-togethers, exciting gift making and an endless array of baking, giving me very little time to tend to my lovely little blog.

But in the last few days before Christmas, I’ve hoarded away a little bit of time to spend writing to you! And boy, is there a lot to write!

So with Tony Bennett’s Christmas album crooning in the background, let’s get down to business!

First, allow me to introduce to you my beautiful niece Amelia who was born on the 5th December.

Amelia!

She came into the world in a very hurried fashioned that earned her and her parents a National News worthy story! Let’s just say, they didn’t quite make it to the hospital in time! Here’s the story if you want to know more!

Next, let’s address the title of this post…

Yes indeed, I did make a quilt. And I did it in quite a sneaky type way too (you may have seen a few glimpses on Instagram!). Usually at Christmas, my close group of friends and I do a Kriss Kringle type of gift giving. So to sooth my need to make a quilt as a gift this Christmas season, I chose to make one for one of my closest girlfriends who I’ve known since high school.

Sam's Tribute Quilt

Thankfully she loved it! And even luckier, the colours went perfectly with a lot of the décor she has in her new inner-city apartment! Whoo!

The pattern I used is called the Tribute Star Quilt that I found (as a FREE download!!) on the Denyse Schmidt website! It’s quite an easy pattern to follow, choc-full of HSTs and simple squares that would look great using any print or solid fabrics.

Sometime in the New Year, I’m planning on giving the Tribute Star block another go using a few different type prints (maybe) and turning the block onto it’s point and adding corner triangles to the edges. From what I can see in my mind’s eye, I think it’ll be a little good ‘un!

What’s also kept me busy over the past few weeks are the Christmas tutorials I’ve been filming, editing and publishing onto YouTube!

Videos I’ve made include:

Paper-Pieced Christmas Trees

Handmade Christmas Felt Ornaments

Handmade Christmas Paper Crafts

Reindeer Cupcakes

The BEST Gingerbread Men in the World

Rocky-Road Christmas Tree

I’ve been putting so much time and effort into these little videos to the point where I’m quite ready to take a much-needed break once Christmas and Boxing Day arrive!

However, once Christmas is over, I’ll be getting straight back into it!

Before the month’s out, I’ll be publishing another Stop-Motion Embroidery video featuring this beautiful design from Urban Threads.

Create Embroidery

And then in the New Year, I have a ton of new quilt block tutorials planned as well as some other fun crafty ideas for you to be inspired by!

If you want to be in the loop of what, where and when I upload these video tutorials, check out my YouTube channel and subscribe to be the first notified! I would love to have you join me!

So my friends, I wish you all a very happy festive season, celebrating and making beautiful memories with your nearest and dearest!

xx