Well, it’s been a bit of a while since I last published post! Gosh! But I think I have a pretty rock-solid excuse for why… I’ve just returned home from a two week cruise to Fiji!!
Dravuni Island, Fiji
I had the best time and will be sharing more of my adventures and love for cruising with you in the next few days!
Now, a few weeks ago, before I went on holiday, I made a video tutorial showing how to make a Quilty Cross Pincushion and I’ve only just realised that I haven’t yet shared that with you here, on my blog!
After casually browsing on Pinterest looking for some inspiring ideas, I came across some sweet little pincushions that I thought would make a great little project to film and share.
So using my favourite Quilty-Cross method by Auntie Cookie, I paired white cotton linen with a few of my ultimate favourite DS Quilts fabrics and proceeded to make this tutorial…
Since uploading this video, I’ve had a wonderful amount of positive feedback from my lovely viewers saying they’ve been inspired to make one for themselves! Such words of encouragement are always wonderful to read!
Over the past few months, I’ve had a numerous amount of interest and requests to make a video tutorial showing how I make the Union Jack block…
The Union Jack Block
The first time I made this block I had just learnt how to Foundation Paper-Piece and was absolutely daunted by all of the different pieces and angles I had to sew! Oh. My. Gosh. So, I took a deep breath, studied the pattern and instructions and then took one step at a time. So then of course I proceeded to make countless mistakes, under and over judged fabric lengths and widths AND importantly learnt that keeping to a quarter-inch seam was critical for the pattern to come together, crisp and evenly at the end! What’s that saying? Through our mistakes, we become stronger… Well, maybe…
Since then I’ve gone on to make a lot of versions of this block, almost to the point where I could do it with my eyes closed! (Well, no. Not really. That would be a terrible idea!!) I had high hopes (and still do, actually) of piecing my many blocks together to make one of those big Britannia type quilts.
A small sample of the Union Jacks I’ve made…
I’ve written about it before in other blog postsand it was on my New Year Quilting Resolutions of 2014 list to make during that year. (An idea that failed miserably! None of those quilts got made! My bad.) But hope is not lost! It will get made… one day… soonish…next year, maybe…
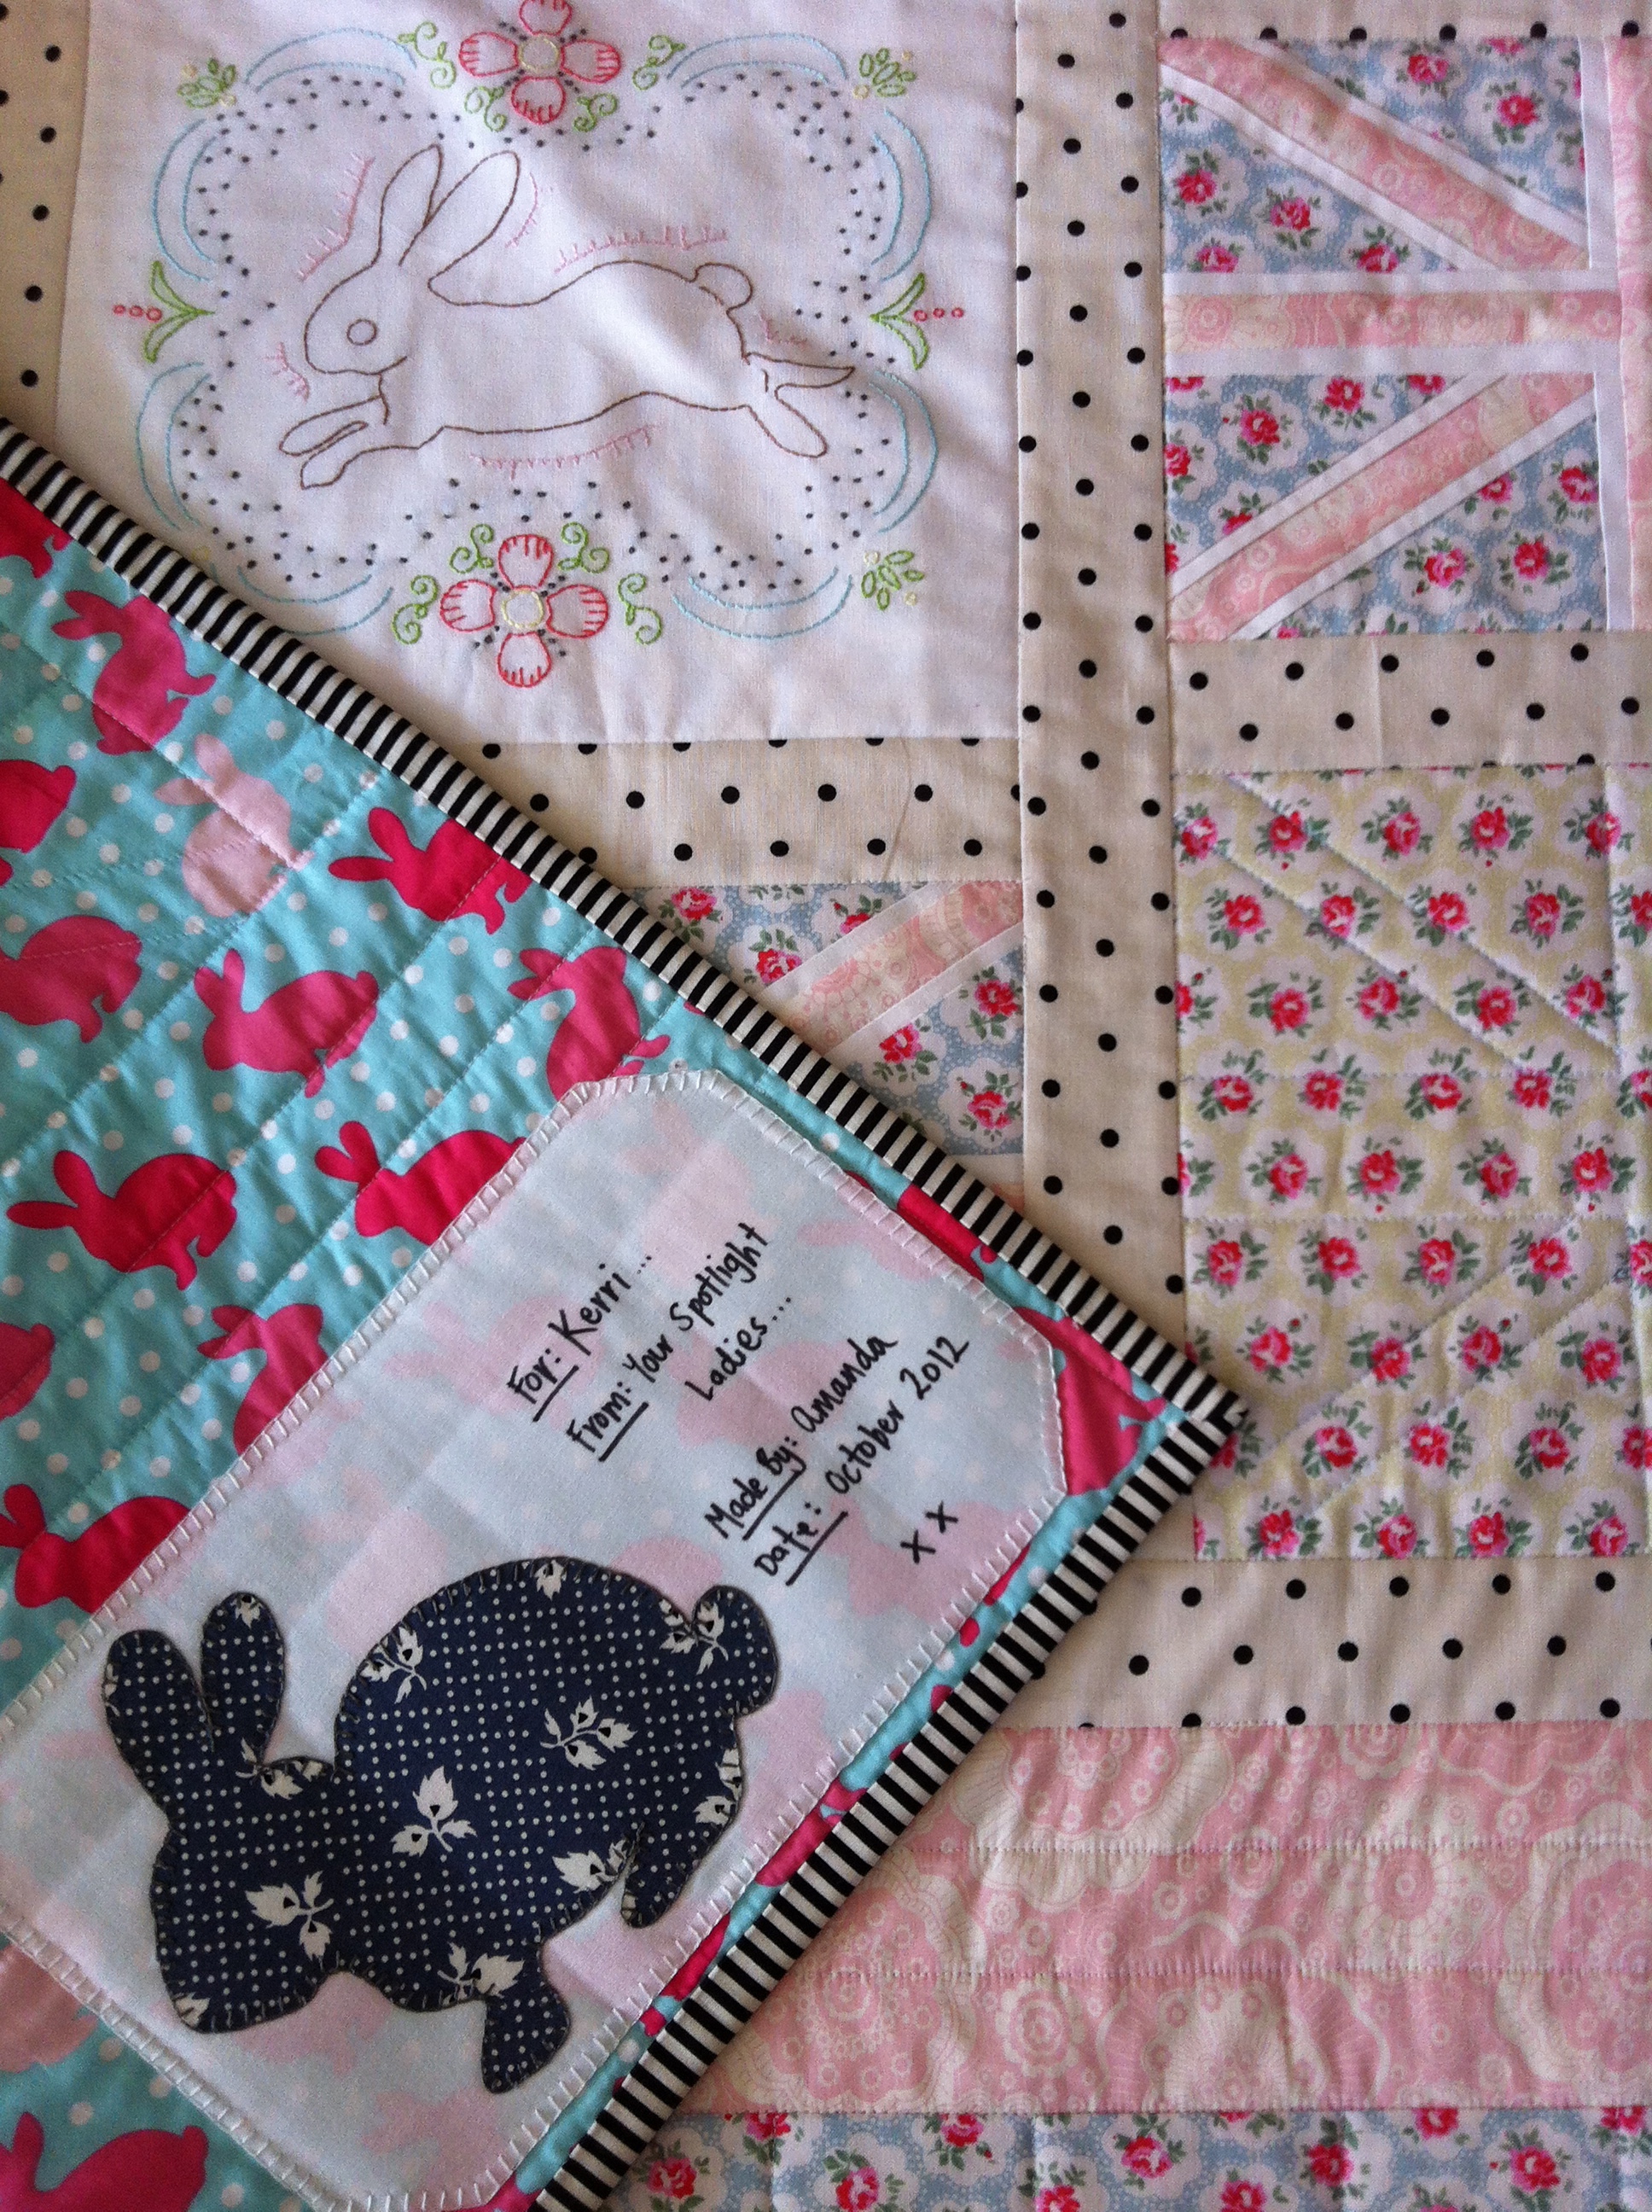
But, alas! I have had the chance to incorporate this block into quilt! I was commissioned by a work colleague to make a quilt for our department manger who was leaving to pursue another job. The biggest love in her life was bunnies as well as sharing the same admiration for all things British, like me. So I made her this quilt as a farewell gift!
English Bunny Quilt (2012)
It still is one of the most favourite quilts I’ve ever made.
I originally found this block in the book Modern Blocks, compiled by Susanne Woods as I was casually flicking through it when visiting my favourite bookstore in Sydney, Kinokuniya. As soon as I saw this block pattern in the book, I immediately made the decision to buy it without even looking at what other blocks were in the book! That’s how keen I was to make it! However, it wasn’t until I got home that I realised the block was made entirely using the foundation paper-piecing method… A technique, at the time, I didn’t know anything about! With my excitement and high hopes of being able to make an inspiring Union Jack Quilt squashed, I placed the book on my shelf and forgot about it.
My Quilting Book Library
A few months later, I signed up to do the online Craftsy Block of the Month with Amy Gibson… [And just on a side note: If you’re new to quilting and want to learn lots of new techniques and be wholly inspired by everything patchwork, I recommend highly to watch these video tutorials! It’s 100% free to watch and join. Honestly, without watching these tutorials, I wouldn’t be the quilter I am today! So go! Do it now! Watch. Learn. And grow!] …and in one of the months she taught me how to foundation paper-piece. Here I was, thinking it would be this weird, strange, ancient technique that I thought I would never enjoy. How very wrong I was. In a matter of minutes, I was in awe of just how easy and simple the technique was. I just couldn’t believe how straight, clean and crisp I could get my seams and how many new and awesome modern block designs that were now open for me to make! And then…Lightbulb! I now had the power to make that Union Jack block!! Huzzah!!
The block in question, called Just Jack, was designed by Lynne Goldsworthy. (A quilt-block designer I seem to keep running across over the past few months…spooky!) The block that I make is a little bit different to the one in the book. I’ve made it smaller (165% as opposed to the suggested 200%) and have eliminated the two pieced strips from the top and bottom so that it’s just a Union Jack.
Now I must admit, this block is pretty tricky (and a little bit daunting!) if you’re new to foundation paper-piecing but I still want to encourage you to give it a go! Don’t worry if you make mistakes – I did and I learnt from them! Be brave, dive in and see what happens! (Oh man, I should take on some of my own advice inother parts of my life! Jeez!)
If you are new to foundation paper- piecing, you’re more than welcome to check out this tutorial I made last year that goes through all of the basic tools and steps to understand the technique.
One of the things I absolutely love about this block is that it allows you to be as free and creative as you wish! You can use fabrics that are rich in print and colour, ones that clash horribly but still look good or just stick to the classic side of things using solid colours to bring the block to life!
Now, the final size of this block will all depend on how big you choose to enlarge this pattern. At 165%, my finished block measured 26.5cmx17.5cm (10&3/8″x7″).
If you don’t have this book or unable to purchase it, here are a few other Union Jack patterns I’ve found on the net that are similar to the one I’ve made.
Of course, let me know if you’re going to make this block (or already have!). Send me a photo of your finished block, or a project with the UJ in it or your fabric selections for your planned block! I absolutely love it when you share your creations and ideas with me!
Oh, man! There’s just something real cool about the Chevron Block (Am I right!?)! I don’t know what it is, but geez, I just love this block! It’s simple, fast to piece together and is so effective when pieced into a quilt!
This is one I made in 2011 using the Chevron Block…
Simply cut x2 5″ squares from two different fabrics (they can be contrasting, matching, clashing, be print vs. solid etc.) and then watch and learn how to piece it together in this video!
FINAL BLOCK SIZE: 22cmx22cm (8&5/8″x8&5/8″)
Here are just a few tips I’ve picked up along the way to help achieve perfect Chevron points…
When piecing together the HST units together, lay the diagonal seams directly on top of each other. (As shown in the video) Pin the two units together and carefully sew them into one row.
By ensuring that these seams are directly aligned with another on either end, you should have perfect points when you open the row out.
Always make sure you sew with a 1/4″ seam. I know I sound like a broken record saying to do this all the time but it really is essential to sew all of your seams exactly the same. If one seams is slightly bigger or smaller than the other, then you’ll begin having problems with matching your seams and points.
This is the most important one: Take your time! Don’t worry about making mistakes! Learn from what you’ve done wrong and simply try again until you master it! I know you can do it! 🙂
Two Chevron Blocks pieced together
Have you made this block into a quilt? If you have, I would love to see a photo of your finished quilt! There are also some great Chevron Quilts to be found on Pinterest if you’re wanting to give this block a go and are looking for some inspiration!
The Hashtag block seems to be absolutely everywhere at the moment! And when I say ‘everywhere’, I really just mean Pinterest and Instagram! 😀
So I thought I’d jump on the bandwagon and make a tutorial showing you how to make this block yourself! Yay!
This is a great little block for all levels of quilters! It’s very simple and quick to piece together and is a wonderful pattern to be able to mix and match prints, colours and values with!
To make this block you will need to…
Cut from one fabric:
x3: 3″x9″ rectangles
and then…
Cut from a contrasting fabric:
x2: 3″x9″ rectangles
and
x2: 3″x13&1/8″ rectangles
And then simply follow the step-by-step instructions in the video to learn how to piece this block together!
The final block size should come to about 32.5cmx32.5cm (12&3/4″x12&3/4″)
The Hashtag Block
And just incase you’re curious, the print fabric I used for this block is called ‘Memoir’, from the Alchemy Quilting Collection by Amy Butler.
Don’t forget to let me know if you’re going to make this block! I would love to know how you get along!
After lots of requests and suggestions to make this block, here it is for you to explore, fold, pin, stitch and rip apart!
So, I’ve approached this teaching of the block assuming that you have a fair understanding of how Foundation Paper-Piecing works. If you’re new to the technique, perhaps have a look at this video first http://youtu.be/R4jNa2zHLbU and then come back to this one.
This tutorial was inspired by this wall-hanging I made in 2013, that also made a few appearances in a few of my earlier video tutorials!
‘I Heart Colour’ Wall-Hanging (2013)
I called this wall-hanging, ‘I Heart Colour’ because of the nine colour-way blocks that are made entirely out of scrap fabrics. Plus, I also really do love colour and thought (at the time) it would be a perfect addition to the wall above my sewing desk in my new sewing room! (And still is!)
As always, let me know if you’re going to give this block a go and send me pictures of your blocks!! You can easily tag me on Instagram (I’m @3and3quarters) or send me a pic on Twitter, through email or on Facebook!
What a better way to start the New Year than to dive head first into a good ol’ block tutorial!
Today we’ll be focusing on the Economy Block!
This simple little block is made up of one centre square with two sets of contrasting triangles sewn around it. It’s a great block to use up some of those larger scrap fabric pieces or perfect to make a fun I-Spy Quilt for the kiddies!
Measurements & Cutting Info…
For the centre
– Cut x1: 5″ square
For the first set of triangles
– Cut x2: 4″ squares (to be cut in half, resulting in x4 triangles)
For the second set of triangles
– Cut x2 5&1/2″ squares (to be cut in half, resulting in x4 triangles)
Follow the steps in the video to learn how to piece this block together!
Final Block Size: 24cm x 24cm (9&1/2″ x 9&1/2″)
Mix & Match with some of your favourite fabrics!
Let me know if give this block a go! I would love to know how you went!
As is expected at this time of the year, the last few weeks have been filled with festive get-togethers, exciting gift making and an endless array of baking, giving me very little time to tend to my lovely little blog.
But in the last few days before Christmas, I’ve hoarded away a little bit of time to spend writing to you! And boy, is there a lot to write!
So with Tony Bennett’s Christmas album crooning in the background, let’s get down to business!
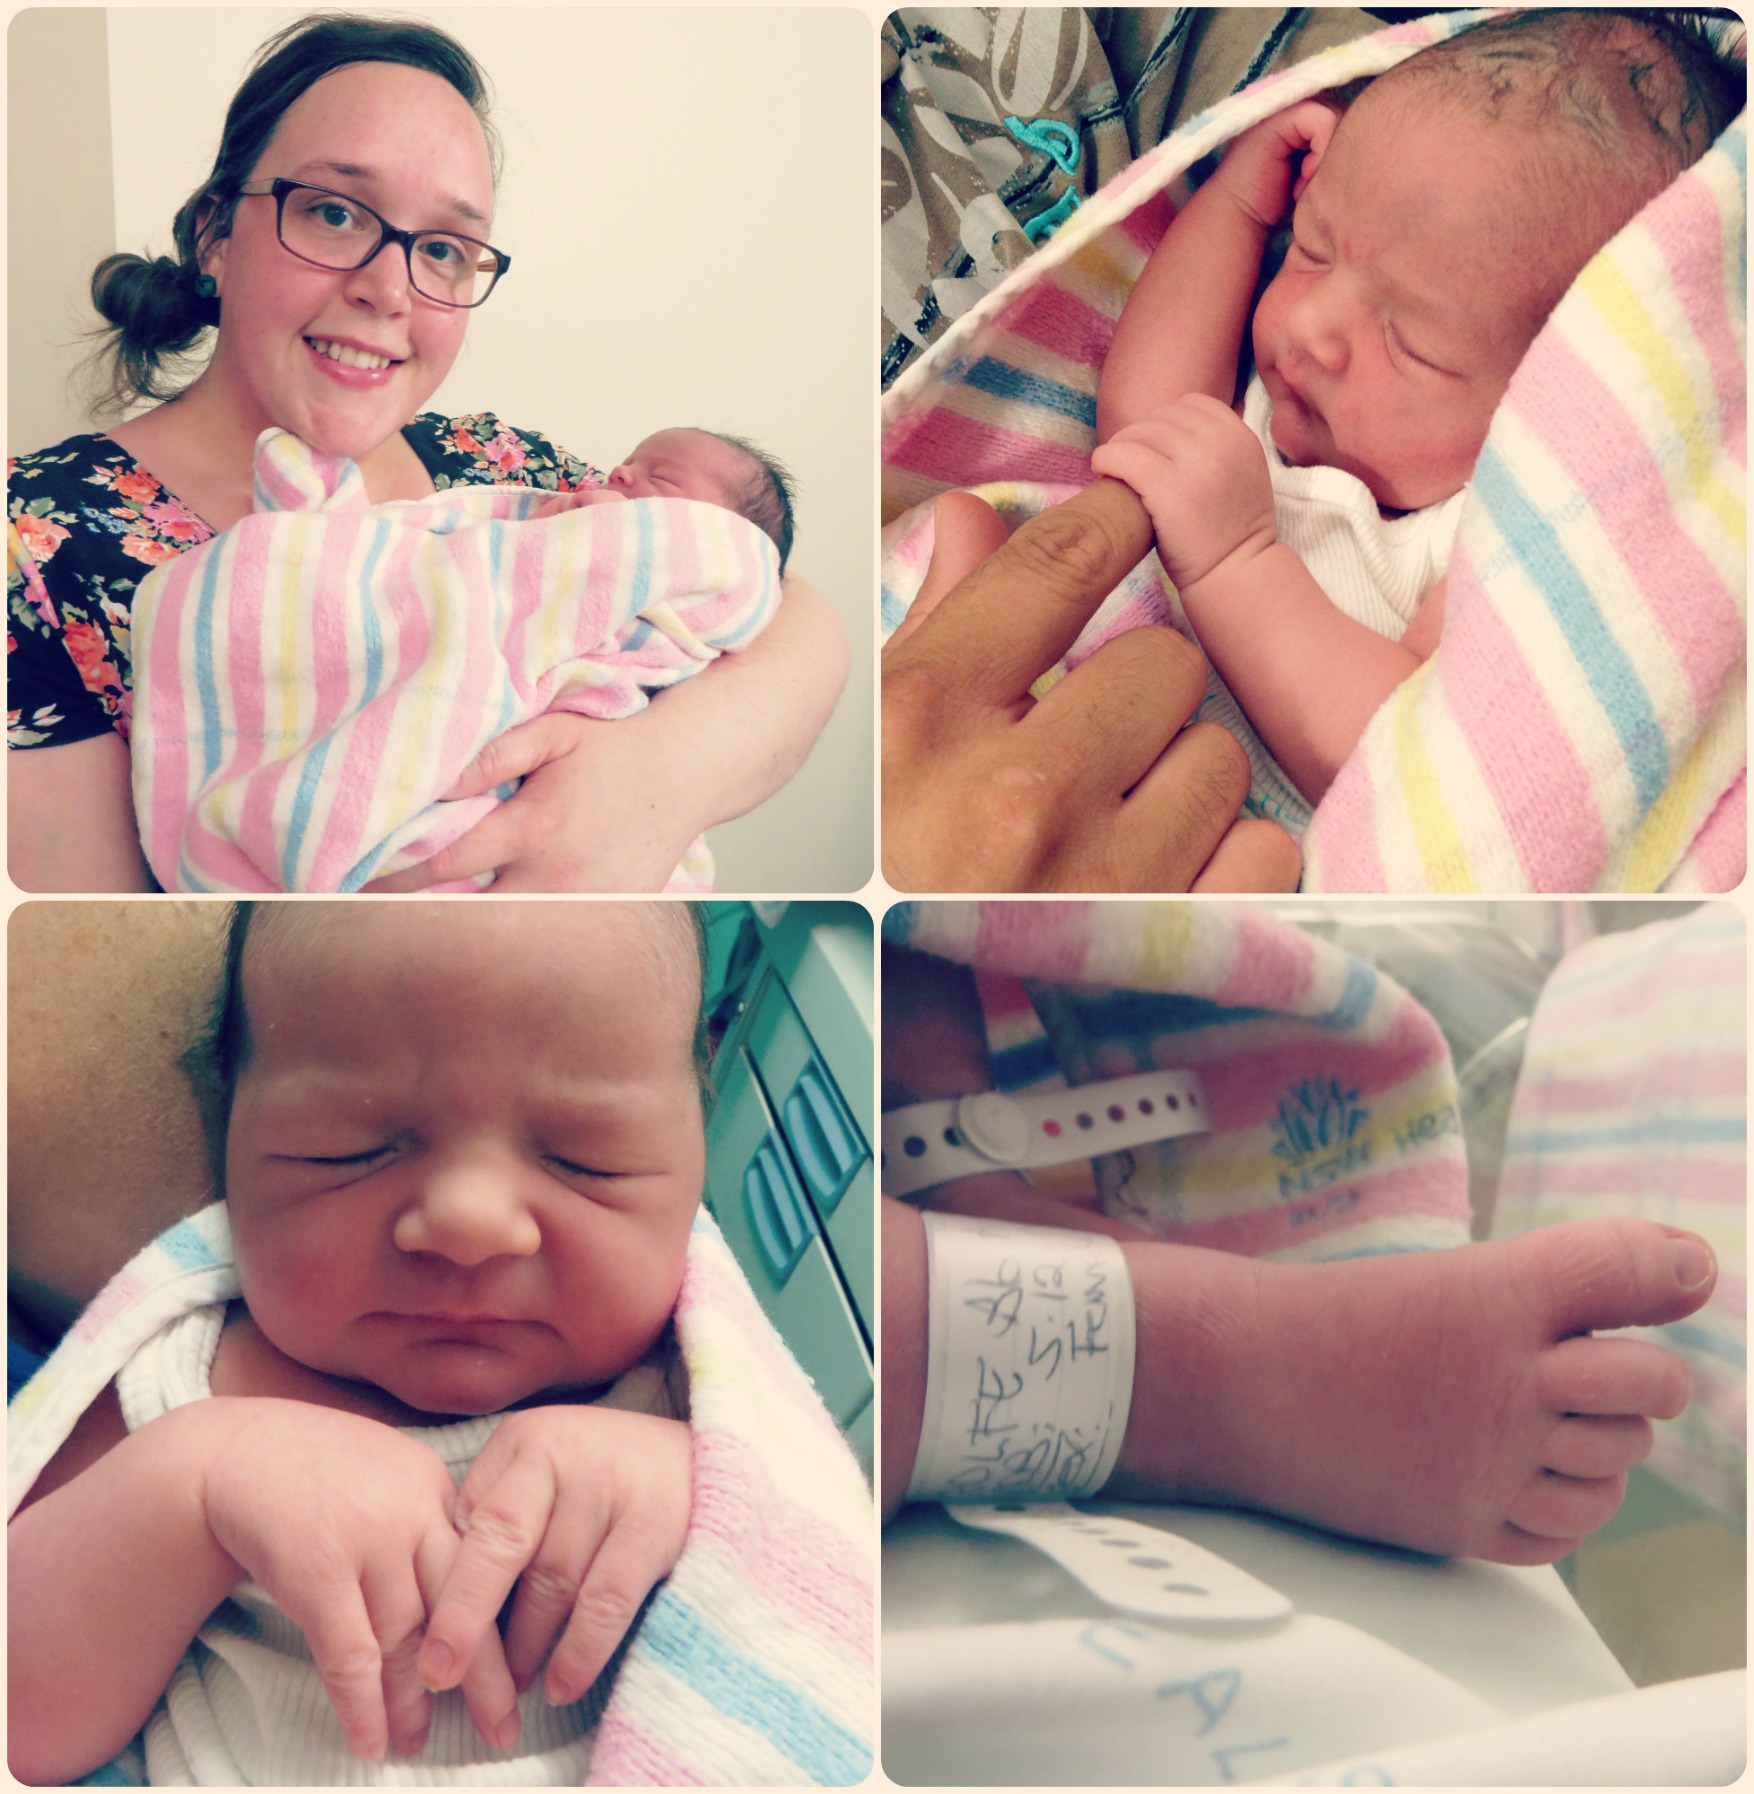
First, allow me to introduce to you my beautiful niece Amelia who was born on the 5th December.
She came into the world in a very hurried fashioned that earned her and her parents a National News worthy story! Let’s just say, they didn’t quite make it to the hospital in time! Here’s the story if you want to know more!
Next, let’s address the title of this post…
Yes indeed, I did make a quilt. And I did it in quite a sneaky type way too (you may have seen a few glimpses on Instagram!). Usually at Christmas, my close group of friends and I do a Kriss Kringle type of gift giving. So to sooth my need to make a quilt as a gift this Christmas season, I chose to make one for one of my closest girlfriends who I’ve known since high school.
Thankfully she loved it! And even luckier, the colours went perfectly with a lot of the décor she has in her new inner-city apartment! Whoo!
The pattern I used is called the Tribute Star Quilt that I found (as a FREE download!!) on the Denyse Schmidt website! It’s quite an easy pattern to follow, choc-full of HSTs and simple squares that would look great using any print or solid fabrics.
Sometime in the New Year, I’m planning on giving the Tribute Star block another go using a few different type prints (maybe) and turning the block onto it’s point and adding corner triangles to the edges. From what I can see in my mind’s eye, I think it’ll be a little good ‘un!
What’s also kept me busy over the past few weeks are the Christmas tutorials I’ve been filming, editing and publishing onto YouTube!
I’ve been putting so much time and effort into these little videos to the point where I’m quite ready to take a much-needed break once Christmas and Boxing Day arrive!
However, once Christmas is over, I’ll be getting straight back into it!
And then in the New Year, I have a ton of new quilt block tutorials planned as well as some other fun crafty ideas for you to be inspired by!
If you want to be in the loop of what, where and when I upload these video tutorials, check out my YouTube channel and subscribe to be the first notified! I would love to have you join me!
So my friends, I wish you all a very happy festive season, celebrating and making beautiful memories with your nearest and dearest!
Although it’s currently summer here in Australia, today has greeted us with a cold and drizzly rainy day that I really don’t mind too much at all! (See ya later humidity!)
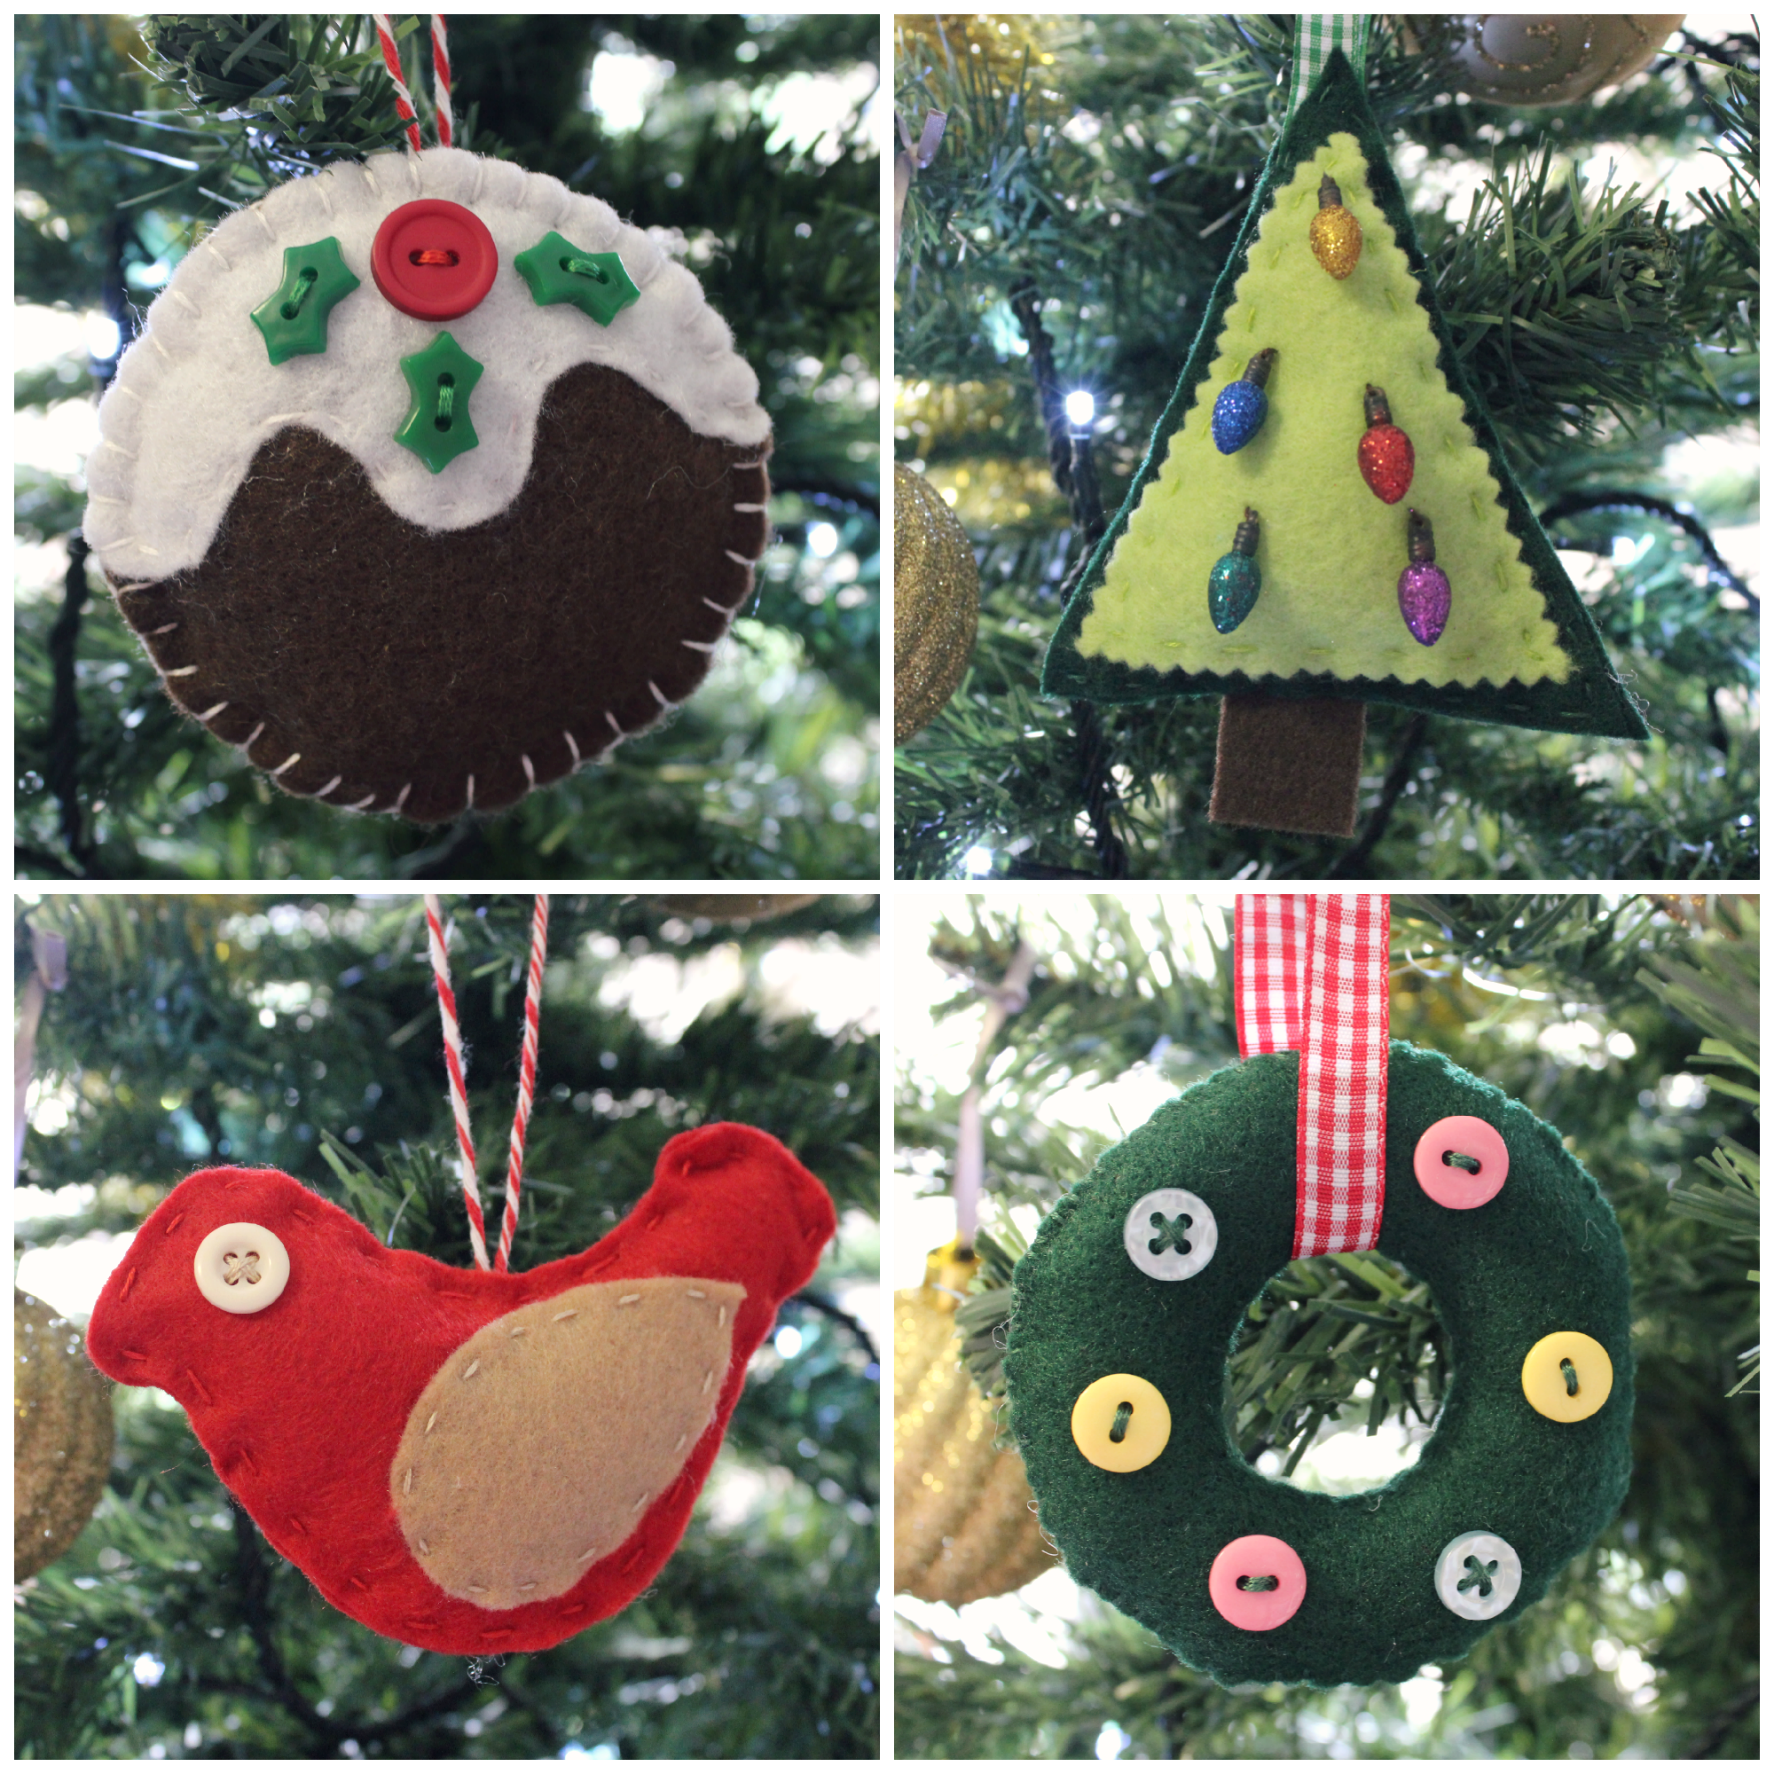
So, with only 13 more sleeps until Christmas (What!? Surely, that can’t be right?!), here’s a little video I made showing you how to make some very inspiring and very festive felt ornaments!
Now these little beauties are entirely handmade, so of course they will look a little rough and imperfect, but I think that adds to their charm!
If you’re keen to make this craft this season, feel free to be as creative as you like, go crazy and mix up the colour combinations or stay traditional in your designs like I have. The choice is completely yours!
For more information about these handmade goodies, check out the description box that’s accompanied with this video on YouTube.
Hello & a Happy Wednesday to you all!
Today brings my first of many Christmas videos for 2014! And we’re starting off with a bit of a tricky one. But take comfort, once you know the basic steps to Foundation Paper-Piecing, you’ll be whipping up these blocks in no time!
Like I mention at the beginning of the video, if you’re new to Foundation Paper-Piecing, perhaps watch the tutorial I made a little while ago explaining everything there is to know to this technique to then help you out with this video.
And if you’re interested, here’s just a quick little list of the sewing tools I used in this video*…
– Brother Innovis 200QE sewing machine
– Brother 1/4″ sewing foot
– Gutermann polyester thread
– Fiskars Rotary Blade and Cutting Mat
– Sew Easy Rulers
– UHU Paper Glue
– Triumph Craft Scissors
– Clover Serrated Tracing Wheel
– Clover Finger Presser
– Fabric from Spotlight
And as always, share with me any pictures of your finished blocks if you’re keen on giving this a go! You can contact me here: 3and3quarters@gmail.com
Happy Sewing Friends!
*This is not a sponsored video or post. All products have been bought by me and all opinions are my own.
Here’s just a quick little tutorial I uploaded last week simplifying the process of making the utterly-tradtional Flying Geese unit.
The process of how to make this block should be a staple in your patchwork library and when it is, you can adapt and shape it into any size or formation you wish!
Here are the measurement & cutting instructions for this block..
– Cut x1: 5&1/2″ x 3″ rectangle from one fabric
– Cut x2: 3″ squares from a contrasting fabric
– Piece together as demonstrated in the video.
– Feel free to make as many Flying Geese units as you wish to piece together a long strip, or square or rectangle. The choice is all yours!
The final measurements of this unit are: 5&3/8″ x 3″ or 13.5cm x 7.5cm.
And, here are some great examples of the Flying Geese unit pieced together in a few beautiful and creative ways!
(Links to the sources of these quilts are at the end of this post!)