My 30th Birthday Weekend

Let’s be honest, I’m not one for the attention that birthdays bring. I’m a typical wall-flower type of gal who likes to happily sit in the wings and watch the world float by.

However, the week leading up to along with the weekend that my 30th fell on, ended up being one of the busiest I’ve had in a long time…

So you know how I rave on about being a Florist and such? Well I actually put my skills into use and only did flowers for my first ever wedding!!!

The bride was the daughter of a family I’ve grown up with pretty much most of my life, so it was an honour to be asked and to contribute to her and her husband-to-be’s magical day.

Prep for the big day began early Thursday morning with trip one of two to the Sydney Flower Markets. Day one concentrated on getting foliages – leaves and greenery. Friday, day two, was all about the flowers! And boy did we get lots of flowers! The colour palette was whites, blush pinks, peaches and soft and rustic pastel colours and highlights.

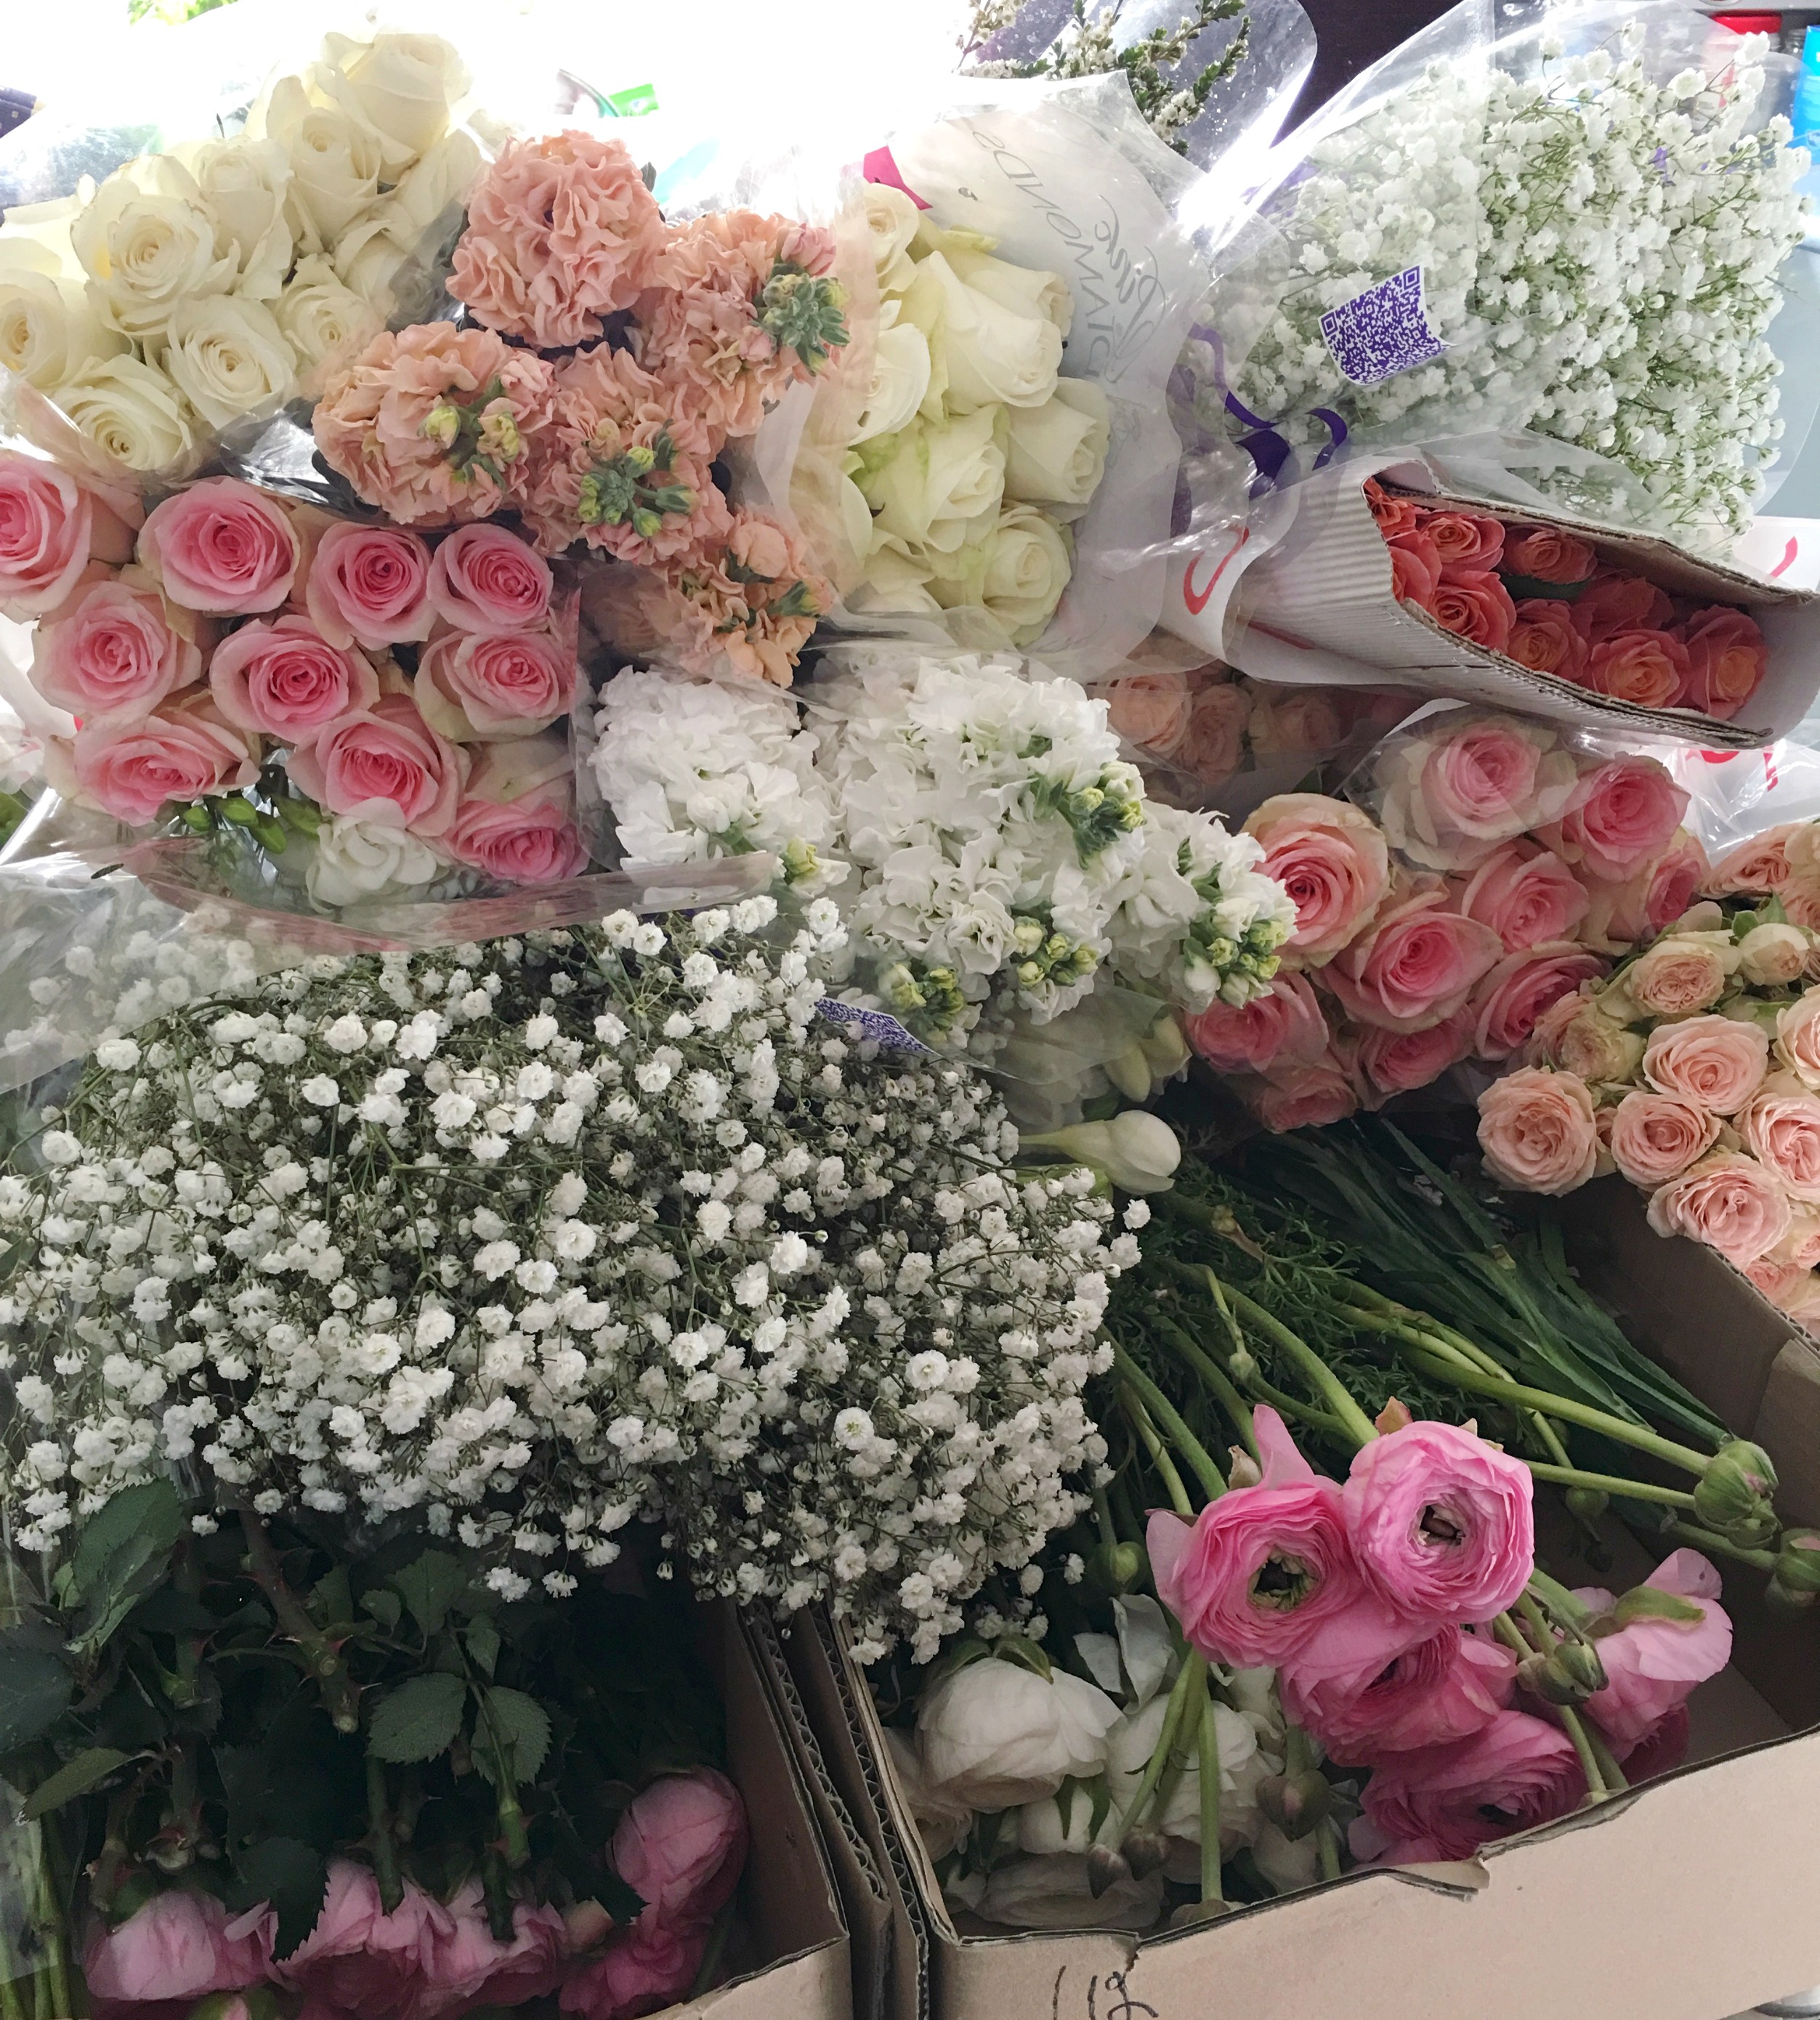
I managed to pick up an array of perfectly coloured Roses, in-season Ranunculus, darling peachy and white Spray Roses, beautifully perfumed Stock, fluffy stalks of Babies Breath and Carnations, feathery lime-green Aspidistra and a whole host of other fun blooms and greeny bits.

The rest of Friday was a bit of a blur of gum leaves, chatter and laughter (I had a good friend come over and help for the day! She’s a real legend!), unnecessary faffing over flower placements, over-the-top swooning over beautiful blooms and total contentment in the sheer joy of what I was doing. (Even though my stress level was at about a 9 out of 10! There was even a moment early in the day when I had a small panic attack that I hadn’t bought enough Roses! No need to worry, I had plenty in the end!)

The Bride’s Bouquet (not finished)

After another early start on the day of the wedding to get all of the last minute ribboning and packaging done, it was off to the venue to set up flowers for the ceremony, the three tier cake, the bridal party and reception tables.

Bridal Party Flowers in the back of my tiny car, ready for delivery!

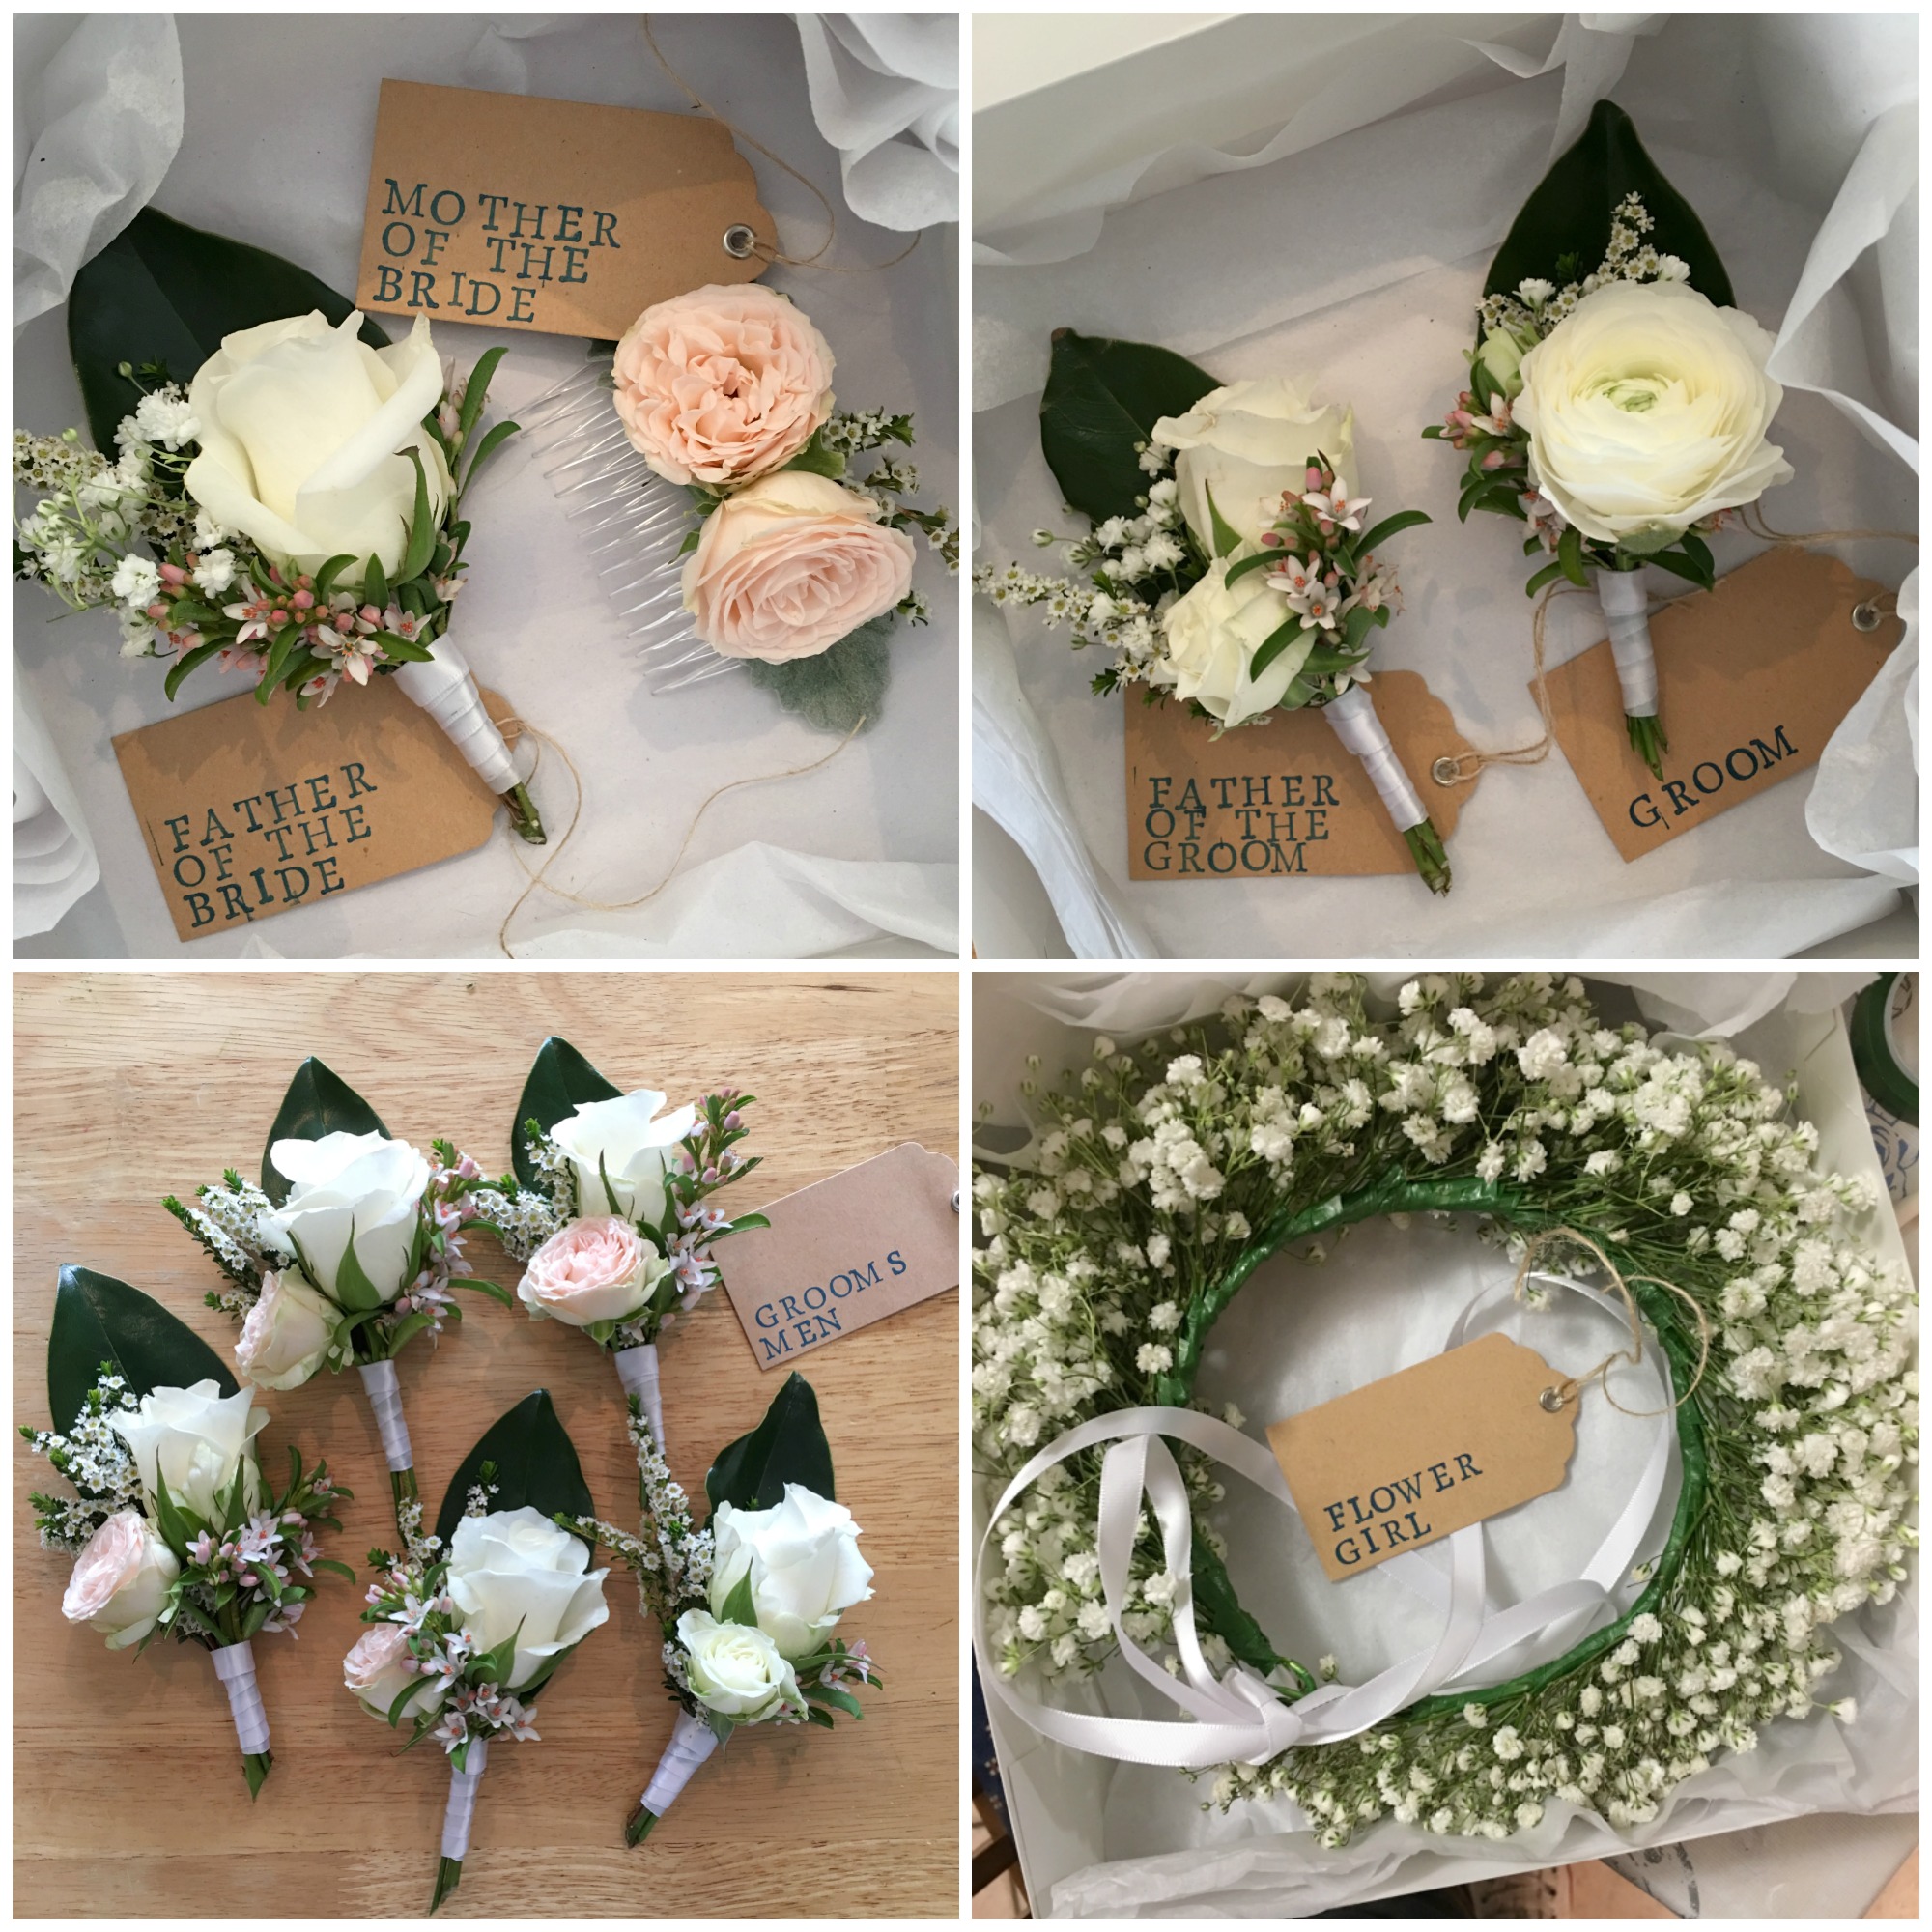
The ceremony and wedding itself was beautiful. The bride and her maids looked gorgeous, the groom and his men were very handsome and everything went smoothly. Safe to say, I slept well that night!! 😀

+++

The next day it was my birthday!

I spent a quite morning at home, cleaning up my mess from the past three days. I even made myself a birthday bouquet out of the few left over flowers that didn’t quite make the cut for the wedding!

Then my family and friends all gathered at a local high-rise restaurant that served High Tea and chatted and laughed the afternoon away.

We had a birthday cake, lots of cute little bit-sized treats, scones with jam and cream, fancy hot teas and fresh yummy sandwiches.

It was such a lovely day spent with my close family and friends. Not too much fuss was made and I took the day and birthday wishes as they came. Which is always enough for this quiet little wall-flower!

+++

Before I go, a BIG thank you to all of you for your lovely birthday wishes you left me either on my YouTube channel, Instagram or Facebook. I appreciated every single one!

Happy Sewing, Friends!

xx

Falling In Love With Sewing Again

It’s no secret, this year has freakishly flown by, eating up time like it’s no bodies business. And my poor sewing machine has suffered as a consequence.

Also, not gonna lie, my motivation to sew and be creative has taken a bit of a hit too. So with all of that combined, not a whole lot of movement has been had in my sewing room this year.

But recently a few projects have come to hand to make me dust off the sewing machine, dig out my rulers and cutters and get sewing again.

In my last post, I shared with you my finished Star Sampler Quilt (sans quilt label!)

It felt like it took me for ages to get this quilt (and YouTube series) finished. But I’m so happy with the end result.

I currently have it hanging in my sewing room and I find myself just staring at it at times, admiring it’s beautiful tactile quilted surface, it’s perfectly pieced and nested points as well as the monochromatic tones clashing with the pops of colours dotted here and there.

When I was quilting this quilt, I took a gamble and used a new tool that I’ve been told is a must-have to use when quilting… Quilting Gloves!! OMG!! How did I ever get through quilting a quilt without these bad boys all of my quilting life?! They’re ah-maz-ing! Although I felt a little bit clumsy and resembled a bad Mickey Mouse look-a-like, the grip the gloves gave me was 10-fold compared to just using my bare hands!

Although the series has now come to an end, I only just finished the final touches to the quilt today… The quilt label!

Quilt Labels from my two previous QALs

And as tradition stands, I made the quilt label a Hexie Flower using some of the fabrics featured throughout the blocks in the quilt. Love it, love it, love it!

+++

Over the past few months, I’ve been sharing a new quilt that I very excitedly started after wanting to do it for ages and ages! The pattern is called Pixelated Rose by Riley Blake Designs and it sings to my yearning Florist inside of me!

So far I’ve loved every stage of getting this quilt underway. Choosing the harmonious solid colours was a breeze, the measuring and cutting was a slow but very meditative experience (I think I must be one of the very few quilters out there who loves the cutting process!) and then the precise piecing has kept me on my toes! Because of it I’ve been able to settle into an easy pressing and nesting routine that each block needs to be able to fit together in the end. Not gonna lie, the whole process (for me anyway) has been quite slow and lengthy. But I already knew this and I took on this project as one of those slow burners that you keep coming to over a set period of time until it’s finished, either months or years after you started!

I’ve been posting pics here and there on Instagram of the progress so far…

Unfortunately, I haven’t gotten any further than the last photo in the right hand corner. The past month has been jammed packed full and this project has been pushed to the side, collated into block order and hung outta mind, outta sight. Although, I do have some free time tonight… Hmm… 🙂

+++

Now, I must also confess that there has been a spectacular fail in the sewing room too.

That being a terrible attempt at making a pretty gathered A-Line skirt for my birthday a few weeks ago.

Despite being quite time poor during the weeks leading up to my birthday, I knew it would be a pretty big stretch to be able to cut, make and finish a skirt when dressmaking really isn’t a strong skill of mine. Although, in saying that, I did successfully stitch a side pocket for the first time as well as sew in a zipper next to another side pocket! Yeah!

However, things began to fall a part when I had to attach the waistband and match up dots and seams and things that I didn’t know I had to match up… So with time pressing on me and my interest and patience waining, I gave it up and allowed in the realisation that I’m no good at dressmaking one bit. (I’m sharing no photos of my sad attempt of a skirt!) Perhaps with a bit more practice and a bit more patience, I may become a superstar seamstress yet!

+++

I hope you enjoyed this brief glimpse back into my sewing room.

I feel like I’ve really fallen back in love with sewing again… Just the raw, basic and fundamental steps in this creative skill I’ve been blessed with. Over the past year or so, I’ve felt slightly distant from my sewing bubble that I’m so used to be being in. But I think I’m finding it again and it feels great!

Happy Sewing, Friends!

xx

Star Sampler Quilt | Finishing Touches

After almost a year of getting the ball rolling, the end of my Star Sampler Quilt Along has come to an end! *insert sad/happy face – whichever one applies!*

In the final instalment of the series, I’ve jammed packed it full of all of the ‘finishing touches’ we need to do to have a completed quilt!

This time ’round there’s no pattern sheet to follow or to download, instead everything you’ll need to know is either in the video tutorial or listed here in this post…

So once you’ve finished piecing together your quilt top with sashing and borders, it’s ready to be backed and basted in preparation for quilting! If you’ve made your quilt with the same measurements as mine, you’ll need:

BACKING: WOF*x150cm (59″)

BATTING: 120cmx150cm (47″x59″)

For my batting I’m using a lovely Premium 100% Cotton Quilt Batting in an Autumn weight by a company called Bosal. To be honest, before receiving this, I never knew that batting was or could be available in ‘seasonal weights’. I chose an Autumn weight as it’s not too fluffy (or lofty) to sandwich between my quilt top and backing, while still being light/heavy enough to keep one warm on a chilly winter’s eve.

When it comes to basting your quilt, use the method that you feel the most comfortable with. For me, that’s spray basting. It’s quick, simple and equates to less time rolling on the floor pricking my fingers with pesky pins! 😀

The same advice goes for your choice in quilting. From the early stages of planning this QAL, I always envisaged this quilt to have a subtle mathematical grid texture to it’s surface. To achieve it, I used my handy Clover Hera Marker and long quilting ruler to mark a 2″ grid pattern across the top of the quilt, three lines at a time (ie. mark three lines, quilt, then mark another three lines, quilt etc.) until the entire quilt was finished.

After trimming away any excess backing/batting from around the edges of the quilt, it’s time to bind! To make your own quick and easy binding, you’ll need:

BINDING: WOF*x40cm (16″)

Cut this into x6 2.5″ strips and sewn end to end on a diagonal to create a long binding strip.

After pressing the binding in half, simply machine sew it onto the front of the quilt as shown in the tutorial, then bring it around to the back and slip-stitch the other edge to the back of the quilt. Too easy!!

Don’t forget to label your quilt with the month/year the quilt was completed, the name of the quilt as well as the name of the person who made it! My label is still to be made (oops, my bad!) but when I do, hopefully I’ll remember to come back to this post and upload a photo of it for you! 😀

FINISHED QUILT MEASUREMENT: 141cmx107cm (55.5″x42″)

*WOF = Width of Fabric

+++

I want to extend a HUGE thank you to the lovely ladies over at Dayview Textiles who so generously helped out with the fabrics and materials I used for this series. Without them I would’ve been able to have the pleasure of using such beautiful fabrics from the Printshop Fabric Range!

And of course, thank you to all of you who participated so patiently in this series! I’ve absolutely loved seeing all of your gorgeous blocks, quilt tops and finished quilts – you’re all so talented and amazing! Although the series is finished, keep on sharing them with me using the hashtag #AmandasQuiltAlong on Instagram as well as over on my Facebook page!

So now that the QAL is finished, it’s time to move on to some more ‘old-school’ content that you’ve been used to seeing! That means some new block tutorials, crafty sewing tutorials, flower based tutorials, some fun Christmas things as well as other usual stuff like Monthly Favourites, Vlogs, Hauls etc! Exciting times ahead people!! Yeah!

So while I go and enjoy my last week of being in my twenties (It’s my 30th Birthday this coming Sunday! Eek!), I hope you all have fun completing your gorgeous quilts!

Happy Sewing, Friends!!

xx

PS. Happy News! I now have a PO Box! If you would like to send me something lovely, you can using this address:

Amanda Rolfe
PO Box 1179
St Marys NSW 1790
Australia