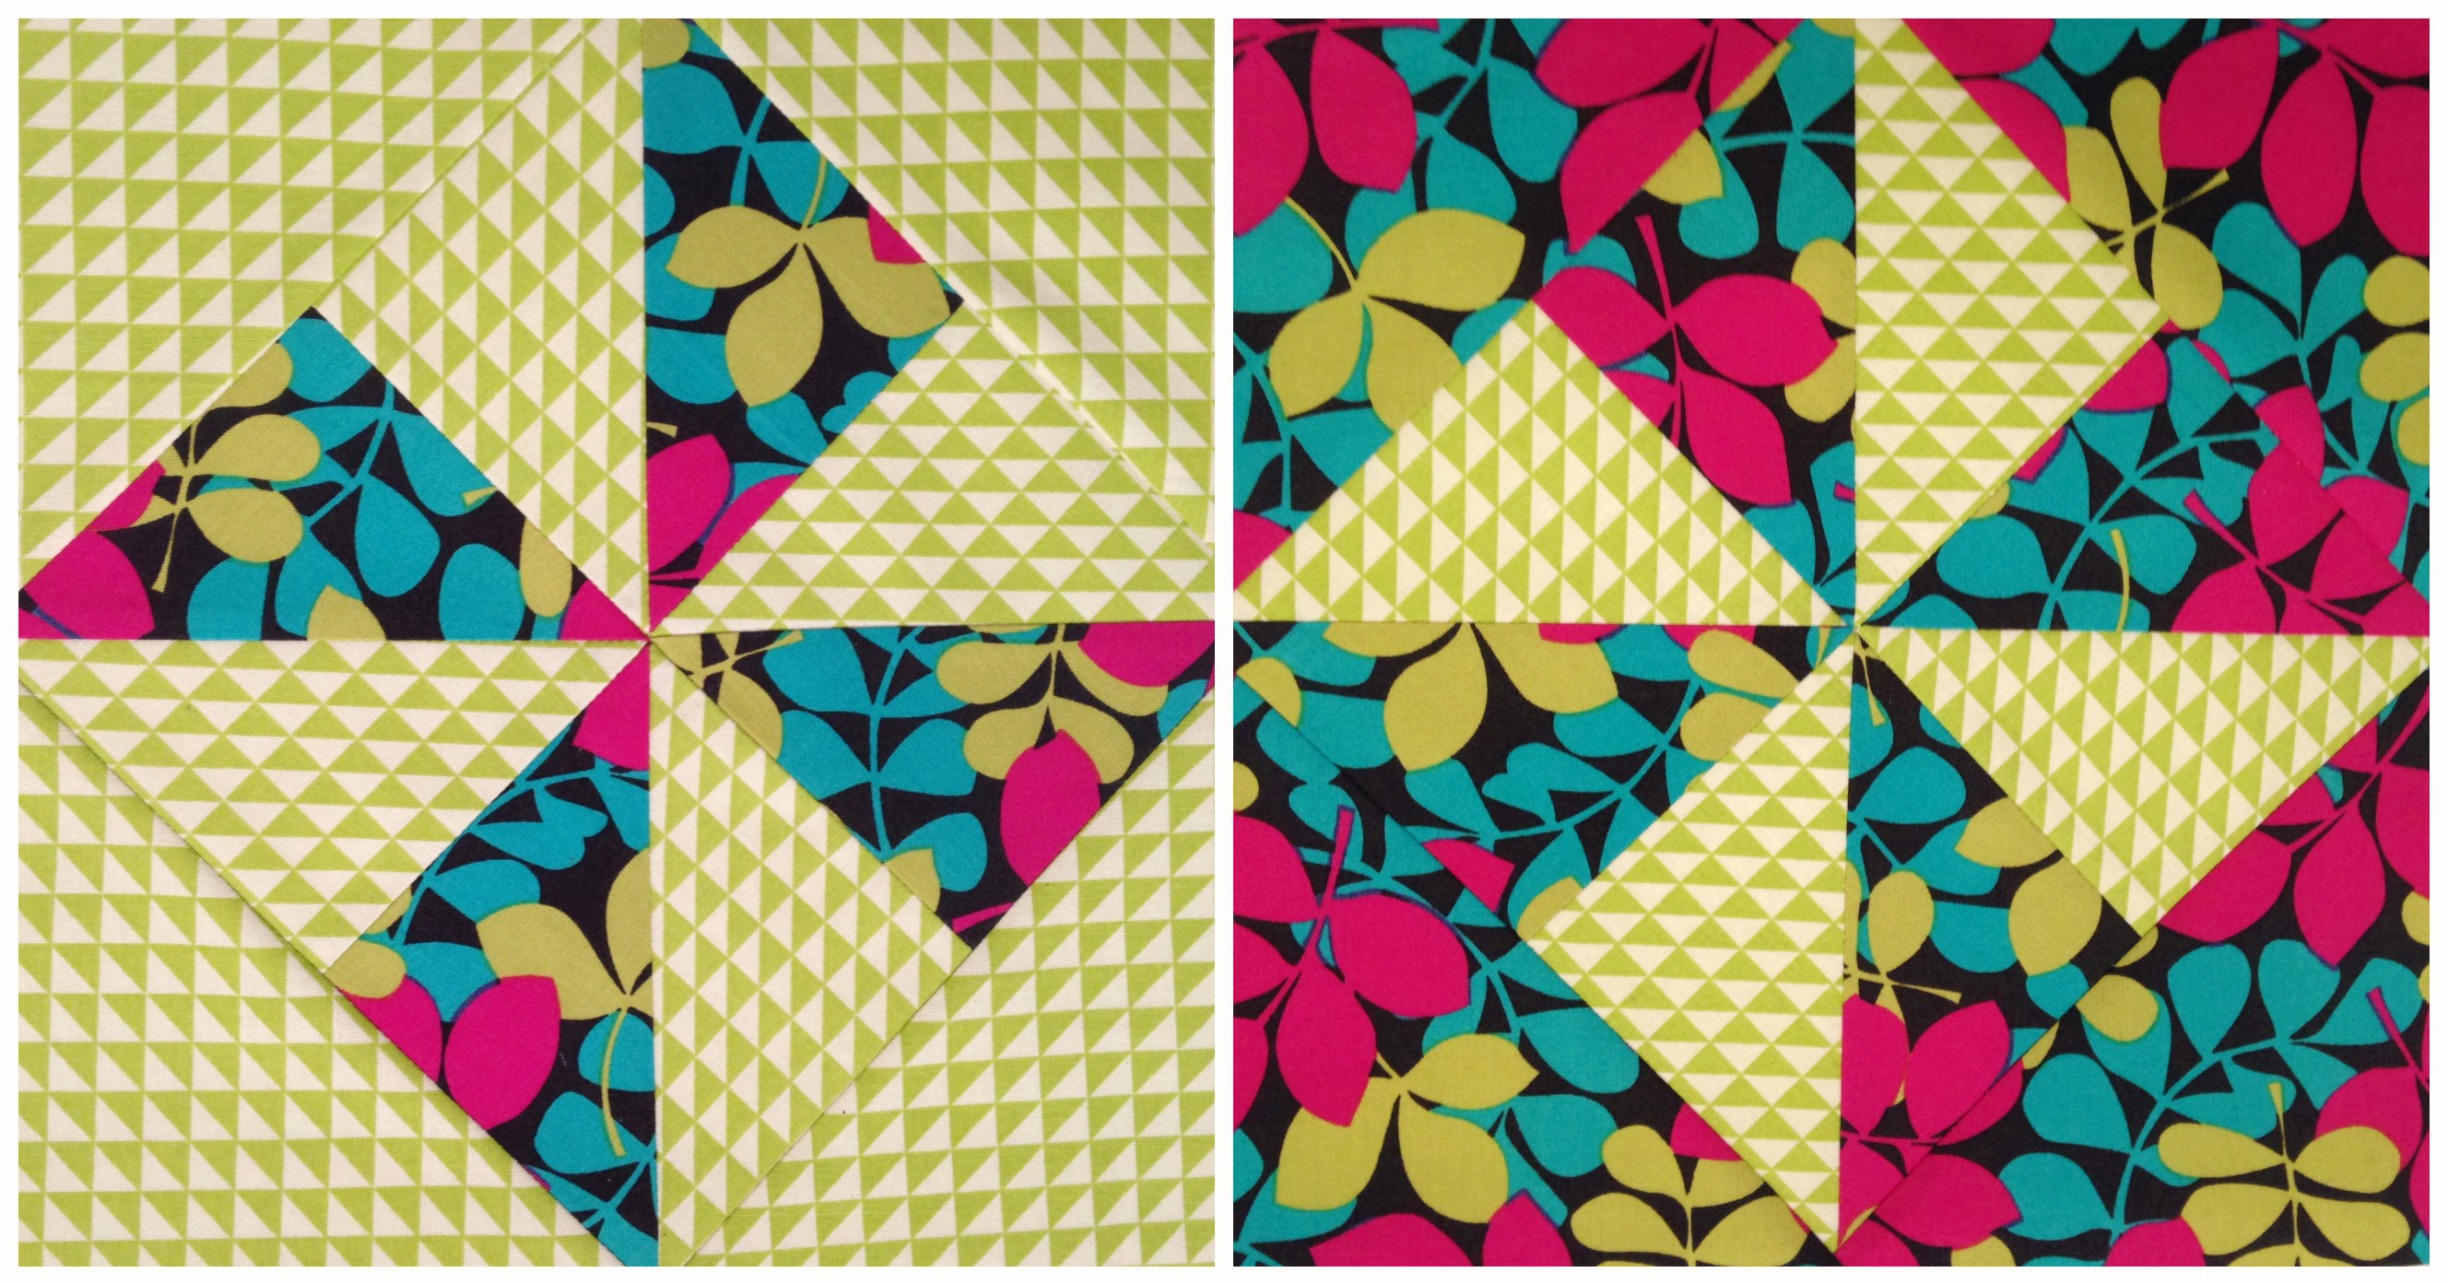
The Hashtag block seems to be absolutely everywhere at the moment! And when I say ‘everywhere’, I really just mean Pinterest and Instagram! 😀
So I thought I’d jump on the bandwagon and make a tutorial showing you how to make this block yourself! Yay!
This is a great little block for all levels of quilters! It’s very simple and quick to piece together and is a wonderful pattern to be able to mix and match prints, colours and values with!
To make this block you will need to…
Cut from one fabric:
x3: 3″x9″ rectangles
and then…
Cut from a contrasting fabric:
x2: 3″x9″ rectangles
and
x2: 3″x13&1/8″ rectangles
And then simply follow the step-by-step instructions in the video to learn how to piece this block together!
The final block size should come to about 32.5cmx32.5cm (12&3/4″x12&3/4″)
The Hashtag Block
And just incase you’re curious, the print fabric I used for this block is called ‘Memoir’, from the Alchemy Quilting Collection by Amy Butler.
Don’t forget to let me know if you’re going to make this block! I would love to know how you get along!
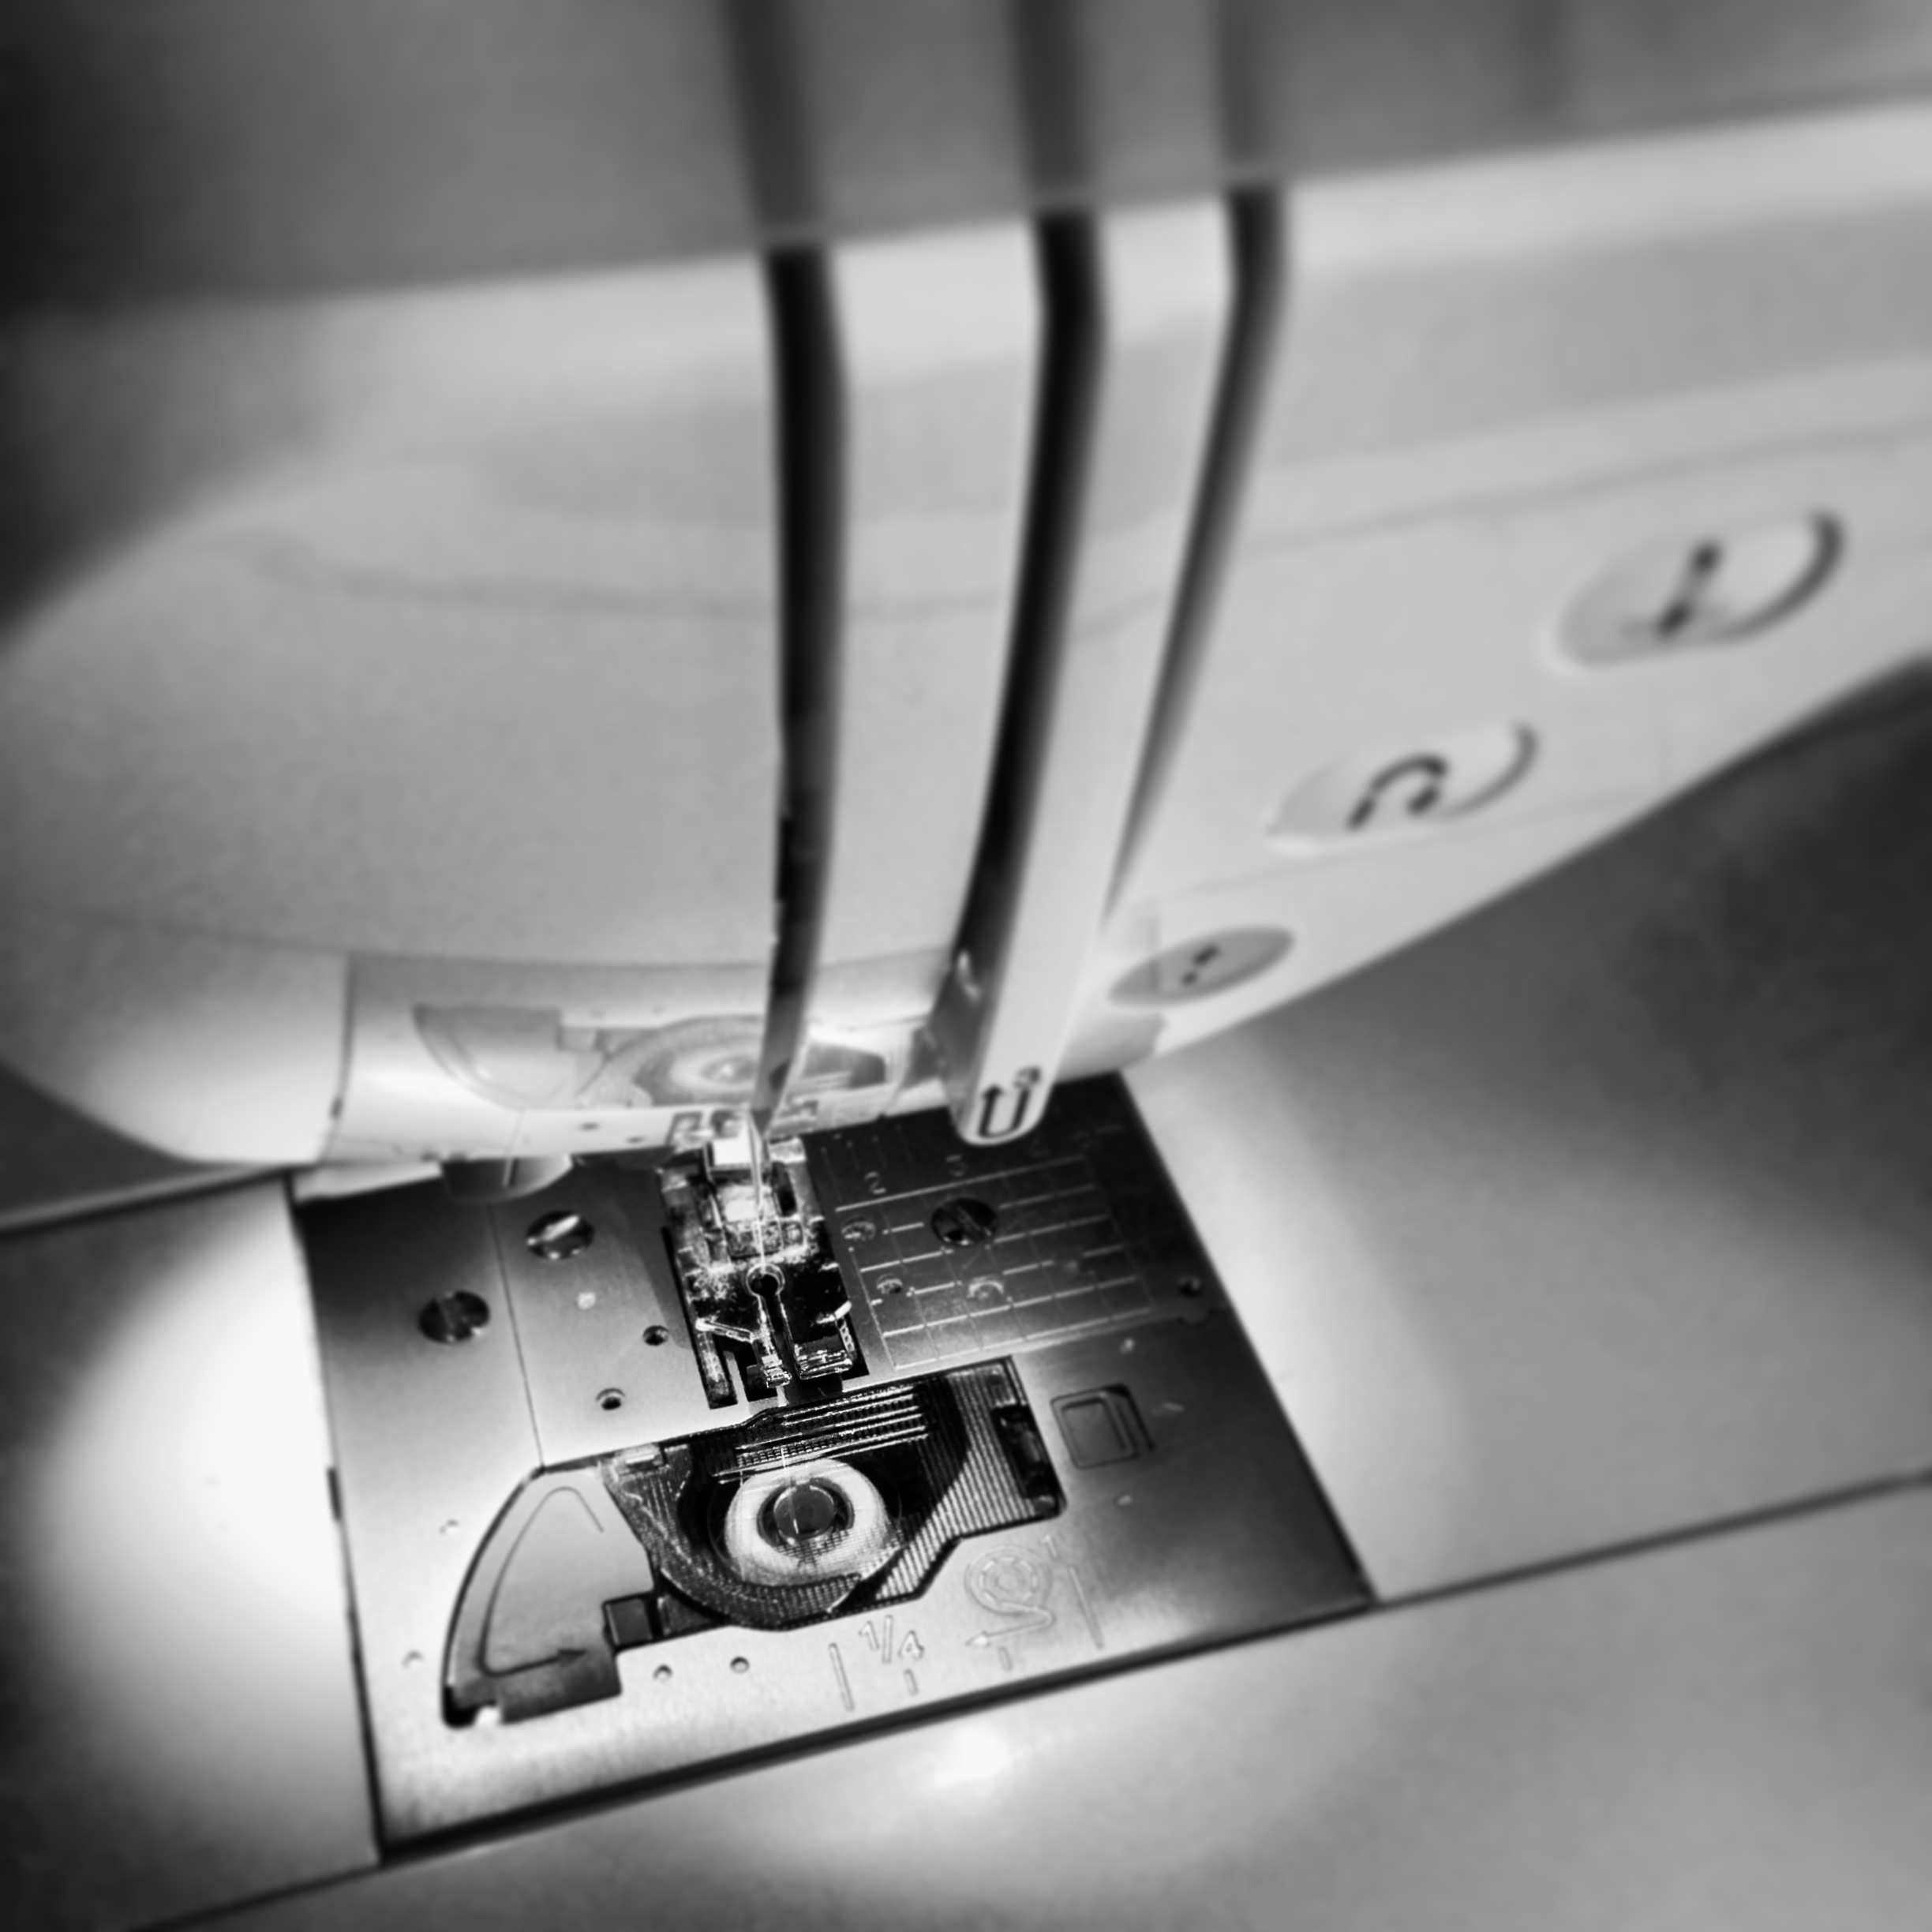
Over the last little while, I’ve been asked some wonderfully awesome questions all about sewing machines. With questions ranging from…
What is the best sewing machine to use when I’m quilting?
How do I use a walking foot?
Can I make a large quilt using my small sewing machine?
What are the best types of threads to use for patchworking?
How much money should I spend on a good sewing machine?
And so many more!
So to answer these questions, I made a video where I sat down and went through all of the basics things there is to know about sewing machines!
Now you may be thinking, ‘how is it that she knows all this stuff!?’
Well, for about six years I worked in a very well know craft/fabric store here in Australia called Spotlight. There, I worked in the fabric and haberdashery department where we also sold sewing machines!
About twice a year, we would have intensive training days with sewing machine reps who taught us everything there is to know about sewing machines, inside and out. We learnt how to demonstrate and talk to customers about sewing machines, how to troubleshoot problems they were having as well as understanding what machine was best for a particular end use i.e. dressmaking, quilting, heavy duty sewing etc.
So because of this, I feel confident in myself and in the knowledge I’ve learnt over the years to answer these questions for you. I am aware that I do not know everything and nor am I ever likely too! I myself, am still learning about the endless possibilities and all of the little intricacies that my sewing machine has to offer and I really love that!
If you have any questions about anything I say in this video or are unsure of any features/functions on yours or are having any issues, please feel free to ask/comment below! I will try my very best to answer you as honestly and as simply as I can!
Also, if you have any tips or nuggets of knowledge that you would like to share with me and others, please comment as well!!
Happy Sewing Friends!!
xx
PS. If you would like to see a few fun little moments where I stutter, mumble, make weird faces and struggle with my words, then you can catch the Bloopers video right here!
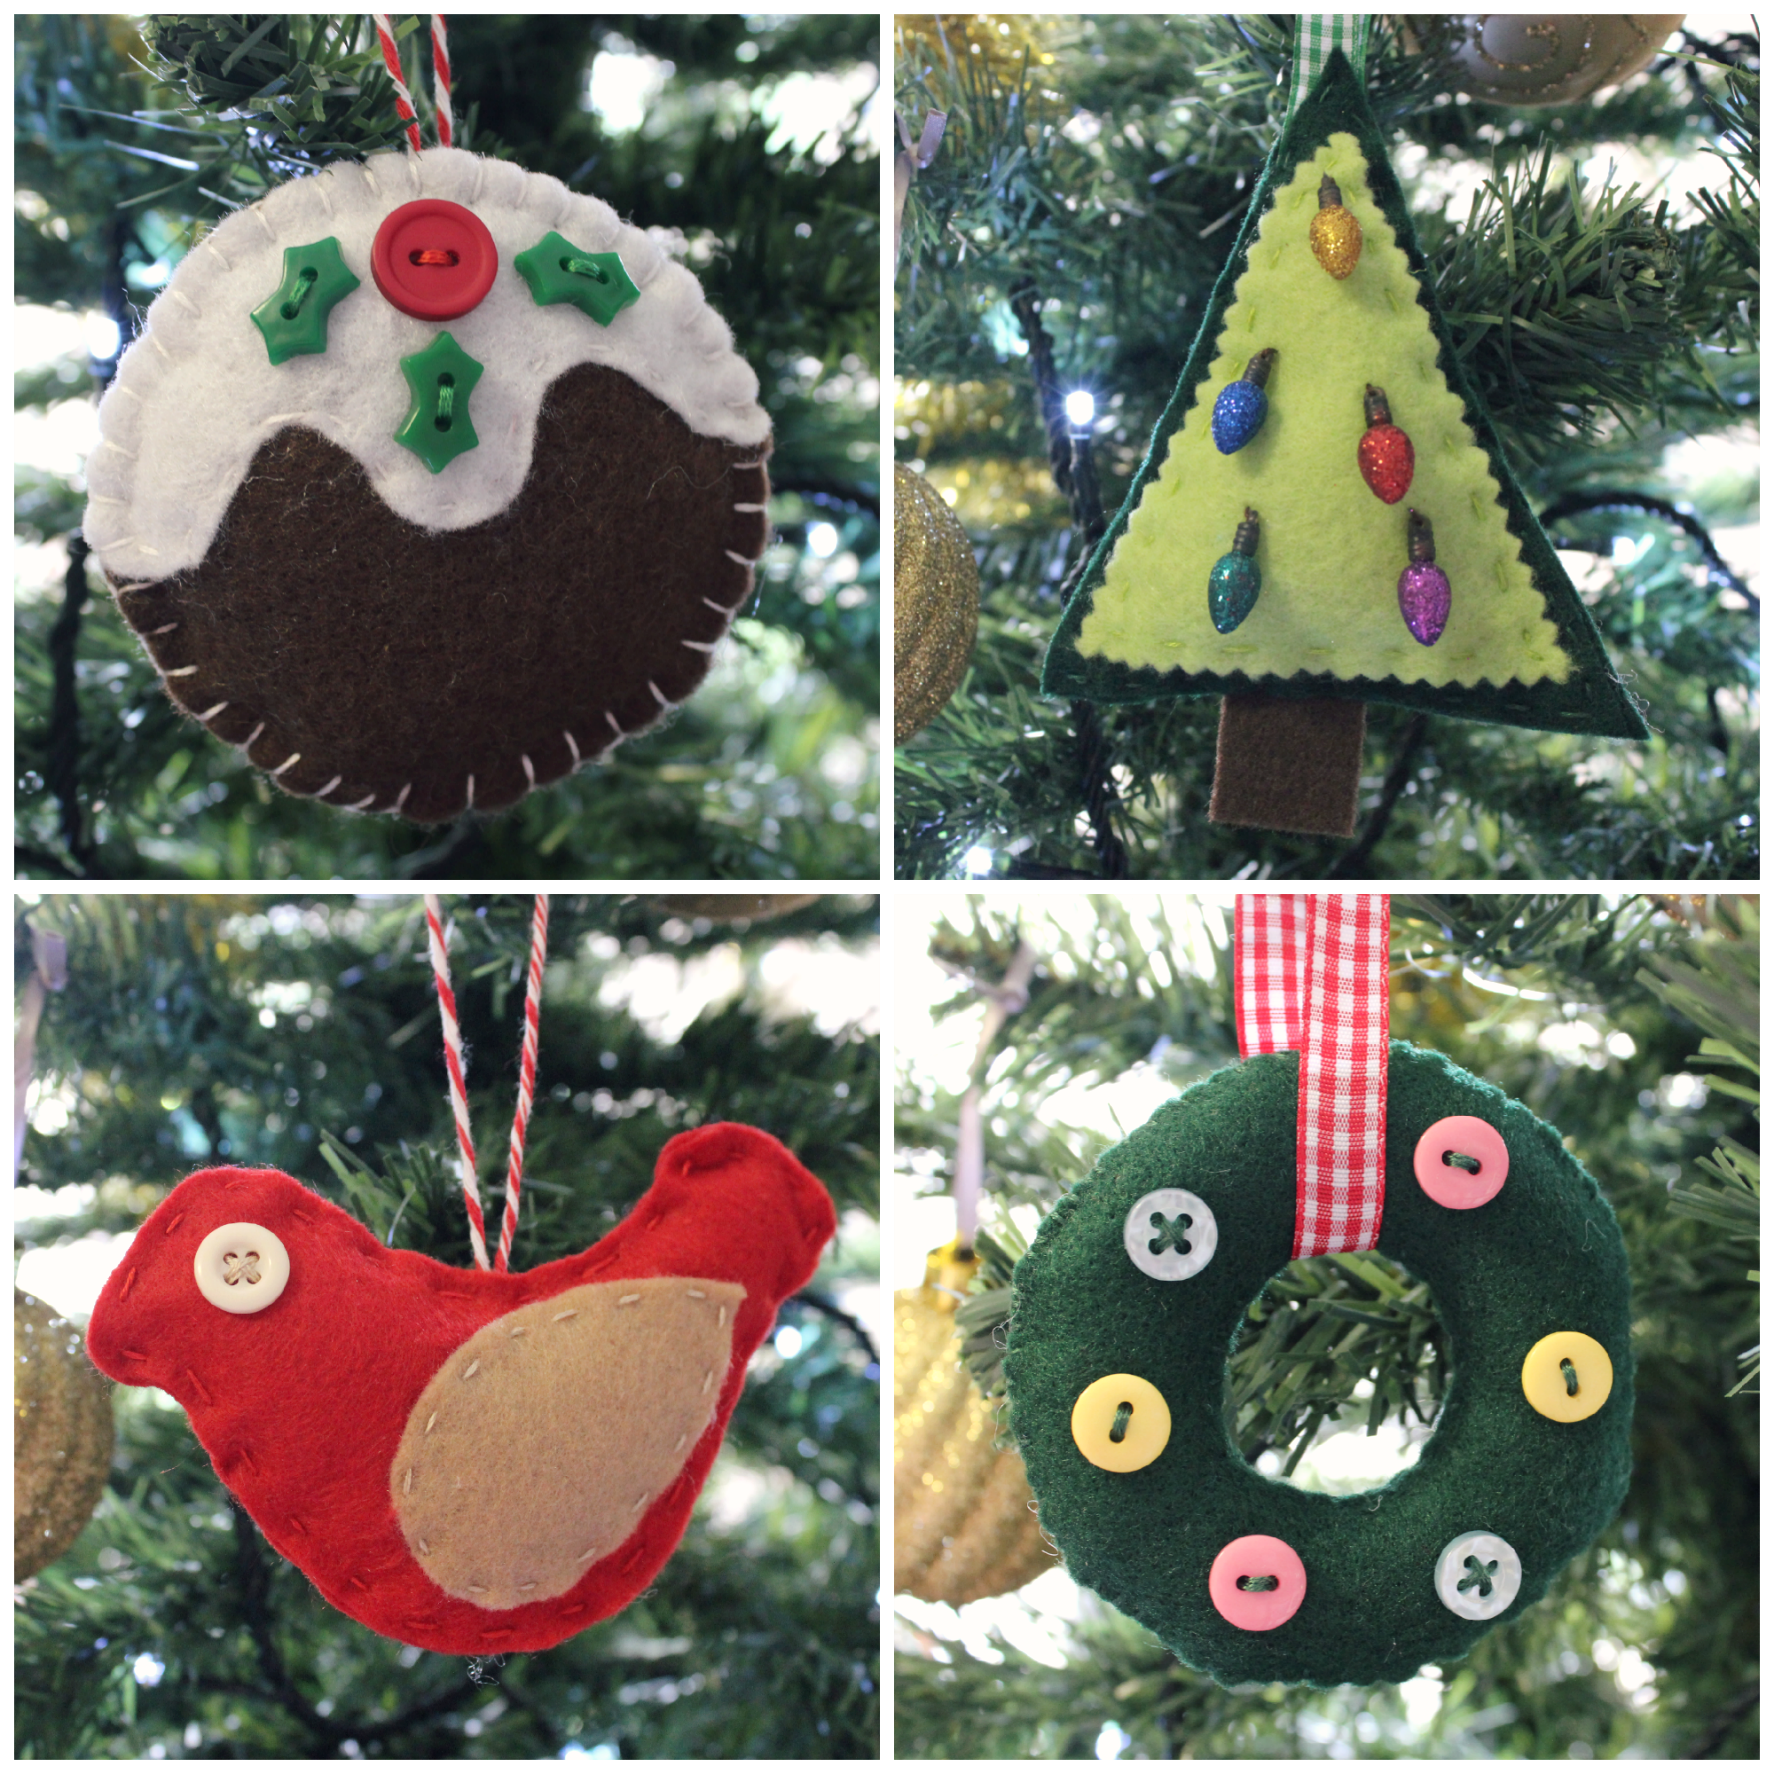
Although it’s currently summer here in Australia, today has greeted us with a cold and drizzly rainy day that I really don’t mind too much at all! (See ya later humidity!)
So, with only 13 more sleeps until Christmas (What!? Surely, that can’t be right?!), here’s a little video I made showing you how to make some very inspiring and very festive felt ornaments!
Now these little beauties are entirely handmade, so of course they will look a little rough and imperfect, but I think that adds to their charm!
If you’re keen to make this craft this season, feel free to be as creative as you like, go crazy and mix up the colour combinations or stay traditional in your designs like I have. The choice is completely yours!
For more information about these handmade goodies, check out the description box that’s accompanied with this video on YouTube.
With a comforting mug of tea settling next to the keyboard and my written notes laid out before me, let’s explore the latest instalment in my quilt block tutorials – the Pinwheel Block!
Inspired by a block in the book ‘500 Quilt Blocks’ by Lynne Goldsworthy & Kerry Green, the Pinwheel Block is deceptively easy!
Here’s what you need to do to make this block!
Measurement & cutting instructions
(This block only requires two contrasting fabrics.)
Cut x2: 6″ squares from one fabric for the corners
Cut x2: 4.5″ squares from each fabric for the HSTs*
Final block size: 25.4cm or 10″ square.
And as always, let me know if you’re going to give this block go! You can email your lovely pictures to this address: 3and3quarters@gmail.com
Happy Sewing Friends!
xx
PS. Regarding my Christmas videos: These will begin in December, with the first one due to come out on Wednesday the 3rd! Then every Sunday & Wednesday upload, until the end of the month will be Christmassy related! Whoo! (This is just incase I didn’t really explain it well enough in the video!) I hope you will all enjoy the ideas and projects I have in store!
On a warm Friday night three years ago, I plucked up the courage to begin writing this here humble quilting blog.
Now here we are, 1,093 days later and I’m still just as dedicated and proud of my little slice of the internet as I was the day I created it.
As I’ve done in other past ‘birthday’ type posts, let’s recap the year that was!
Firstly: YouTube!
This year, I’ve dedicated a lot of hard work into developing my YouTube channel(and with some very pleasing results thus far!).
I’ll also be the first one to admit that I’ve spent so much time planning and creating content for it, that my blog has had to fall-by-the-way-side so speak and become the second child. But! In saying this, my blog has never been too far out of my mind! Along with my YT channel, the welfare of my blog is always on my mind and I’m constantly developing ways in which I can improve its quality! Hence my little foray into making video tutorials!
Thanks to YouTube, my confidence in my patchwork/quilting skills has improved, I’ve felt confident in delivering and teaching skills to others and I’m continually being challenged in both my sewing skills and editing/technical skills.
Hooray!!
Here’s a list of some of the most challenging videos I’ve created this year…
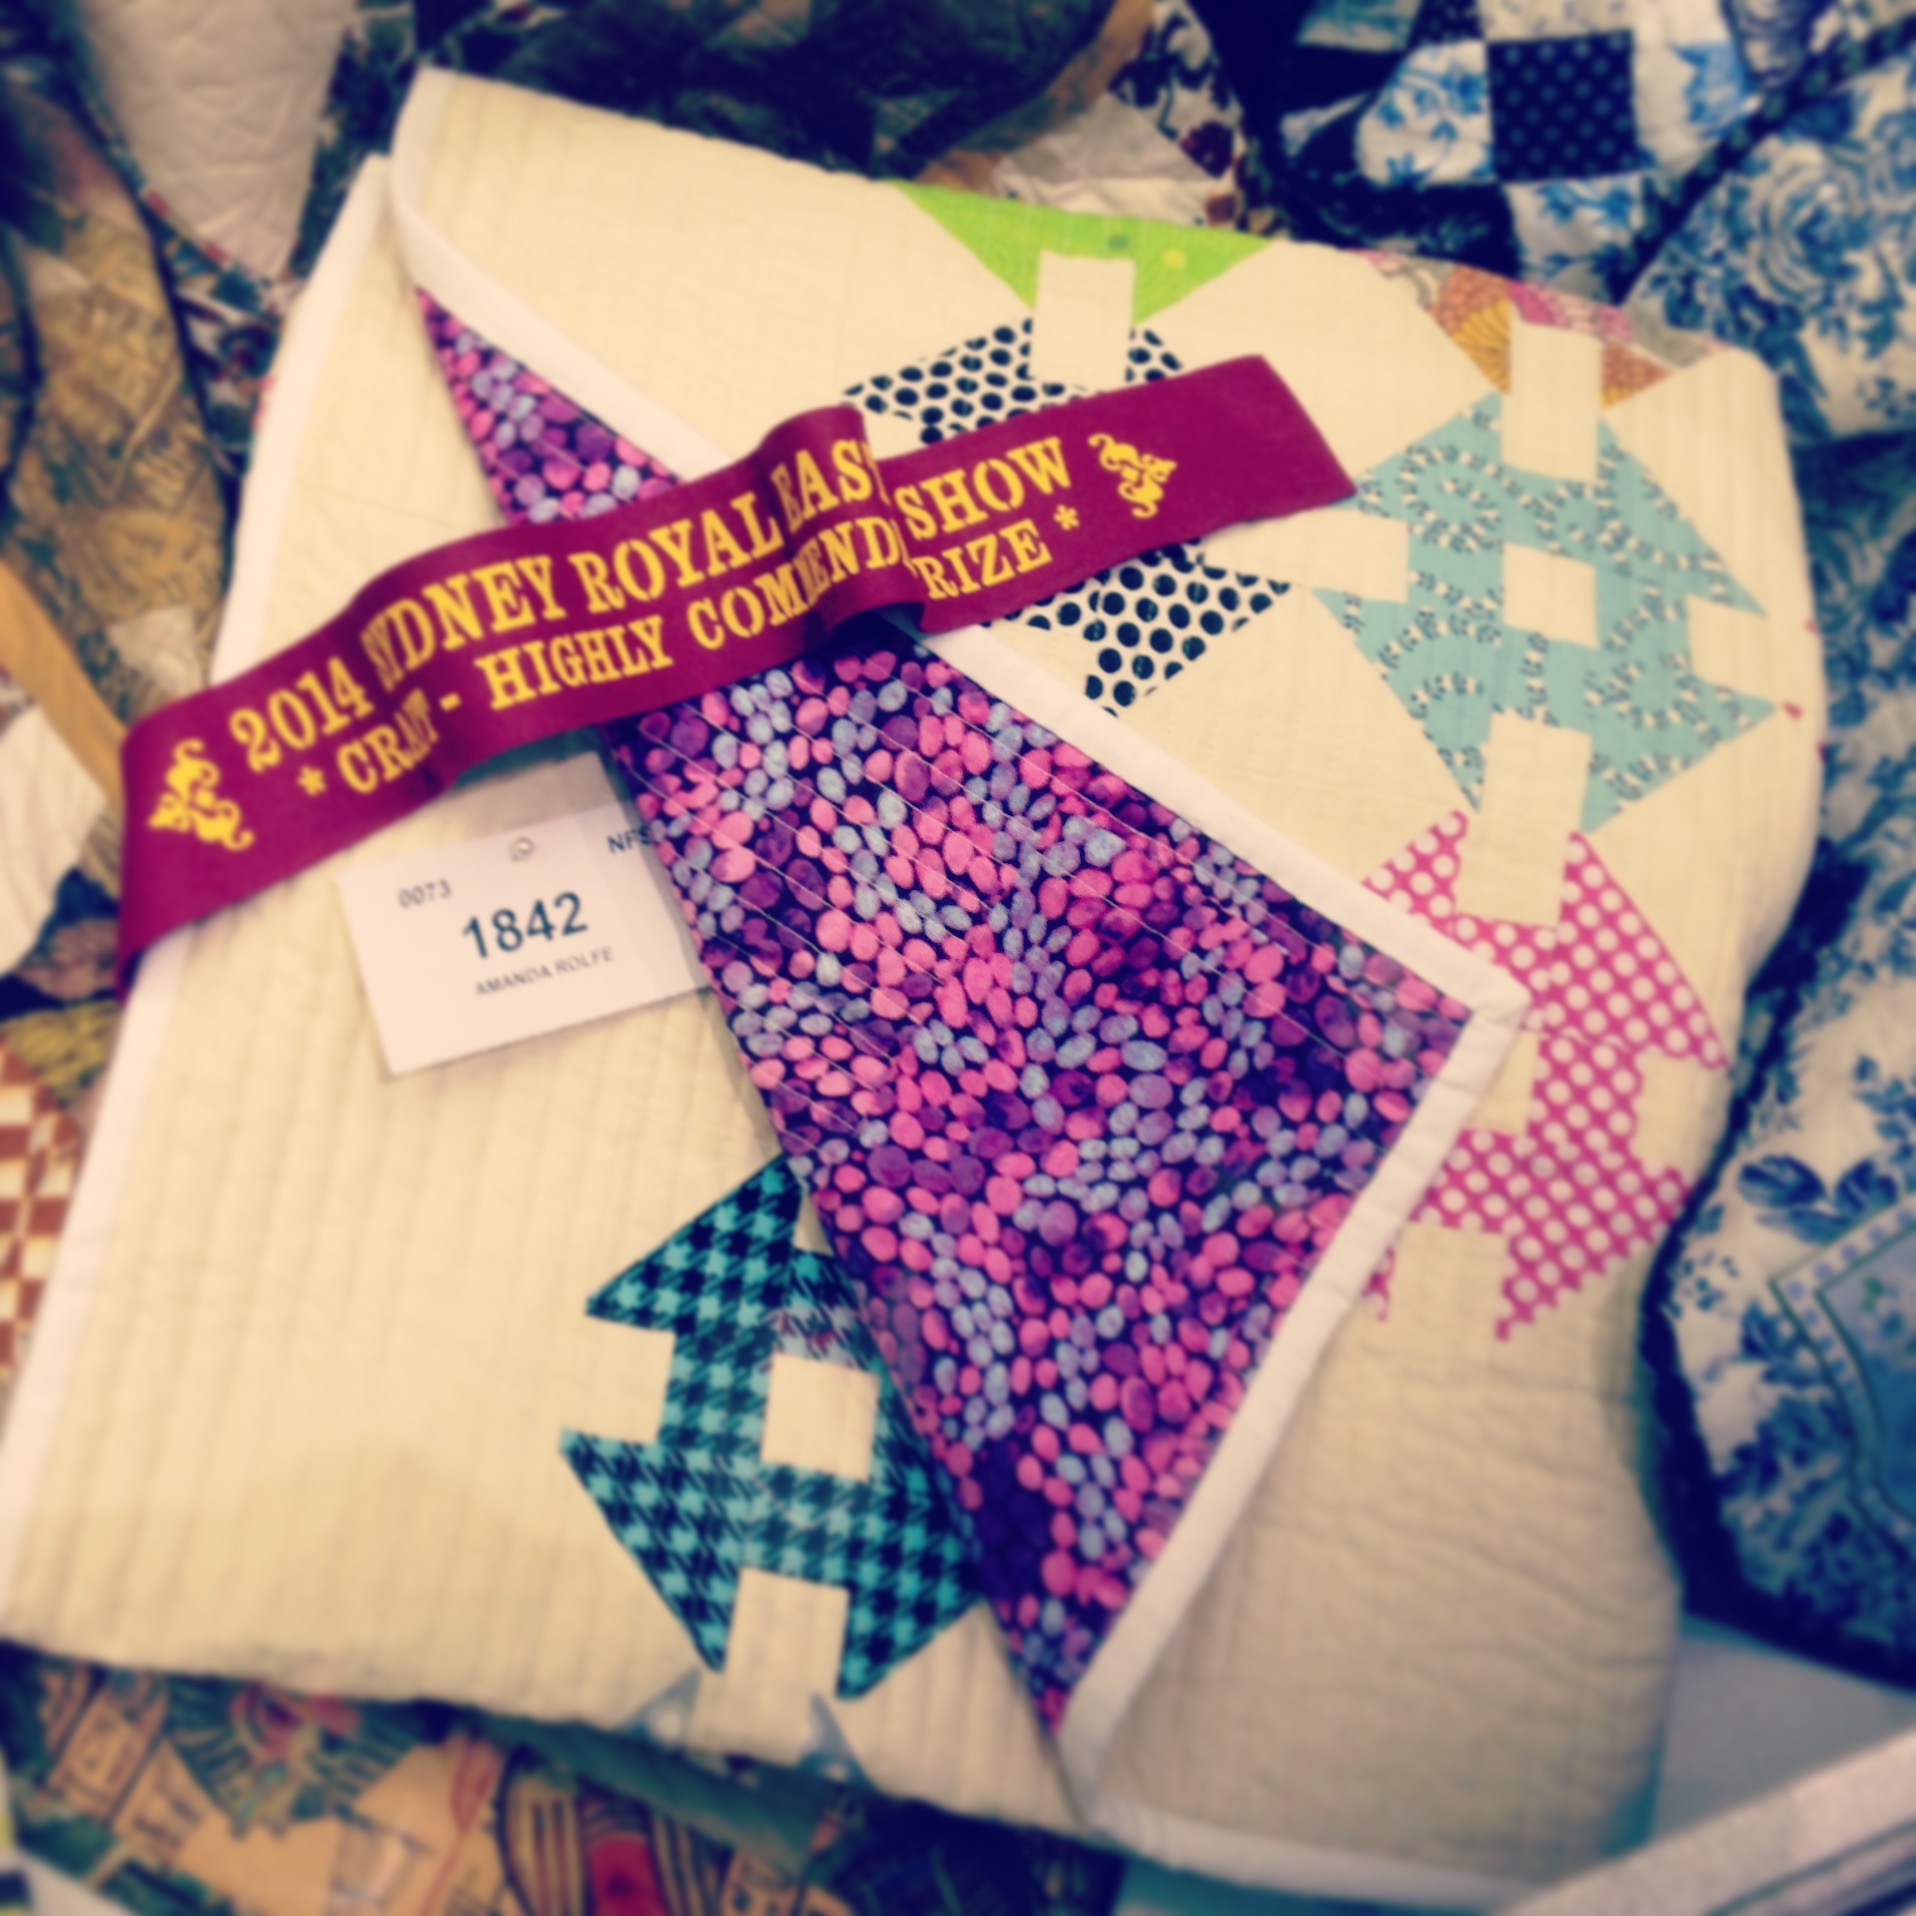
Although I had been quilting for over 7 years, 2012 was the first year I was confident enough in my work to enter them into shows.
This year, I struck a goal off my list and entered a few items into the prestigious Sydney Royal Easter Show in April/May. And would you believe it, one of my quilts received a highly commended ribbon!!
No way did I think I would receive anything in my first year of entering! Not in the least! But I’m so greatly humbled that my sweet little ‘Happy Quilt’ was noticed and received the love it’s owed.
Now this quilt hangs in my room and I use it as a backdrop for quite a lot of my videos! (Just like this one!)
And like last year, I entered a mini quilt into the Sydney Quilt Show during July. Although it didn’t receive any ribbons, I’m still chuffed to bits that my little quilt was invited to hang in an enormous room filled with many, many, many beautiful quilts!
Thirdly: Projects!
As I began brainstorming and planning the things I would write for this section, a pang of guilt was slowly rising inside of me. I felt that I really hadn’t ‘made’ or ‘done’ very much sewing/patchwork/quilting/crafting wise to really reflect and chat about.
However, after having a quick squizz through all of the post I’ve published over the last year, so many little projects kept popping up with me exclaiming out loud, ‘Oh yeah! I totally forgot about that one!’ Hence highlighting the reason why I chose to begin writing a blog! My mind really is like a sieve sometimes!
So here are some highlights of the creative things I’ve began and/or finished over the past 12 months.
Halloween Crafts: This is the first time I’ve ever got into Halloween crafting. Halloween isn’t widely celebrated in Australia but it’s very slowly (some may say very quickly!) catching on!
Dressmaking: I’ve made a few little things in the past (a coat, aprons, dresses) but over the last month or so I’ve really enjoyed the process of making simple t-shirts through preparing the pattern, pinning it down, cutting it out and then constructing a 2D material into a 3D wearable garment.
Plus, there’s an element of pride in wearing something that you’ve made and then having others compliment you on how well it looks! (Modest much!?)
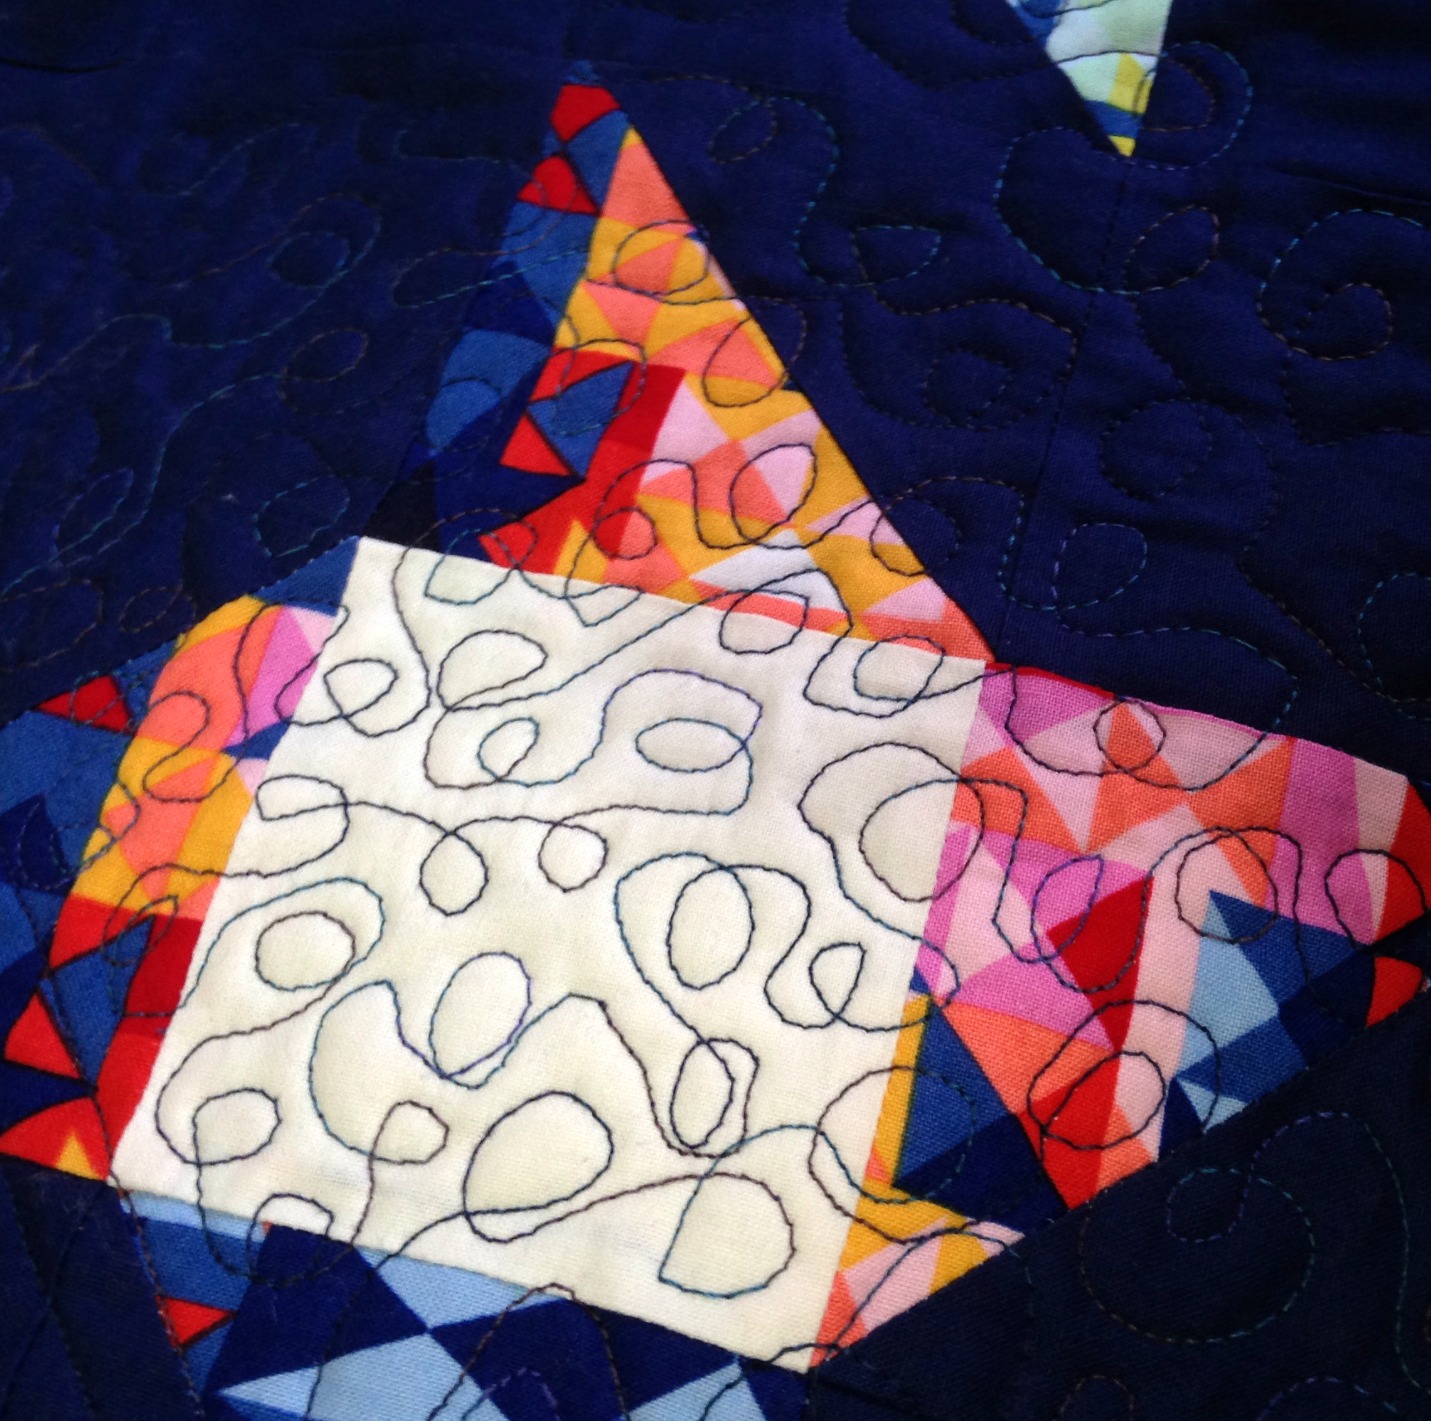
Struggling with WIPs: At the start of the year, I made a pledge to try and finish all of my WIPs. It’s safe to say that promise went out the window two weeks in! To add to the pile is a Plus Block Quilt and my ‘Diamonds in the Sky’ Quilt that I totally ruined with some ridiculous experimental quilting!!!
Oh! It’s so horrible!!
(I haven’t the heart or patience to unpick this yet! I’m still in mourning!)
It’s still listed, waiting for the perfect buyer. Do you know anyone having a little baby girl soon? Perhaps this is what you’ve been looking for! (A little bit of promotion on my blog never hurt anyone, right?)
Another quilt that is currently under way is one I’m making for my niece who is due to enter our family in early December!
And here’s a little bit of trivia for you: one of the blocks in this quilt is the very one I made in my Bear Paw Block tutorial! Yep!
Embroideries: I’ve stitched a few more embroideries including this one which I made into video!
Little Purses: These little guys are always my best seller when I list them up onto my madeit store. They’re super easy to make and the design possibilities are endless!
I have quite a few listed at the moment if you’re interested… Unfortunately, they’re only available for Australian residents. Postage is insanely pricey for any international sales. You’ll find the postage will be more expensive than the purse itself!
Fourthly: Goals for the coming year.
I think one of the main things I want to achieve over the next 12 months is a steady growth in my sewing skills, gain confidence when it comes to teaching and filming for my YT channel as well as to take on opportunities that are given to me to develop my creativity and voice in the world.
There are also some big quilts I want to attempt too!
One being a hand-applique based quilt that will feature this design…
Sampling the planned design!
(I’m thinking of entering this into the 2015 Sydney Royal Easter Show if I finish it on time!)
I’ve always, always, always admired these quilts. The technical skills and patience to make this is incredible to think of! But, I feel that I could tackle a quilt of this magnitude and do a good job of it too! (Famous last words??)
So there are two quilts with some pretty intense types of skills that I’ll need to teach myself and hone but I’m ready for the challenge and ready for downfall! (If that happens, of course!)
So there is the year that’s past. Looking back over previous posts from this year, I’ve open up a lot about myself to you all (check this post out), have shared where I get my inspiration from, have studied a heck of a lot, re-joined the retail working-class and shared the lovely things I have in my life.
But lastly, to all of you who follow my blog in one way or another, I would like to thank you for your most wonderful support, for your always kind words of encouragement and for simply ‘liking’ my posts!
Every little bit of interaction from you (whether you’re just browsing or seriously analysing my every word) brings me immense pleasure and happiness! I truly am lucky to have like-minded people interested in the things I write, make and photograph.
About this title:I had a plan today to sit down and dedicate some time to my blog (I know, it’s been a while…). But at the same time, my TV decided to air a Friends marathon… even though I’ve seen all of the episodes like a gazillion times!
So due to a not-to-be-missed marathon and the need to get some blog posts written, I’m currently sitting on my couch binge watching Friends and typing this post in the ‘notes’ app on my iPad. The title of my note reads ‘New Note’ and I liked it.
Hence the title: A New Note….
Yes.
Well, anyway…
As much as this blog has been neglected over the past couple weeks, my sewing and patchwork adventures haven’t!
There’s just so much to catch you up on it’s hard to know where to start…
Hmmm…. How about here…
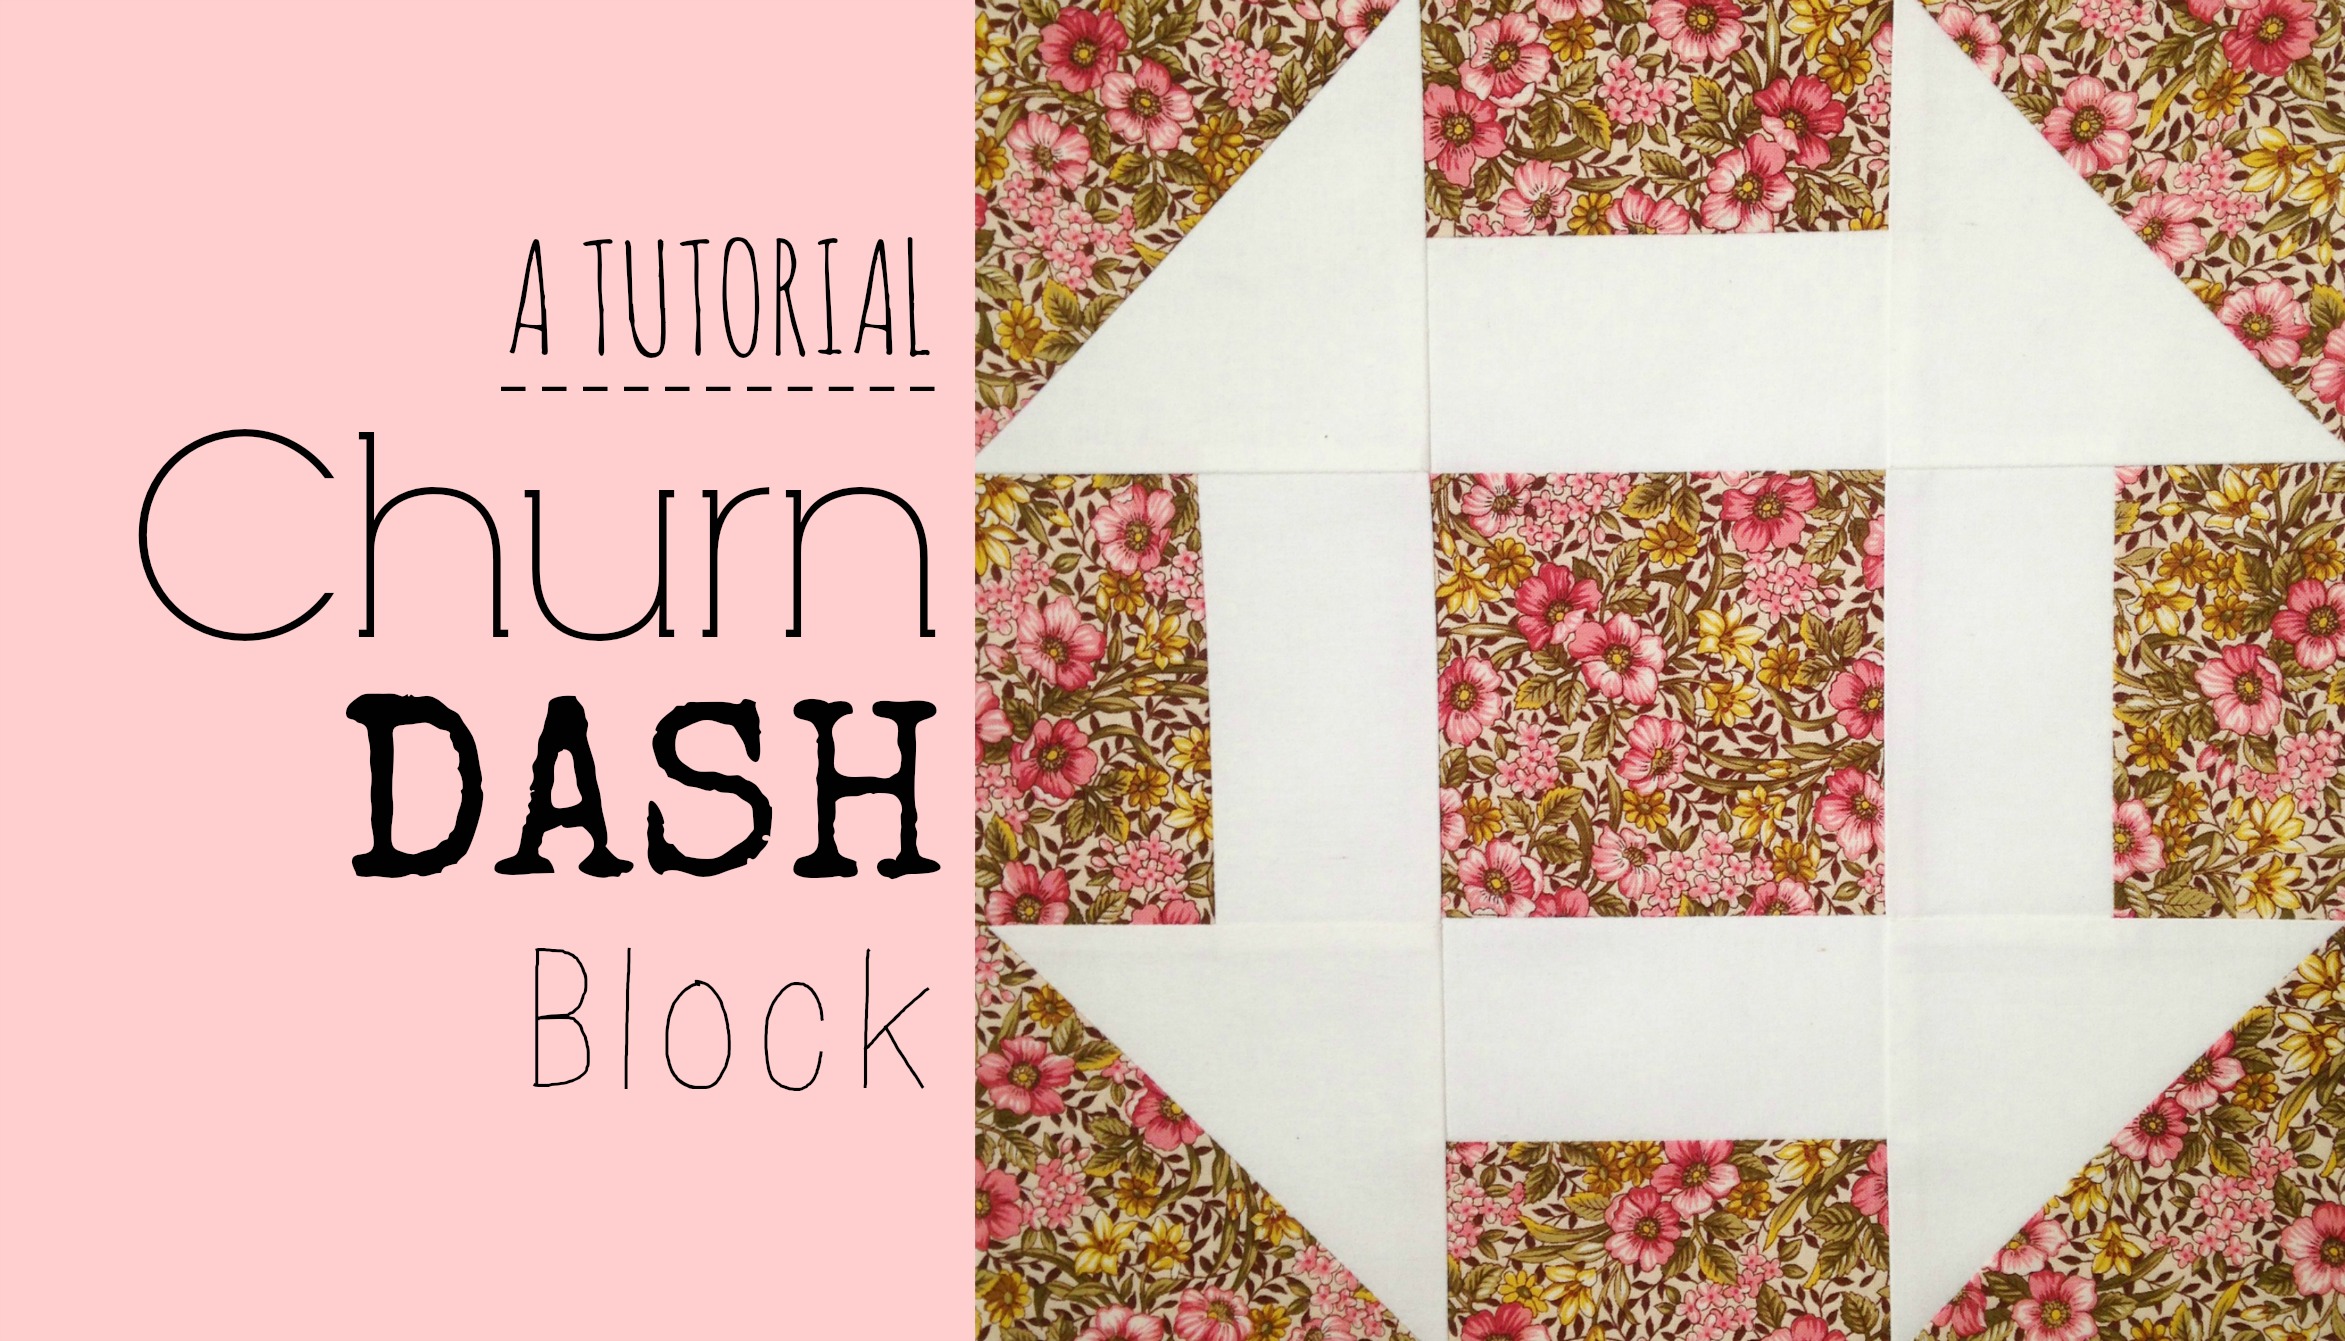
My last post was all about my latest Quilt Block Video Tutorial – the Churn Dash Block!
Simple, quick and effective! Perfect for beginners!
Video Thumbnail
I really think you should check it out! (But only if you want to, of course! No pressure!)
Next!
One afternoon, about a week ago, I was bitten by the ‘Cutting Bug’.
Da-Da-Daaaa!! *imagine sinister movie music*
You know the one I’m talking about; where you’re suddenly taken over with an urge to start cutting up some fabric and begin piecing together a quilt just for the heck of it.
I’ve always had a craving to do one of those simple Cross Quilts where they sort of all joined up together…
Find links to each of these quilts at the end of this post!
So in about an hour, I had cut 100 5inch squares from random fabrics that I thought looked good together and hey-presto, a new quilt top is currently (albeit slowly) being pieced together!
Once finished, I think it’ll become a really sweet lap quilt – suited for watching Friends marathons and writing blog posts on the couch! Te-He!
Another sewing adventure happened this past weekend when I helped host a Quilting Expo Day at my local Spotlight store. It was a fun day, as usual, where I got to teach, demonstrate, chat, sew, laugh, eat and be inspired by others.
I made simple blocks and projects that featured basic patchwork elements like cutting and piecing, making HSTs, pressing and chatting about all the different tools that can make the experience a whole lot easier (and fun!). I also had the opportunity to make and swoon over this Piccadilly DS Quilts Fabric range! Oh my!!
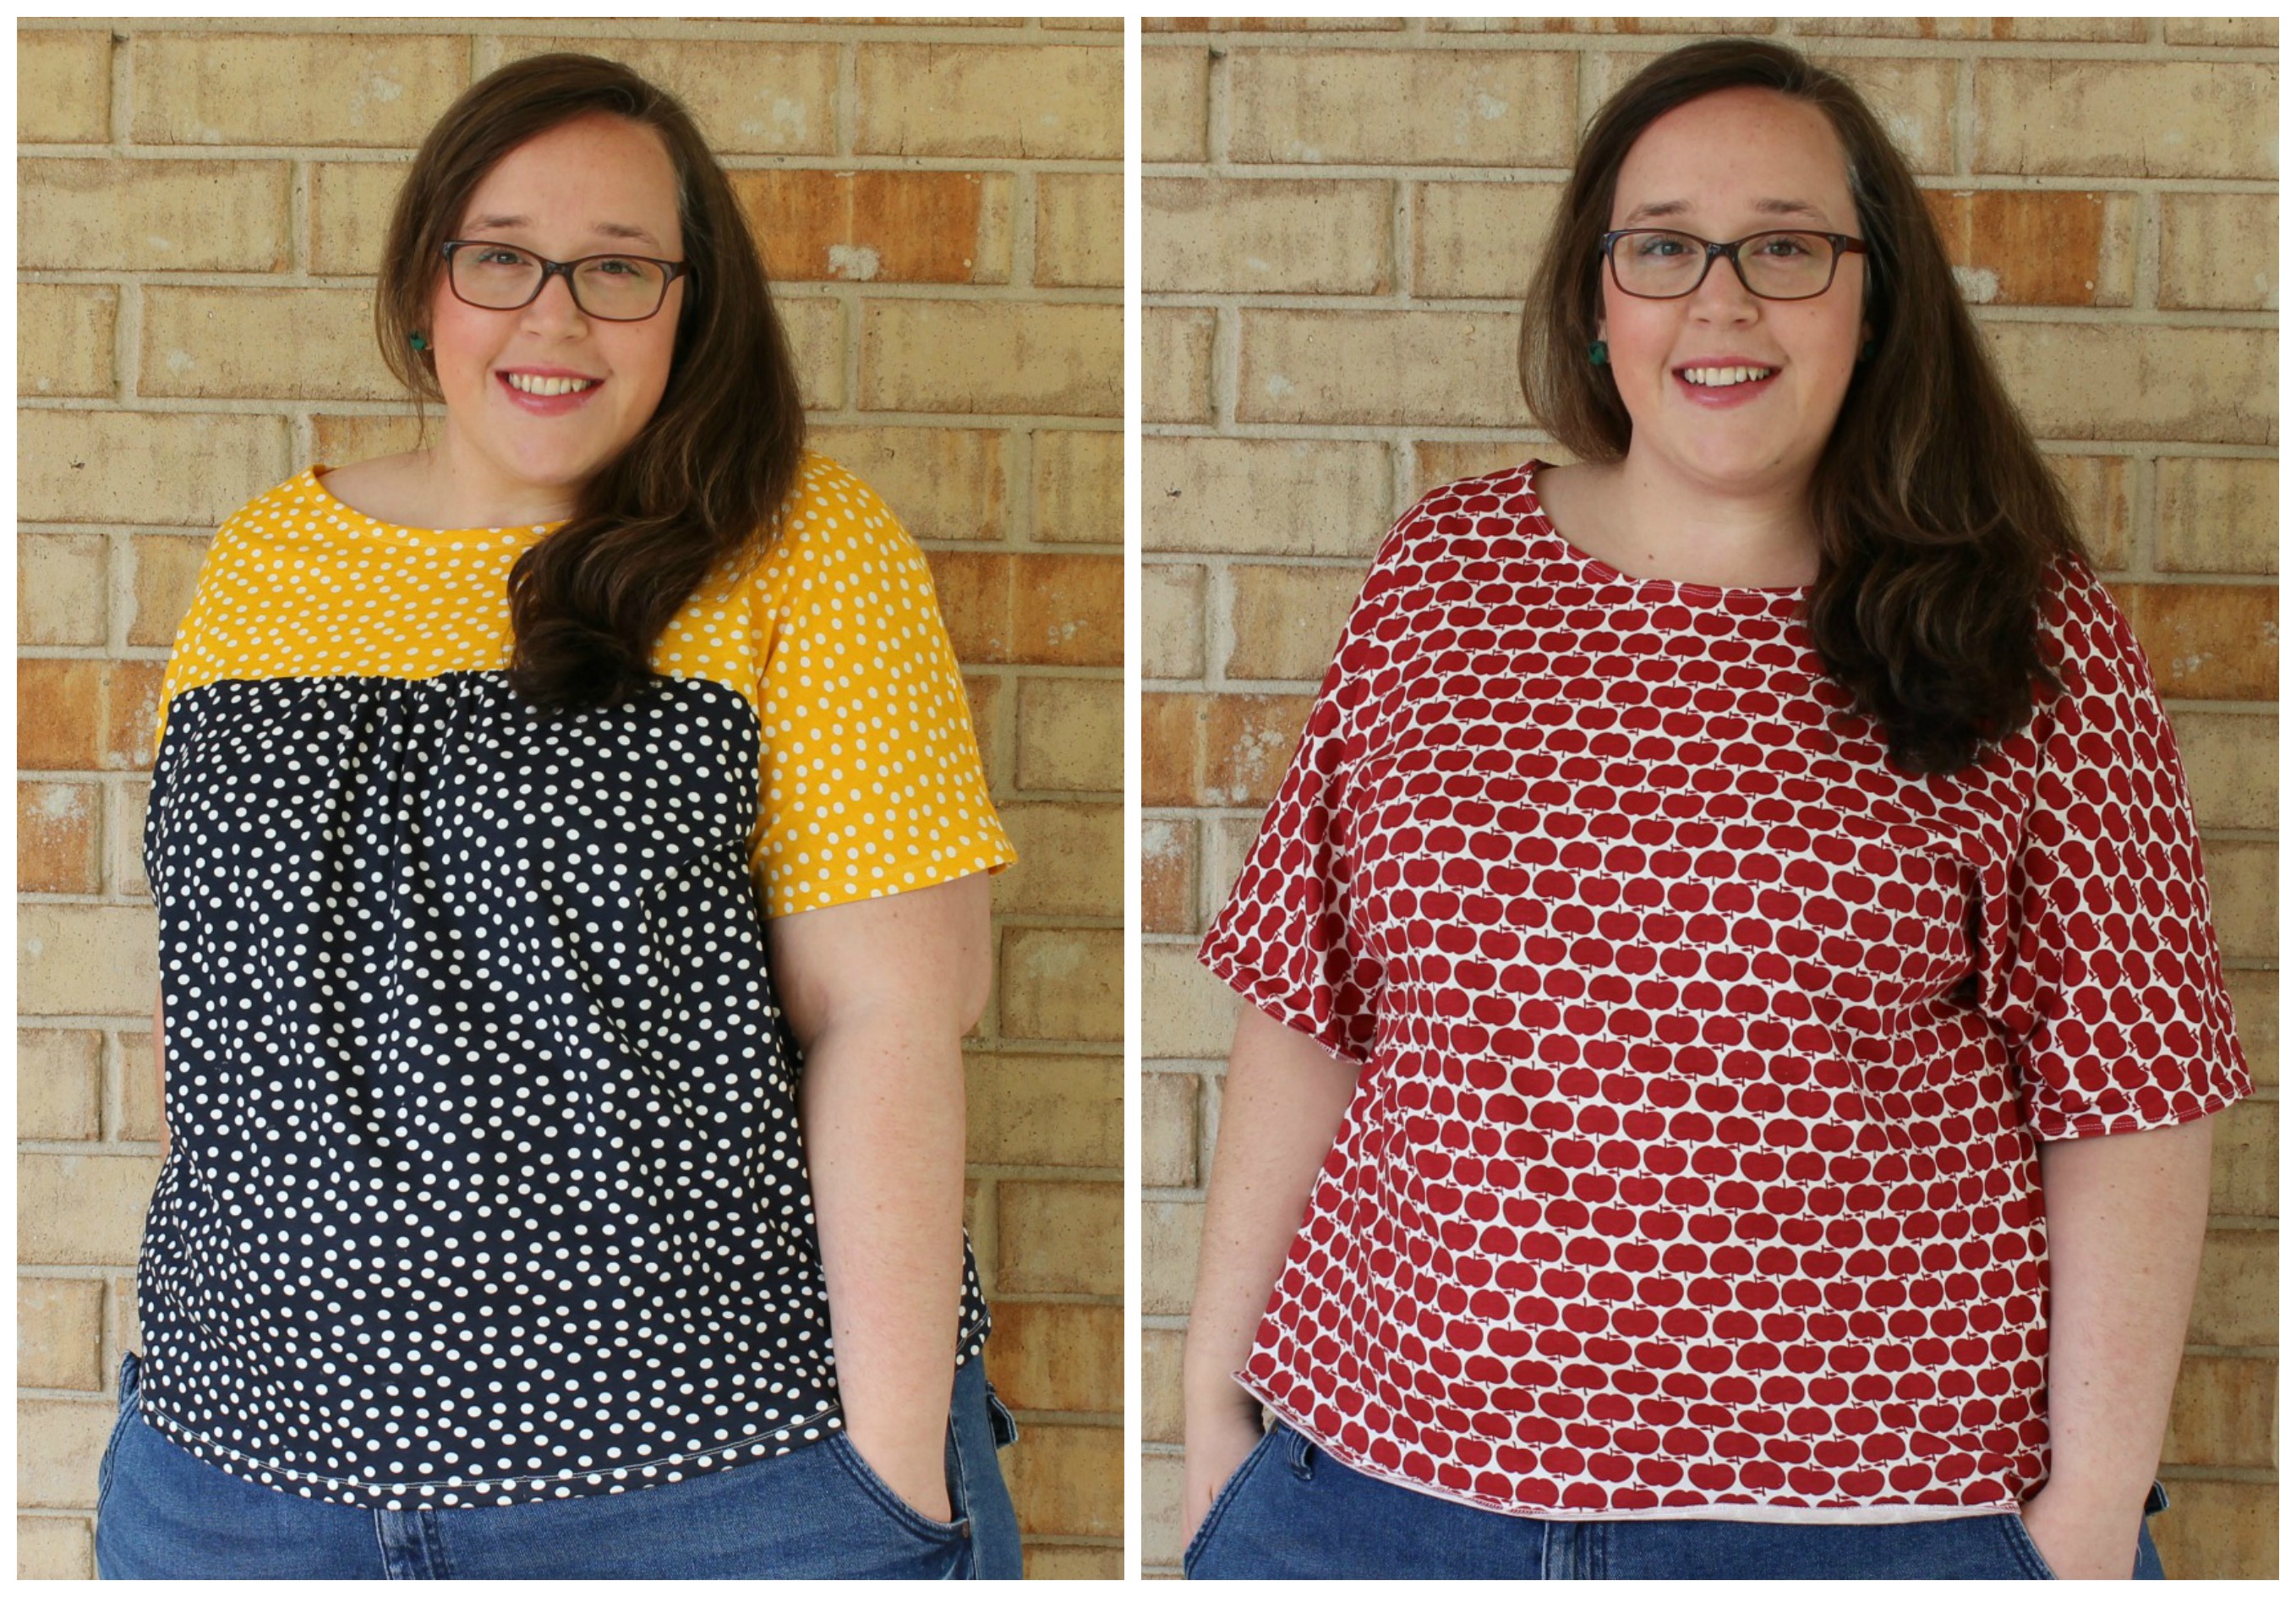
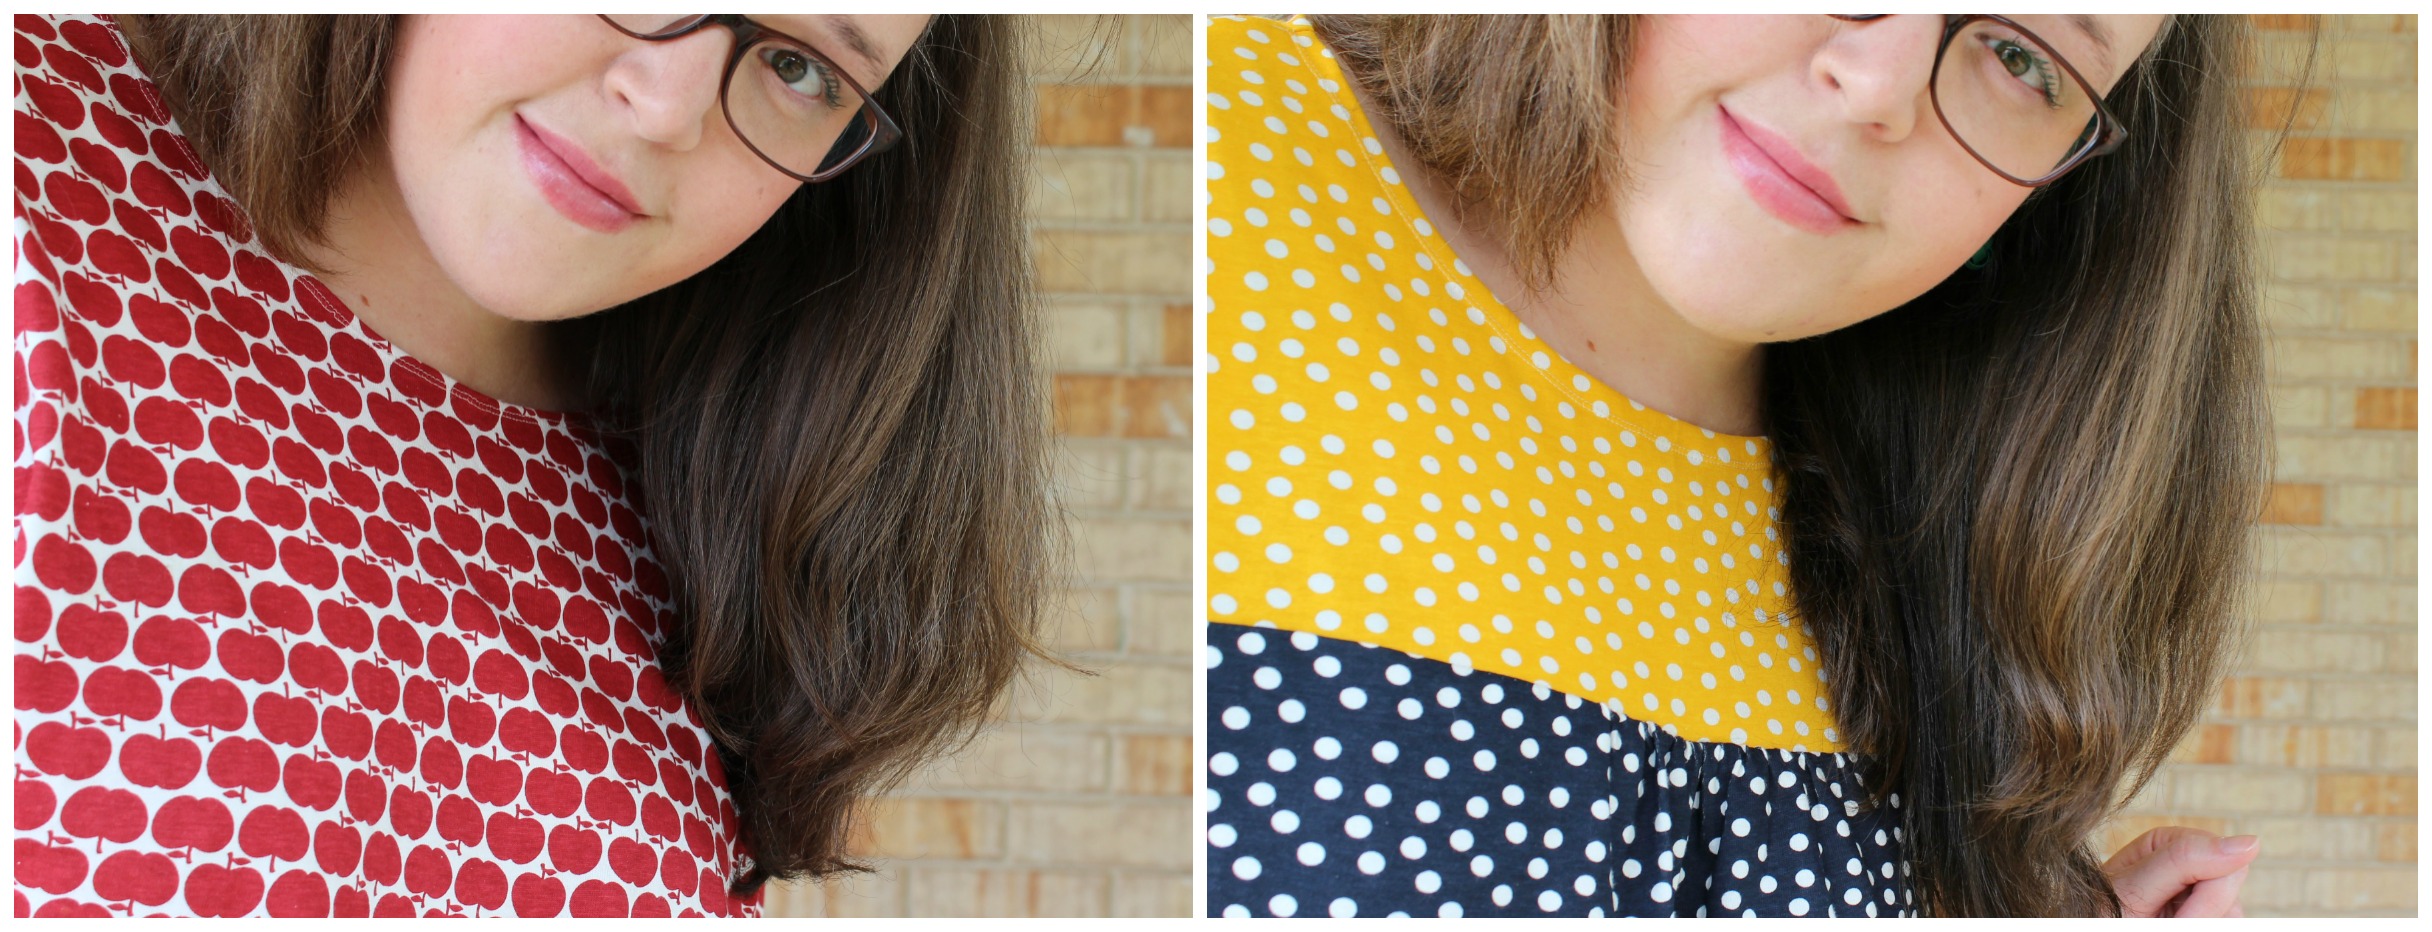
And lastly, over the past few days I’ve been dabbling in a spot of dressmaking!
#quilterturneddressmaker
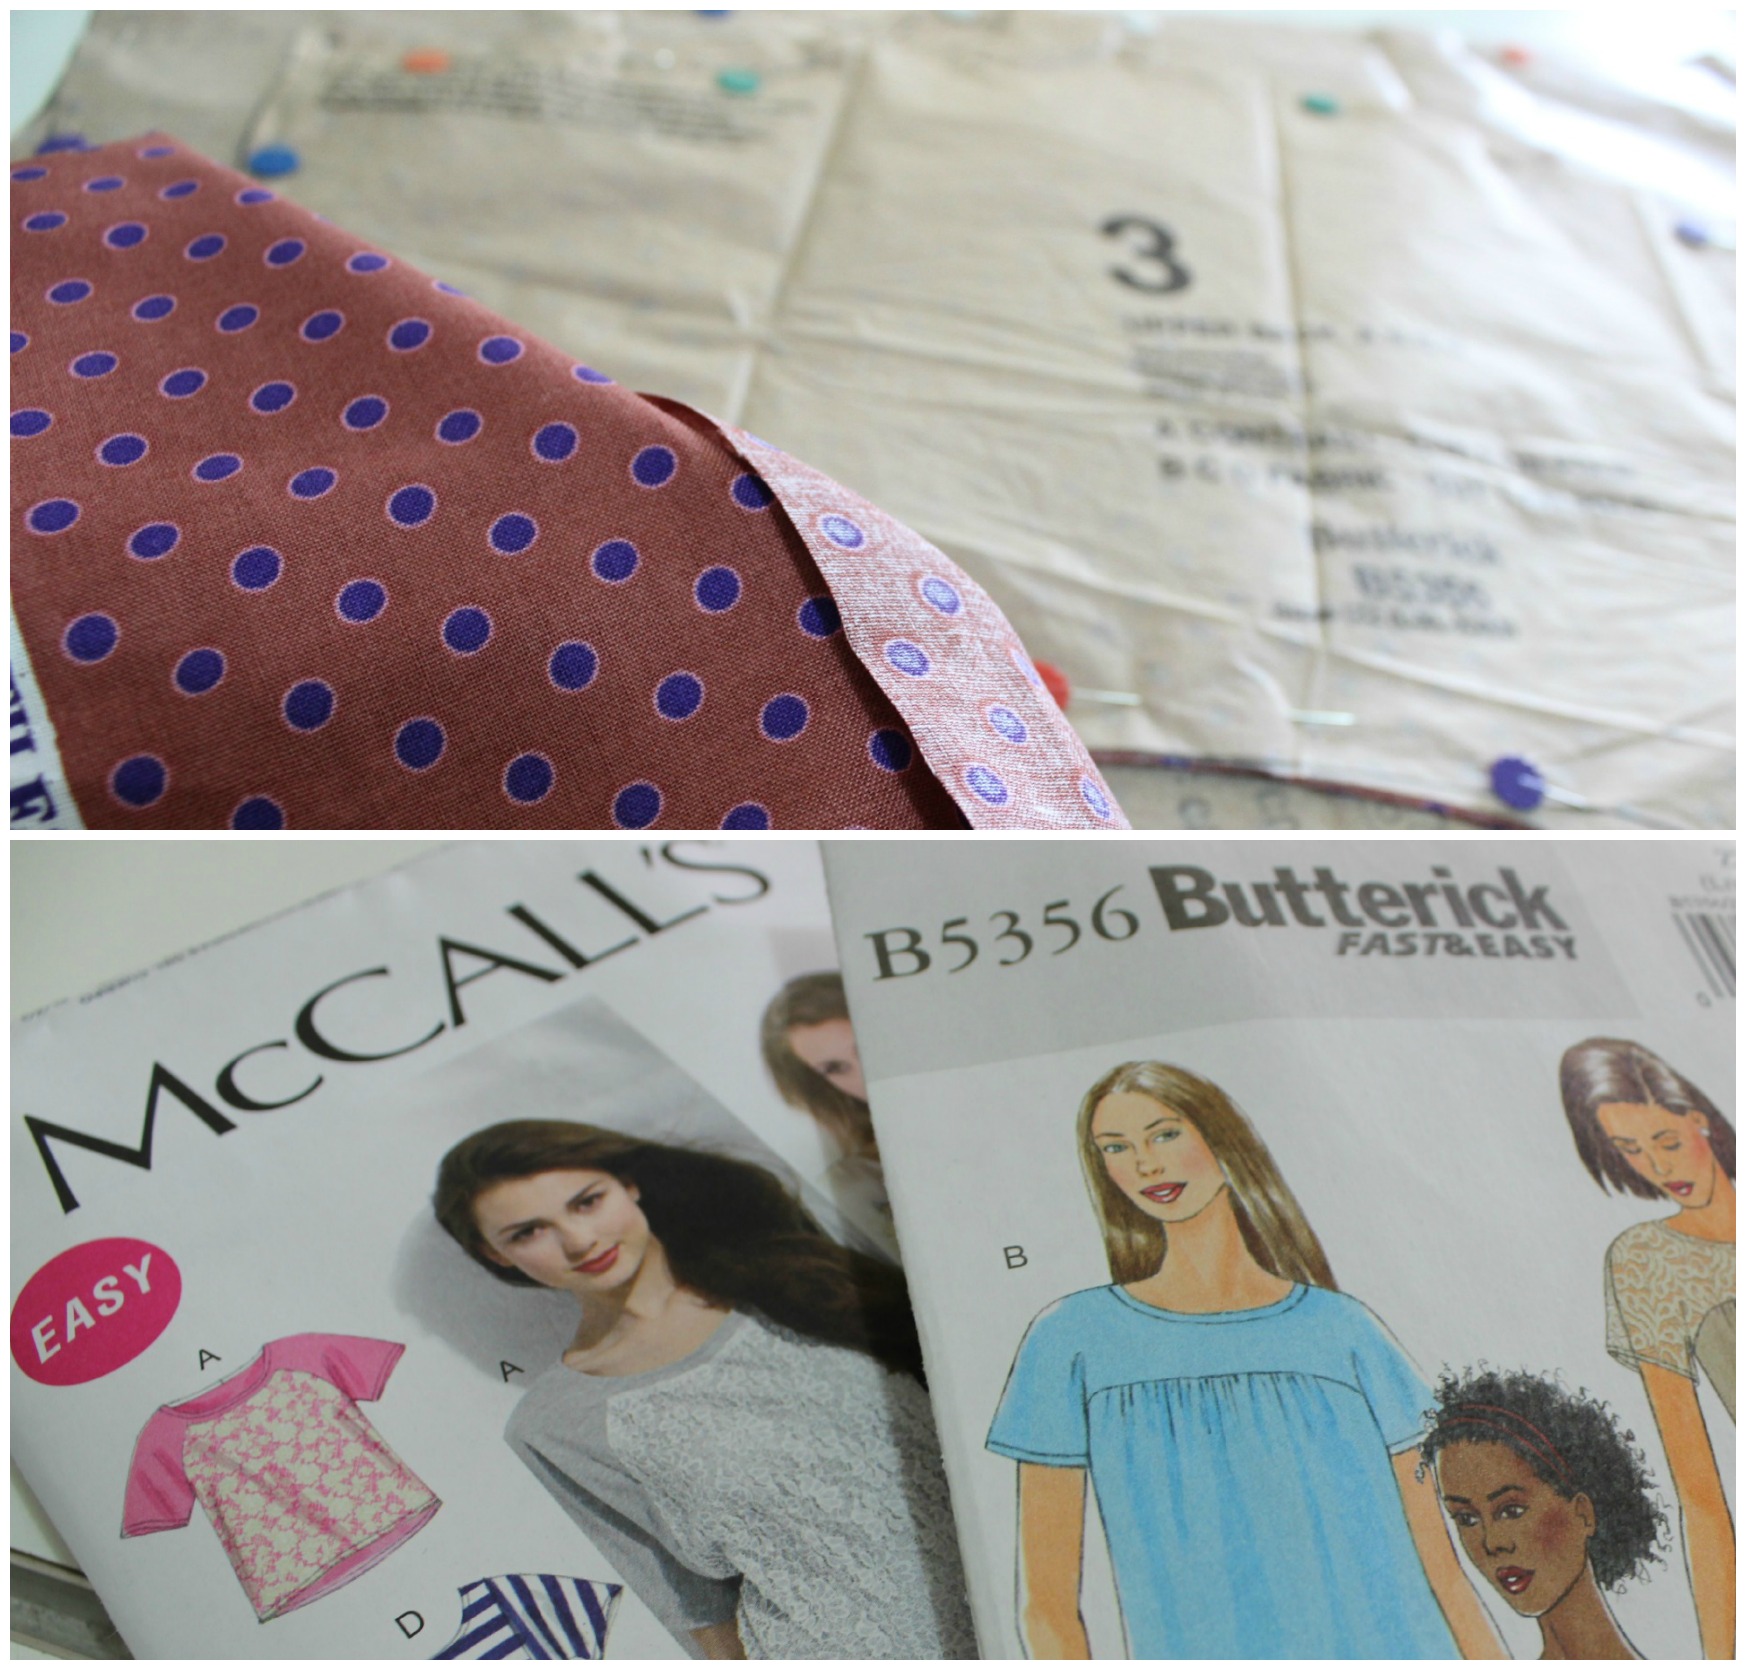
I’ve been searching for a while for some basic t-shirt patterns and was able to find some perfect ones while I was at Spotlight on the weekend! Whoo!
So I bought some fun printed cotton knit fabrics and got going the next day!
I’m so happy with how they’ve turned out!
So happy that I’ve actually cut out my third pattern, but instead I’m using a lovely cotton weave spotty fabric that will make (I think) a really beautiful blouse.
In recent Pinterest binges, I’ve happily come across some beautifully designed and pieced quilts featuring the Churn Dash block.
Links to these quilts are at the end of this post.
Then by crazy chance I came across a simple pattern on how to make it within all of my lose-leaf patterns that I’ve collected over the years.
So duh! I just had to share it with you in tutorial form!
It really is ridiculous just how easy this block is construct! Before you know it, it’s done!
The other thing I love about this block is how easy it is change up….
Simply replace the centre square with the opposite fabric and then turn all of the blocks’ units 180degrees and you have a totally different looking block! Love it!!
I’m also kinda in love with the floral fabrics I’ve used. The patterns remind me a lot of the old tablecloths, dresses and skirts my mum inherited from her aunties! Again, love it! So adorably kitsch and retro!
Let me know if you’re planning on giving this block a go! I would absolutely love to see how you interpret this block and see the types of fabrics you use.
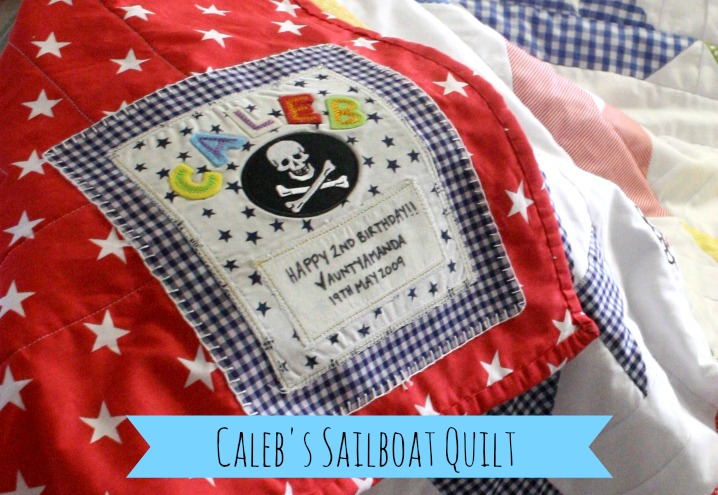
Quilt Labels. They’re one of those things you usually forget all about during the glorious triumphant moment of finishing a quilt!
By the time you’ve conquered sewing down that last part of the binding, you’re thinking, ‘Yes! That’s it! It’s finally finished!!’ No more hand sewing! No more schlepping this heavy quilt all over the house.
But no.
There’s still one last little bit of sewing that needs to be done. And it’s one of the most important elements you’ll add to the quilt.
The Label.
Quilt Labels are like the heart and soul of a quilt. They list when the quilt was made or finished, who it was made by, who it was made for, it may list the name of the quilt and/or display a special message or saying about the quilt or be directed to the person who will be receiving the quilt.
The creative possibilities of making quilt labels are literally endless. There are no boundaries or rules to what they should look like and there are no wrongs or rights to how they should be attached to a quilt.
The way that you want to make and attach a quilt label is entirely up to you!
But in any case, here are just a few ideas that may help…
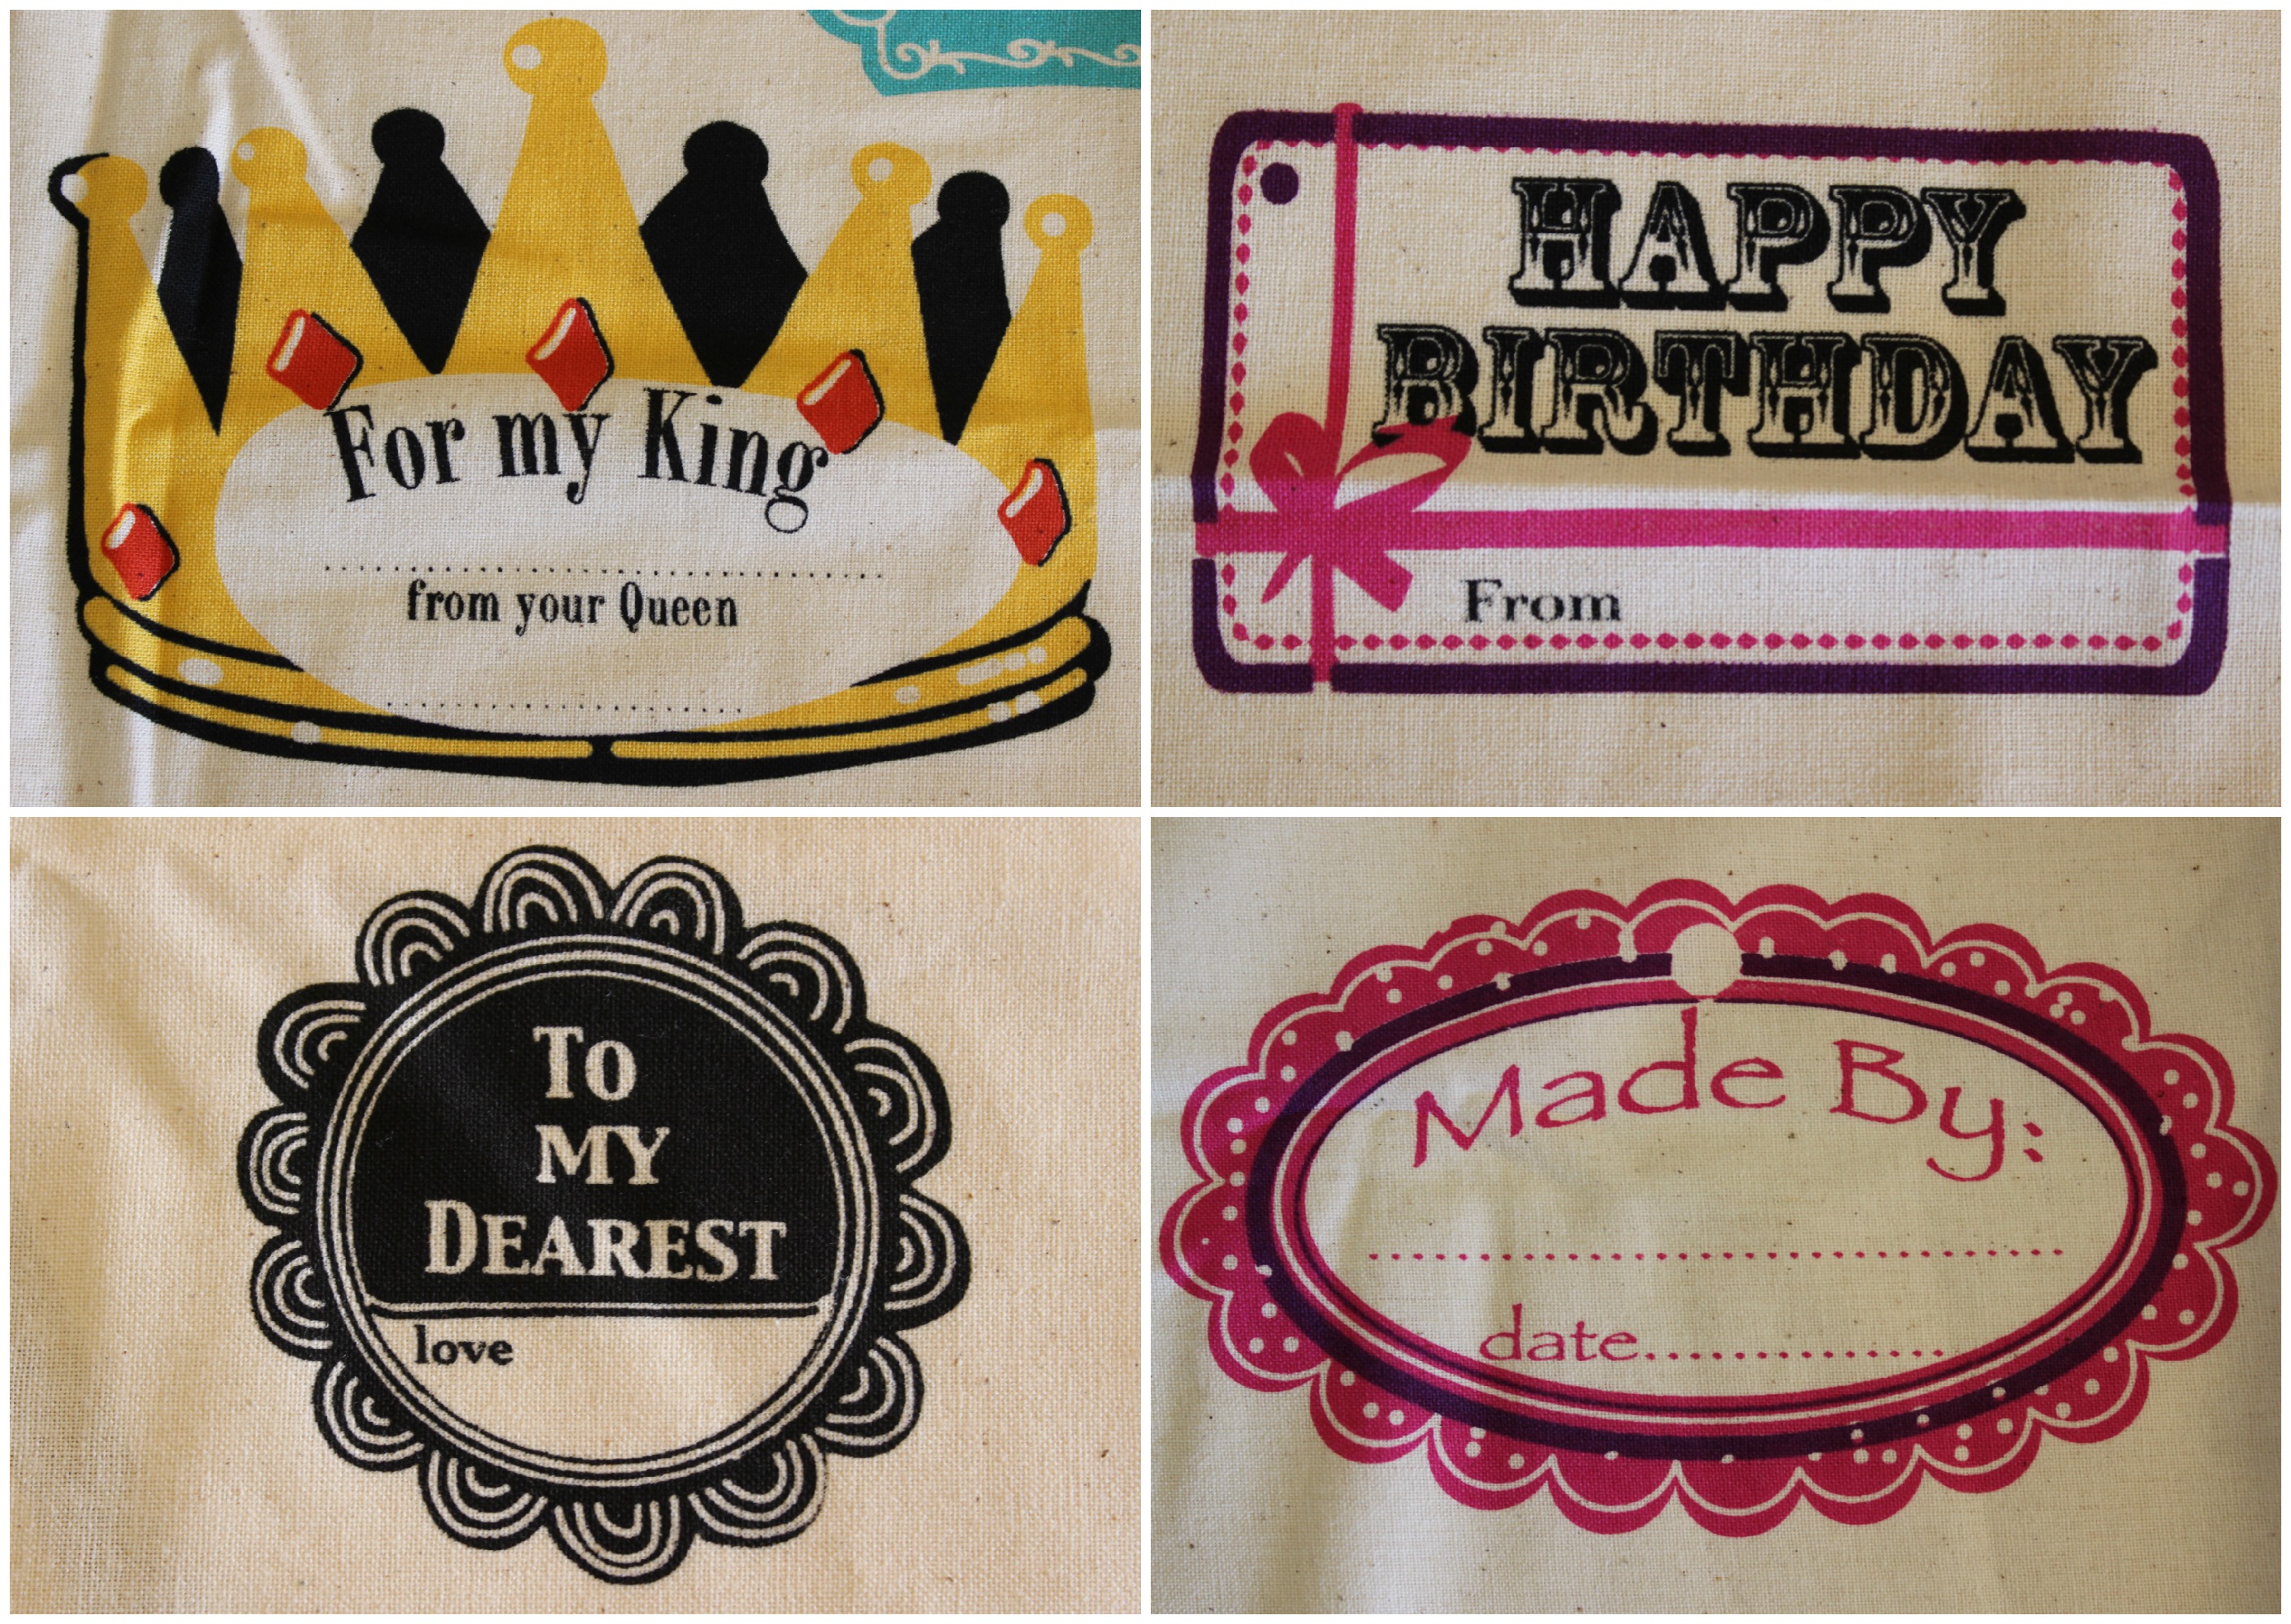
#one: Quilt Label Panels
These panels are a great idea for those of you lack time or confidence in making a label from scratch.
Labels like these tend to be personal and direct with themes like ‘Made by Grandma’ or ‘First Baby Quilt’ or ‘Congratulations’ etc.
Most quilting, fabric or haberdashery stores should sell similar type label panels that you can buy and stash away for a rainy day.
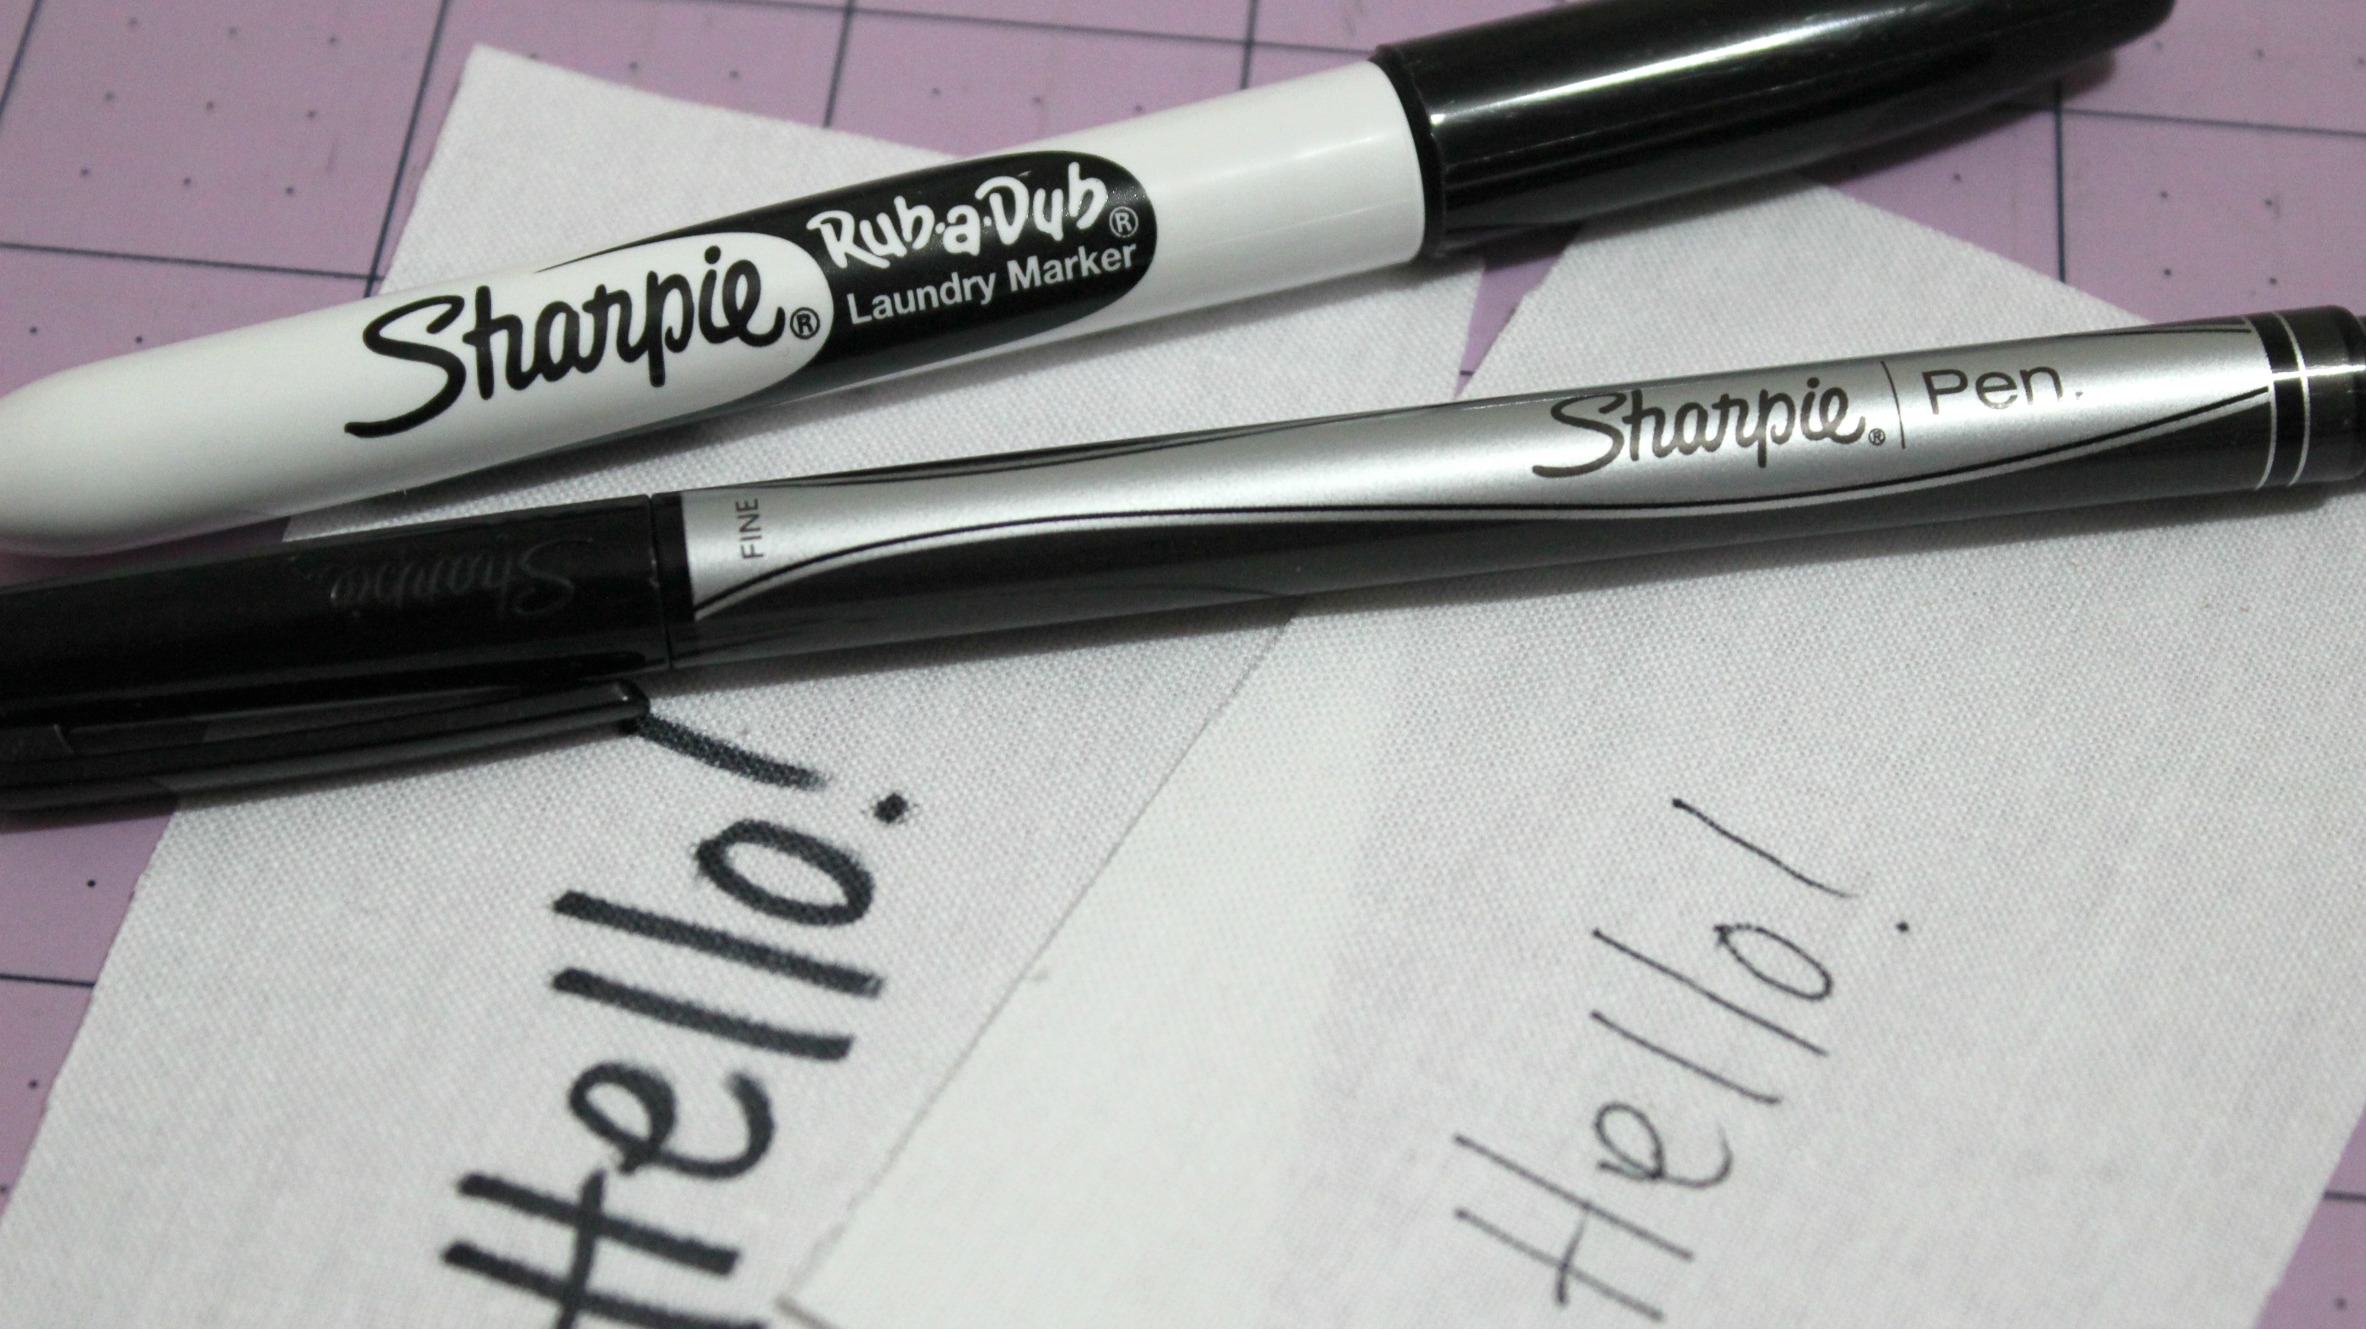
When it comes to writing on these fabric labels, I usually like to use Sharpie pens.
The two that I tend to use the most are the Sharpie Rub-a-Dub Laundry Marker (with a thicker type nib) and a Sharpie Fine Point Pen – both in black.
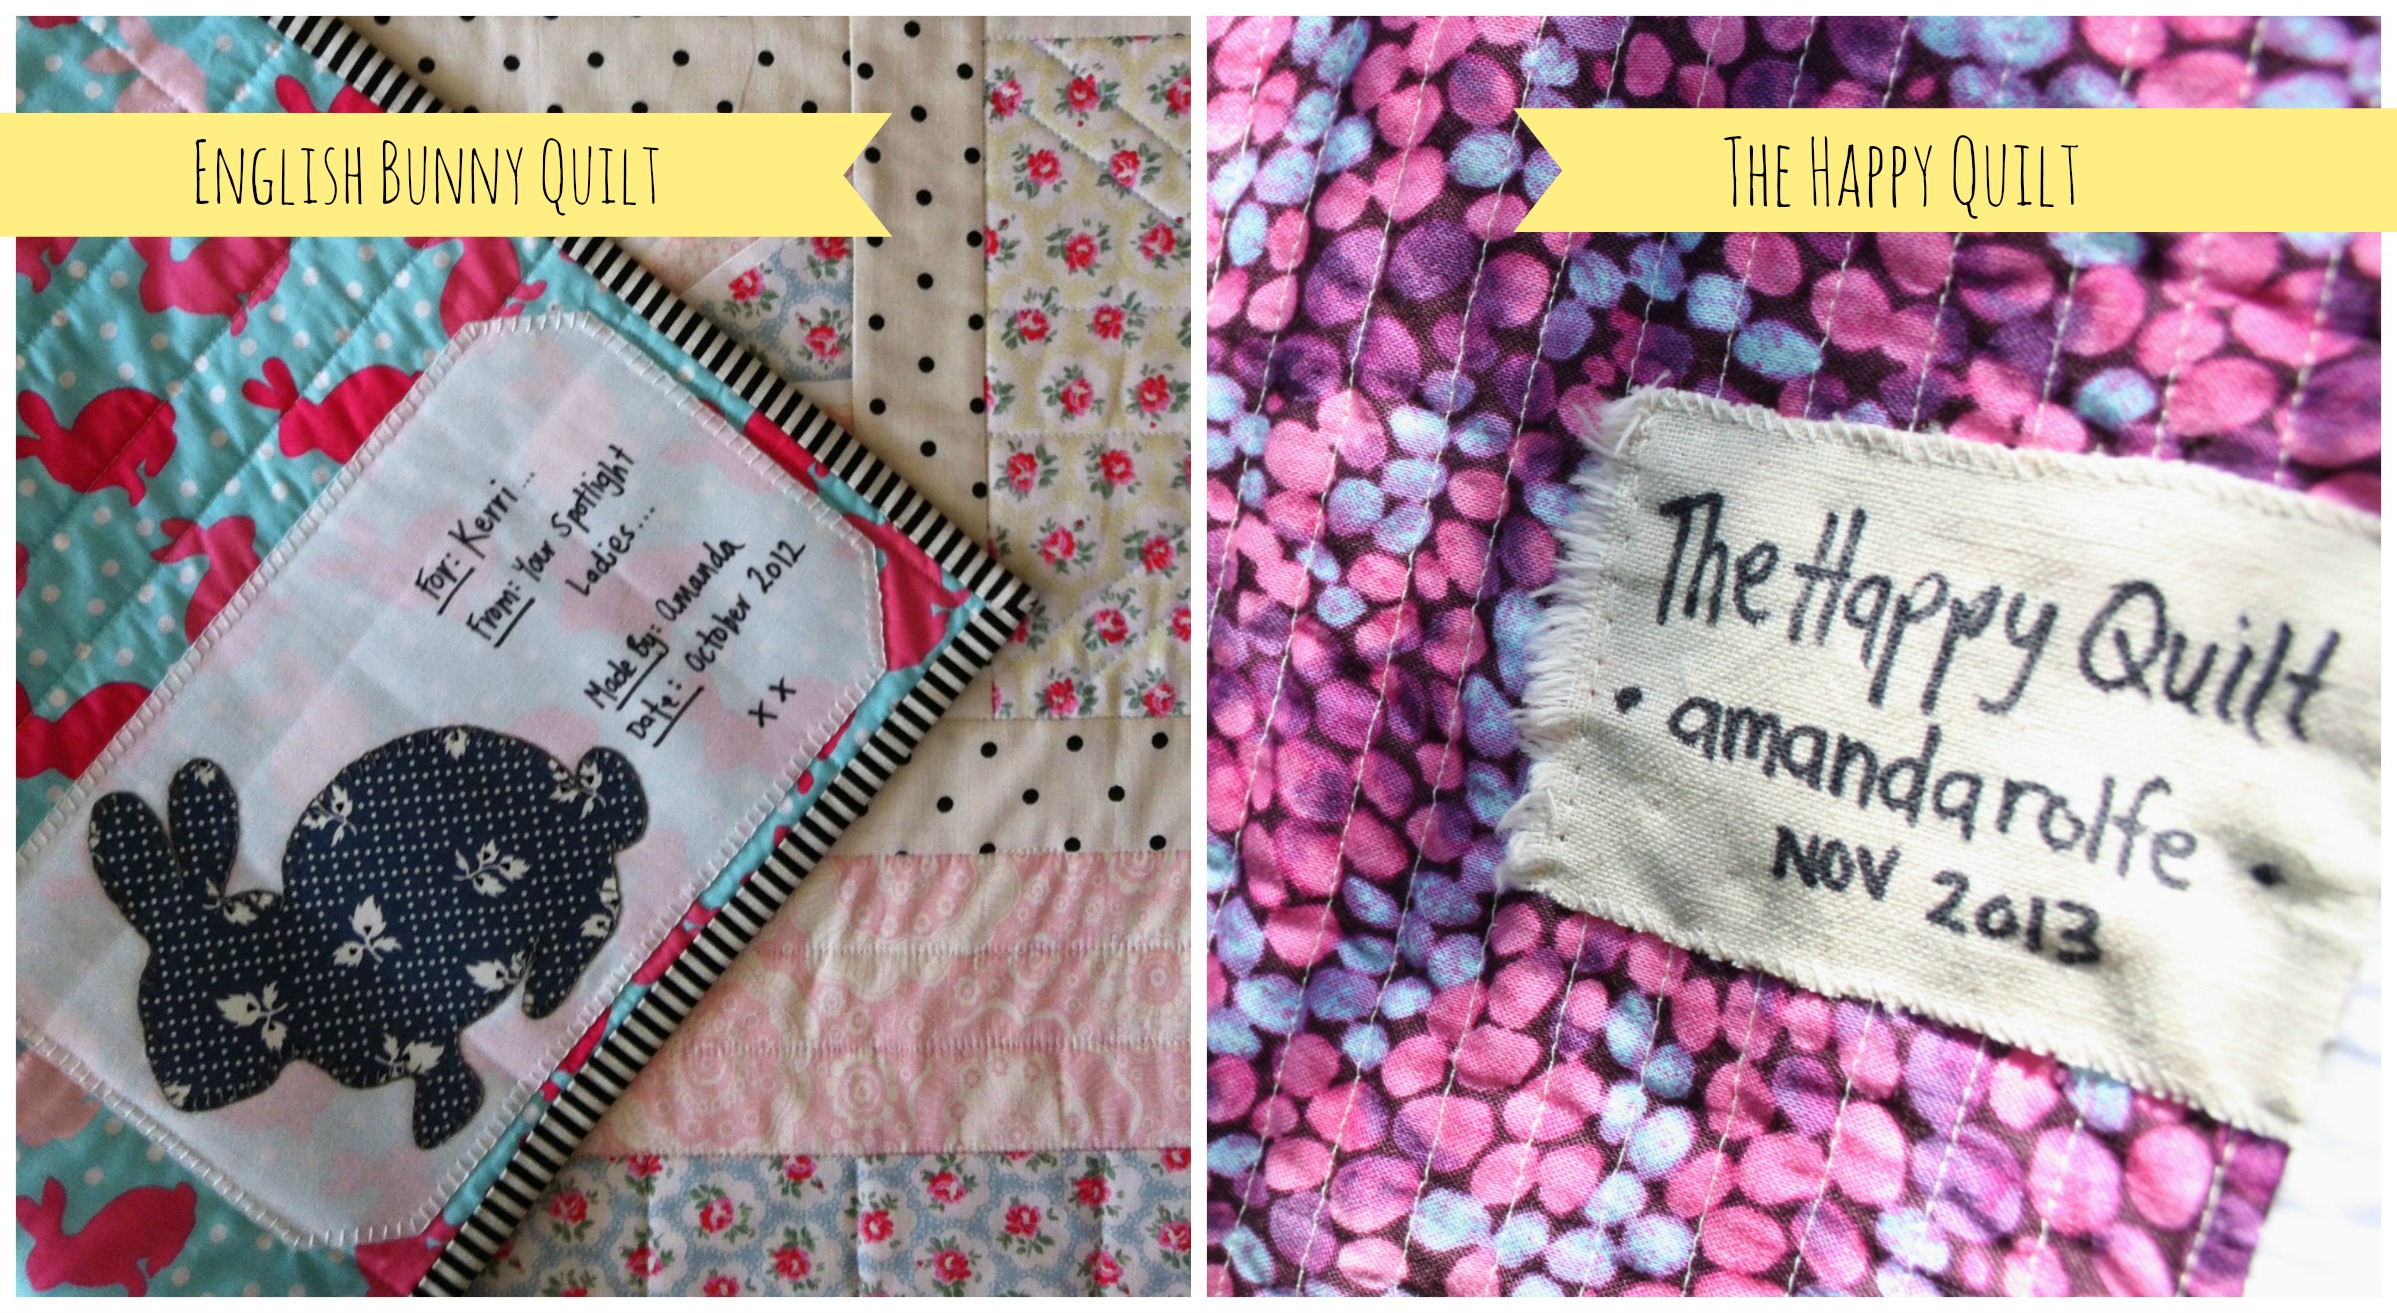
#two: Hand Written Labels
Sometimes, often than not, I make my own labels.
For the base of the label I’ll cut out an adequate size of 100% Cotton Homespun (in a practical colour) and write, using one of my Sharpie pens, all of the information that I feel is needed to accompany the quilt.
Personally, I feel that this particular technique is a little boring and uncreative. Recently, most of my labels have been created using the next idea…
#three: Hand Embroidered Labels
I love handmade embroidered labels. There’s something magically personal and sweet about attaching a little label that has been meticulously stitched together. An embroidered label just takes the quilt to a whole other level of being specially made for a particular reason or a very special person!
Amelia’s Baby Quilt Label
Just like the hand written labels, I use a foundation of Cotton Homespun (usually in white or cream) and gently sketch in the details of what I want to embroider in lead pencil. Then using DMC threads/floss in matching or contrasting colours to the quilts’ theme and then carefully stitch the label into life.
#four: Fancy Handmade Labels
If you have any left over blocks or elements that didn’t quite make the front of the quilt, you can very easily turn them into the centrepiece of the quilt label!
I made a Dresden Plate that was to be attached to the front of the wall-hanging (I sort of had a blooming flower effect idea rolling through my head at the time…). The idea was a complete flop but I didn’t want to waste the time I had put into making the Plate. So instead had a spark of creative genius and made it into the label of the quilt!
#five: Print Your Own on the Computer
This particular type of label I’ve never made, so can’t quite comment on it in too much detail.
But if I were to make a quilt label on the computer I’d possibly use a Photoshop/Illustrator type of software (or an online editing site like PicMonkey) to design the type of label I wanted. I would save it as a particular size with the right ppi (pixels per inch) and then print it onto special A4 printable fabrics that I’ve seen at office supplies stores and fabric/quilting stores. They usually cost a pretty penny which is why I’ve never really given it a go.
Now, there might be one question you’re all asking me right now and that is, ‘How do I attach the label to the quilt?!’
Ahh yes, good question!
Well, the method I like to use is appliqué.
I use a product called HeatnBond Lite that is a lightweight iron-on adhesive that can be sewn through either by hand or using a sewing machine – perfect for any quilter’s appliqueing needs!
I cut the same size amount of that of the label then iron (using a hot dry heat) the shinny side of the paper to the back of the label, wait for it too cool, peel the paper backing away from the label and then iron the label front side up to one of the bottom corners of quilt (usually the left).
To secure the edges, I then carefully stitch a blanket stitch (or buttonhole stitch) around the edges ensuring that I don’t bring the stitch through the top of the quilt.
And ta-dah!! A Quilt Label is completed!
Hopefully I’ve answered a few questions that people have sent through to me in recent weeks and have given some inspiration to those of you have mental-blanks when it comes to these types of things! (Don’t worry, we’ve all been there!)
If you want to see me chat a bit more about Quilt Labels, check out this video I posted on YouTube!
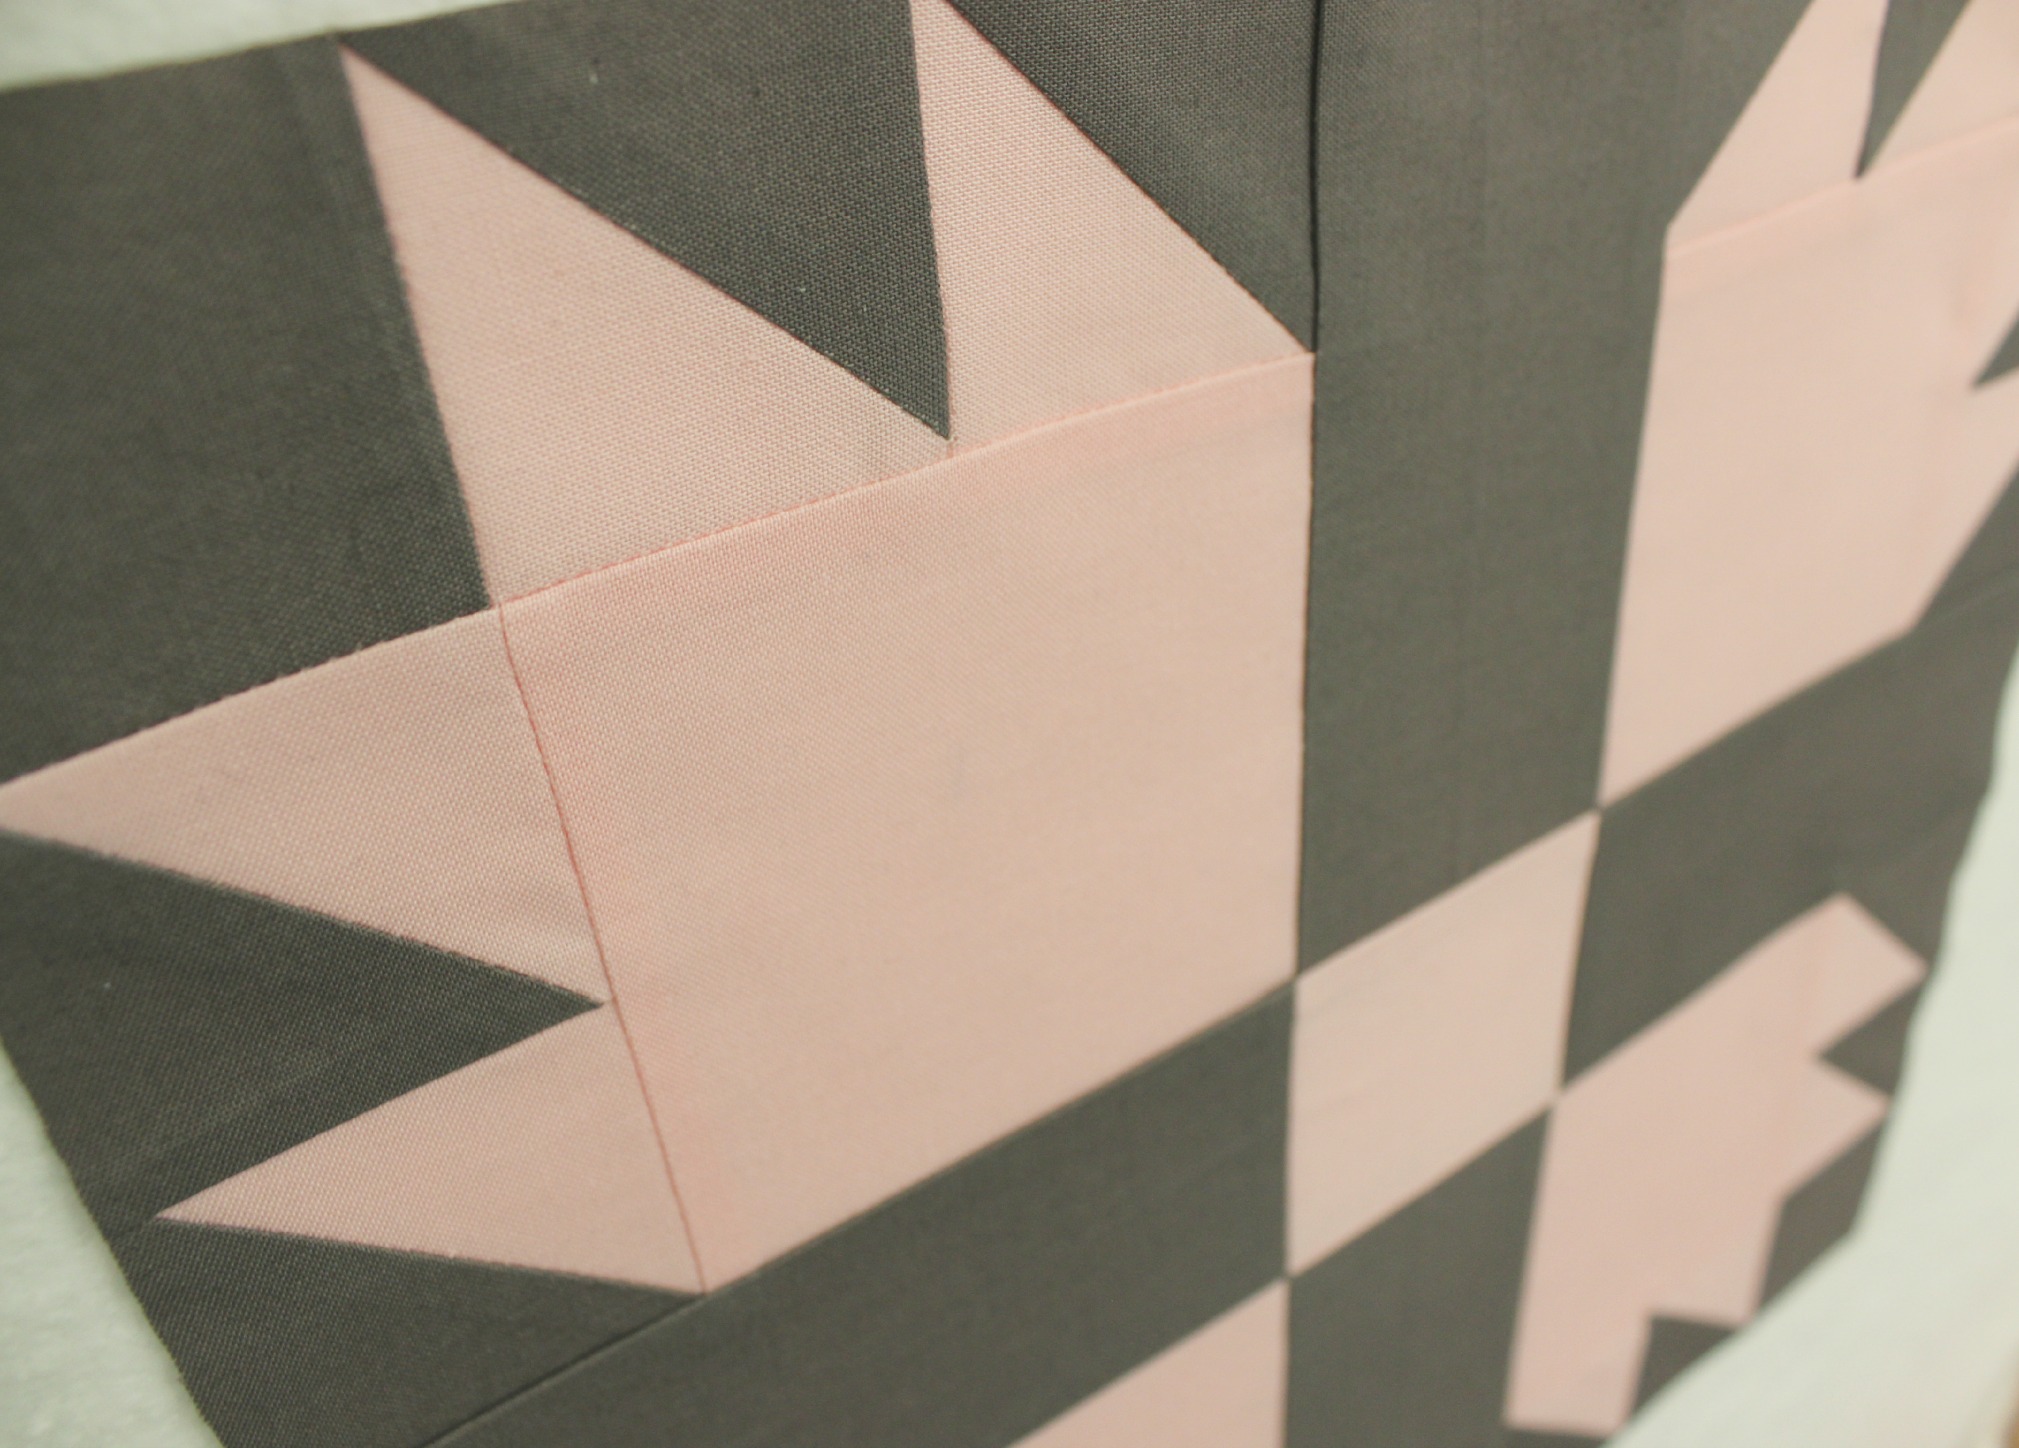
I’ve always had a bit of a soft spot for this block…
Perhaps it’s because it was one of the first ‘traditional’ blocks I ever constructed. (And come to think of it, I’m pretty sure it was one of the first times I ever made half square triangles!)
So, in a bid to mix the traditional with the modern (one of the things I love best to do in my quilting practice), I hovered over to my quilt book library and dug out this book. Full of simple and oh-so-delightful patchwork blocks, I found the one that I wanted and adapted it for this little tutorial.
Next came finding the right fabrics that would help make the unique design of the block stand out. In the end, I chose to construct the block using two solids – pink and grey – both so scrumptiously modern! LOVE IT!!
(Looking for the measurement & cutting instructions? Click of the PDF link at the start of the post and there they’ll be!)
Trailing off on a side note: some of you might not know that this December, a brand new little baby girl will be arriving in our family! No, it’s not me – I’m not pregnant… But my brother and sister in-law are expecting their fifth child after having four glorious boys! So this means, I can finally get into my pink cutesy fabrics and make something so girly that you’ll become so clucky you’ll want to have your own little baby girl!!
😀
But anyway, I’ve casually been on the lookout for a quilt design to make for my new niece and I’m quite sure I’ve found it in this little tutorial!
I am so simply in love with these two colours together that I almost feel a little uncomfortable by it… They don’t seem to over dominate each other; they quietly sit side-by-side, emitting a beautiful message of unity and history so much so that it almost makes me feel a bit teary! (Or it could just be my ever-loving monthly hormones wrecking havoc all over the place!)
So what I’m trying to say, after all of that weird emotion, I’ve decided to make a baby quilt for my pending niece using the Bear Paw block. YAY!
Have you made this block before? If so, let me know! And if you have a photo of the quilt, I would love to see it!
Also, if you have questions or feedback about this block/tutorial or have any other suggestions for tutorials or crafty things you would like me to demonstrate, comment down below or send me an email at 3and3quarters@gmail.com
In next weeks tutorial, I’ll be delving into the open possibilities of Quilt Labels! Should be a hoot!
For weeks now, I’ve been promising this little tutorial to you all.
I’ve been teasing, procrastinating and stressing out over it for ages until I finally said, ‘Sod it! Just get it done already!!’
And here it is!
I’ve been hella nervous to publish this pattern & tutorial for so many reasons.
Here are just a few…
#1: This is the first ‘pattern’ I’ve ever really made and created. I’m sure somewhere there will be a crucial element I’ve missed or half explained that I will need to address sometime in the future. I’m super nervous that the pattern pieces are incorrect and won’t all match-up. And I’m desperately praying that the pattern link downloads and opens easily for everyone who clicks it! (The original plan was to have a PDF pattern but that wasn’t working, so I’ve uploaded it as Word docx. instead! Fingers crossed!)
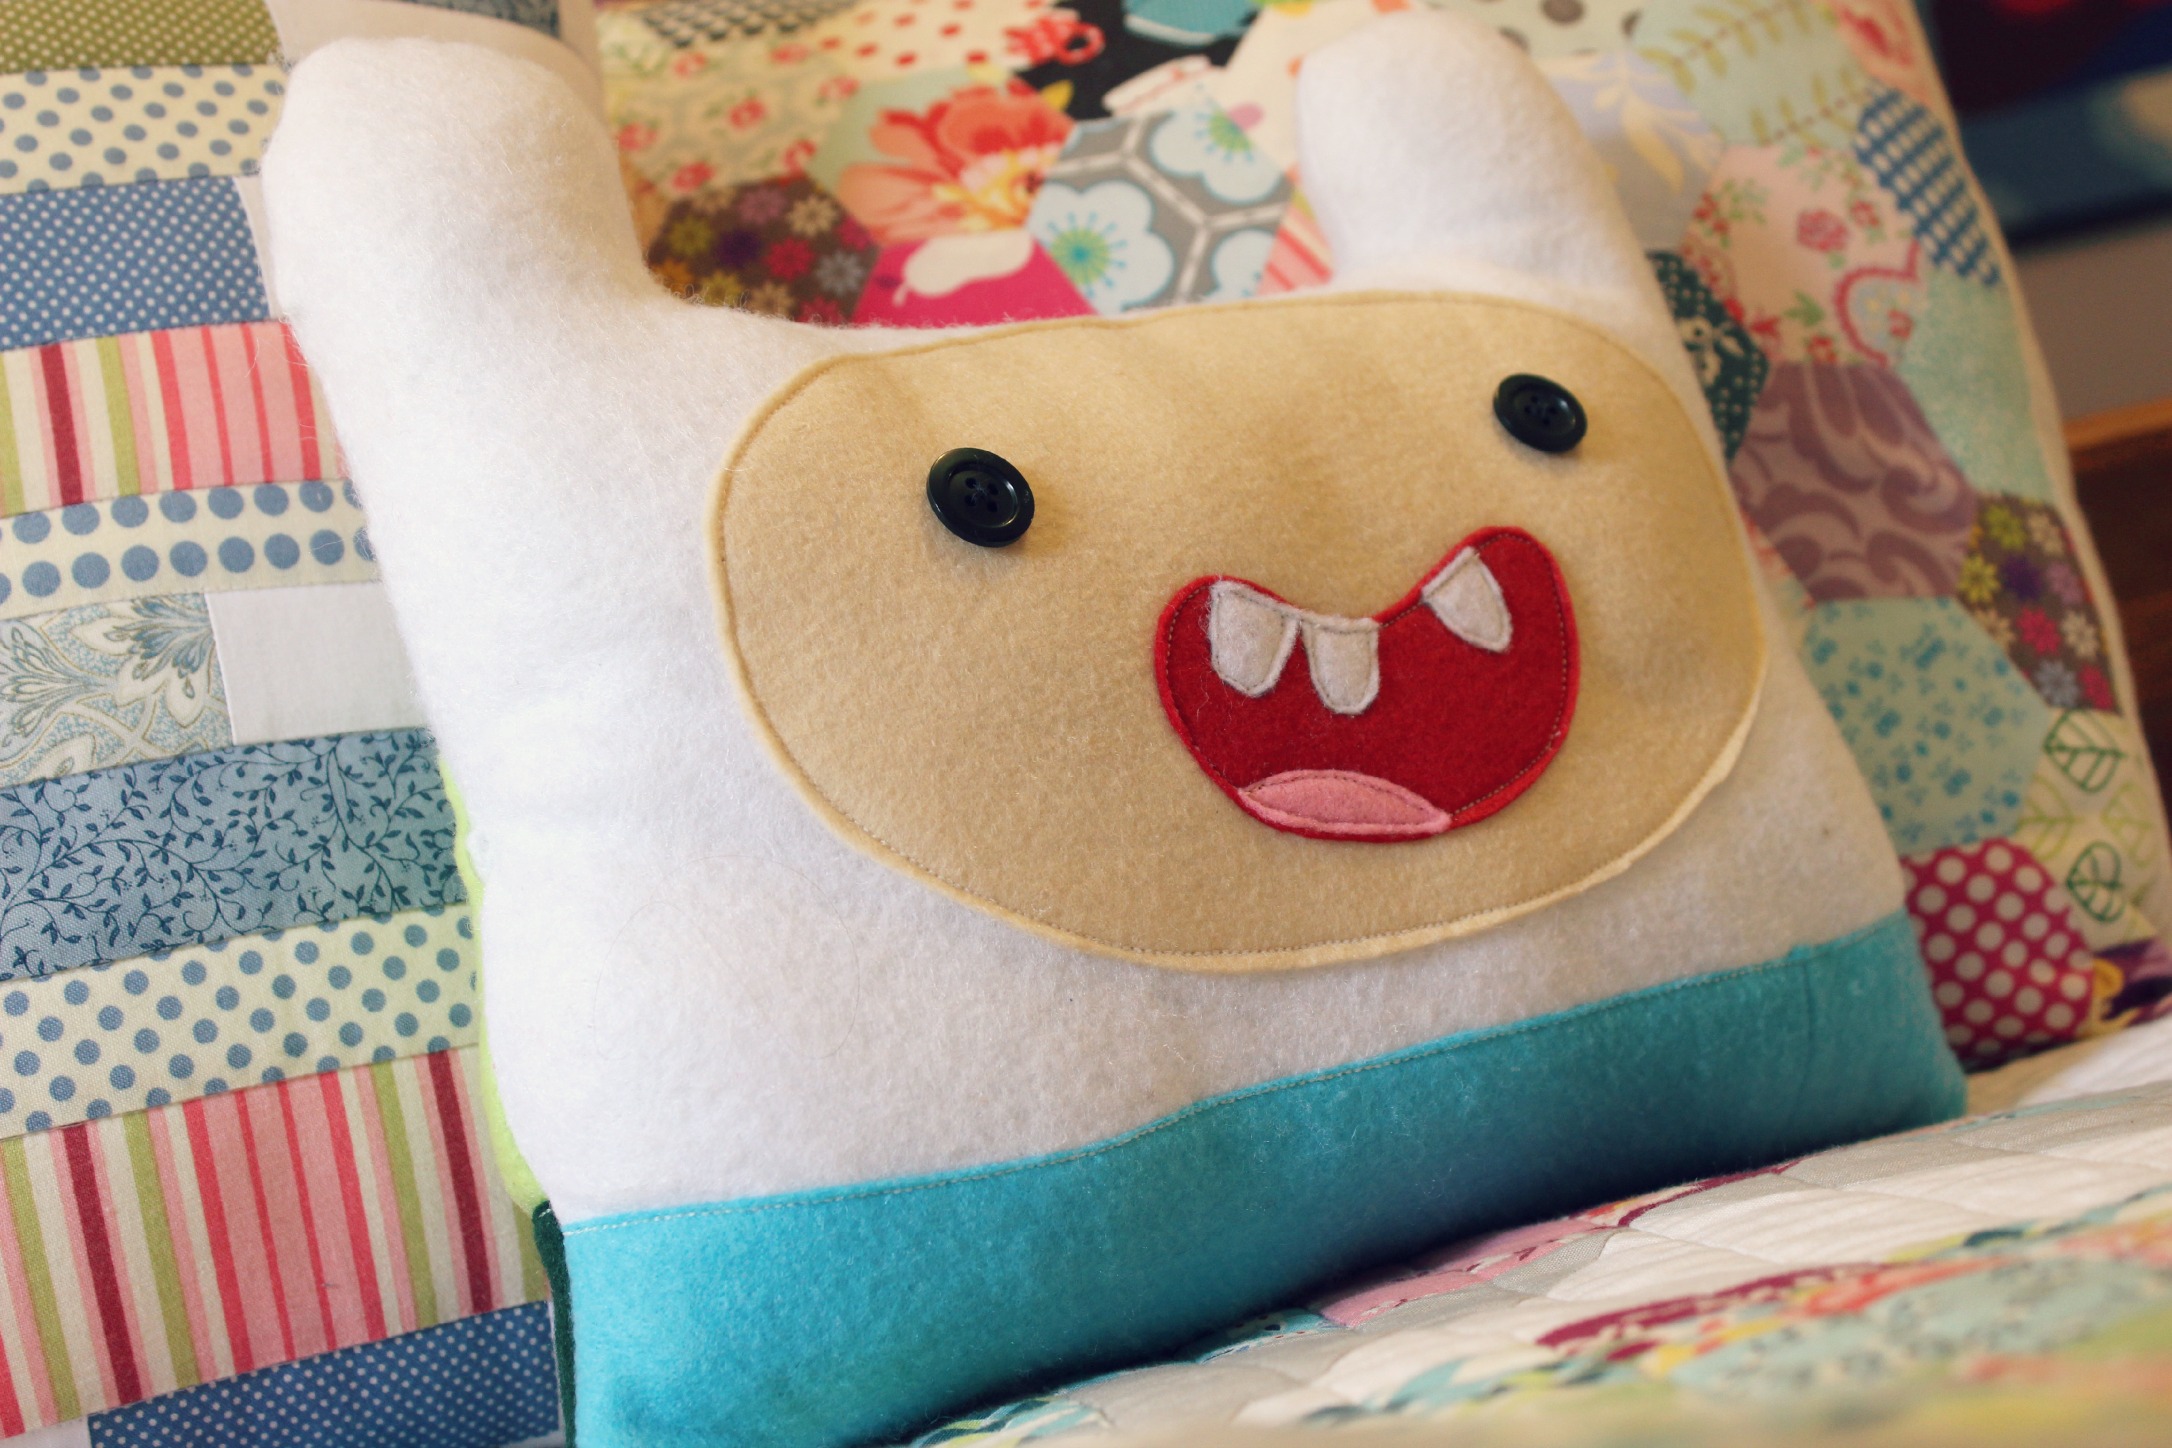
#2: OMG, it’s Adventure Time! This cartoon series is huge at the moment and I’ve been so conscious to get the design pretty much perfect to the original design of Finn so that it doesn’t just look like another one of those ridiculous try-hard crafting nightmares!
#3: I suppose, in all honesty, I’m worried about the feedback I’ll get from this project. Will people hate it? Will they not understand the pattern? Are there elements of the design that just don’t work?
Hmm… I don’t know… I think I’m letting my mind run away with this issue far too much than I really should. I need to remember: Any feedback is good feedback (as along it’s constructive and helpful of course!).
If you’re new to the crafting/sewing game and would like to make this, I recommend watching the video first, that way you’ll grasp a better understanding of each step and not get too befuddled with what needs to be done next.