September 14th: A Happy Monday

I feel that for the third day in a row, I should comment on how great the weather has been today as my first few opening sentences… Man, the weather was lovely today! Super sunny, warm breeze and the scent of fresh flowers perfuming the air! Ooo, it was grand! 😀

So just as the title of this post suggests, it’s been a happy Monday! Big collaboration prospects were discussed and organised this morning. (More on that when the right time comes along!) Fun and exciting future projects were developed further (HINT: Quilt-Along!!). A little bit more sewing got done. And I put a quilt on sale in my Etsy Shop!

OpenWindowQuilt1

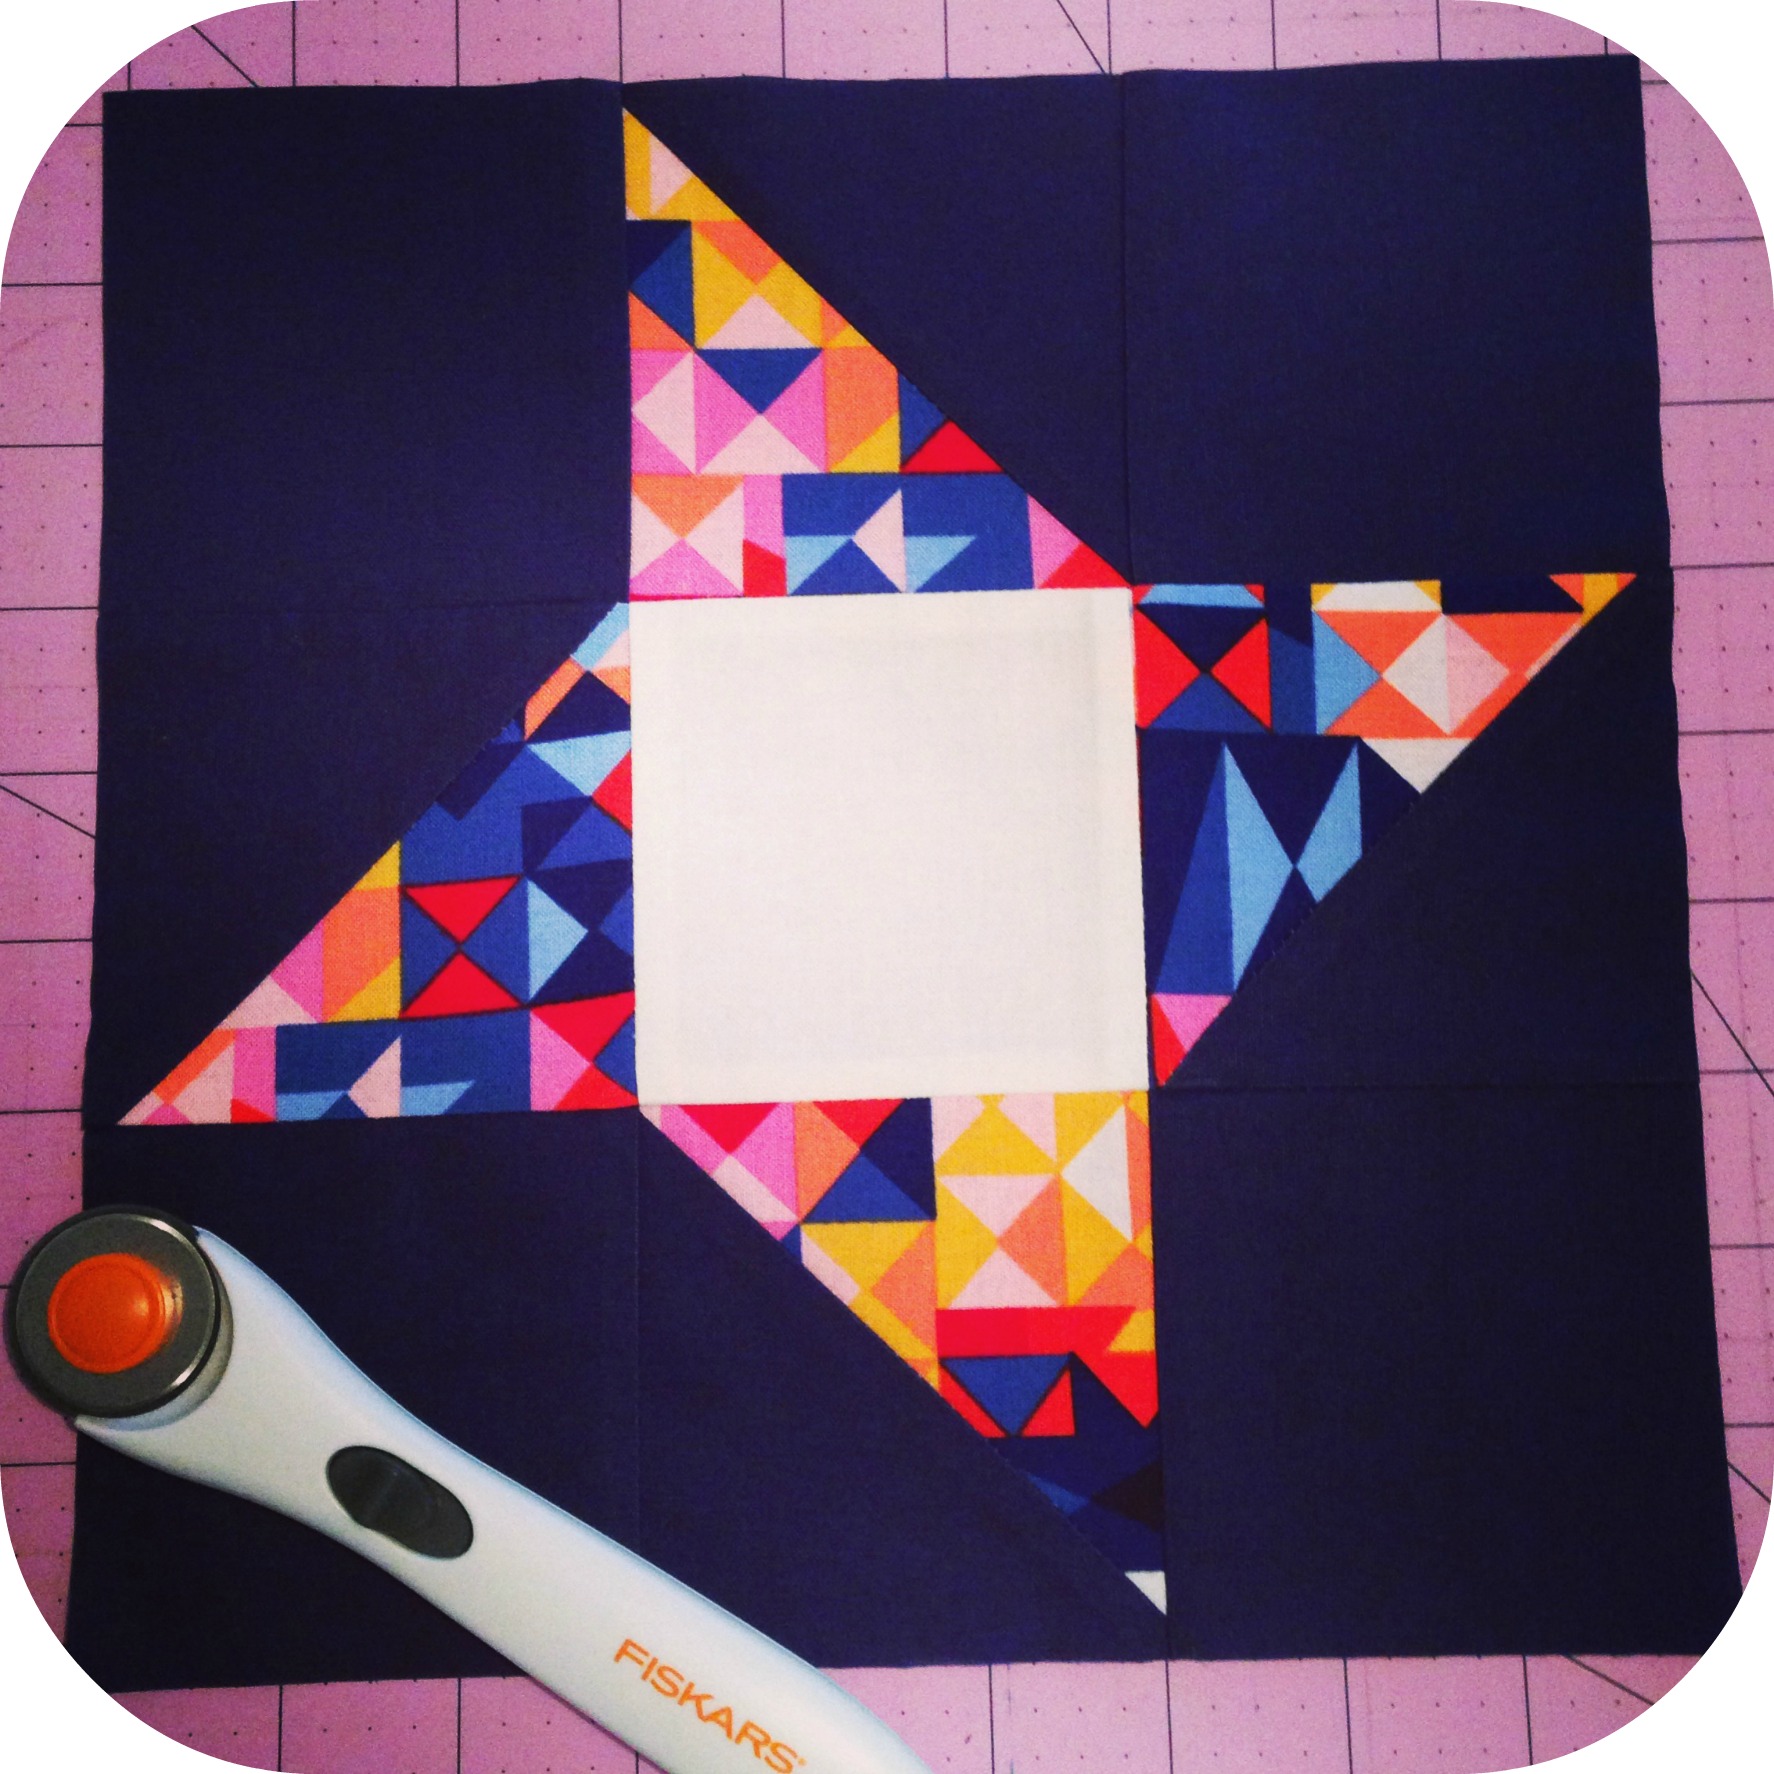
Yep, my Open Window Quilt I made for the Fat Quarter Shop Blog Hop last week is looking for a new home! It so deserves a place where it can be loved, used and cherished everyday by someone who loves it just as much as I do! The reason I’ve decided to sell this quilt is simply because I have no room for it! Our house has literally been taken over by quilts (every lounge, sofa and chair practically has one draped over the back and/or over its arm!) that I just have no where to put it! So that’s why it must to go to a good home where it’ll be appreciated!

+++

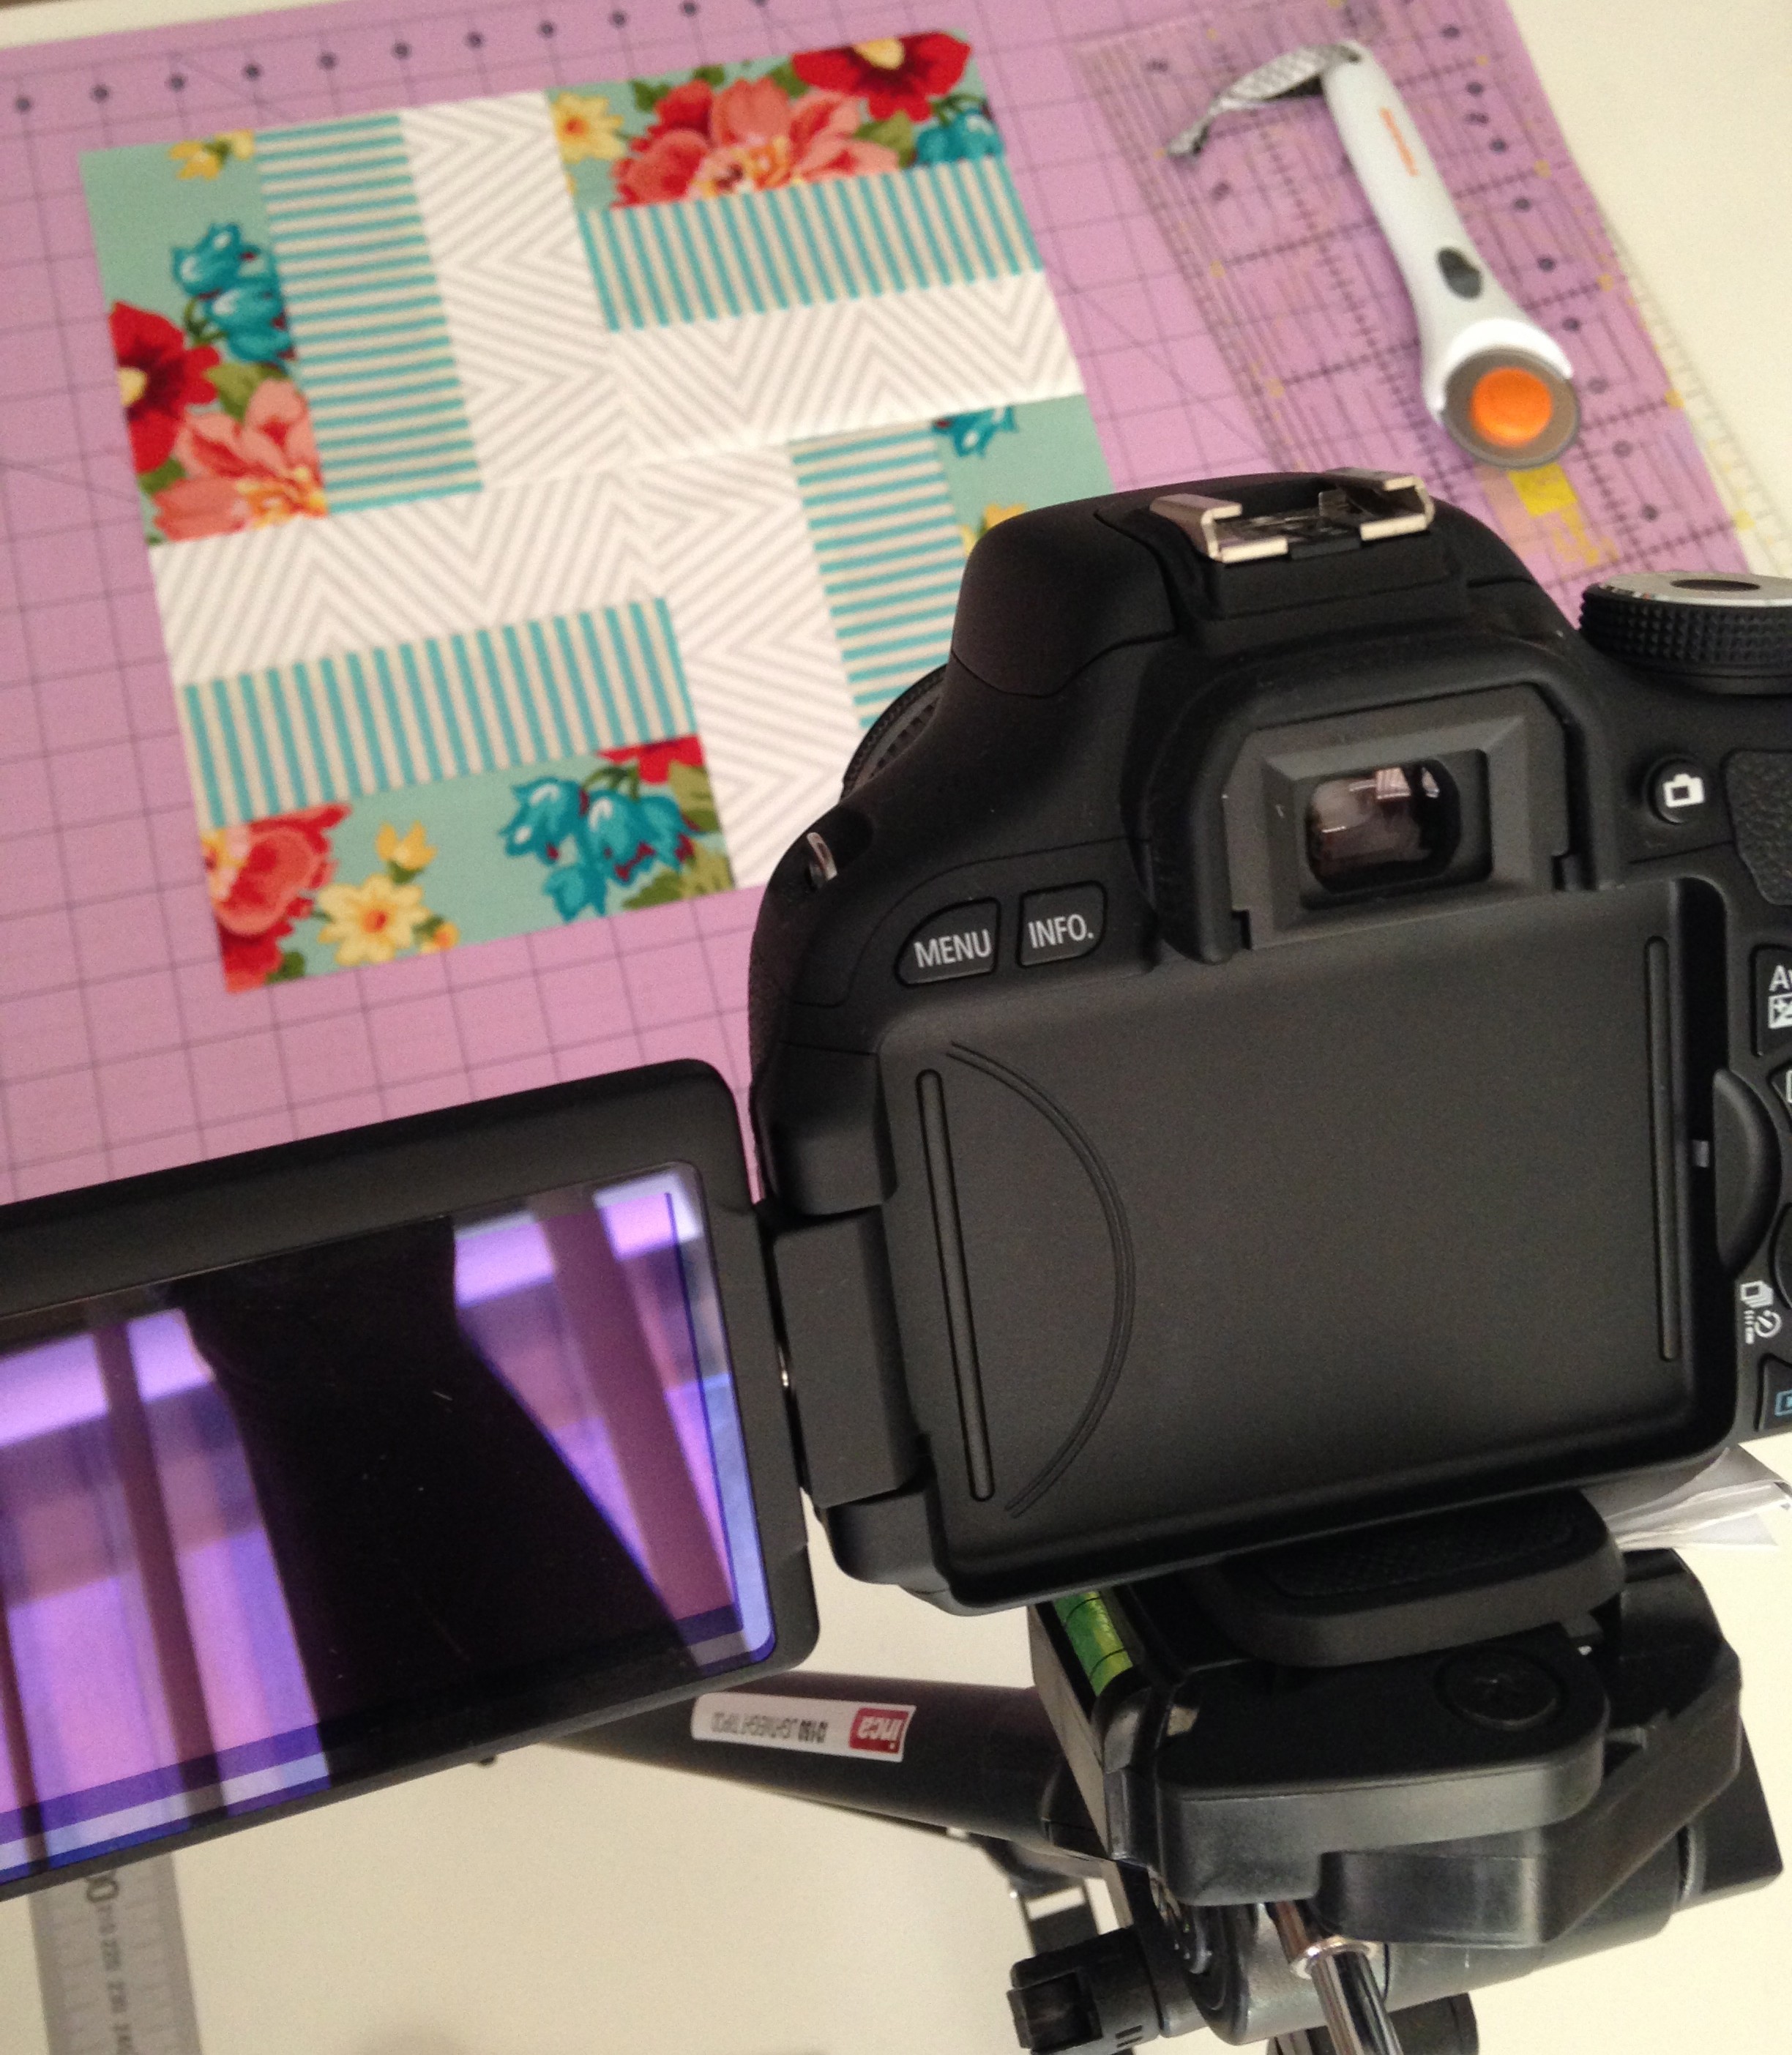
 Ooo, I also got a little bit more done on my Notting Hill House Mini! I stitched on a 2.5″ white sashing around the four edges of the quilt top, then prepared the binding (pastel pink, left-over from a baby quilt I made for my niece last year!) along with the backing (left-over backing from my Open Window Quilt) as well as the batting (white Cosy Cotton, left-over from my Geo Dreams Quilt!).

NottingHillHouseMini2

Right now, I’ve got it to the stage where all three layers are ready for basting and then quilting! Yay! Although, I’m still not sure how I want to quilt it… Criss-cross grid? Straight line? Ditch in the stitch? Dare I say it: FMQ?! Hmm, that decision needs to be slept on and decided in the morning, I think! 🙂

I hope you all have a great Monday too!

Happy Sewing, Friends!

xx

September 13th: A Sewing Day!

Another sunny weekend-day has come to an end and today I finally got stuck into some sewing!

As the early afternoon rolled over, I fired up the iron, got my machine in working order (new needle, full bobbin and full thread on top), pressed all of my fabrics and begun the task of making my Notting Hill House Mini!

NottingHillHouseMini1

Ooo, isn’t it just the loveliest thing!!

I found, just like the Pandamonium Mini Quilt, there was a lot of cutting before the sewing could begin. But being as I’m a total loser for cutting (it’s one of my favourite steps in quilt making!), I was in my element as I meticulously checked and re-checked the measurements, lined up the fabric on my mat and then cut, cut, cut!

Piecing it together was a piece of cake! At almost every step in the pattern, there is a little diagram showing you what, where and how to piece all of the little pieces together to create the door, the windows and the roof and then how to bring them all together to complete the quilt top! Fab!

I was saying in yesterdays post, I wasn’t too sure on the fabrics I had chosen to use for this mini. But you know, I looked at the choices this morning with fresh eyes and didn’t change a thing! I could see that all of the fabrics I had pulled out would work brilliantly with each other!

All in all, I’m really happy with how everything came together. The door and stair section is a little wonky, but hey, it adds character! Now, I think I’m going to add a little border sashing around the outside of the house (even though the pattern doesn’t suggest that), just so that it stands out a little bit. I’m not too sure when I’ll have the time to quilt it as the week ahead is a busy one along with the weekend! I may have to pull some late-nighters to see it finished! But what ever happens, I’ll keep you in the loop!

Happy Sunday friends and I hope you all have a lovely week ahead!

xx

How I Match My Fabrics!

Have you ever had one of those weeks where you’ve had so much planned to do but by the end of the week, hardly nothing has been done?

Yeh, that’s one of the weeks I’m currently experiencing!

Here it is, a windy, chilly Thursday afternoon and I find that my sticky-note to-do list is still full of those task I wanted to get done on Monday! Gahh!! When did life get so busy and full?!

Anyway, let’s all calm down and allow me to use this small amount of time I’ve discovered this afternoon to write this (late!😁)* post and share it out to the world! Yay!

So quite recently, I’ve been asked by a lot of you to share the way, the method and/or the steps I take when matching fabrics for a block/quilt. I thought, ‘what a great idea! I’d love to share that with you all!’

So over the past weekend I made and uploaded the following video onto my YouTube channel, giving you an insight into how I do this when starting from just one main fabric. I decided to use three different print fabric examples in the video so that you could get the gist of how I do it!

If you have a particular method or style when it comes to matching your fabrics, please free to share it in the comments below!

Happy Matching, Friends!!

xx

*It’s okay, I know you all don’t mind that I write and publish out blog posts a little later than usual. And I know that you understand that life’s a busy ol’ mess and sometimes things don’t go according to plan. And you know, that’s okay, because there are situations in life that could be a whole lot worse than a busy and unstructed week. (Wow, I just got all like deep-thinkery and stuff about the situation and I scared myself a little bit… ohh… It must of been the 85% Dark Chocolate I nibbled on earlier. Which, may I say is horrible! Ergh! It was way too bitter! My disappointment levels are sky high right now!!! All I wanted was a nice little piece of chocolate with my afternoon cuppa, but instead was hit with a mouth full of saliva-sapping cold-hearted bitterness! 😭 Oh gosh, I’m rambling now…. I’m sorry. Must. Stop. Typing. Uhhh….yep…I’m going…I’m stopping…right now… uhh… Bye!)

The Unexpected Quilt

This past weekend I was invited to demonstrate some quilty techniques and projects at my local Spotlight, in celebration of their National Craft Month.

Although the crowd was small, I had a lovely relaxing time sewing, chatting, learning and sewing some more.

Among many things, I demonstrated how to cut, piece and join these three 9-Patch blocks:

– The Shoofly

– The Snowball

– The Friendship Star

Blog pic 1And it’s with the Friendship Star block that I found myself unexpectedly started a new quilt…

One of the projects I was asked to make was a quilt featuring the Friendship Star block as its focus.

Blog pic 2So I chose these colours: Navy and Cream Homespun paired with an awesome Cynthia Rowley Prism print.

The print fabric really helps the ‘star’ part of the block to pop out! I love it!

blog pic 3So I’m six blocks in from a potential 25 to be made.

I’m not sure when that will actually happen…

Uni started back this week and I’m already crushing under a new wave of assessments and deadlines.

This weekend is out as I’m taking a mini-break to our nation’s capital – Canberra – to get me some culture! (We’ll be visiting lots of art galleries and exhibitions!)

I’m so impatient to get this quilt going, as I know it’ll be a beauty once it’s finished!

Plus I’ve already promised it as a display piece for my lovely friends at Spotlight…

Hmm, I think I see some late nights looming in the future!

Happy Sewing Friends! xx

TUTORIAL | Scrappy Log Cabin Block

I love making blocks with my scrap fabrics.

There’s something about mixing un-coordinated fabrics together to make a block look coordinated that strangely appeals to me.

(I hope that makes sense?)

I think it’s also the thrill of pairing fabrics you’ve used in separate projects and fusing them together into one little patchwork square – ahh, the memories!

(It’s the simple pleasures, right?!)

In my opinion, the Log Cabin block has to be one of the best stash-busting blocks you can make.

It’s quick, easy, super simple and can be so visually affective you swoon at the sight of it everyday!

So here I present to you a little video tutorial of how I make a very free and easy Scrappy Log Cabin Block!

If you’ve watched this and have any questions, post a comment here or on my YouTube channel and I’ll be more than happy to answer them.

Do you have any other blocks you would like me to demonstrate? Pop your suggestions in a comment and I’ll take them on board!

Happy Sewing Friends! xx

WIP Weekly Update | #3

Okay.

Confession time.

I haven’t done as much as I had hoped for this past week on the Rail Fence Quilt.

I did do a few more lines of quilting here and there over the days but not to the point where it’s worthy for a WIP photo opportunity…

In the moments after I finished writing the previous sentence, I had a quick squizz at my quilting efforts on the R.F Quilt and felt compassion. (Weirdo alert!!)

So here is an up-to-date ‘progress-report’ image…

Current State | 27/01/14

Yeah….there’s not much difference from what it looked like last Monday.

I also must confess that I have been giving my time to another (new!) project.

I received an email Saturday morning from the NSW Quilting Guild containing information and forms for this year’s Sydney Quilt Show.

A more-than-mild wave of panic washed over me at that moment.

I hadn’t at all begun planning my entry for this show; the thought had always been at the back of mind but nothing else!

Although the Show isn’t until early June, it’s always nice to have things on-the-go from an early start!

Of the categories in the show, one or two stood out: Amateur Small or Wall Quilt (minimum size 40cmx40cm) as well as an Open category named Miniature (a quilt with a scaled down pattern with a perimeter of 200cm).

So early Saturday afternoon, I picked out a bunch of pretty and modern fabrics and raided my quilt book library for some block inspiration.

I had the thought of pairing two contrasting modern fabrics together and patch them together into a ‘traditional’ block formation.

In one of my favourite patchwork/quilting books, 130 Mini Quilt Blocks by Susan Briscoe, on page 46, I discovered an itty-bitty version of the Snail Trail Block that had a finished block size of 12.7cm or 5”! Perfect!

I have made this block before a few years back so I felt pretty comfortable tackling it.

Start to Finish | Mini Snail Trail Block

I quickly drew up a sketch to make sure the colours would sit well together – and they did!

The next hour or so I cut out all of the tiney-tiny pieces and begun sewing mini squares and HST together.

Four blocks were completed by yesterday; they were quickly sashed together and the quilt top is now ready to be quilted!! Whhhaaattt?!?!

(You know, I’m really liking this Mini-Quilt making thing – it’s quick, easy and non-stressful!)

The size of the quilt top measures 46cmx46cm or 18”x18” and fits into both Show categories as previously mentioned. I’m just not sure which one I’ll choose yet.

I’m also torn on what I’ll name this sweet little mini; I have two in mind…

Golden Trail

— OR —

Yellow Brick Road

Which one would you choose??

So there we have it.

Perhaps next week I’ll have more progress on my R.F Quilt to show and not have to confess that I’ve been distracted (again!) by other things.

Happy Sewing Friends! xx

WIP Weekly Update | #1

So I thought to keep me honest and on track with my WIP* New Year Resolutions, I would try my very hardest to post every Monday updating my progress on getting these quilts finished.

Whether this is a good or bad thing I haven’t worked out yet!

Believe it or not, I have made some headway in completing my Rail Fence Quilt. (You know, the quilt top with all the spots…)

During the week, I blew out my fortnightly budget by buying a whole lot of batting in preparation for all of these quilts I need to finish.

IMG_2360

I set out the same afternoon and patiently basted up the R.F Quilt and it’s now ready to quilt!

Along the way, I also took some time out to start filming a little tutorial on how to make a very simple Rail Fence Block (perfect for all you beginners out there!).

IMG_2358

This, unfortunately, is still in the editing process and will hopefully be ready to upload near the end of this week! Whoo!

So, without procrastinating anymore, I think it’s time to get quilting!

Happy Sewing Friends! xx

* WIP = Works In Progress

Two Years Later…

Two years ago, on this very day, I found the guts to start writing a blog.

I was nervous, unsure and a little bit scared at the thought of writing and publishing my own quilty work on the internet.

But I was looking for a challenge, an expressive medium and a chance to reach out to other creatives around the world!

And two years later, here we are! Still writing. Still making. Still challenged!

I thought for today’s post I would look down memory lane of the past year – reflecting on the good (and plain-right exciting!!) things that have happened over the past 12 months!

IMG_2139

Main picture: Me with my Minimalist: 101 quilt at the Sydney Craft and Quilt Show – my first ever entry into this show!

From bottom left to top right –

1. Hexie Cushion, detail. (I looove hexies!!)

2. London Phone Booth Embroidery, detail. (I wanna go to London so bad!!)

3. Mini Cot Quilt – hospital donation.

4. Painted Flowers Embroidery. (Click here to watch it come to life!)

5. Double Wrench Mini Blocks, quilt top only (ATM!!)

IMG_2141

From left to right –

1. Olfa Rotating Cutting Mat – featured in my 5 Quilting Tools I Couldn’t Live Without post & video.

2. Small Plates Lap Quilt – This quilt featured in my Fast Forward Quilting video!

3. Scrumptious Double Wrench Mini Block units ready to be ironed. (Simply delightful!)

4. Coloured Hexie Stack. (I looove colour!)

5. A snapshot of my Fiskars Rotary Blade – featured in my #instagramjunkie post.

IMG_2146

From left to right –

1. An array of fabrics used for Quilt Expo 2013 at Spotlight

2. Xavier’s Baby Quilt – read the post here.

3. Hexie Pincushion (Click here for the video tutorial!)

4. Lovely fabrics used in the Double Wrench Mini Blocks

IMG_2155

From left to right –

1. I Heart Colour wallhanging – machine paper pieced wonky log cabin blocks designed by yours truly! Quilt made from 100% scraps – nothing new was bought to make this baby!!

2. Sewing Notions – from the post #instagramjunkie

3. Tape Measure – from the post #instagramjunkie

4. Scissors Embroidery – made specially for my new sewing room door.

5. Scrap-Happy String quilt, detail.

This also happened during the year…

Encouraging blog stats!

And this is what happened in my life behind the blog…

IMG_2142

Main picture: I became an Auntie again!! My fourth nephew, Xavier, was born in August! (Isn’t he just the cutest!!)

From left to right –

1. I decided to grow my hair out long – I’ve always had it really short (think, pixie/short-bob style for 6 years!) and decided a change was in need! (Change is a good thing, right?)

2. I took my ‘challenge’ mantra to the next level and started making YouTube videos featuring quilty stuff, life stuff and lots of other stuff. (I think of it as a cleansing [and confronting at times] way of finding my self-confidence…). Don’t forget to subscribe while you’re there – it’ll help boost my self-confidence even more!! 😀

3. I drank a lot of tea!

So…wow!

It’s definitely been a busy year!

And I’m thankful it’s been a busy one, otherwise I would’ve just gone insane! Literally…

Thanks to everyone who has ever read my little blog and has left messages of encouragement and support! It really does mean a WHOLE LOT!

I’m terribly excited to see what the next 12 months will bring!!

*whoop-whoop*

Happy Sewing Friends! xx

Oh! And one last thing…

This happened during the year too –

My own precious sewing space!!

My place.

My hub.

My den.

My heaven.

Ohh….iMac!

I can hardly contain my excitement, as I am, at this very moment, writing this blog post on my new, very shiny, extremely fast, super-dooper awesome iMac! OH MY GOSH I LOVE THIS THING! Although most of the time I have no idea what I’m doing or where to find anything on the desktop, I’m having the best time exploring the cool little short cuts, simple apps that make life insane and being blown away by the awesome little touch-track mouse that is so incredible to use! In my opinion: BEST PURCHASE EVER!

With all the refreshing spare time I have on my hands now, I made a start on my How Does Your Garden Grow? competition quilt. The final decision on how to construct this quilt came down to paper piecing. Over the past three to four days I’ve been constructing plans, drawing up the final design, cutting out the pieces, tacking on fabric and sewing all the pieces back to one another by hand. All I can say is thank goodness for my 10 series collection of Friends that has gotten me through the mundaneness of repeating the same steps over and over and over again!! When the quilt is all finished, I’ll post up a How it was Made blog showing you the different steps I took to make it. Here are a few photos I’ve taken over the last few days….

I’ve also taken the time to start a friends Gumnut Babies quilt. I’ve made it with giant half-square triangles (HST) that then makes a Giant Square block – equaling the quilt top. I’ve used a few co-ordinating fabrics from own stash to mix up the prints and hope to make my first pieced-back with the left over Gumnut Babies fabrics.

Over the weekend, I took the plunge and re-organised my sewing area – it was in desperate need of a tidy and re-vamp! I sorted a quarter of the fabrics that I have on show into colour bundles, folded them nicely and stacked them in colour order in of many bookshelves.

I also sorted out my quilting/fabric/crafty related books and recycled a whole lot of quilting magazines that I haven’t read or referred to since I bought them like three years ago!

You never realized just how much crap you actually have that is cluttering up your shelves until you pull it all out and then regret you even started!

Happy Sewing! xx

Hooray for the weekend!!

What a week! I’ve been so overwhelmingly busy these past few days that I’m so glad it’s the weekend!

The last two days I’ve spent at the Craft & Quilt Show at Darling Harbour where I helped man our stand full of our latest issues and associated quilting products.

Of course I took full advantage of my time there to go shopping and spend a ridiculous amount of money on fabric. I mainly bought fat-quarters in mind of a new quilt idea bubbling in the back of my brain. Let’s just say, for now, it will feature the use of a lot of spotty fabrics!

I also bought a beautiful Amy Butler fabric which I’m thinking I could use as a feature print in a quilt sometime in the future.

I also found the sweetest Babushka Sailor Doll, who is now a new addition to my sewing table.


*******************************************************************

So one of the biggest thrills (as well as the most loserish in the world!) a quilter can get is the purchase of a brand new, shinny, fang-dangle iron! And I, as a quilter, had one of these wet-your-pants-with-excitement moments last weekend when I bought our new iron.

It’s just so pretty and fancy! And yes, I understand that I am the dorkiest, most insane and weirdest person ever in the world to be so excited over an iron. Everyone in my household thinks I’m crazy, and you know, I don’t blame them because I would think the same thing if the roles where reversed. But for a quilter, without an iron you can’t get clean precise lines to match up or have all your blocks lie flat resulting in a flat pristine quilt top that will obey your every command. In patchwork and quilting, an iron is just as important as your sewing machine, fabrics and threads! Hence, my giddy excitement and wet pants.

So of course I had to find a legit reason to use this new piece of appliance that had come into our household and my June Craftsy BOMs where the perfect excuse! Plus I knew I could get them done in a few hours, curing me of my sewing addiction for the day.

With a twist to the old nine-patch block, I’m really pleased with how my fabric choices work in these blocks, especially the Greek cross – the bold pink print fabric really makes it pop!

I’m about to get started on quilting the Butterfly Cot Quilt, where I’m going to take a big bold step and stipple (or free-hand machine) quilt  around the butterflies. I haven’t done very much free-hand quilting before – let alone on an actual quilt – but I’m all for taking on challenges; doing it, learning from it and loving the result! How will you grow in your skills if you don’t give new things a go right? I hope to get started on it this weekend as I’m so anxious to get it finished as I think it’s going to turn out really sweet and charming!

I’ve begun the first steps of figuring out how to create my How does your Garden Grow? quilt competition quilt by mocking up a smaller scale of the quilt design and playing around with a few of the techniques I mentioned in my last blog. I think I’ve come to a conclusion of which direction to go in to construct this one: English Paper Piecing. It’s going to take a while and require a lot of patience but I think it’ll be worth it in the end!

So there’s a lot to carry on with during the weekend and maybe, just maybe I can hopefully squeeze in an extra few hours at the Craft & Quilt Show and explore its inspiring goodness and tempting products in my own time, at my own leisure. Maybe. If I have the funds to spare it!

Happy Sewing!! xx