TUTORIAL: The Chevron Block!

The Chevron Block
The Chevron Block

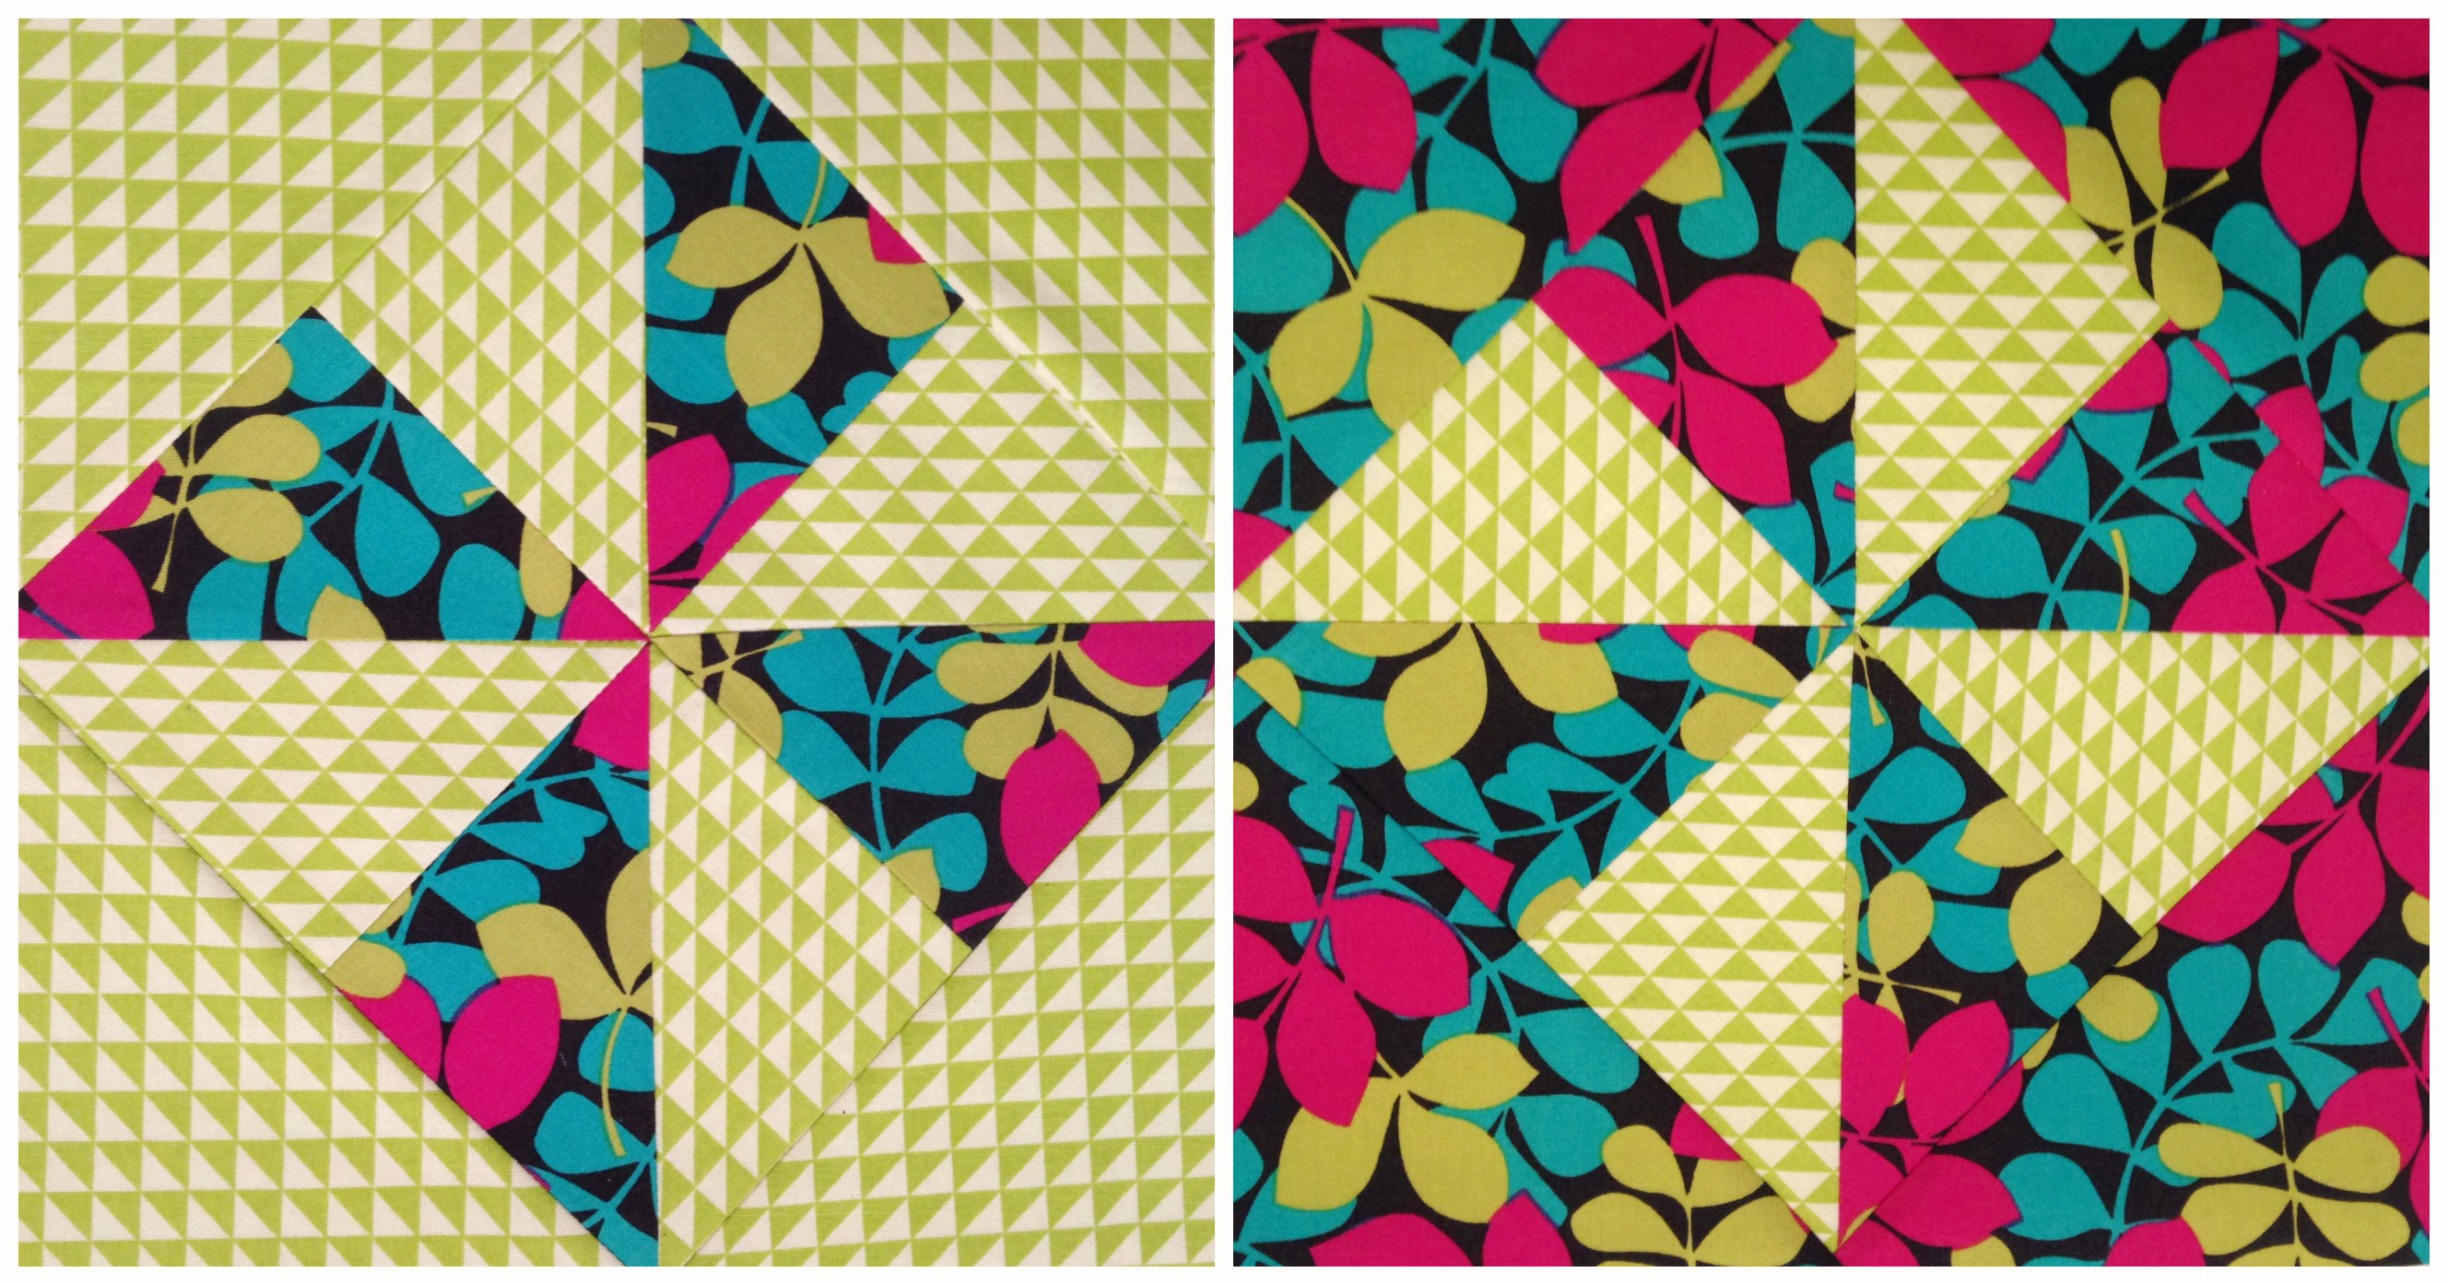
Oh, man! There’s just something real cool about the Chevron Block (Am I right!?)! I don’t know what it is, but geez, I just love this block! It’s simple, fast to piece together and is so effective when pieced into a quilt!

This is one I made in 2011 using the Chevron Block…

I called it A Summer Zig-Zag Quilt!

Summer Zig Zag Quilt (2011)

So here’s what you need to do to make this block…

Simply cut x2 5″ squares from two different fabrics (they can be contrasting, matching, clashing, be print vs. solid etc.) and then watch and learn how to piece it together in this video!

FINAL BLOCK SIZE: 22cmx22cm (8&5/8″x8&5/8″)

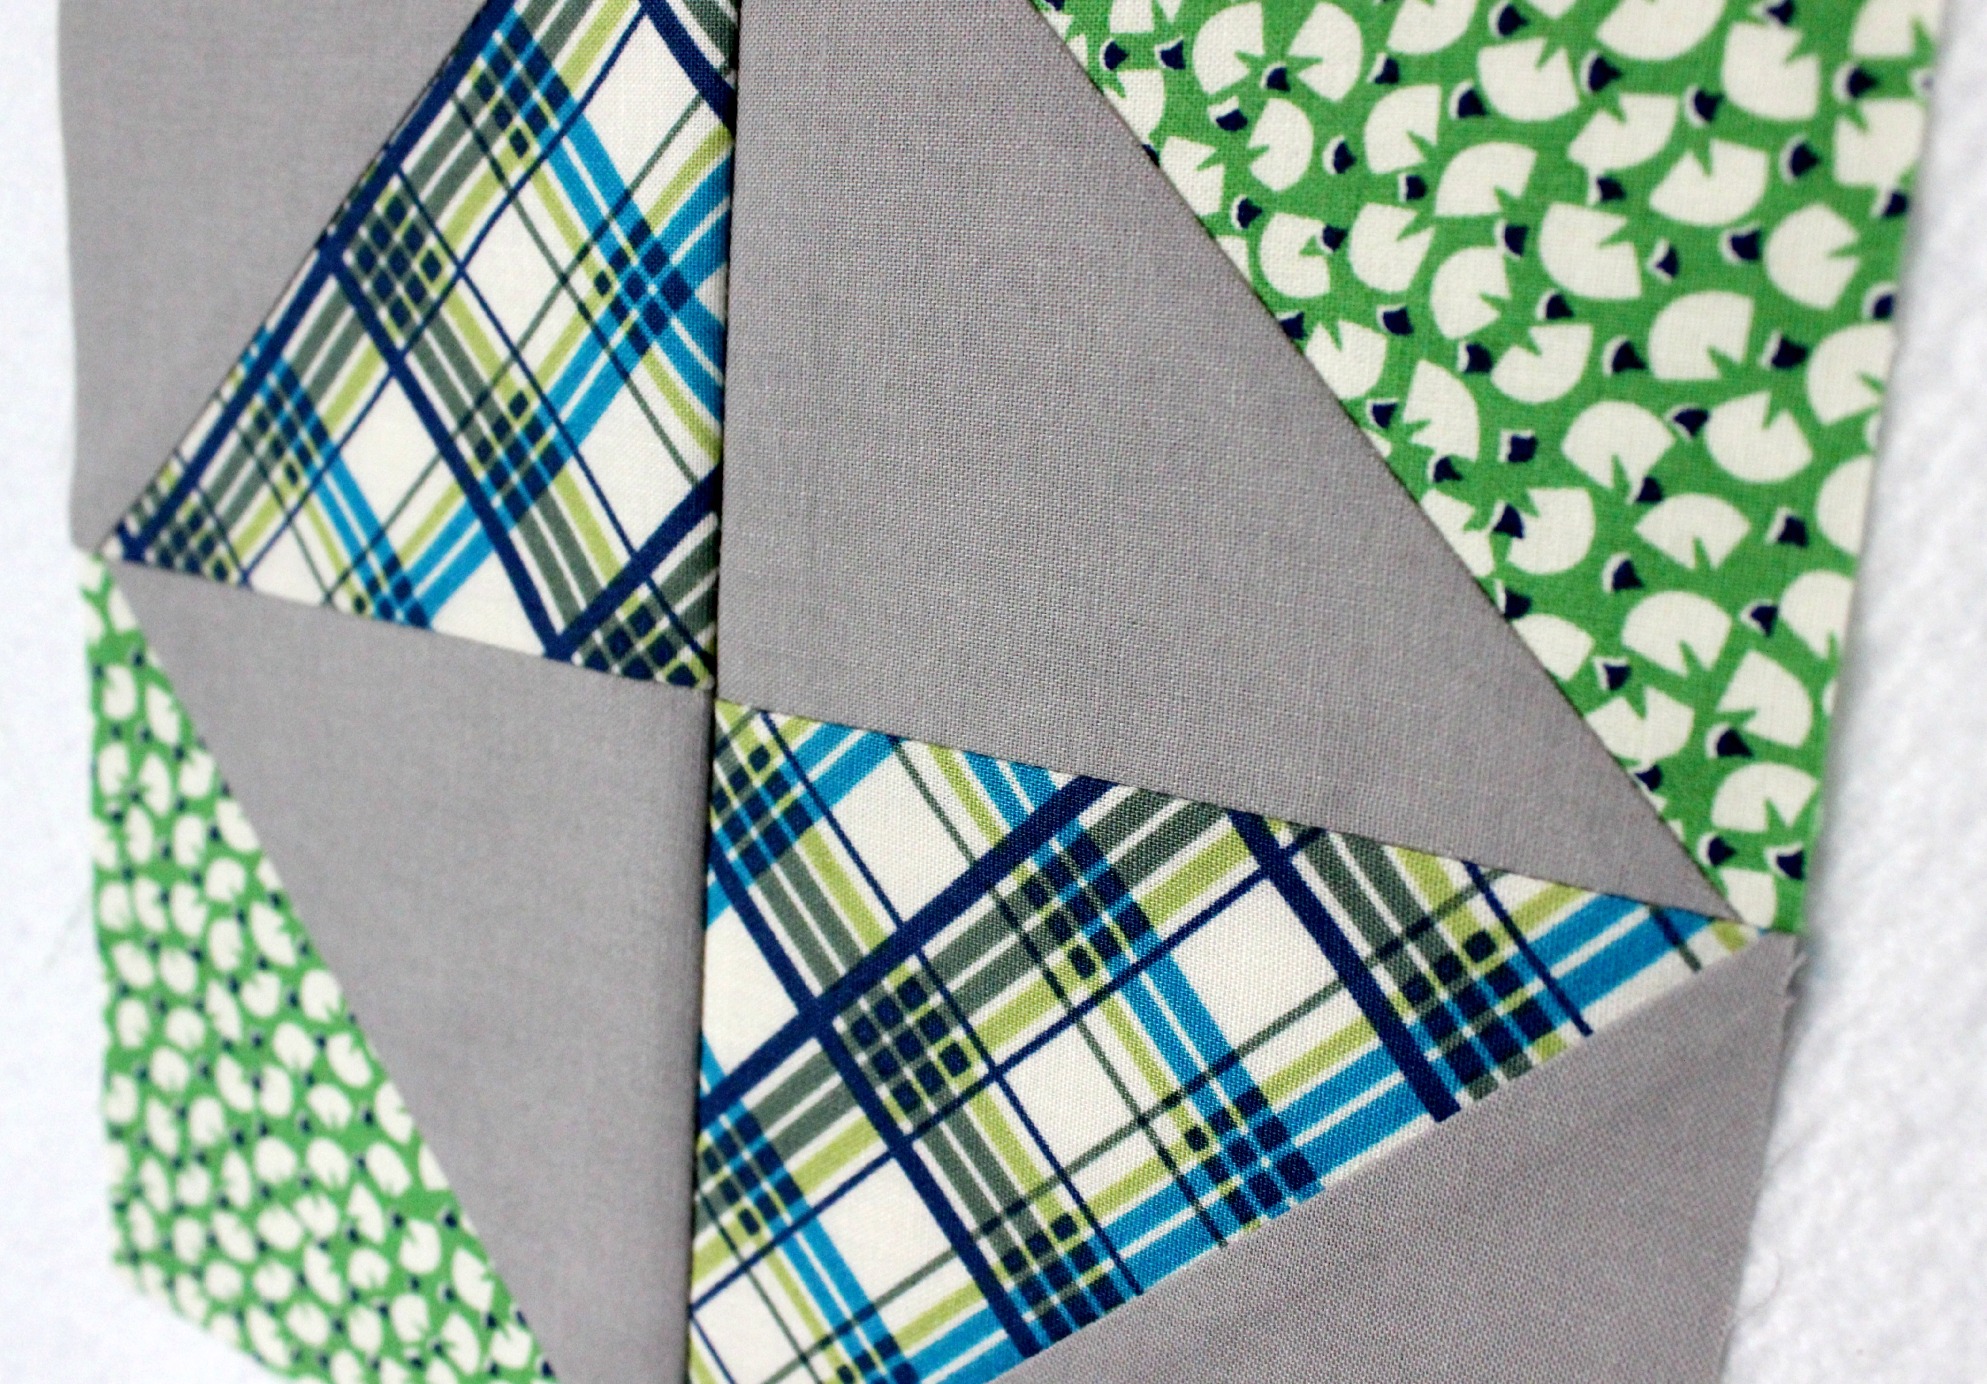
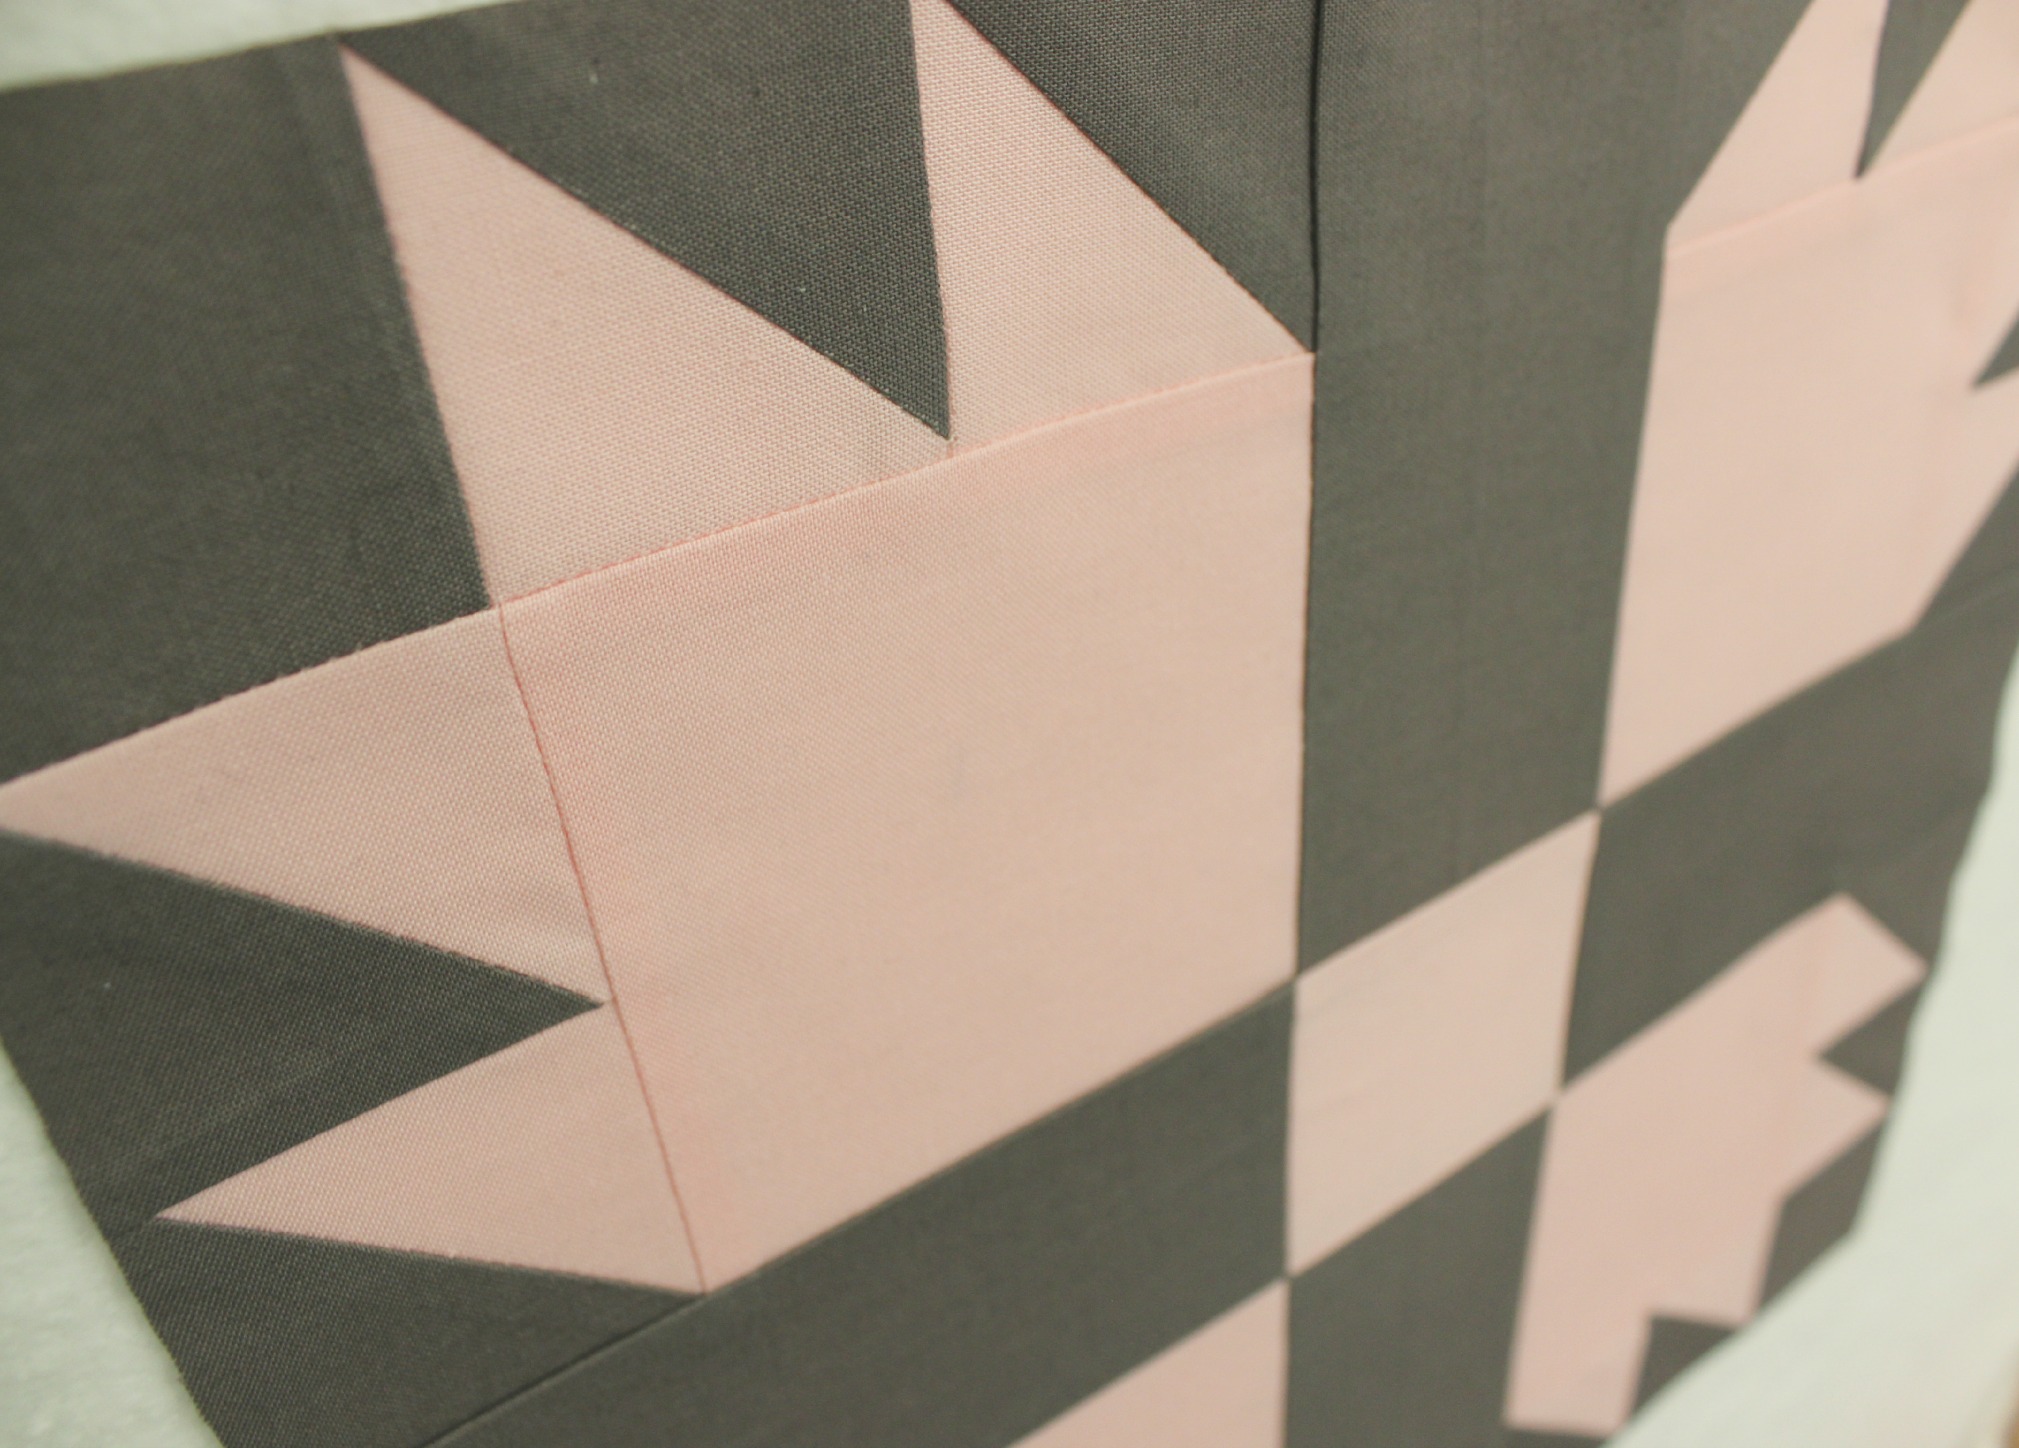
Here are just a few tips I’ve picked up along the way to help achieve perfect Chevron points…
When piecing together the HST units together, lay the diagonal seams directly on top of each other. (As shown in the video) Pin the two units together and carefully sew them into one row.
By ensuring that these seams are directly aligned with another on either end, you should have perfect points when you open the row out.

Always make sure you sew with a 1/4″ seam. I know I sound like a broken record saying to do this all the time but it really is essential to sew all of your seams exactly the same. If one seams is slightly bigger or smaller than the other, then you’ll begin having problems with matching your seams and points.

This is the most important one: Take your time! Don’t worry about making mistakes! Learn from what you’ve done wrong and simply try again until you master it! I know you can do it! 🙂

Two Chevron Blocks pieced together

Have you made this block into a quilt? If you have, I would love to see a photo of your finished quilt! There are also some great Chevron Quilts to be found on Pinterest if you’re wanting to give this block a go and are looking for some inspiration!

Happy Sewing Friends!

xx

TUTORIAL: The Hashtag Block!

The Hashtag block seems to be absolutely everywhere at the moment! And when I say ‘everywhere’, I really just mean Pinterest and Instagram! 😀

So I thought I’d jump on the bandwagon and make a tutorial showing you how to make this block yourself! Yay!

This is a great little block for all levels of quilters! It’s very simple and quick to piece together and is a wonderful pattern to be able to mix and match prints, colours and values with!

To make this block you will need to…

Cut from one fabric:
x3: 3″x9″ rectangles

and then…

Cut from a contrasting fabric:
x2: 3″x9″ rectangles
and
x2: 3″x13&1/8″ rectangles

And then simply follow the step-by-step instructions in the video to learn how to piece this block together!

The final block size should come to about 32.5cmx32.5cm (12&3/4″x12&3/4″)

The Hashtag Block
The Hashtag Block

And just incase you’re curious, the print fabric I used for this block is called ‘Memoir’, from the Alchemy Quilting Collection by Amy Butler.

Don’t forget to let me know if you’re going to make this block! I would love to know how you get along!

Happy Sewing Friends!!

xx

TUTORIAL: Foundation Paper-Pieced Wonky Log Cabin Block

IMG_3475

Get the Pattern: Wonky Log Cabin Pattern

After lots of requests and suggestions to make this block, here it is for you to explore, fold, pin, stitch and rip apart!

So, I’ve approached this teaching of the block assuming that you have a fair understanding of how Foundation Paper-Piecing works. If you’re new to the technique, perhaps have a look at this video first http://youtu.be/R4jNa2zHLbU and then come back to this one.

This tutorial was inspired by this wall-hanging I made in 2013, that also made a few appearances in a few of my earlier video tutorials!

'I Heart Colour' Wall-Hanging (2013)
‘I Heart Colour’ Wall-Hanging (2013)

I called this wall-hanging, ‘I Heart Colour’ because of the nine colour-way blocks that are made entirely out of scrap fabrics. Plus, I also really do love colour and thought (at the time) it would be a perfect addition to the wall above my sewing desk in my new sewing room! (And still is!)

As always, let me know if you’re going to give this block a go and send me pictures of your blocks!! You can easily tag me on Instagram (I’m @3and3quarters) or send me a pic on Twitter, through email or on Facebook!

Happy Sewing Friends!!

xx


TUTORIAL: The Economy Block

What a better way to start the New Year than to dive head first into a good ol’ block tutorial!

Today we’ll be focusing on the Economy Block!

This simple little block is made up of one centre square with two sets of contrasting triangles sewn around it. It’s a great block to use up some of those larger scrap fabric pieces or perfect to make a fun I-Spy Quilt for the kiddies!

Measurements & Cutting Info…

For the centre
– Cut x1: 5″ square

For the first set of triangles
– Cut x2: 4″ squares (to be cut in half, resulting in x4 triangles)

For the second set of triangles
– Cut x2 5&1/2″ squares (to be cut in half, resulting in x4 triangles)

Follow the steps in the video to learn how to piece this block together!

Final Block Size: 24cm x 24cm (9&1/2″ x 9&1/2″)

Mix & Match with some of your favourite fabrics!

Let me know if give this block a go! I would love to know how you went!

Happy Sewing Friends!

xx

MINI TUTORIAL: Flying Geese Block

Here’s just a quick little tutorial I uploaded last week simplifying the process of making the utterly-tradtional Flying Geese unit.

The process of how to make this block should be a staple in your patchwork library and when it is, you can adapt and shape it into any size or formation you wish!

Here are the measurement & cutting instructions for this block..

– Cut x1: 5&1/2″ x 3″ rectangle from one fabric

– Cut x2: 3″ squares from a contrasting fabric

– Piece together as demonstrated in the video.

– Feel free to make as many Flying Geese units as you wish to piece together a long strip, or square or rectangle. The choice is all yours!

The final measurements of this unit are: 5&3/8″ x 3″ or 13.5cm x 7.5cm.

And, here are some great examples of the Flying Geese unit pieced together in a few beautiful and creative ways!

(Links to the sources of these quilts are at the end of this post!)

FlyingGeeseQuiltsHappy Sewing Friends!

xx

{LINKS}

The Quilt by City Stitches

The Quilt by A Stitch In Time

Tutorial: The Pinwheel Block

Pinwheel Duo

Good Afternoon to you!

With a comforting mug of tea settling next to the keyboard and my written notes laid out before me, let’s explore the latest instalment in my quilt block tutorials – the Pinwheel Block!

Inspired by a block in the book ‘500 Quilt Blocks’ by Lynne Goldsworthy & Kerry Green, the Pinwheel Block is deceptively easy!

Here’s what you need to do to make this block!

Measurement & cutting instructions

(This block only requires two contrasting fabrics.)

Cut x2: 6″ squares from one fabric for the corners

Cut x2: 4.5″ squares from each fabric for the HSTs*

Final block size: 25.4cm or 10″ square.

And as always, let me know if you’re going to give this block go! You can email your lovely pictures to this address: 3and3quarters@gmail.com

Happy Sewing Friends!

xx

PS. Regarding my Christmas videos: These will begin in December, with the first one due to come out on Wednesday the 3rd! Then every Sunday & Wednesday upload, until the end of the month will be Christmassy related! Whoo! (This is just incase I didn’t really explain it well enough in the video!) I hope you will all enjoy the ideas and projects I have in store!

*HSTs = Half Square Triangles

TUTORIAL: Broken Dishes Block

Hello!

Here’s a great little block for all of you beginners out there!

Broken Dishes Block

Broken Dishes Block 2

The Broken Dishes block is a classic traditional block made up entirely of HSTs*.

Its design aesthetics are endless and it is insanely quick to make!

So if you’re looking for an easy block design that is the next step up from a Four Patch Block then you’ve come to the right place!!

Measurements & Cutting Instructions…

From the GREY fabric cut:

– x2: 5″ squares

From the PRINTED fabrics cut:

– x1: 5″ square of each

The finished size of the block is around 22cm square or 8&5/8″ square.

Things I used in this video:
– Printed Fabrics: ‘Piccadilly’ fabric range by DS Quilts Collection
– Clover Finger Presser: http://goo.gl/IOXilY
– Brother Innovis 200QE sewing machine
– Fiskars rotary blades, cutting mats and scissors
– Sew Easy quilting rulers

And here’s a great example by Red Pepper Quilts using the traditional Broken Dishes block in a very modern way! (Personally, I love the use of all the solid colours working so harmoniously together!)

Do you have any quilt blocks you’d love for me to demonstrate? I’m currently in the midst of organising my tutorials schedule for next year and would love to add your suggestion to the list! Comment below with your marvellous idea! 😊

Happy Sewing Friends!

xx

*HSTs = Half Square Triangles

(An Alternate Video Thumbnail)

TUTORIAL: The Maple Leaf Block

MapleLeaf

MapleLeafPair

Adding to my stash of quilt block tutorials is this one:

The Maple Leaf Block!

I thought it would be fit to dedicate this particular block to all of my friends (that’s you!) who live in the Northern Hemisphere who are welcoming the coming months of fall/autumn!

I hope you enjoy the cooler months!

#totesjealous

So this block, just like others I’ve demonstrated in the past, is super simple and is ideal for the beginner quilter who would like to stretch their legs a bit and give HSTs (that is, half square triangles) a go!

Learning how to make HSTs is an essential skill to learn if you’re serious about patchwork. It will become one of those knowing-how-to-write-without-thinking-about-it type skills that you’ll forever be falling back on again and again.

So if you feel unsure about making HSTs or just have no clue what a HST is, watch the tutorial and you’ll know!!

(PS. You can find all of the measurement and cutting instructions for this block at the end of this post!)

If I’ve inspired you to make this block, then here are just a few creative ways this block can be used to make a beautiful quilt!

MapleLeafQuiltInspirations

Here are the links of where you can find the makers of these darling quilts!

The Quilt by Amy at Diary of a Quilter

The Quilt by Messy Jessy

The Quilt by Annabella at Kech Quilts

The Quilt by Sarah at sew&tellhandmade

#sharethelove

Happy Sewing Friends!!

xx

Measurement & Cutting Instructions

From the x5 ORANGE fabrics cut:

– x1: 3&1/2″ square for the centre

– x1: 3&7/8″ square from each of the others for the HSTs

From the BROWN fabric cut:

– x1: 3&1/2″ square for the stalk

From the WHITE fabric cut:

– x1: 3&1/2″ square for the upper corner

– x2: 3&7/8″ squares for the HSTs

– x2: 2&1/2″ squares for the stalk

Don’t forget to send me a photo of your finished block!

I would love to see it!

Tutorial: Churn Dash Block

In recent Pinterest binges, I’ve happily come across some beautifully designed and pieced quilts featuring the Churn Dash block.

Churn Dash Quilts
Links to these quilts are at the end of this post.

Then by crazy chance I came across a simple pattern on how to make it within all of my lose-leaf patterns that I’ve collected over the years.

So duh! I just had to share it with you in tutorial form!

It really is ridiculous just how easy this block is construct! Before you know it, it’s done!

The other thing I love about this block is how easy it is change up….

My Churn Dash Blocks

Simply replace the centre square with the opposite fabric and then turn all of the blocks’ units 180degrees and you have a totally different looking block! Love it!!

I’m also kinda in love with the floral fabrics I’ve used. The patterns remind me a lot of the old tablecloths, dresses and skirts my mum inherited from her aunties! Again, love it! So adorably kitsch and retro!

Let me know if you’re planning on giving this block a go! I would absolutely love to see how you interpret this block and see the types of fabrics you use.

Send me an email (3and3quarters@gmail.com) or tag me on through Instagram @3and3quarters.

Happy Sewing Friends!

xx

LOVE word count: 5! (Note: must buy a Thesaurus!)

{LINKS}

Pepper Churn Dash Quilt by mybricole

Churn Dash Quilt by Amy Smart at WeAllSew

TUTORIAL: The Bear Paw Block

REFERENCE GUIDE: Bear Paw Block Layout PDF

I’ve always had a bit of a soft spot for this block…

Perhaps it’s because it was one of the first ‘traditional’ blocks I ever constructed. (And come to think of it, I’m pretty sure it was one of the first times I ever made half square triangles!)

So, in a bid to mix the traditional with the modern (one of the things I love best to do in my quilting practice), I hovered over to my quilt book library and dug out this book. Full of simple and oh-so-delightful patchwork blocks, I found the one that I wanted and adapted it for this little tutorial.

Next came finding the right fabrics that would help make the unique design of the block stand out. In the end, I chose to construct the block using two solids – pink and grey – both so scrumptiously modern! LOVE IT!!

(Looking for the measurement & cutting instructions? Click of the PDF link at the start of the post and there they’ll be!)

Trailing off on a side note: some of you might not know that this December, a brand new little baby girl will be arriving in our family! No, it’s not me – I’m not pregnant… But my brother and sister in-law are expecting their fifth child after having four glorious boys! So this means, I can finally get into my pink cutesy fabrics and make something so girly that you’ll become so clucky you’ll want to have your own little baby girl!!

😀

But anyway, I’ve casually been on the lookout for a quilt design to make for my new niece and I’m quite sure I’ve found it in this little tutorial!

Bear Paw 1

I am so simply in love with these two colours together that I almost feel a little uncomfortable by it… They don’t seem to over dominate each other; they quietly sit side-by-side, emitting a beautiful message of unity and history so much so that it almost makes me feel a bit teary! (Or it could just be my ever-loving monthly hormones wrecking havoc all over the place!)

So what I’m trying to say, after all of that weird emotion, I’ve decided to make a baby quilt for my pending niece using the Bear Paw block. YAY!

Have you made this block before? If so, let me know! And if you have a photo of the quilt, I would love to see it!

Also, if you have questions or feedback about this block/tutorial or have any other suggestions for tutorials or crafty things you would like me to demonstrate, comment down below or send me an email at 3and3quarters@gmail.com

In next weeks tutorial, I’ll be delving into the open possibilities of Quilt Labels! Should be a hoot!

Come join me!

Happy Sewing Friends!

xx