Boy, these tutorials sure are coming on thick and fast! (Oh my, that was not intended to sound as rude as it does!)
Ahem! Moving on…
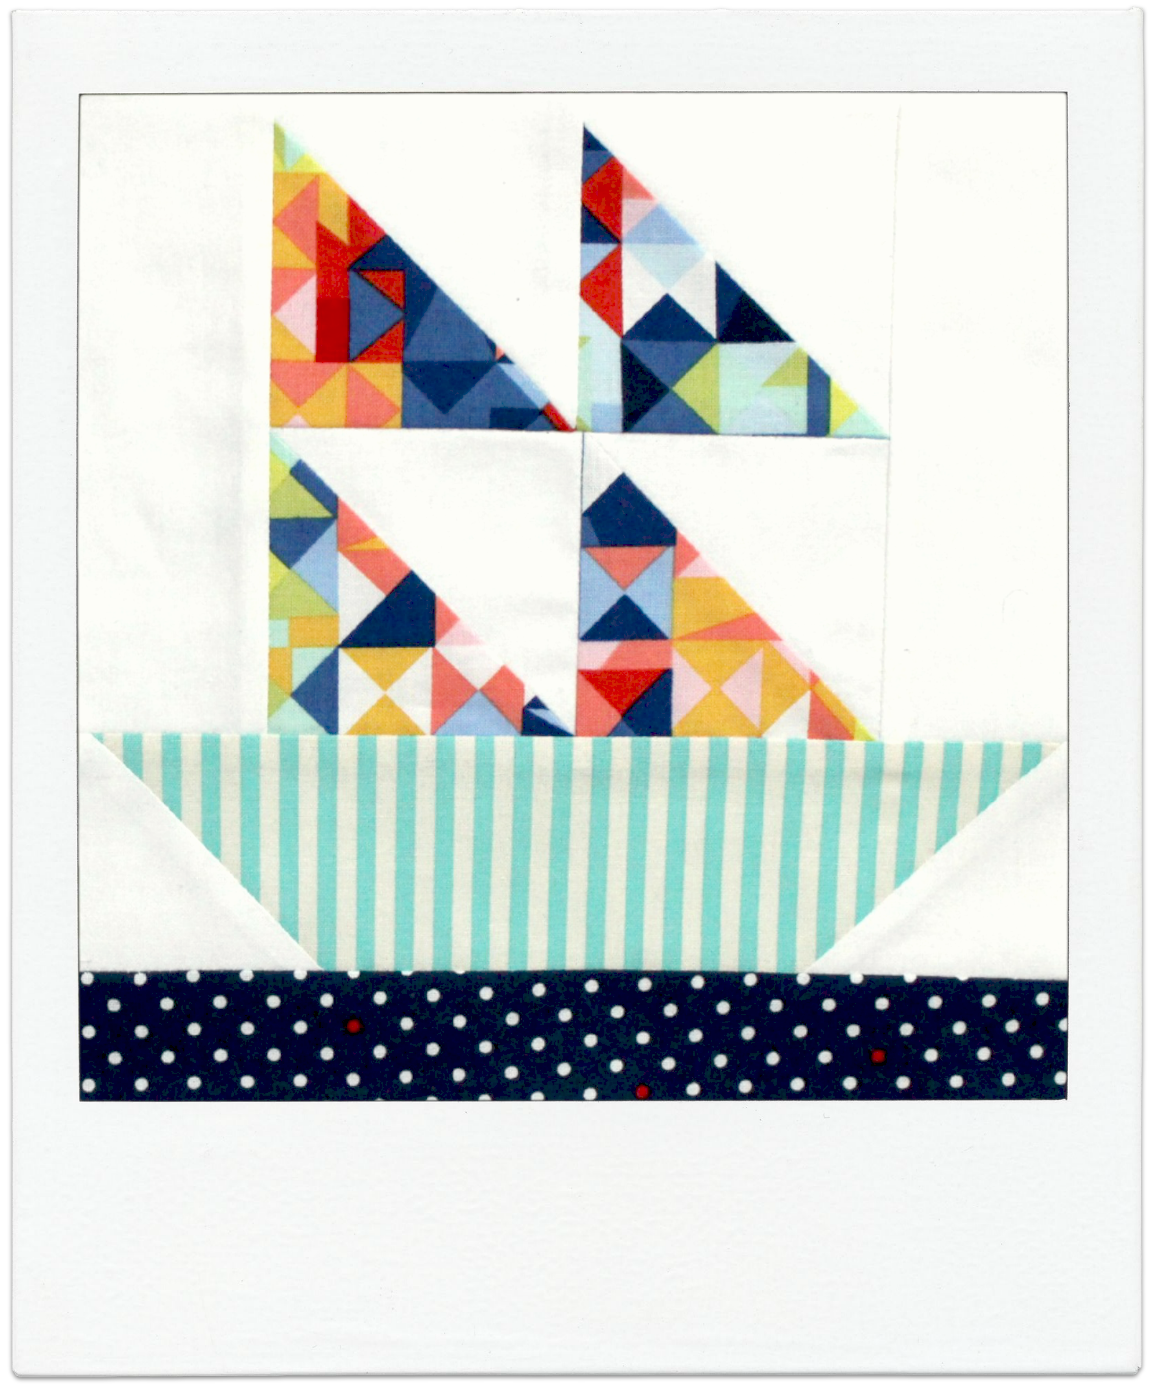
This week’s tutorial is The Sailboat Block!
It’s a wonderfully versatile and super-simple block to construct that has deep traditional roots but still possess an edge of modernity to it.
I love it!
Why only yesterday, on Facebook, one of the many quilting pages I follow posted a heritage quilt made up entirely of the Sailboat Block. I couldn’t believe it! Everything was in exactly the same place/design as the one I demonstrate in my tutorial! I was amazed, with my love, passion and appreciation for patchwork growing just that little bit more!
Here are the measurement & cutting instructions if you want to make this block yourself:
For the Sails cut:
– x2: 3&3/8″ white squares
– x2: 3&3/8″ print squares
For the side of the Sails cut:
– x2: 2″x5&1/2″ white rectangles
For the Boat cut:
– x2: 2&1/2″ white squares
– x1: 2&1/2″x8&1/2″ print rectangle
For the Sea cut:
– x1: 1&1/2″x8&1/2″ print rectangle
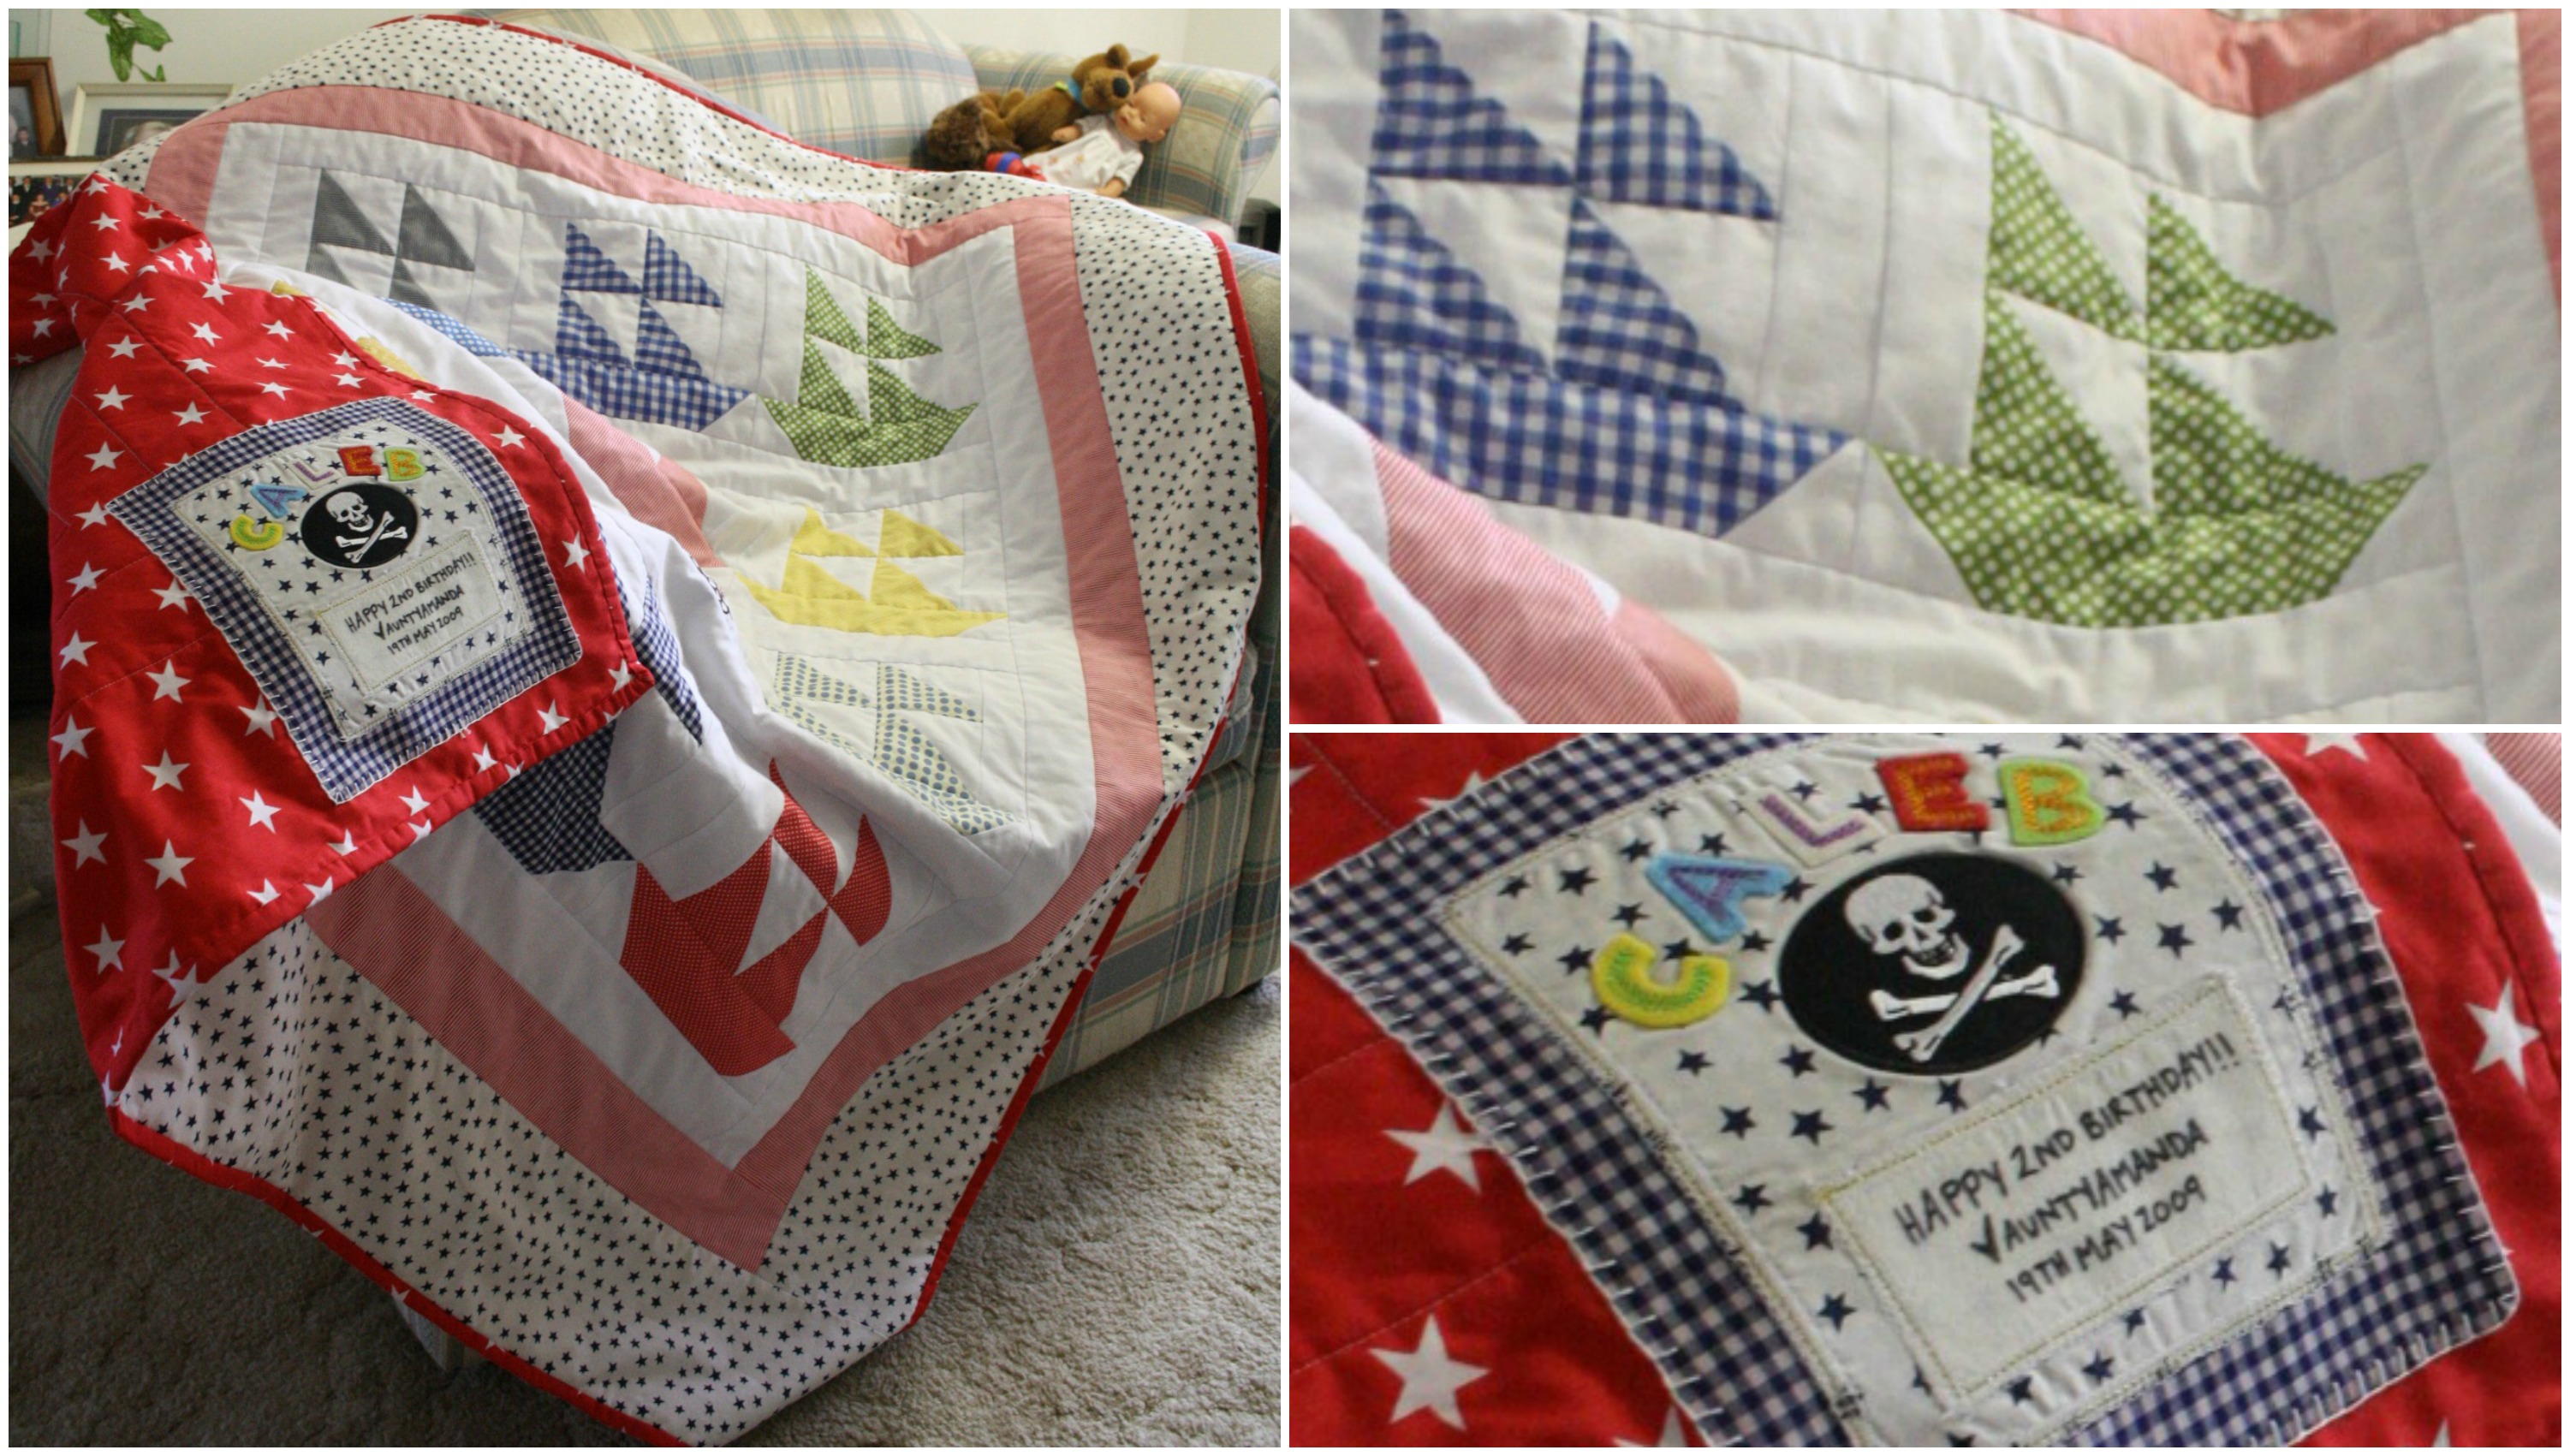
Making this block again brings back beautiful memories of the quilt I made for my oldest nephew (who is now 7!) in celebration of his 2nd birthday.
Caleb’s Sailboat Quilt | May 2009
This quilt was made way back when even before I started my blog! Almost seems like a lifetime ago!
Let me know if you’re going to give this block a go! It is so delightfully boyish that I think any little man will adore and treasure it! (Ha! Get it? Treasure…it!)
Hello & Good Morning to you on this chilly Australian winter morning!
The heater is pumping, Coldplay are repeating their mellow tunes through my computer speakers and a hot cup of Earl Grey is happily steaming next to me. But most importantly, my fingers are itching to present to you a new Quilt Block Tutorial!
One of the most viewed posts here on my blog is this one. It’s where I first begun sharing the creation of my Jacob’s Ladder Quilt.
Quilt Top Construction
And now, two years later, I’ve created a tutorial for those who would like to make this block themselves!
Here’s a quick low-down of the measurement and cutting instructions…
For the 4-Patch Units cut x20 assorted 2.5″ squares.
For the HSTs cut x2 white 4&7/8″ squares and x2 grey 4&7/8″ squares.
The finished size of the 4-Patch & HST units should measure 4.5″.
The finished size of the block should measure 12″.
Blooper Collage!
If you’re planning on making a fair size quilt with this block, I made 16 blocks to make this quilt…
My finished Jacob’s Ladder Quilt!
Like I said at the end of the video, if you’re going to give this block a go, take a photo of it and send it to me! You can email me (3and3quarters@gmail.com), Tweet me (@3and3quarters) or Instagram me (@3and3quarters)!
Finally I’ve got my act together and have produced a brand new Quilty Tutorial for you all!
I first came across this block at a Sew Saturday event last year (?) at my local Spotlight.
It was super-sweet and insanely easy to piece together!
No measurements.
No restrictions.
It’s just simply dive-in and start cutting and piecing!
Like many of the other Block Tutorials I’ve shown you, this little beauty is perfect to be made up out of your scrap fabrics. If like me and you’ve already got lots of scrappy-strippy bits of fabric, half of of the work is already done for you as this block requires a lot of strippy bits of fabric!
If you’re going to give this block a go, let me know!
Send me an email (3and3quarters@gmail.com) or tag me on instagram or twitter with your finished block!
I would love to see your own interpretation of this block!
I’m still creating tutorials and the like but I’ve also begun uploading weekly vlogs (and sometimes daily vlogs too!), in an attempt to have you, my viewer and reader, get to know me more.
I want to continue to post and share my Weekly Vlogs with you here on my blog, bravely welcoming you into my life behind my sewing, my writing, my filming – the whole lot!
If you’re not the kind to watch vlogs or are solely uninterested in watching – then that’s cool. I promise I won’t be offended. 🙂
So here is the first of many (I hope!) Weekly Vlogs!
So what made me want to film the things happening in my life and share them all over the internet? Good question! Here are my answers…
1. I love watching daily/weekly vlogs. I think it’s very common to be naturally curious about how other people live their lives, about what happens to them, the experiences they face on a daily basis and the fun that they have with others. Simply, vlogs easily allow me to relate with other people, roughly the same age as me, in what they’re doing. And by that, I feel a little less lost and useless in this crazy world!
2. I like the creativeness of vlogging. Filming and editing footage is a new platform for me and I’m still learning the ins-and-outs of the biz. Vlogging gives me the outlet to experiment and become more relax in front of the camera as well as give me confidence in translating what’s in my brain into a video that’s a few minutes long. Editing footage also gives me the chance to be creative with most of my senses: sight, touch, hearing/listening, emotive, worth etc. and that pleases me.
3. I’ve received some awesome encouragement from friends, readers and viewers to get on the ‘Vlogging Bandwagon’ so to speak and I’ve taken that encouragement to heart! To receive comments from strangers (essentially) who are genuinely interested in my day-to-day life is extraordinary and completely blows my mind! I think it comes back to the whole ‘relating to what other people do’ shiz.
4. In all honesty, I worry that the content I put on my YouTube channel is so far out of the ‘mainstream box’ and isn’t ‘personal’ enough that I need to plump it up a bit with more videos about myself. Perhaps that’s my ego or my endless self-doubt creeping in but that’s just how I feel. Don’t get me wrong, I’m super-proud of the content I have my channel (each video is obsessed over time and time again before it’s uploaded). I wouldn’t change the main goal/idea of what I want the channel to be, but I just want to make it a little bit more relatable to those who aren’t quite into the quilty/crafty/diy scene.
Okay, so I’m a little brave in sharing with you my deep and honest thoughts (my panic & anxiety is through the roof!) and I don’t know why I feel the need to justify the reasons why I’ve started to vlog my life… But it’s happening and I’m super-excited about it!
And…while we’re talking about videos and the like, I’m currently in the middle of editing another Quilt Block Tutorial! Yay! I haven’t filmed/uploaded one for over three weeks!!! (My bad…) Here’s a sneaky!
(PS. You can see the whole block on my instagram!)
Happy Sewing Friends!
xx
One last thing: Here are links to some of my favourite vloggers…
This is the third tutorial I’ve posted in row here on my blog – it’s as though I do nothing else!
Anywho – requests came through for me to demonstrate this block after the quilt I made this block with received a prized ribbon at the Sydney Royal Easter Show in April!
This new video has been a labour of love and pure patience!
For over two weeks I umm-and-ahhed and stalled and procrastinated over filming this block…
(Who honestly knows why!?)
But I finally got over myself and just did it!
And here’s where the ‘patience’ part comes in…
At the very same time it came to uploading this tutorial, it was also the perfect time for our internet to decide to run at an excruciatingly glacial pace!
(i.e. we had reached our maximum data usage! Boo!)
So, like any silly impatient Gen Y-er, I endured a 35hour upload time, slowly watching my video process…
One. Percent. At. A. Time.
**SNORE**
Eventually my video, which I started to upload on Thursday afternoon, was finally ready to publish onto YouTube Saturday morning.
Lesson learnt: be patient and never-ever continue through with an upload that has over 2000 minutes waiting time! NEVER!
Enjoy!!
Cheerio
&
Happy Sewing!!
xx
PS. Do you have any suggestions for future Quilt Block Tutorials?
Let me know in the comments below and I’ll add them to the list! x
The Easter Long Weekend came as blessing in disguise for me.
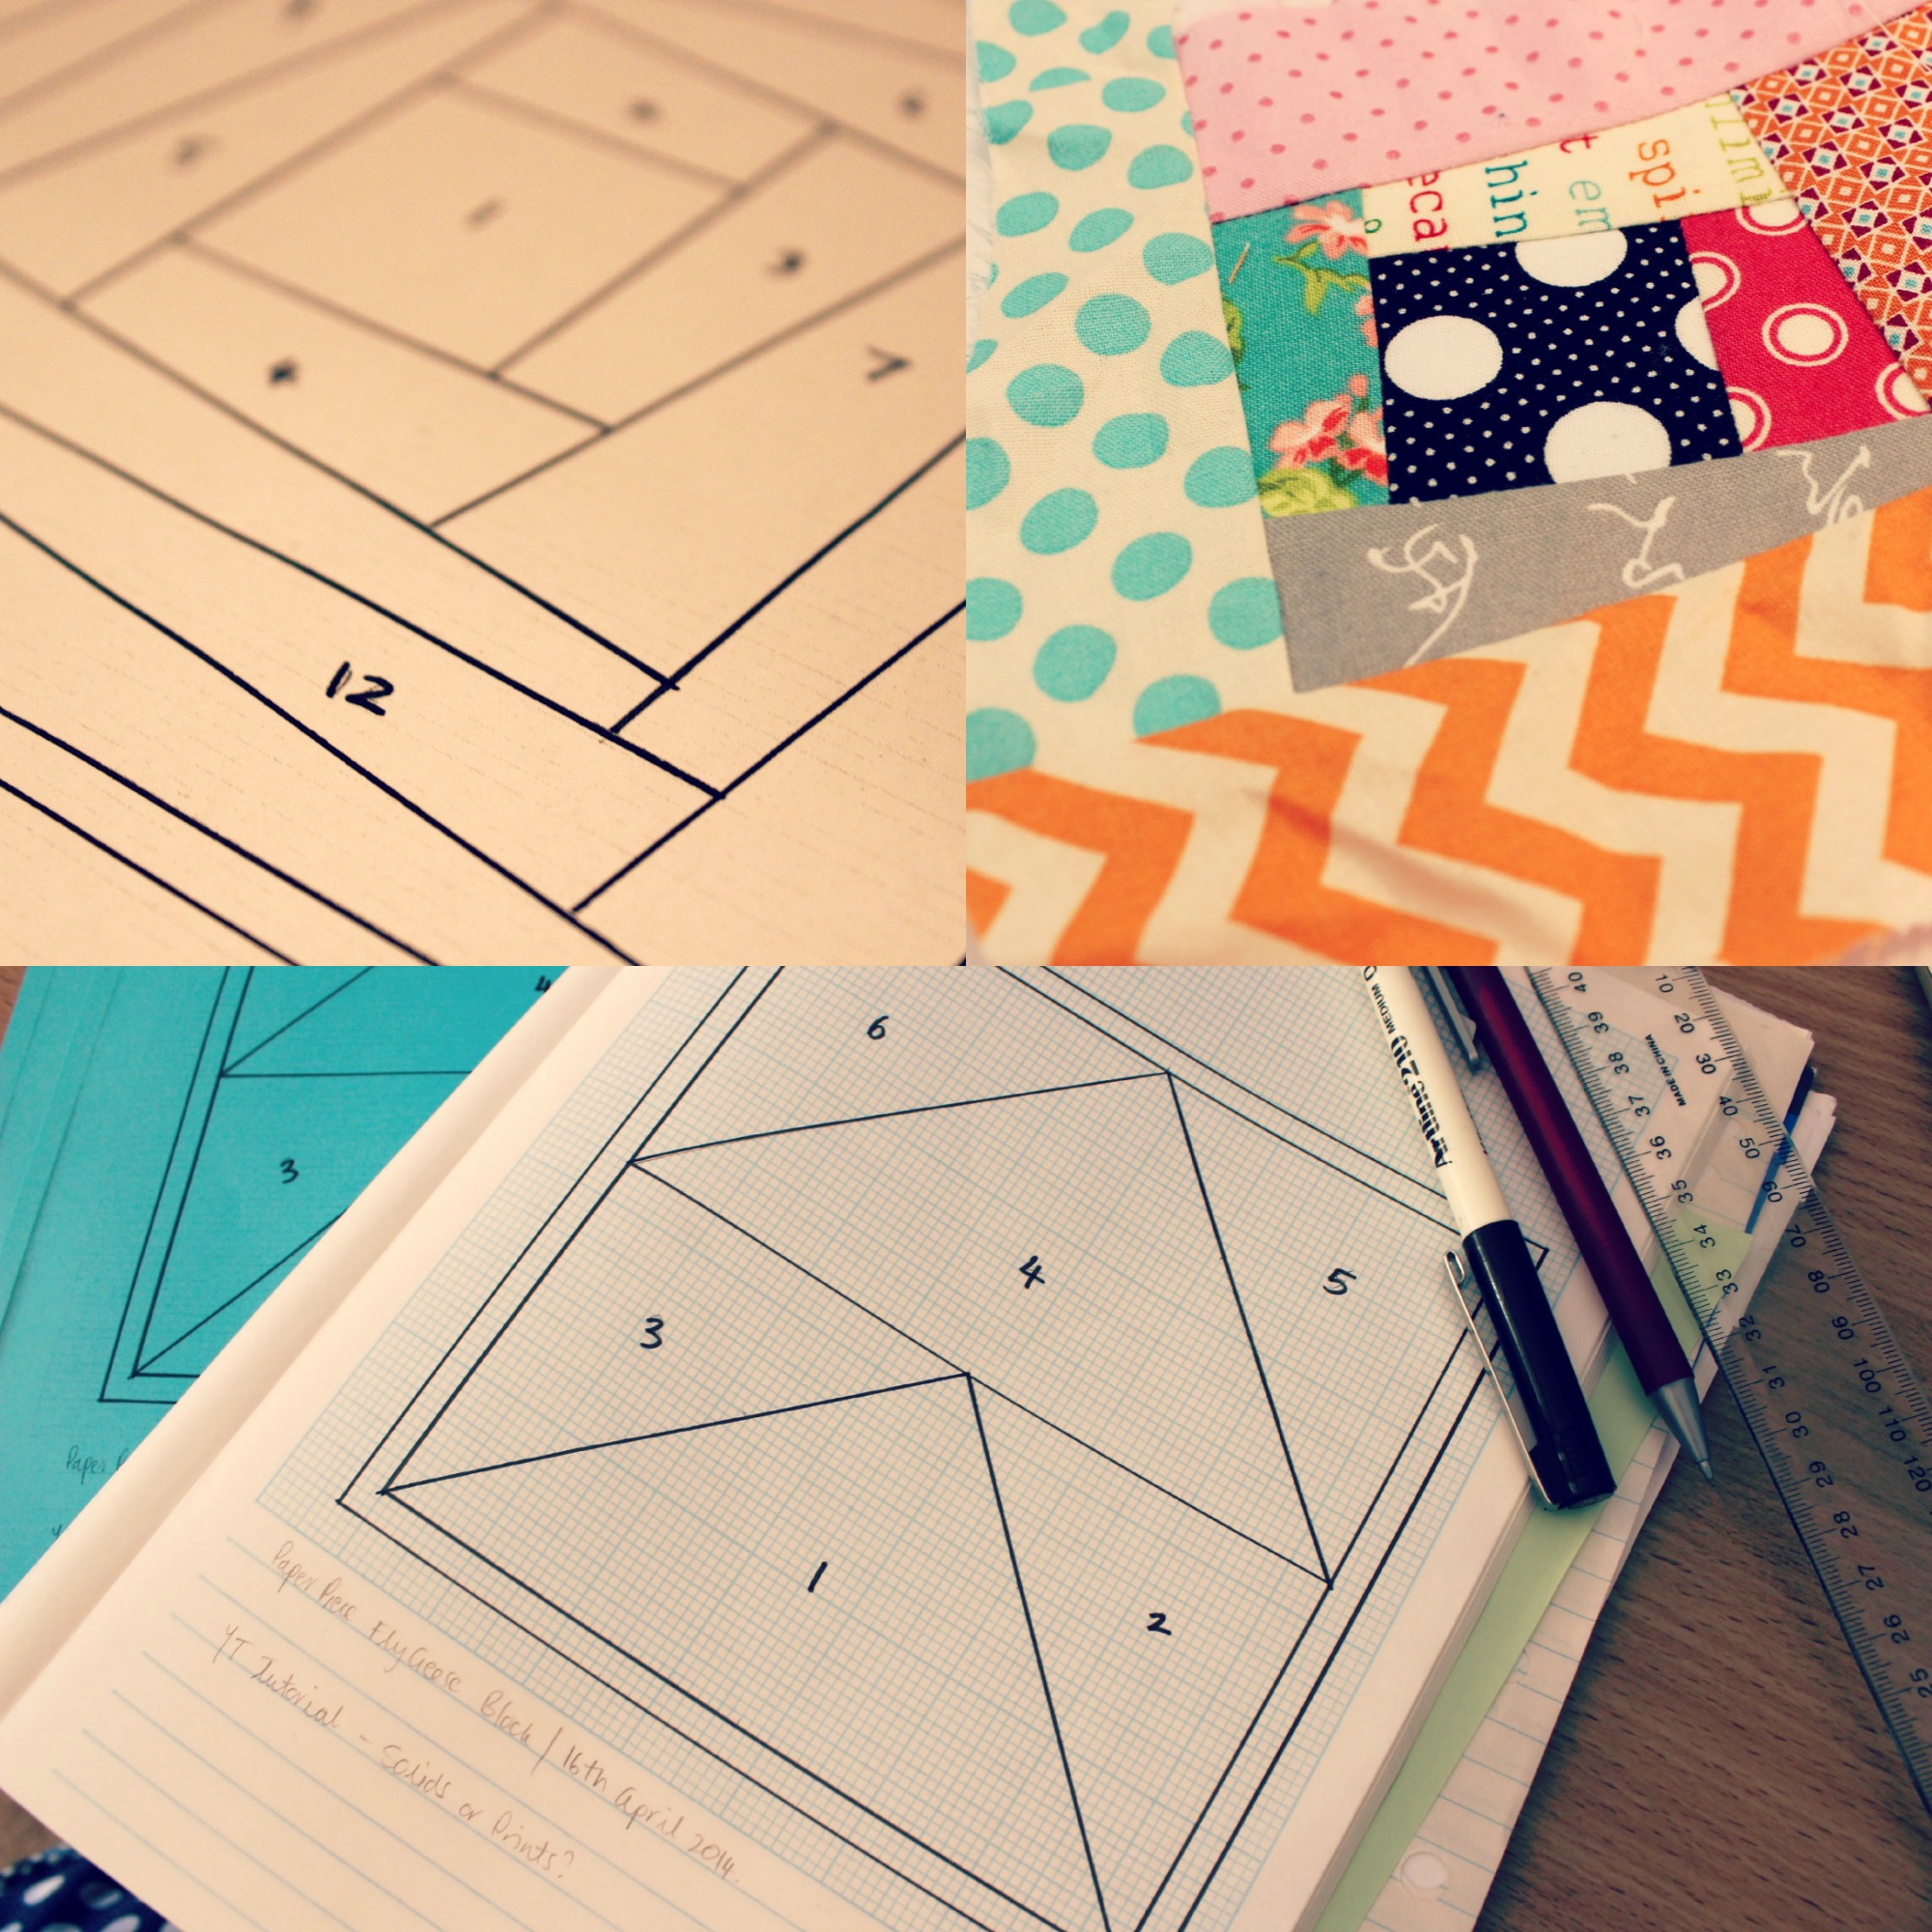
I was able to use the time to focus on getting my Foundation Paper Piecing tutorial edited and uploaded for you!
Initially I was going to demonstrate the technique using a Wonky Log Cabin pattern that I had drawn up, but decided it was possibly a little bit too complicated and fiddly for a ‘beginners’ tutorial.
So in the end, I drew up a Flying Geese type pattern that seemed a lot more quick and simple.
The method I use to tackle Foundation Paper Piecing is the way I was initially taught and feel is the most easiest, quickest and neatest way to do it.
However, there are plenty of other ways Foundation Paper Piecing can be done. These preference will (and do!) vary from quilter to quilter!
There’s something about mixing un-coordinated fabrics together to make a block look coordinated that strangely appeals to me.
(I hope that makes sense?)
I think it’s also the thrill of pairing fabrics you’ve used in separate projects and fusing them together into one little patchwork square – ahh, the memories!
(It’s the simple pleasures, right?!)
In my opinion, the Log Cabin block has to be one of the best stash-busting blocks you can make.
It’s quick, easy, super simple and can be so visually affective you swoon at the sight of it everyday!
So here I present to you a little video tutorial of how I make a very free and easy Scrappy Log Cabin Block!
If you’ve watched this and have any questions, post a comment here or on my YouTube channel and I’ll be more than happy to answer them.
Do you have any other blocks you would like me to demonstrate? Pop your suggestions in a comment and I’ll take them on board!