There’s something about mixing un-coordinated fabrics together to make a block look coordinated that strangely appeals to me.
(I hope that makes sense?)
I think it’s also the thrill of pairing fabrics you’ve used in separate projects and fusing them together into one little patchwork square – ahh, the memories!
(It’s the simple pleasures, right?!)
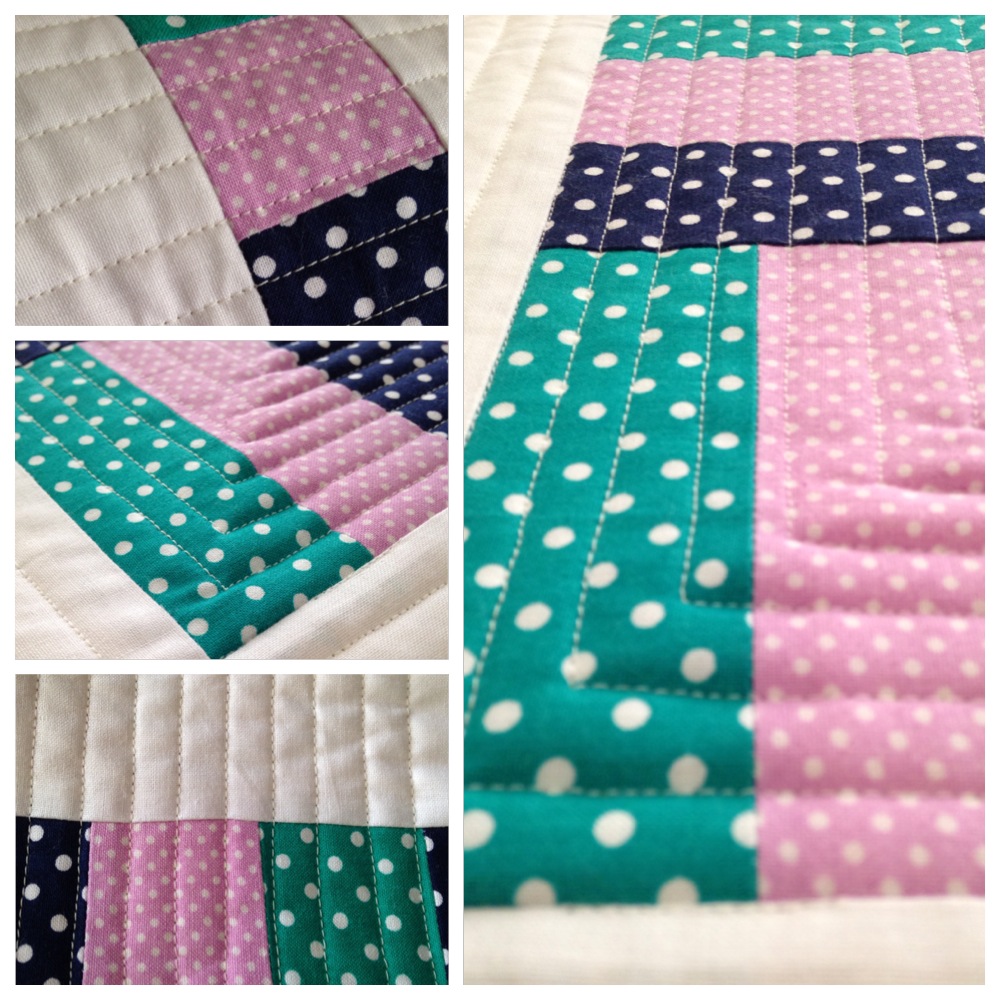
In my opinion, the Log Cabin block has to be one of the best stash-busting blocks you can make.
It’s quick, easy, super simple and can be so visually affective you swoon at the sight of it everyday!
So here I present to you a little video tutorial of how I make a very free and easy Scrappy Log Cabin Block!
If you’ve watched this and have any questions, post a comment here or on my YouTube channel and I’ll be more than happy to answer them.
Do you have any other blocks you would like me to demonstrate? Pop your suggestions in a comment and I’ll take them on board!
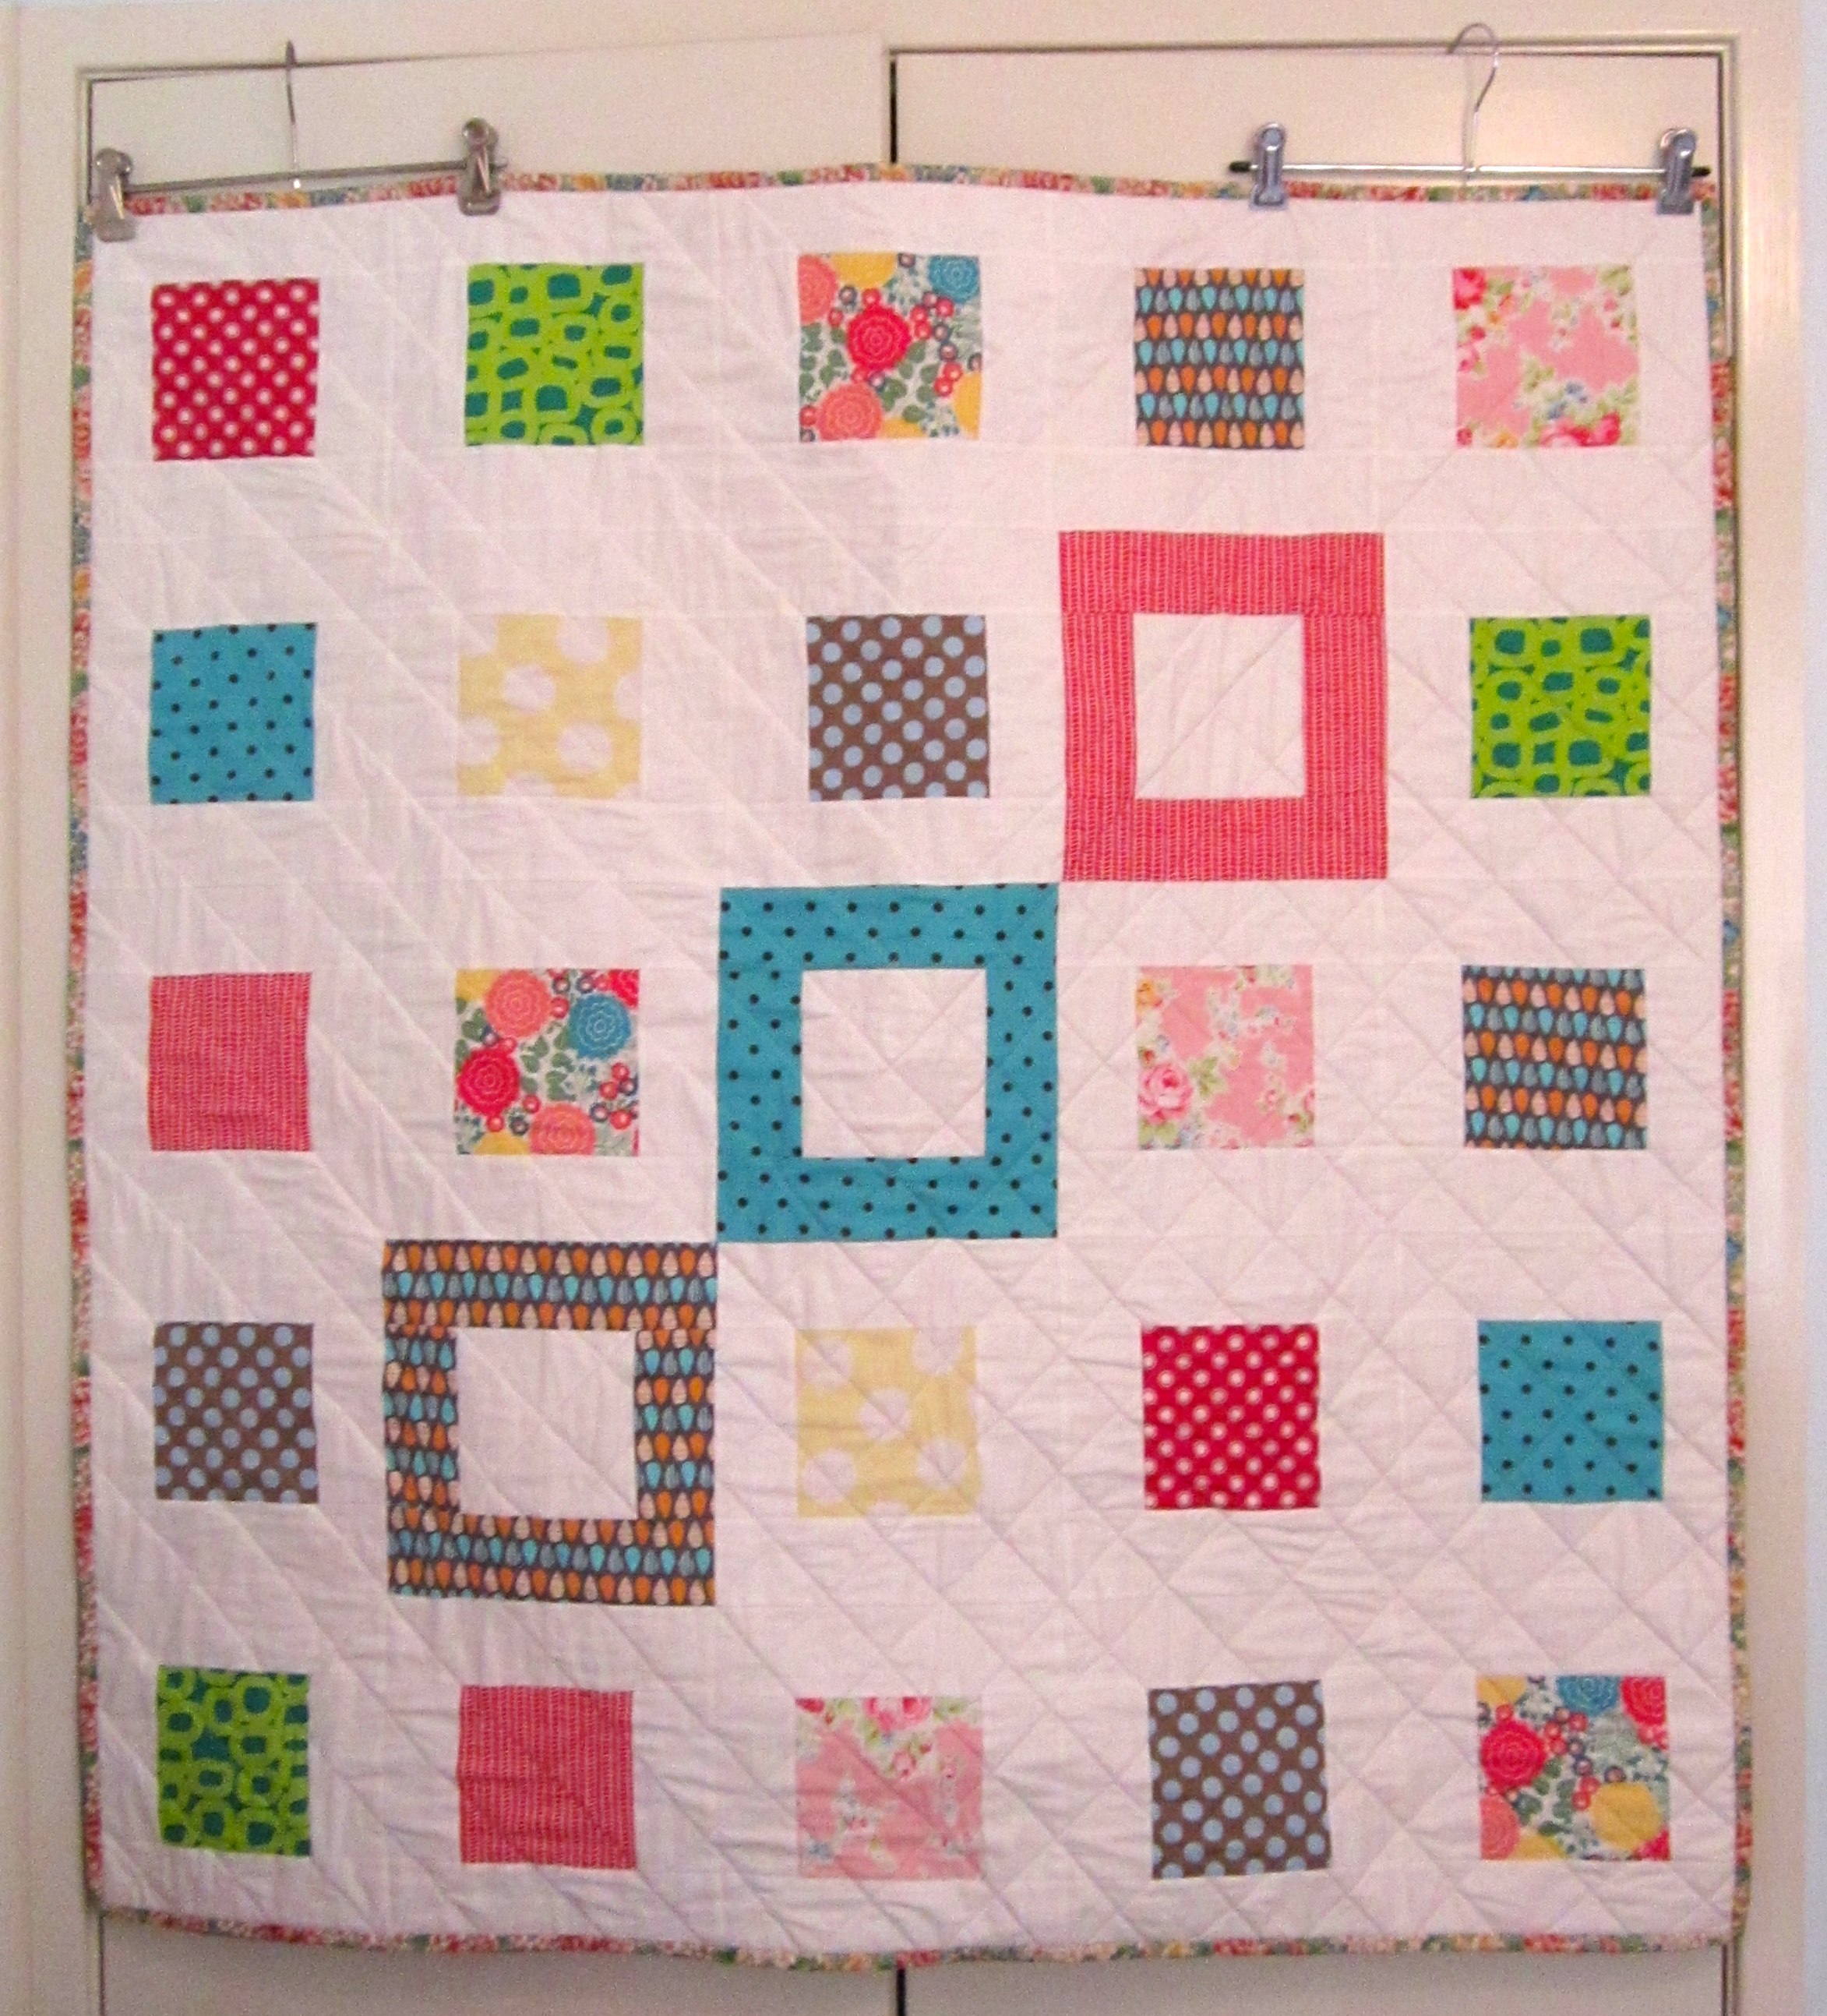
I’ve had this video tutorial in the planning for a while – ever since I filmed my Fast Forward Quilting video last year in early September, where the Square-in-a-Square Block features.
Small Plates Lap Quilt (2013)
The Square-in-a-Square Block, in my opinion, has to be one of the most easiest, quickest and adaptive blocks available for all levels and types of quilters.
It can be made into any size, using a range of differing centre-square and sashing measurements and can be made into a block as traditional or as modern/quirky as you wish it to be!
Give it a go and see what you think!
Way back in 2006, when I first became interested in making quilts, I used the Square-in-a-Square Block to make my very first quilt!
My First Quilt! (2006)
So essentially, this block was the very first block I had ever constructed!
If you’re a beginner I hope this little tutorial, in some small way, can help you in your own patchwork/quilting journey!
Jeez, a week sure can creep up on you in an instant!
I’m deeply baffled at how it can be the fourth-ish week of the New Year already! *WOW*
In the last seven days since we spoke, some quilting progress has been made to my Rail Fence Quilt…
Delicious quilty lines!
Predictably, I’ve started quilting my usual straight-line formation. (It’s easy and I’m lazy!) I’ve opted for a pattern quite similar to the way I quilted my Jacob’s Ladder Quilt, but on this one the quilty lines are a lot closer creating more of an intense surface design and texture.
To go along with this R.F Quilt, I’ve filmed and uploaded a very simple and informative tutorial on how to make the Rail Fence Block. I tried to make it as down-to-earth and helpful as possible especially for all you beginner quilters out there.
Let me know what you think of the video – I’m 100% open to any positive constructive criticism. I would love to know what I could to do improve my teaching skills and/or production/filming/editing skills.
Do you have any suggestions for quilt blocks that you would love to see me demonstrate?
Comment below and I’ll definitely take your ideas onboard!
Well, it’s now time to go and enjoy this glorious summer afternoon with a lovely icy-cold beverage, finger-licking snacks and a heart-warming rom-com!
It’s not every day that I would rock out in a felty-jingly-sparkly antler headband with a plastic Christmas crown on my head and make funny pouty faces at my computer…
But this Christmas, I did.
(And I am not ashamed of it!)
Along with that, this Christmas I also followed on the tradition of my Handmade Christmas pledge.
The majority of gifts given this year were handmade, a few were not. (Hey, I’m only human!)
First off, I made six Lil’ Santa Stockings personalised with hand embroidered names for my four nephews, one for a good friend’s son and another for my 30 year old brother!
I filled each one with an array of ‘boy’ things such bouncy balls, lollipops, stickers/tattoos, a boxes of chalk, Pez and other fun stuff personalised for each boy/man!
They all went down a treat and I couldn’t be happier!
Moving on…
For two of my close couple-friends I made some very cute Wine Bags.
I bought them each a bottle of some organically produced Shiraz (with a very pretty and simplistic label!) and popped it in the bag. I also placed a handmade Hessian Bird Ornament around the neck of the bottles as an extra little gift.
For my oldest brother and sister in-law, I gave them four Christmas Tree frames made from popsicle sticks, each with a photo taken of their sons this year.
I thought they would become sweet mementos to place on the Christmas tree each year.
Each of these gifts featured in my 12 Days of Christmas Crafts Series I posted on YouTube (and my blog) in the 12 days leading up to Christmas.
If you want to see how each of them have been made and want to get into some early inspiration for Christmas 2014, follow these links…
And with that comes the very last day of 12 Days of Christmas Crafts!
(There’s mixed emotions floating around here…)
Like I said yesterday, this craft is the simplest of the lot and will literally take you 5 minutes or so to complete! (Go on, give it a go right now!)
So with that said and all videos uploaded, I would like to take this moment to wish you all a very Happy Christmas (and prosperous New Year!) and to also give my deepest thanks and appreciation for all the support and lovely, kind words you’ve all sent to me over the past year!
It’s Day 11 already! And in 2 days time it’ll be Christmas!
Todays festive project is what I made and gave to some very special friends of mine.
I filled each bag with a bottle of some organically produced Shiraz (I bought it because the label looked pretty!) and hung a little Hessian Bird Tree Ornament from the neck of the bottles.
The final product will be in my Handmade Christmas Low-Down blog post that I’ll write and publish after Christmas!
~~~~~~
So tomorrow comes with the last Christmas Craft episode of this little series!
I can’t wait to share it with you – it’s one of the most simplest projects yet!
Holy-Moly, can you believe it’s only 3 more days until Christmas?! Oh my!
Surprising, I’m pretty much ready for the big day. I have a few cooking chores to do over the next few days but apart from that, I say ‘bring on the big day!’
If you’re still stuck on what to get that special someone aaannnddd you’ve got a knack for sewing up some quick seams, stay tuned for tomorrow’s Christmas Craft…it involves a bottle wine!
On this awfully hot and humid summer’s day in Sydney Australia, I present to you Day 9 of 12 Days of Christmas Crafts!
I think this is such a fun and creative activity to do with kids.
Together you can go hunting for sticks and twigs in the backyard, then sort through them and finally make some really awesome down-to-earth tree hanging-thingys.
A word of warning, if you are thinking of doing this with your kids, perhaps use PVA or strong Craft Glue instead of Hot Glue – just to save little fingers from getting burnt! However it does mean the trees will take longer to dry…
So have fun, go crazy, be creative!!
*****
Tomorrow is not only predicted to be another heatwave-of-a-day (40C+, YEESH!), but it’s also my nephew Noah’s 2nd birthday aaaannnnddd I’ll have Day 10 (!!) uploaded promptly in the morning!
Get out your tub of scrap fabrics cos this is a fun one!