HST Sampler Quilt | BLOCK #4: Friendship Star

PATTERN SHEET: HST Sampler Quilt – BLOCK4

Yay! It’s Friday!

(Happy Dance!)

Let’s end the week on a high with Block Four in my Quilt Along series – the Friendship Star!

I absolutely love this block! I have done since I made this quilt top using this fun little block! I’ve had a few issues with the quilting on this one and it’s currently in the process of having all of the quilted stitches unpicked by hand because I hated the FMQ job I did on it! I’m sure one day I’ll get around to re-quilting it and placing it on a bed or on the back of lounge so that it be used for cuddling under!

If you click on the pattern sheet linked at the top of this post, you’ll be able to find a full list of all of the measurements and cutting info, along with the fabrics* I’ve used to piece this block together! If you would like to use the same 12.5″ set square as me, you can find it here: June Tailor Get-Squared 12.5″ Ruler.

+++

I wish you all the most loveliest of weekends, wherever you are in the world! I hope you all enjoy making the blocks from this week and are ready to discover two more HST delights next week!

Keep sharing your blocks! I love seeing them!

Share here:

Instagram: @3and3quarters (PS. If your account is private, I won’t be able to see your block/s!)

Twitter: @3and3quarters

Email: 3and3quarters@gmail.com

Facebook

Happy Sewing, Friends!!

xx

*A big thanks to Australian wholesale supplier and fabric distributer Dayview Textiles for supplying me with such beautiful fabrics! If you want to see all of the fabrics I’ll be using in this Quilt Along, check out this post where I share them all with you!

HST Sampler Quilt | Block #3: Contrary Wife

PATTERN SHEET: HST Sampler Quilt – BLOCK3

Happy Wednesday, Friends!!

Continuing on with my HST Sampler Quilt Along, here is the third block in the series for you to make! This one is called the Contrary Wife Block!

To be honest with you, I struggled to find some decent historical information on this one to include in the pattern sheet. Bummer! I’m sure there is a fascinating story behind it! If you know any fun little facts about this block, please comment below – I would love to know more!!

All of the measurements and cutting info, along with the fabrics* I’ve used to piece this block together are in the pattern sheet linked at the top of this post! If you would like to use the same 12.5″ set square as me, you can find it here: June Tailor Get-Squared 12.5″ Ruler.

+++

Block four in the series will be ready for you on Friday (hopefully on time – I have a long awaited appointment to see the Dentist on Friday afternoon! Wisdom teeth suck!) The block that we will be making is a fun little favourite and is very appropriate for our little community that we have going on here! And that block is the Friendship Star!

Don’t forget to share all of your blocks with me and if you have any questions, please feel free to ask at any time! 🙂

See ya on Friday, Friends!

xx

*A big thanks to Australian wholesale supplier and fabric distributer Dayview Textiles for supplying me with such beautiful fabrics! If you want to see all of the fabrics I’ll be using in this Quilt Along, check out this post where I share them all with you!

HST Sampler Quilt | Block #2: Morning Star

PATTERN SHEET: HST Sampler Quilt – BLOCK2

Okay, who’s ready for block two?!

The Morning Star, I think, has to be one of my favourites! I love how bright and vibrant the layout is and how by just using two fabrics in the block it makes it look really effective, humble and simple.

Just like before, everything you’ll need to know in regards to the measurement and cutting information as well as the fabrics* I’ve use to piece this block together are in the pattern sheet linked at the top of this post! If you would like to use the same 12.5″ set square as me, you can find it here: June Tailor Get-Squared 12.5″ Ruler.

+++

Blocks three and four will be coming out on Wednesday and Friday of next week! One of the blocks I’ve made before, while the other is a bit of a traditional one that I thought I’d never make!

I hope you all have a lovely weekend sewing up your blocks! Don’t forget to share them with me and if you have any questions, please feel free to ask at any time! 🙂

Happy Sewing, Friends!!

xx

*A big thanks to Australian wholesale supplier and fabric distributer Dayview Textiles for supplying me with such beautiful fabrics! If you want to see all of the fabrics I’ll be using in this Quilt Along, check out this post where I share them all with you!

HST Sampler Quilt | Block #1: Formal Garden

PATTERN SHEET: HST Sampler Quilt -BLOCK1

**Argghh! Right at the last minute I’ve just realised I’ve been quoting the size of the block wrong throughout the whole video!! The size of the blocks will be 12.5″ square NOT 12&1/4″! The set square ruler I use is 12.5″ NOT 12″! Oh my, where was my brain today! :/

Hello and happy Wednesday to you all!

Today brings to you the first block in my HST Sampler Quilt Along series, the Formal Garden Block!

Everything you’ll need to know in regards to the measurement and cutting information as well as the fabrics* I’ve use to piece this block together are in the pattern sheet linked at the beginning of this post! If you would like to use the same 12.5″ set square as me, you can find it here: June Tailor Get-Squared 12.5″ Ruler.

I know I’ve said this a thousand times now but don’t forget to share your finished blocks with me! I love, love, love seeing them!

Happy Sewing, Friends and I’ll see you on Friday with block #2!

xx

*A big thanks to Australian wholesale supplier and fabric distributer Dayview Textiles for supplying me with such beautiful fabrics! If you want to see all of the fabrics I’ll be using in this Quilt Along, check out this post where I share them all with you!

Introducing Quilt-Along Series #2 | HST Sampler Quilt!

Happy Day! The time has finally come to introduce to you my next Quilt-Along-With-Me series on my YouTube channel! Yay!

This time around we’ll be doing a HST* Sampler Quilt!

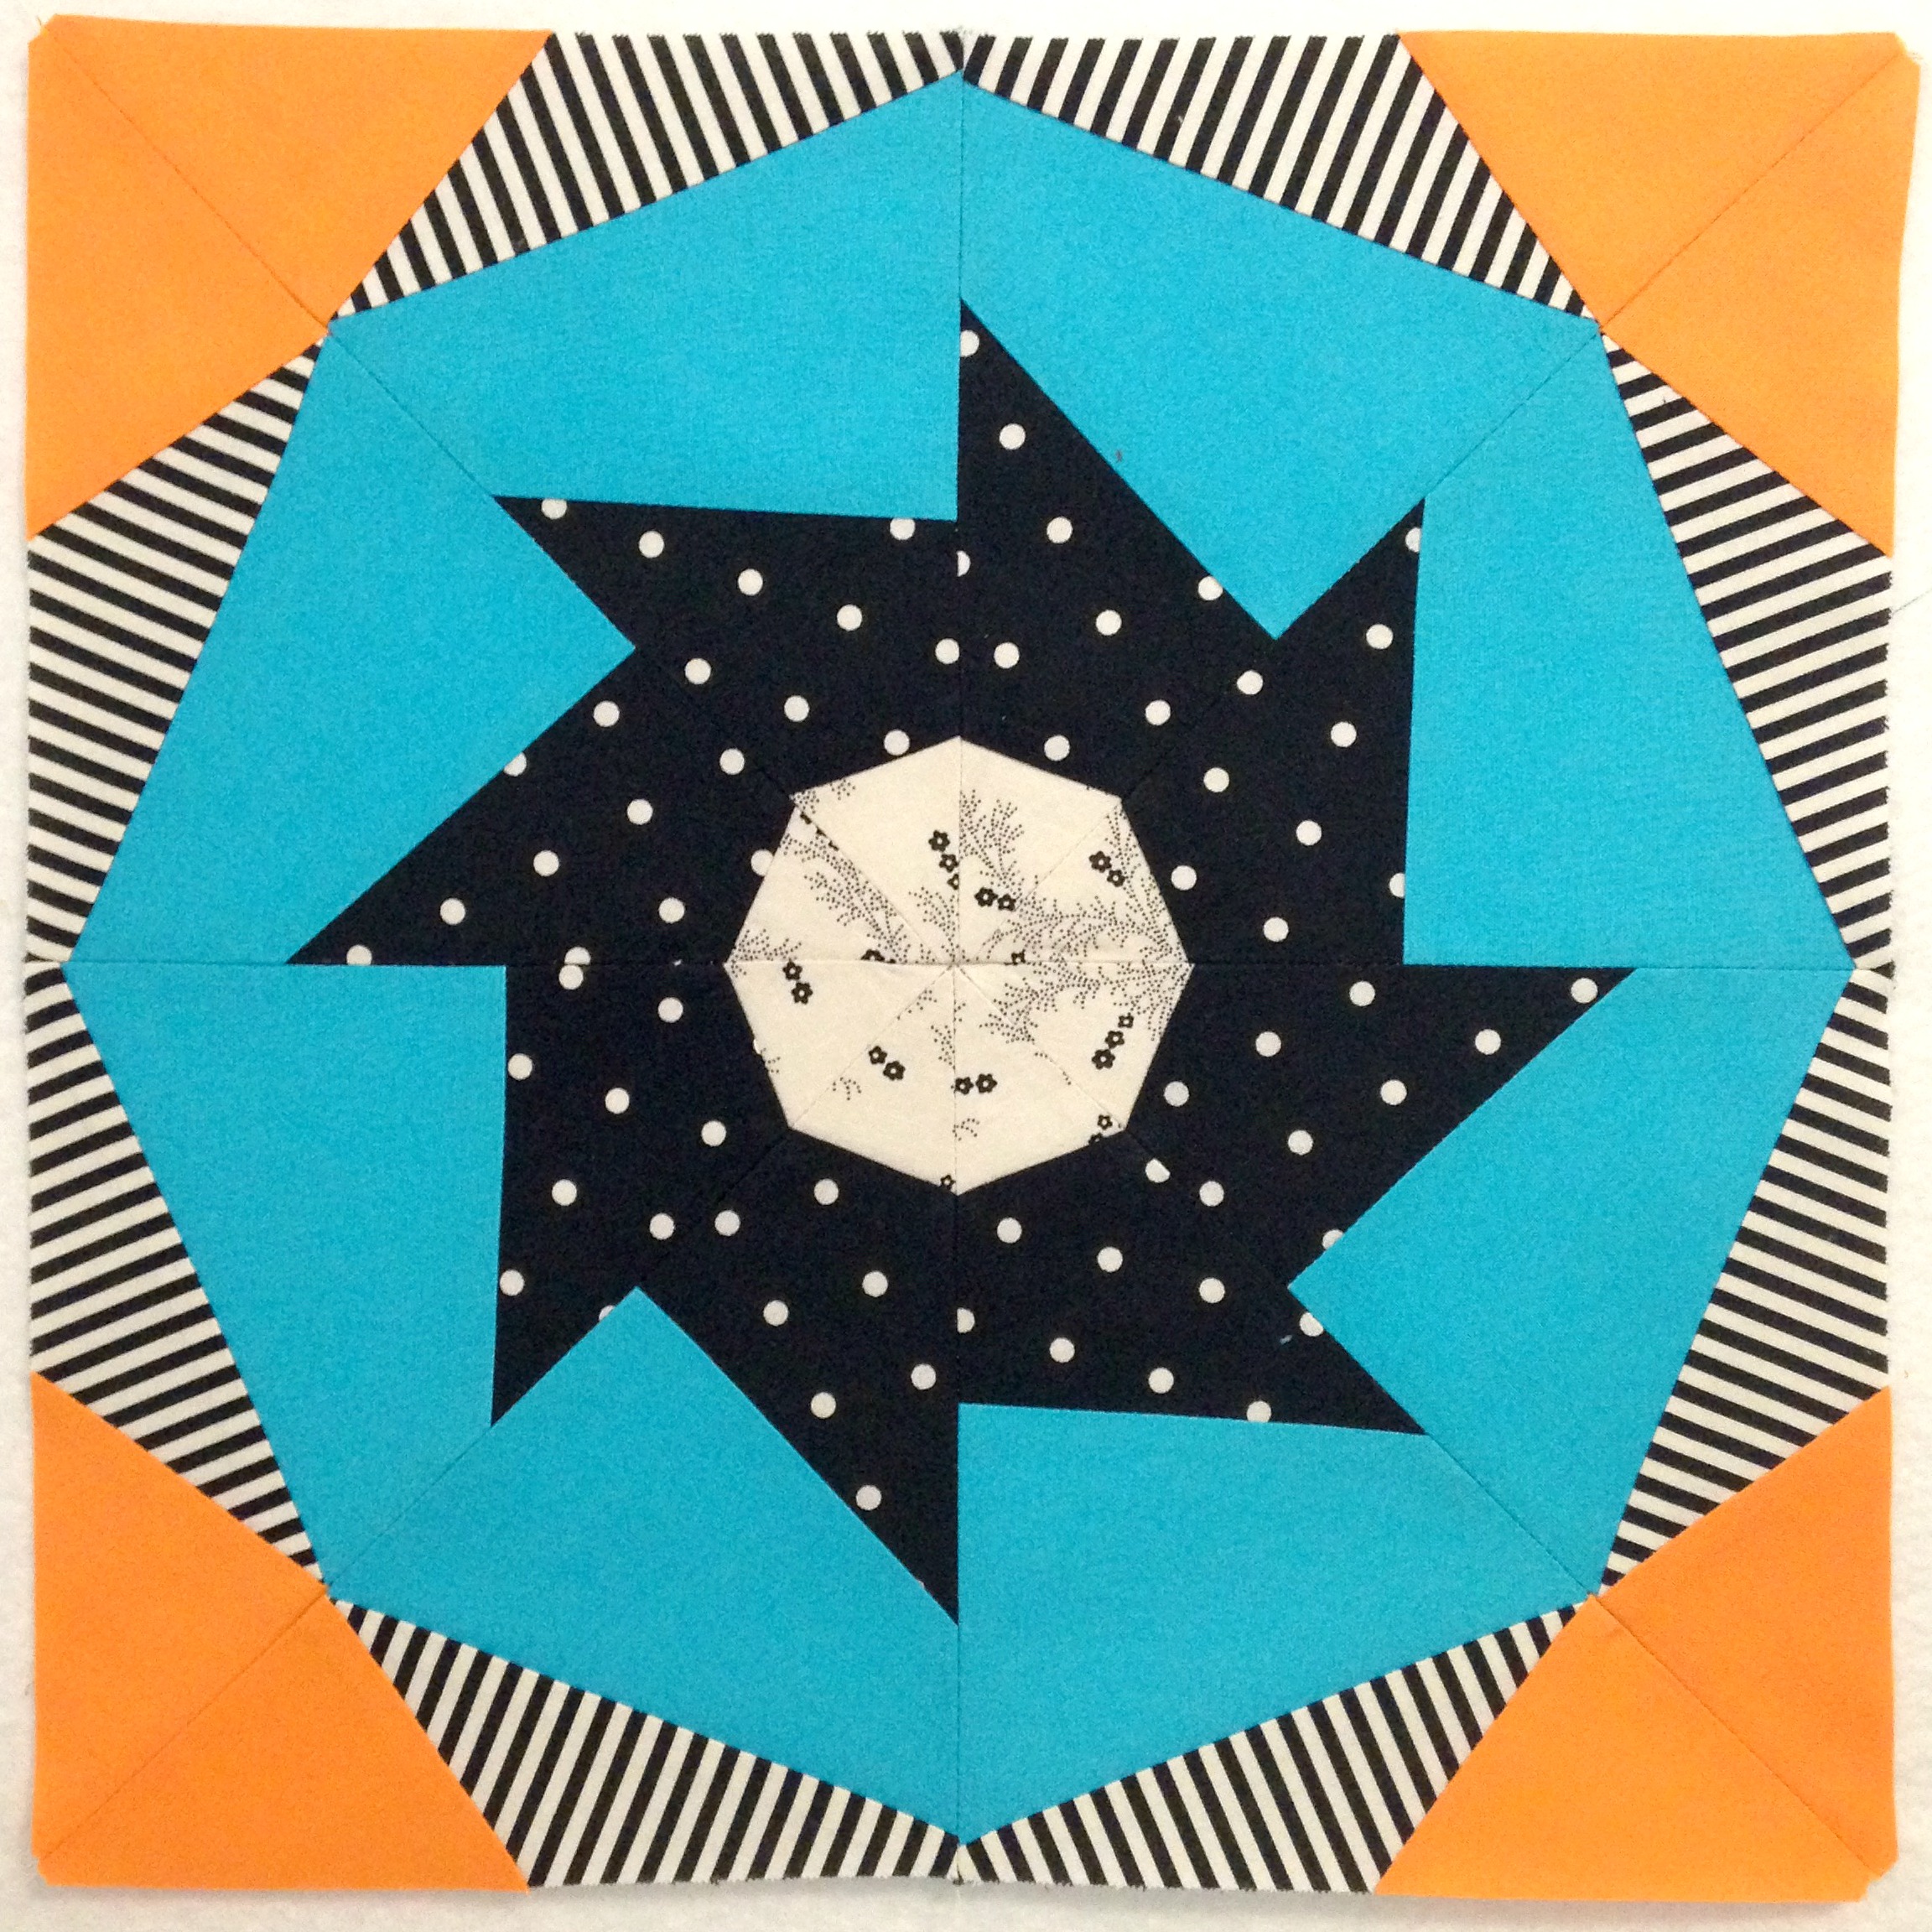
The quilt will be made up of nine 12″ blocks that all feature HSTs in their design. Most of the blocks are quite simple to piece together with only a small handful that may challenge you! So if you’re a lover of HSTs, a hater of HSTs who wants to learn to love them or simply have issues piecing HSTs, then this is the perfect project for you to follow along with!

The blocks we’ll be making are (in order of release): Formal Garden, Morning Star, Contrary Wife, Friendship Star, Shoo-Fly, Mill Wheel, Churn Dash, Open Window (a new variation) and the Windblown Square.

In each block tutorial I’ll let you know all of the measurements and cutting info like I usually do, along with what fabrics I’m using for that block. An information sheet will also be available for you to print off and follow along with at home! (These will be available to download from my blog.)

For this series, I’ll be using a range of fabrics from RJR Fabrics and Cotton+Steel. The main collection is one called The Sultan’s Garden designed by Mary McGuire and soon as I saw it, I knew it was perfect for this series!

The fabrics I’ve chosen are from the Apricot/Turquoise edition of the collection (there’s also a Berry edition featuring beautiful shades of purples and pinks!).

Here’s a list of each of the fabrics I’ll be using, along with it’s name and where it’ll feature in this Sampler Quilt.

Tulips

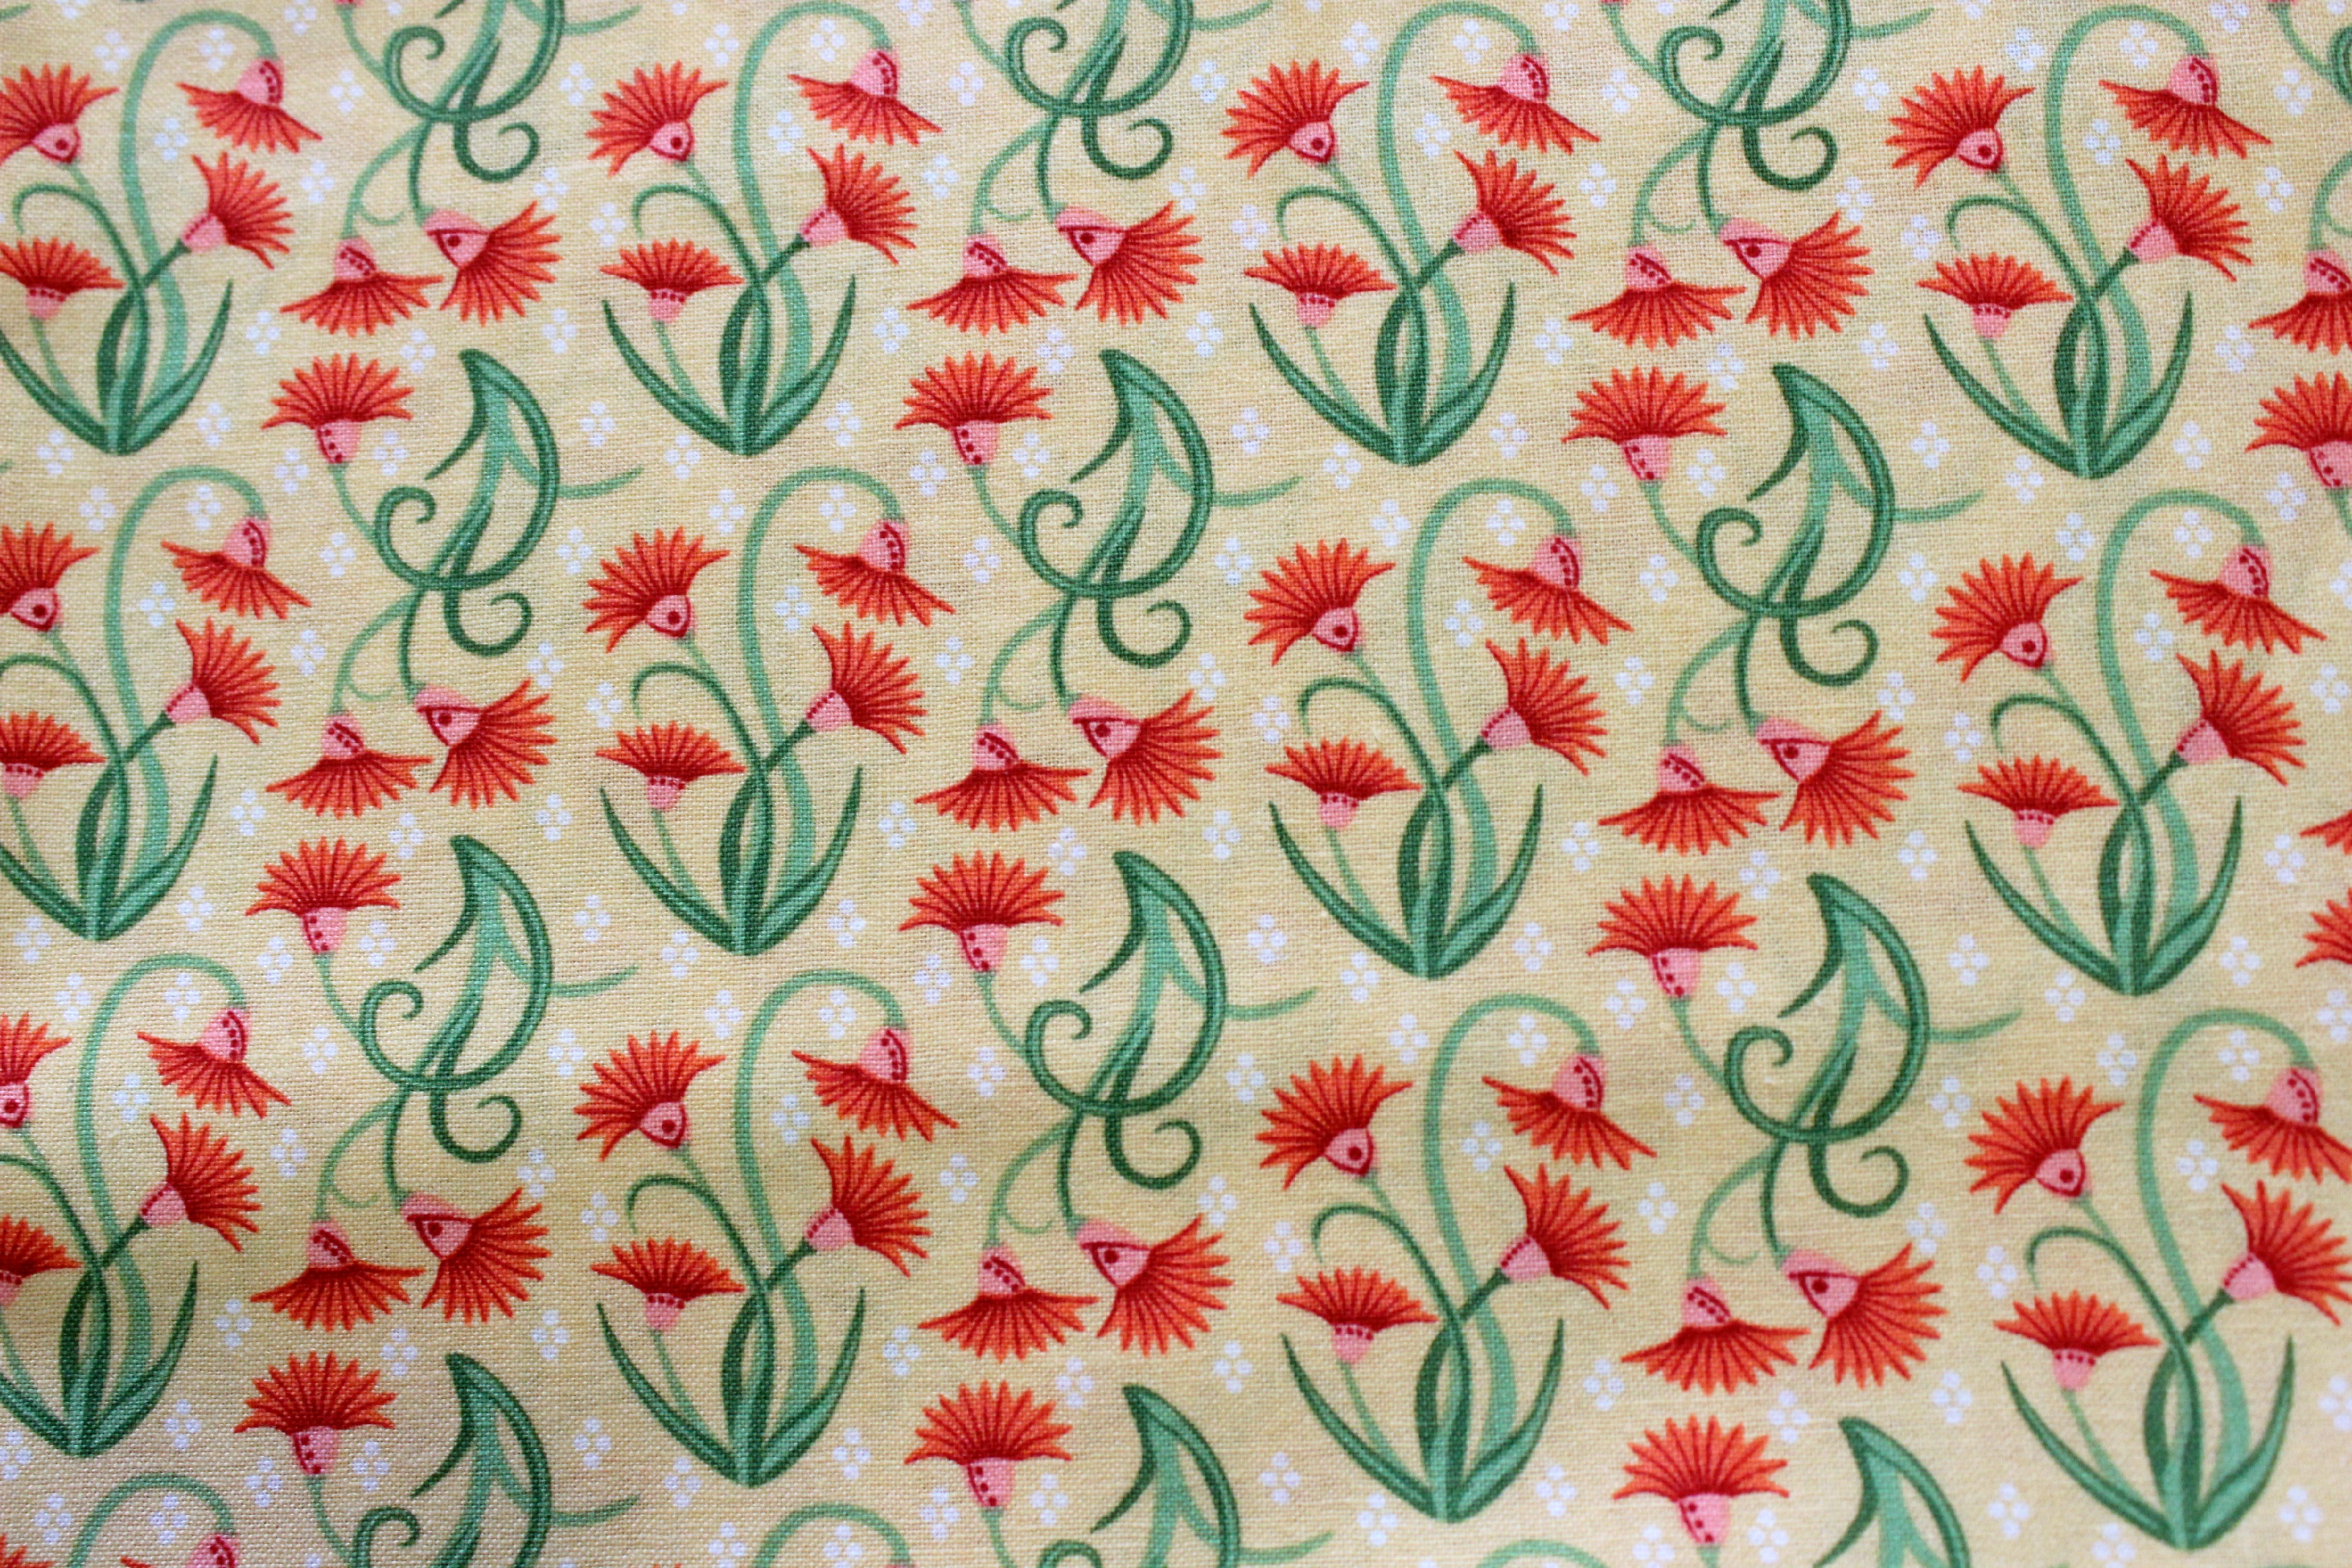
FABRIC NAME: Tulips. This fabric will used in two of the blocks.

Melisa

FABRIC NAME: Melisa. This fabric will be used in one of the blocks.

Minaret

FABRIC NAME: Minaret. This fabric will be used in one of the blocks.

Mosaic

FABRIC NAME: Mosaic. This fabric will be used in one of the blocks.

Leila

FABRIC NAME: Leila. This fabric will used in two of the blocks.

Blossom

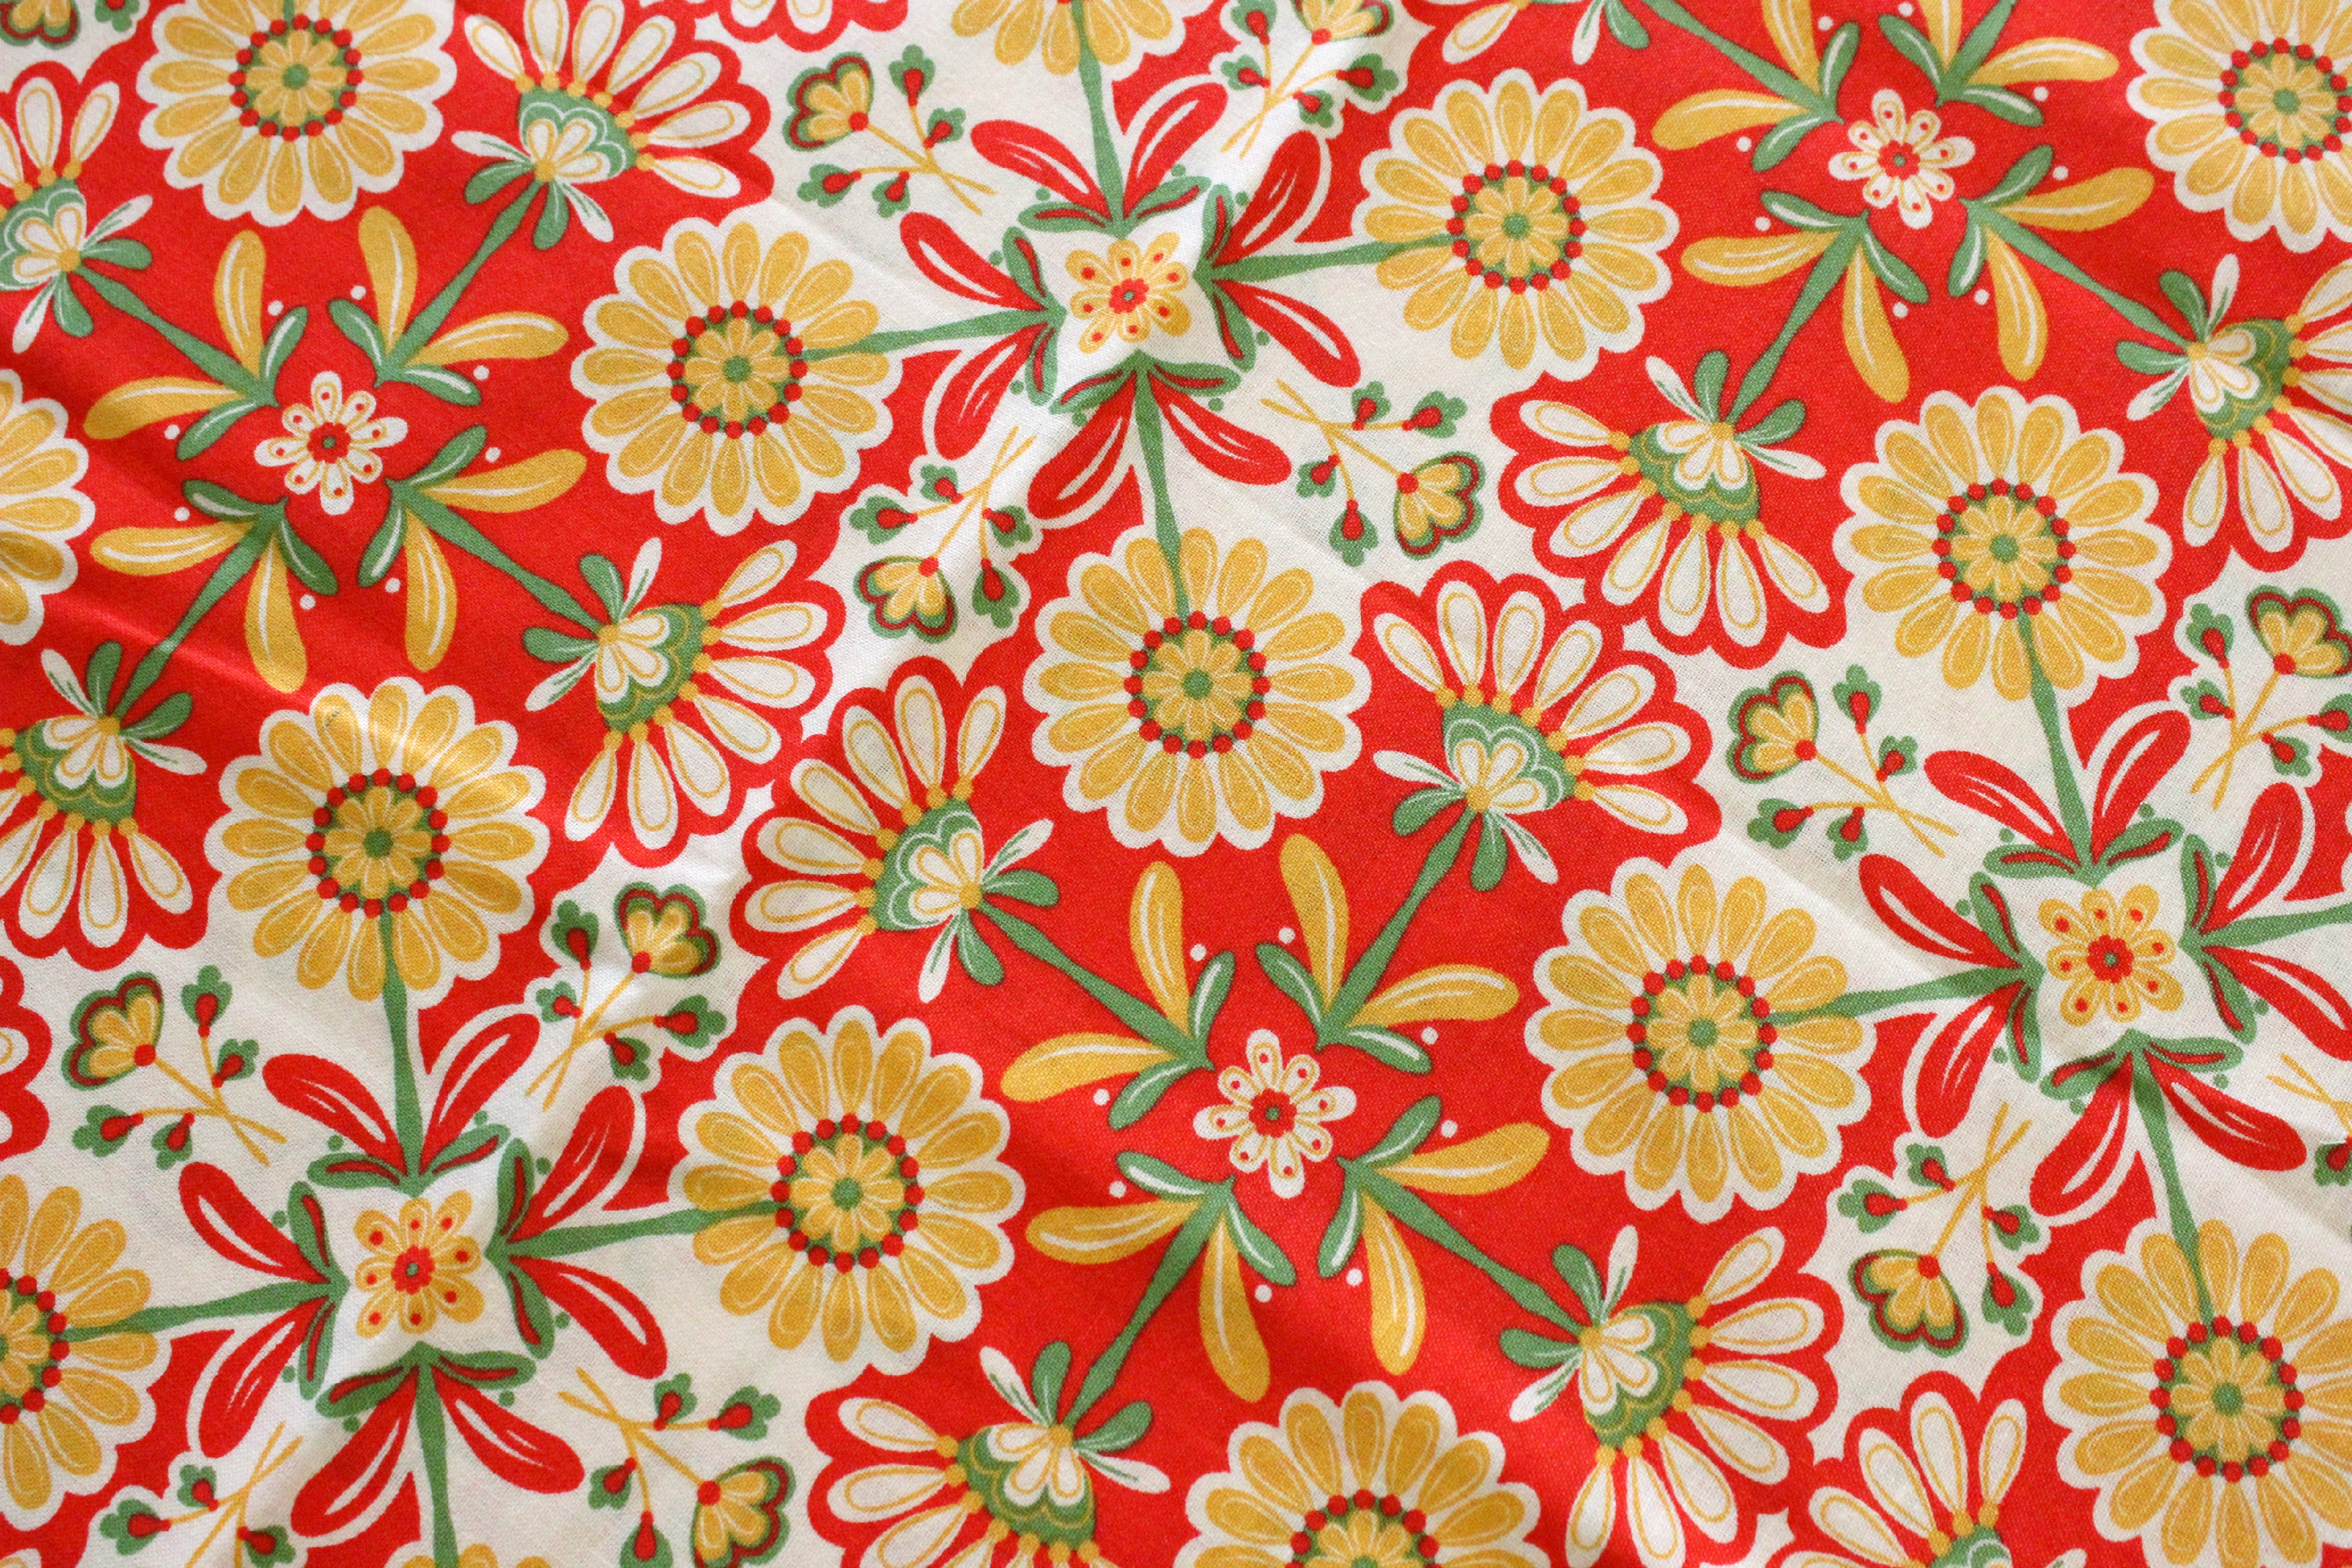
FABRIC NAME: Blossom. This fabric will be used in three of the blocks.

Stripe

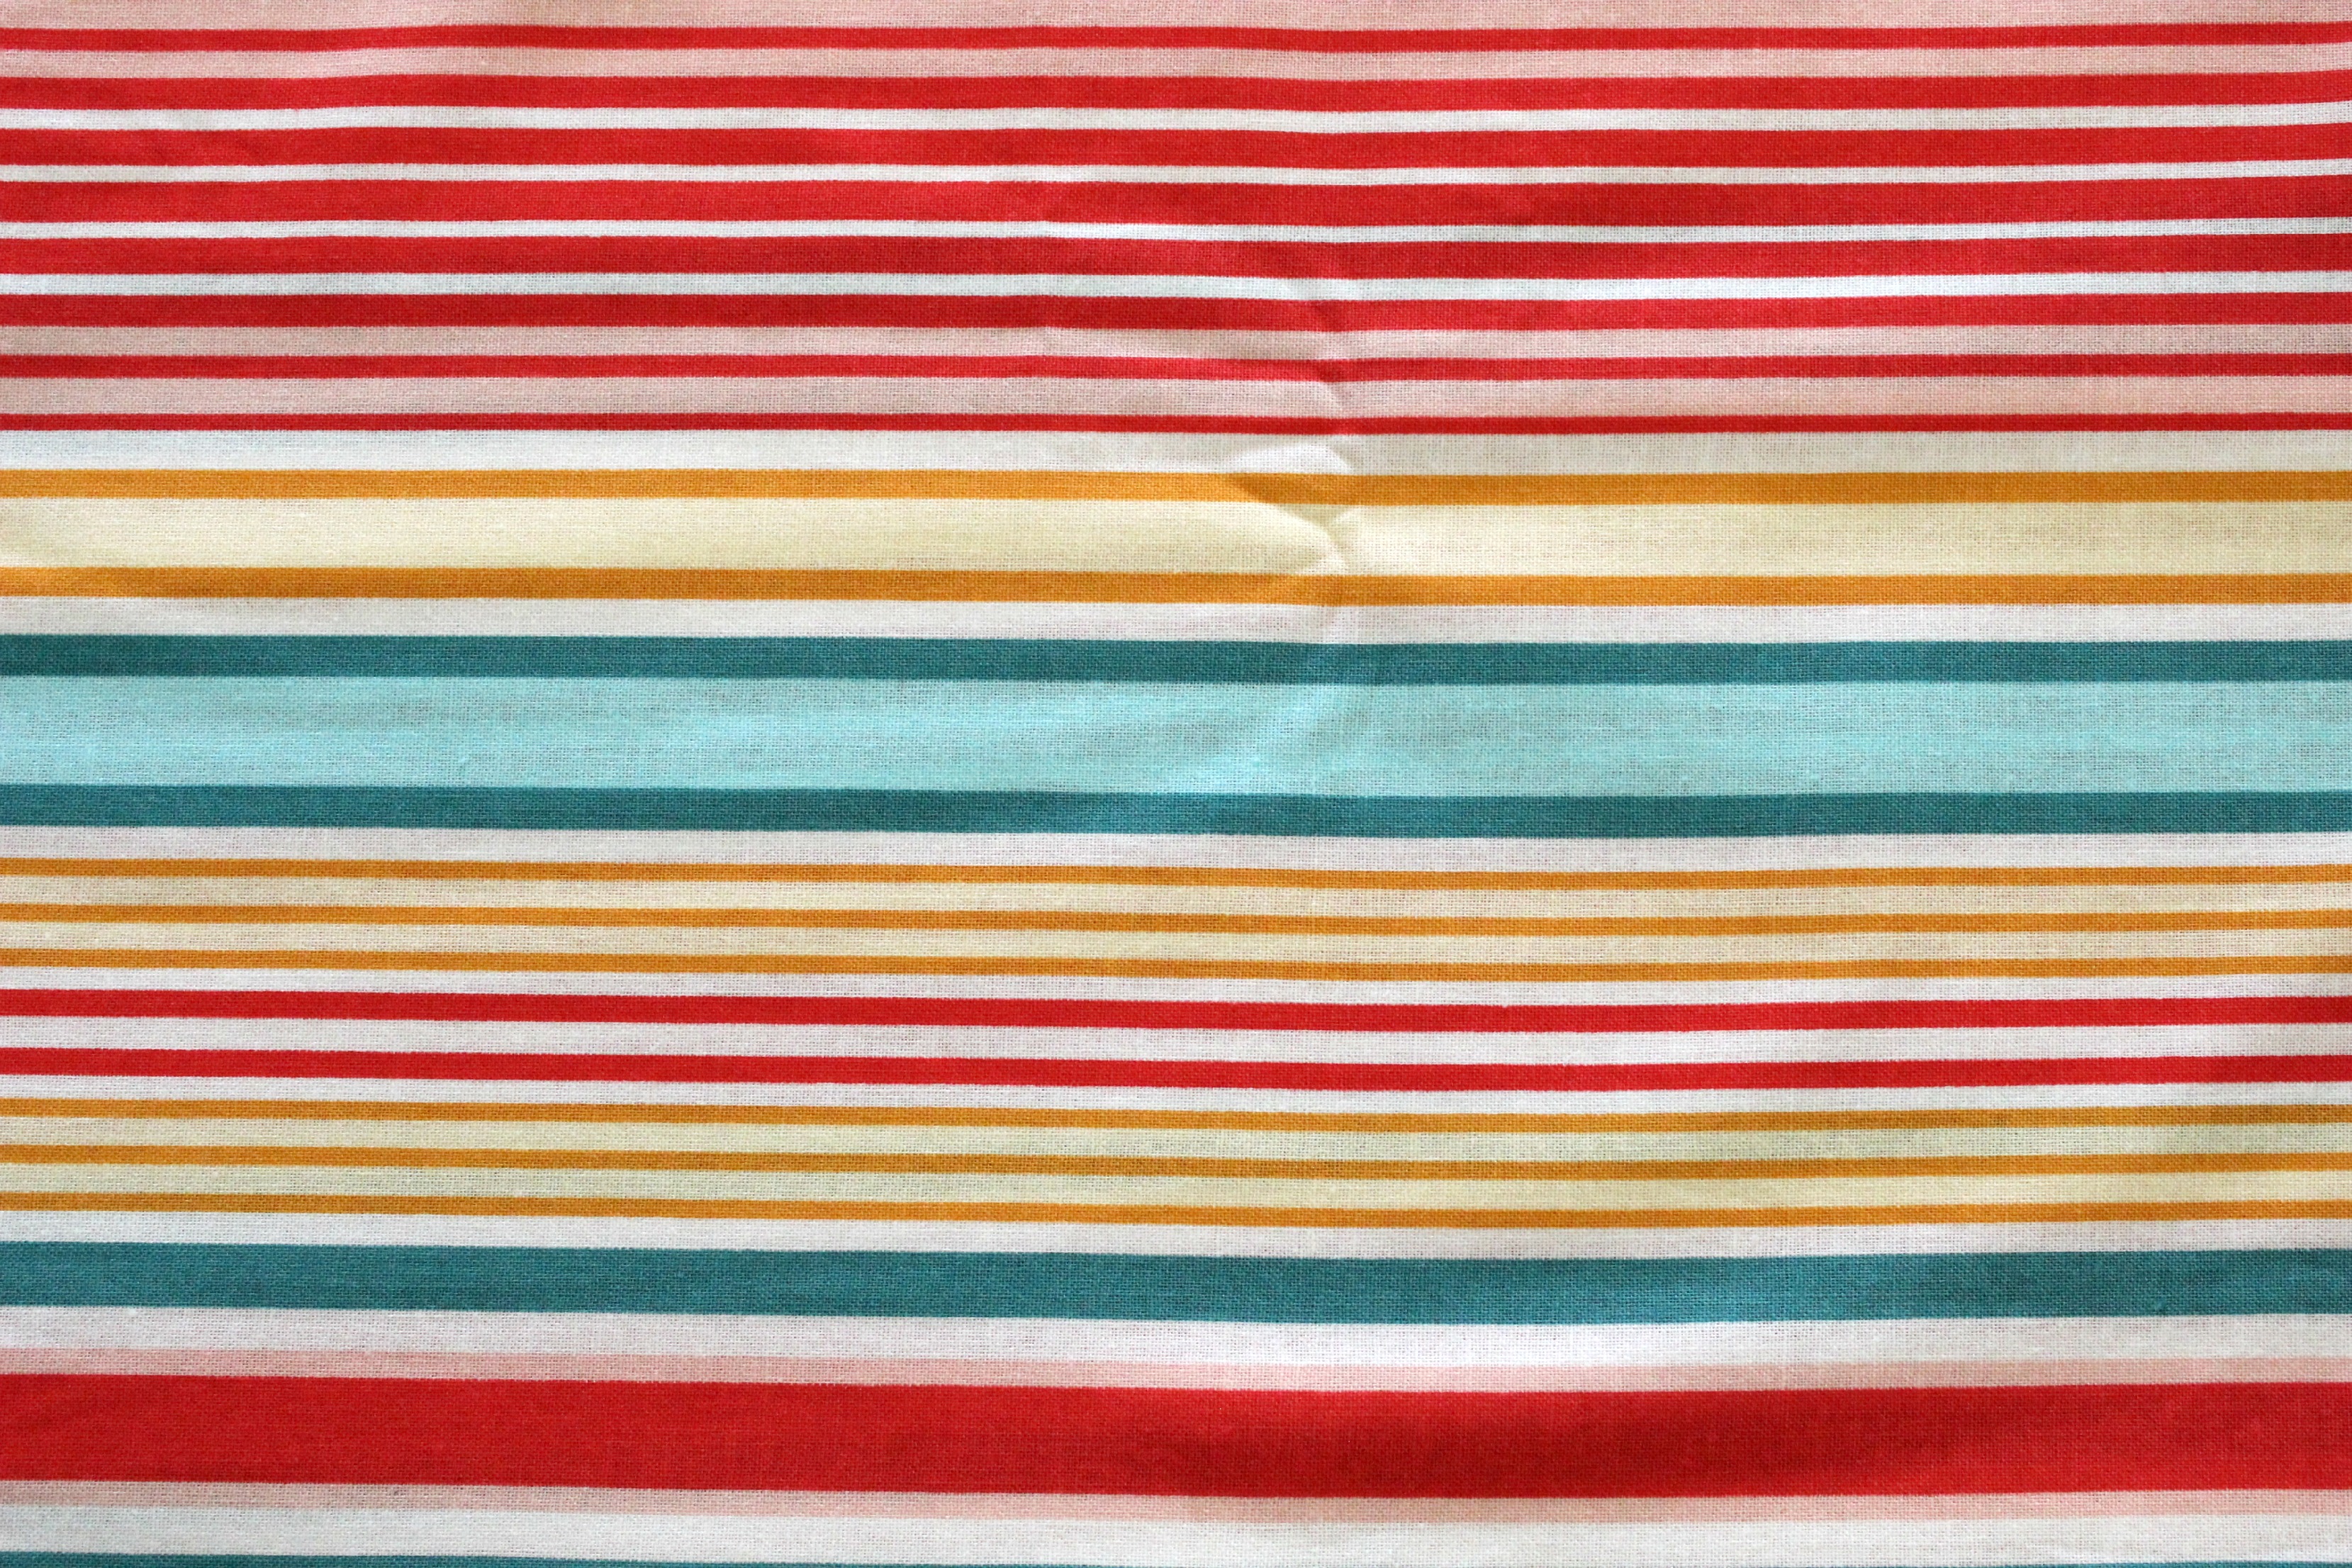
FABRIC NAME: Stripe. This fabric will be used as the binding for the quilt.

+++

To accompany these prints, I’ve also mixed in two matching XOXO Basics fabrics from Cotton+Steel.

PinkCheeks

FABRIC NAME: Pink Cheeks. This fabric will be used in three of the blocks.

Dandelion

FABRIC NAME: Dandelion. This fabric will be used in one of the blocks.

+++

To balance out the prints, I’m also using two Cotton Supreme Solids from RJR Fabrics.

FABRIC NAME: Elephantastic Pink (on the left). This fabric will used in two of the blocks.

SupremeSolids

FABRIC NAME: Blue Skies (on the right). This fabric will be used as the background fabric in all nine blocks as well as for the sashing and borders. (NB: This fabric doesn’t photograph well: in real life it doesn’t look this grey and boring!)

+++

Now in regards to how much fabric you’ll need will all depend on if you’re going to use as many fabrics as I am. If you are, I would recommend in getting no more than a half metre or half yard cut of fabric for each print you’ll be using in your blocks. You possibly could get away with using Fat Quarters, but if you make a mistake with a certain block, you may come up short and I don’t want that to happen to you! For the background fabric, you’ll need at least two metres (2 yards) and no more than 1 metre (1 yard) of fabric for the binding. Once the quilt top has been completed, I’ll share how much backing and batting you’ll need to finish it off!

+++

Now luckily for me, a wonderful Australian wholesale supplier and fabric distributer know as Dayview Textiles very kindly sourced and supplied these beautiful fabrics to me which I am very grateful for! If you’re in Australia and are keen on using the same fabrics as me, pop over to their website to find the nearest quilt store to you that they distribute fabrics to!

If you’re not in Aussie-Land, here are a few places you can purchase these fabrics online… (OH MY GOSH! Fabric.com has everything!)

Fabric.com – The Sultan’s Garden

Fabric.com – XOXO Basics

Fabric.com – Cotton Supreme Solids

+++

I’m so excited about this little series finally starting and I can’t wait to see all of your lovely blocks and potentially beautiful quilts over the next coming weeks!

The video tutorial for block #1 will be out on Wednesday, with block #2 out on Friday!

See you then!

Happy Sewing, Friends!

xx

P.S If there’s any vital information you think I’ve missed, comment below and I’ll add it in!

P.P.S I also uploaded this video to my YouTube channel introducing the series if you’re interested in watching it!

*HST = Half-Square Triangles

A Block Review // FPP Jack-O-Lantern

The other day, while wasting time on Facebook, I came across a link that was shared to this awesome little FPP Jack-O-Lantern pattern by Sonja Callaghan from the blog Artisania. And with Halloween coming up very soon, I just knew that I had to print it off and give it a go!

FPP JackOLantern Block 1

Firstly, I printed off the pattern at a scale of 90% so that I was sure the pattern would fit comfortably on a A4 piece of paper. Then I sat down for a bit, trying to figure out the best way to make it as I’ve never attempted a FPP pattern this intricate before!

Once confident of how to start and what steps I had to do to be successful at the end, I picked out some fun autumnal RJR Supreme Cotton Solids and jumped straight into making!

Here are a few tips that I think might help you when making the block yourself…

No. 1 – The block is divided into six sections labelled A to D. So you need to carefully cut the paper pattern into the sections before you can start any sort of piecing! (See Photo #2) I also cut an extra 1/4″ seam allowance around the outside line of the pattern so that I wouldn’t get caught out not having enough fabric to cover each section. (See Photo #1)

Cutting a 1/4" seam allowance out from the edges of the paper pattern.
Photo #1
Image #2
Photo #2

No. 2 – Another prep step before starting: Using a Clover Serrated Tracing Wheel and a ruler I perforated all of the lines in each section that I’ll be sewing on top of. (See Photo #3) Doing this simply helps to ensure that the paper will rip away smoothly from the back once the block is finished.

JackOLanternStep3
Photo #3

No. 3 – I found it really helpful to initial each numbered section of the colour that was to be used so that I wouldn’t get confused!

JackOLanternStep4

W=White, O=Orange, B=Black and G=Green.

No. 4 – I was really relaxed with sizes of fabric I cut for each section. I found, that because a majority of the numbered sections were quite small, I was able to use quite a lot of fabric pieces from my little scrap pile I was creating from the other sections I had finished piecing. And due to that, the block came together really quite quickly!

No. 5 – As you piece each section together, make sure to leave enough fabric over the edges so that you can trim the block down with a 1/4″ seam allowance around each side. For this pattern to come together perfectly at the end, you need to cut a 1/4″ out from each edge on all six sections (excluding the edges you cut around before on the outside of the pattern)…Hopefully Photo #4 will help you understand a little better…

Photo #4
Photo #4

No. 6 – Once you’ve come to the part where you’re ready to piece each section back together, I found doing it in this order the easiest…

Sew section A to section B, then section C to the other side of B. Remove the paper from the back and press the seams either to one side or flat open. Then sew section D to section E and then section F to the other side of E. Again, carefully remove the paper from the back and press the seams in the same way as before. From here, piece the two sections together to finish the block.

TIPS: When piecing each section together make sure to line up the seams around the outside of the pumpkin and around his mouth to achieve clean crisp lines. It may take a little bit to get these parts aligned and sitting perfect but trust me, it’ll be worth it in the end!

Finished block size: 7.5″x9.5″ (19cmx24cm)

FPP JackOLantern Block 2

So to sum it all up, despite a few mistakes on my part resulting in the seam ripper to make an appearance more than once, this was a really fun FPP pattern to piece together! Believe it not, I did learn a few new things and expanded my knowledge on the way I should tackle these types of tricky pattern designs! I also felt like a slight rebel making this little guy as Halloween isn’t widely celebrated in Australia as it’s seen as more of an ‘American’ tradition. But I like Halloween – it appeals to the crafty and creative side to me! Hence why I loved this making little guy!

If you like the look of this guy and would love to make him yourself but don’t know a thing about Foundation Paper Piecing (FPP), then check out this tutorial I made a little while ago taking you through the steps of how to do it!

Of course, if you have any questions about this block or are stuck on any step, please don’t hesitate to ask! I’m always here to help!

Best of luck to all of you who are going to print this little guy off and give him a go! Don’t forget to share your photos with me!

Happy Paper Piecing, Friends!!

xx

TUTORIAL // FPP Friendship Circle Block!

GET THE PATTERN: FriendshipCircleBlockTemplate_3and3quarters

FPPFriendshipCircleBlock

Hi all!

Although my Post-A-Day Challenge for September fizzled away too near to the end of the month, I’ve re-kindled the friendship between me and blog and we’re ready to present to you another awesome Quilt Block Tutorial! Yay!

So you may’ve already guessed what the block in question is by the title of this post, the title of the template pattern and the thumbnail of the video below…

But despite all of that, the block we’re learning how to make today is the Foundation Paper Pieced Friendship Circle Block! (Whew, what a mouth full!)

Everything you’ll need to know on how to piece this little beauty together is in the video below and trust me when I say that this block is easier to make than it looks!

FINAL BLOCK SIZE:
13&1/4″x13&1/4″ approx. (33.5cmx33.5cm)

FABRIC INFO:
You can easily make this block using Fat Eighths, Fat Quarters as well as those little scraps that tend to float around your sewing room! Be as creative or as safe as you like when it comes to choosing the fabrics that you think would look best in this block!

CUTTING INFO:
Cut these amounts for each section in the template. (These amounts are to make one full block.)
A1 & B1: x8 2.5″x2.5″ square
A2 & B2: x8 4.5″x4″ rectangle
A3 & B3: x8 4″x5.5″ rectangle
A4 & B4: x8 2″x6″ rectangle
A5 & B5: x8 3.5″x3.5″ square

TOOLS & NOTIONS:
Brother Innovis 200QE sewing machine
Brother 1/4″ sewing foot
Gutermann polyester thread
OLFA Cutting Mat
Fiskars Rotary Blade (28mm)
Sew Easy Rulers
Bostick Glue Stick
Triumph Craft Scissors
Birch Non-Melt Flower Head Quilting Pins
Clover Serrated Tracing Wheel http://goo.gl/kS3aoi
Clover Finger Presser http://goo.gl/IOXilY
Spray Starch
Philips Azur Iron

 +++

If you’re keen-as-beans to make this block, let me know how you go and don’t forget to share your finished blocks with me either on my Facebook page, Instagram and Twitter (@3and3quarters) or through email: 3and3quarters@gmail.com. I would love to see how you interpret this block! And if you have any questions, don’t feel shy to ask – I’m always happy to help! 🙂

I hope all have the most terrific weekend!

Happy Sewing, Friends!

xx