An Update From My Sewing Room… #3

A very good afternoon to you friends! I hope you’re doing well! Me? Well I’m rugged up in a scarf and woollen jacket, with a lovely cup of tea beside me while I write this post to help keep my fingers warm! Ahh, winter… It’s nice to think about when it’s hot out but when it really comes along, you hate it with every inch of your numb digits and extremities!

Anyway, today we’re delving again into the fun things happening in and around my sewing room! Lots of things have been happening and I’m so excited to share them with you!

Right! Let’s get started!

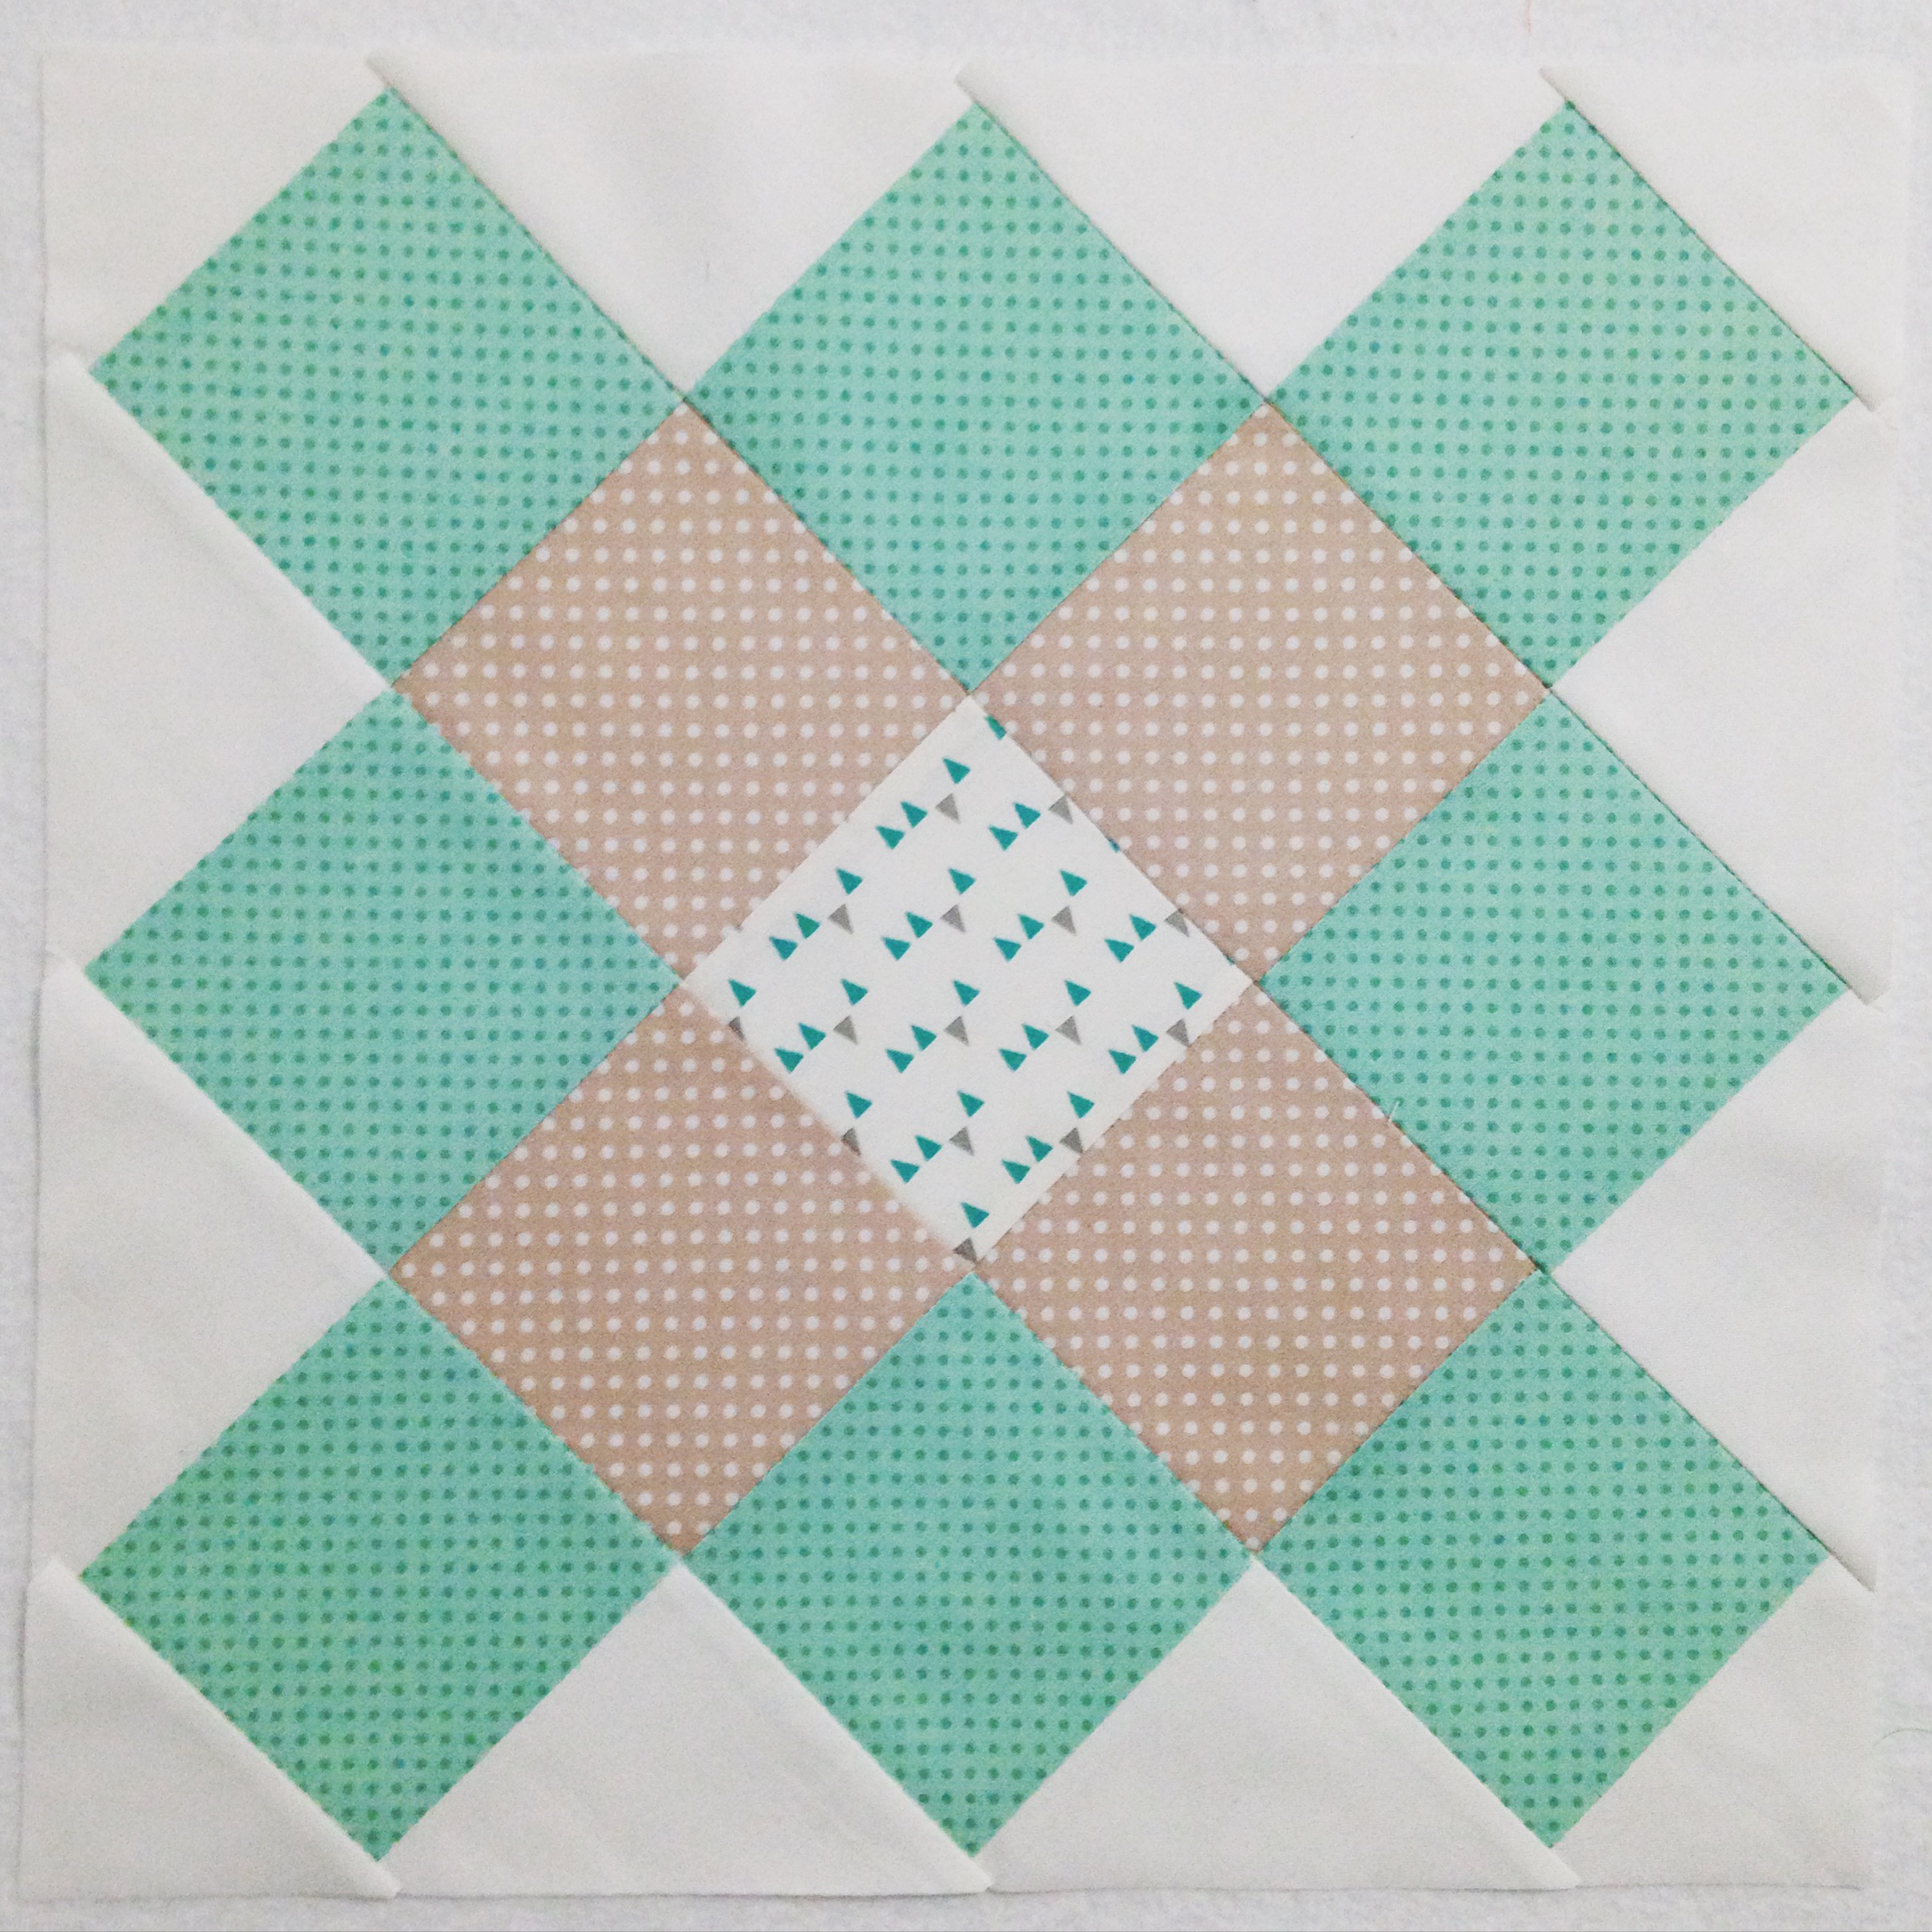
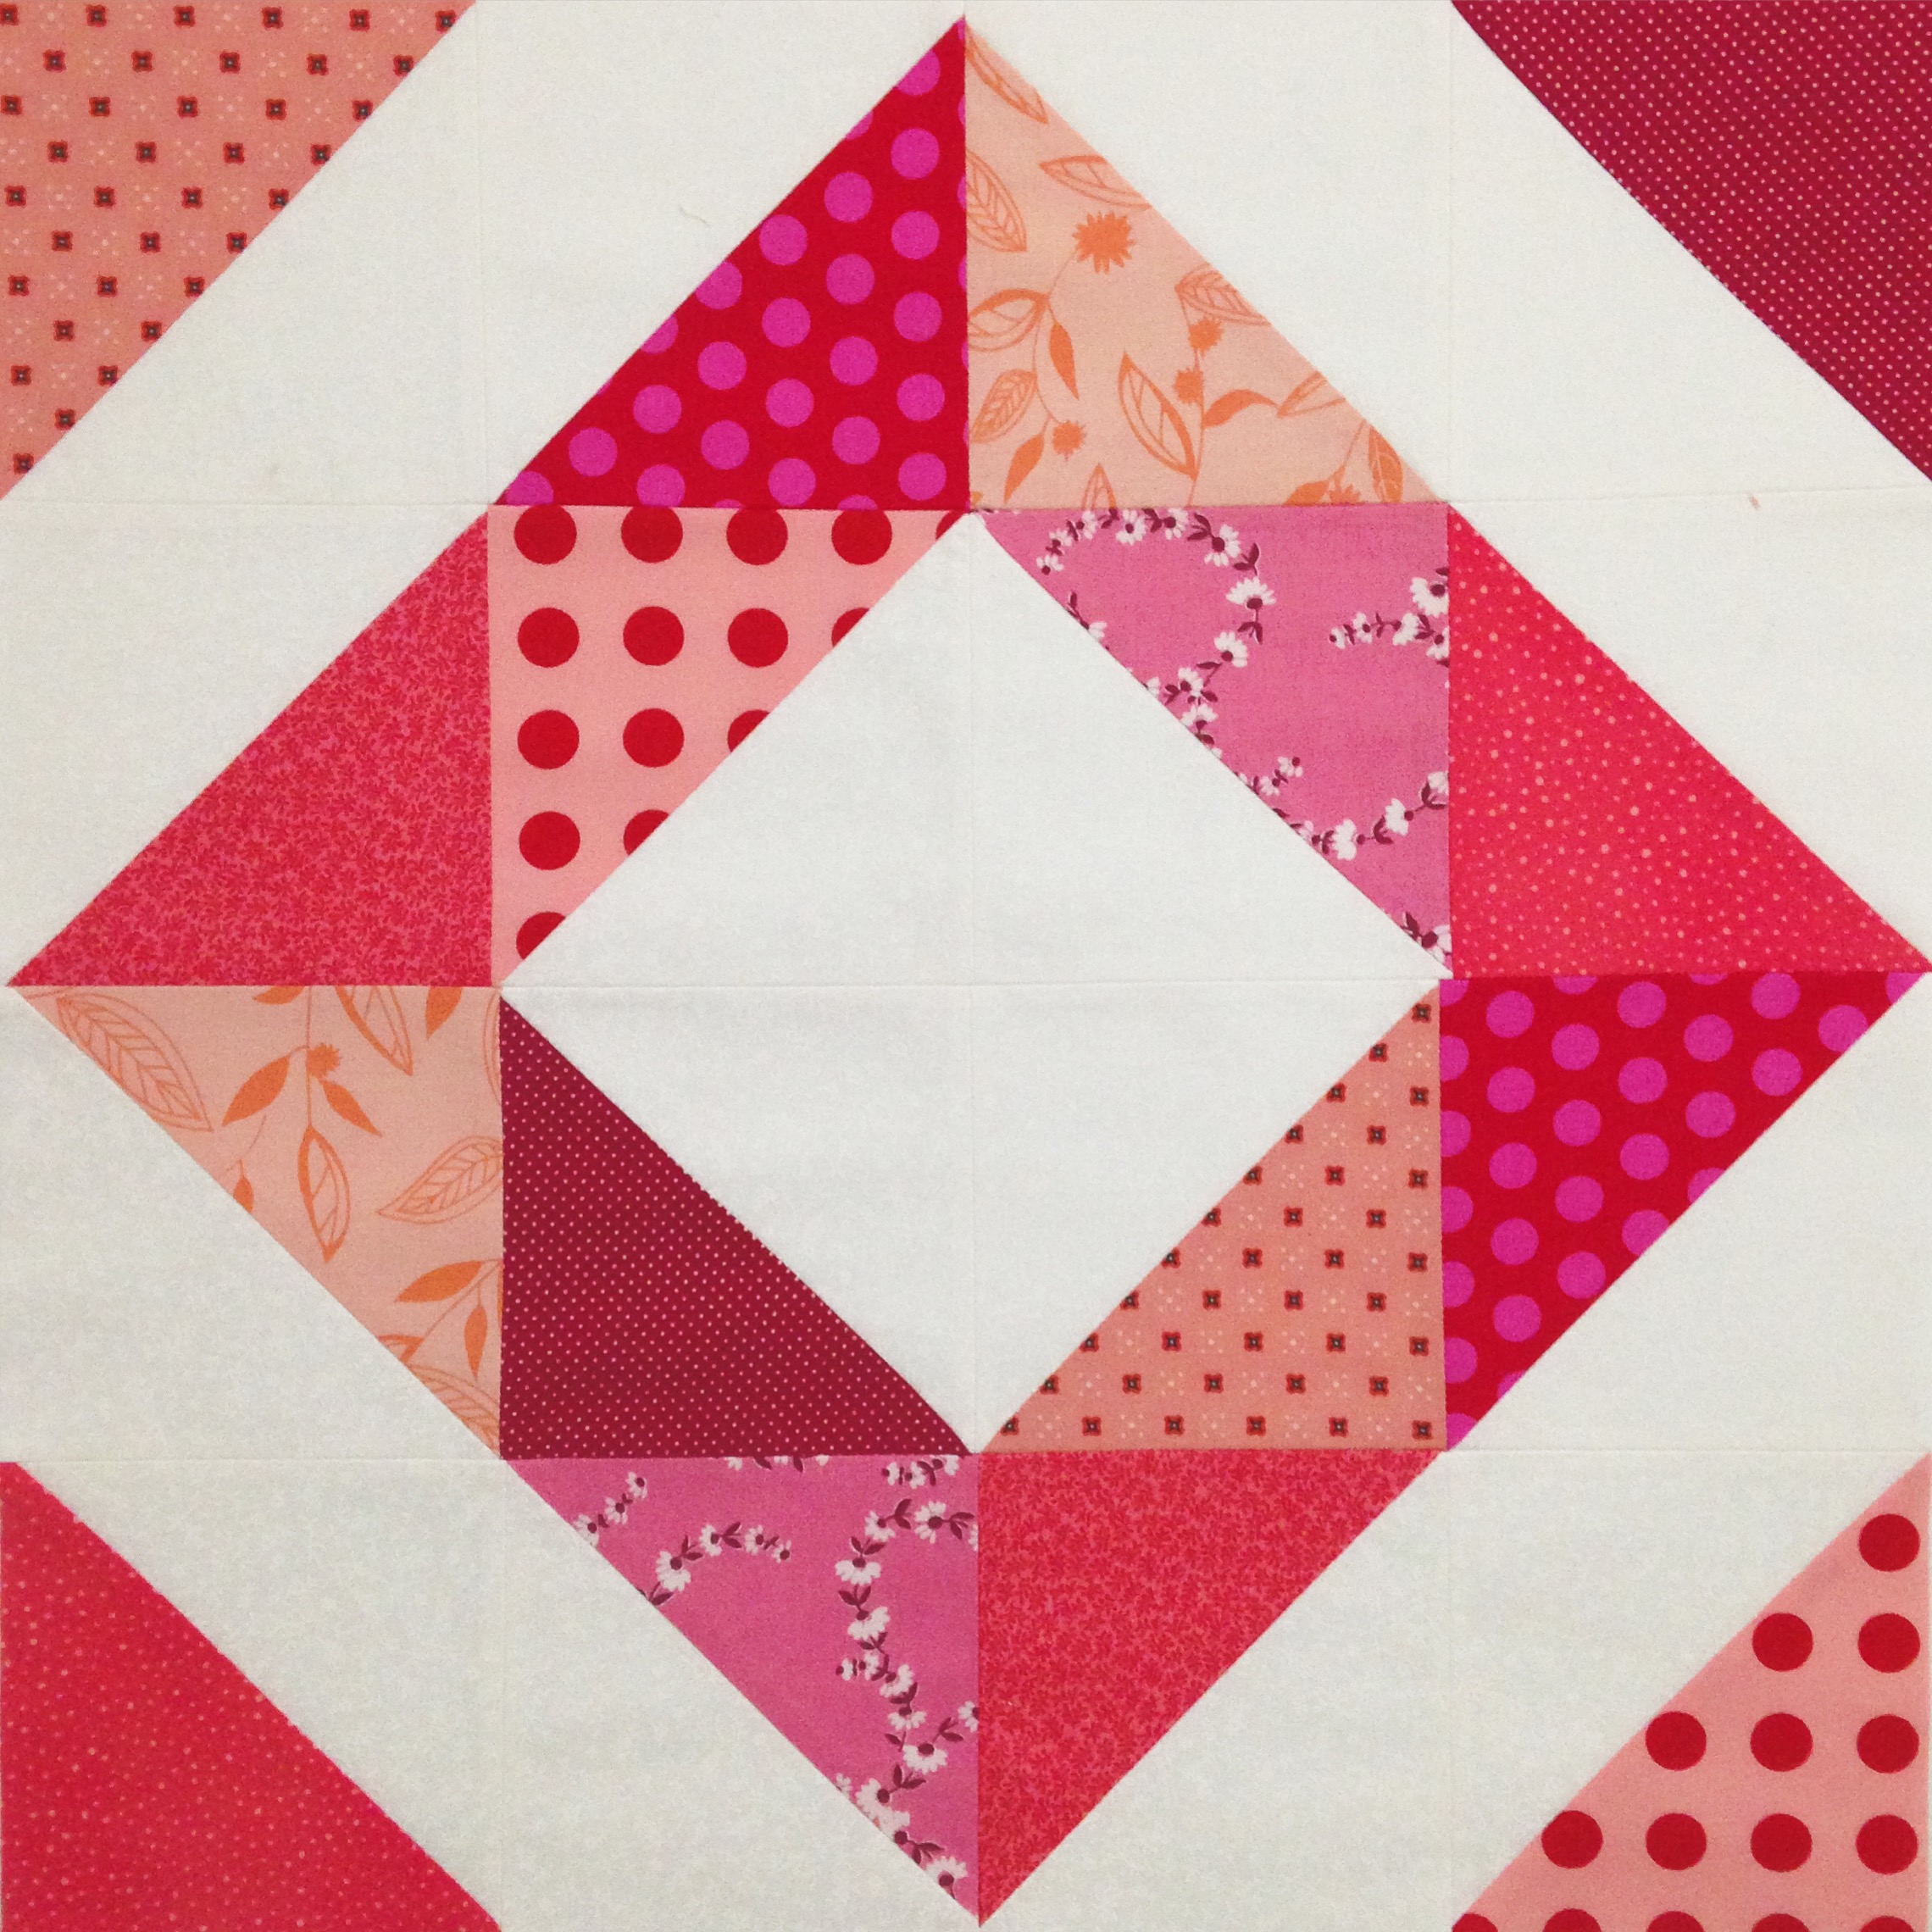
Last week, I bunkered down and got my Diamond Square Block Quilt finished to finally gift to one of my good friends for her 50th birthday! Although Donna’s actual birthday was at the end of May, she received her quilt over a month late with exclaims of excitement and thankfulness!

IMG_4433

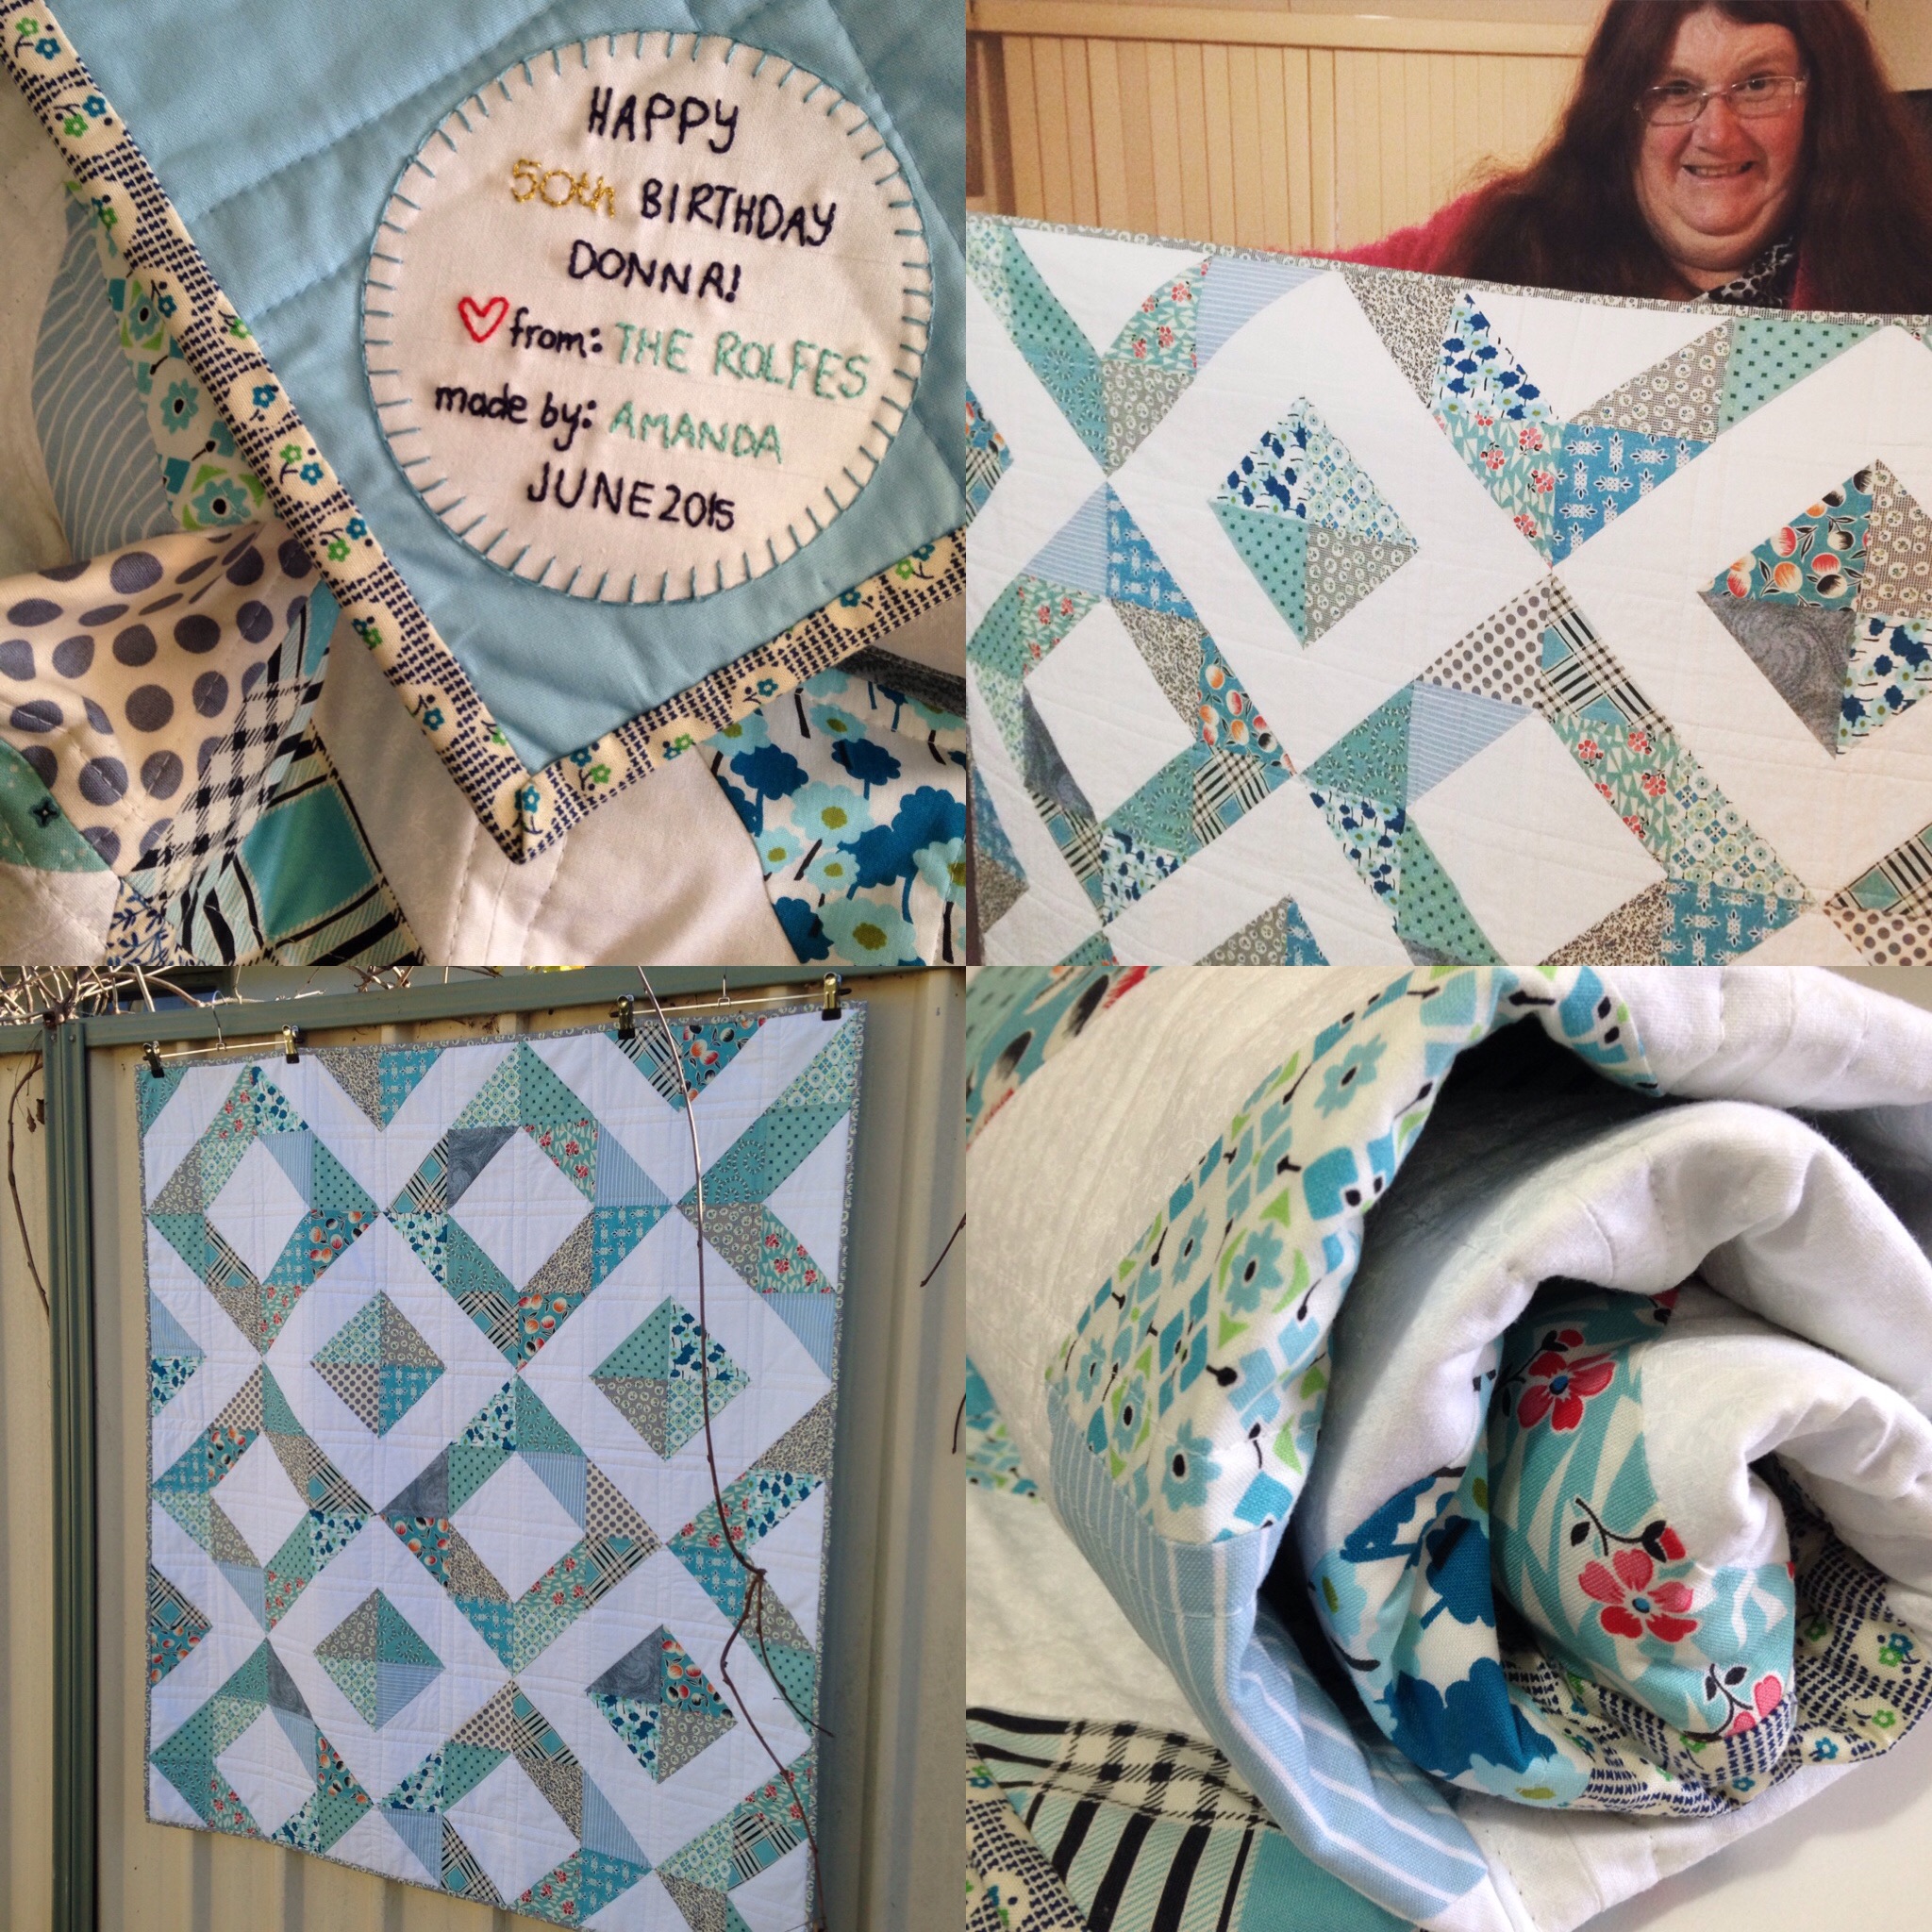
It was quite funny to watch her reaction: as she was talking, she kept folding and unfolding the quilt to look at it and inspect it! I’ve seen many reactions to people receiving quilts but this one, well, it was super lovely to watch!

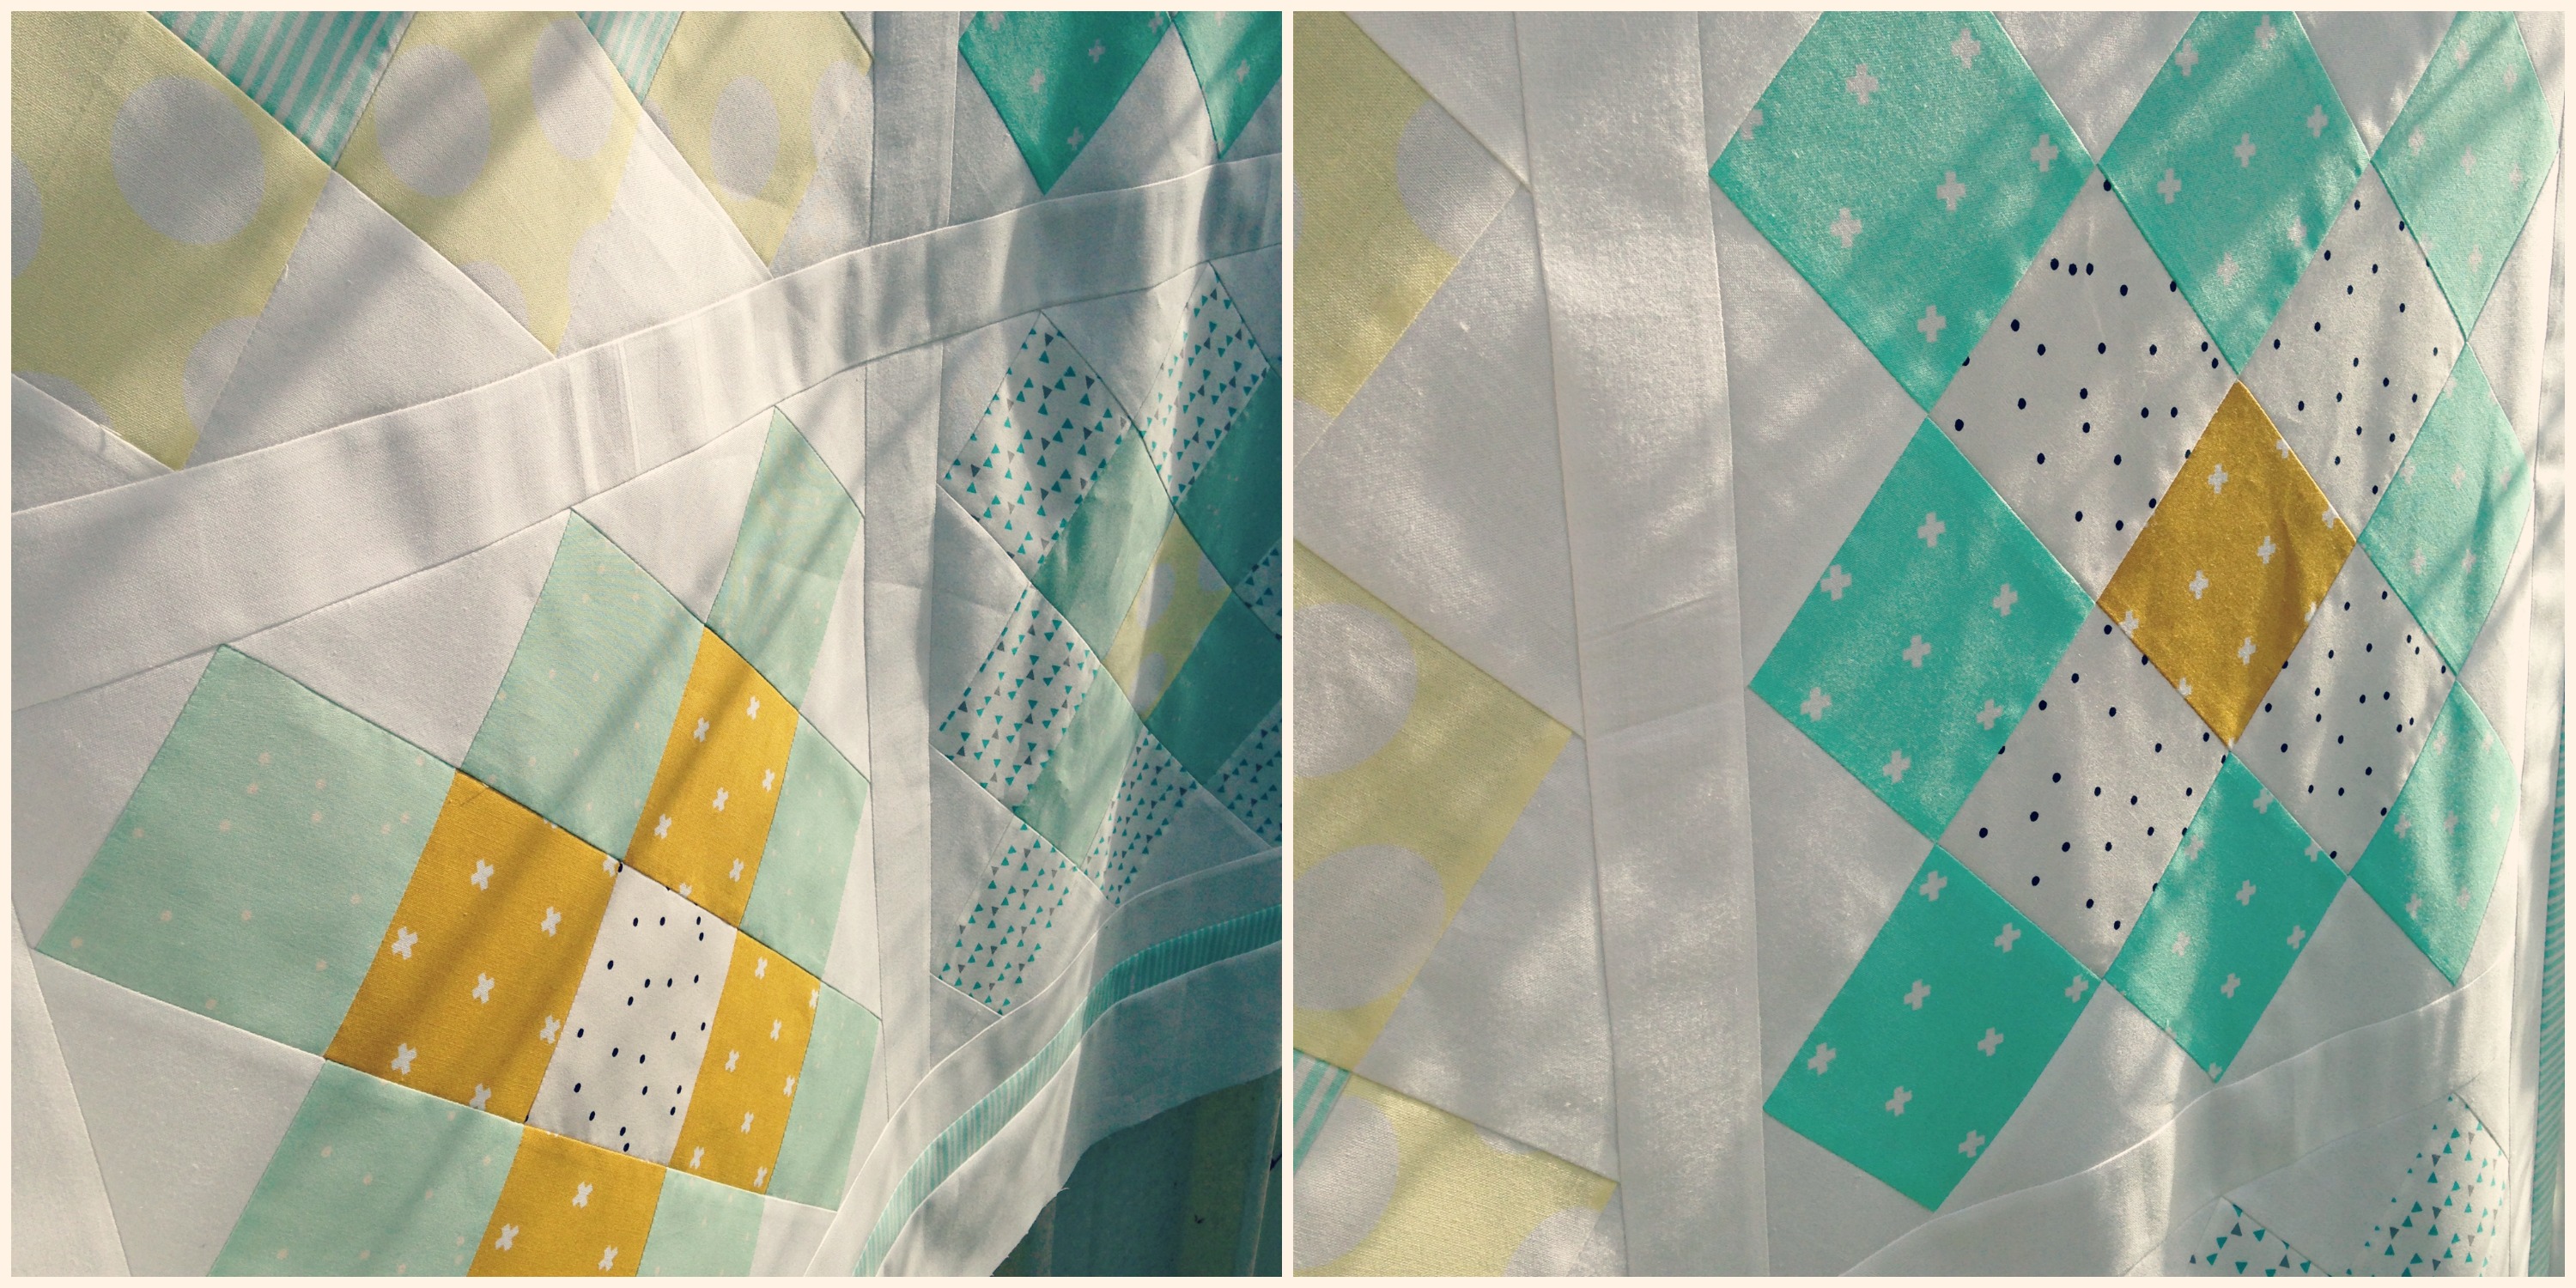
I’ve also just realised I haven’t shared with you the final finish of the quilt! The quilting design I chose was one I’ve been wanting to try for a while now and have been waiting for the right quilt-top to come along for me to try it on. It’s the technique where you sew two parallel lines next to the seam joins of each block/unit to create a grid-like surface pattern. (Ooo, did I explain that well enough?)

DonnasQuilt1 DonnasQuilt2 DonnasQuilt3 DonnasQuilt4

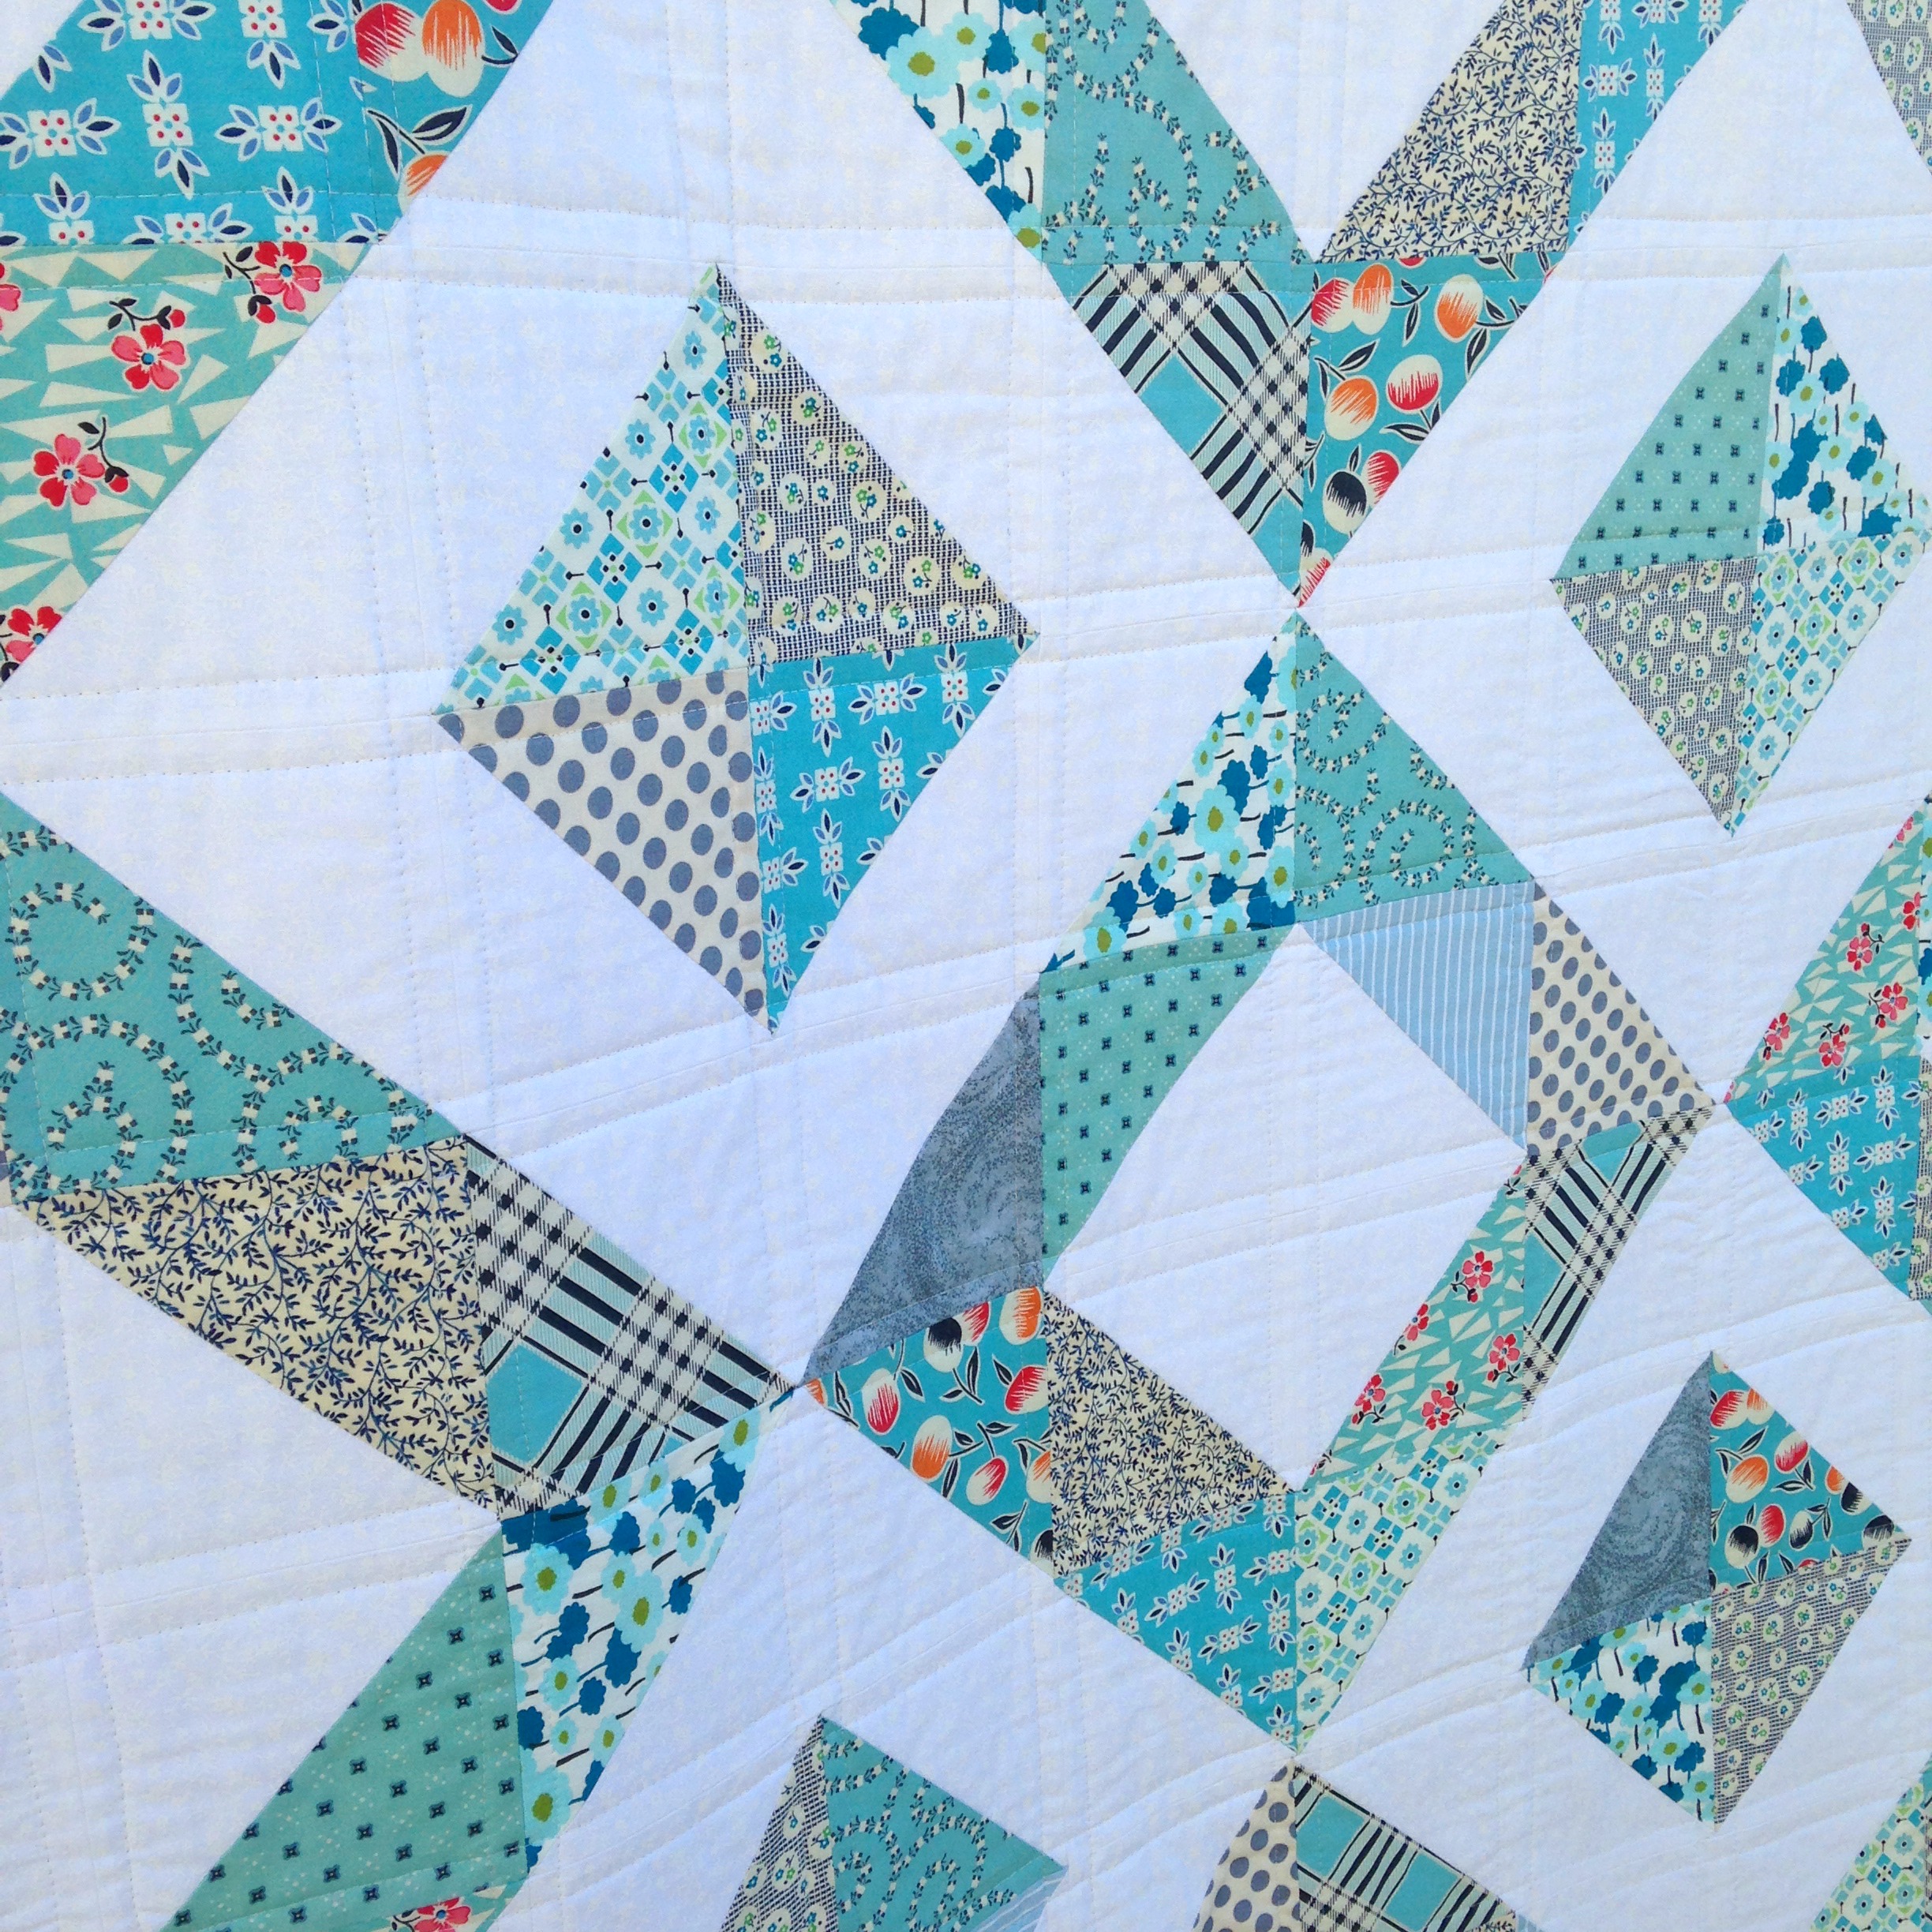
I’ve seen this type of quilting on so many quilts when on Pinterest and I just fell in love with how simple but effective it seemed to be. I love how it adds a subtle outline to the blocks as well as adding that secondary grid-type pattern to the quilt-top. I definitely think I’ll try out this method again, especially when I’ve made a quilt that has quite a distinctive design/pattern to it!

+++

Over the weekend, I shared a new quilt block tutorial with you on my YouTube channel! This time round it was the super simple and insanely cute Pinwheel Block!

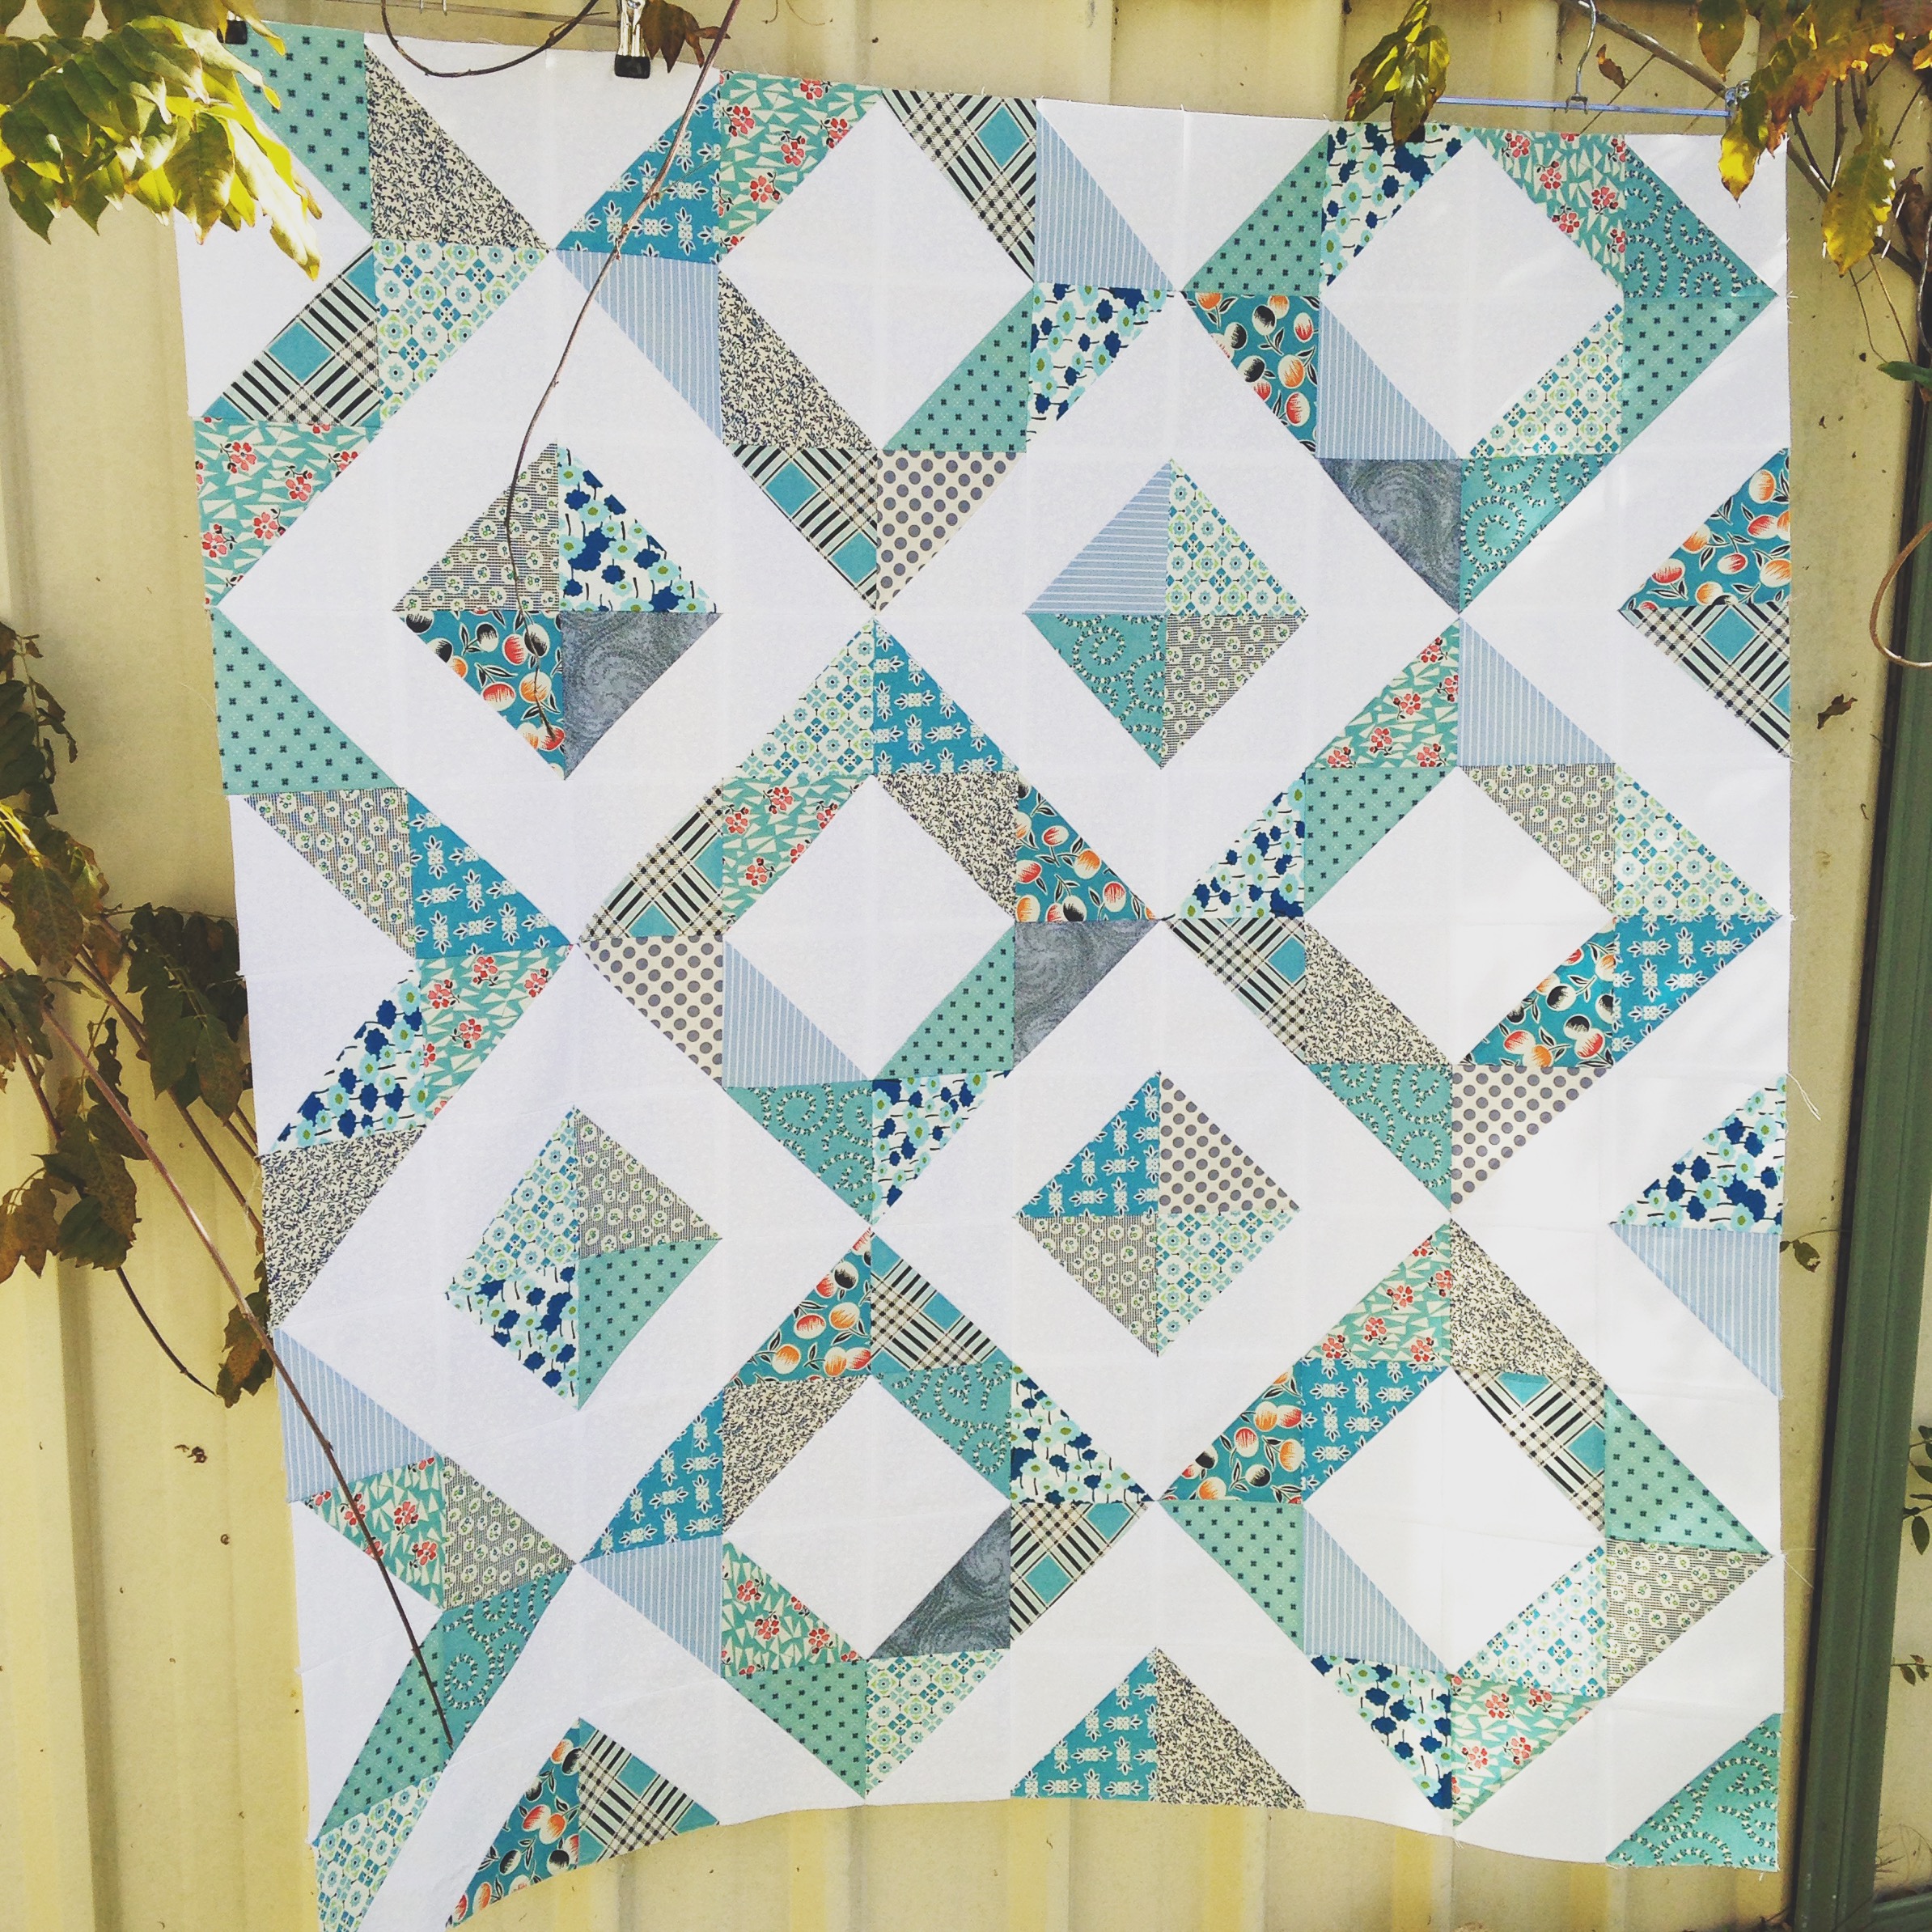
I thought it would be nice to share the uber-simple way I make my Pinwheels in a quick mini tutorial after using the block in the second of two baby quilts I’m making for a friend! Here’s that quilt-top for you now…

IMG_4386

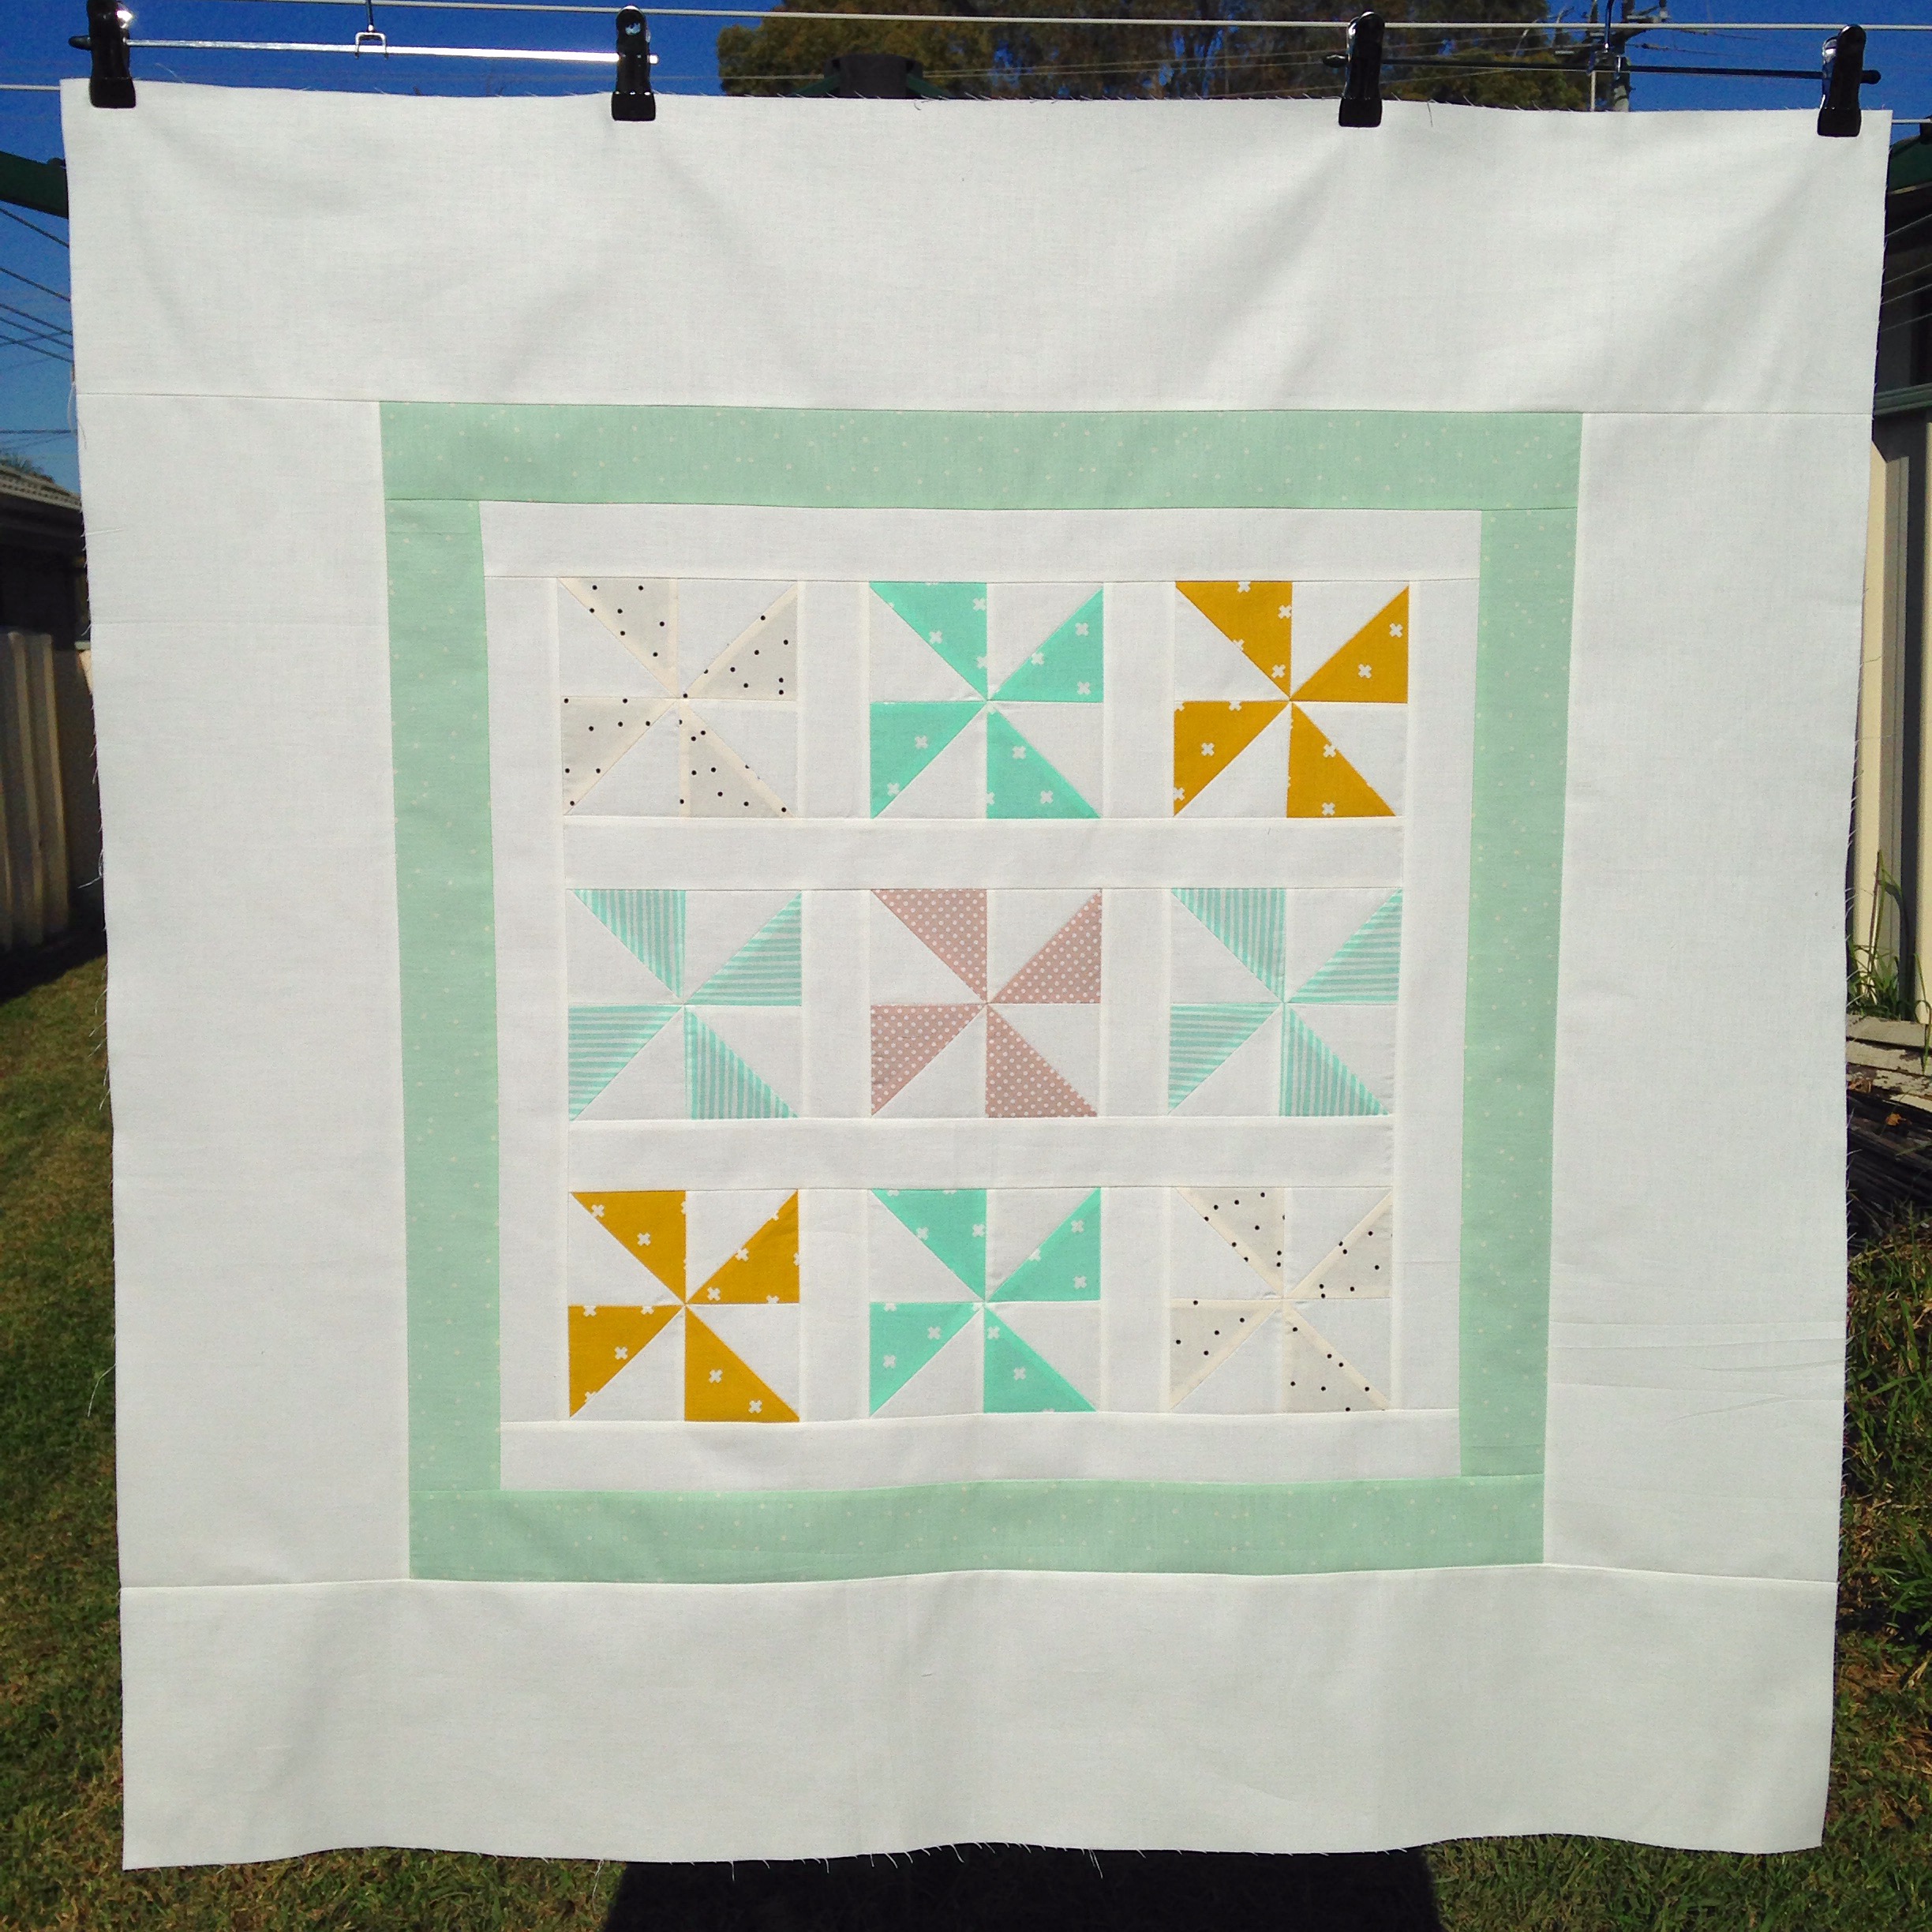
I’m hoping to set aside some time next week to get this baby quilt and the other one (the Granny Squares Quilt) quilted and finished! I have a fair idea of what types of designs I would like to quilt onto each, but I’m still up for being persuaded with something else if I see it on Pinterest!

And as always, I do a little shout to those of you will be giving this tutorial a go, to share your finished block with me on Instagram, Twitter or on my Facebook page! I love, love, love seeing what you make and in turn, love being inspired by how talented you are! 🙂

+++

Speaking of all things YouTube, sharing, talent and friendship, on Monday morning I woke up to my end-of-year goal surpassed by reaching over 5000 subscribers on my YouTube channel! What!?!?

IMG_4455

I sometimes wonder just where all of you are coming from!

Although this number is practically minuscule compared to other channels that are out there, this number of people was something I never thought I would achieve! I was totally happy with just having 50, but 5000, gosh my brain hurts just thinking about how many people that actually is!

Thank you!

Thank you to each and every one of you for supporting, commenting, liking, encouraging, contributing, chatting, sharing and hanging out with me! I never actually thought anyone would watch or be interested in what I make or share. It truly, truly, truly means a lot and your support has given me so much more confidence within myself as a person and as a quilter! I feel so lucky and humbled by how many lovely friends I’ve made since starting this whole thing! It makes me so happy to be in touch with others who just ‘get it’! Who understands that rare passion, desire and drive we feel for making beautiful quilts, for swooning over richly designed fabrics, for buckling at the sight of beautifully nested seams and for making quilts for others, not for the glory or compliments it’ll give us, but because making and gifting a quilt for someone special is one of the best feelings you can give and receive.

So again, thank you!

And, just a heads up, make sure to be watching my channel this coming Sunday (12th July 2015) for a special GIVEAWAY (!!!) as a thank you for just how wonderful I think you all are!

+++

And now onto the last exciting bit of news for today!!

Tomorrow I’ll be publishing another fun little blog post where I’ll be sharing with you the finished Mini Quilt I’ve made using these beautiful coloured solids!!

MysteryMiniQuilt!

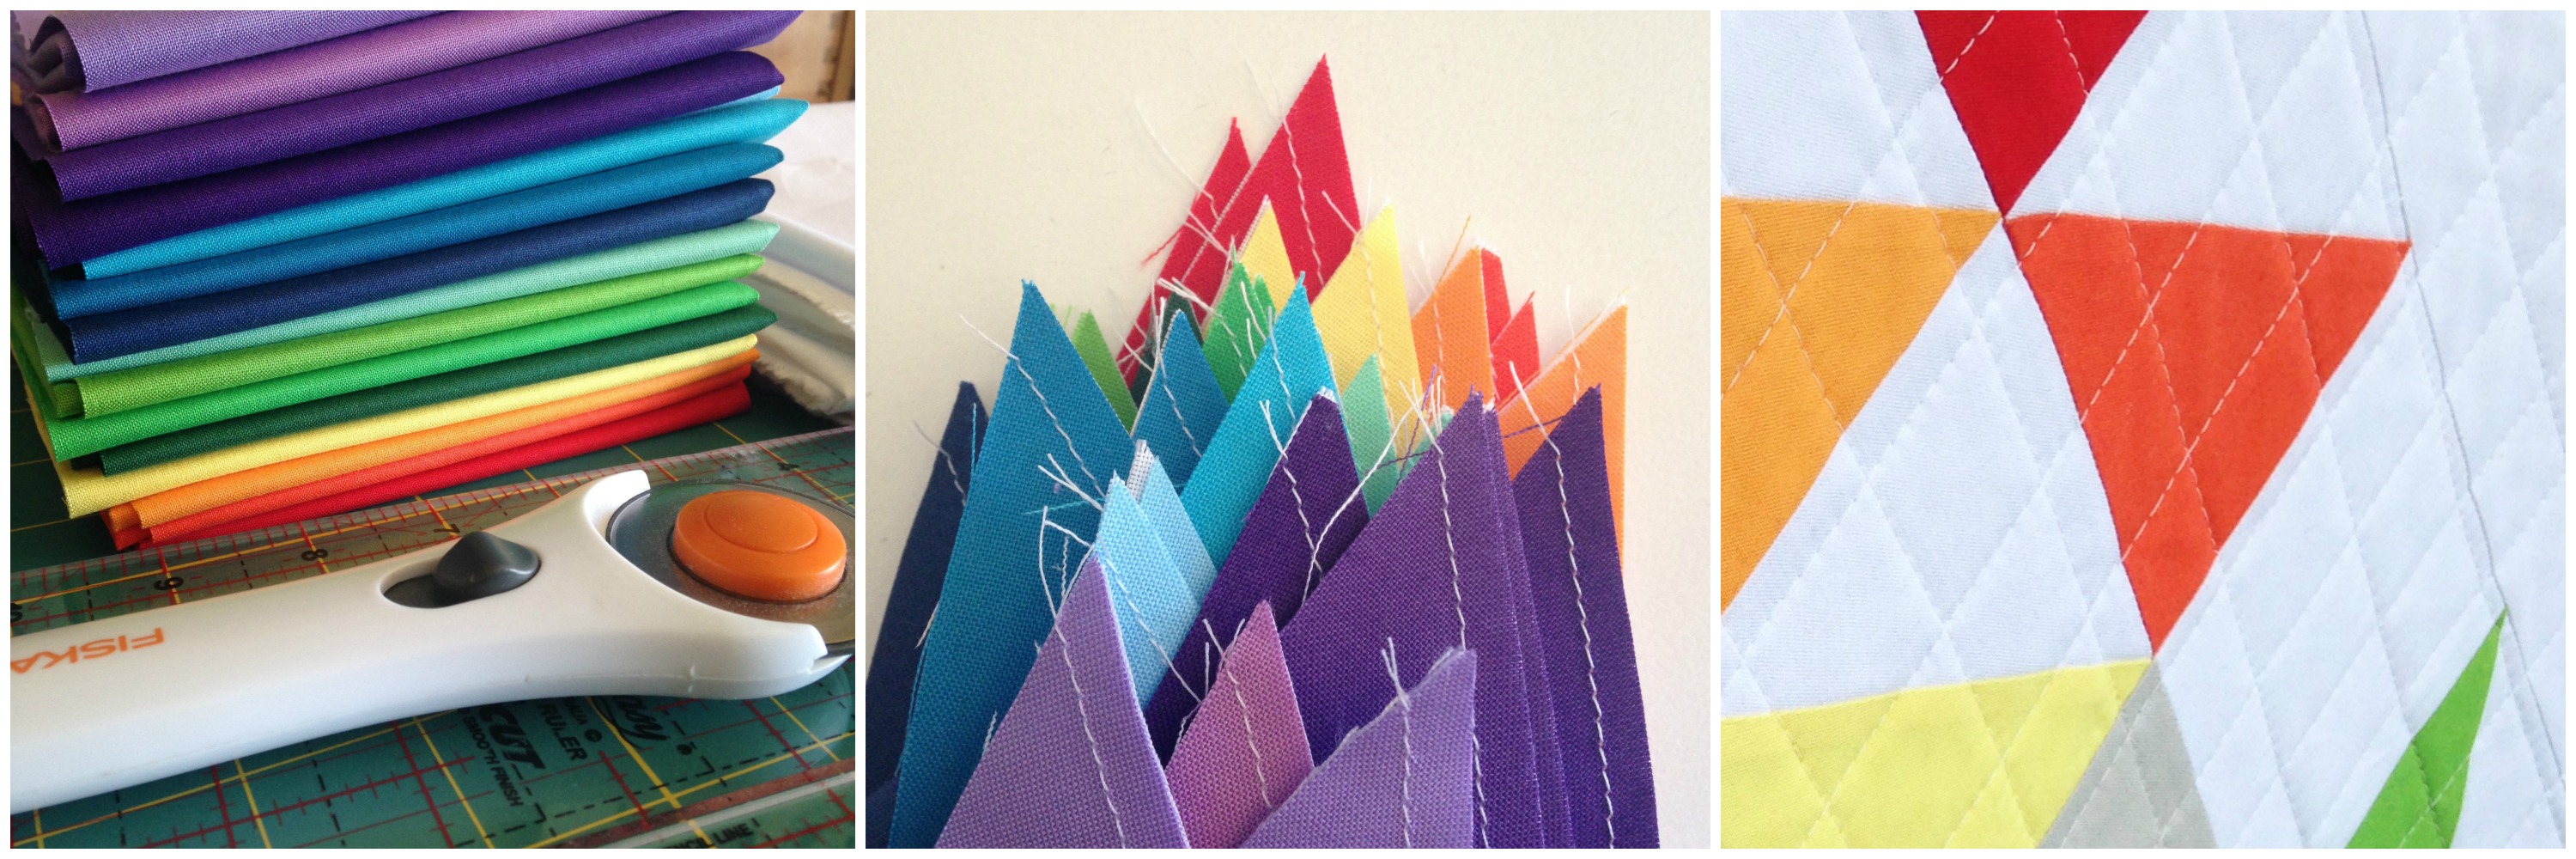
Ooo, what could it be…??

All I know is that I’m completely in love with the finished result and I hope you will be too!!!

Eek!!

Until then,

Happy Sewing, Friends!!

xx

How I Match My Fabrics!

Have you ever had one of those weeks where you’ve had so much planned to do but by the end of the week, hardly nothing has been done?

Yeh, that’s one of the weeks I’m currently experiencing!

Here it is, a windy, chilly Thursday afternoon and I find that my sticky-note to-do list is still full of those task I wanted to get done on Monday! Gahh!! When did life get so busy and full?!

Anyway, let’s all calm down and allow me to use this small amount of time I’ve discovered this afternoon to write this (late!😁)* post and share it out to the world! Yay!

So quite recently, I’ve been asked by a lot of you to share the way, the method and/or the steps I take when matching fabrics for a block/quilt. I thought, ‘what a great idea! I’d love to share that with you all!’

So over the past weekend I made and uploaded the following video onto my YouTube channel, giving you an insight into how I do this when starting from just one main fabric. I decided to use three different print fabric examples in the video so that you could get the gist of how I do it!

If you have a particular method or style when it comes to matching your fabrics, please free to share it in the comments below!

Happy Matching, Friends!!

xx

*It’s okay, I know you all don’t mind that I write and publish out blog posts a little later than usual. And I know that you understand that life’s a busy ol’ mess and sometimes things don’t go according to plan. And you know, that’s okay, because there are situations in life that could be a whole lot worse than a busy and unstructed week. (Wow, I just got all like deep-thinkery and stuff about the situation and I scared myself a little bit… ohh… It must of been the 85% Dark Chocolate I nibbled on earlier. Which, may I say is horrible! Ergh! It was way too bitter! My disappointment levels are sky high right now!!! All I wanted was a nice little piece of chocolate with my afternoon cuppa, but instead was hit with a mouth full of saliva-sapping cold-hearted bitterness! 😭 Oh gosh, I’m rambling now…. I’m sorry. Must. Stop. Typing. Uhhh….yep…I’m going…I’m stopping…right now… uhh… Bye!)

An Update from my Sewing Room… #2

I can tell you a secret?

(Well, it’s not really a secret. More of a thought, actually.)

I really loved having the opportunity to sit, write and share what had been happening in my Sewing Room last time and the response to that post was really encouraging and supportive! So because of that, I’ve decided to make this into a bit of a series to explore and to use as a ‘newsletter’ type thing, keeping you updated on things that I don’t share so much on YouTube, Instagram or any other of my social networky places. Sound good? Good!

And also, I like writing these types of posts as I love to be able to go back and read about what I was up to this time last year (yes, I am the type of blogger that actually likes to re-read what they wrote a year ago!), or to re-fresh my memory on the progress I made with quilts-in-the-making. I especially like looking back on posts about quilts that I give away, remembering what they looked like and re-living the thoughts (and struggles) I was facing when making them.

So, where to start off this time… Hmm…

Let’s start here!

The other day I did share this completed quilt top on Instagram of one of the commissioned baby quilts I’m making for a friend.

IMG_4354

I’m completely over the moon with how well it’s all come together! I absolutely loved how the fabrics shone, glimmered and danced in the winter sunshine and soft breeze on the day I shot these photos! It was a beautiful moment where my crazy quilt-nerdisms went into hyper-drive and I squealed and giggled to myself over its cuteness!

GrannySquaresQuiltTopDuo

All up, I made five Granny Squares Blocks and had a hard time deciding whether to leave in the top left yellow spot block or this green spot block (ie. the first block I made at beginning!)

My First Granny Squares Block!

I ended up using the yellow spot block as it seemed to balance out all of the mint-green fabrics I had used. It seemed to give the quilt an over-all subtlety and softness that I really like.

Moving on to baby quilt number two. This time around I’m making a small bunch of 5.5″ Pinwheels using the left over 3.5″ squares I over cut for the Granny Squares Blocks. (They really are super adorable!)

Pinwheels1

I’ll also be using up any left over 2″ sashing I used on the previous quilt to sash the Pinwheels together. I think I’ll then add the same kind of border I did to the other one as well, but instead use the soft yellow spot fabric in place of the green strip border.

PinwheelsDuo

Yesterday afternoon I spent some down time finishing the piecing of the Pinwheels and then begun sashing the blocks together. I’m now at the stage where I can quite easily finish the quilt top in one afternoon or evening sewing session. (That’ll either happen today or tomorrow!)

I’ve set myself a goal to have both baby quilt tops finished for the start of next week so I can concentrate on getting them quilted. I think I’ll stick to some pretty basic quilting lines – nothing as intense as my Geo Dreams Quilt or Amelia’s Baby Quilt – as I think it’ll really compliment the softness and simpleness that each of these quilts already radiate.

(Here’s a piece of behind the scenes trivia for you: While piecing the Pinwheel Blocks together, instead listening to music like I usually do, I played season four of Adventure Time in the background! It helped tremendously to make those tedious steps of squaring up HSTs and pressing tricky seams a lot more bearable and fun! Math!)

8087079d646ea5586809f50d6d662595
Finn & Jake // IMAGE SOURCE

The next thing I wanted to share with you is a pattern that I’ve been swooning over for the past week! And it’s this one by Fat Quarter Shop

The Panda-Monium Mini Quilt!

Panda-Monium Mini Quilt by Fat Quarter Shop // SOURCE
Panda-Monium Mini Quilt by Fat Quarter Shop // IMAGE SOURCE

I’m dying to get stuck into making this sweet little mini but I just can’t… I already have my fingers in so many pies, so to speak, that I really need to calm myself down, put my patience pants on and begin it when I don’t already have so many other quilts to get finished!! (And seeing so many great versions of it being made on Instagram doesn’t help to calm my fever!!)

Oh, and I forget to mention – it’s a free pattern!! (Say what!?) Yep. A FREE pattern! I love a good freebie! Annndd, there’s also a YouTube tutorial on the Fat Quarter Shop channel showing you how to make it! How good is that?! 😀

And lastly, may I just say, how awesome is the Mollie Makes magazine?!

MollieMakes

If I could sum up everything that I want to be as quilter/sewer/crafter/whatever, this magazine is it! It’s 100% me but in pretty matte-pages form!

Although we’re a few issues behind here in Australia and you literally have to pay a small fortune for just one copy, it’s totes worth it, especially when you get cute freebies like pastel vintage buttons and DIY pincushion kits!!

+++

So that’s it this time ’round.

The weekend ahead, as usual, is full of sewing, creating, filming and editing!

I hope you’re weekend will be just as fun as mine!

Happy Sewing, Friends!

xx

TUTORIAL: Diamond Square Block

Here’s another quilt block tutorial coming your way! This time we’re looking at how to make the Diamond Square Block!

After showing this quilt I’m making for a friend for her birthday on Instagram and in the background of a few of my videos

IMG_4195

I’ve received so many requests from all you to show you how to piece this block/quilt together!

So here it is for you to make and turn into a lovely quilt, just like I have!

PS. I decided to make the following block using a range of pink printed fabrics, as I was so ready for a change from using so many blues!!

The deets…

This block is made up of x16 5″ HSTs and measures approx. 18.5″ squared.

Measurement & Cutting info:
You will need to cut:
– x8: 5.5″ white squares
– x8: 5.5″ squares from an assortment of print or coloured fabric (x1 of each)

A quick low-down of the steps to take:
1. Pair, sew, cut, press and trim the squares to make x16 HSTs.
2. Lay out the HSTs into the Diamond Square block design.
3. Sew the squares into four rows of four.
4. Press each seam on the back of the rows flat open.
5. Sew each of the four rows together to form the block.
6. Press and square up the block to finish.

For more detailed instructions on how to make this block, simply follow along with the steps in the video!

Diamond Square Block

+++

I can’t believe that some of you have already been sharing your completed blocks with me on Instagram (which I absolutely love, btw!), you’re creativeness and fabric choices always blow me away! If you would like to share your blocks/quilts with me, you’re always more than welcome to by tagging me on Instagram, Facebook and/or Twitter!

FYI: If your Instagram account is set to private and I don’t follow you, I won’t be able to see your photos when you tag me!! If this is the case, send me an email letting me know you’ve tagged me and I’ll do my best to find you on Instagram so I can give you a big fat LIKE and some wonderful words of positivity and encouragement!! 😀

Happy Sewing, Friends!!

xx

TUTORIAL: Jacob’s Ladder Block

Hello Good Morning to you on this chilly Australian winter morning!

The heater is pumping, Coldplay are repeating their mellow tunes through my computer speakers and a hot cup of Earl Grey is happily steaming next to me. But most importantly, my fingers are itching to present to you a new Quilt Block Tutorial!

One of the most viewed posts here on my blog is this one. It’s where I first begun sharing the creation of my Jacob’s Ladder Quilt.

Quilt Top Construction

And now, two years later, I’ve created a tutorial for those who would like to make this block themselves!

Here’s a quick low-down of the measurement and cutting instructions…

For the 4-Patch Units cut x20 assorted 2.5″ squares.
For the HSTs cut x2 white 4&7/8″ squares and x2 grey 4&7/8″ squares.

The finished size of the 4-Patch & HST units should measure 4.5″.
The finished size of the block should measure 12″.

Blooper Collage!
Blooper Collage!

If you’re planning on making a fair size quilt with this block, I made 16 blocks to make this quilt…

My finished Jacob's Ladder Quilt!
My finished Jacob’s Ladder Quilt!

Like I said at the end of the video, if you’re going to give this block a go, take a photo of it and send it to me! You can email me (3and3quarters@gmail.com), Tweet me (@3and3quarters) or Instagram me (@3and3quarters)!

I would LOVE to see what you make!

Happy Sewing Friends!

xx

Inspiration for this block:
CRAFTSY | http://goo.gl/7qp40g