Our lovely second make in my House Block QAL is here! Say hello to the Three Terraces block. 👋🏠
Inspo for this one came from those sweet little inner city streets that are endlessly lined with rows of tall houses standing neatly together. Although they’ve all been built the same, each one is slightly different to their neighbour either through the exterior colours or how well they’ve been loved throughout the years.
Another option for this block that I think would look super cute – change the grass sections for yellow sand and turn the terraces into fun little beach huts! Or even change the grass sections into blue water and the paths into yellow sand trails… 🏖️
There’s so much room for creativity and fun with this block and I can’t wait to see how you all interpret the design and make it yours!
Don’t forget to share your finished block with me on Instagram…
Welcome friends to a muchly anticipated and very over-due Quilt Along!
I can’t quite believe the last Quilt-Along (the Mini Block QAL) I hosted was seven years ago – that was 2018! What!?!?
Well today, I’m so happy to be able to share with you the first block in this new House Block QAL!
The Original Homestead is a nod to the classic house block seen in both vintage and modern quilts and is relatively simple to piece together.
Take your time choosing the right colours and prints you want to use for your block and take advantage of the colouring-in page to explore and decide what works best!
Follow the tutorial below to learn how to piece this block together.
Don’t forget to share your finished blocks with everyone using the hashtag – #AmandasHouseBlockQAL as well as tagging me on Instagram @3and3quarters!
Sneaky hint for the next block in the QAL…
Block #2 is a Trio of fun! 🏠🏠🏠
Happy Sewing, friends!
PS. Just incase you missed it, here’s the Introduction video I shared chatting all about this new QAL! xx
Well here we are, five blocks in and still having a hoot of a time! (At least I think we are, yeh?)
I love this simple little block. It’s another super quick and easy one to whizz together and has the potential to be as fun and crazy as you wish it to be!
My best advice when pulling fabrics for this block would be to choose those that are contrasting from one another. That way, you’ll end up with a block where the design really pops and you can distinguish the unique ‘cross’ in the centre.
One other bit of advice I’ll share when making this block; pay very close attention to your measurements. There are a few tricky ones in this block, so just take your time, measure twice and cut once! (See what I did there! 😜)
REMEMBER: Trim all x4 HST units to 2¾”!
+++
I’m really looking forward to making block 6! Although it is another simple one, it’s a block that I’ve always wanted to make!
After navigating through winter colds, endless days/weeks at work and my terrible habit of procrastinating, block four is finally here!
Hoorah!
It may look tricky on the outside but once you delve into what makes this block tick, you’ll be pleasantly surprised by just how simple it actually is to piece together!
The only real ‘tricky’ bit to this one are the sizes of the pieces that make up the block. (But hey, that’s the whole point to this series isn’t it? Challenging our abilities to make gorgeous mini blocks out of mini pieces of fabrics!)
I’m 100% sure, like me, you’ll squeal and swoon over the wee 1.5″ HST blocks you’ll piece together and then stare amazingly at the intricacies of the finished block. (You can actually see me do this near the end of the tutorial!)
So like I always say when it comes these complicated looking blocks, take your time when making it; try to be as accurate as you can when cutting and sewing, relax and just simply do your best!
Made a mistake? Try again. Learn from it. Become better! 👍🏻
+++
For block 5, we’ll be back to something a bit easier compared to this block. I promise!
It’ll also mark the halfway point in our Quilt Along!! (Can you believe it!?!)
Hopefully it won’t be too long between drinks (so to speak) until I can get that out to you!
As always, don’t forget to share your blocks with me using the hashtag: #AmandasMiniQAL on all the socials!
After almost a year of getting the ball rolling, the end of my Star Sampler Quilt Along has come to an end! *insert sad/happy face – whichever one applies!*
In the final instalment of the series, I’ve jammed packed it full of all of the ‘finishing touches’ we need to do to have a completed quilt!
This time ’round there’s no pattern sheet to follow or to download, instead everything you’ll need to know is either in the video tutorial or listed here in this post…
So once you’ve finished piecing together your quilt top with sashing and borders, it’s ready to be backed and basted in preparation for quilting! If you’ve made your quilt with the same measurements as mine, you’ll need:
BACKING: WOF*x150cm (59″)
BATTING: 120cmx150cm (47″x59″)
For my batting I’m using a lovely Premium 100% Cotton Quilt Batting in an Autumn weight by a company called Bosal. To be honest, before receiving this, I never knew that batting was or could be available in ‘seasonal weights’. I chose an Autumn weight as it’s not too fluffy (or lofty) to sandwich between my quilt top and backing, while still being light/heavy enough to keep one warm on a chilly winter’s eve.
When it comes to basting your quilt, use the method that you feel the most comfortable with. For me, that’s spray basting. It’s quick, simple and equates to less time rolling on the floor pricking my fingers with pesky pins! 😀
The same advice goes for your choice in quilting. From the early stages of planning this QAL, I always envisaged this quilt to have a subtle mathematical grid texture to it’s surface. To achieve it, I used my handy Clover Hera Marker and long quilting ruler to mark a 2″ grid pattern across the top of the quilt, three lines at a time (ie. mark three lines, quilt, then mark another three lines, quilt etc.) until the entire quilt was finished.
After trimming away any excess backing/batting from around the edges of the quilt, it’s time to bind! To make your own quick and easy binding, you’ll need:
BINDING: WOF*x40cm (16″)
Cut this into x6 2.5″ strips and sewn end to end on a diagonal to create a long binding strip.
After pressing the binding in half, simply machine sew it onto the front of the quilt as shown in the tutorial, then bring it around to the back and slip-stitch the other edge to the back of the quilt. Too easy!!
Don’t forget to label your quilt with the month/year the quilt was completed, the name of the quilt as well as the name of the person who made it! My label is still to be made (oops, my bad!) but when I do, hopefully I’ll remember to come back to this post and upload a photo of it for you! 😀
I want to extend a HUGE thank you to the lovely ladies over at Dayview Textiles who so generously helped out with the fabrics and materials I used for this series. Without them I would’ve been able to have the pleasure of using such beautiful fabrics from the Printshop Fabric Range!
And of course, thank you to all of you who participated so patiently in this series! I’ve absolutely loved seeing all of your gorgeous blocks, quilt tops and finished quilts – you’re all so talented and amazing! Although the series is finished, keep on sharing them with me using the hashtag #AmandasQuiltAlong on Instagram as well as over on my Facebook page!
So now that the QAL is finished, it’s time to move on to some more ‘old-school’ content that you’ve been used to seeing! That means some new block tutorials, crafty sewing tutorials, flower based tutorials, some fun Christmas things as well as other usual stuff like Monthly Favourites, Vlogs, Hauls etc! Exciting times ahead people!! Yeah!
So while I go and enjoy my last week of being in my twenties (It’s my 30th Birthday this coming Sunday! Eek!), I hope you all have fun completing your gorgeous quilts!
Happy Sewing, Friends!!
xx
PS. Happy News! I now have a PO Box! If you would like to send me something lovely, you can using this address:
Amanda Rolfe
PO Box 1179
St Marys NSW 1790
Australia
Sorry it’s been a while a since I last checked in on my Star Sampler Quilt Along! Things have been crazy over on this side of the computer monitor. Work. Family. Sickness. Winter. The list goes on and on! But hooray! After many weeks of coming and going with filming this tutorial, I finally got it finished! Whew!
Hopefully my little hiatus has given you the time to catch up on completing all 12 Star blocks and are now ready to sash and piece them all together! Cos that’s what we’re doing today!
When placing the blocks into their final positions, feel free to mix them up and place blocks in any order you wish. Also, if you want to make your sashing and border pieces wider than mine than that’s okay too! Just be aware that the wider and longer you make your quilt top, the more batting and backing fabric you’ll need in the next part!
As always, everything you’ll need to know in regards to the measurement and cutting information as well as the fabrics* I’ve use to piece the quilt top together are in the pattern sheet linked at the beginning of this post!
+++
Depending on my work schedule and other social thingys I’ve got happening over the next month or so, I hope to get started on the next stage of the Quilt Along very soon! (Fingers crossed for next week!!) Now that the blocks have been pieced together and a lovely quilt top has emerged, I can’t wait to see it finished in it’s all glory! The fabrics I’ve chosen for the backing and binding are going to finish the quilt off beautifully!! So exciting!!
I hope you’re all having a lovely week and enjoy the weekend ahead!!
Happy Sewing, Friends!
xx
+++
*A big thanks to Australian wholesale supplier and fabric distributer Dayview Textiles for supplying me with such beautiful fabrics! If you want to see all of the fabrics I’ll be using in this Quilt Along, check out this post where I share them all with you!
A big hello to you on this chilly May day! Late Autumn has definitely set in here in Australia… The afternoons are turning darker earlier, the chill in the air is becoming more bitter each morning and the Ugg boots are already getting a good workout at home! And it’s finally tea drinking season and I’m loving it! 🙂
In today’s post I’m sharing with you the second last block that we’ll be making in my Star Sampler QAL! It’s a beautiful chunky-like star called the Square & Star. Personally, I’ve never heard (or really seen) of it before. It’s one of those blocks that looks tricky from the outside but once you peek inside and see the simple units that make up the block, it’s one of those easy-peasy ones that you can make within 45 minutes or so.
Have fun with mixing different contrast fabrics together for this block. The bolder the contrast, the better the block will look I think! Or if you want, stick with a favourite solid or bold all-over print for the ‘square’ and ‘star’ bits and it’ll turn out just as great!
As always, everything you’ll need to know in regards to the measurement and cutting information as well as the fabrics* I’ve use to piece this block together are in the pattern sheet linked at the beginning of this post! If you would like to use a similar 12.5″ set square as me, you can find it here: June Tailor Get-Squared 12.5″ Ruler.
+++
Like I mention in the video, block 12 has been a long time coming and I thank and appreciate everyone for being so patient with me! Block 12 is the one design that I’ve been so excited to make! It’s final layout, I think, will be very effective and really add an element of interest to the finished quilt top! The final hint for this block is that it’s similar to an Ohio Star block but it’s not an Ohio Star block… If you get what I mean! 🙂
*A big thanks to Australian wholesale supplier and fabric distributer Dayview Textiles for supplying me with such beautiful fabrics! If you want to see all of the fabrics I’ll be using in this Quilt Along, check out this post where I share them all with you!
Are we ready for another block tutorial in my Star Sampler Quilt Along?!
Block 9 is the Missouri Star, a design I’ve actually never made before. Fun fact of the day; when I was filming this, it was actually my first time making too!
When I was piecing it together, I was honestly unsure whether or not I had made the right choice in fabrics. I felt that the prints and colours of my two main fabrics didn’t quite mesh well together… But once I finished the block and took a step back, I think it works. The contrast in the fabrics show the design of the block and help highlight those semi-tricky half quarter square triangle units!
My tips for making this block:
Taking your time to make sure you square up the centre unit to a 6.5″ square as well as ensuring your HSTs and then half QSTs are trimmed and squared up to the measurements mentioned in the tutorial.
When making your half QST units, pay attention when placing the marked background fabric squares on top of your HST units. The marked line should be running in the opposite direction to the seam of the HST underneath.
Keep true to a 1/4″ seam allowance. All of your seams and points will match up perfectly, resulting in a precise 12.5″ block at the end after squaring it up.
As always, everything you’ll need to know in regards to the measurement and cutting information as well as the fabrics* I’ve use to piece this block together are in the pattern sheet linked at the beginning of this post! If you would like to use a similar 12.5″ set square as me, you can find it here: June Tailor Get-Squared 12.5″ Ruler.
+++
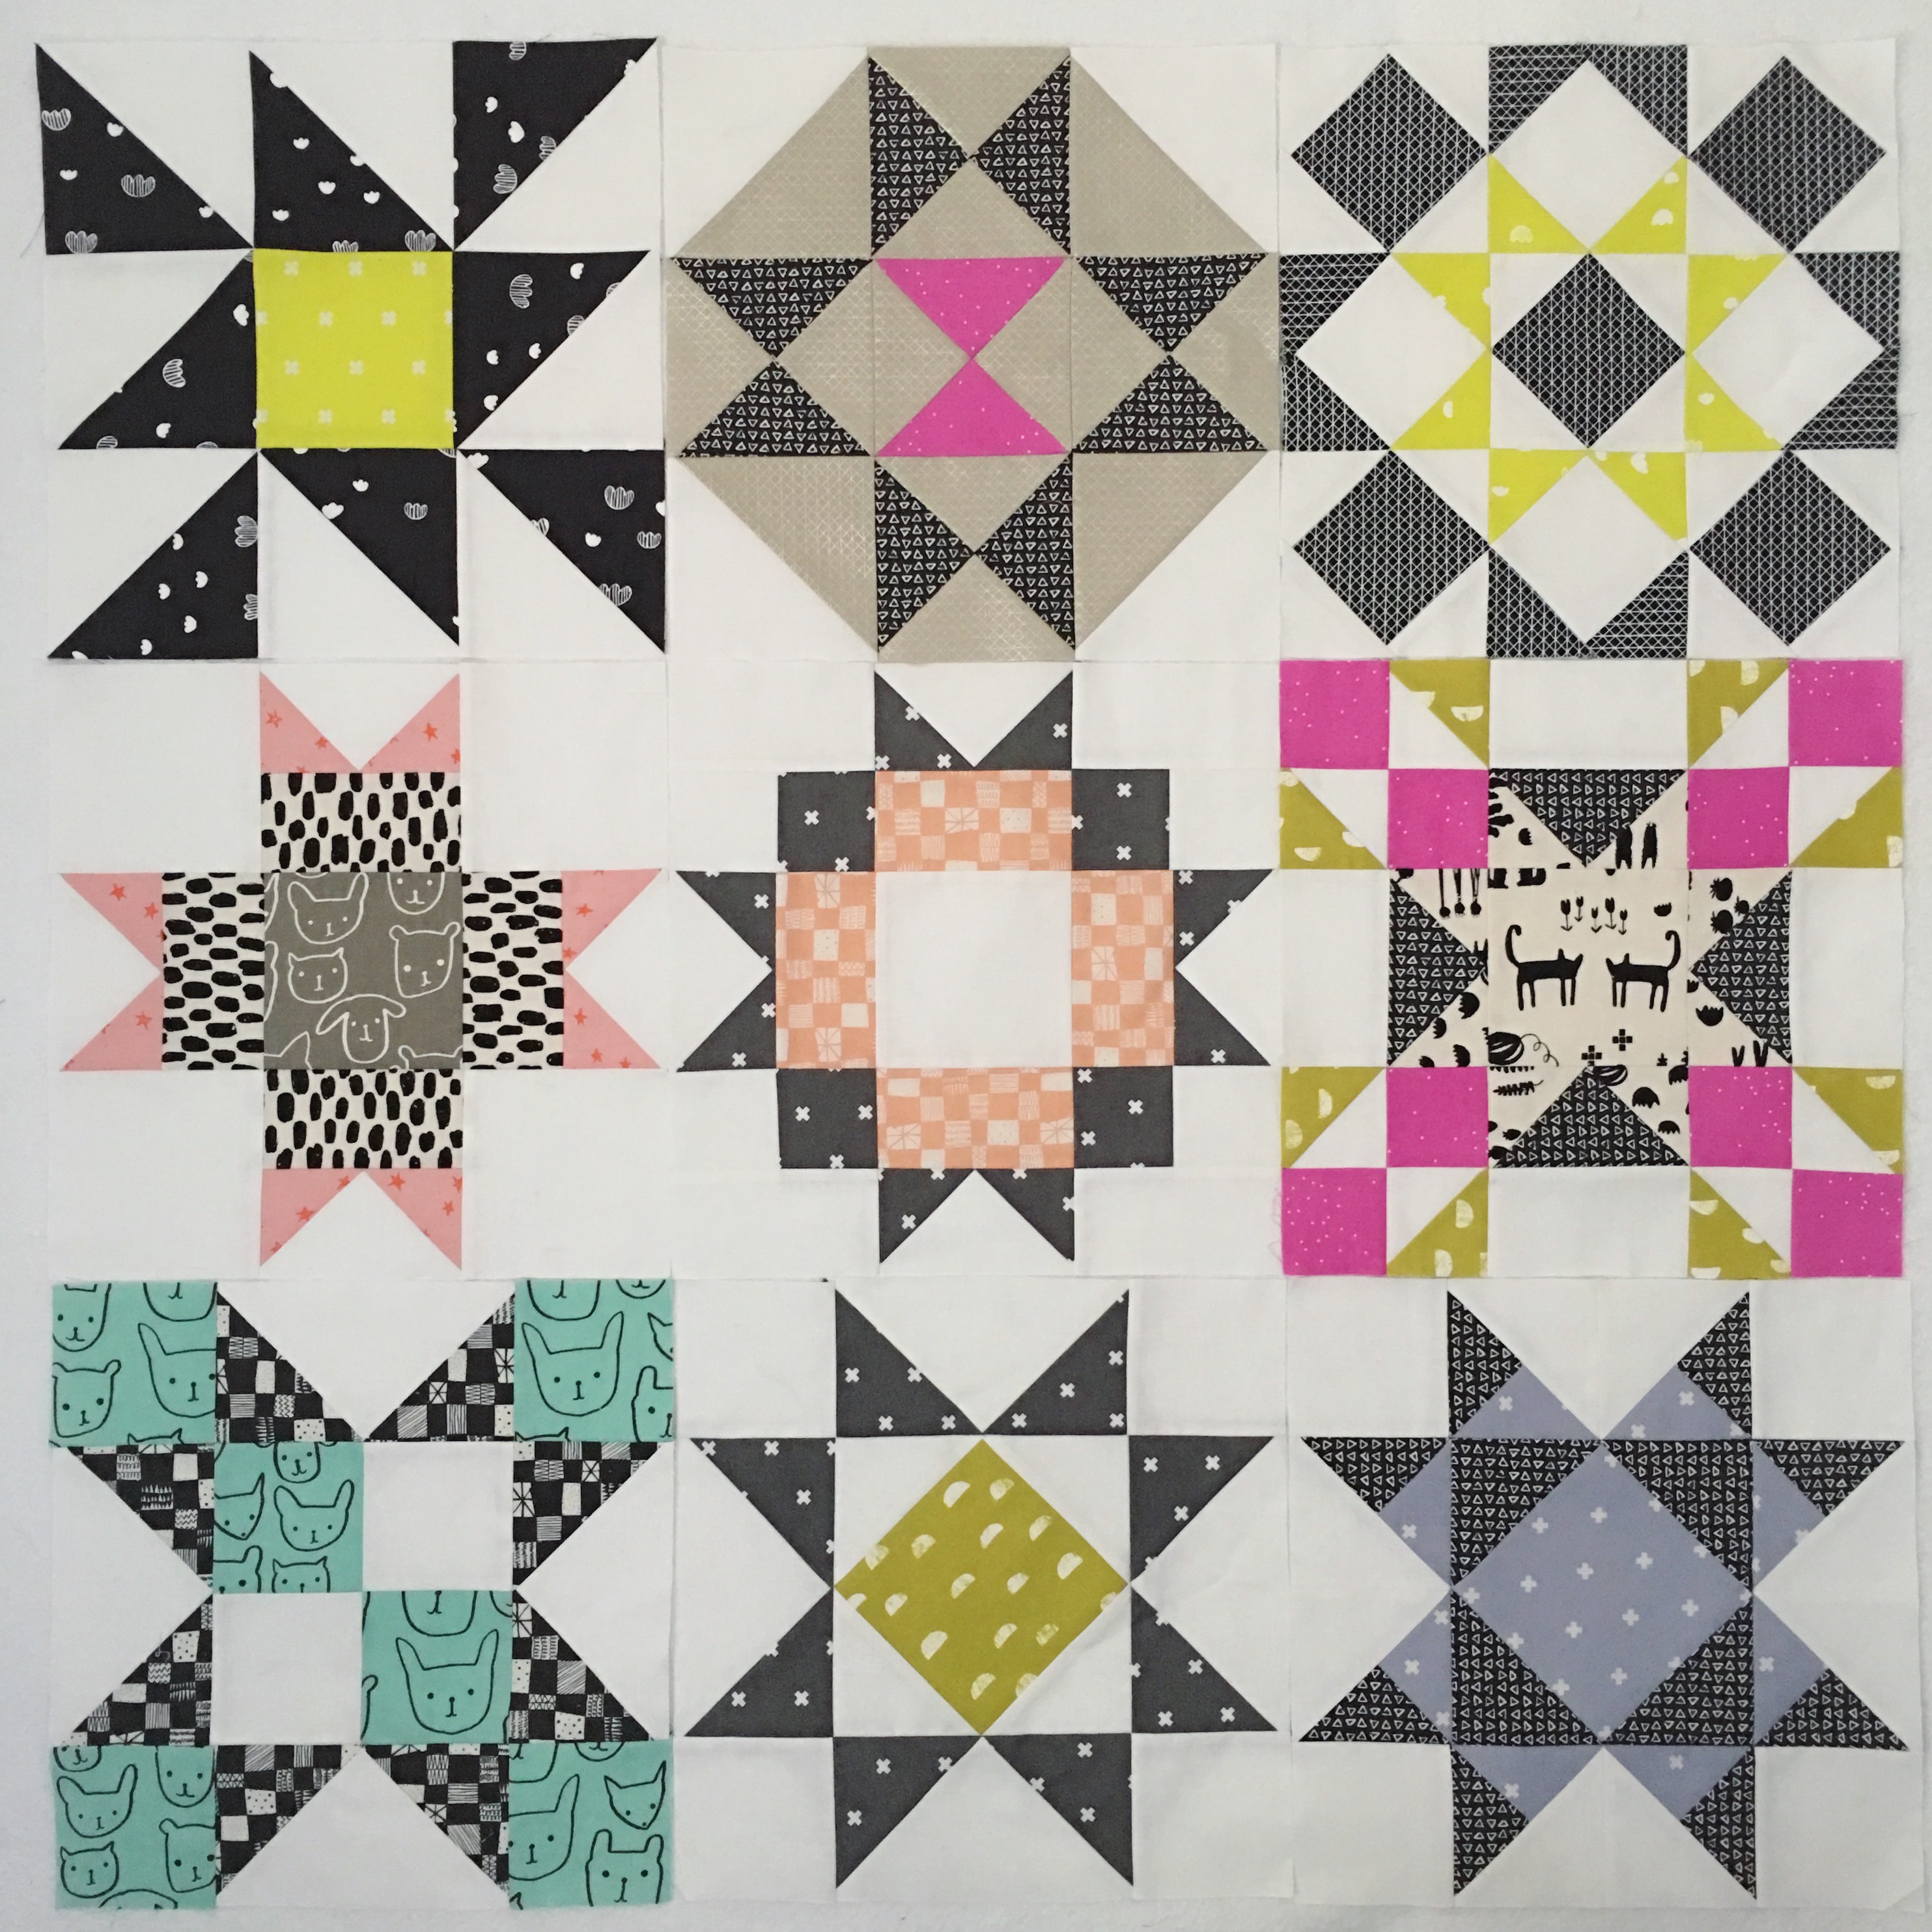
Can you believe it, we’re nine blocks down with only three more to go?! Time flies when you’re having fun, huh?!
My 9 Star Sampler Quilt Blocks!
I’m super excited for block 10! We’ll be making the Martha Washington Star block (google it to see how pretty it is!). The thing I love most about that block is the gorgeous half QST pinwheel in the centre! Too cute!!
Keep sharing your blocks! (Use the hashtag #AmandasQuiltAlong on Instagram!) If you can, post a picture like mine above showing me all nine of your blocks so far! All of your quilts are going to be beautiful, I just know it! 😀
Happy Sewing, Friends!
xx
*A big thanks to Australian wholesale supplier and fabric distributer Dayview Textiles for supplying me with such beautiful fabrics! If you want to see all of the fabrics I’ll be using in this Quilt Along, check out this post where I share them all with you!
Huzzah!! The day is FINALLY here where Block 8 in my Star Sampler Quilt Along series is up on my YouTube channel, ready for you to make!!
My deepest apologies for the taking a hella-of-a long time to get this block out to you! Excuses include: Christmas, New Years, Holidays (cruise time!) and lots of work shifts slotted in between. Not to mention our Internet decided to conveniently break last week, leaving us with a veeeeerrrrrryyyy sllllllooooooowwwww connection for about 8 days. Uploading a video and trying to write a blog would’ve been painful and very soul-crushing!
But alas, our Internet is back and happy, I’m back and happy from my long break away from YouTubing and blogging and I’m ready to dive straight back into the creating!
So back on topic; Block 8 is such a simple beauty to piece together. It does require you to be quite precise with your cutting, piecing and trimming of each unit, but I go more into that in the video. Have fun choosing some great contrasting fabrics to really make each element in the Star pop!
For all of the measurement and cutting details, along with the fabrics* I’ve used to piece this block together and a diagram of the block layout, click on the pattern sheet linked at the top of this post. If you would like to use a similar 12.5″ set square as me, you can find it here:June Tailor Get-Squared 12.5″ Ruler.
+++
Like I mention in the video, I’ll be starting on Block 9 this week. It features elements that we’ve covered before in the series, but will be applied in a slightly different way. (Pretty cryptic, huh?!) I’m genuinely very excited to make this block as I think the final outcome of it will be stunning!!
*A big thanks to Australian wholesale supplier and fabric distributer Dayview Textiles for supplying me with such beautiful fabrics! If you want to see all of the fabrics I’ll be using in this Quilt Along, check out this post where I share them all with you!
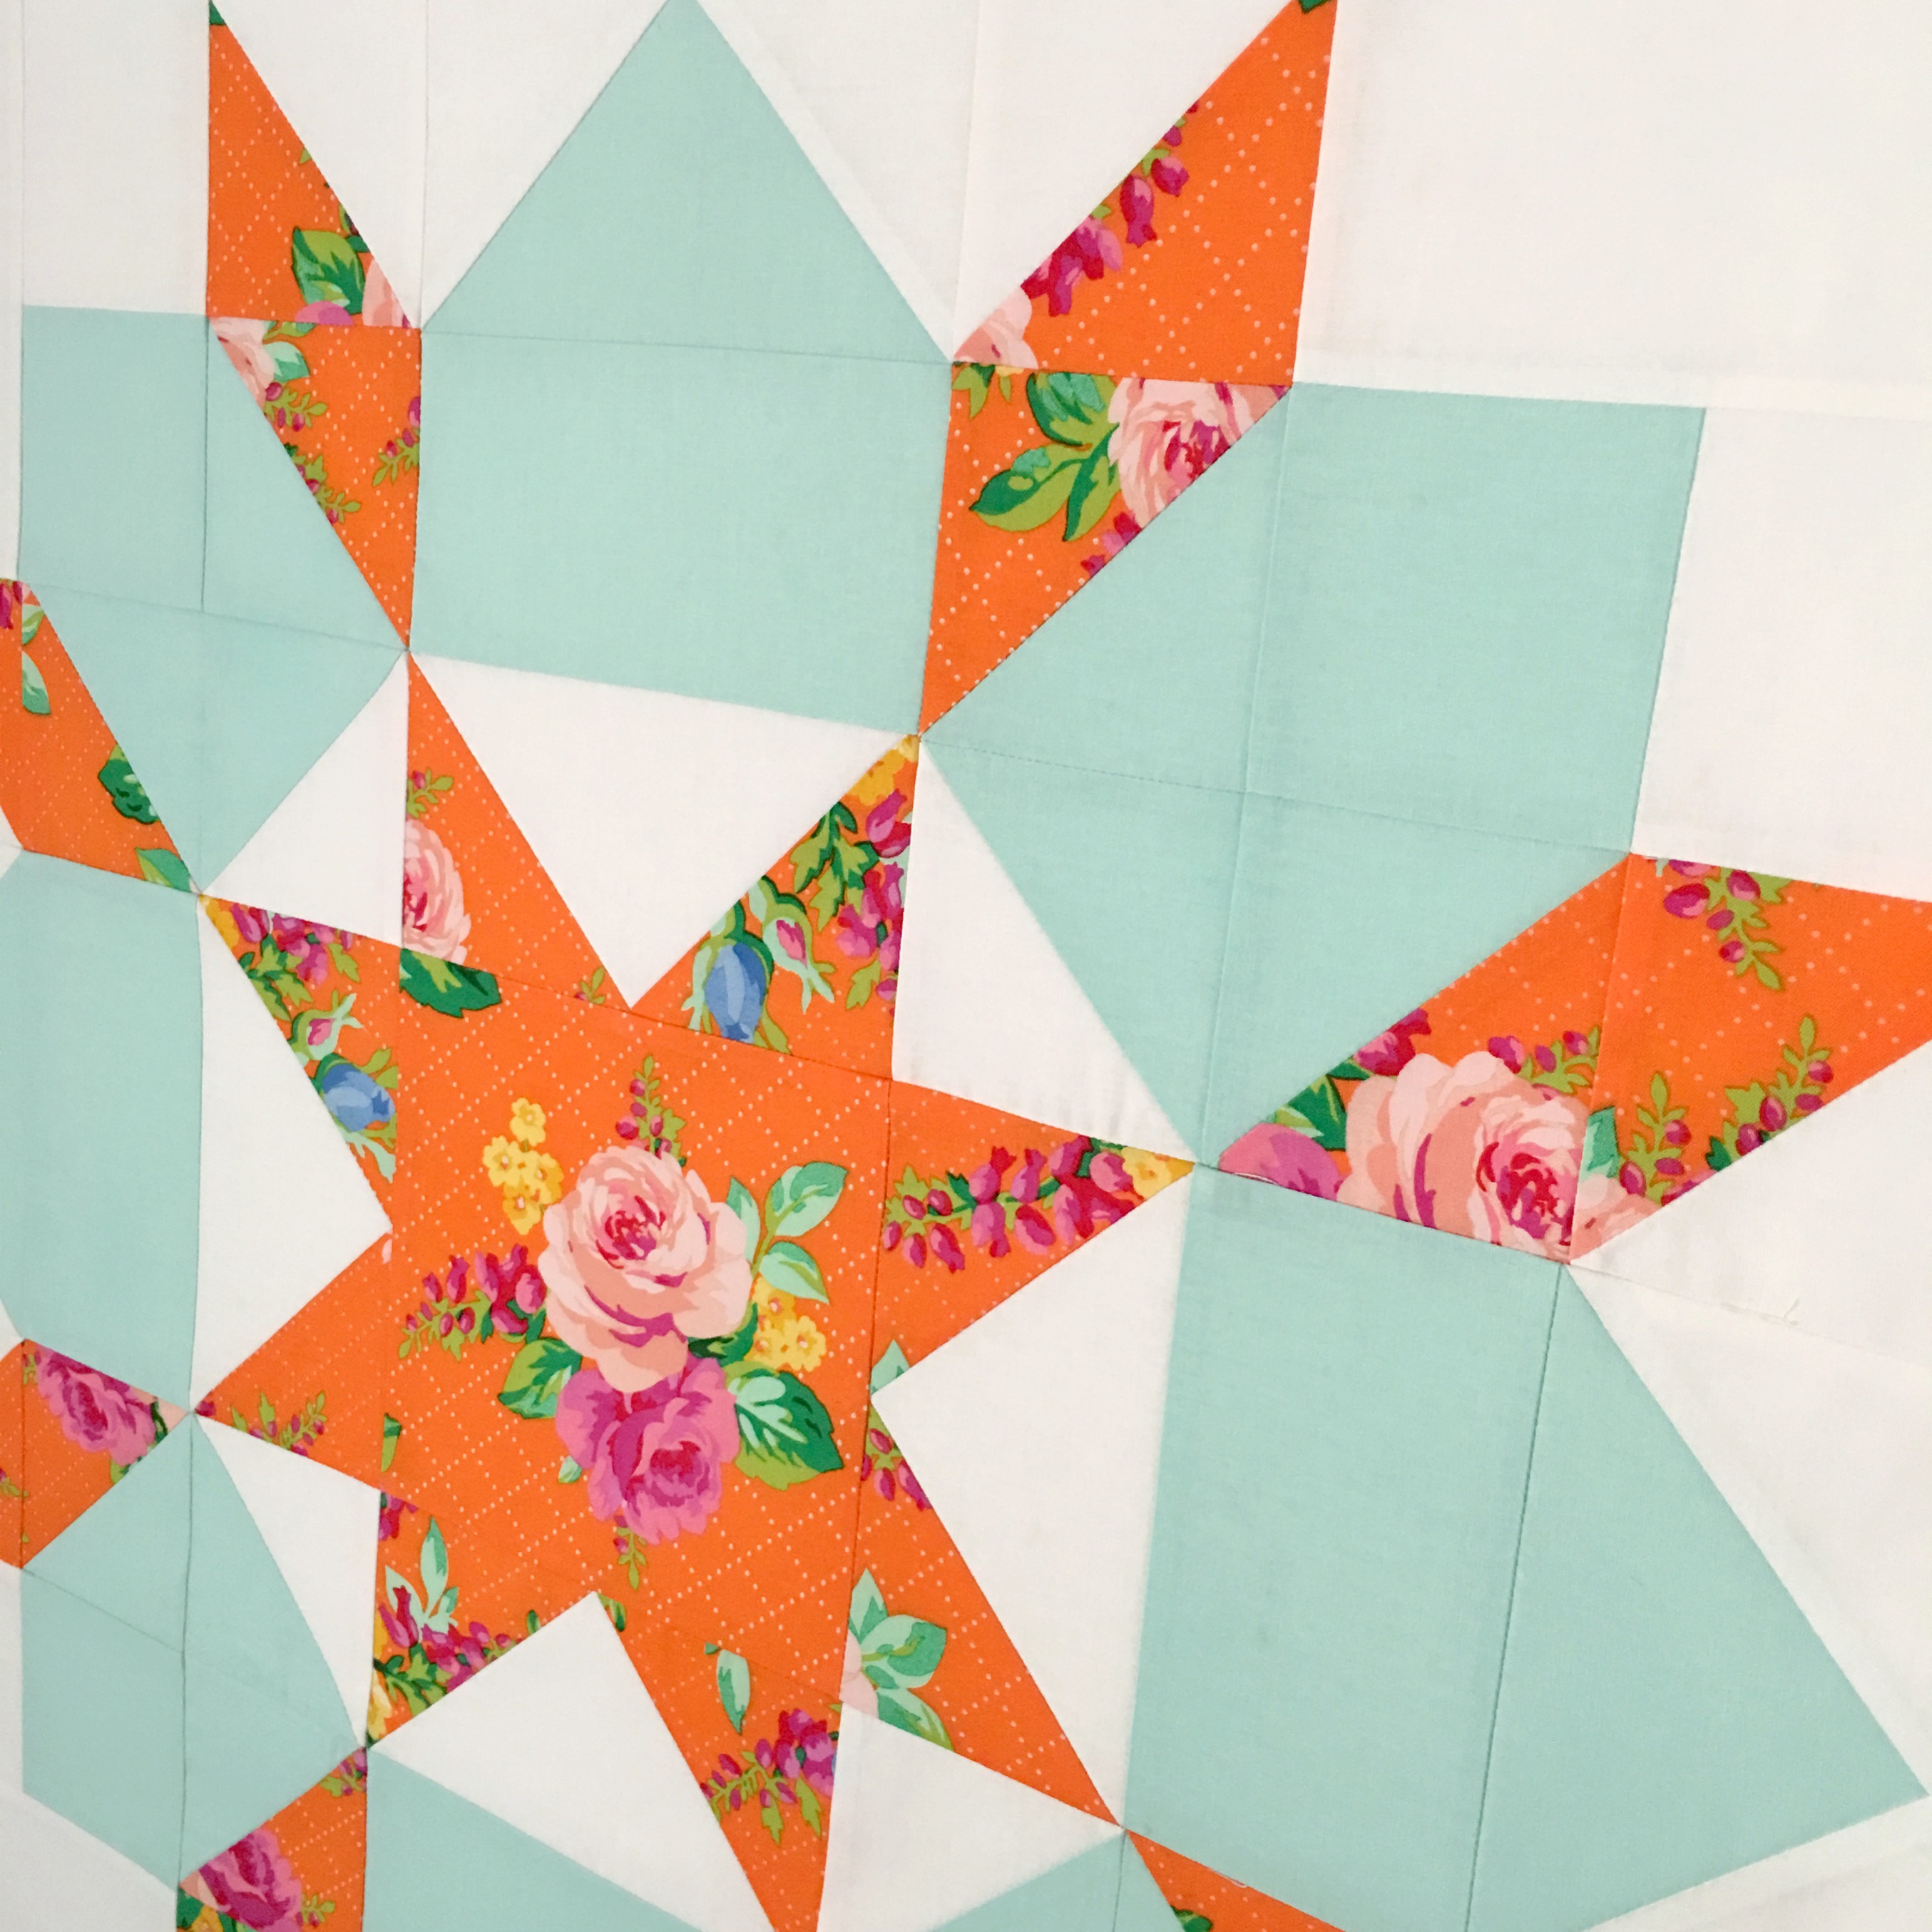
With a rare weekend off from work, I’ve taken the opportunity by the reins and dedicated my hours getting reacquainted with my sewing machine! Before getting back into my Quilt-Along series, there’s one block that I’ve always wanted to make and this weekend was perfect to finally do it!
It’s the Swoon block designed by Camille Roskelley at Thimble Blossoms. This block came out just at a time when I began to get really serious into patchwork and quilting. It seemed like everyone at the time were buzzing all about and making all of these beautiful Swoon blocks! So naturally, I just had to get in on the action! With the pattern bought, downloaded and printed, that’s as far as I got. Five years later, I’ve finally made my first one!
And I love it!!
As I placed it up onto my design wall and stepped back, I exclaimed out loud, ‘Oh wow, it’s sooooo pretty!!!’ Because it is. It really, really is.
The fabrics I used to make my Swoon include two basic solid colours; white and ice blue. The vibrant orange floral print is from a range by Victoria Findlay Wolfe called Mostly Manor. This particular print is called, Elise. (All info taken from the fabric selvedge.) I absolutely love the floral motifs in this print. So much so, for the centre unit I fussy-cut my favourite floral spray and made it centre of attention!
Sometime throughout this new year, I would love to make another one. If you can’t already guess, the block is quite time-consuming to make, all depending on how fast a sewer you are of course! Due to the extreme heat we’ve been living through in Sydney these past few days (40C+ temperatures!), it took me two days to complete this block. I’m sure if given the opportunity to make this block on a less hotter day, I could definitely have one whipped up in a day.
While it’s been so lovely to have some time to myself to do some ‘me-time’ sewing, it’s also time to get back into my Quilt-Along series! I left you all at the end of last year to catch up to Block Seven. It was the beautiful and very simple Indian Star block.
Lots of you have been sharing your finished blocks with me on Instagram or Facebook and they’re all looking so great!!
This week I’ll be working on getting Block Eight filmed, edited and uploaded for you to sew together next weekend. The block that we’ll be making is called the Crystal Star block and is another simply designed block that you’ll be able to piece together in an afternoon.
Along with the rest of my Quilt-Along series, I’ve got some great videos and tutorials lined up for this year. I will be doing another Stop-Motion Embroidery video since the Christmas one I had promised was a total fail. (I always seem to misjudge how busy I actually am during the Christmas season!). I also want to try and do a few other crafty tutorials along with all of my other usual content; Monthly Favourites, a few hauls and even some daily/weekly vlogs (all depending on if I can find the confidence to do so!).
I also have a few little sewing room goals that I want to achieve this year. Before telling you what they are, can I tell you something really bad? Something that I’m kinda ashamed of and really makes me sad…
In the year 2016, I never finished one quilt. It’s been the first year since I started quilting eleven years ago that I didn’t produce a finished quilt. It feels a bit strange really. Last year was one of the busiest I’ve had in a long time and because of that I had to put to one side the thing I love to do the most just to keep my head above the water of life’s crushing responsibilities. Sigh..
HOWEVER!! All of that is changing this year! I will find the time and dedicate my all to my craft. My passion. My life. My love. My escape. My happy place!
Although I never actually finished a quilt last year, I did rediscover lots of quilt-tops that are ready to be basted, quilted and finished. So my sewing room goal for this year is to complete AT LEAST one of these many quilt-tops hiding inconveniently under my sewing table!
My Colourplay Quilt-Top is top of the list!
As the year ticks away, I’ll try and keep you in the loop with how I’m travelling with these quilts. Every year I seem to make a promise to get all of my WIPs finished, but it never seems to happen. I wonder if this time next year I’ll be writing the same kind of words…
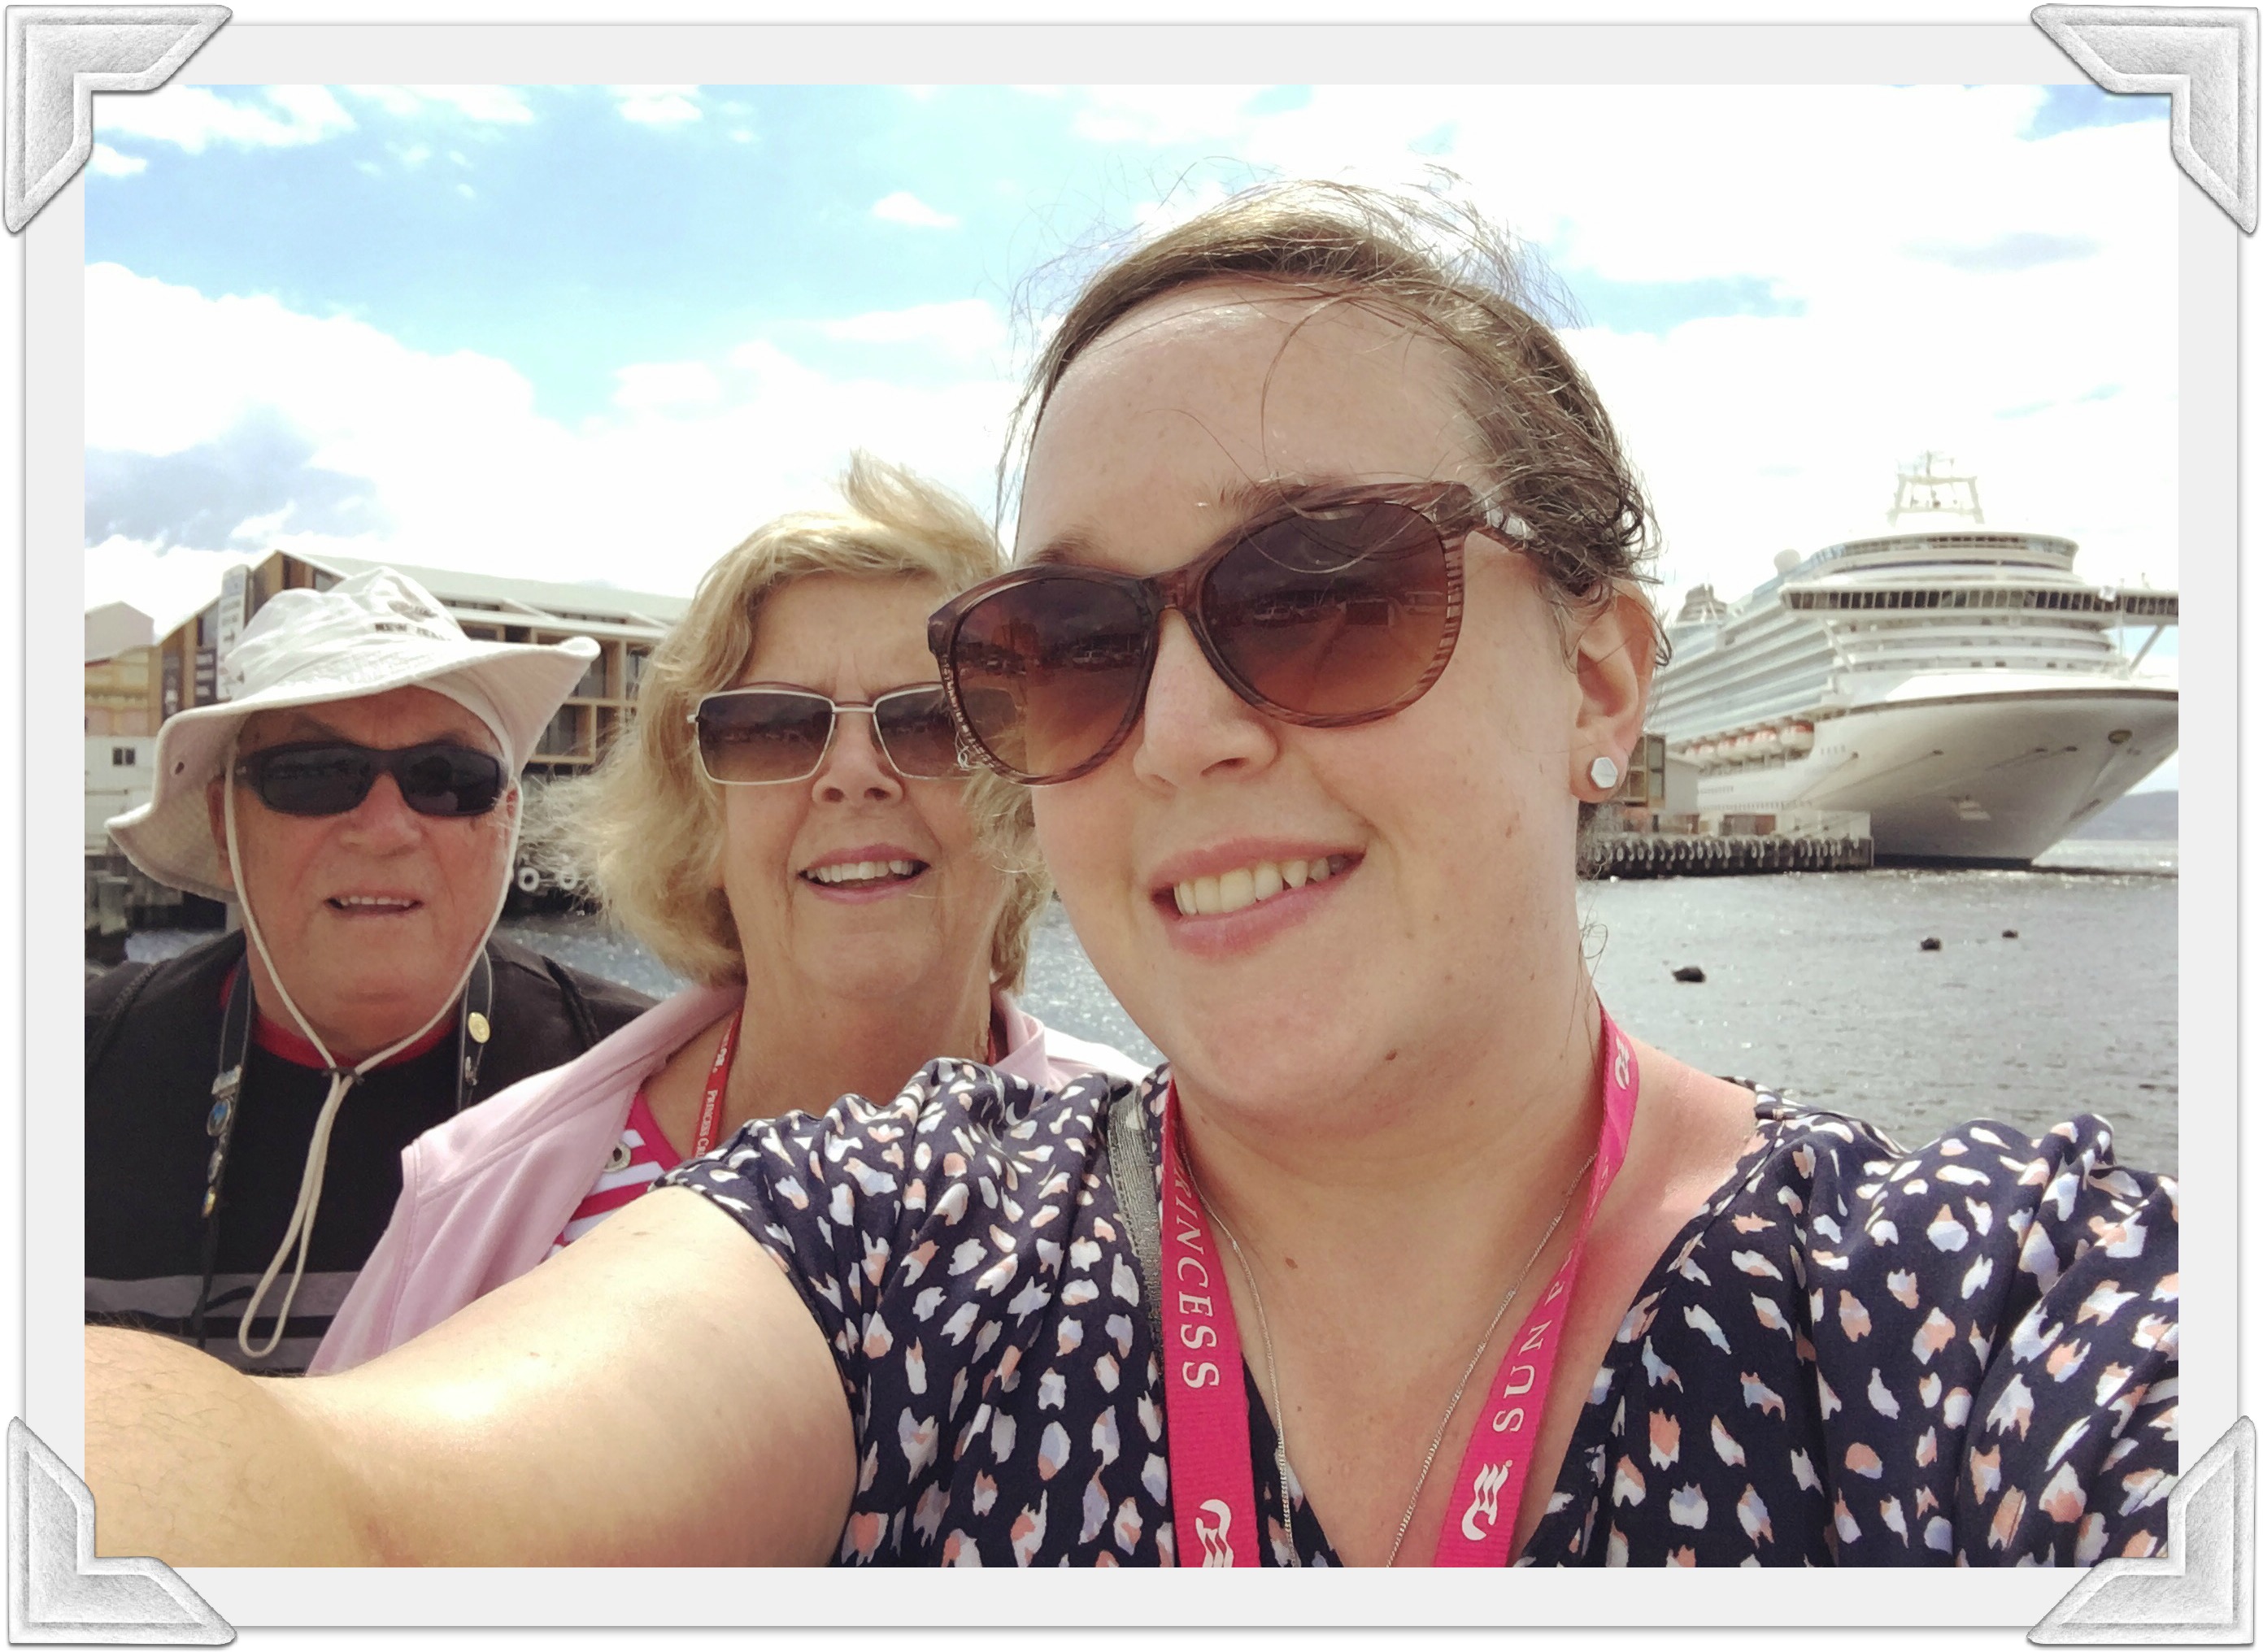
Before wrapping up today’s post, I wanted to share some happy snaps from my holiday! (I was going to make a vlog of my holiday for my YouTube channel, but I wasn’t all that happy with the little footage I actually captured!). I’ve just recently come back from a cruise on the Emerald Princess where we sailed from Sydney to Port Arthur and Hobart (Tasmania) and then Melbourne. It was just a short eight-night cruise but it was so lovely to get away from reality for a while and be a happy passenger on a pretty boat.
Emerald Princess tendered in Port Arthur, Tasmania
Emerald Princess docked at Hobart / GIANT slice of pizza / A delicious Chocolate dessert / The Atrium
Although I love visiting and exploring other countries, there’s nothing better than discovering the beautiful nooks-and-crannies in your own country. Whether that be learning something new about our history, exploring hidden bays and coves or marvelling at the different skylines and architecture that each major city has, forming a rich culture and persona.
A few of these photos you may’ve already seen of Instagram, but I thought I’d share them here for you too.