Now, I’m not sure how many of you who are reading this little post are beginners…
But, if you are, you’ve stumbled upon the right blog at the right time!
Huzzah!!
Because my latest little quilty-chat video is all about the essential tools that I believe you’ll need when starting out in the quilting game.
There are tons of different tools that we (as more experienced quilters) could try and convince you (the naive beginner quilter) to begin with – i.e. fancy rulers, differing thread weights, designer patterns, expensive sewing machines.
But, I think it’s more important to arm you, newbie patchworkers, with the most simple and basic tools to get started with. And then, as you become more confident and dedicated to your craft, by all means go get those fancy rulers that will help perfect your HSTs (that is Half Square Triangles); go and buy every shade of your favourite weighted thread; stalk those uber-cool quilt pattern designers on Instagram(a guilty pleasure!); and treat yourself to that sewing machine you’ve had your eye on for the past six months!
By the way, I am no professional when it comes to knowing what is best for each individual quilter. I chose the items stated in this video from experience when I worked at Spotlight. Eager newbie quilters would come into our store and ask, ‘What do I need to make a quilt?’. And so, this is what I would direct them to…
Here’s a list of all the items featured in this video:
– ‘Quilting Step By Step’ by Maggi Gordon
– ‘The Practical Guide to Patchwork’ by Elizabeth Hartman
– Fiskars Classic Stick rotary cutters, 28mm and 45mm
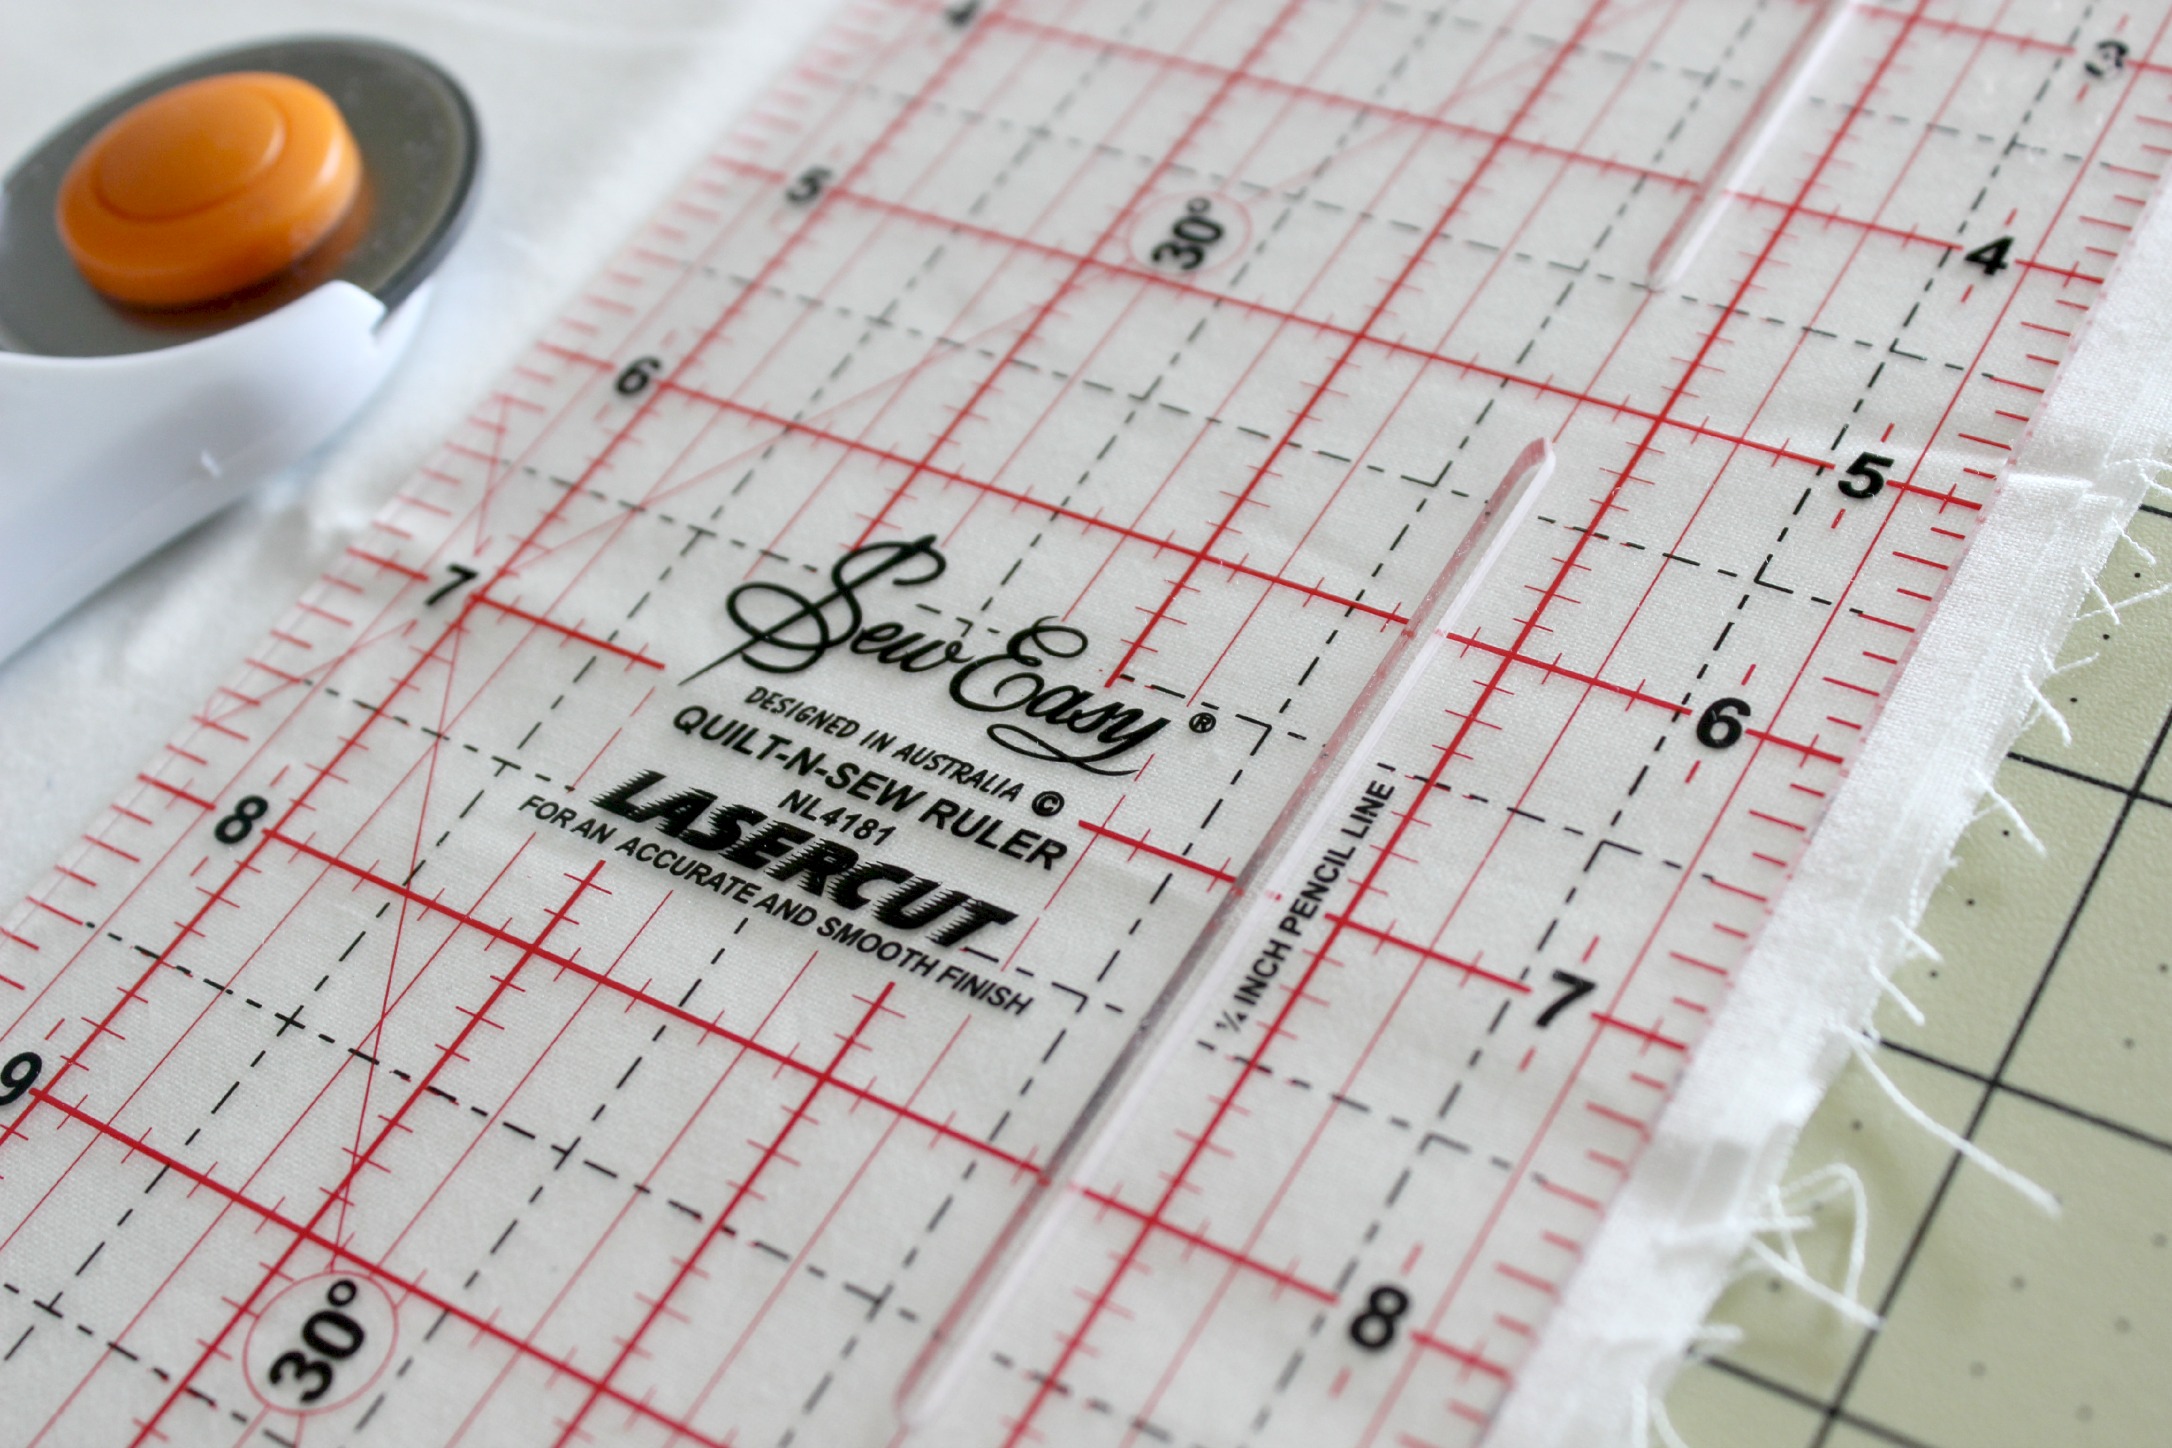
– Sew Easy Quilt-N-Sew Ruler, 14″x5″
– Fiskars Self-Healing Double-Sided cutting mat, 18″x24″
– Mundial Dressmakers Shears, 9 1/2″
– Tonic Studios Non Stick Precision Scissors
– Birch Quilters No-Melt Flower Head pins
– Birch Quilters Tape Measure, 300cm/120″
– Gutermann threads, 100% Cotton and 100% Polyester, 250m spools
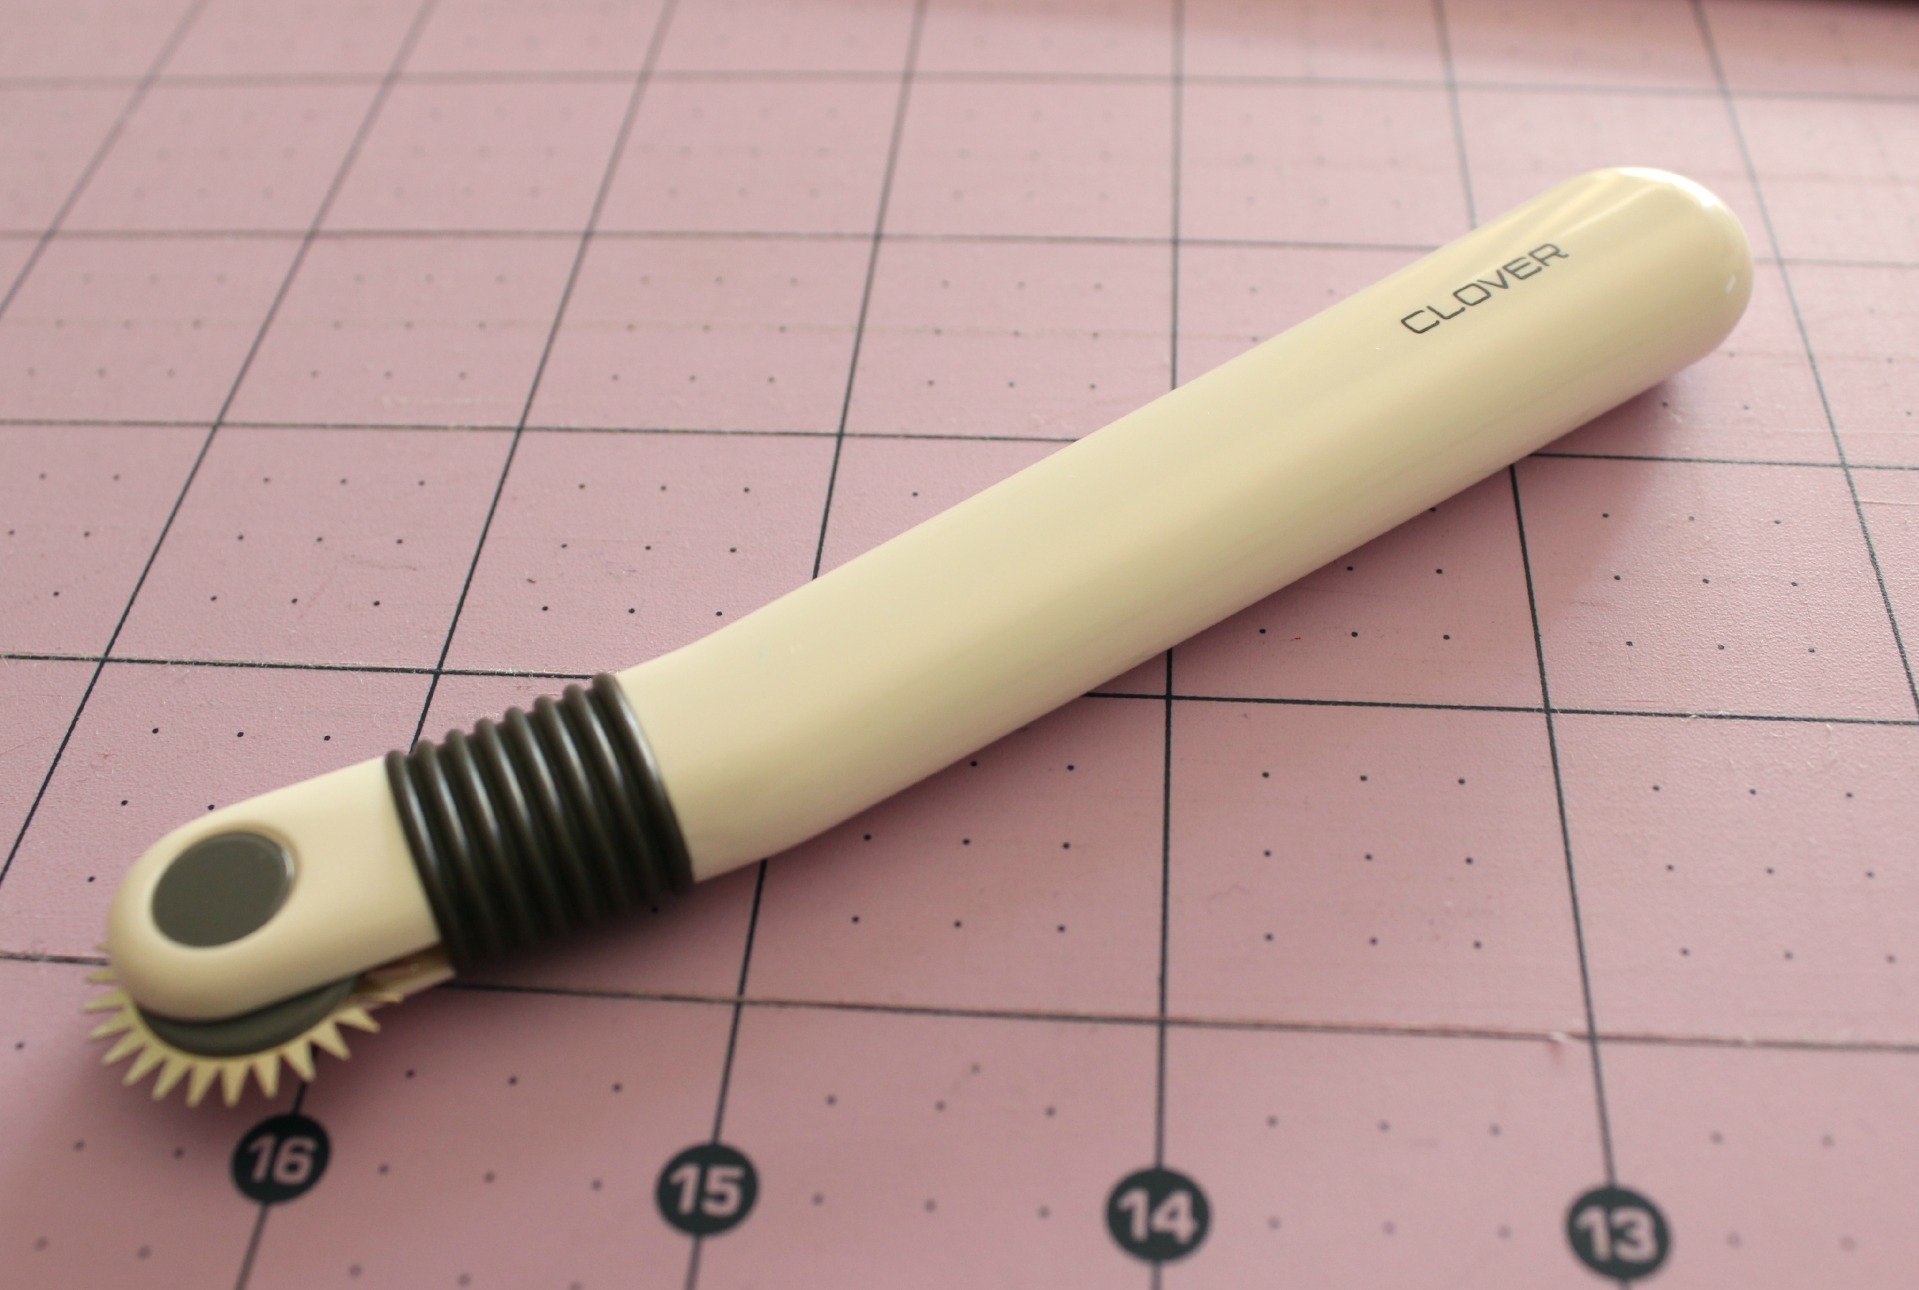
– Clover Seam Ripper
– Philips Iron | Model: Azur
– Birch Quilters Curved Steel Safety Pins, 27mm
– Birch Quilt Basting Spray, 350g can
– Brother Innovis 200QE Sewing Machine (not seen)
So if are that eager newbie quilter – welcome to the fun, the creativity, the endless possibilities and ever evolving world of quilting!
I’ve been buying so many quilting gadgets and sewing accessories over the past month or so (who doesn’t, right?!), that I wanted to share a few of them with you in something that I call:
A Craft Haul!
Item #1
‘The Quilting Answer Book’ | Barbara Weiland Talbert
I discovered this little beauty of a book in one of my local bookshops and immediately knew it was coming home with me!
I had a good little flick through it to see what it was all about…
It begins with the basic questions and answers that all newbie quilters begin with regarding fabrics, batting, tools/accessories as well as cutting, piecing and pressing and how a quilt is assembled etc.
The book also delves into answering the deeper and more advanced techniques of quilting like applique, quilting techniques and skills, embellishments, calculating your own block designs and more!
The book has been set out into easy to find and read sections that have informative diagrams and images to follow along with.
[CLICK HERE] To see more information about this book!
Item #2
Fiskars Self-Healing Double-Sided Cutting Mat | 18x24inches
I had been saving like mad and keeping my patience hat on, waiting to get this.
My previous cutting mat was getting a bit ‘rough-around-the-edges’, both sides. Because I was really impressed by the quality and features of that Fiskars cutting mat, I was on the look out for a good sale price (these baby’s aren’t cheap!).
Eventually my patience was rewarded with a 40% off Fiskars Quilting Tools sale at Spotlight! Cha-Ching!
The thing that I especially love about the Fiskars Mats is that they have the 1/8th” measurement lines as well as a dotted lines in between the solids so that accurate measuring and cutting is a breeze!
Item #3
Sew Easy Patchwork Ruler | 14×4.5inches
While I was ‘treating’ myself to a new cutting mat, I also purchased another quilting ruler.
I was looking for another one of those ‘basic’ types of rulers that can be used when measuring and cutting anything.
This particular ruler is slightly longer than the previous one I was using (tick!) and features the all-important imperial measurements (tick!).
Item #4
Clover Tracing Wheel | With Serrated Edges
When I do paper-piecing, I like to perforate the lines that I’ll be sewing over by guiding the paper through an unthreaded sewing machine. This perforation helps when tearing the paper off in the later stages of the block construction.
To avoid this time consuming step, I bought a serrated edge tracing wheel that will, hopefully, do the same kind of job as the sewing machine.
I’m yet to trial this method out so I can’t really say whether this will work with much success! I’ll keep you posted!
Item #5
Pink Thread Snips | With anti-slip grip handle
I like using these types of thread cutters. I find that they’re quicker to pick up and use and the point at the end of blade cuts closer to the surface.
These particular thread snips are unbranded and were on the cheap side, so how well they’ll work and how long they’ll last is anyone’s guess!
Item #6
‘PaintBox’ Collection by Cynthia Rowley | ‘Prism’, 50x112cm
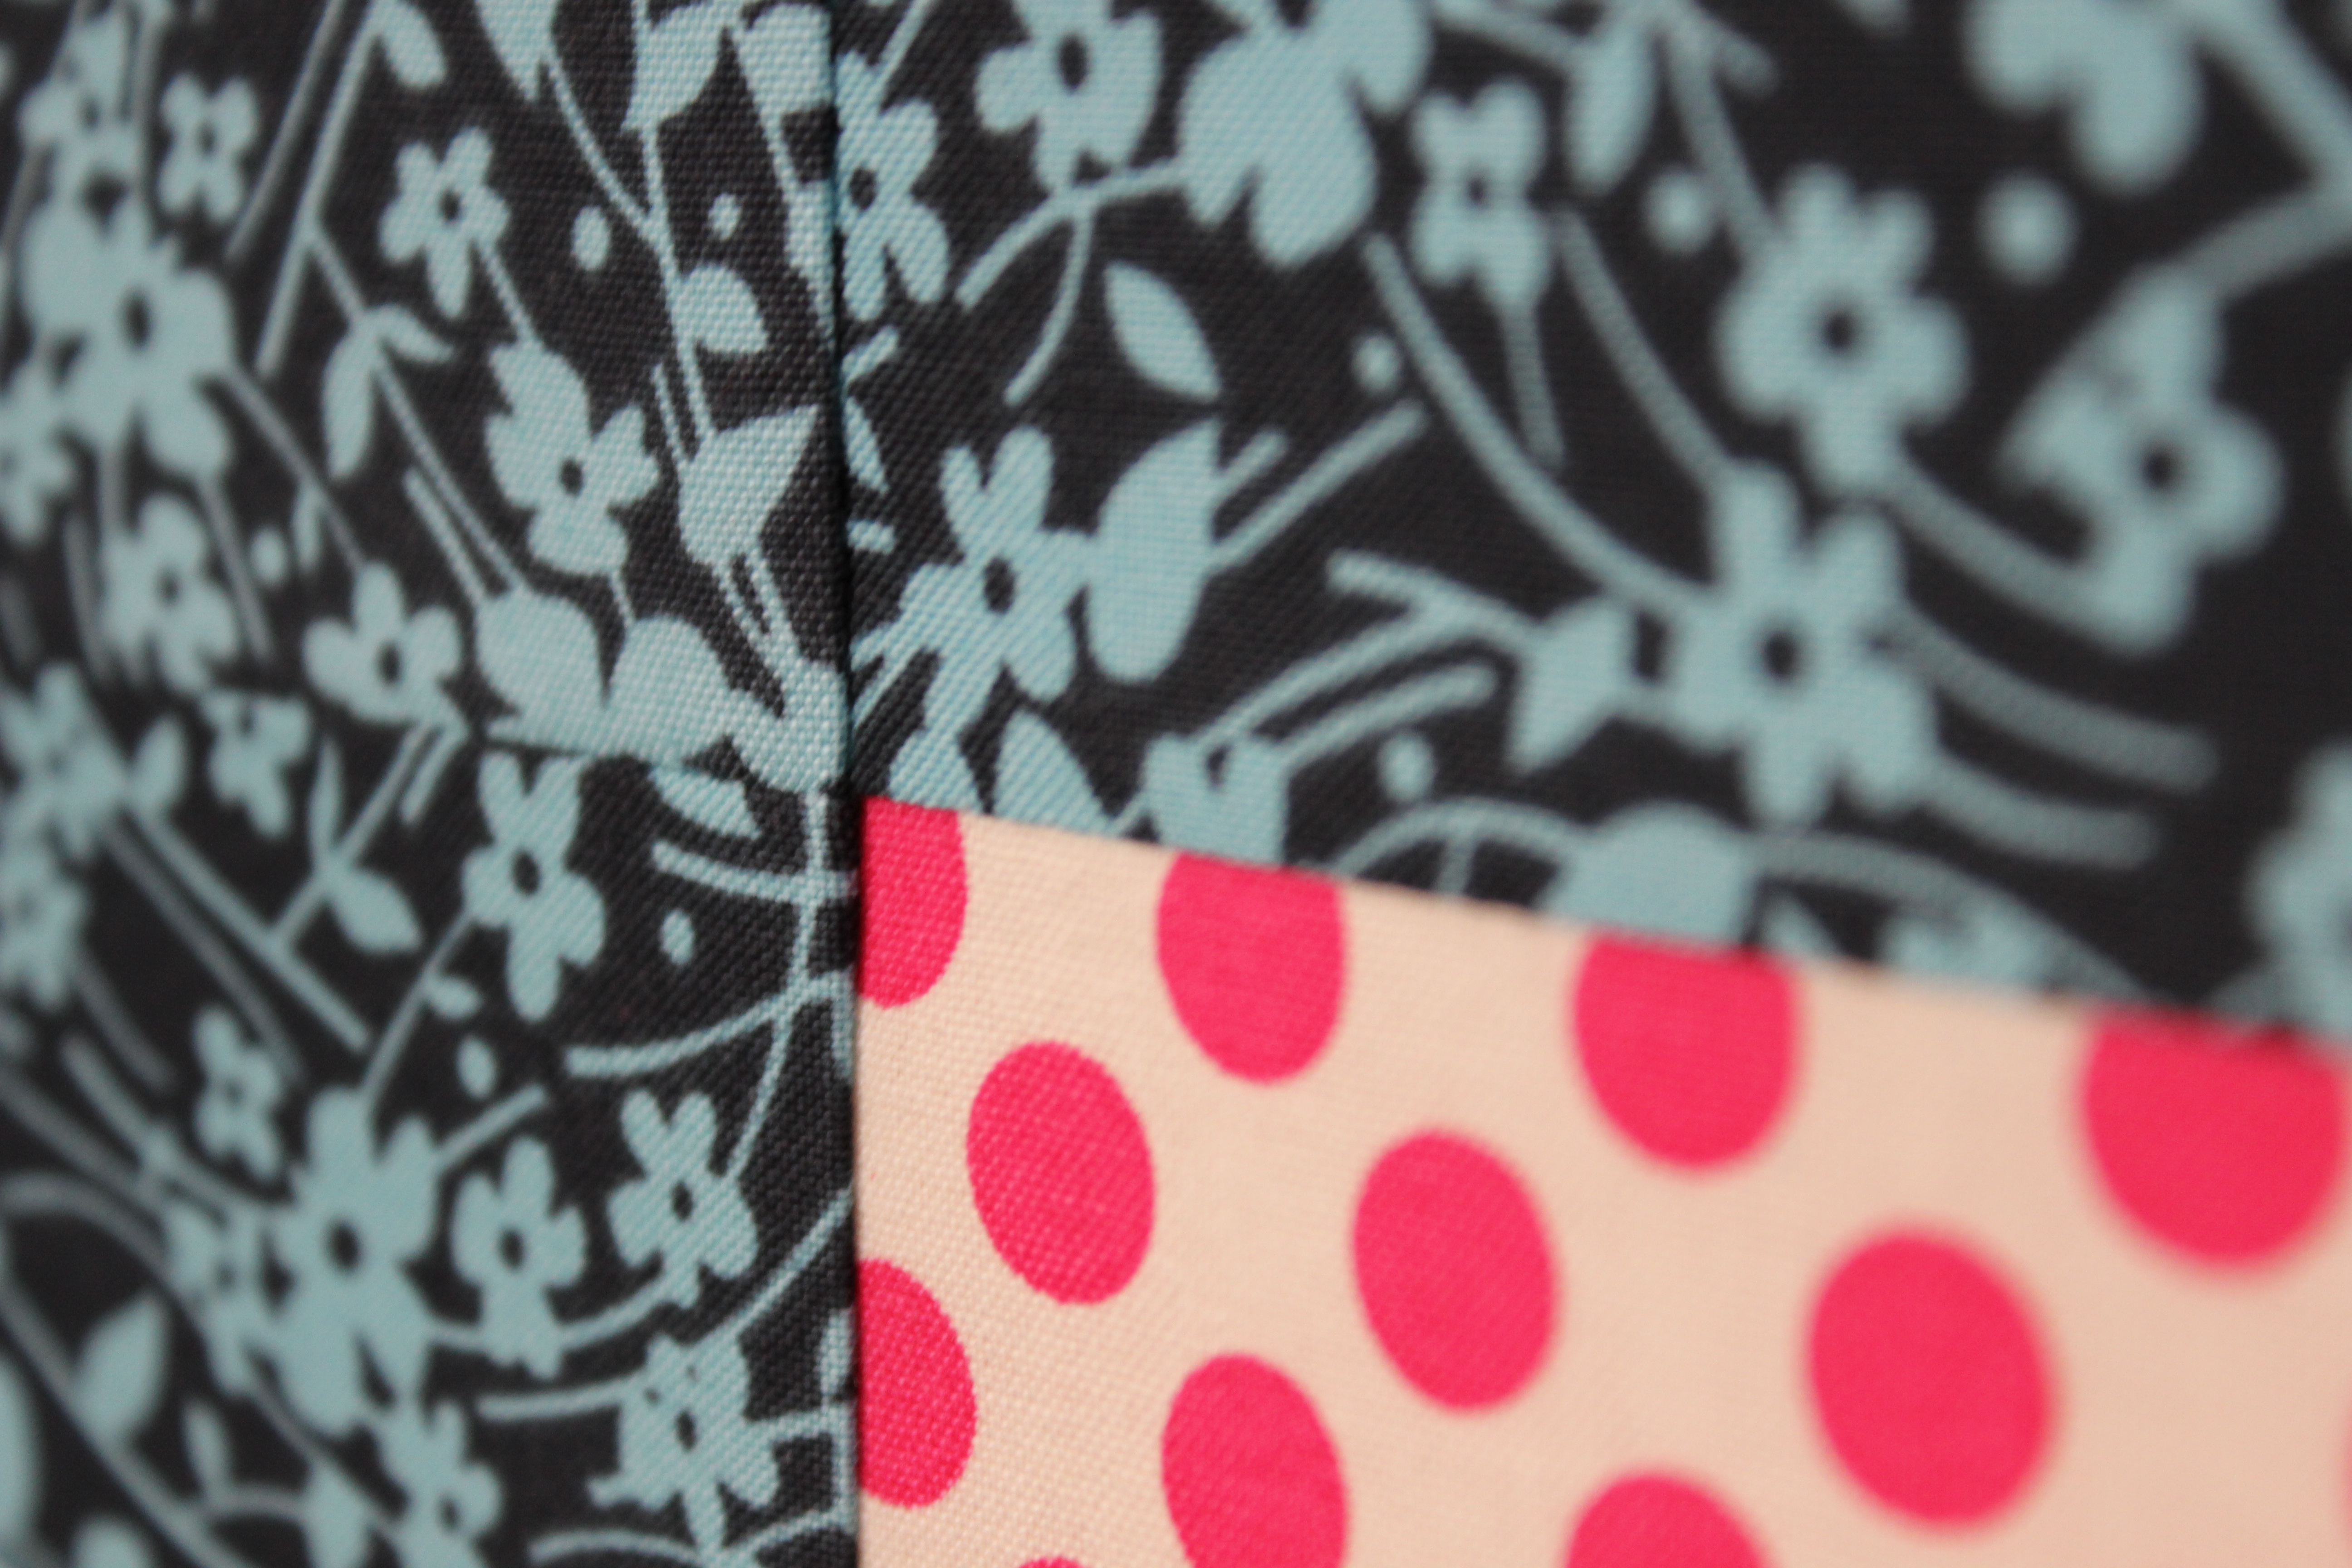
Gosh I love this fabric! I’m sucker for anything with crisp geometric forms and bold intense colours.
As you may know, I’m using this print as the feature in my Friendship Star Quilt. Initially I only got about half-a-metre (50cm) from the meterage and realised it wouldn’t quite be enough for what I was doing (don’t you hate it when that happens!?). So I bought another 50cm for when I need it – and I will!
This print was part of a super-swish collection from Cynthia Rowley that I purchased from Spotlight. The other designs in the range are all insanely beautiful and fun…I wish I was a millionaire so I could buy them all!
I’d been searching around for chalkboard paint for ages until I very randomly came across this sweet little tin in one of my favourite stationary stores.
I was happy with the price ($9.95) and the size, so I got it!
I haven’t used this product yet, so again, I’m not sure of the quality that lies within… However, I’m always on Pinterest, so I’m sure I’ll come across a brilliant craft idea to try it out on! I’ll share that too when the time comes!
I also filmed a video of me chatting about all of these products on my YouTube Channel!
All of these products, except the book and chalkboard paint, I purchased at Spotlight – usually when there was a catalogue sale or storewide sale.
I haven’t been paid or asked to review/chat/share these items. Everything written is my own opinion, experience and thought.
Moving on, I have new quilt block tutorial coming out later this week!!
Here’s a little glimpse…
Mystery Block…
Ooo, what could it be!?!?
Stay tuned for more!
Happy Sewing Friends!
xx
PS. You can also find more of me, my work and patchworky dreams here –
On to other things, it’s summing up to be a few busy days of sewing and quilting ahead as I’ve been invited to lead the sewing/patchwork/quilting demonstrations at my local Spotlight store on Saturday as part of their Sewing Fest/Craft Month celebrations!
I’ll be demonstrating basic techniques such as how to quilt and bind a quilt along with how to construct a few selected 9-Patch Blocks designs.
It should be a fun day and I’m really looking forward to it!
Look out for a post some time early next week to see what I got up to that day!
There’s something about mixing un-coordinated fabrics together to make a block look coordinated that strangely appeals to me.
(I hope that makes sense?)
I think it’s also the thrill of pairing fabrics you’ve used in separate projects and fusing them together into one little patchwork square – ahh, the memories!
(It’s the simple pleasures, right?!)
In my opinion, the Log Cabin block has to be one of the best stash-busting blocks you can make.
It’s quick, easy, super simple and can be so visually affective you swoon at the sight of it everyday!
So here I present to you a little video tutorial of how I make a very free and easy Scrappy Log Cabin Block!
If you’ve watched this and have any questions, post a comment here or on my YouTube channel and I’ll be more than happy to answer them.
Do you have any other blocks you would like me to demonstrate? Pop your suggestions in a comment and I’ll take them on board!
If you’re a regular reader of this darling little blog, you may have notice that I didn’t post up a weekly WIP update on Monday, as I have for the past month or so.
This is mainly because there is nothing to really update you with i.e.. nothing has changed since I last wrote about my WIPs. (My laziness/procrastinating ways are finally showing!)
However, this week I feel very proud to introduce to you a tour of my sewing room!
I love this space!
It’s where I feel the most comfortable.
Where I feel the safest.
The most inspired.
Freely creative.
And connected to the rest of the world.
In the video I show you where I sew/quilt (duh!) but also where I write, shoot, edit and publish my blogs and videos.
It may not be the best kind of sewing space as some others may have (look up ‘sewing studios’ on Pinterest and you’ll know what I’m talking about!) but I’m thankful for my mum giving up her little study space for me to have my very own little sewing space!
I also made a second video with some other extra bits I couldn’t quite fit into the first Sewing Room Tour video.
I’ve had this video tutorial in the planning for a while – ever since I filmed my Fast Forward Quilting video last year in early September, where the Square-in-a-Square Block features.
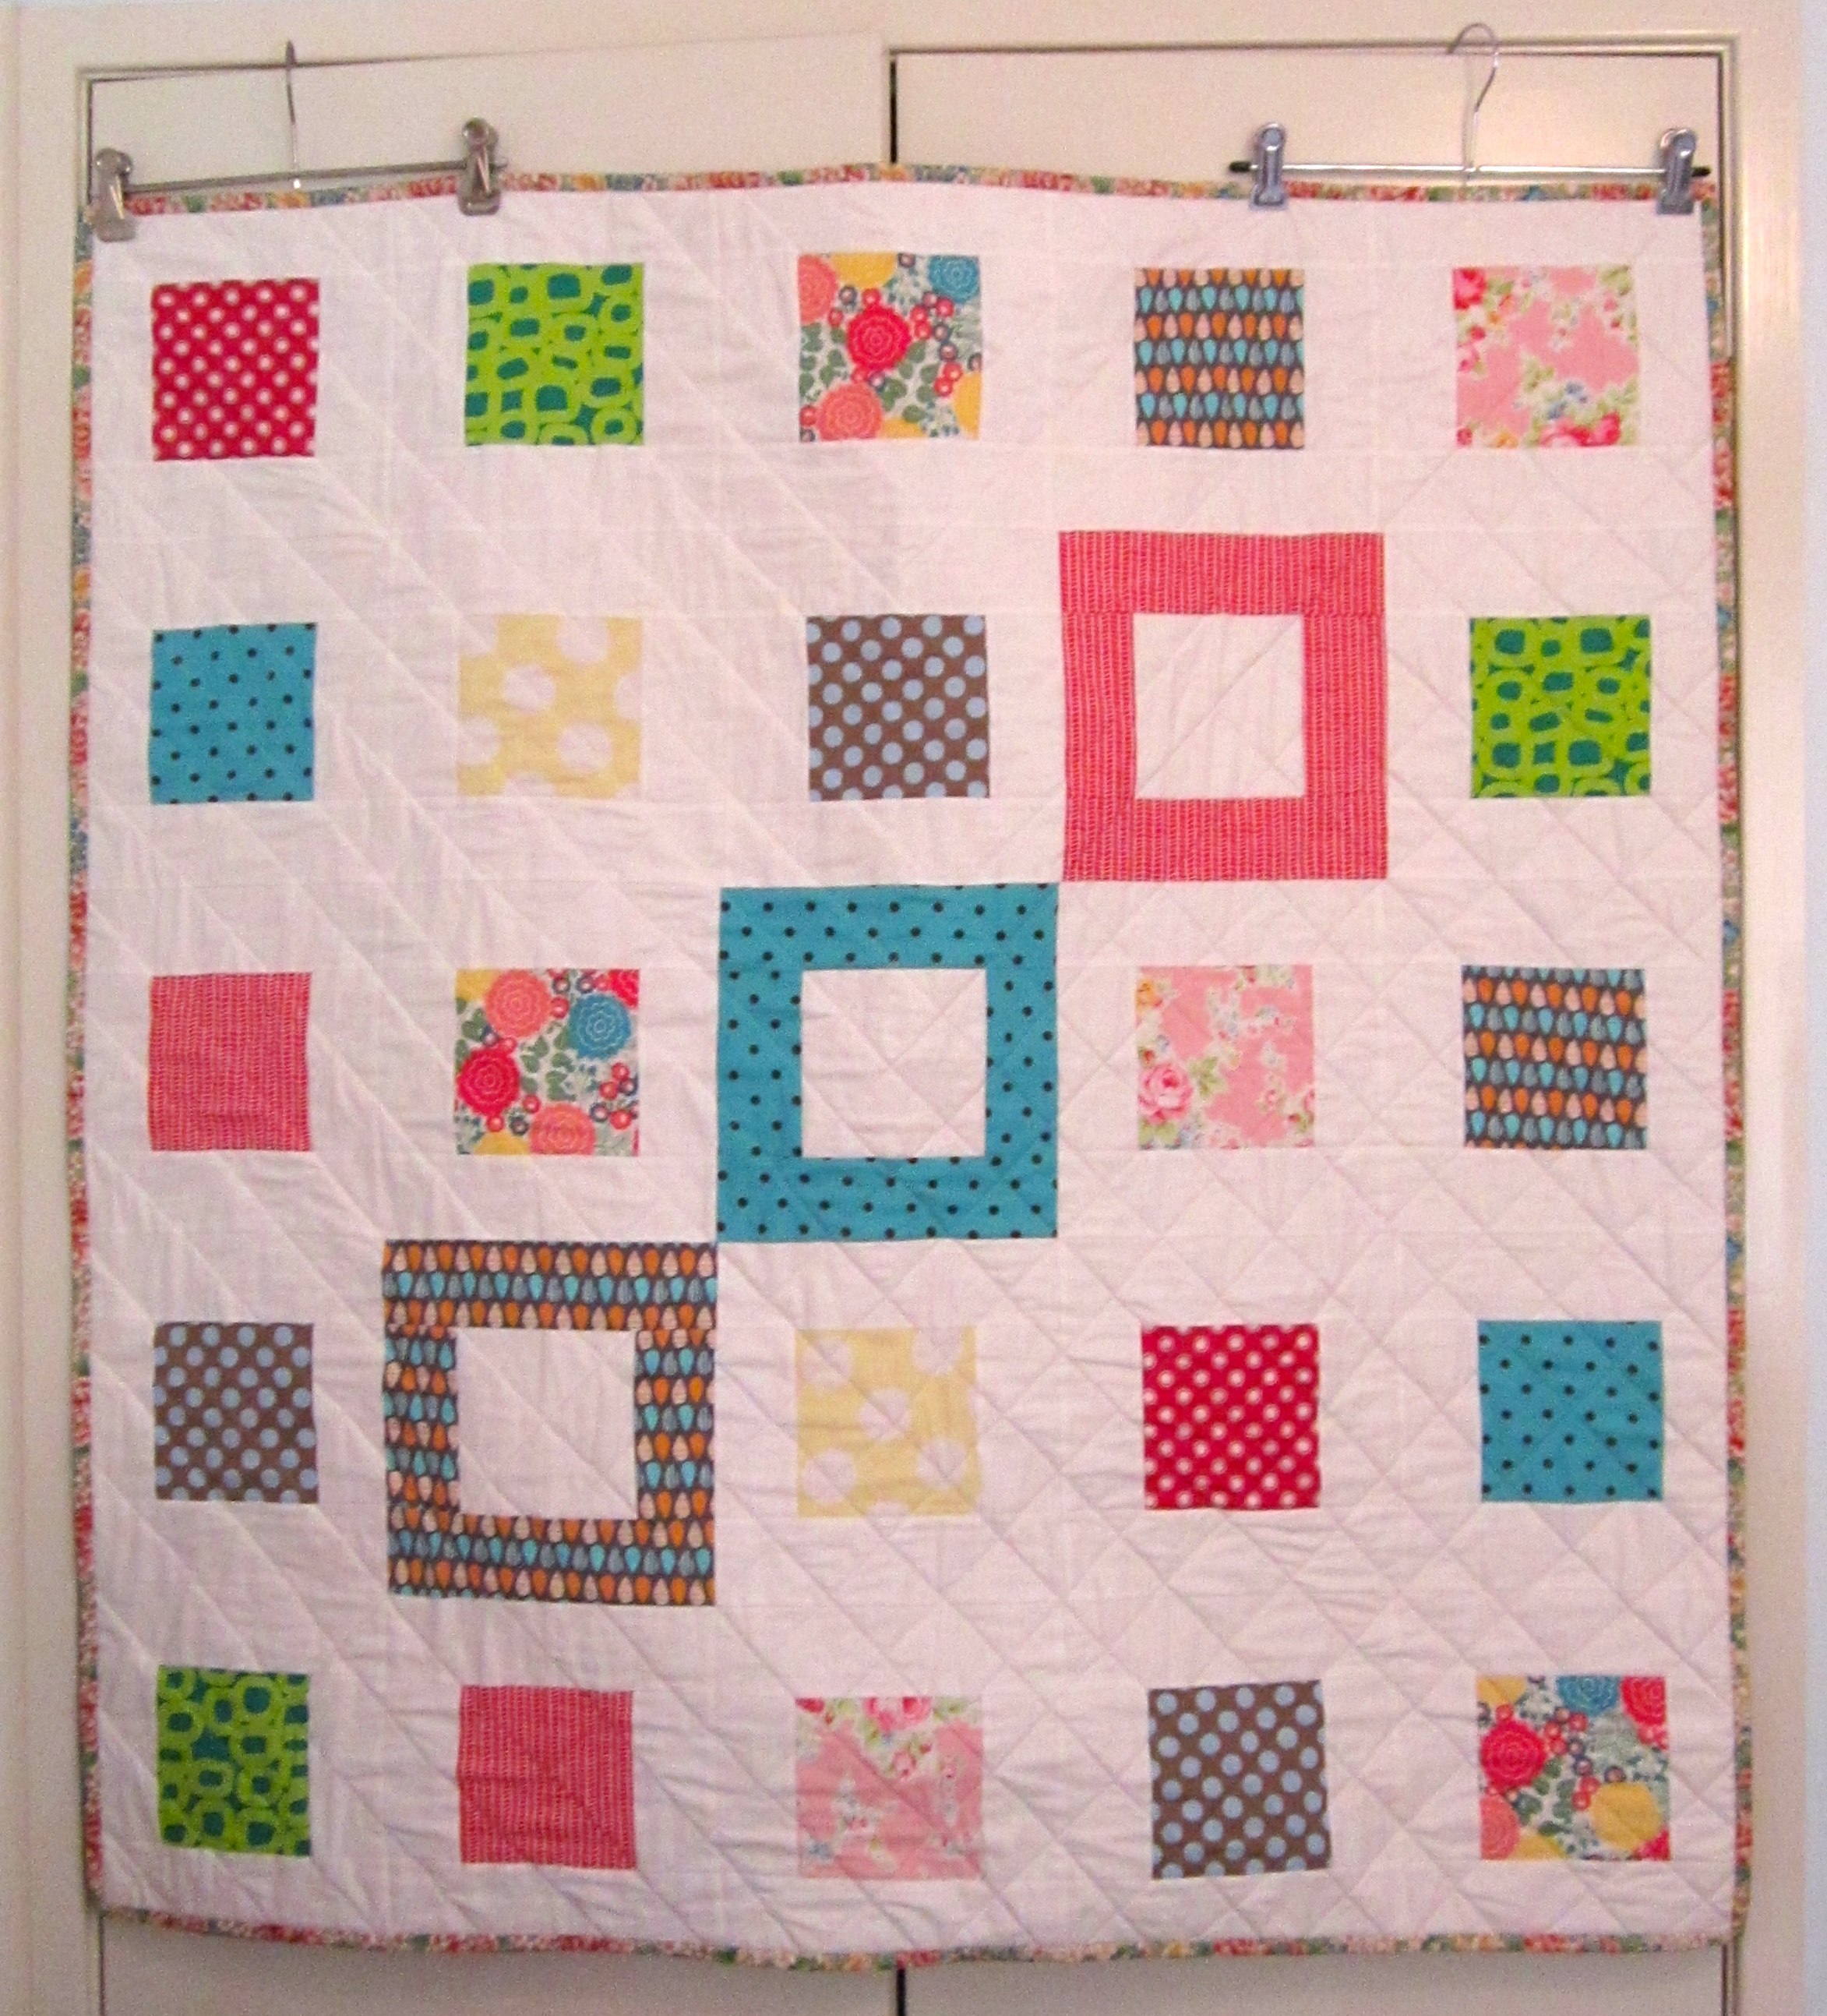
Small Plates Lap Quilt (2013)
The Square-in-a-Square Block, in my opinion, has to be one of the most easiest, quickest and adaptive blocks available for all levels and types of quilters.
It can be made into any size, using a range of differing centre-square and sashing measurements and can be made into a block as traditional or as modern/quirky as you wish it to be!
Give it a go and see what you think!
Way back in 2006, when I first became interested in making quilts, I used the Square-in-a-Square Block to make my very first quilt!
My First Quilt! (2006)
So essentially, this block was the very first block I had ever constructed!
If you’re a beginner I hope this little tutorial, in some small way, can help you in your own patchwork/quilting journey!
Jeez, a week sure can creep up on you in an instant!
I’m deeply baffled at how it can be the fourth-ish week of the New Year already! *WOW*
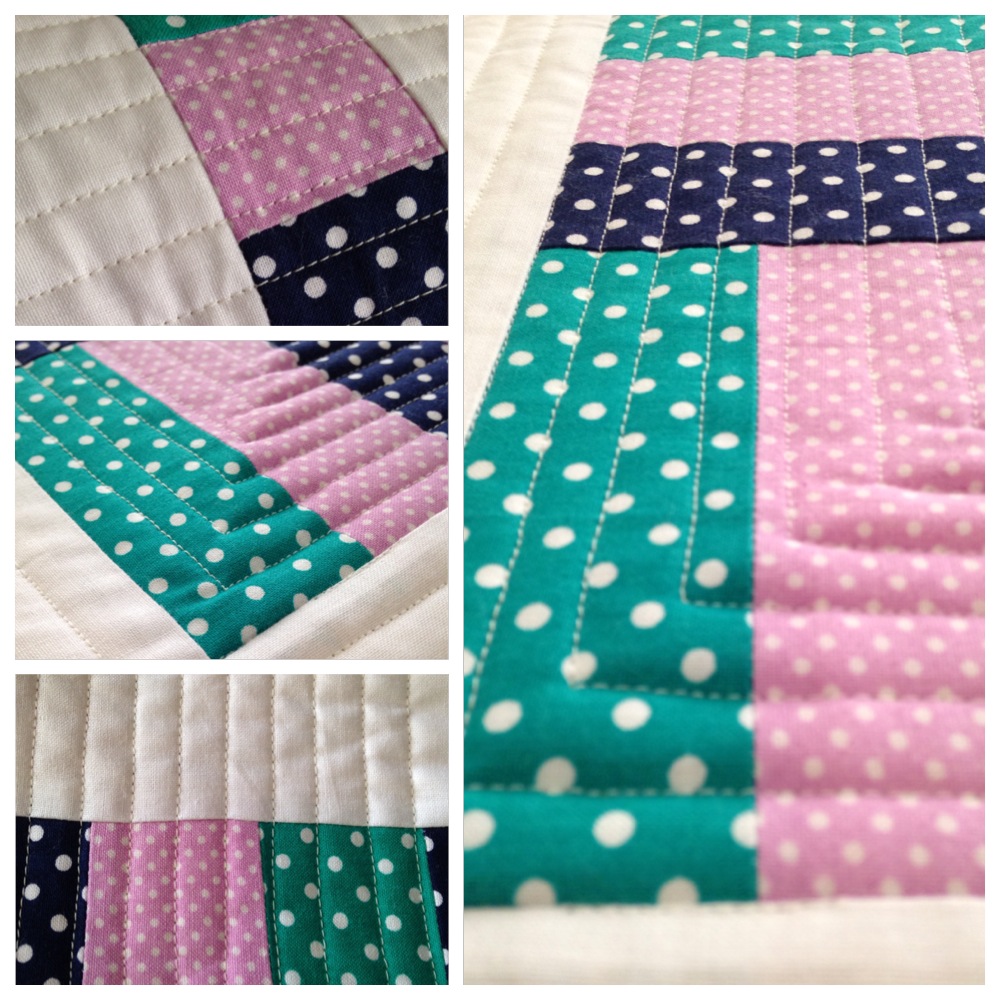
In the last seven days since we spoke, some quilting progress has been made to my Rail Fence Quilt…
Delicious quilty lines!
Predictably, I’ve started quilting my usual straight-line formation. (It’s easy and I’m lazy!) I’ve opted for a pattern quite similar to the way I quilted my Jacob’s Ladder Quilt, but on this one the quilty lines are a lot closer creating more of an intense surface design and texture.
To go along with this R.F Quilt, I’ve filmed and uploaded a very simple and informative tutorial on how to make the Rail Fence Block. I tried to make it as down-to-earth and helpful as possible especially for all you beginner quilters out there.
Let me know what you think of the video – I’m 100% open to any positive constructive criticism. I would love to know what I could to do improve my teaching skills and/or production/filming/editing skills.
Do you have any suggestions for quilt blocks that you would love to see me demonstrate?
Comment below and I’ll definitely take your ideas onboard!
Well, it’s now time to go and enjoy this glorious summer afternoon with a lovely icy-cold beverage, finger-licking snacks and a heart-warming rom-com!
I’m not normally one of those resolution-kind-of-setting people making plans at the beginning of each New Year and then failing two weeks later…
So when I made up my mind to set out some quilting resolutions for 2014, I made sure I would choose goals that I knew I would happily follow through on.
(I may regret this!)
I start so many new projects each year, each month, each week, each day that it’s absolutely ridiculous!
Worse yet, three quarters of these projects don’t get finished or are ever seen again!
This year, that changes!
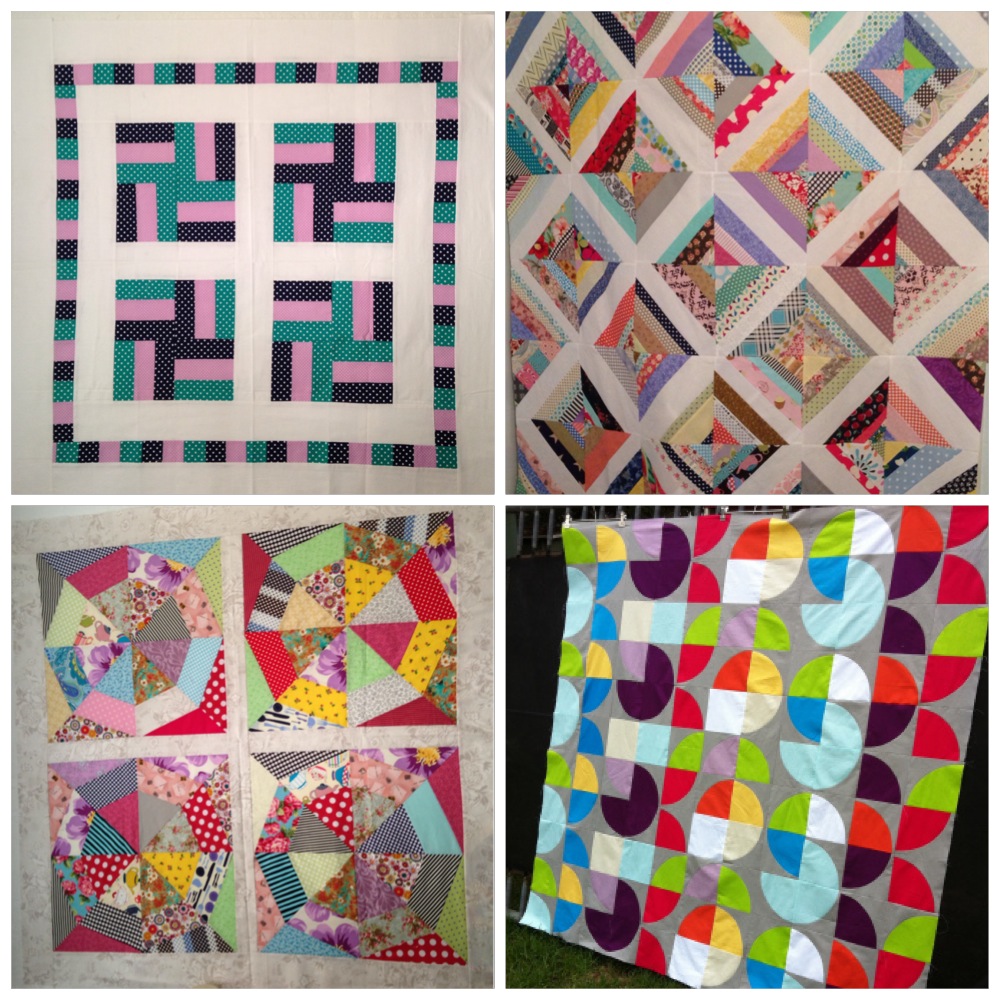
I have a total of six quilts that I’ve ‘started’, all at different stages of the quilt-making adventure, that I resolute to FINISH over the course of this year.
I may even go to the point of saying that I need to get all these finished before I start a(nother) new project! (Oh no! Can I take that back??)
So, there are four quilt tops that are ready to be sandwiched and basted ready for quilting and two stacks of completed blocks that need to be pieced together.
Some of these quilt tops may seem familiar…
From top left to bottom right –
This is a small lap quilt or baby quilt I began two years ago using the Rail Fence block along with some sweet polka-dot fabrics that I was madly in love with at the time. I’m thinking, once I’ve finished it, I’ll put it up for sale in my madeit store. Watch this space!
The next one is my Scrap-Happy String Quilt! I accidently made this quilt a whole lot bigger than I originally intended to last year after ‘trying’ to demolish the never-ending growth of my scrap fabric! I freely admit that the size put me off from ever wanting to get it finish. And yet, I know that when I do get around to finishing it, it’s going to be B-E-A-utiful!
Two years ago, I tried the endless struggle to not let my fabric scraps overwhelm me! (See previous quilt top!) So when I discovered an awesomely scrappy-kinda-quilt PDF pattern by Anna Maria Horner, I sung out loud the Hallelujah Chorus and pressed print! I have no idea why I didn’t get the chance to finish this little gem: the size is like a lovely cozy lap quilt and I simple adore the crazy mix-match of the prints together! (Hmm, that’s a head scratcher!) But the ball has been set into motion again and this little sweetie will be finished!
This would have to be the BIGGEST quilt I have pieced together! Seriously this quilt will be a beast when it’s finished! I remember I found the pattern to this quilt when I had a craving to tackle a quilt featuring curved piecing as well as one where I could only use block colours. Bingo! This quilt was perfect! The original design for this quilt came from Jen Carlton Bailey and her quilt 5-HTP Squared. I started this quilt (named Colourplay) this time last year (January 2013) and I distinctly remember that as it got to the part where I needed to baste and proceed onto quilting, the harsh Australian Summer decided to get even. In that week alone we suffered through 40-45C+ heat. Every. Single. Day. Because of this, I was put-off from quilting it (which I was also internally dreading because of it’s size!) and conveniently forgot all about it until a few weeks ago when I decided to commit to some silly New Year resolutions lark! I know completing this quilt will challenge me. I know that I’ll need to be as strong as an ox to quilt it. And I know that I’ll need to be so much more patient than I already am to reach that moment of completion! I say: bring it on!
And now onto the quilt blocks that are ready to be pieced!
At the top is my stack of Craftsy’s 2012 Block of the Month blocks that have, so unfortunately, been sitting on my sewing table over the past year, yearning out to be finished! This was and still is my very first Sampler slash Block of the Month type of quilt. It symbolises a lot of new skills that I learnt along with some simply wicked modern fabrics that I do and will always love!
Although I identify myself as an Australian, I’m also a self-obsessed Anglophile and absolutely adore the thought of quintessential British living! If given the opportunity to live in another country apart from Australia, I would choose England hands-down! From Sydney to London is my ultimate dream. Full. Stop. Thank you very much!So to help immerse myself into that dream, I started to make some Union Jack paper-pieced blocks with the intention to make a tip-top Britishy quilt all for me! Yeah…obviously that hasn’t happened yet. My quilt in progress was inspired by this quilt made by Amy Smart at Diary of a Quilter.
Alternatively (833 words later!), you can watch me display and chat about each of these quilts here…
Other Quilting-related New Year Resolutions I’ve got in the bag include –
Entering local quilt shows, in particularly the Sydney Royal Easter Show (application form submitted this morning!!) in April and the Sydney Quilt Show in June.
Challenging my quilting skills by attempting block patterns that force me into a spinning vortex of stress and anxiety!! *Falls into a foetal position*
Sooo, watch this space for these WIPs or ‘Works-In-Progress’!
I’m pumped and ready to get going!
Have I inspired you to get your unfinished quilts and projects out and onto the road of completion? Let me know and we can discuss our progresses together!