RJR Supreme Cotton Fabrics Blog Hop!

Over the past few weeks, I’ve been having so much fun choosing, playing, cutting, stitching and just simply swooning over all of these beautiful Cotton Supreme Solids by RJR Fabrics in preparation to join their RJR Supreme Cotton Fabric Blog Hop today!

IMG_4444

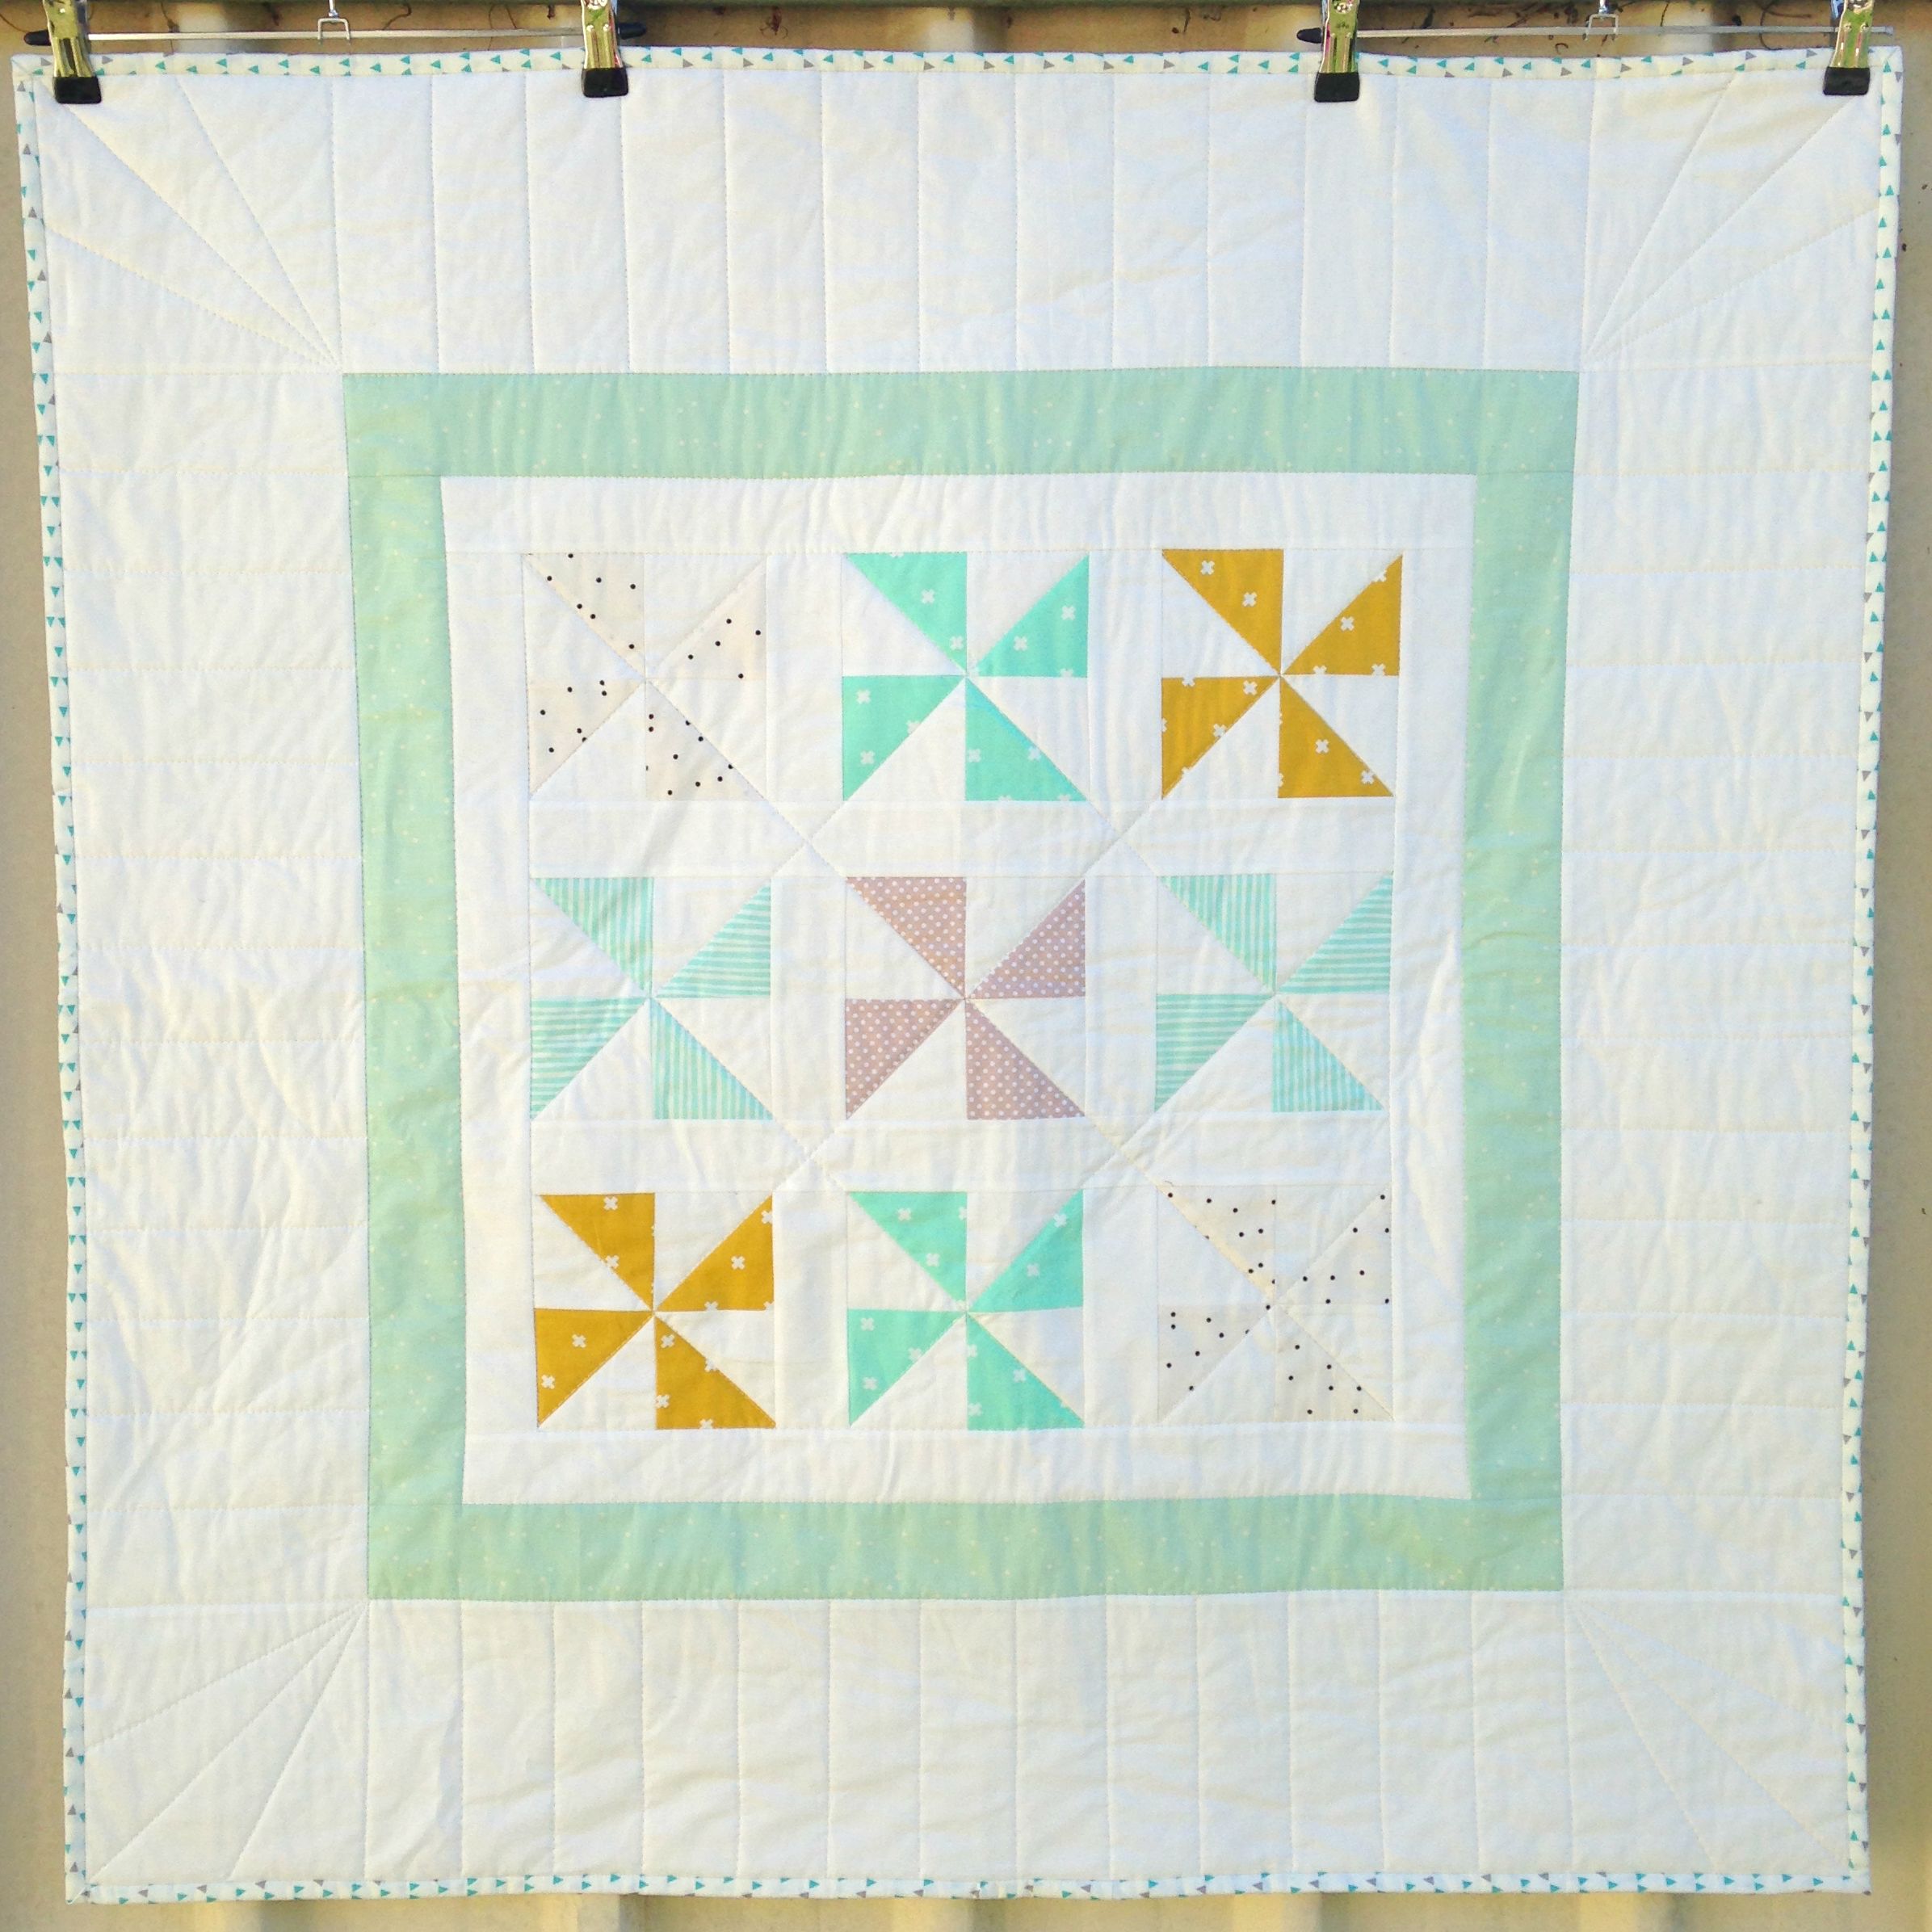
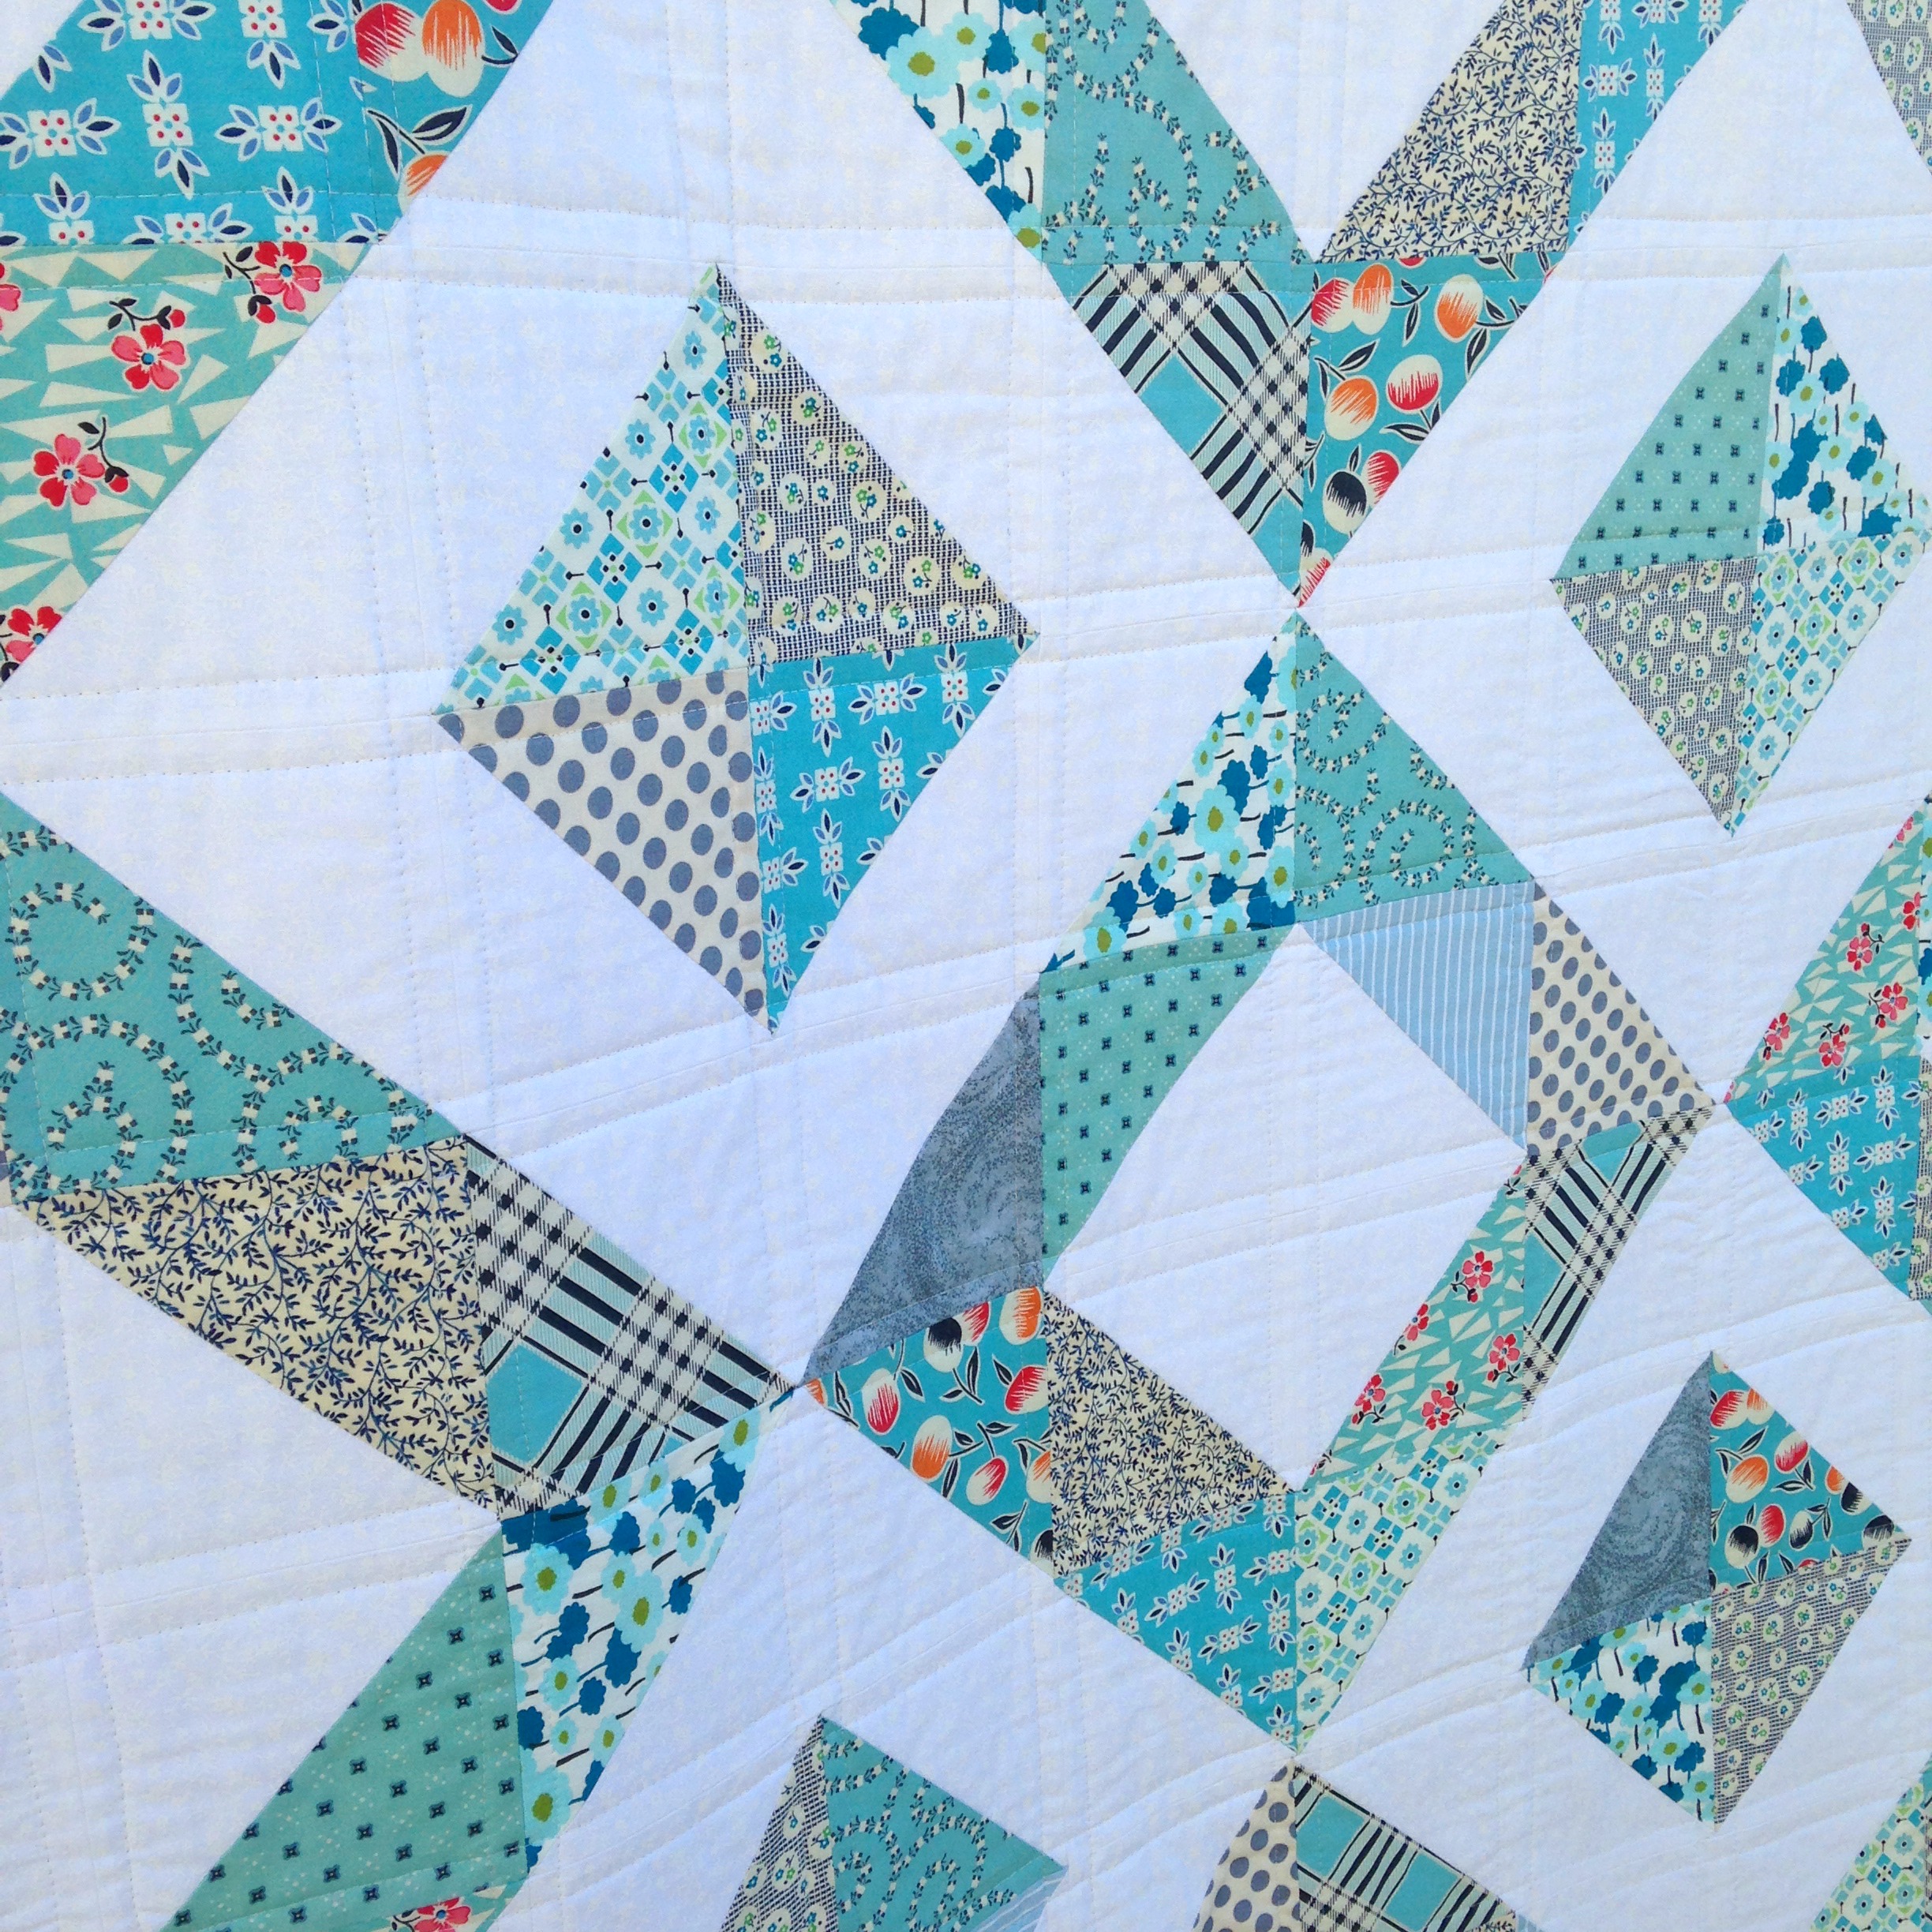
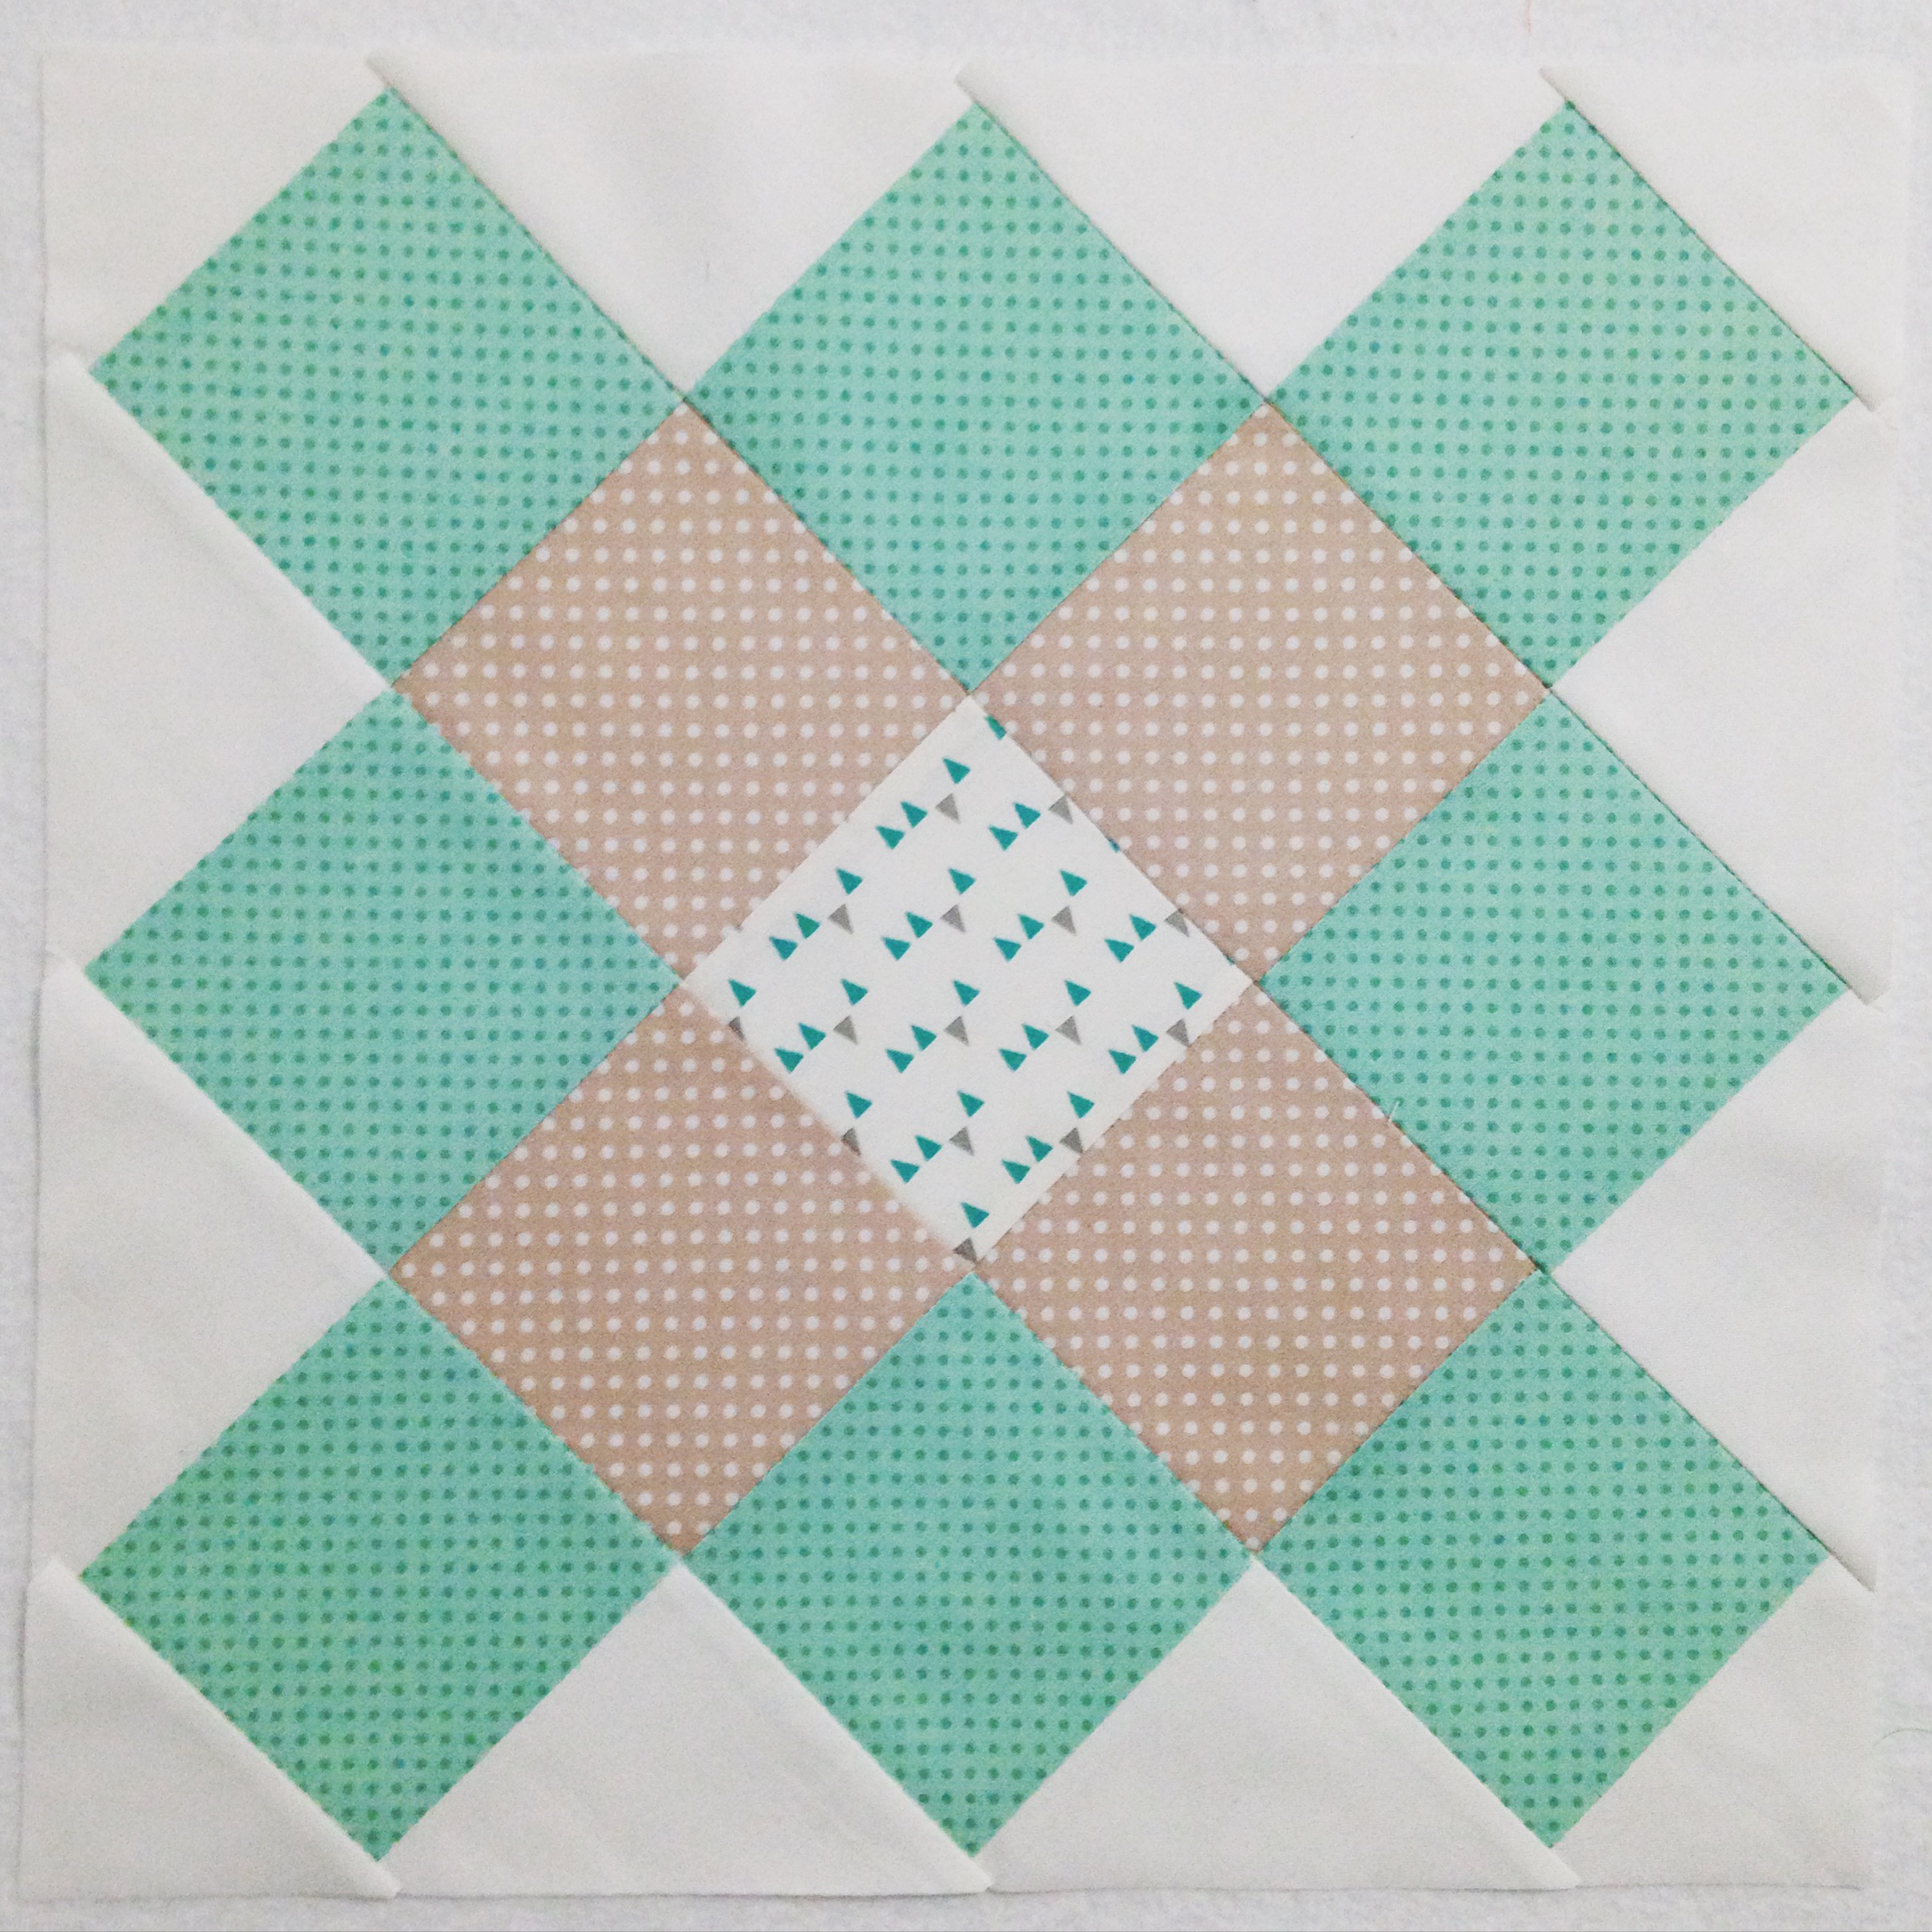
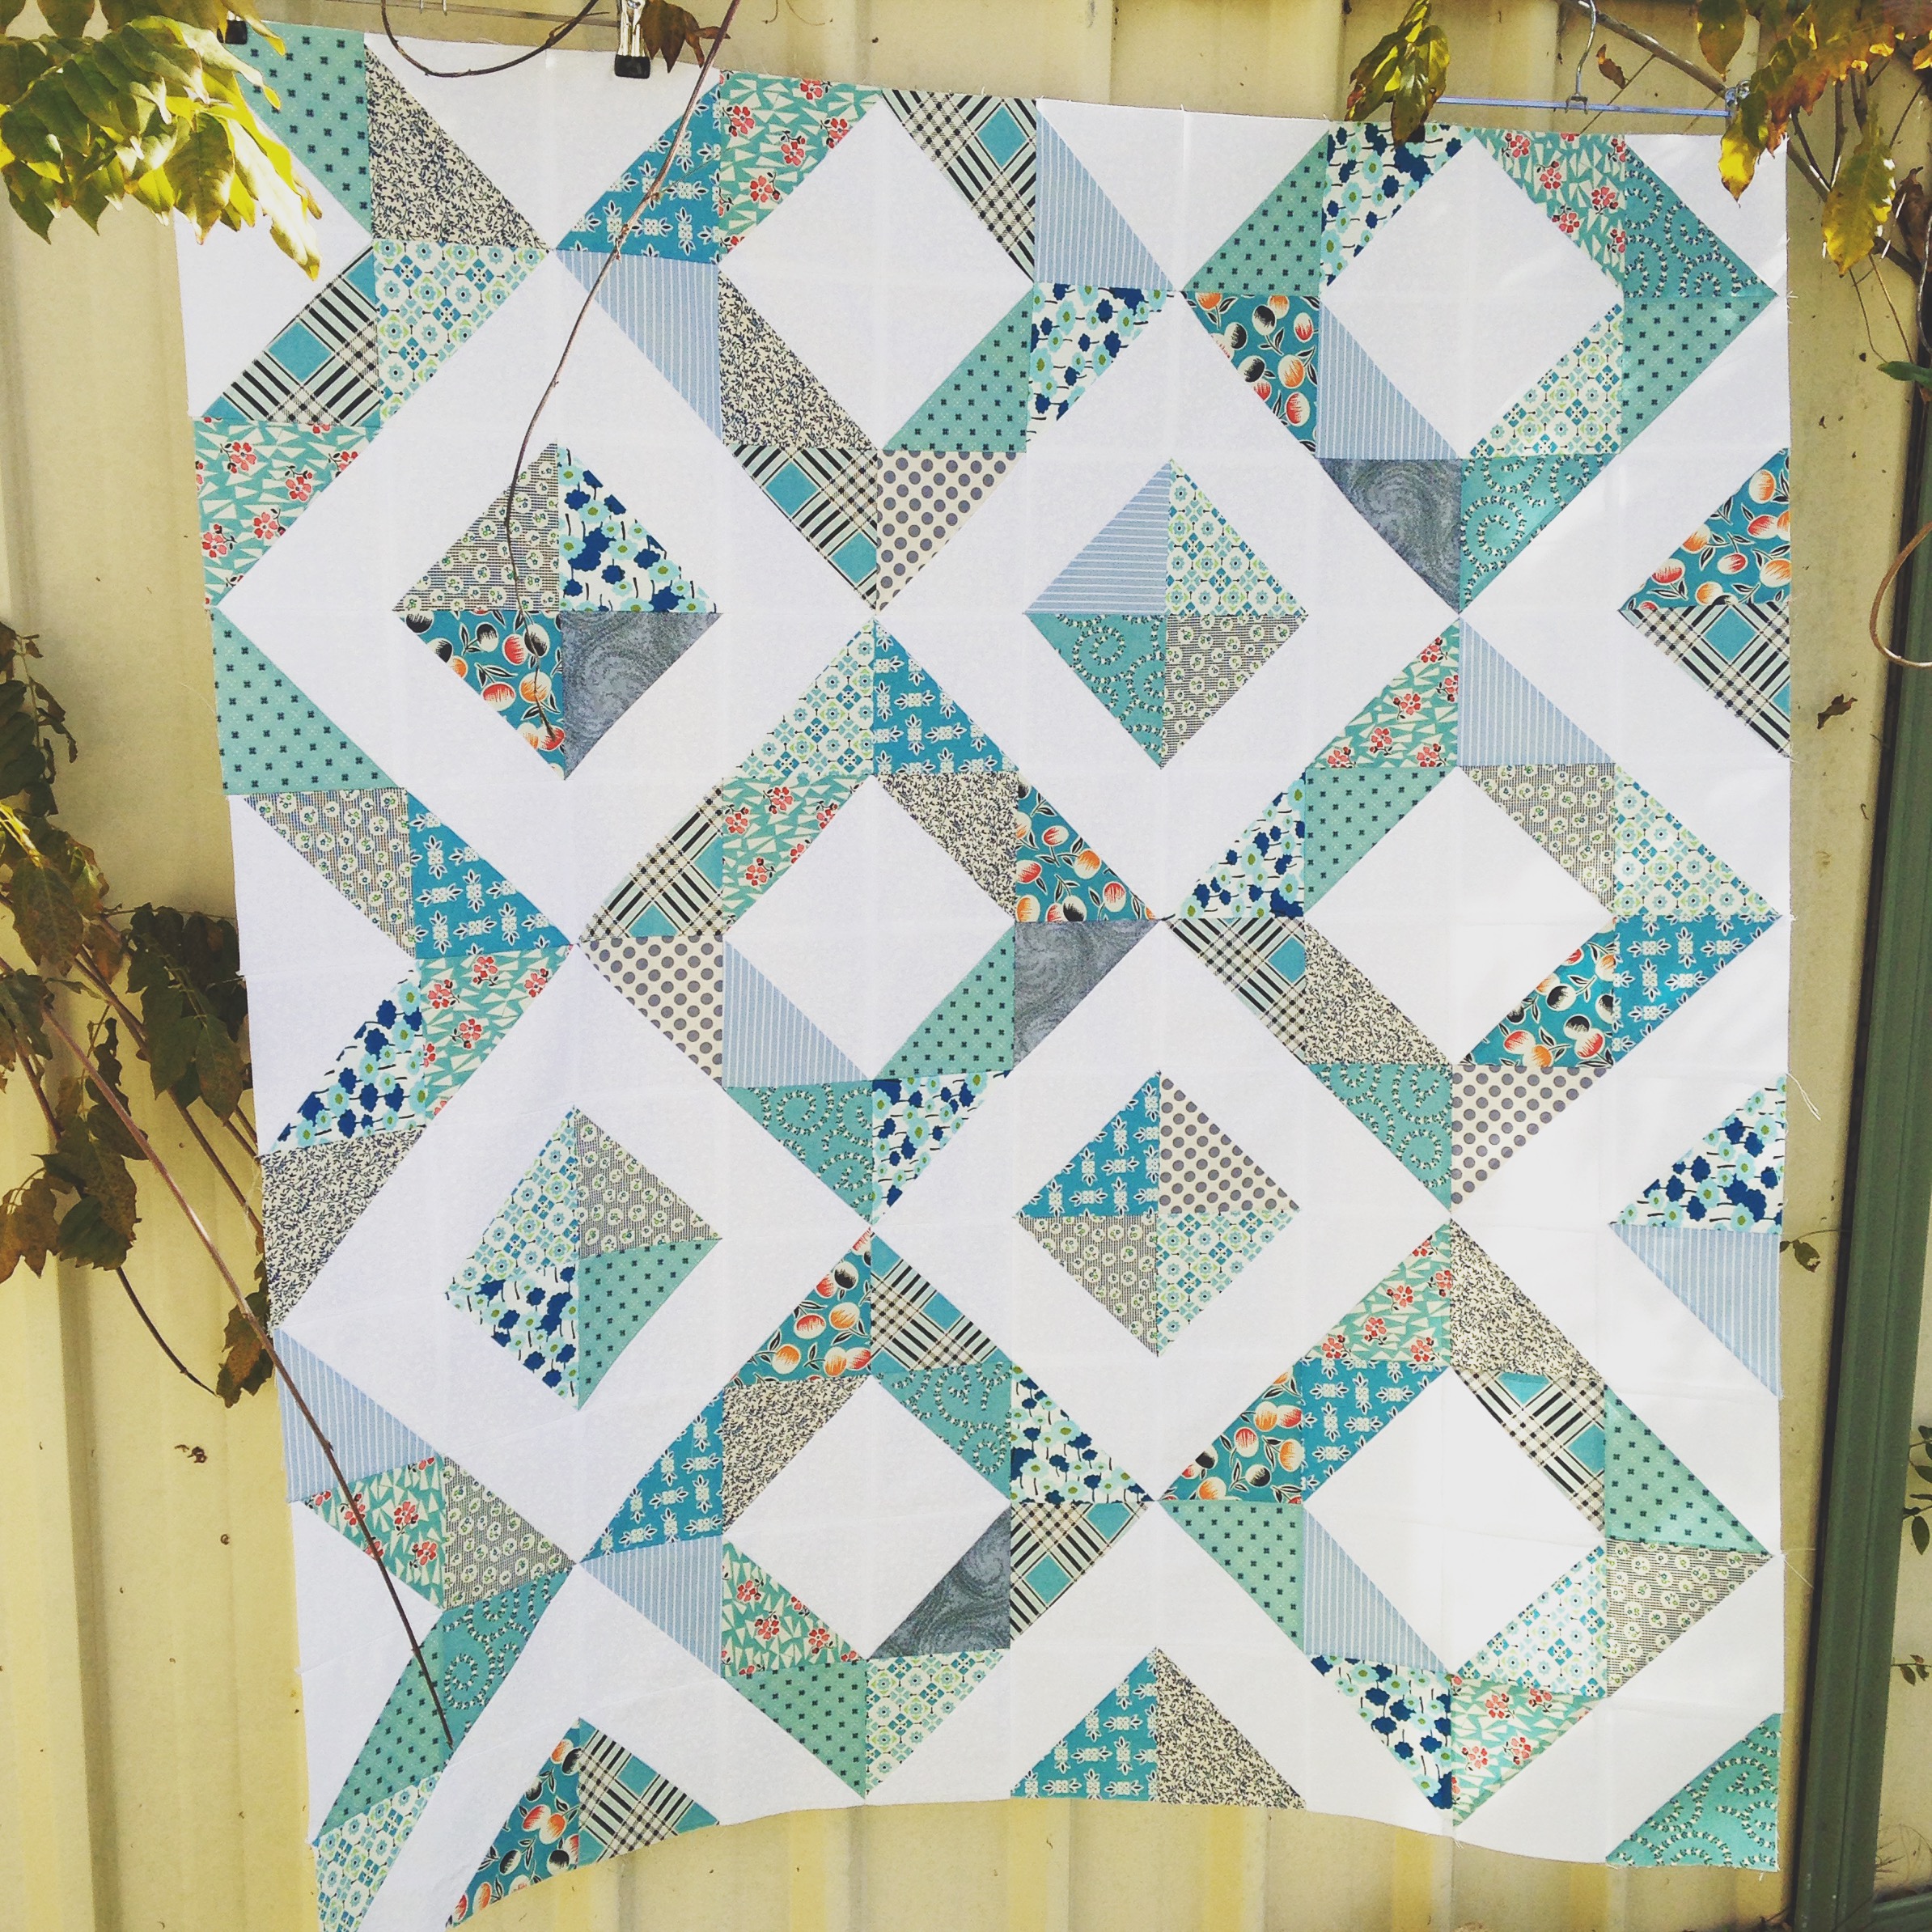
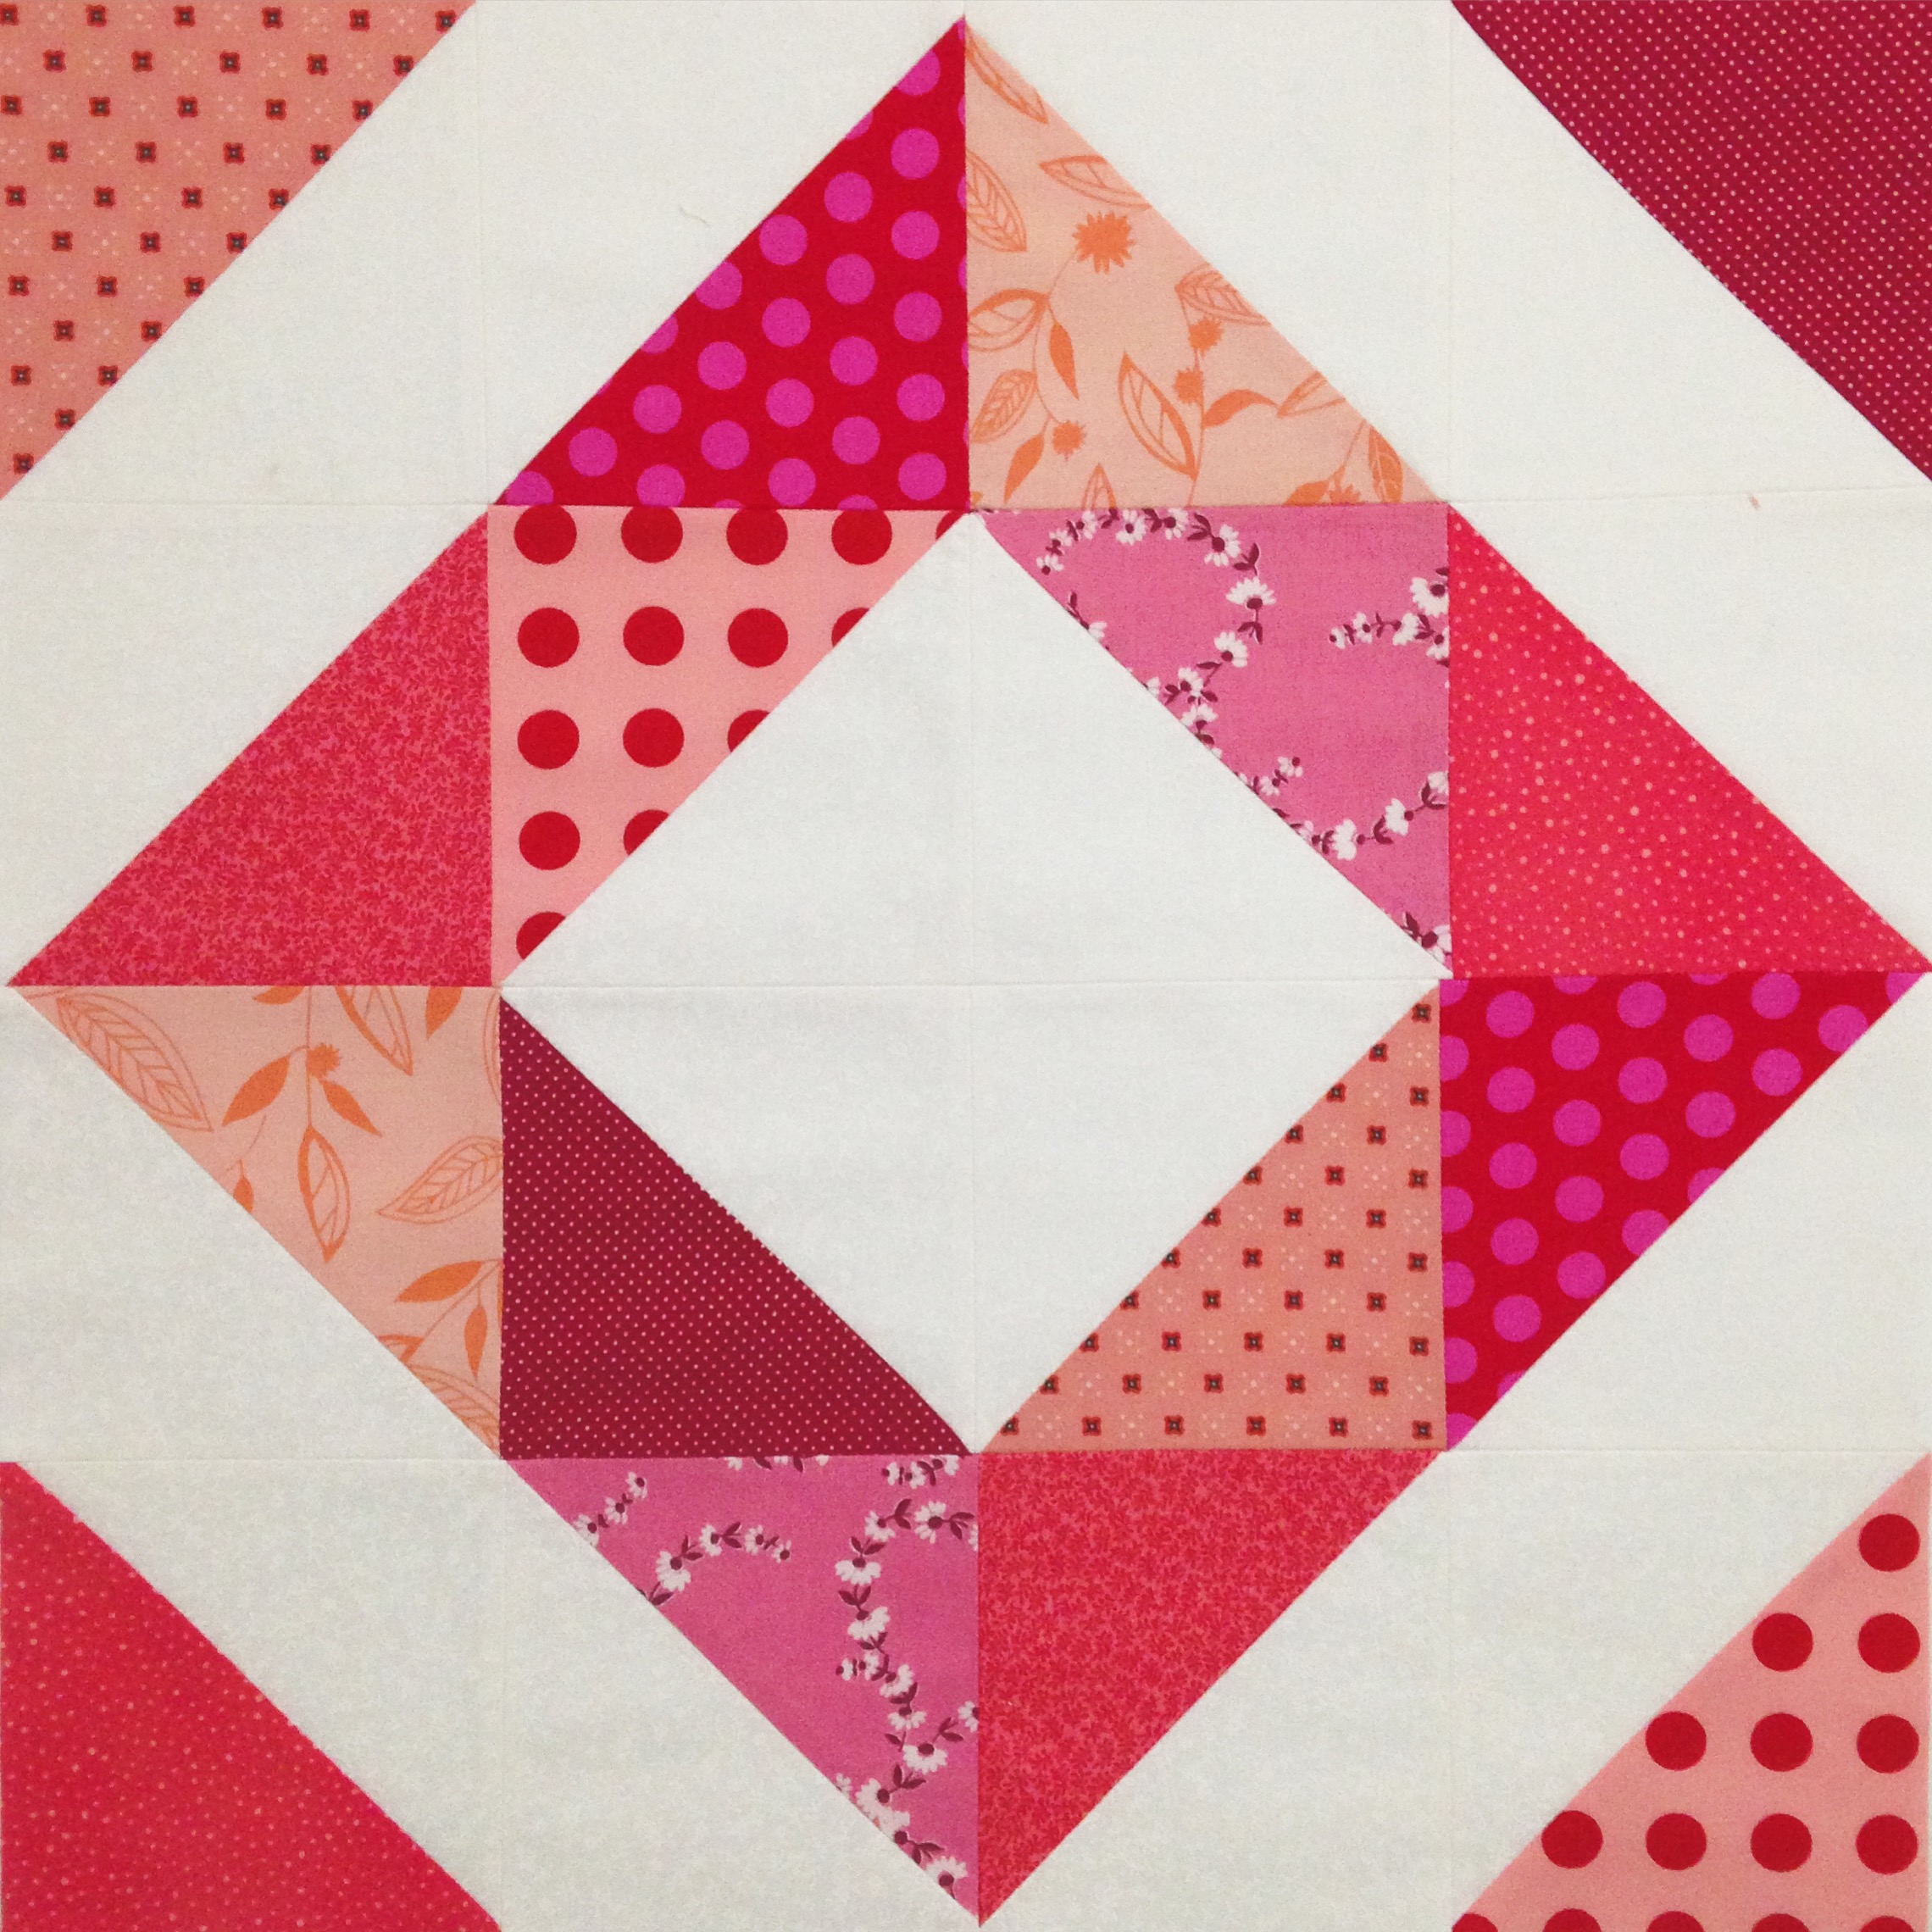
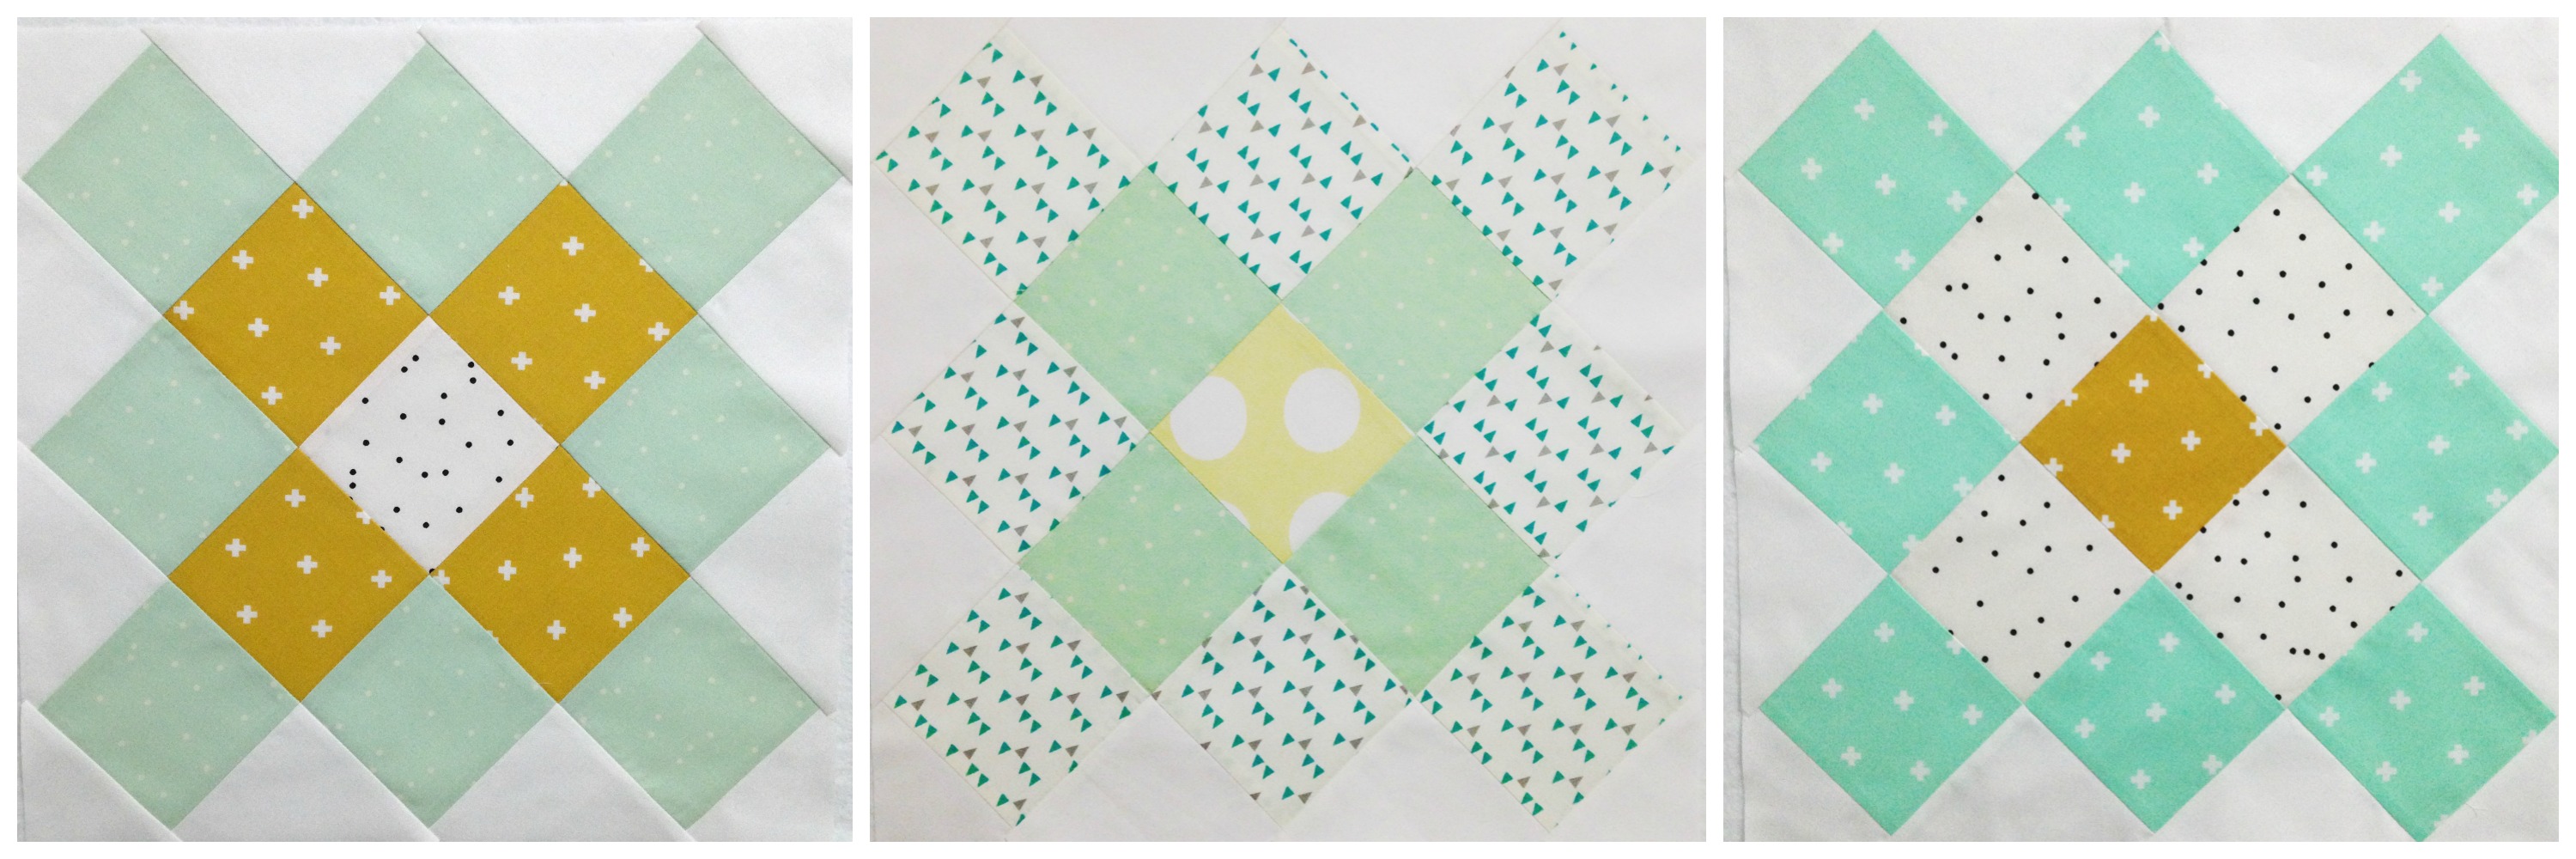
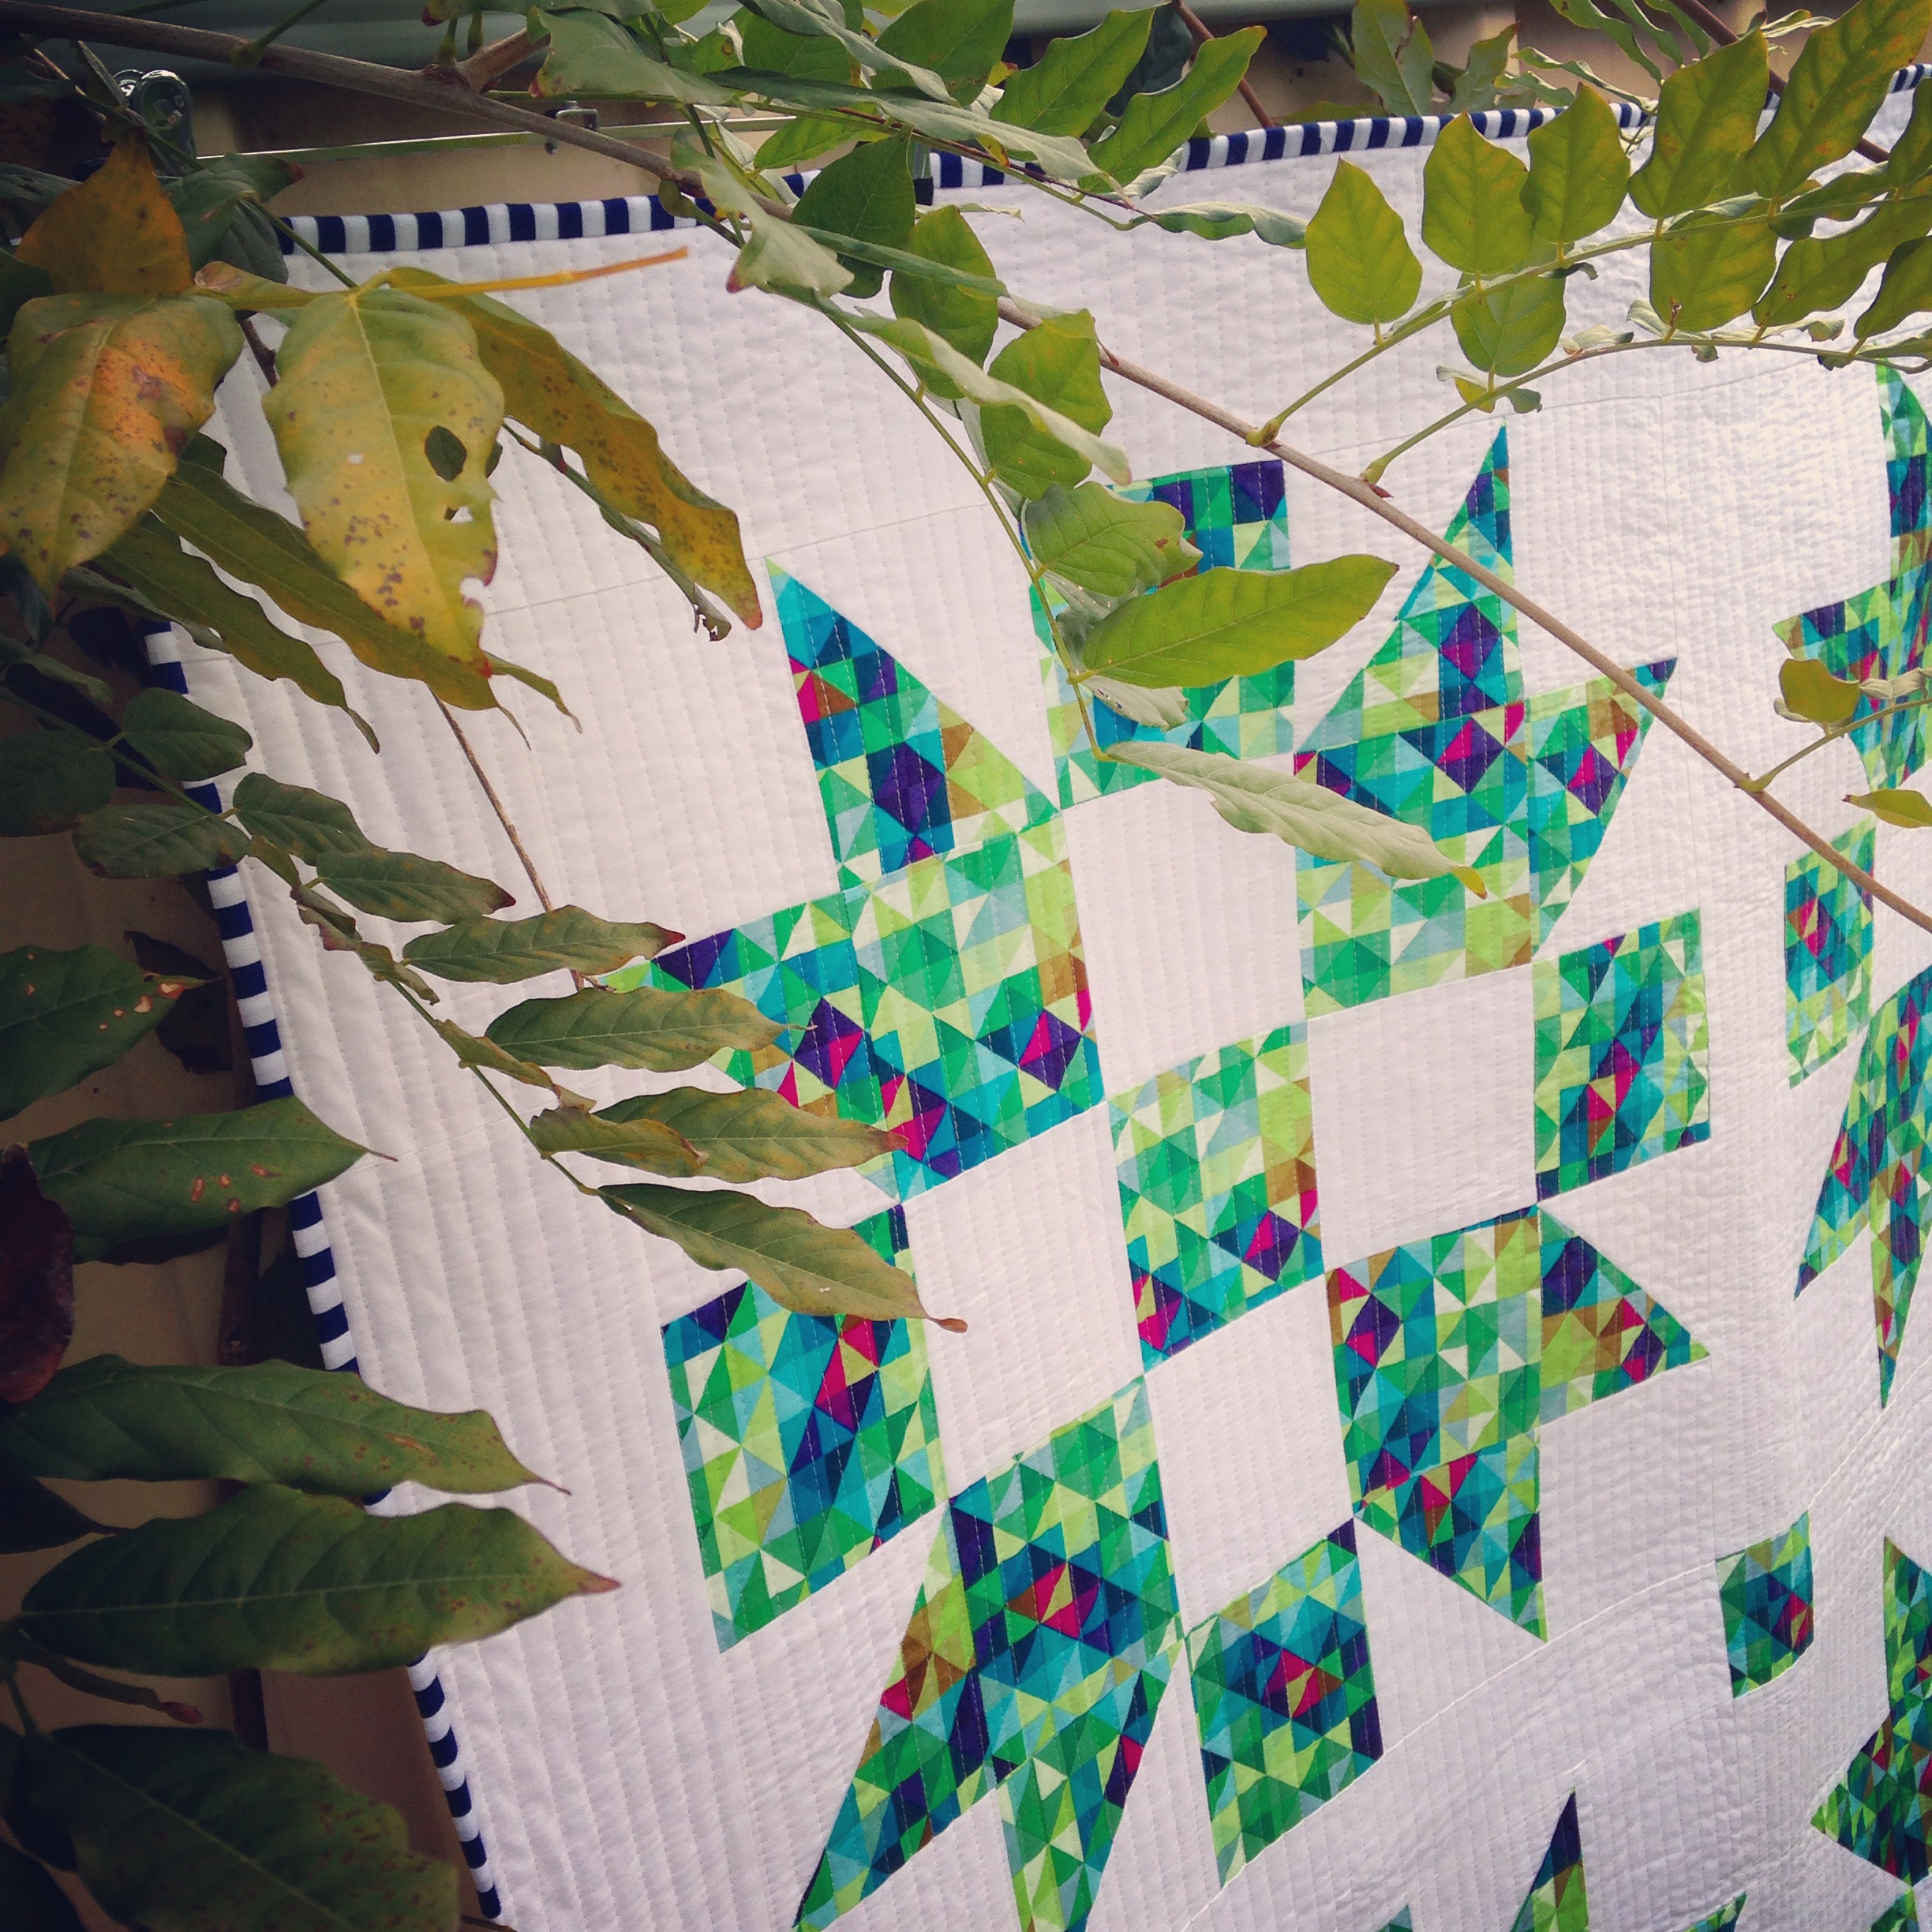
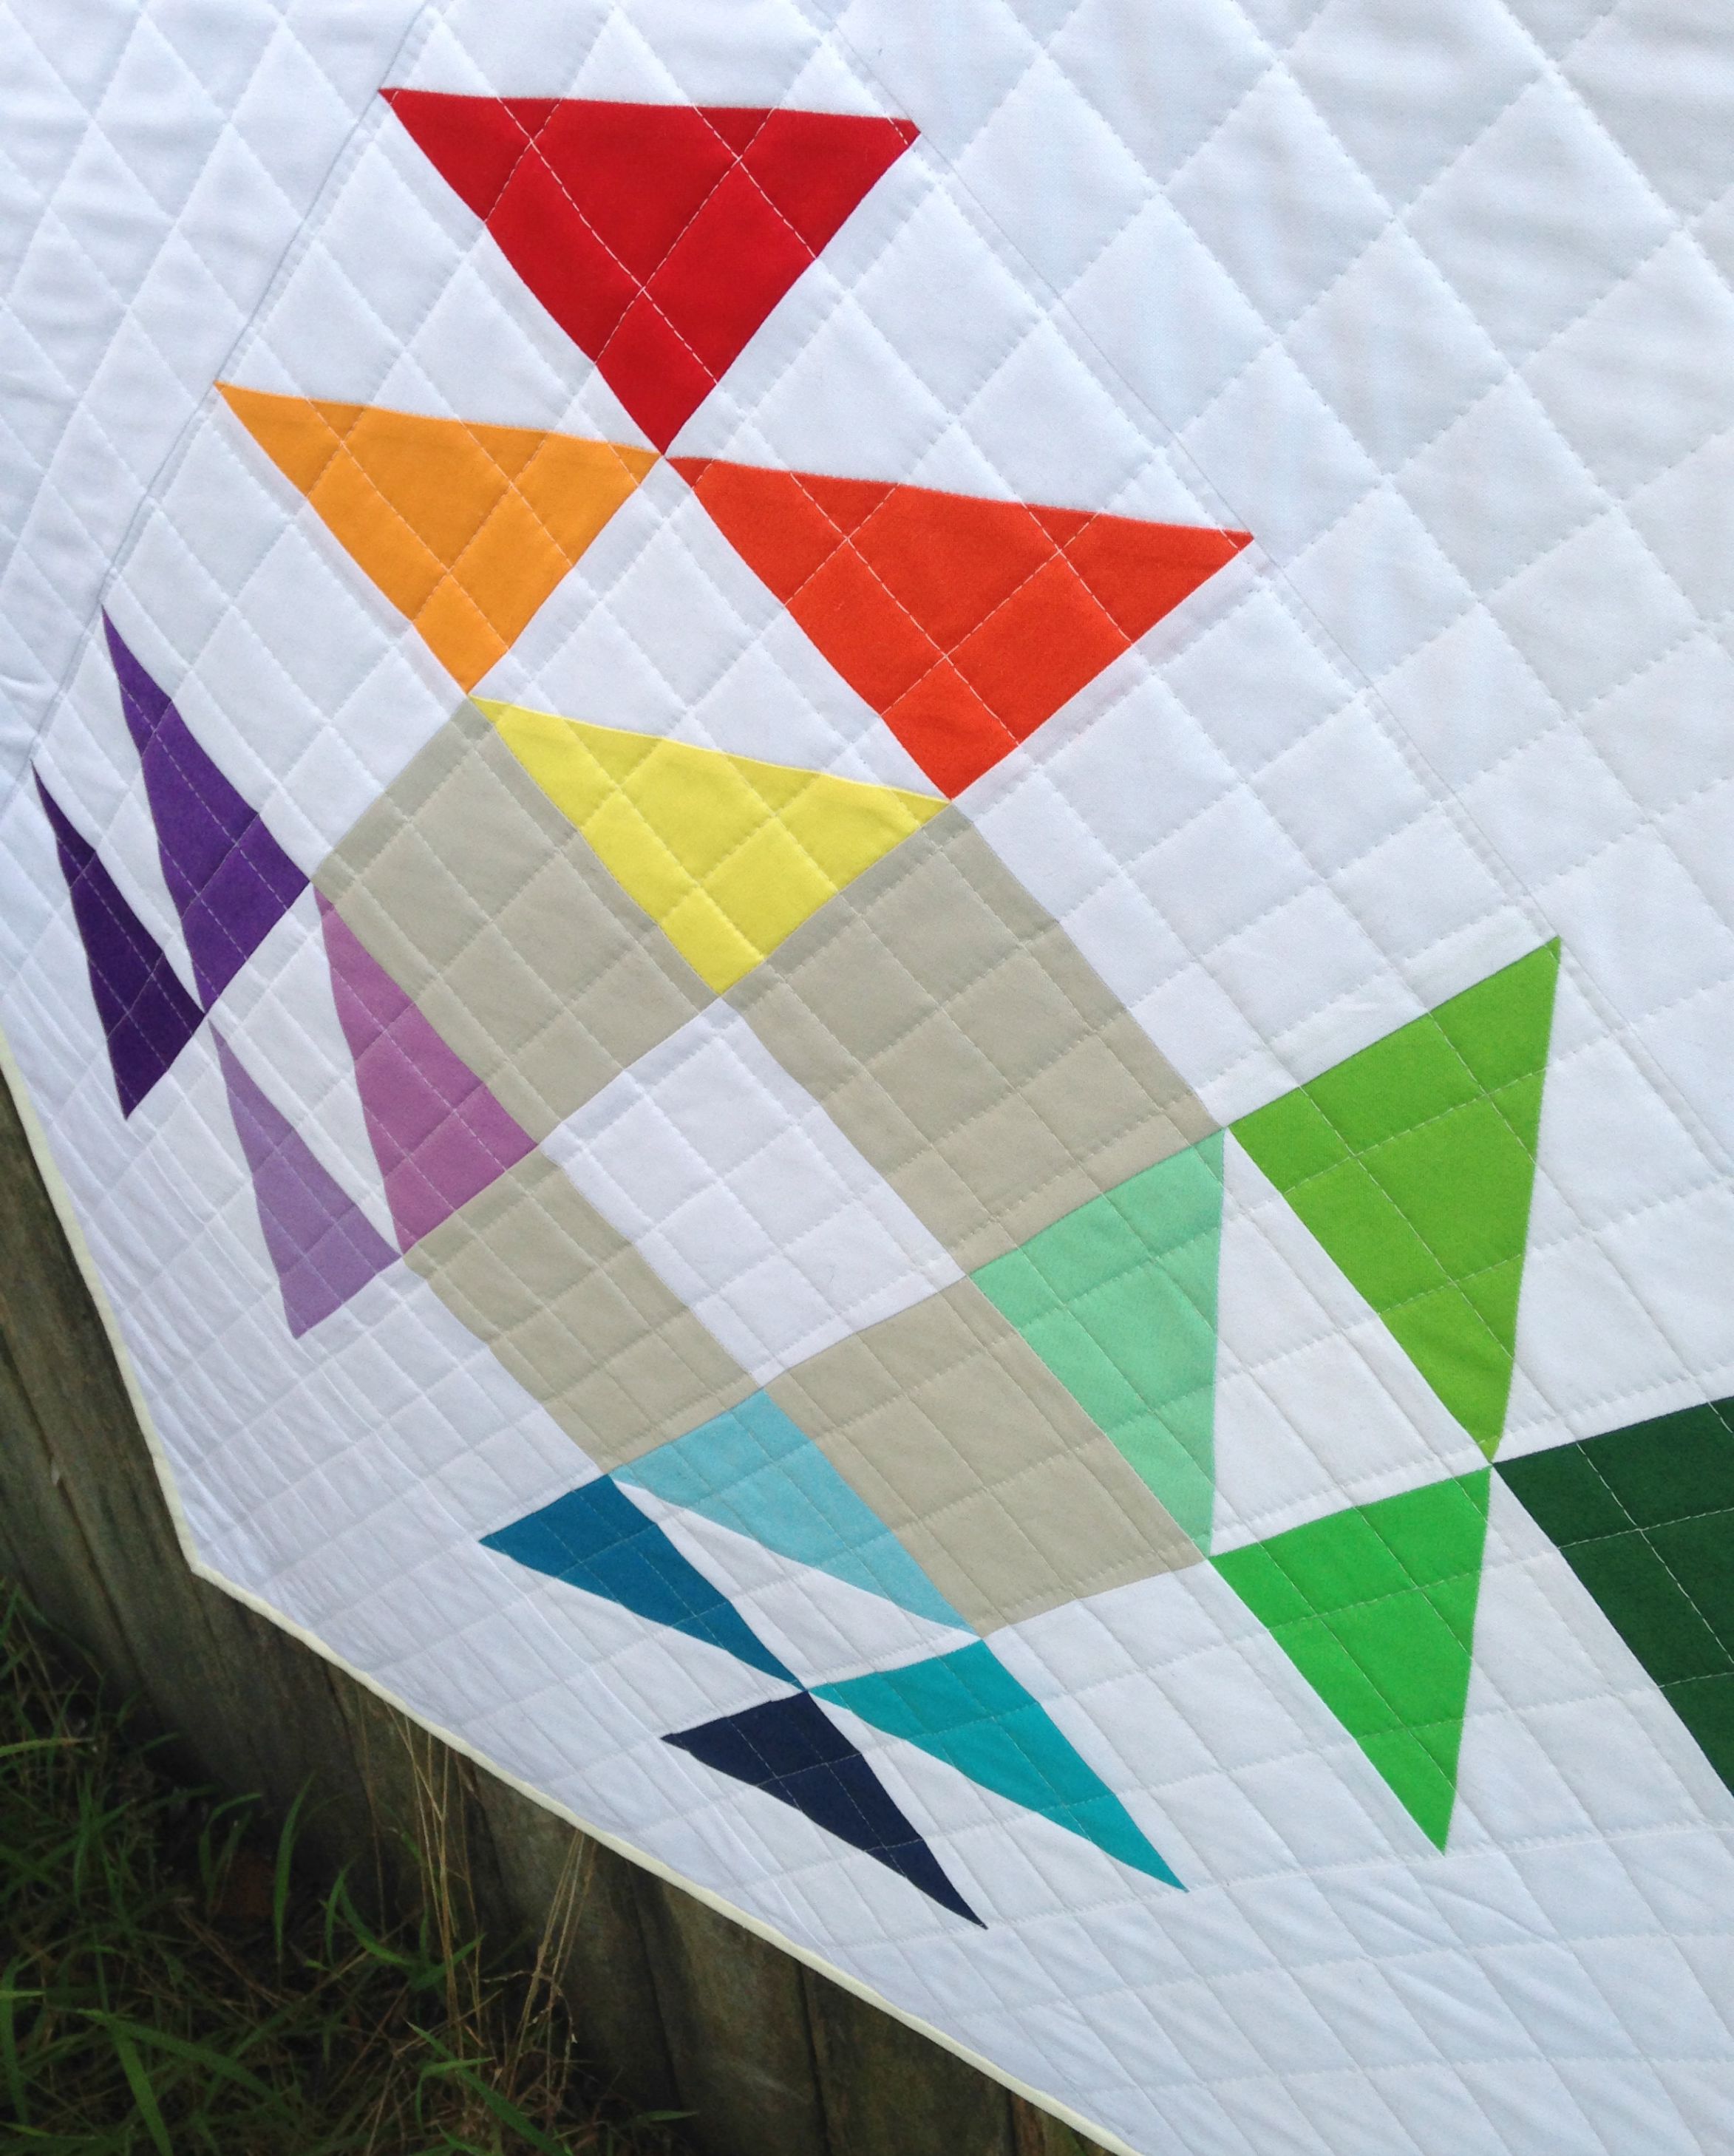
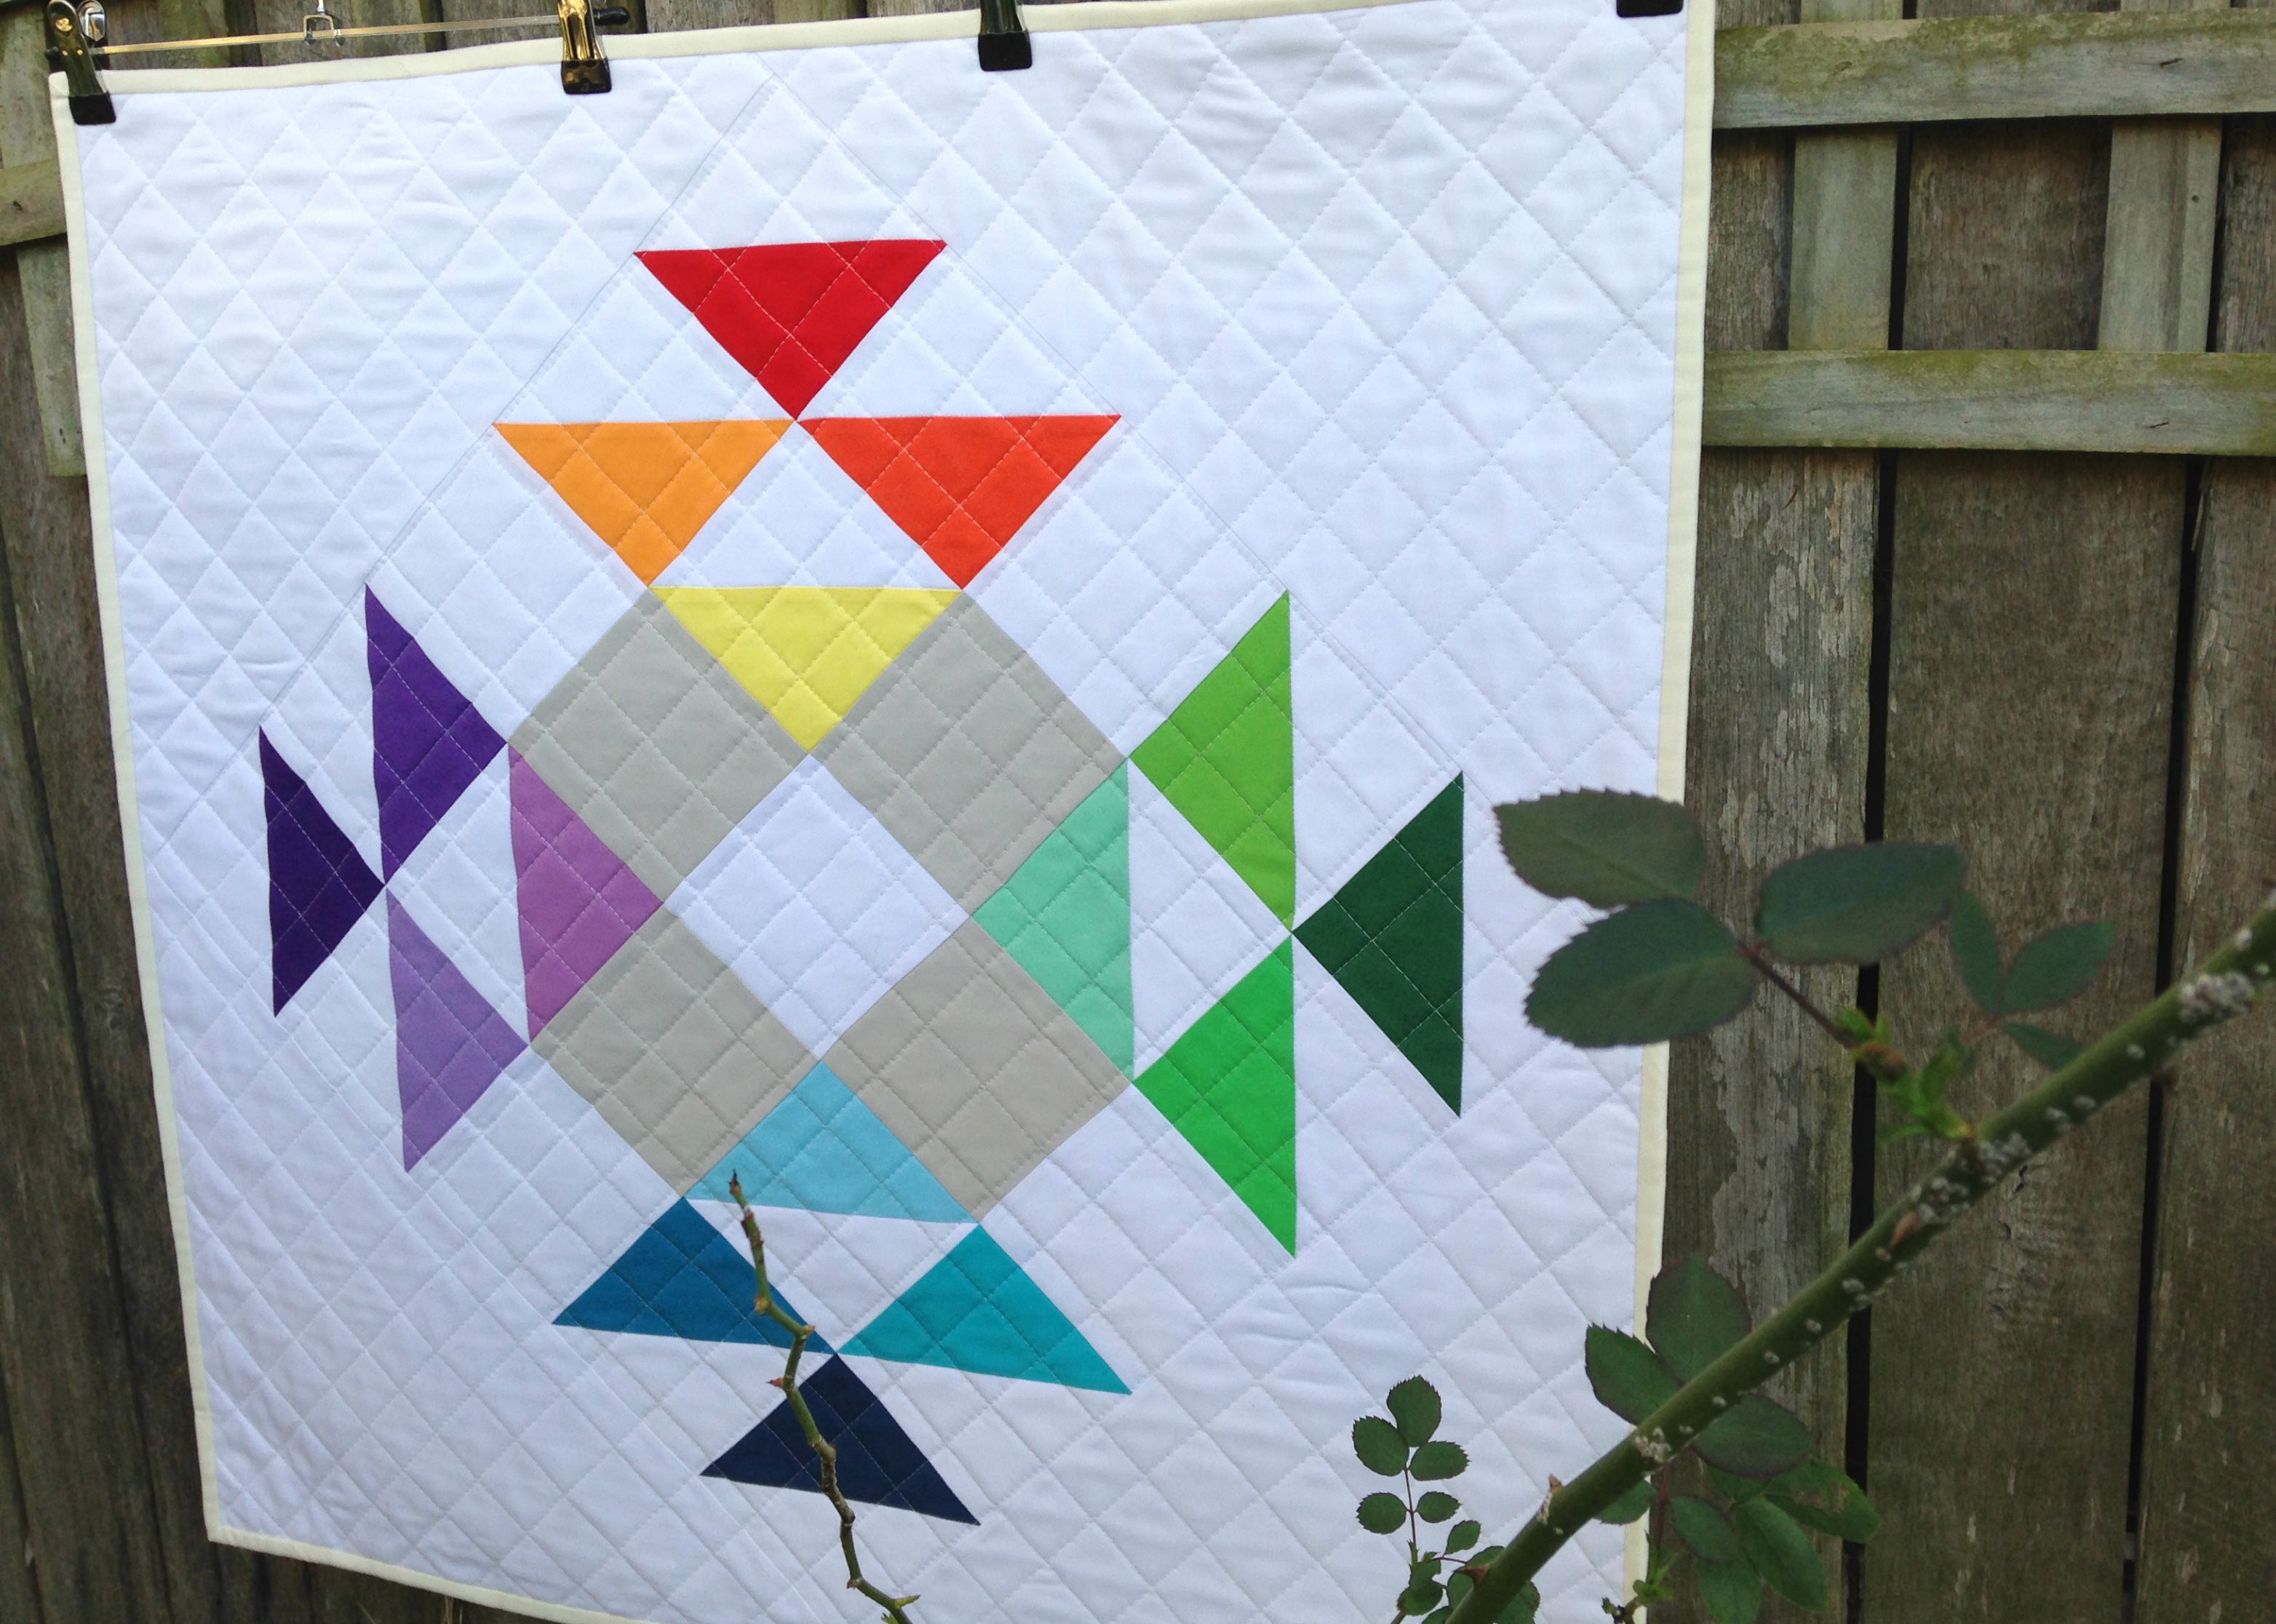
As soon as I was asked to be a part of it, out came the quilting books and Pinterest searches as I dove straight into planning what I could do to show case as many of the beautiful colours in the range as I could! And once I clasped eyes on the Crown of Thorns block, I knew instantly that it was the perfect one to use!

CrownofThornsMiniQuilt1:AmandaRolfe

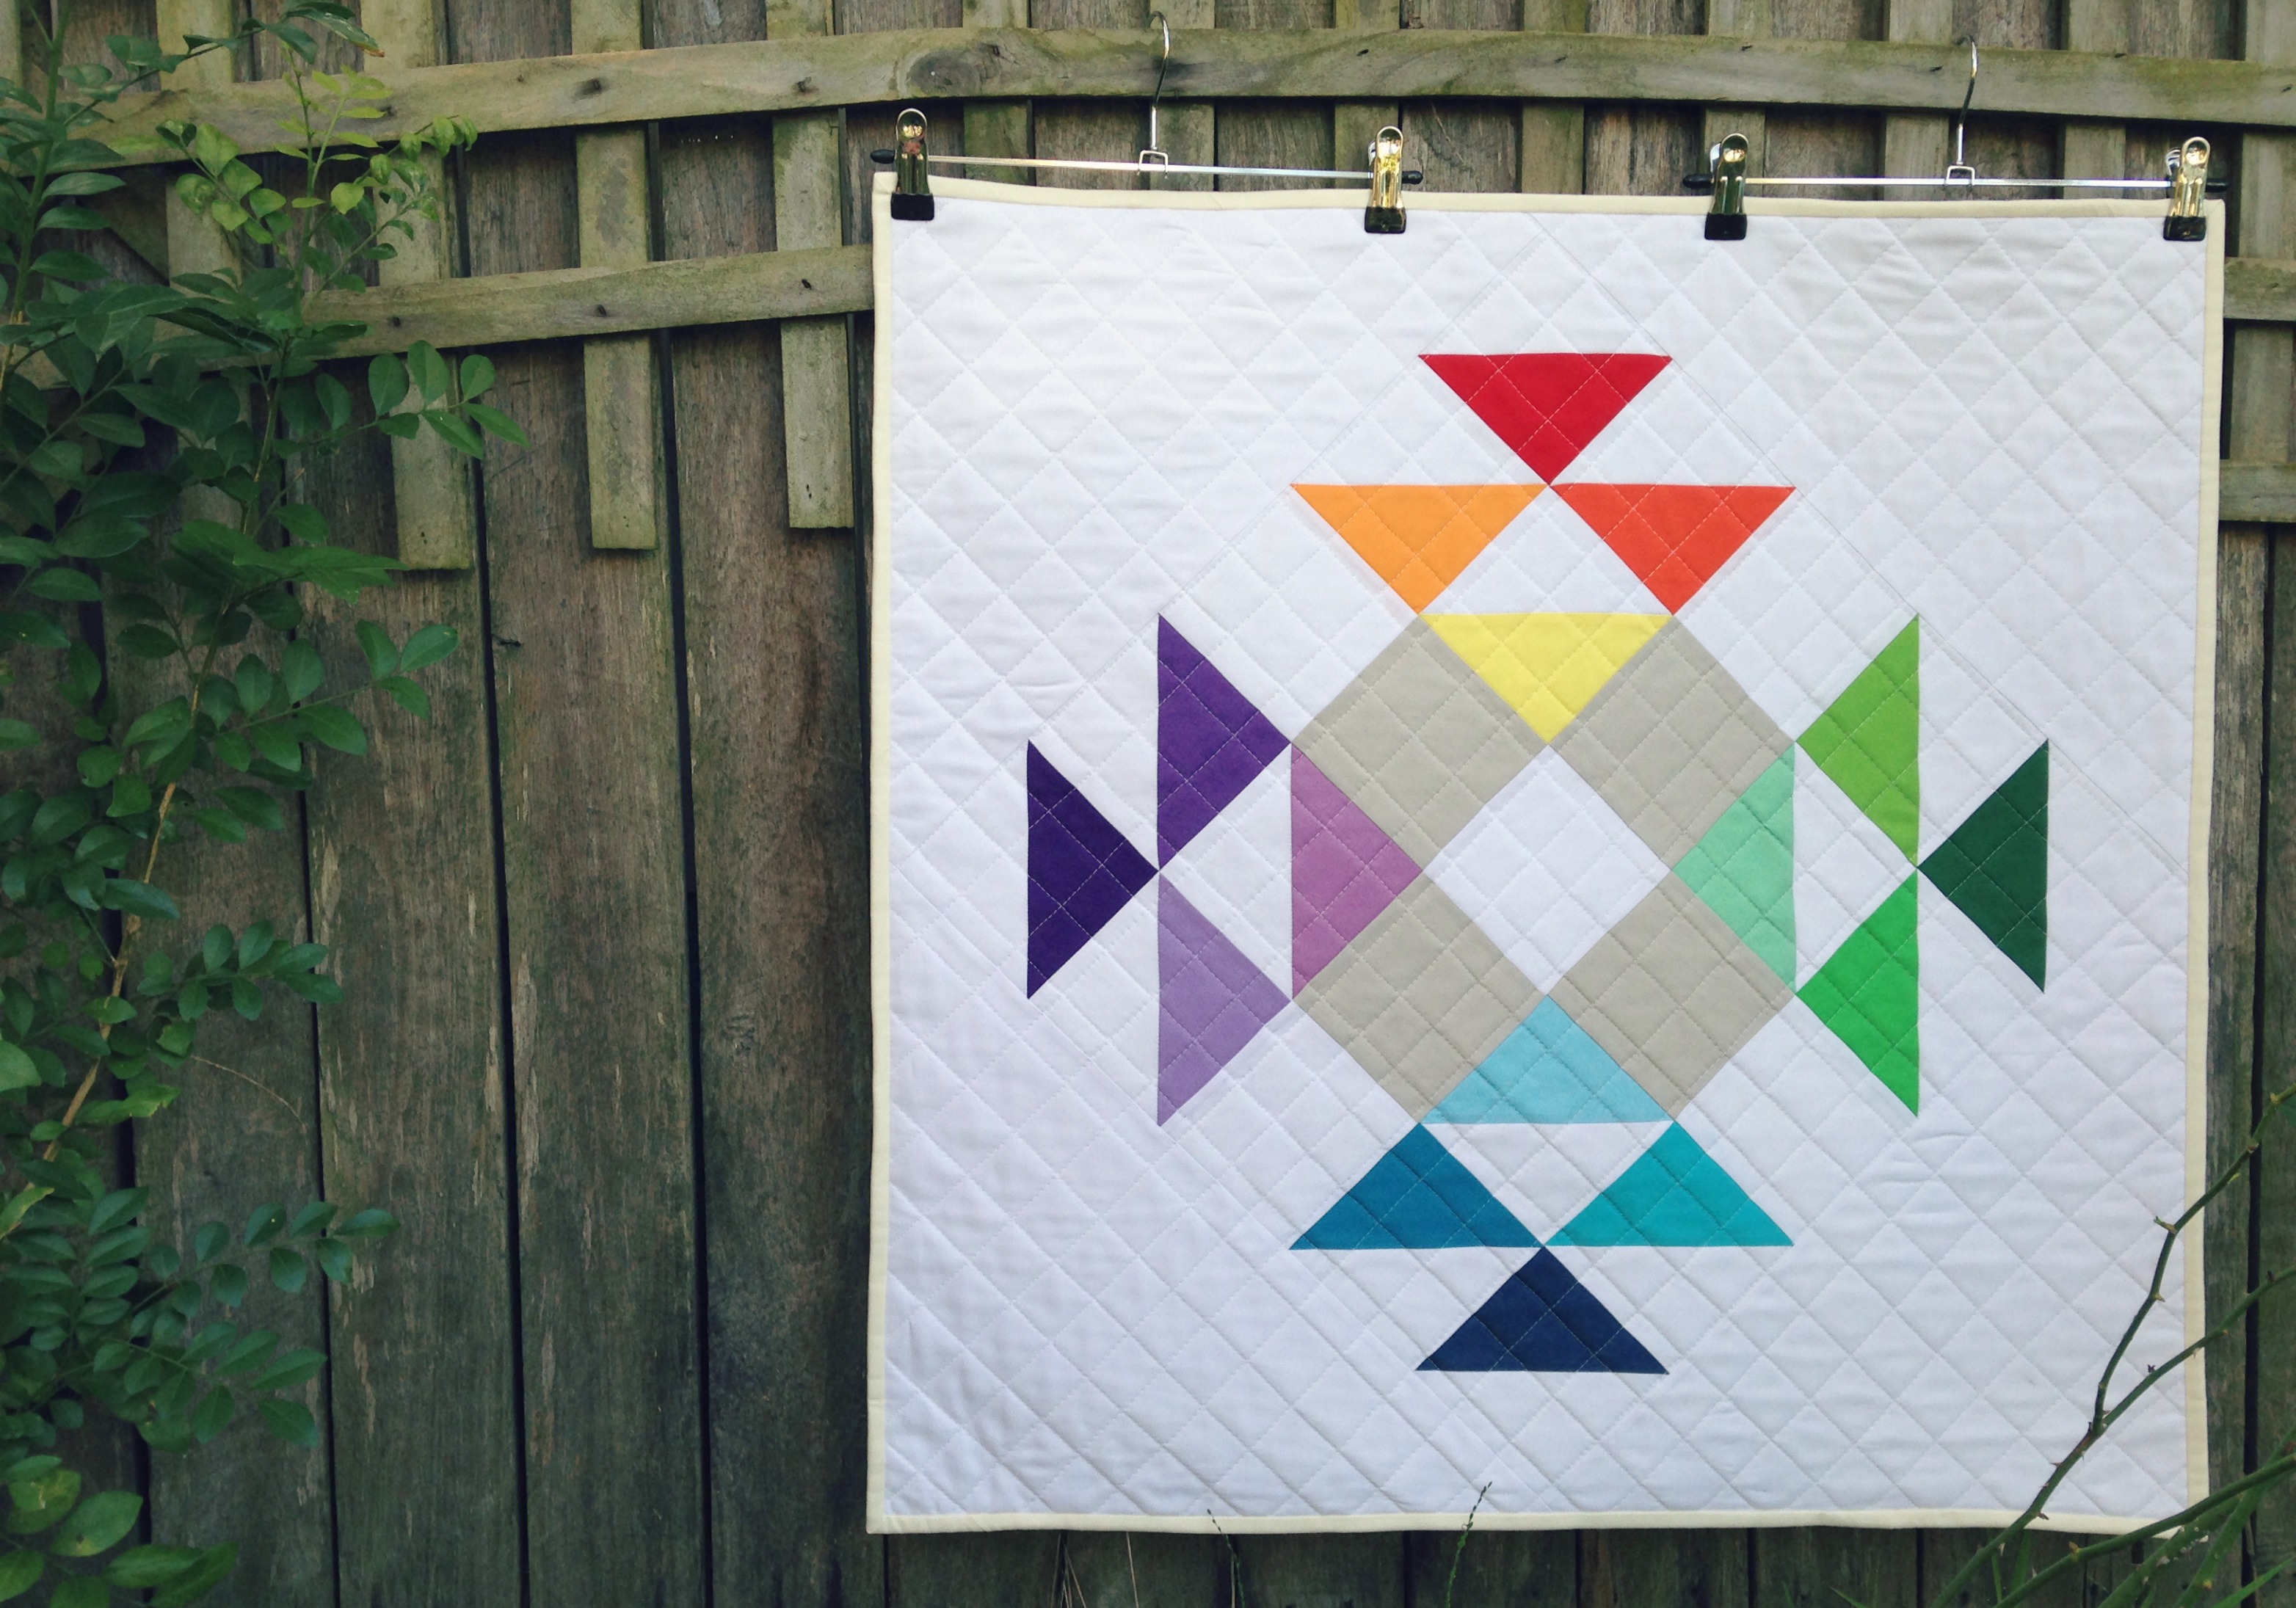
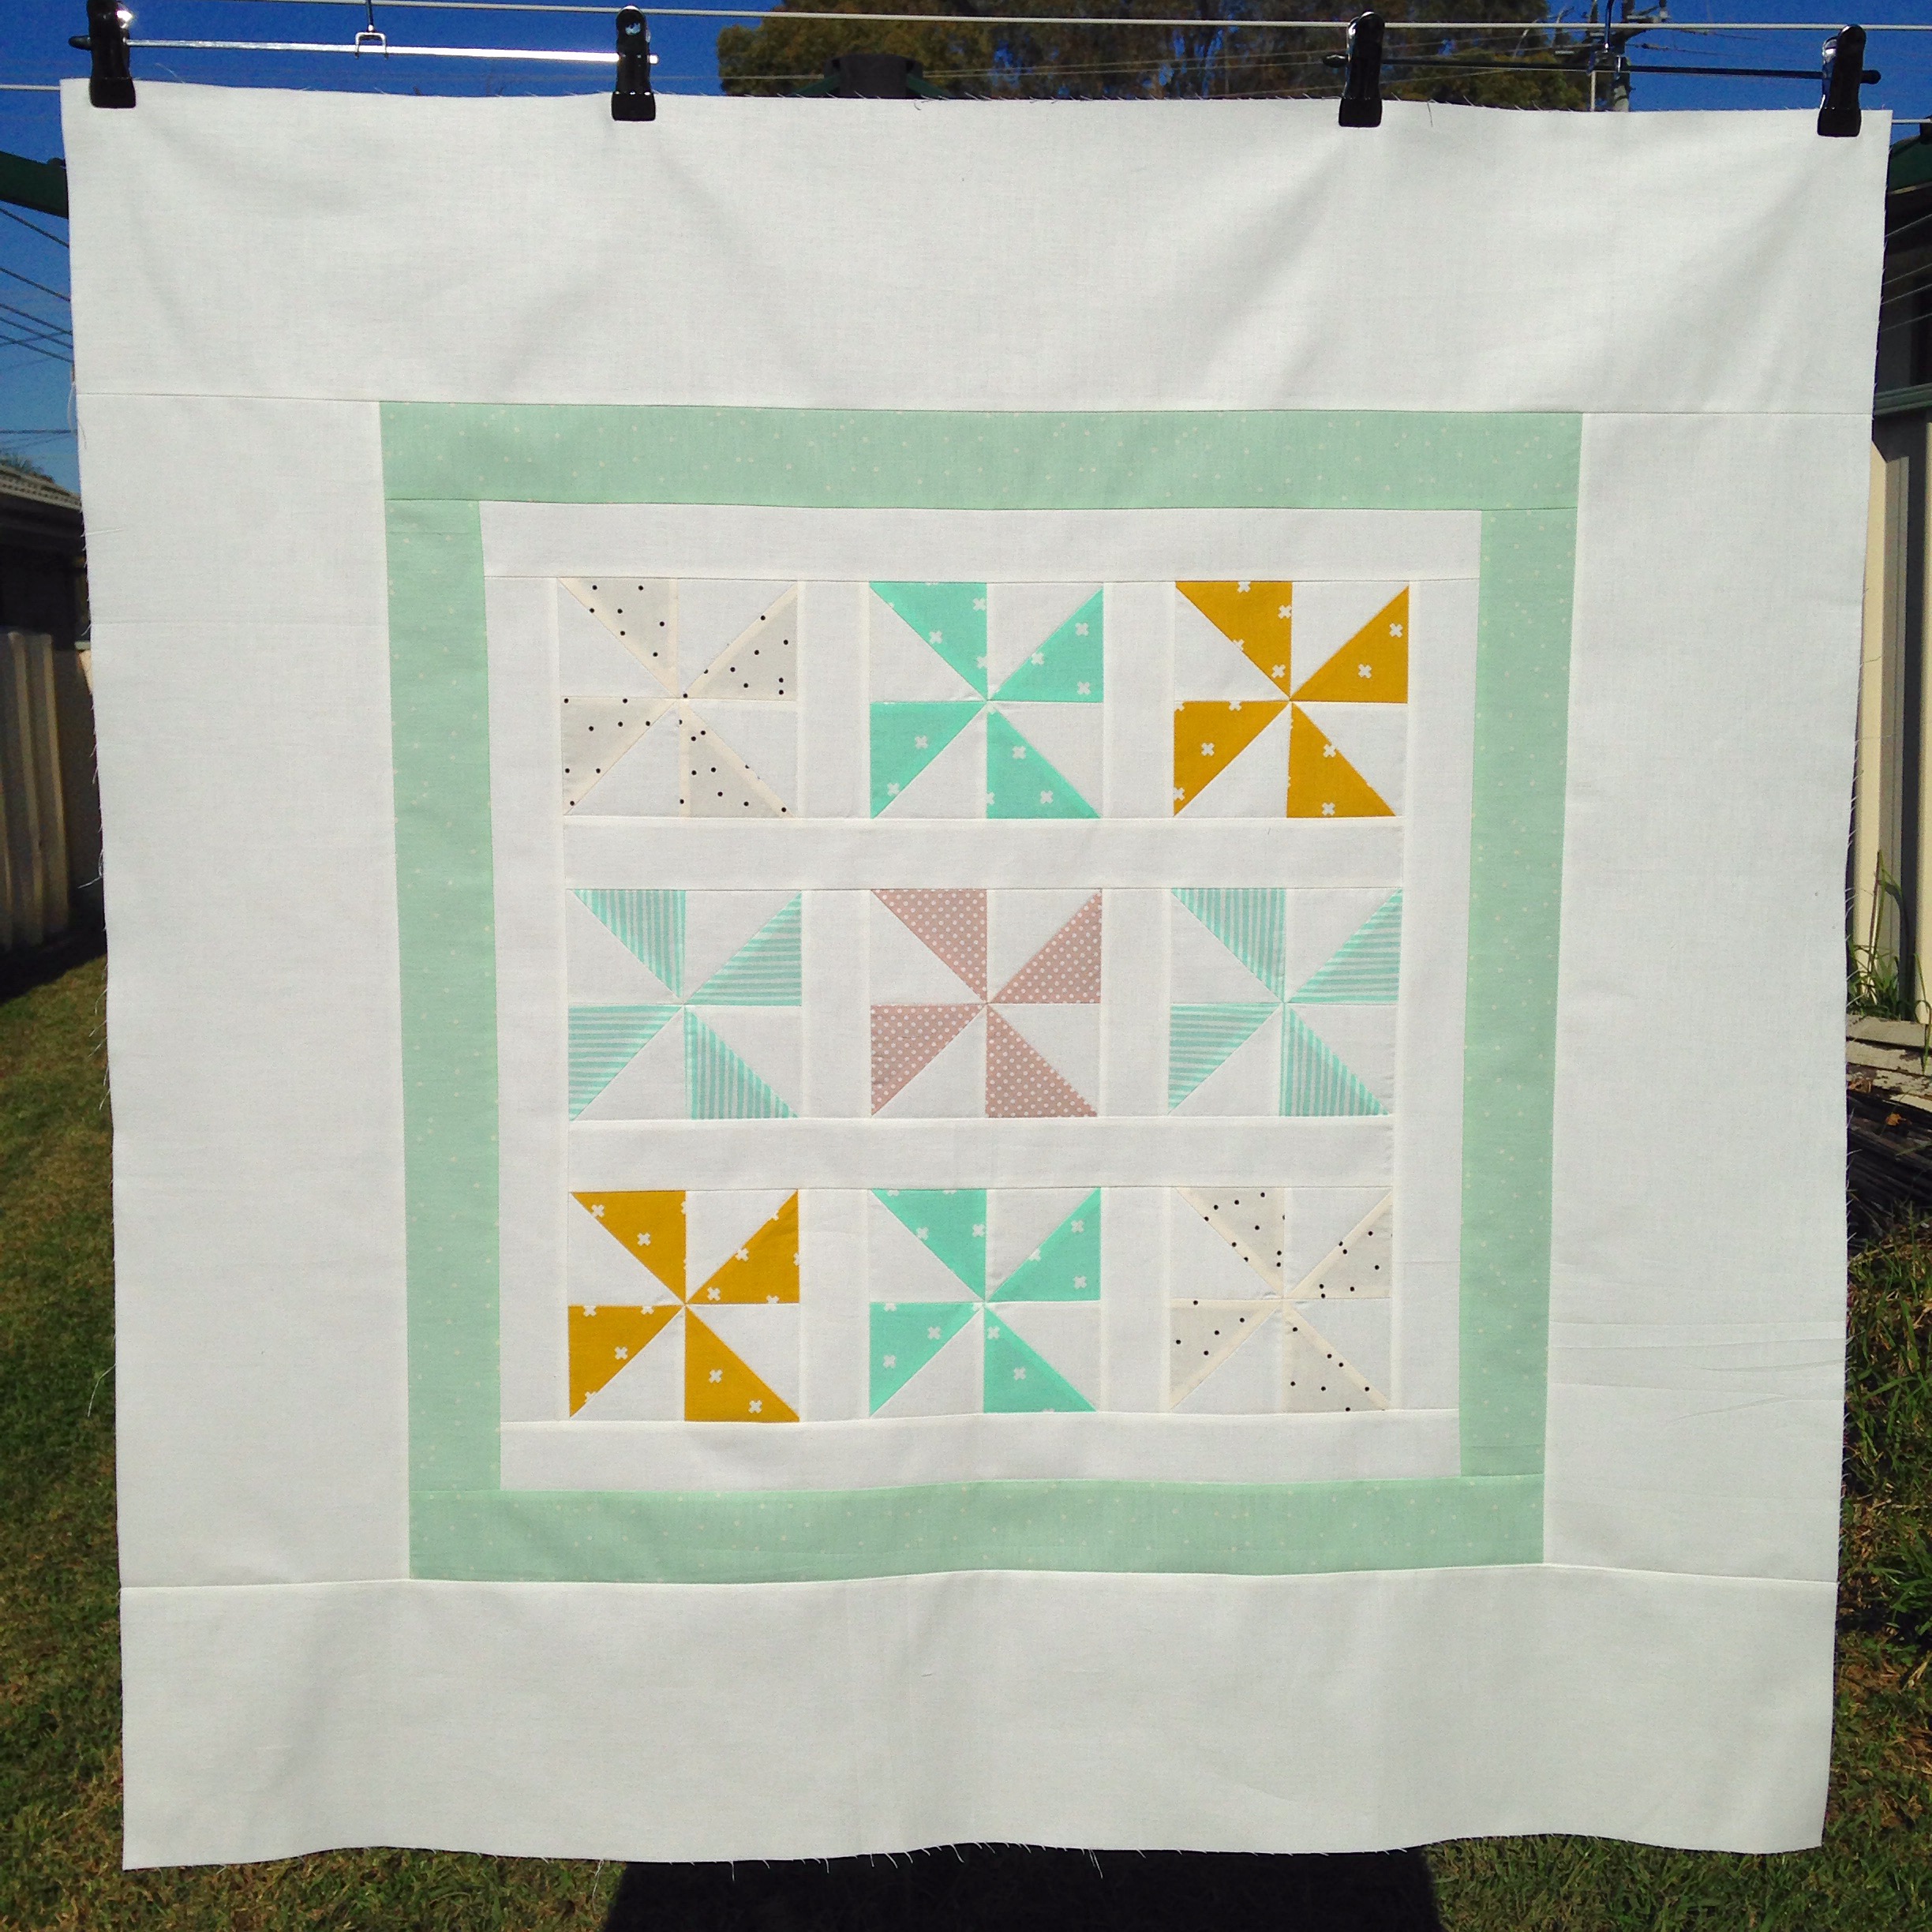
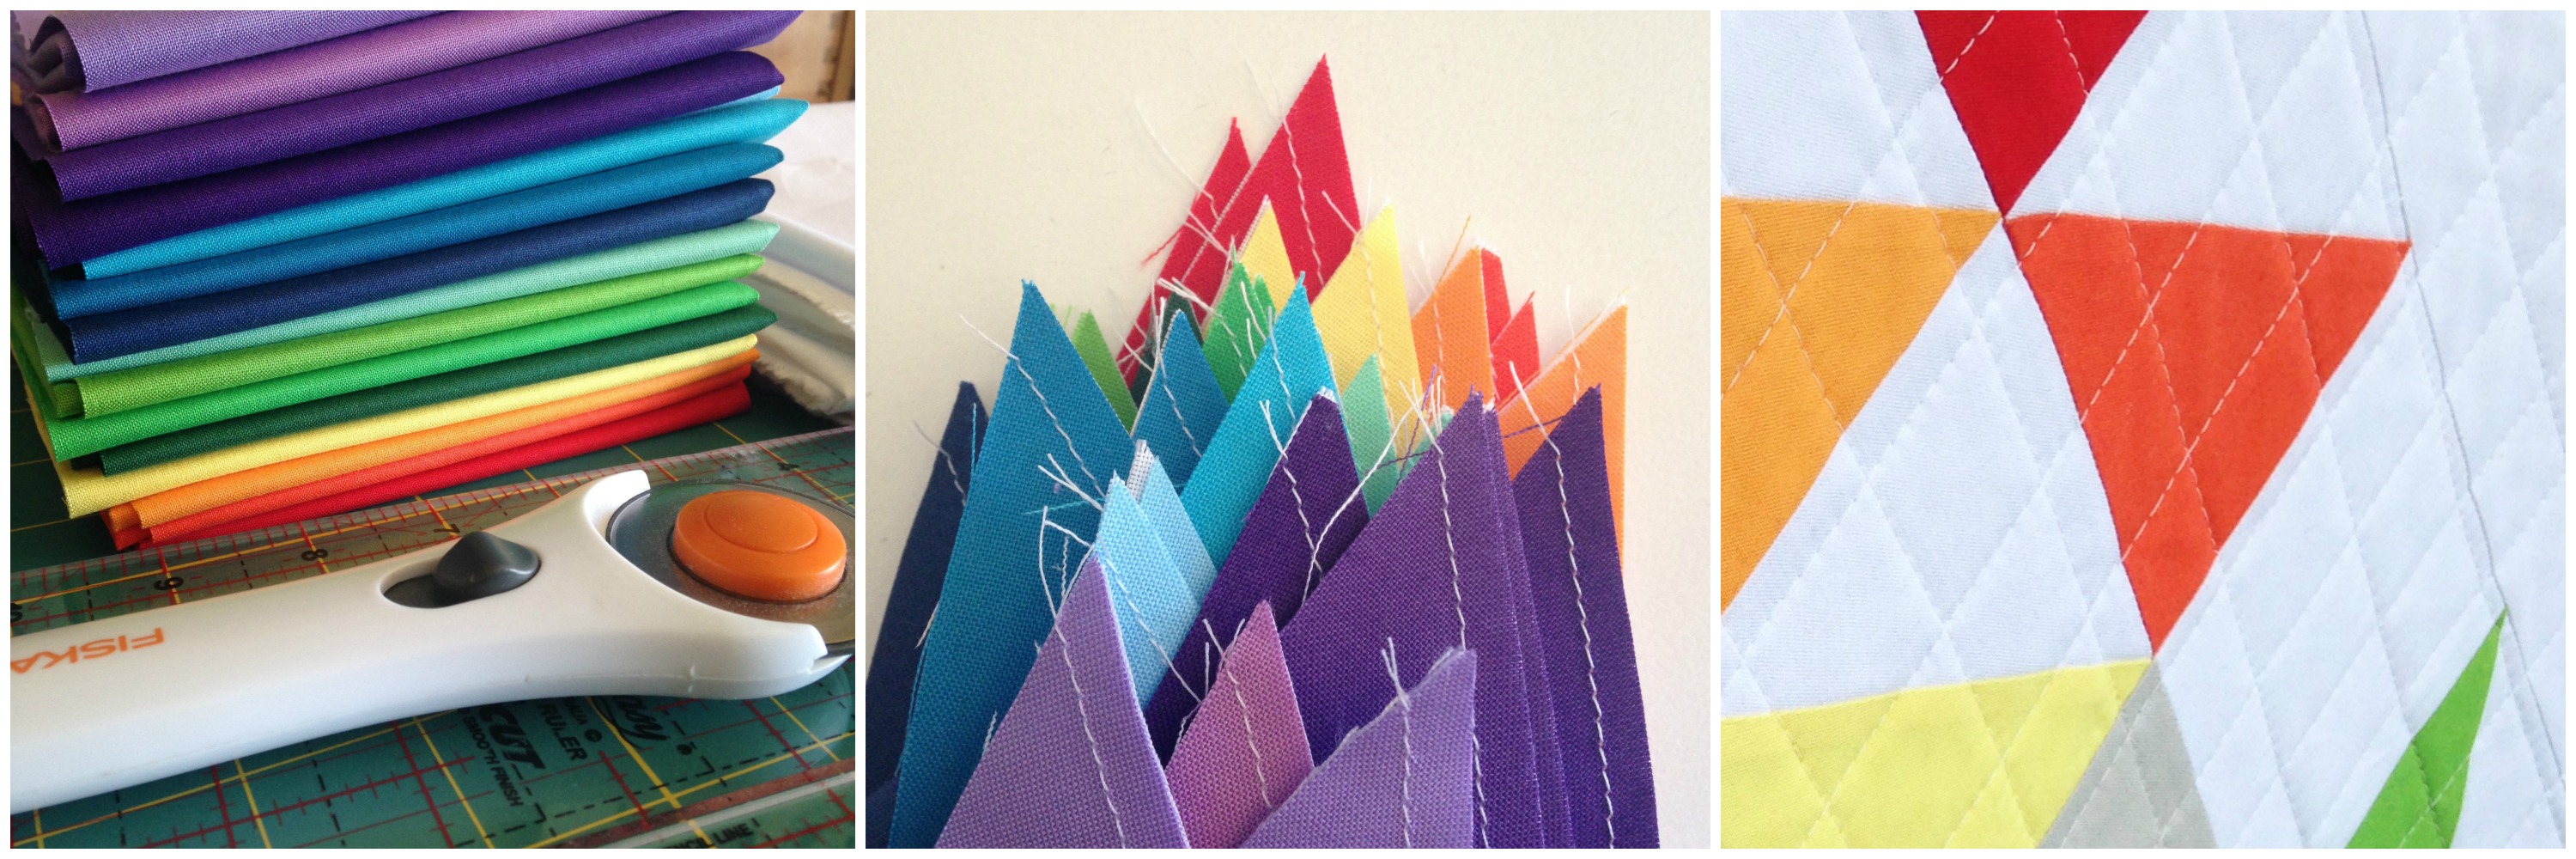
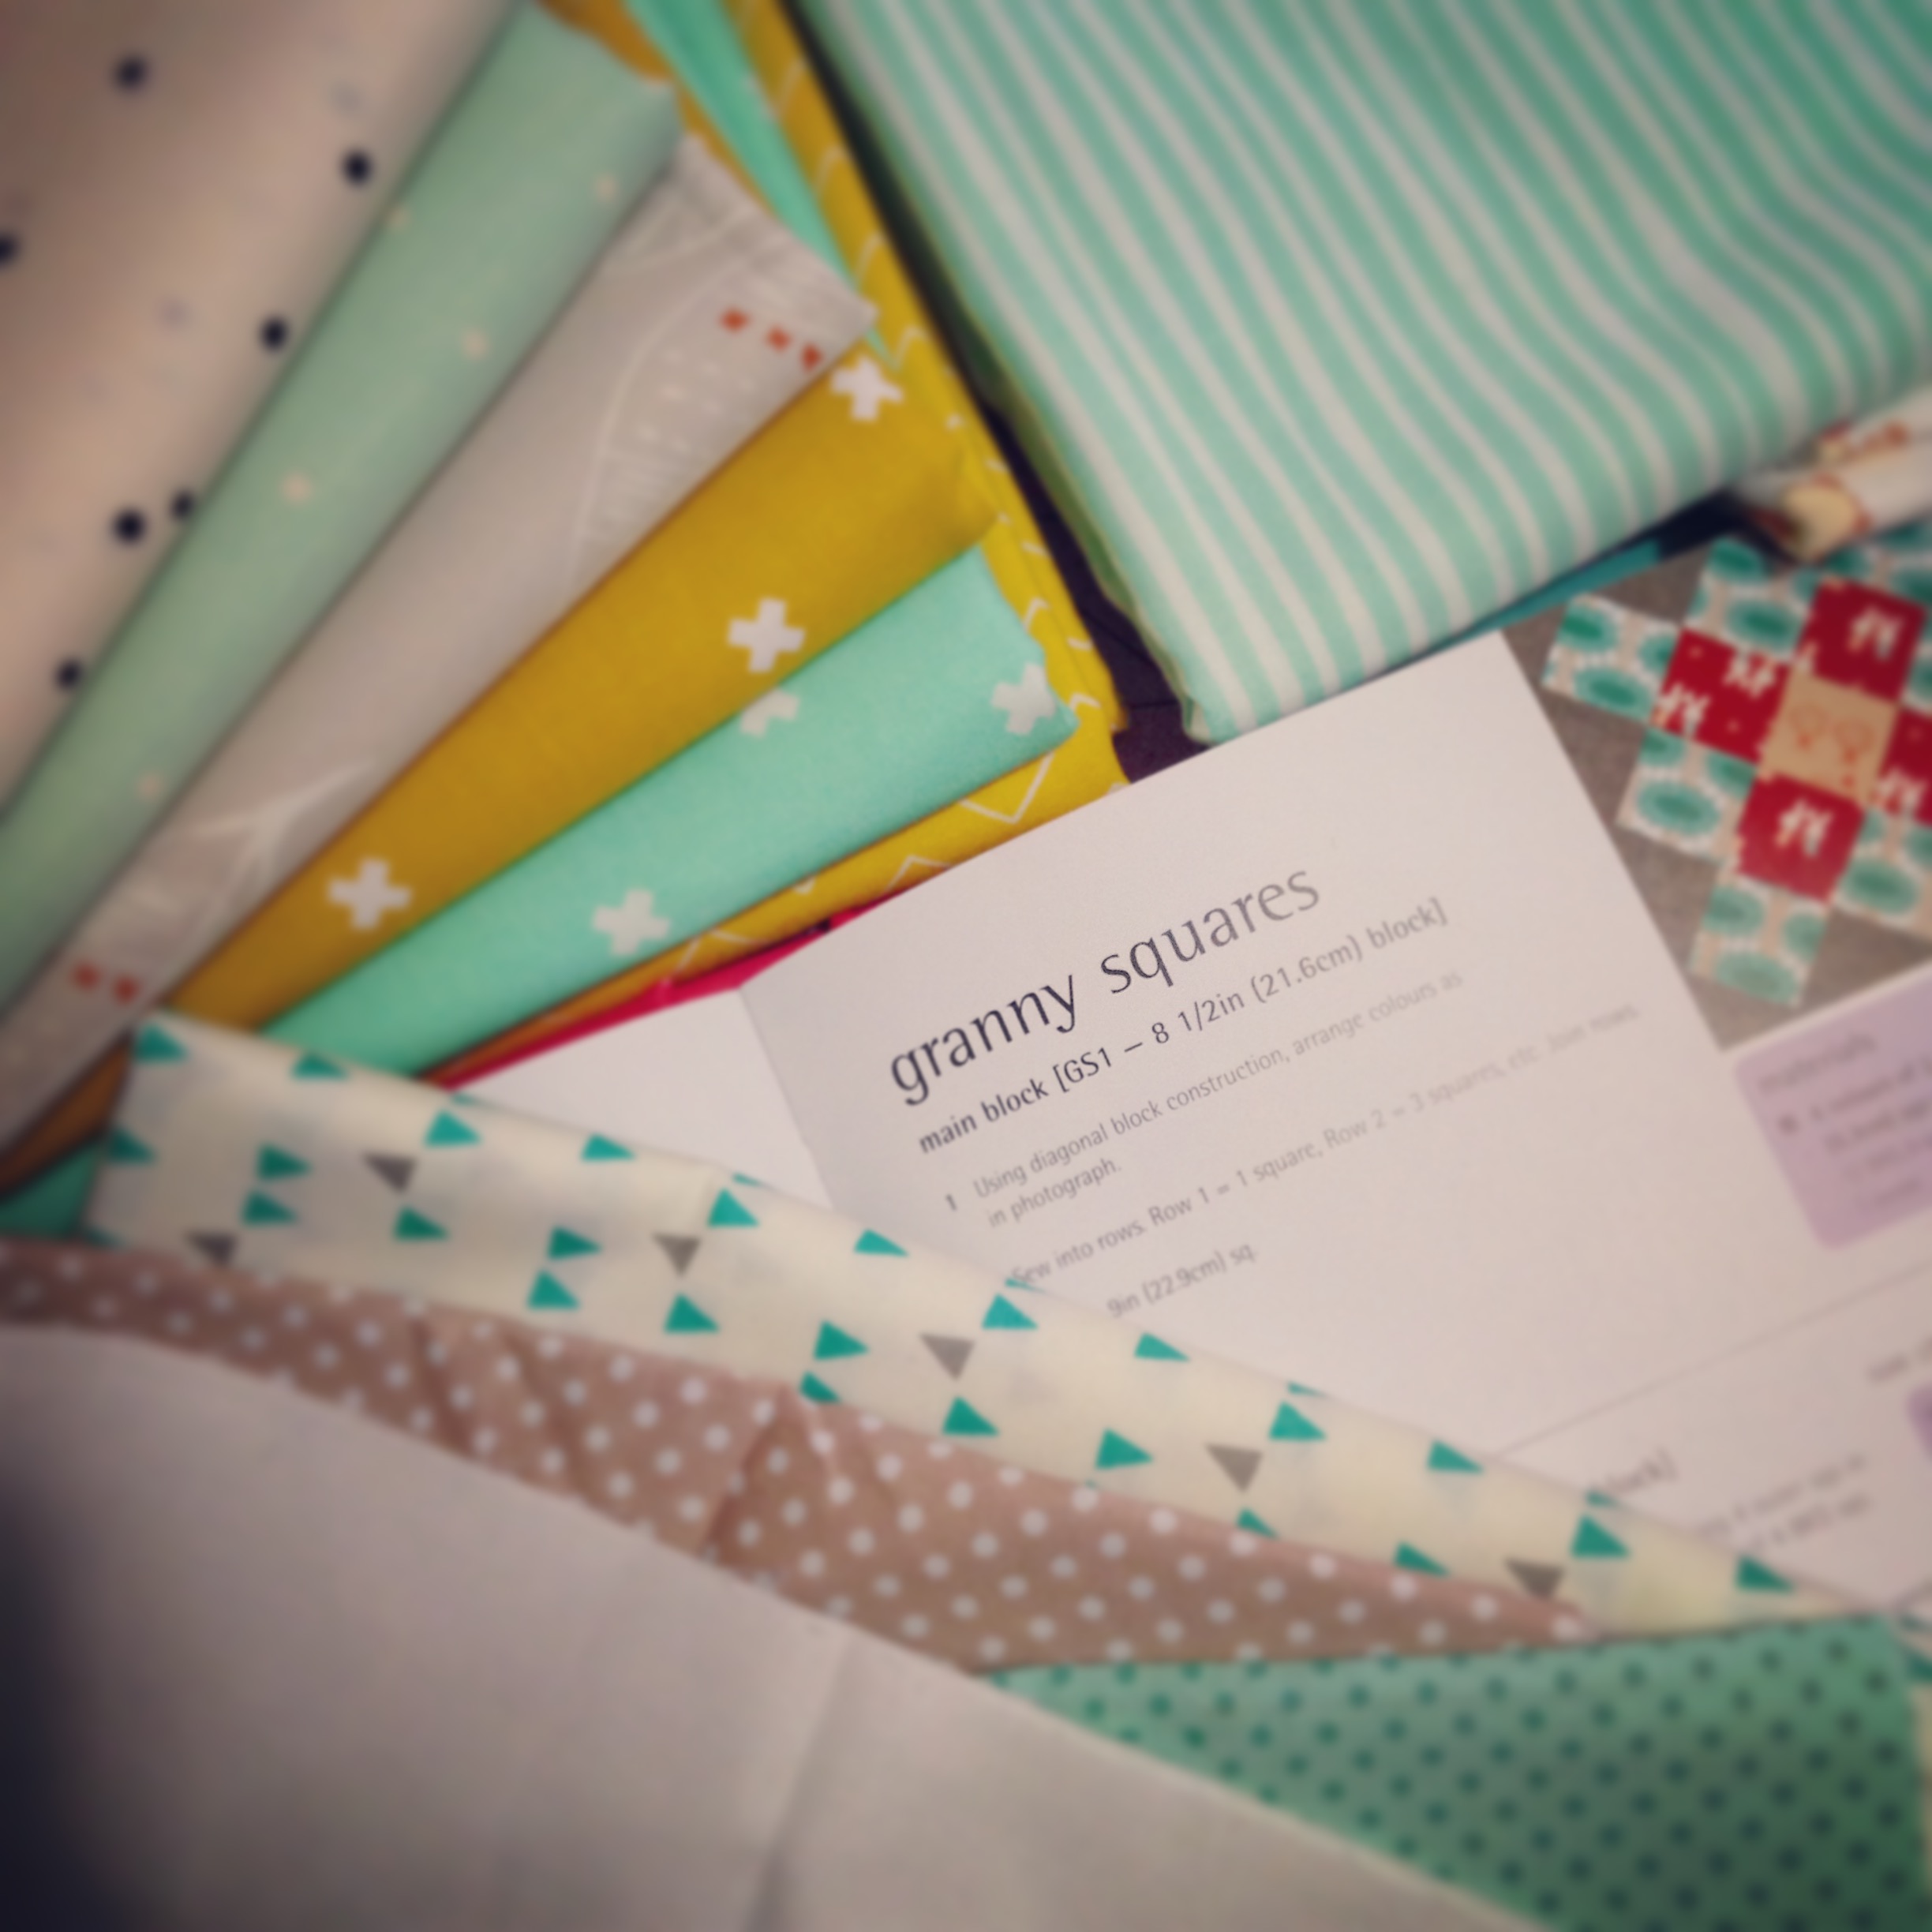
Now, the idea to create this mini quilt like I have was purely down to the fact that I couldn’t choose between all of the wonderfully vibrant colours I had available to pick from! I was like a little kid with a box full of scrumptious chocolates as I opened the Colour Card that was sent to me! As I unfolded and unfolded and unfolded the card, my eyes lit up every time at the abundant amount of fabrics lined up in perfect colour order. (I’m quite sure a big, ‘Oh, wow!!’ escaped my lips as well!) So because of that, I chose four different variants of four different colours in the range, from lightest to darkest, along with three neutral shades of white, cream and grey to help showcase my colour choices.

CrownofThornsMiniQuilt3:AmandaRolfe

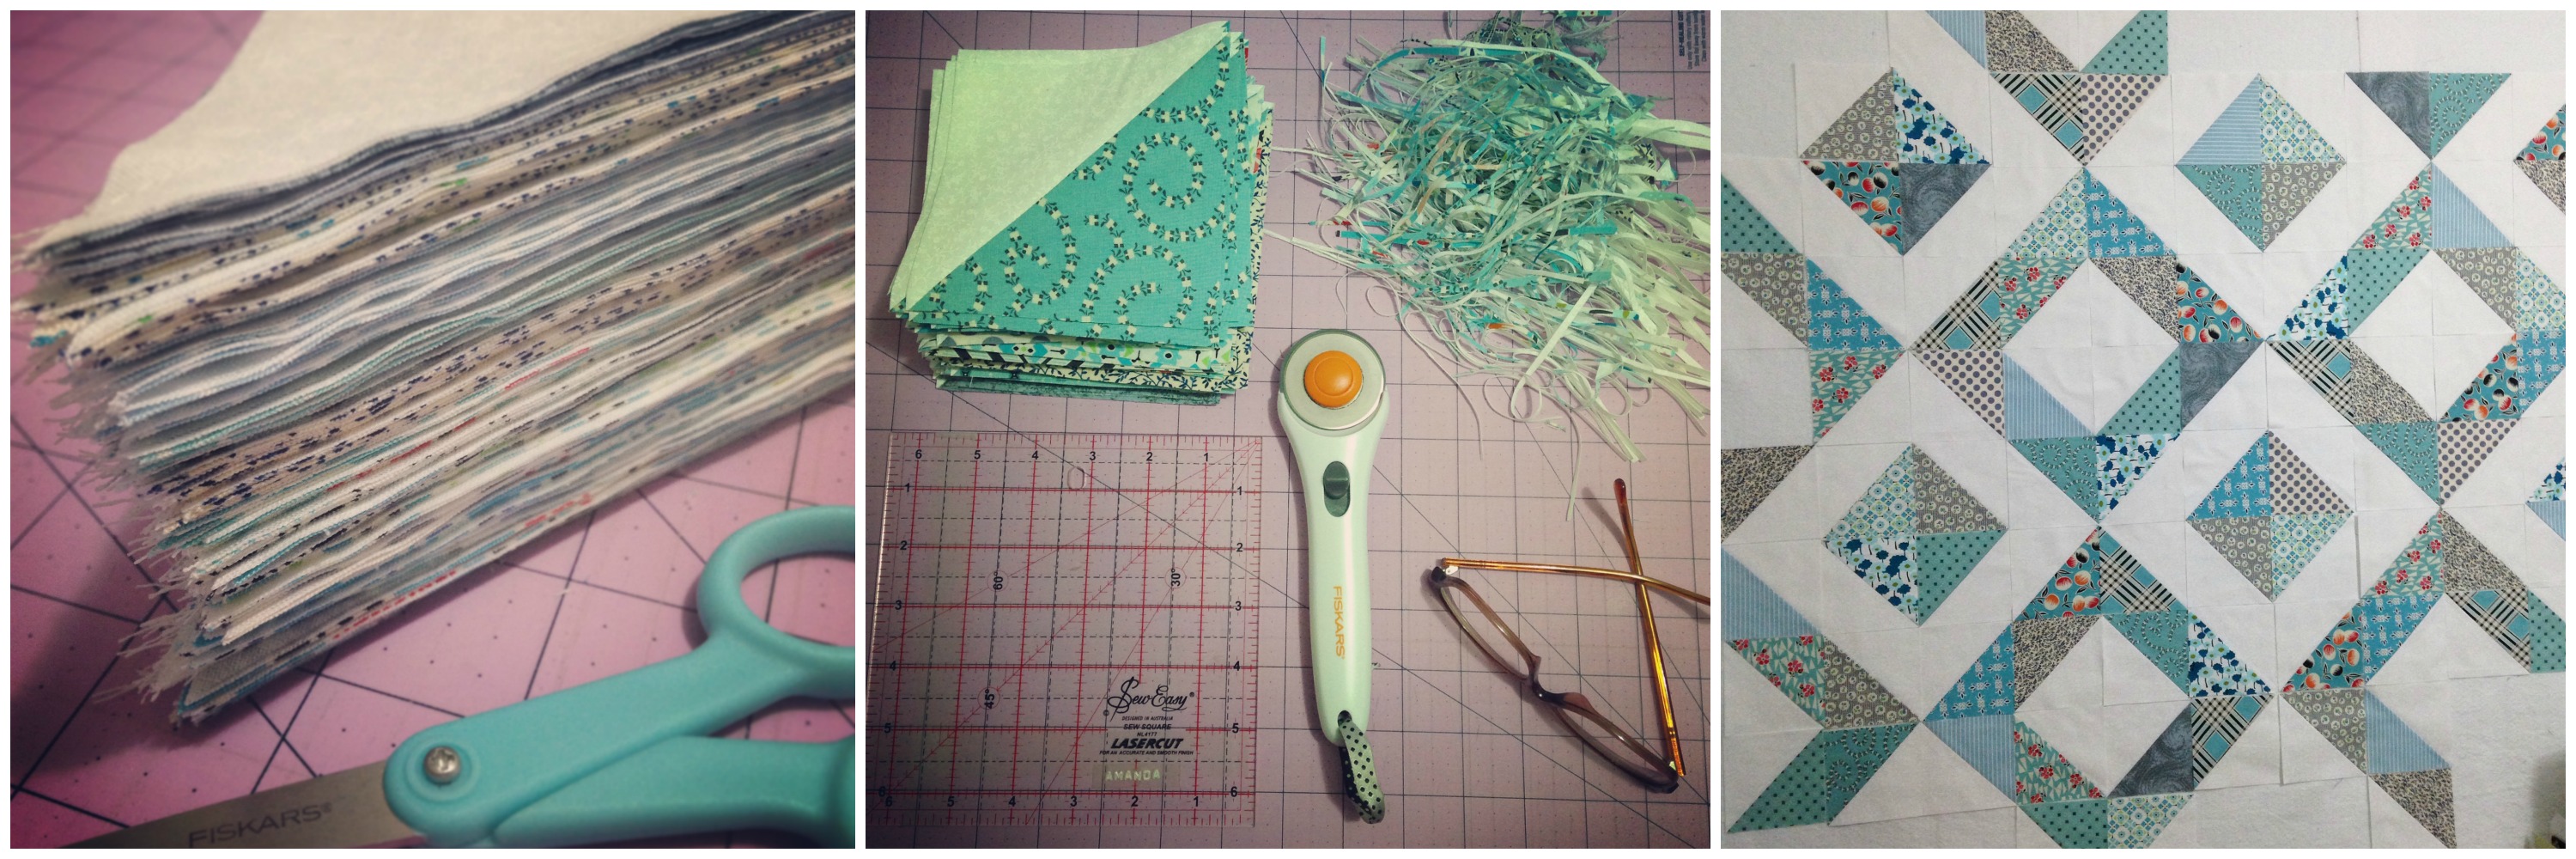
To be honest, I had never used Cotton Supreme Solids by RJR Fabrics before, so I was eager to know what the quality would be like. And wow! Was I impressed! The fabrics are so beautiful! Super-soft to handle, the colours are insanely vibrant and true, they’re easy to press and cut and, the best bit, they sew like a dream through the sewing machine! What more could you ask for?! They’re absolutely perfect for any fabric project you could ever dream of making!

IMG_4445

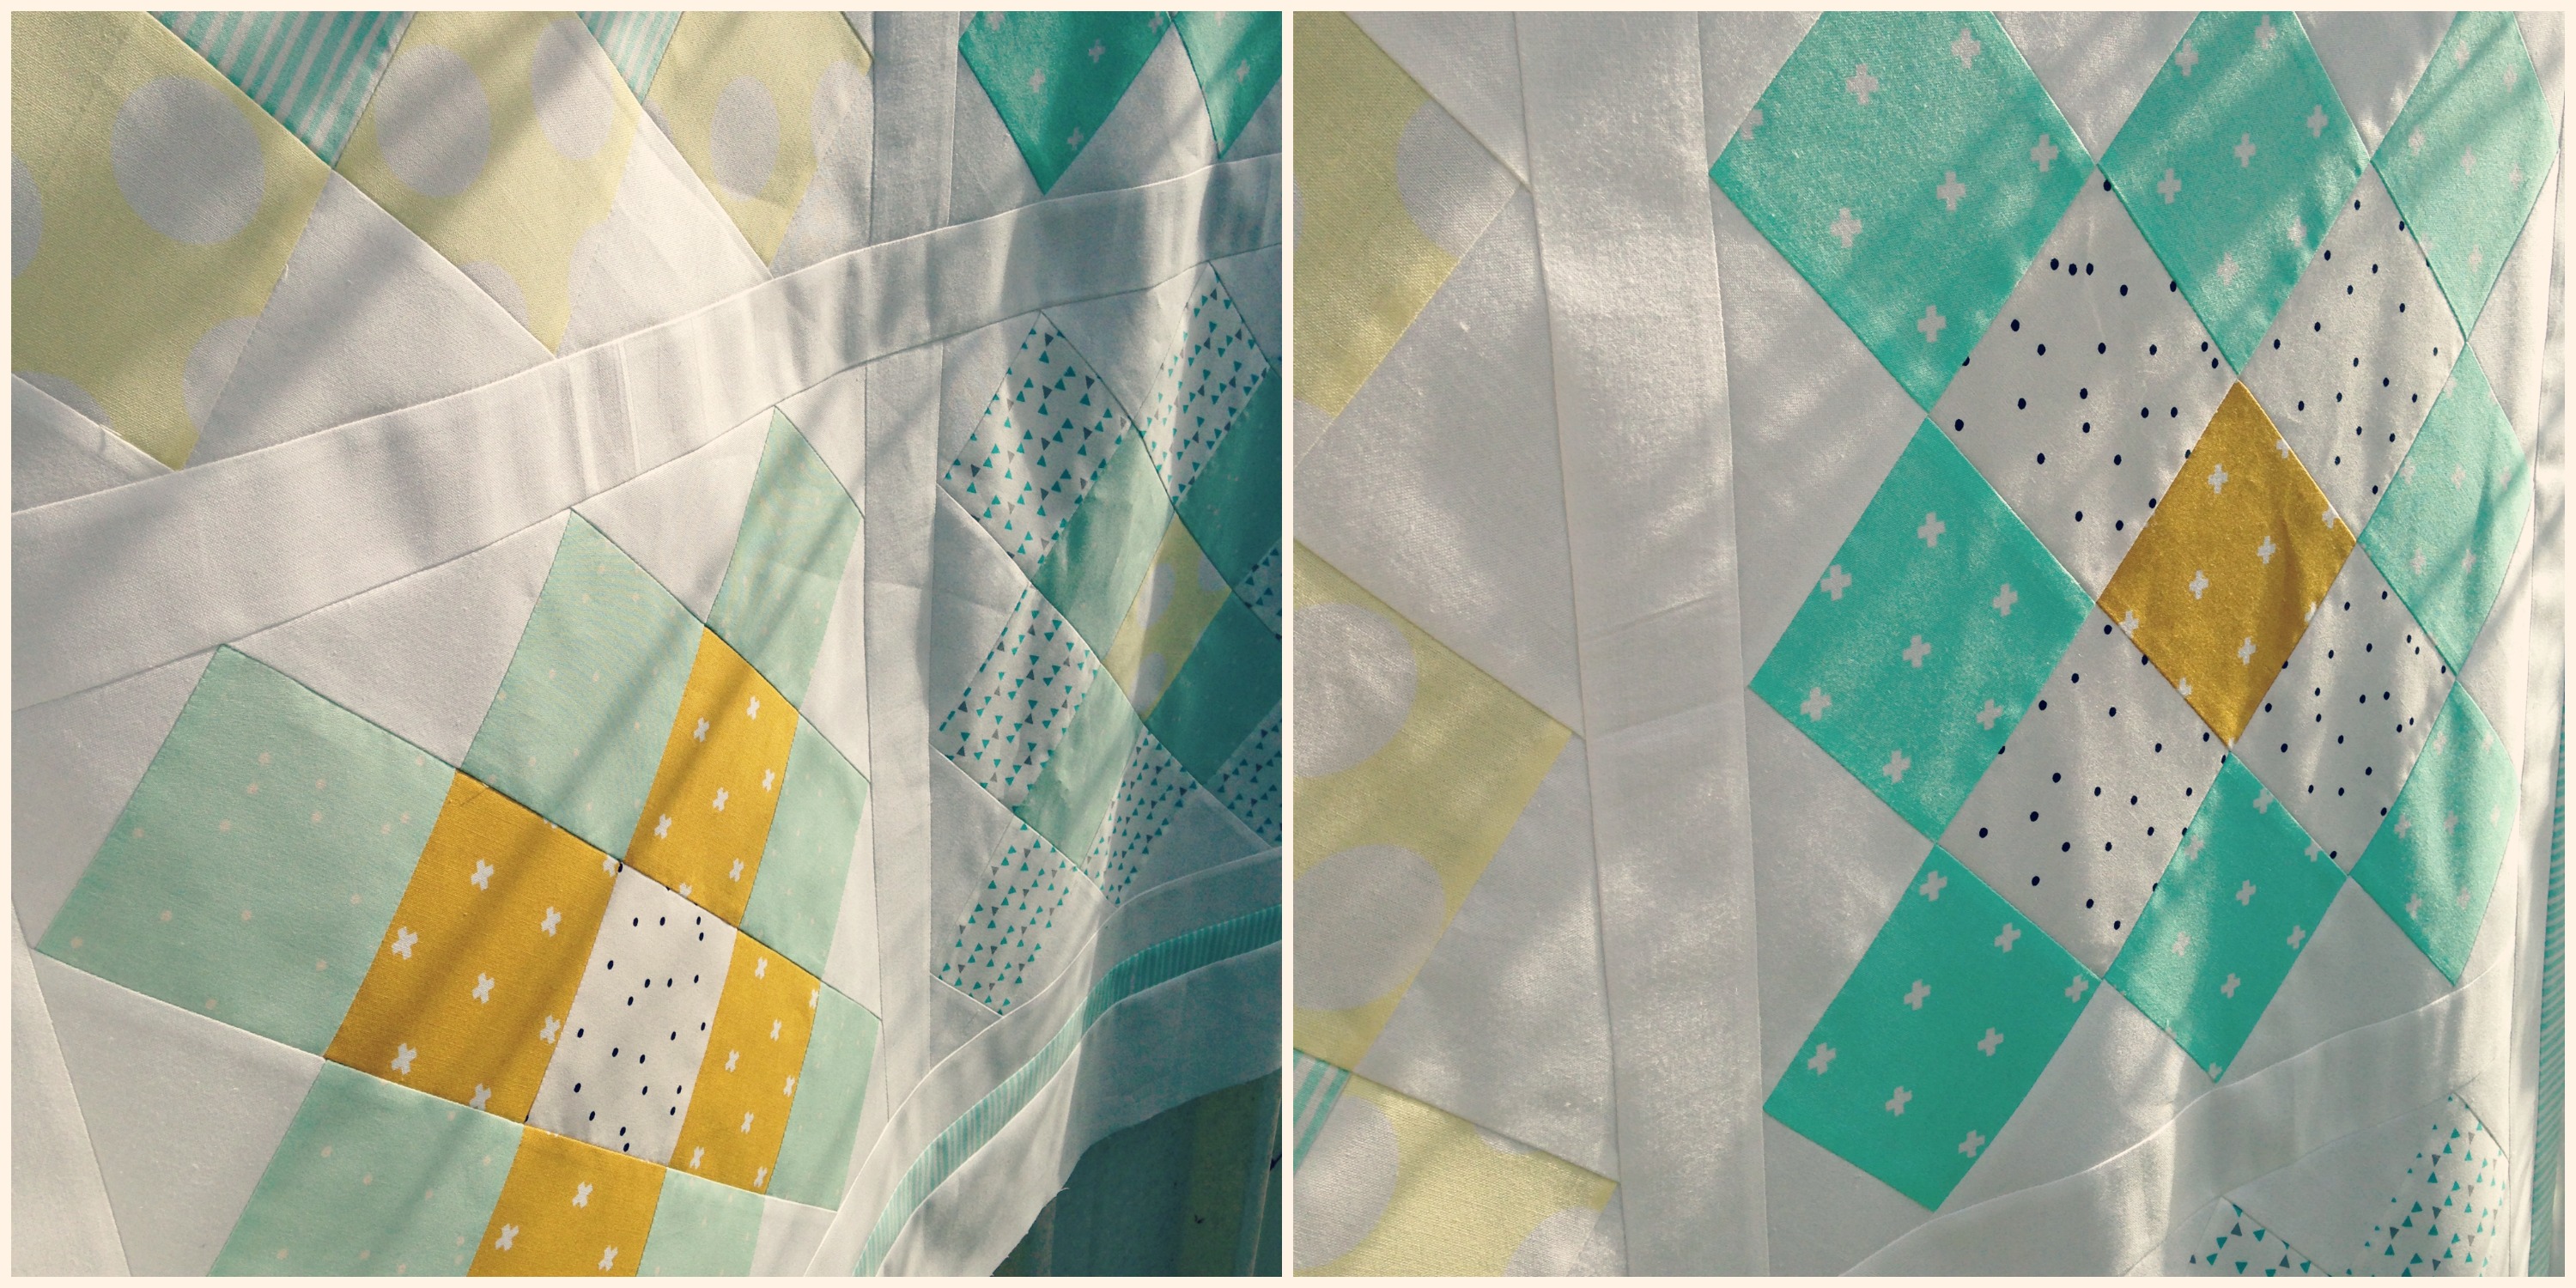
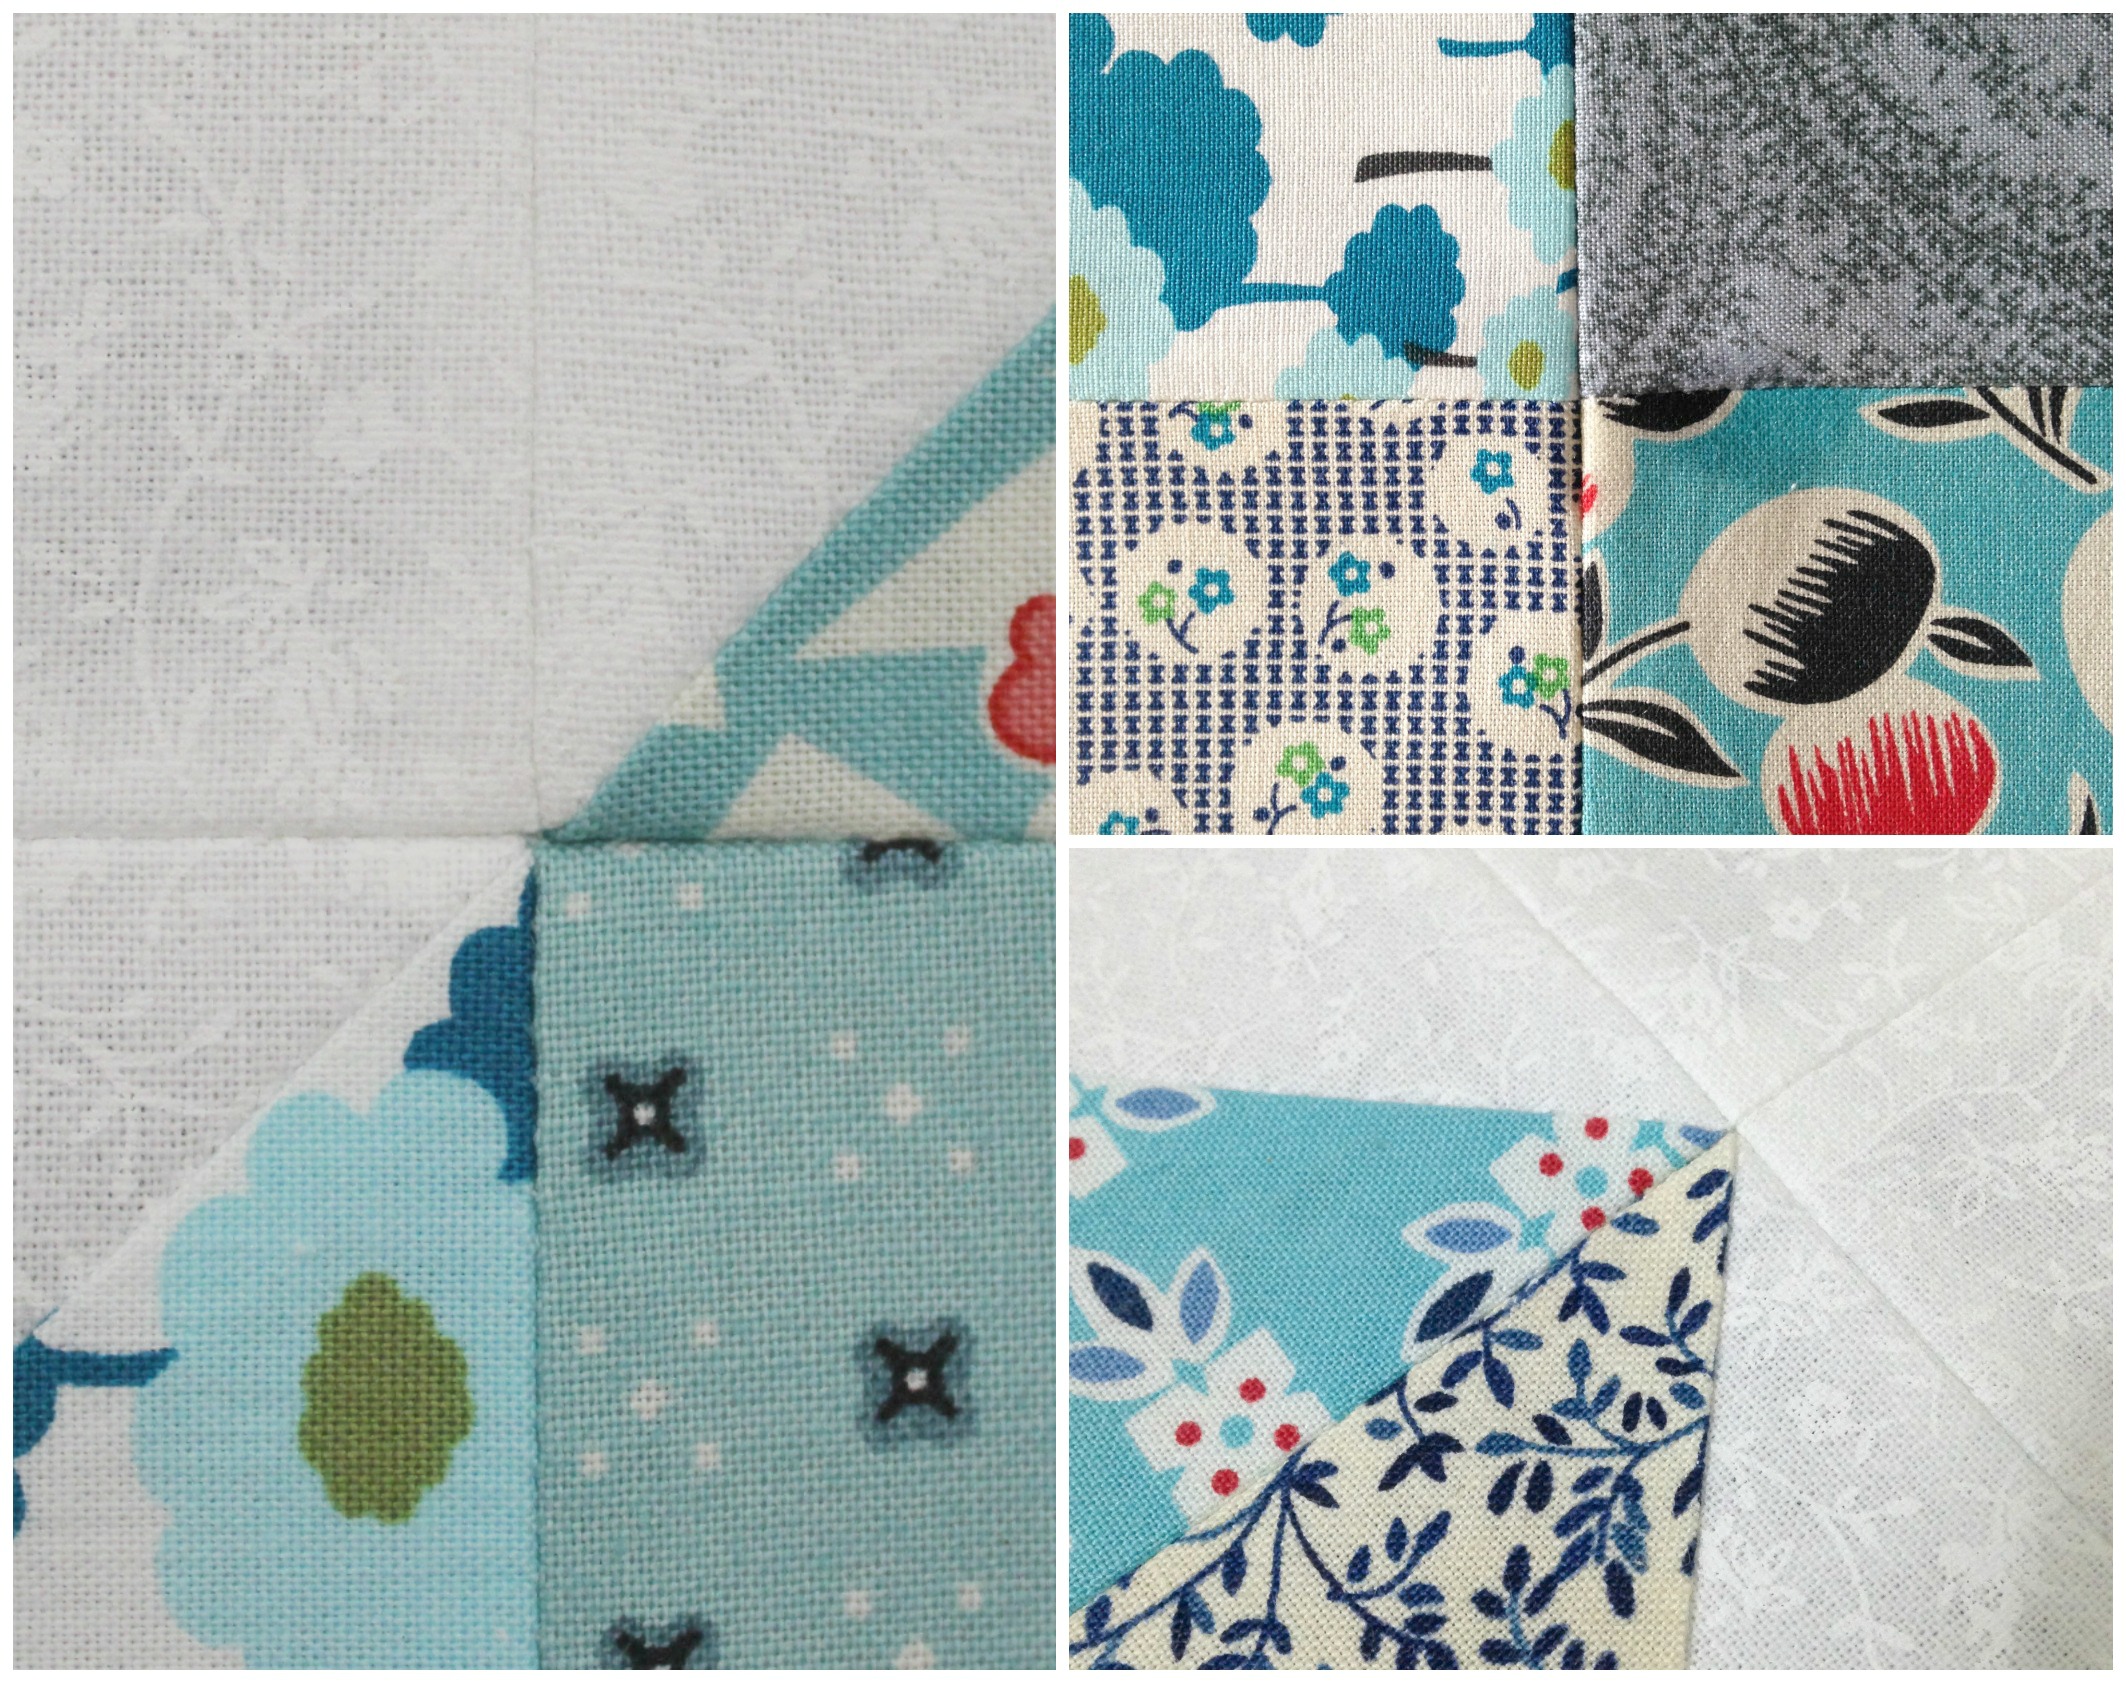
I think the thing that I loved most about using these fabrics was the gentle softness in their handle. You know how sometimes you can buy those cheap, nasty like solids that feel rough and stiff and the weave is just slightly more open than it should be…? Well, the Cotton Supreme Solids are the complete opposite to that! They’re like luxury to touch and use, and feel almost satin-like between your fingers…Hmm, heaven! And because of this, they were such a pleasure to sew with! I found it so easy to press, trim and piece the fabrics exactly the way that I wanted without having any unnecessary fuss with fraying edges or unwanted movement when it came to quilting it. And it’s those kind of experiences that make quilting the best thing ever!!

CrownofThornsMiniQuilt4

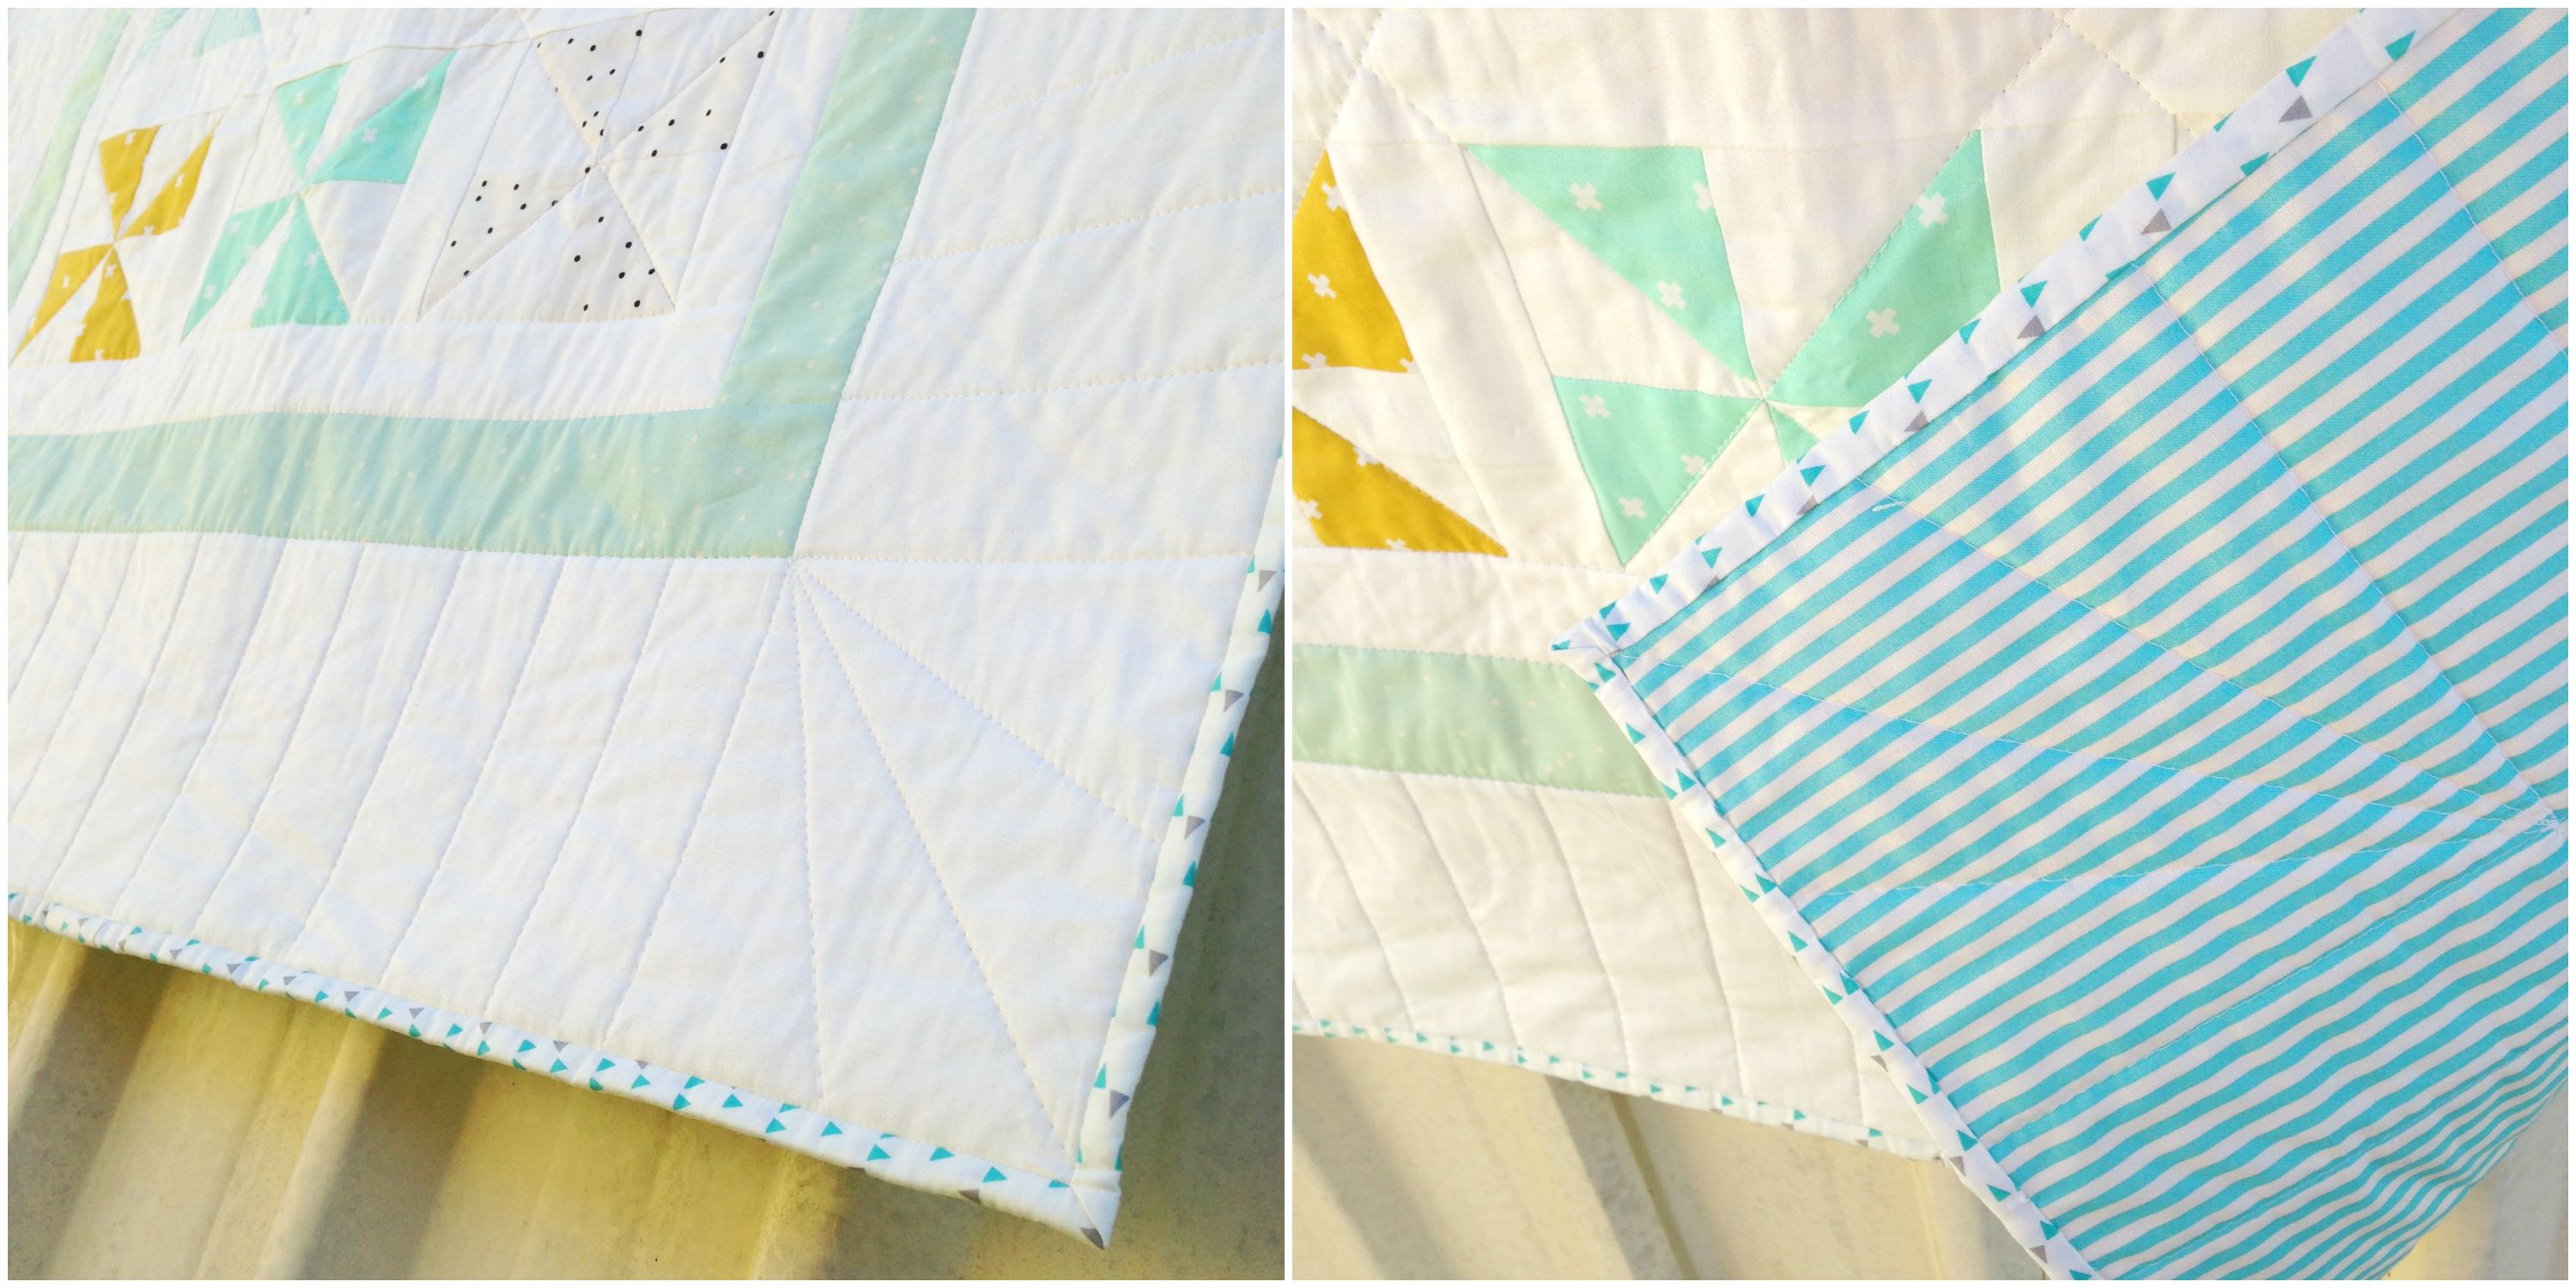
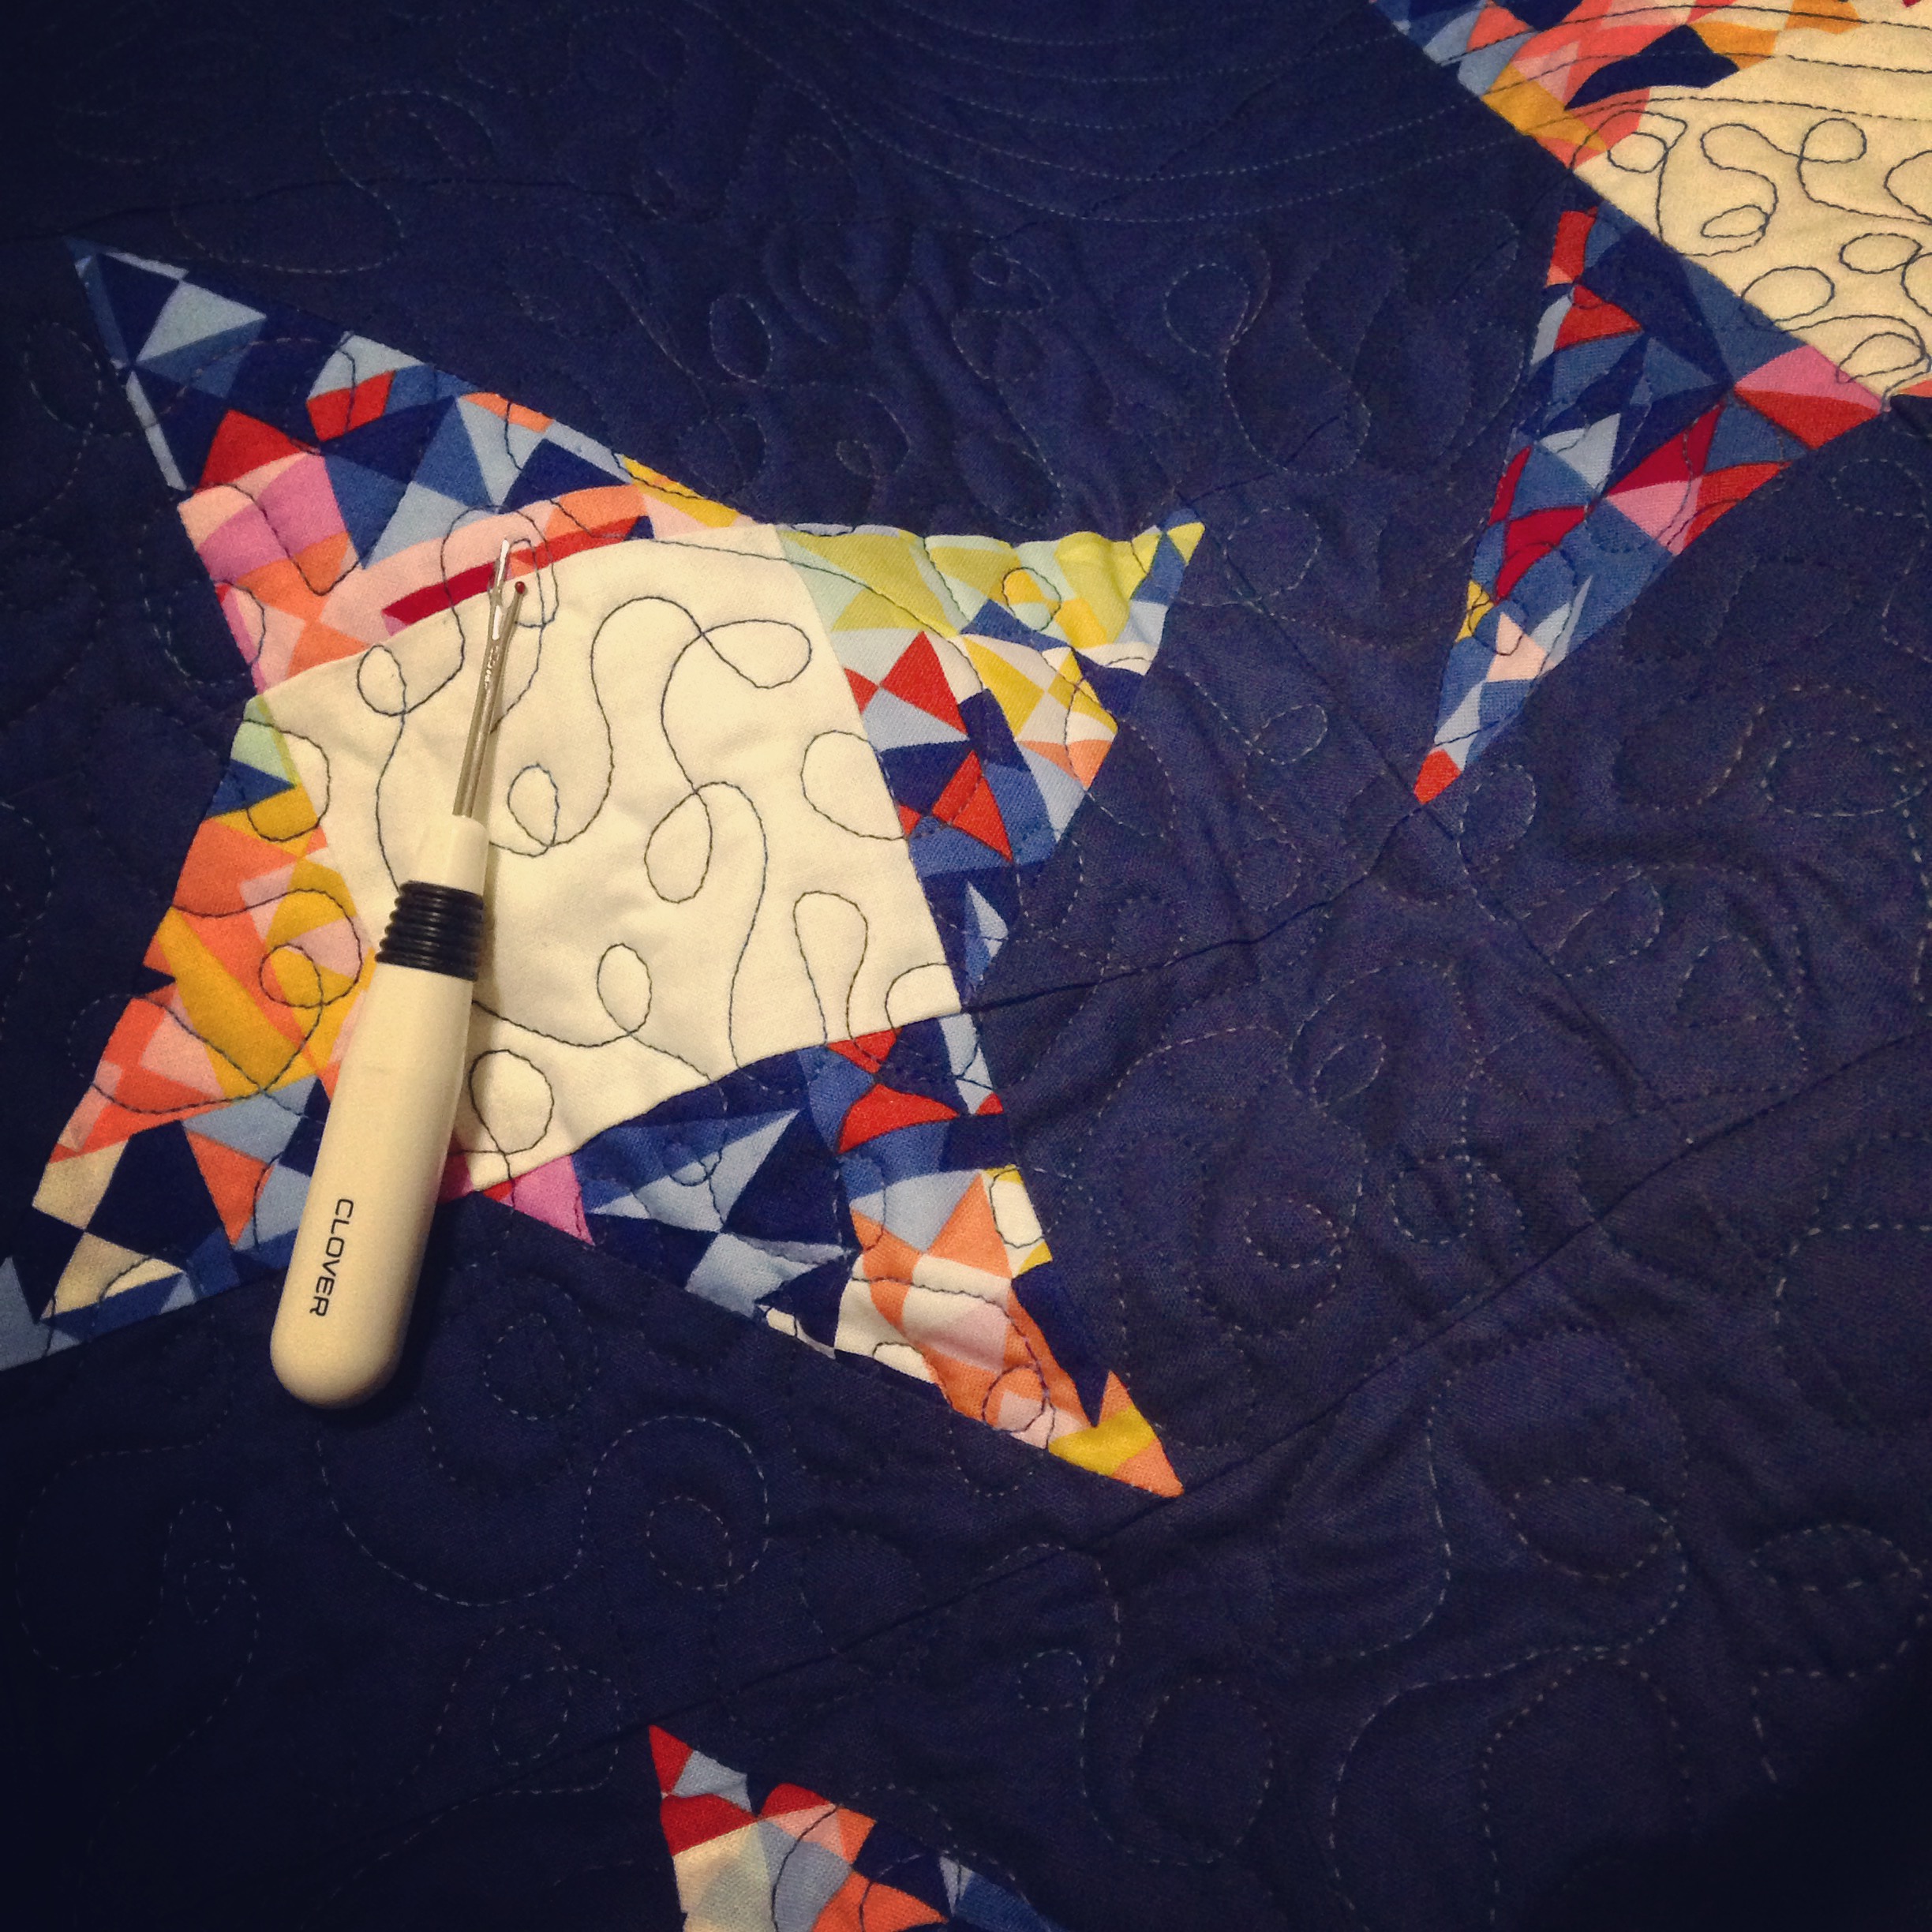
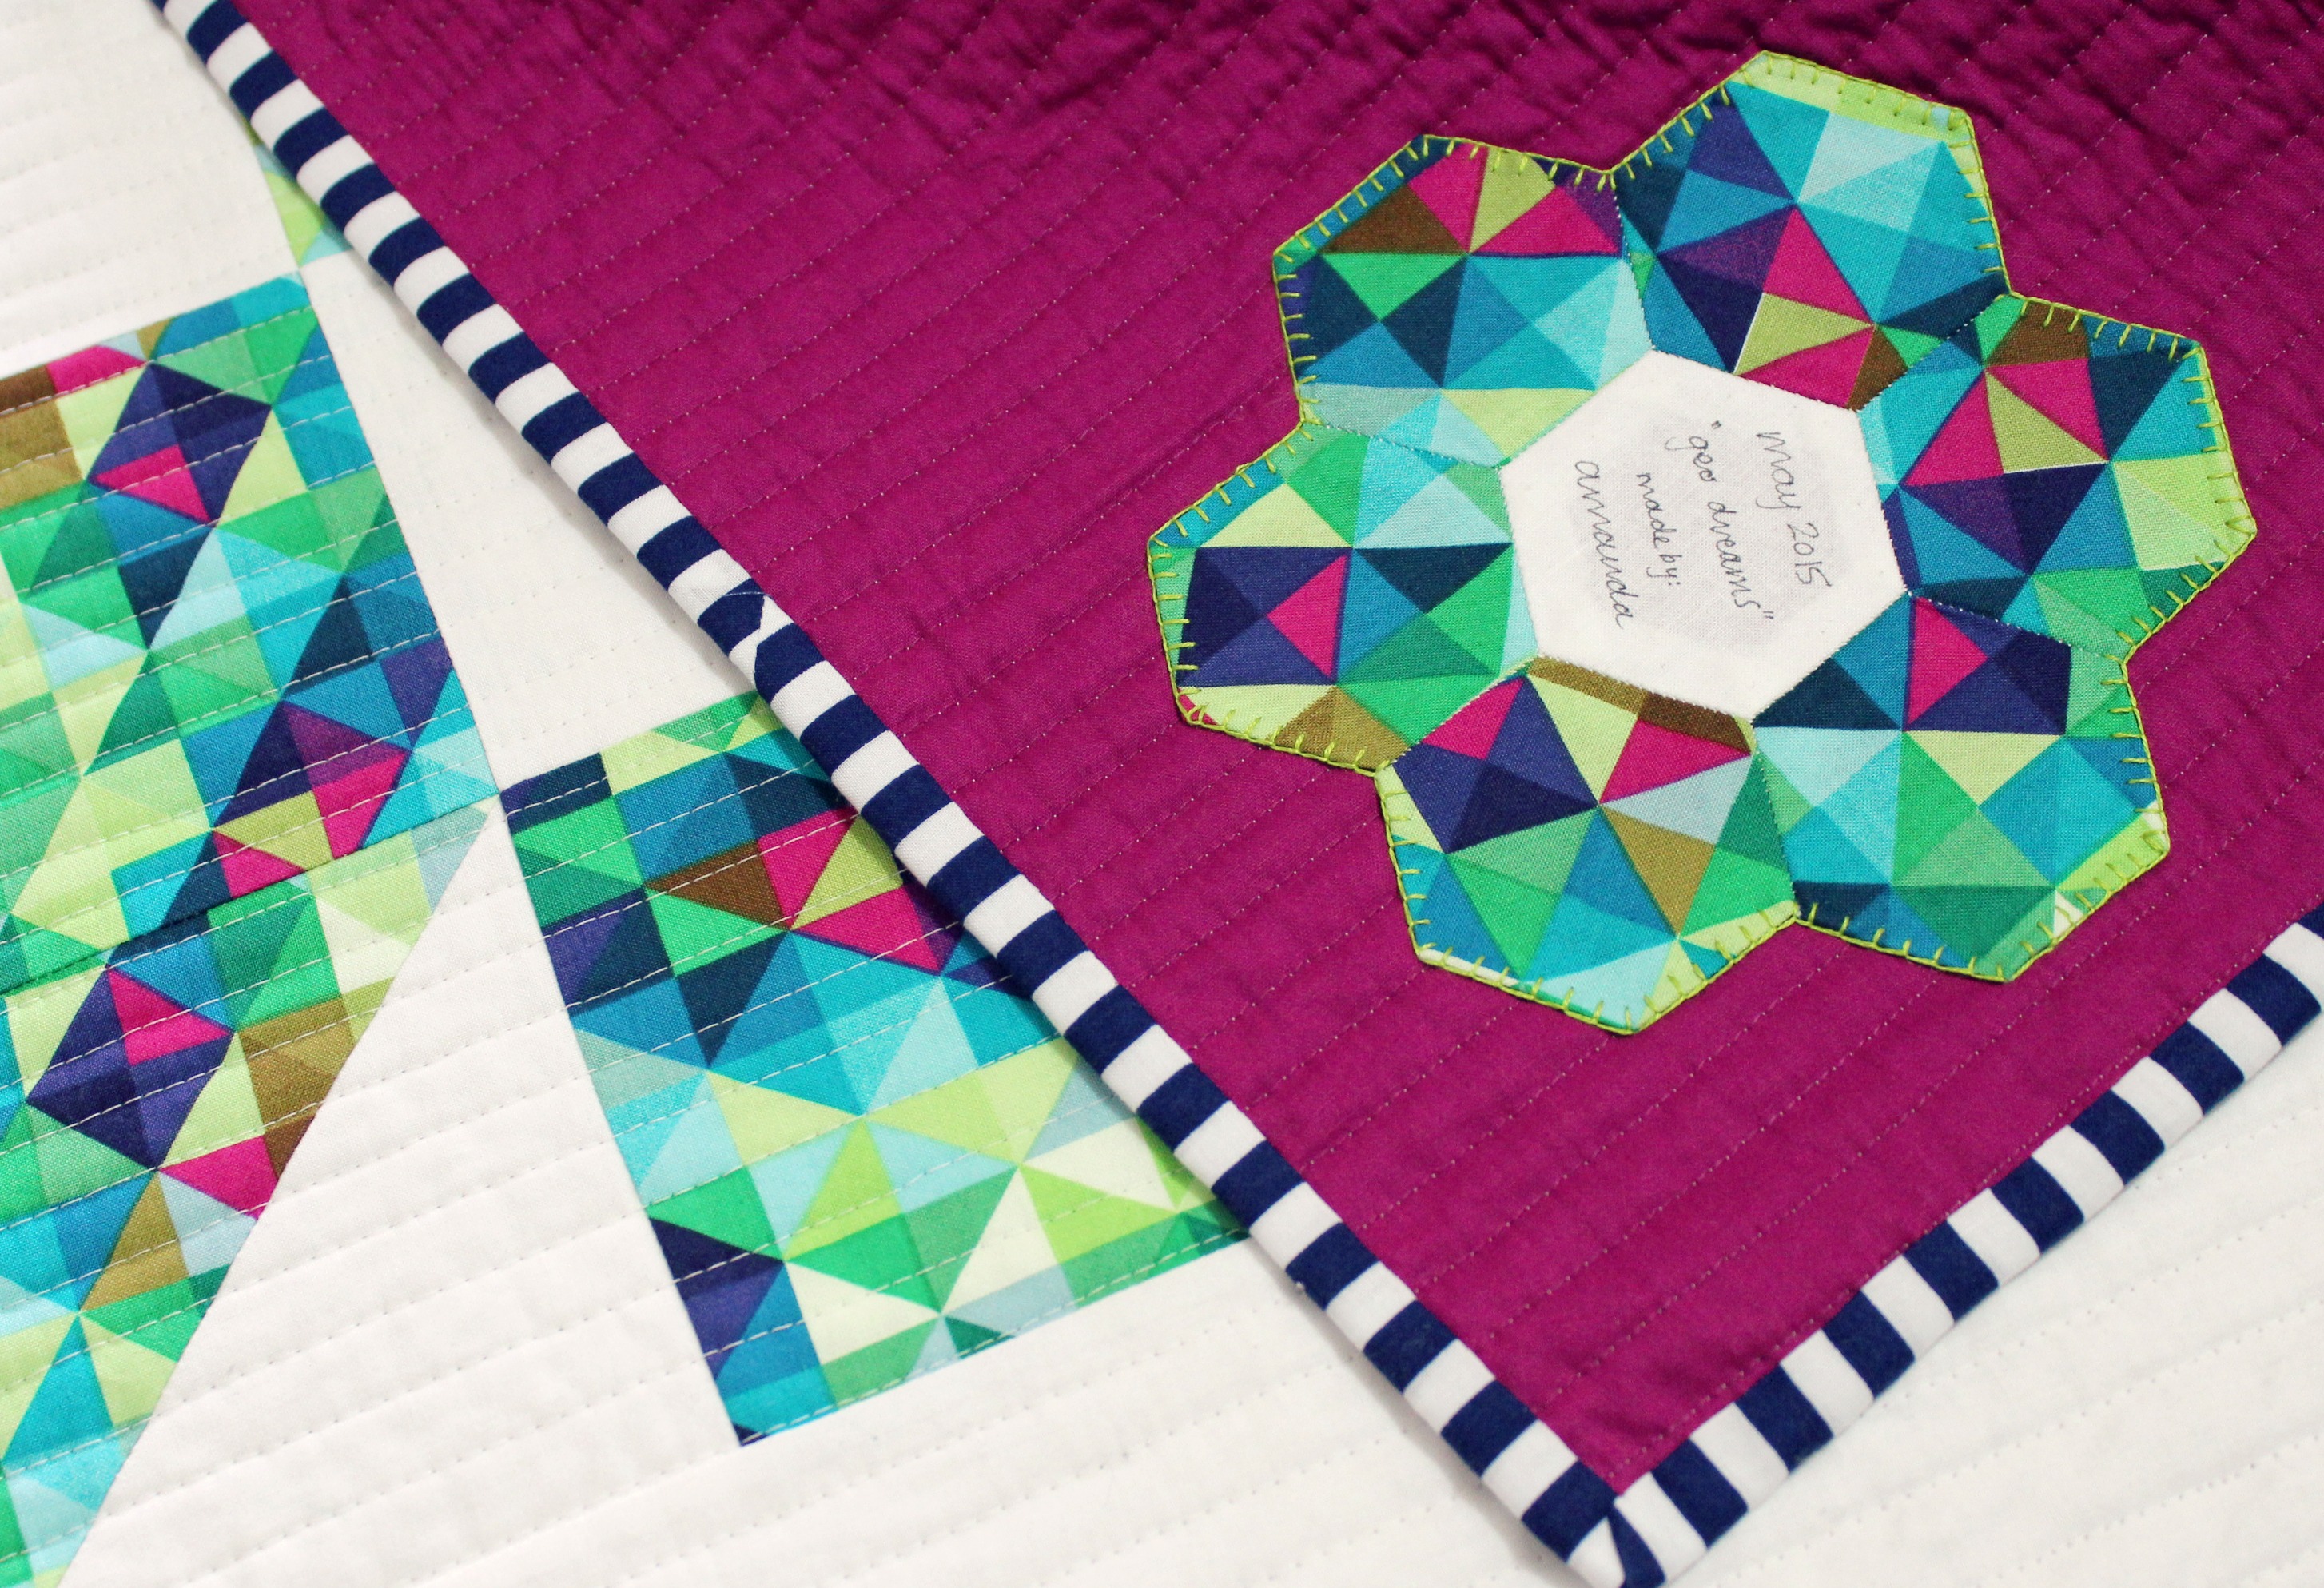
For the quilting, I chose to explore a design I had never really attempted before: the grid! I quilted the lines kind of off-set to the Crown of Thorns block just to add a little bit of interest and movement to the surface of the quilt. It also gave me a great excuse to put to use my new Clover Hera Marker and to see if all the fuss around it was worth it! (And it is, by the way!) Being able to mark my lines before quilting them gave me a lot more confidence in being able to sew a decent straight line while keeping the grid pattern perfectly spaced and even!

CrownofThornsMiniQuilt6

Now, if you yourself want to try out these fabrics and see just how wonderful they are to use, RJR Fabrics have hooked me up with a Fat Quarter bundle with every single Cotton Supreme Solid fabric that I’ve used in my mini quilt to GIVEAWAY to you!! Yay!

RJRFabricsBundle

To enter, all you have to do is comment on this post with what you would love to make with these fabrics if you’re the lucky winner! The giveaway is open internationally and the most creative answer will win! THIS GIVEAWAY IS NOW CLOSED!

And also, because I’ve had so much fun making this little mini, I’ve made a tutorial for my YouTube channel showing you how to make it!

Enjoy!

Measurement and cutting info:

To make the quilt top you will need to cut from the white fabric:

– x16: 5″ squares

– x5: 4.5″ squares

– x2: 16″ squares

From the grey, cut:

– x4: 4.5″ squares

And then from each of the 16 colours, cut:

– x1: 5″ square

FINAL BLOCK SIZE: 20.5″x20.5″ approx.

To make the rest of the quilt you will need:

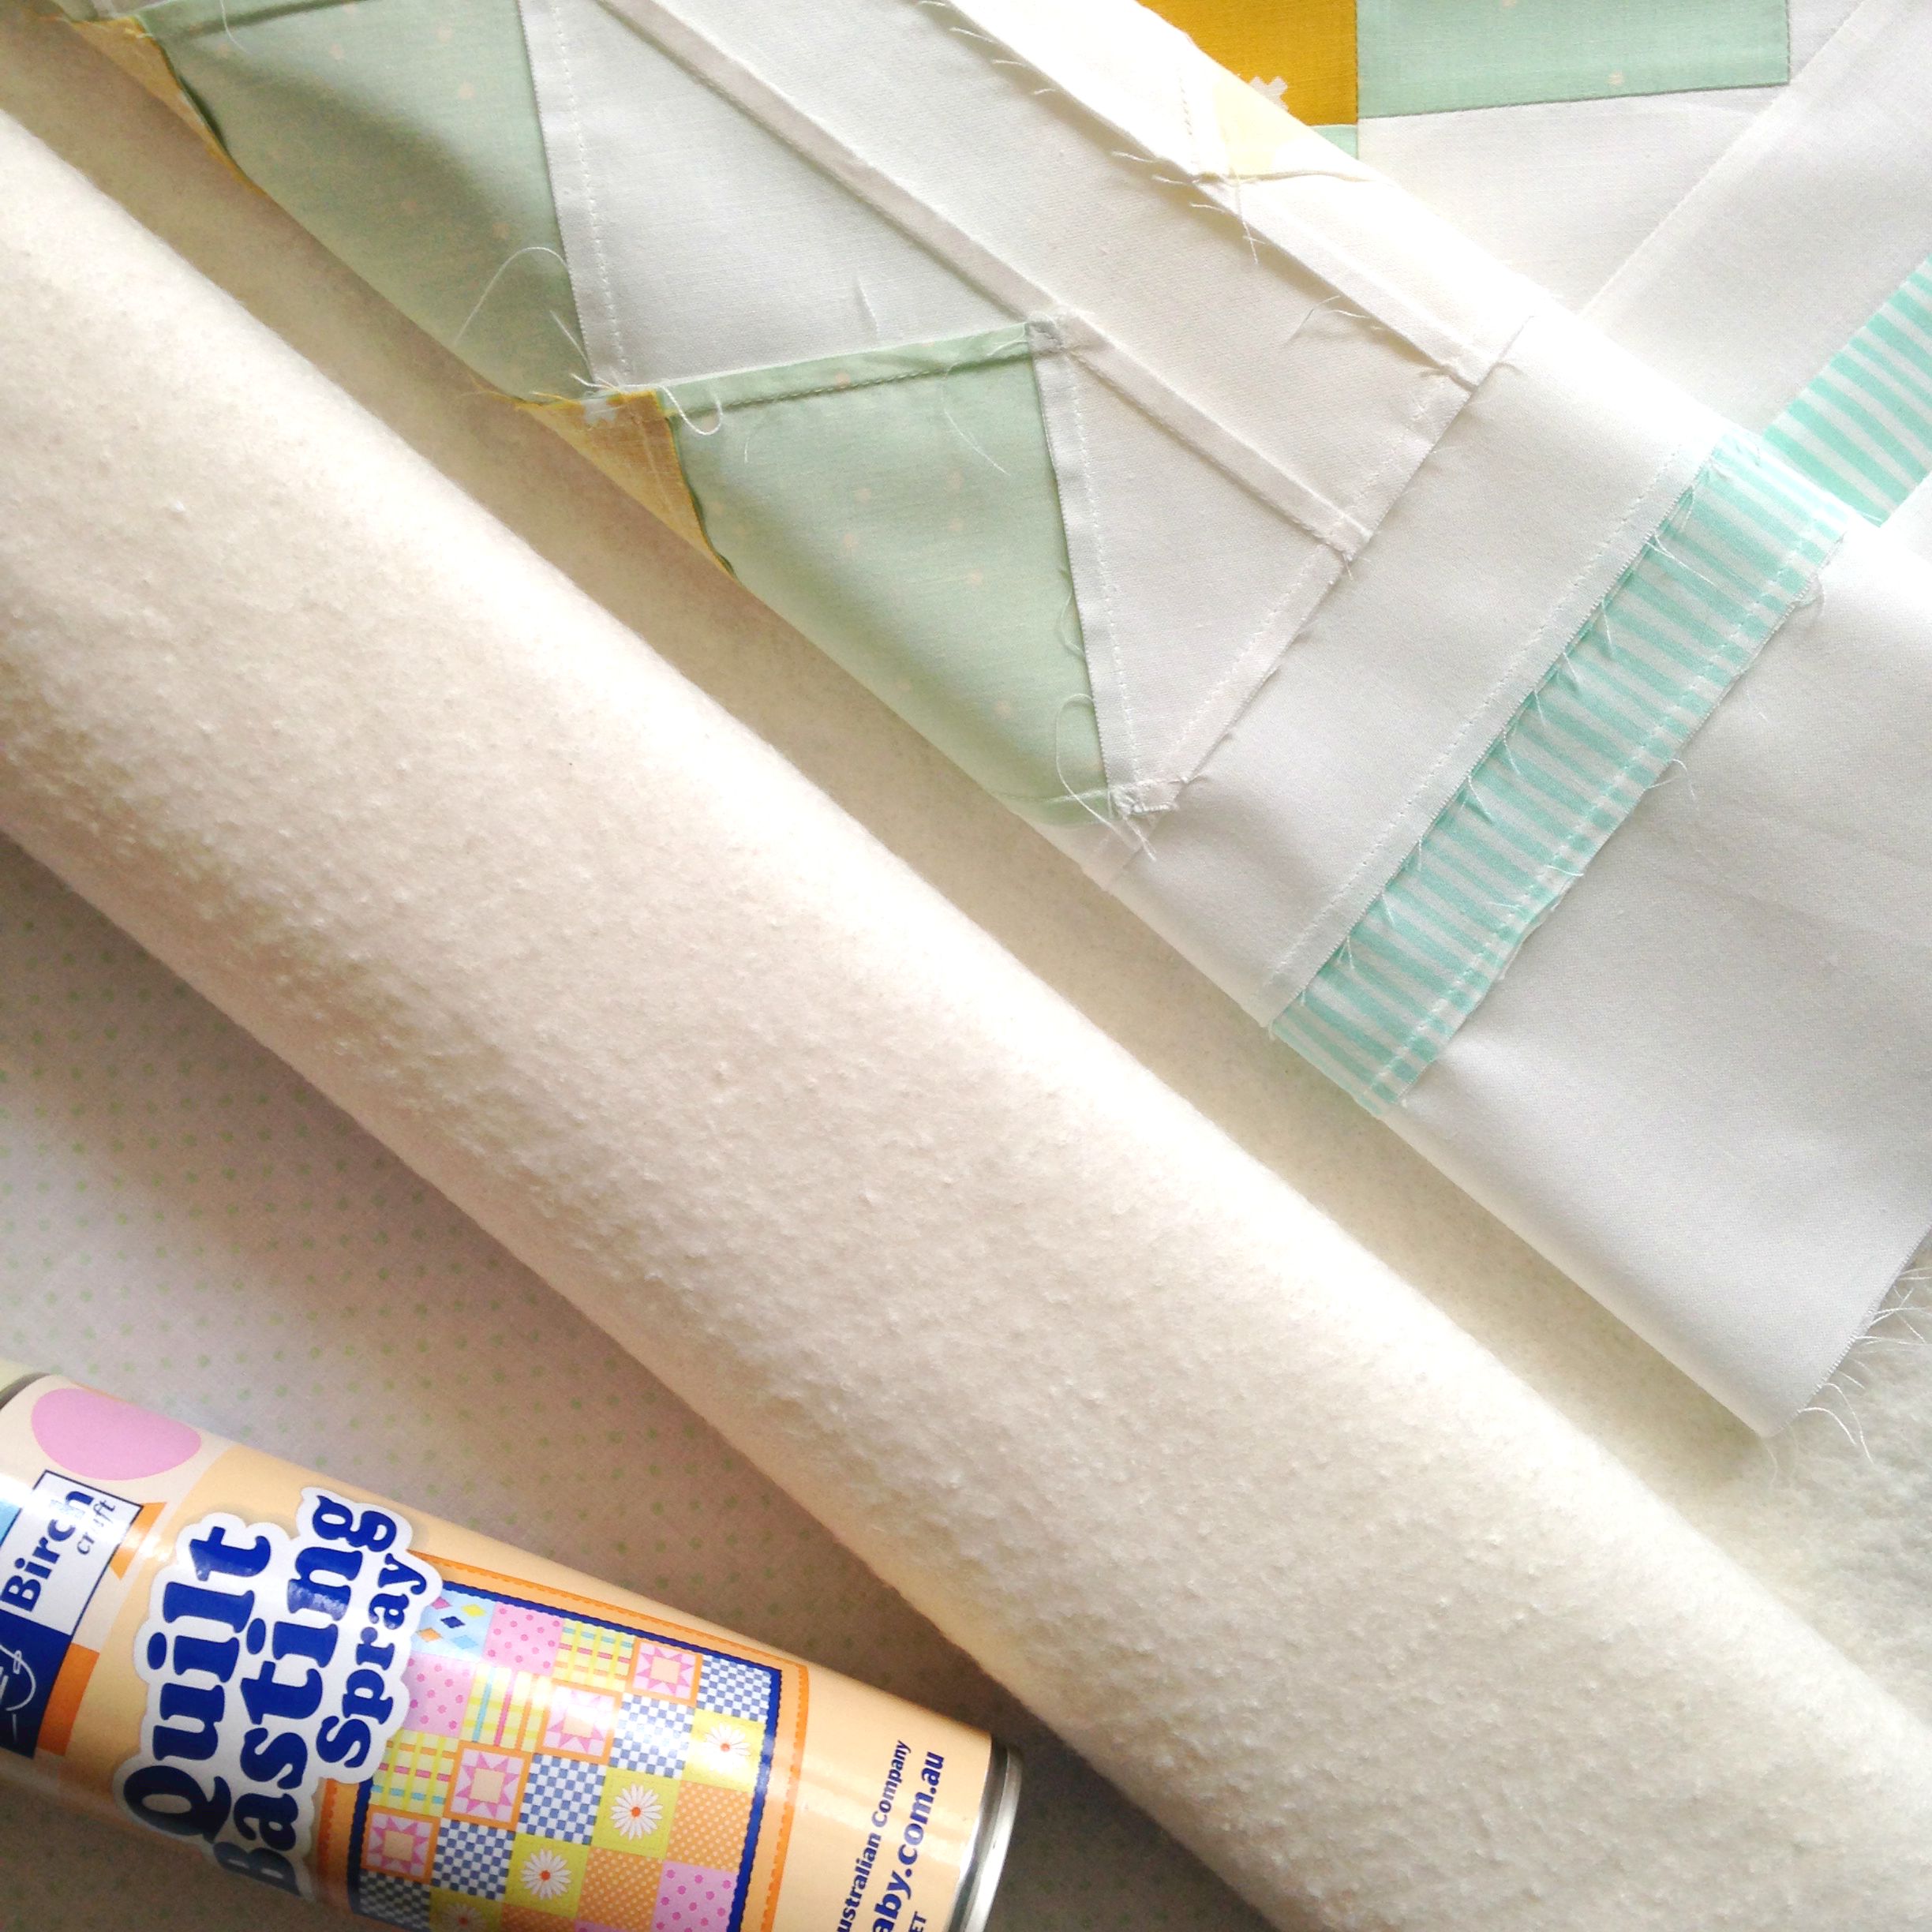
– x1: 36″x36″ square of backing fabric

– x1:36″x36″ square of cotton batting

– 12″xWOF cream fabric for the binding (cut into x5: 2.5″ strips)

FINAL QUILT SIZE: 30″x30″ approx.

Cotton Supreme Solid Fabrics I used:

Optical White (33): quilt top and backing

Graystone (155): quilt top centre

Linen White (32): binding

Colours – from lightest to darkest in colour groups:

Banana Cream Pie (336) / Carrot (131) / Mandarin (159) / Chilli Pepper (49)

Meadowland (352) / Grass is Always Greener (347) / Aloe Verde (349) / Shamrock (109)

Pool Side (327) / Turks & Caicos (292) / Bora Bora (328) / Denim (106)

Hydrangea (214) / Opera Mauve (123) / Amethyst (215) / Grape (121)

May we just take a minute to appreciate how awesome some of the names of these fabrics are! I think my favourite would have to be ‘Pool Side’! It’s currently winter in Australia and I couldn’t think of anything better than being pool side, drinking up the glorious warmth of the summer sun and watching the light sparkle on the surface of the water! Ooo, heaven!

CrownofThornsMiniQuilt5

If you’re keen on giving this mini quilt a go, feel free to share your results with me on Instagram, Twitter or on my Facebook page!

Also, if you would like to know more about the RJR Supreme Cotton Fabric Blog Hop and are curious to see what other quilters have made using these fabrics, check out their Facebook page!

A big thanks to Laura and the team at RJR Fabrics for inviting me to join this Blog Hop! It’s the first one I’ve ever been a part of and I’ve had so much fun playing and making with such lovely fabrics!

RJR Solids Blog Hop banner

Happy Sewing, Friends!

xx

PS. Don’t forget to enter the giveaway!!!

Two Little Baby Quilts

I know I’ve possibly overshared these two little beauties throughout the past few weeks but I just wanted to wrap it all up by showing you the final finished quilts in all their glory before being posted to their final homes!

And aren’t they just lovely!!

IMG_4670

Words really can’t describe just how happy I am by how darling they’ve come out! Everything just works. The blocks, the fabrics, the colours, the quilting, even the binding and backing I chose to use. They all just work so well together! Never have I had a brief go so well and match exactly to what I was planning in my head! I love it when that happens! Yay! 😀

So, shall we do a quick low-down of each quilt? Just so we can say goodbye together…

Let’s start with the Granny Squares Block Quilt.

GrannySquaresBlockQuilt

This was the first time I had ever attempted to make a Granny Squares Block. I had always looked at it and thought, ‘Geeze, that looks complicated!’ But after delving more into how the block was pieced together, I realised just how incredibly simple it was to make and I literally jumped straight into it!

You can check out the block tutorial I made right here!

I loved matching the adorable Cotton+Steel Basics fabric with some of the similar coloured Art Gallery Fabrics (AGF) that I already had in my stash. The direction and shapes in the prints added such a great depth of character, movement and sweetness to the quilt so much that every time I stepped back to observe it, a squeal of delight came out my mouth!

Then, the way that I quilted it made me fall in love even harder! I decided to do a grid-like-pattern that was sewn off-set to the squares in the block.

IMG_4575

To make it easier for me to get sharp and precise straight lines, I used my Clover Hera Marker to ‘score’ or ‘bruise’ my ‘to-quit line’ on the top of the quilt. I then simply followed this line as I quilted, resulting in this lovely even design!

GrannyDuo

When basting this quilt, I also came across a beautiful batting that I’ve always wanted to use, but always thought it was too expensive to buy. The one that I was recommended to use by my always-so-helpful friend Bitza at my local Spotlight, was a bamboo/cotton blend batting made by Legacy that didn’t cost the earth or empty out the balance of my bank account!

BambooBlendBatting

It was such a delightful batting to work with! Super soft to the touch, lightweight and dreamy, easy to baste and quite literally glided like butter through my machine! Oh. My. Gosh. I was in love! It’s going to be really hard to now go back to using an all cotton batting!

GrannySqauresBack

To finish this little delight, I backed it with a darling lime pin-spot fabric and used the leftover ‘Hello Bear’ black spot fabric from AGF for the binding. It simply came out perfect!

+++

PinwheelQuilt

Oh. The Pinwheel Quilt! This came together so quickly and perfectly that I could almost cry at the ease of it!

I always love a good little pinwheel and I think they’re just so ideal for little kid quilts! They’re super-easy to piece together and are the perfect block to use up all of those leftover HSTs you’ve got floating around your sewing room!

You can check out the tutorial for this block here!

Again, for this quilt I used a mixture of the Cotton+Steel and AGF fabrics paired with an off-white solid. I also chose to incorporate another dominate type border sash around the blocks to ‘frame’ the main focus of the quilt.

IMG_4546

With this quilt, I tried my best to really ‘echo’ or be inspired by the shape of the pinwheel in my quilting. As you may know by now, I love to quilt my quilts using straight lines. And with this, I always love to challenge and stretch my self with the different ways I can do that by exploring direction, shape and density. I think you can really see that with this quilt, especially around the outside border and corners. (BTW: I love doing those little fan-like-designs in the corners, they look so Art Deco-y!) To help achieve the beautiful lines in this quilt, I again used my Clover Hera Marker to create lines in the right positions before quilting over them.

PinwheelFront&Back

To finish this little lovely, I backed it using a teal and creamy white stripe fabric and used a AGF fabric with little triangles on it for the binding.

+++

TwoLittleBabyQuilts

I’ve had so much fun making these gorgeous little quilts and I’ve loved sharing every single step along the way with you! It also makes me cringe-worthy happy that I’ve even inspired some of you to make these blocks and turn them into beautiful quilts for yourselves!

Thanks to everyone for all of your lovely comments and encouragements throughout the last few weeks when it came to these quilts! It truly means a whole lot!! 🙂

So now, let’s all say ‘cheers’ and wish the lucky little bubbas and mummas-to-be all the best!!

Happy Sewing, Friends!

xx

An Update From My Sewing Room… #4

Woah! Talk about blog neglect! It feels like ages since I last posted! Safe to say, lots of busy things have been happening in this little room of mine and I’ve finally found the time to tell you all about it!

+++

First off, I took a day last week to finish one of the two baby quilts I’ve been currently making. It was this one with the little Pinwheels in the centre…

IMG_4386

Because of the design I chose to quilt, it only took me a few hours to get all of the quilting finished! Yay! And I just have to say, I absolutely love how it’s come together!

When I was quilting, I took the opportunity to use a special tool I had recently purchased to help mark and quilt straighter lines. It’s called a Clover Hera Marker. It’s an awesome little tool that helps to ‘mark’ or ‘bruise’ lines into the fabric so that you can either follow them, match them up with another point or sew over.

IMG_4546

Since using it, I’ve seen a definite improvement in my quilting and how neat my lines seem to be. If you’re having issues with quilting straight lines, I would 100% recommend you to use this tool to help you out! It’s brilliant!

Tomorrow I’m hoping to retreat back into my room and get the second baby quilt finished! This is the one with all of those super-sweet Granny Squares blocks that I’ve fallen head-over-heels for! It’s such a cute little quilt and I can’t wait to see what it looks like once finished!!

+++

During my ‘down-time’, I’ve been very patiently unpicking the horrible FMQ mess I made to my ‘Like Diamonds In The Sky Quilt’ sometime last year.

IMG_4537

When I posted this picture on Instagram and Facebook, I had so many lovely comments from you asking what was wrong with it as you all thought it looked okay… Well, that was so super-nice of you all to say that, but to me, the stitching just doesn’t suit at all! It’s way too busy and ‘messy’ looking for the overall feel of the quilt. The squiggly stippling line clashes with the already busy layout of the quilt top and geo-print fabric I used and I now can’t stand the floral fabric I used as the backing! Urgh, what was I thinking! Nah, everything about it I just hate and it absolutely needs to come out!

So almost every night for the past week or so, I’ve been unpicking, unpicking and unpicking while watching either Game of Thrones or Studio Ghibli movies like Laputa: Castle in the Sky, The Wind Rises and Kiki’s Delivery Service! And even now as I write this, there’s still more to unpick! Phew!

But with patience and a good cuppa to the side, I’ll get there and I’ll be so much happier with it once it’s free and can be made into the beautiful quilt that it is! And also, in a bit of an odd way, I’m finding unpicking the stitches quite relaxing and strangely hypnotic… It gives me a chance to just sit and think about things while keeping my fingers busy… So it’s not all bad! 😀

+++

Another thing that happened last week was the opening of my Etsy shop! Hoorah!!

LittleWalletsFour

In there at the moment are a few Little Wallets that I always love making and usually sell the best, plus a sweet baby quilt perfect for any new little girl in world!

I have a few new Little Purses that are almost ready to go on sale and another little quilt that I only just started yesterday afternoon.

IMG_4567

I’ve even already got a name for it: “The Stash Quilt’, as all of the 2.5” squares have come from my stash of scraps! There are fabrics in there that I had completely forgotten about and swooned all over them as I pulled them out! I love it when that happens!! So once I’ve got all of these little squares pieced together, I’ll sash it with either a white or cream homespun cut at 10″ or 15″ and then get quilting it!

You know, I just had a thought… This ‘to-be quilt’ reminds me so much of those I-Spy Quilts that are made for kids! There are so many great little prints to search for and discover! Love it!

+++

And finally, over the past few weeks I’ve been working on a video tutorial that seems to be taking forever to edit and perfect! It’s all about how to make one of those simple half-aprons using just one fabric.

IMG_4561

The bulk of the video has been edited, but it’s just the little cutaway parts of the finished project and my speaky-bit at the start and end that need to be filmed and added. I just haven’t found the right time to get it done! Plus our internet is having issues at the moment, so uploading a high-def 10 minute video will literally take the rest of the year to upload! That’s how bad it is!! And I’m still also tossing up whether I need to write a pattern for it, as it could be possible for people to get a little lost in what needs to be done, especially during the cutting step… But apart from all of that,  I should have it ready to go up by Friday! (I’ve decided to change my upload day from Sundays to Fridays. I’ll be posting another video soon explaining why this is!)

+++

Now, I think that’s everything up to date in what’s been happening in and out of my sewing room…

I’m curious (and nosey), what have you been up to in your sewing/quilting/crafting adventures?? You’re more than welcome to leave a comment letting me know!

Happy Sewing, Friends!

xx

PS. I can now finally share with you the little mini quilt I made using the block I made in my Diamond Square Block tutorial!

IMG_4539

During the past week I held a little giveaway on my YouTube channel as a thank you for 5000 subscribers, and this mini was part of the main prize! Sadly, the giveaway is now closed, the winners have been announced and all prizes are on their way!

Thank you to everyone who entered!!

x

An Update From My Sewing Room… #3

A very good afternoon to you friends! I hope you’re doing well! Me? Well I’m rugged up in a scarf and woollen jacket, with a lovely cup of tea beside me while I write this post to help keep my fingers warm! Ahh, winter… It’s nice to think about when it’s hot out but when it really comes along, you hate it with every inch of your numb digits and extremities!

Anyway, today we’re delving again into the fun things happening in and around my sewing room! Lots of things have been happening and I’m so excited to share them with you!

Right! Let’s get started!

Last week, I bunkered down and got my Diamond Square Block Quilt finished to finally gift to one of my good friends for her 50th birthday! Although Donna’s actual birthday was at the end of May, she received her quilt over a month late with exclaims of excitement and thankfulness!

IMG_4433

It was quite funny to watch her reaction: as she was talking, she kept folding and unfolding the quilt to look at it and inspect it! I’ve seen many reactions to people receiving quilts but this one, well, it was super lovely to watch!

I’ve also just realised I haven’t shared with you the final finish of the quilt! The quilting design I chose was one I’ve been wanting to try for a while now and have been waiting for the right quilt-top to come along for me to try it on. It’s the technique where you sew two parallel lines next to the seam joins of each block/unit to create a grid-like surface pattern. (Ooo, did I explain that well enough?)

DonnasQuilt1 DonnasQuilt2 DonnasQuilt3 DonnasQuilt4

I’ve seen this type of quilting on so many quilts when on Pinterest and I just fell in love with how simple but effective it seemed to be. I love how it adds a subtle outline to the blocks as well as adding that secondary grid-type pattern to the quilt-top. I definitely think I’ll try out this method again, especially when I’ve made a quilt that has quite a distinctive design/pattern to it!

+++

Over the weekend, I shared a new quilt block tutorial with you on my YouTube channel! This time round it was the super simple and insanely cute Pinwheel Block!

I thought it would be nice to share the uber-simple way I make my Pinwheels in a quick mini tutorial after using the block in the second of two baby quilts I’m making for a friend! Here’s that quilt-top for you now…

IMG_4386

I’m hoping to set aside some time next week to get this baby quilt and the other one (the Granny Squares Quilt) quilted and finished! I have a fair idea of what types of designs I would like to quilt onto each, but I’m still up for being persuaded with something else if I see it on Pinterest!

And as always, I do a little shout to those of you will be giving this tutorial a go, to share your finished block with me on Instagram, Twitter or on my Facebook page! I love, love, love seeing what you make and in turn, love being inspired by how talented you are! 🙂

+++

Speaking of all things YouTube, sharing, talent and friendship, on Monday morning I woke up to my end-of-year goal surpassed by reaching over 5000 subscribers on my YouTube channel! What!?!?

IMG_4455

I sometimes wonder just where all of you are coming from!

Although this number is practically minuscule compared to other channels that are out there, this number of people was something I never thought I would achieve! I was totally happy with just having 50, but 5000, gosh my brain hurts just thinking about how many people that actually is!

Thank you!

Thank you to each and every one of you for supporting, commenting, liking, encouraging, contributing, chatting, sharing and hanging out with me! I never actually thought anyone would watch or be interested in what I make or share. It truly, truly, truly means a lot and your support has given me so much more confidence within myself as a person and as a quilter! I feel so lucky and humbled by how many lovely friends I’ve made since starting this whole thing! It makes me so happy to be in touch with others who just ‘get it’! Who understands that rare passion, desire and drive we feel for making beautiful quilts, for swooning over richly designed fabrics, for buckling at the sight of beautifully nested seams and for making quilts for others, not for the glory or compliments it’ll give us, but because making and gifting a quilt for someone special is one of the best feelings you can give and receive.

So again, thank you!

And, just a heads up, make sure to be watching my channel this coming Sunday (12th July 2015) for a special GIVEAWAY (!!!) as a thank you for just how wonderful I think you all are!

+++

And now onto the last exciting bit of news for today!!

Tomorrow I’ll be publishing another fun little blog post where I’ll be sharing with you the finished Mini Quilt I’ve made using these beautiful coloured solids!!

MysteryMiniQuilt!

Ooo, what could it be…??

All I know is that I’m completely in love with the finished result and I hope you will be too!!!

Eek!!

Until then,

Happy Sewing, Friends!!

xx

How I Match My Fabrics!

Have you ever had one of those weeks where you’ve had so much planned to do but by the end of the week, hardly nothing has been done?

Yeh, that’s one of the weeks I’m currently experiencing!

Here it is, a windy, chilly Thursday afternoon and I find that my sticky-note to-do list is still full of those task I wanted to get done on Monday! Gahh!! When did life get so busy and full?!

Anyway, let’s all calm down and allow me to use this small amount of time I’ve discovered this afternoon to write this (late!😁)* post and share it out to the world! Yay!

So quite recently, I’ve been asked by a lot of you to share the way, the method and/or the steps I take when matching fabrics for a block/quilt. I thought, ‘what a great idea! I’d love to share that with you all!’

So over the past weekend I made and uploaded the following video onto my YouTube channel, giving you an insight into how I do this when starting from just one main fabric. I decided to use three different print fabric examples in the video so that you could get the gist of how I do it!

If you have a particular method or style when it comes to matching your fabrics, please free to share it in the comments below!

Happy Matching, Friends!!

xx

*It’s okay, I know you all don’t mind that I write and publish out blog posts a little later than usual. And I know that you understand that life’s a busy ol’ mess and sometimes things don’t go according to plan. And you know, that’s okay, because there are situations in life that could be a whole lot worse than a busy and unstructed week. (Wow, I just got all like deep-thinkery and stuff about the situation and I scared myself a little bit… ohh… It must of been the 85% Dark Chocolate I nibbled on earlier. Which, may I say is horrible! Ergh! It was way too bitter! My disappointment levels are sky high right now!!! All I wanted was a nice little piece of chocolate with my afternoon cuppa, but instead was hit with a mouth full of saliva-sapping cold-hearted bitterness! 😭 Oh gosh, I’m rambling now…. I’m sorry. Must. Stop. Typing. Uhhh….yep…I’m going…I’m stopping…right now… uhh… Bye!)

An Update from my Sewing Room… #2

I can tell you a secret?

(Well, it’s not really a secret. More of a thought, actually.)

I really loved having the opportunity to sit, write and share what had been happening in my Sewing Room last time and the response to that post was really encouraging and supportive! So because of that, I’ve decided to make this into a bit of a series to explore and to use as a ‘newsletter’ type thing, keeping you updated on things that I don’t share so much on YouTube, Instagram or any other of my social networky places. Sound good? Good!

And also, I like writing these types of posts as I love to be able to go back and read about what I was up to this time last year (yes, I am the type of blogger that actually likes to re-read what they wrote a year ago!), or to re-fresh my memory on the progress I made with quilts-in-the-making. I especially like looking back on posts about quilts that I give away, remembering what they looked like and re-living the thoughts (and struggles) I was facing when making them.

So, where to start off this time… Hmm…

Let’s start here!

The other day I did share this completed quilt top on Instagram of one of the commissioned baby quilts I’m making for a friend.

IMG_4354

I’m completely over the moon with how well it’s all come together! I absolutely loved how the fabrics shone, glimmered and danced in the winter sunshine and soft breeze on the day I shot these photos! It was a beautiful moment where my crazy quilt-nerdisms went into hyper-drive and I squealed and giggled to myself over its cuteness!

GrannySquaresQuiltTopDuo

All up, I made five Granny Squares Blocks and had a hard time deciding whether to leave in the top left yellow spot block or this green spot block (ie. the first block I made at beginning!)

My First Granny Squares Block!

I ended up using the yellow spot block as it seemed to balance out all of the mint-green fabrics I had used. It seemed to give the quilt an over-all subtlety and softness that I really like.

Moving on to baby quilt number two. This time around I’m making a small bunch of 5.5″ Pinwheels using the left over 3.5″ squares I over cut for the Granny Squares Blocks. (They really are super adorable!)

Pinwheels1

I’ll also be using up any left over 2″ sashing I used on the previous quilt to sash the Pinwheels together. I think I’ll then add the same kind of border I did to the other one as well, but instead use the soft yellow spot fabric in place of the green strip border.

PinwheelsDuo

Yesterday afternoon I spent some down time finishing the piecing of the Pinwheels and then begun sashing the blocks together. I’m now at the stage where I can quite easily finish the quilt top in one afternoon or evening sewing session. (That’ll either happen today or tomorrow!)

I’ve set myself a goal to have both baby quilt tops finished for the start of next week so I can concentrate on getting them quilted. I think I’ll stick to some pretty basic quilting lines – nothing as intense as my Geo Dreams Quilt or Amelia’s Baby Quilt – as I think it’ll really compliment the softness and simpleness that each of these quilts already radiate.

(Here’s a piece of behind the scenes trivia for you: While piecing the Pinwheel Blocks together, instead listening to music like I usually do, I played season four of Adventure Time in the background! It helped tremendously to make those tedious steps of squaring up HSTs and pressing tricky seams a lot more bearable and fun! Math!)

8087079d646ea5586809f50d6d662595
Finn & Jake // IMAGE SOURCE

The next thing I wanted to share with you is a pattern that I’ve been swooning over for the past week! And it’s this one by Fat Quarter Shop

The Panda-Monium Mini Quilt!

Panda-Monium Mini Quilt by Fat Quarter Shop // SOURCE
Panda-Monium Mini Quilt by Fat Quarter Shop // IMAGE SOURCE

I’m dying to get stuck into making this sweet little mini but I just can’t… I already have my fingers in so many pies, so to speak, that I really need to calm myself down, put my patience pants on and begin it when I don’t already have so many other quilts to get finished!! (And seeing so many great versions of it being made on Instagram doesn’t help to calm my fever!!)

Oh, and I forget to mention – it’s a free pattern!! (Say what!?) Yep. A FREE pattern! I love a good freebie! Annndd, there’s also a YouTube tutorial on the Fat Quarter Shop channel showing you how to make it! How good is that?! 😀

And lastly, may I just say, how awesome is the Mollie Makes magazine?!

MollieMakes

If I could sum up everything that I want to be as quilter/sewer/crafter/whatever, this magazine is it! It’s 100% me but in pretty matte-pages form!

Although we’re a few issues behind here in Australia and you literally have to pay a small fortune for just one copy, it’s totes worth it, especially when you get cute freebies like pastel vintage buttons and DIY pincushion kits!!

+++

So that’s it this time ’round.

The weekend ahead, as usual, is full of sewing, creating, filming and editing!

I hope you’re weekend will be just as fun as mine!

Happy Sewing, Friends!

xx

TUTORIAL: Diamond Square Block

Here’s another quilt block tutorial coming your way! This time we’re looking at how to make the Diamond Square Block!

After showing this quilt I’m making for a friend for her birthday on Instagram and in the background of a few of my videos

IMG_4195

I’ve received so many requests from all you to show you how to piece this block/quilt together!

So here it is for you to make and turn into a lovely quilt, just like I have!

PS. I decided to make the following block using a range of pink printed fabrics, as I was so ready for a change from using so many blues!!

The deets…

This block is made up of x16 5″ HSTs and measures approx. 18.5″ squared.

Measurement & Cutting info:
You will need to cut:
– x8: 5.5″ white squares
– x8: 5.5″ squares from an assortment of print or coloured fabric (x1 of each)

A quick low-down of the steps to take:
1. Pair, sew, cut, press and trim the squares to make x16 HSTs.
2. Lay out the HSTs into the Diamond Square block design.
3. Sew the squares into four rows of four.
4. Press each seam on the back of the rows flat open.
5. Sew each of the four rows together to form the block.
6. Press and square up the block to finish.

For more detailed instructions on how to make this block, simply follow along with the steps in the video!

Diamond Square Block

+++

I can’t believe that some of you have already been sharing your completed blocks with me on Instagram (which I absolutely love, btw!), you’re creativeness and fabric choices always blow me away! If you would like to share your blocks/quilts with me, you’re always more than welcome to by tagging me on Instagram, Facebook and/or Twitter!

FYI: If your Instagram account is set to private and I don’t follow you, I won’t be able to see your photos when you tag me!! If this is the case, send me an email letting me know you’ve tagged me and I’ll do my best to find you on Instagram so I can give you a big fat LIKE and some wonderful words of positivity and encouragement!! 😀

Happy Sewing, Friends!!

xx

TUTORIAL: Granny Squares Block

IMG_4198

Classic. Traditional. Modern. Simple. Fun.

…Are just a few words I would use to describe this sweet, sweet block!

Previous to this, I had never made a Granny Squares Block, whether in crochet or patchwork. It was those funny little triangle edges that always threw me off… I just couldn’t understand how this block was constructed to be able to achieve those odd angled squares and triangle-ly bits. It was only after a quick search on Pinterest, where I saw this simple picture, that I finally experienced that moment of: “Ohhhhh! That’s how you do it!!” It was legit a great moment and I immediately got into cutting and piecing my first block together…

My First Granny Squares Block!

I cannot express enough at just how quick and simple this block is to construct! It’s purely just piecing squares together (in the correct layout order), pressing the seams, sewing the rows together and then squaring the block up! So. Easy.

The reason why I’ve dived head-first into making Granny Squares is because of a commission I was recently ask to do for a friend. She has two friends who are expecting babies in the next few months and so asked me to make a baby quilt for each little bubba! This block will feature in one quilt and the other quilt is currently in the planning! Because both mums-to-be don’t know the gender of their babies, I’ve been sticking to a ‘gender-neutral’ colour palette of mint greens, creams, yellows and tans, with subtle, soft prints like polka-dots, little crosses and triangles. Some of the fabrics I’ve been using are from the Basics xoxo range from Cotton+Steel and the Hello Bear range by Art Gallery Fabrics. Both are such beautiful fabrics to use and blend in so nicely with each other throughout the other blocks I’ve made…

TrioOfGrannySquares

So smitten I was (and still am) by the Granny Squares block, I decided to make a tutorial for my YouTube channel on how to make one!

So here’s how you do it!

Measurements and Cutting info:
This block is made up of x25 3.5″ squares. (You can cut your squares bigger or smaller depending on how big you wish the final block size to be!)
The block is usually made using three to four fabrics. (I’ve chosen to use four.) But can also be completely scrappy if you wish!
Of each fabric you will need to cut:
~ x12 white squares for the background
~ x8 green squares for the outer section
~ x4 cream squares for the inner section
~ x1 mustard square for the centre

FINAL BLOCK SIZE: 13.5″ squared (approx.)

Fabric bought from Kelani Fabric Obsession
~ Natural Unseeded Homespun
~ Cotton+Steel Basic xoxo in Mint
~ Hello Bear by Art Gallery Fabrics: Firefly
~ Cotton+Steel Basic xoxo in Mustard

I hope you enjoy making this block just as much as I have and are able to create a beautiful quilt with them for someone special!

Happy Sewing, Friends!

xx

An Update from my Sewing Room…

Today, I thought I’d take some time out and write up a bit of an ‘old school’ type post.. One where I share with you all of the going-ons that have been happening in and around my sewing room! Just like the good ol’ days!!

First up, I’ve been spending my down time making this quilt for a friend of mine who recently celebrated a very special birthday! (I’m saying no more on the subject, just incase they read this blog!) Typically, I missed the deadline of their actual birthday to have this quilt finished and gifted to them, but you know, better late than never!

IMG_4195I found the inspiration for this one on Pinterest (where else!). The picture hit me straight in the face and I knew instantly it was perfect for this occasion! The recipient of this quilt loves the colour blue, so I riffled through my stash and found a mish-mash assortment of beautiful blues and mints with a mixture of prints, directions and values that would help add interest and movement to the quilt. I then paired these with a crisp white-on-white print fabric that make all of the blues pop and sing! All up I think I made about 120 5″ HSTs… I do love making HSTs but sometimes the monotony of trimming can be draining and painful! But after numerous cutting, piecing and trimming sessions, the time came to place the squares into place onto my design wall. I did this with no particular plan. I simply just placed them up ensuring similar prints and colours weren’t placed too close to one another. This did take a lot of back-and-forthing to ensure everything was working harmoniously!

TrioBlueHST

The way I chose to piece the quilt top was an odd and very laborious one. I literally pieced the quilt top together one square at time… What I did was divide the quilt into quarters, pieced each one together and then brought them all together to complete the quilt top! It may not seem that tiring, but by doing it this way, I was forced to press every single seam on the back flat open! It wasn’t fun and it slightly took away the fun and excitement of making this quilt. But hey-ho, I pushed through it and got it completed about two weeks past its due date! Oh dear!

However I must say, by doing it that way, I had so much more control on getting the points of the triangles sitting perfectly together! I don’t think I’ve ever been able to get such perfect point matches and seam nests/joins in any other quilt I’ve pieced! Some of these beautiful joins just simply take my breath away!! PerfectPointsSo now I have the quilt top hanging to the right of me whilst I find the perfect backing for it and muster the enthusiasm to baste it! I’ll keep you updated once I’ve basted it and starting the quilting!

+++

Next, I finally managed to finished my Tree embroidery that I took away with me while on holiday in Fiji! I’m not really sure why it took me so long to finish as I only had a few little areas to fill in to say that it was completed! I did share the finished result on my Instagram, but here it is again if you missed it, plus another showing the details…

IMG_4095

IMG_4102

I purchased this embroidery pattern from Urban Threads – a great online source of modern and quirky embroidery patterns and ideas!

+++

Another thing that’s been revolving and considered in my sewing room is the decision to open my own Esty store! I’ve sold things I’ve made online before – for quite a few years actually – but wanted to find and use a new platform that would be and is more accessible to international shoppers. From what I’ve heard, Etsy has a pretty good reputation and is trustworthy and well known worldwide, so I thought I’d give it a go and see what happens!

At the moment, I haven’t anything for sale yet as I’m still at the planning stage of figuring out shipping rates, packaging and what it is I actually want to sell in my shop. I have a few quilts that I’ve made (or are half made atm!) that I would like to sell as well as some embroideries (possibly framed; still figuring that out!) and a few other things that I’ve made in the past that have sold well.

So stay tuned, things will be up and running fairly soon! (Hopefully!)

+++

Ooo!! Exciting times are ahead here in Sydney! The craft and quilting communities are getting ready for the Craft & Quilt Show to open next week!! Wheee!! This is like our version of QuiltCon or Quilter’s Market, where you get to explore, buy and be inspired by what’s new in the crafting and quilting worlds!

Craft-Quilt_FB-button_403px-by-403px_come-see-us2

Also at the show they have the Sydney Quilt Show on where they display all of the quilts to be judged for Best in Show and other awards for 2015. I’ve entered in quilts over the past two years, but decided not to enter this year for a few different reasons. But I’m excited to see what the quality is like this year. The quilts last year were the best I’ve seen yet!

+++

And speaking of quilts and fabric and all good things, I recently went on a bit of a splurge on one of my favourite online fabric stores, Kelani Fabric Obsession! Every time I click onto that website, there’s always something new and beautiful to tempt me to buy and I sit there trying to justify why I need it in my life!

IMG_4170

This time around, I did have a few good reasons why I needed to purchase some new fabrics… The first is a commission to make two gender-neutral baby quilts for a friend who has two girlfriends expecting! I love, love, love making baby quilts, so I said yes and immediately began planning what I would make! So half of the fabric I bought are to use in those two little quilts, while the rest of the order is to be used to make some special projects for my Esty shop! I’m so excited to get into them and get making some beautiful things for you all!

Oh, and I almost forgot! I uploaded a ‘Haul’ video on my YouTube channel over the weekend showing you everything I got!! If you would like to watch that, click right here!

+++

And finally the last thing I wanted to share with you is something I saw on Instagram this morning. It was a pledge created by Amy Gibson from the blog, Stitchery Dickory Dock. Called the ‘The For Keeps Pledge’, she encourages us quilters to pledge to keep the art of quilt making joyful, soulful, non-boastful and enjoyable! To see the pledge in full, click here to go to the blog post she wrote about it! I think it’s such a great concept for all quilters to focus on and work by, especially for me as I share so much of what I do online and with others.

+++

So that’s the end of the update! There is still so much to share with you but all in good time… 😉

Happy Sewing, Friends!

xx

‘Quilt-Along-With-Me! Part Six: Quilt Label & Finish!

GET THE FULL PATTERN: QAWM – ‘Geo Dreams’ Quilt Pattern

What a wonderful day! You wanna know why? Cos it’s the final step in finishing our quilt!! Yay!!

In part six, we find out how to make and attach a quilt label so that we can officially say that our quilt is finished!

I think it’s super important to take time at the end and document all of the crucial details of the quilt in a label. It’ll serve as a great reminder of when the quilt was made, by whom it was made, for who it was made for as well as documenting the name of the quilt!

And the official name I’ve called this quilt is: Geo Dreams!

Geo Dreams Quilt Label

If you want to know a little bit more about quilt labels, how to make them, what to write on them along with the best ways to attach them to a quilt, I made this video and wrote this blog post about it!

As always I encourage you to make and attach your quilt label in the way that you know best and using a method that you find the easiest and/or most successful. You are always more than welcome to use my way as guide or for inspiration! If you would like to make your label as a hexie flower the same as mine but don’t know how to make them, here are two super-early videos I made showing you how to make hexies and then sewing them into a flower…

HOW TO MAKE HEXIES PART 1

HOW TO MAKE HEXIES PART 2

GeoDreamsQuiltLabel2

Because this is the final part in my QAWM series, the full pattern is now available for you to download, print and share with your quilty friends! Yeah!! The link to this at the top of this post… (PS.Let me know if there are any typos or mistakes – it’s always best to get a second opinion about these things!)

Thank you so much to all of you for participating and supporting me in this series! Your words of encouragement and excitement has made all of the hard work I put in totally worth it!
Thank you, thank you, thank you, thank you, thank you!!!

Although the series is at an end, please keep sharing with me your photos of your  finished blocks, quilt tops, quilts or any of the stages you’re up to! Feel free to tag me on Instagram or Twitter at @3and3quarters, send me an email or share them on my Facebook page!

I’m going to leave you with a few of my favourite photos of the finished quilt I took in our backyard a few days ago…

IMG_4133

GeoDreamsQuilt

GeoDreamsQuilt+Label

GeoDreamsQuilt+Fence

Happy Sewing, Friends!

xx